


4. Copy Mini-distro Contents To USB Key
Change your directory focus to the directory into which you downloaded the archive, and copy its entire contents into the newly-mounted USB volume. This screenshot shows what we saw as we followed these instructions.
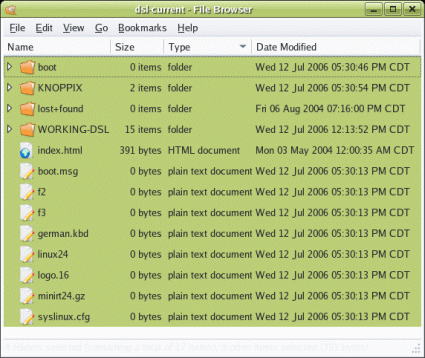
Listing of the DSL-embedded directory
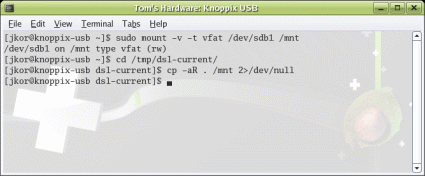
Copy the entire distribution directory onto the USB flash drive.
5. Unmount USB Key
Unmounting the USB device is crucial before undertaking the next step. Take the USB volume offline by issuing the umount [sic] command as shown in the following screenshot.
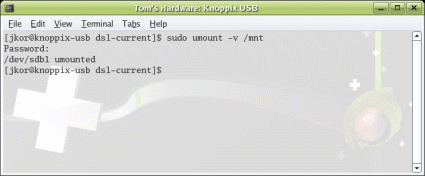
You must unmount the volume, and take it offline before proceeding to the next step.
6. Create Syslinux Configuration
Create a syslinux configuration to make the USB flash drive bootable. The simple command line sequence required is depicted in the next screenshot.
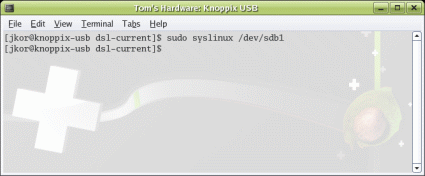
Modify the USB flash drive to boot from the new distribution.
Feather Linux version 7.5 was not available in a USB version as we wrote this story, but creating one using the latest ISO is trivial. Most of the files that reside in the boot/isolinux directory must be relocated to the USB root directory path, except for boot.cat and isolinux.bin. For the USB key to work properly, boot.cat must be moved into the Knoppix/ directory on the same USB key, and isolinux.bin may be deleted entirely. The resulting directory structure appears in the next screenshot.
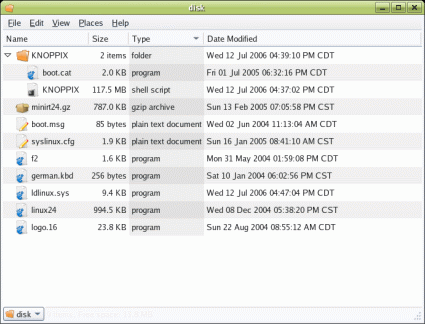
Creating the Feather Linux USB flash drive directory structure for version 0.7.5
Other Knoppix installations may be tailored using the same approach, but of the course the details for each will vary slightly in structure, configuration, and operation. DSL Linux also works using these same procedures, as we verified for ourselves using the latest CD-ROM ISO version.
