
Tom's Hardware Verdict
For the price, this is a solid lens to add to your collection. Ease of use and clear image quality provide a great experience for hobbyists and scientists alike. Science and electronics experiments will be greatly improved and documented using this lens.
Pros
- +
Low cost of lens
- +
Superb image quality
Cons
- -
The microscope stand is a must for this lens
- -
Only compatible with the High Quality Camera
Why you can trust Tom's Hardware Our expert reviewers spend hours testing and comparing products and services so you can choose the best for you. Find out more about how we test.

With the release of the Raspberry Pi HQ camera came a new world of interchangeable lenses for Raspberry Pi photography. For the most part these lenses were for general photography projects, but a new $28 lens ($49.80 with dedicated stand) on sale via Pimoroni offers the chance to view the microscopic world around us.
Design of the Pimoroni Microscope Lens

Measuring 4.21 inches (107 mm ) high and1.53 inches (39 mm) wide, the all-black Pimoroni Microscope Lens screws directly into the Raspberry Pi HQ camera, fitting snugly over the sensor using a CS/C adapter. It cannot be used with any other type of Raspberry Pi camera module.
A knurled adjustment ring provides a means to alter the magnification factor from 0.12 to 1.8x, approximately 60 to 900x magnification. The Pimoroni Microscope Lens’s focus is set by moving the lens nearer to or farther from the target, which requires a steady hand or a microscope stand, which can be bought as a bundle with the lens. In our tests we used the bundled microscope stand to ensure that our images were sharp.
Image Quality of Pimoroni Microscope Lens

After enabling the camera in raspi-config, we took our first picture, and all we saw was a black image. To use this lens you must first set the zoom level using the knurled ring, then set the focus by moving the lens nearer / farther from the target. If you are using the microscope stand, as we did, there is a large knurled black dial which can be used for fine tuning the focus. This will take some time to get right and using the terminal command raspistill -k will provide a live preview that enables you to set the zoom and focus.


Picture quality is superb, largely due to the 12.3 megapixel Sony IMX477R sensor on the Raspberry Pi HQ Camera, but the lens provides a clear and distortion free image. Our test images were all captured at the maximum resolution available: 4056 x 3040 and the level of detail is amazing considering the cost of this lens.
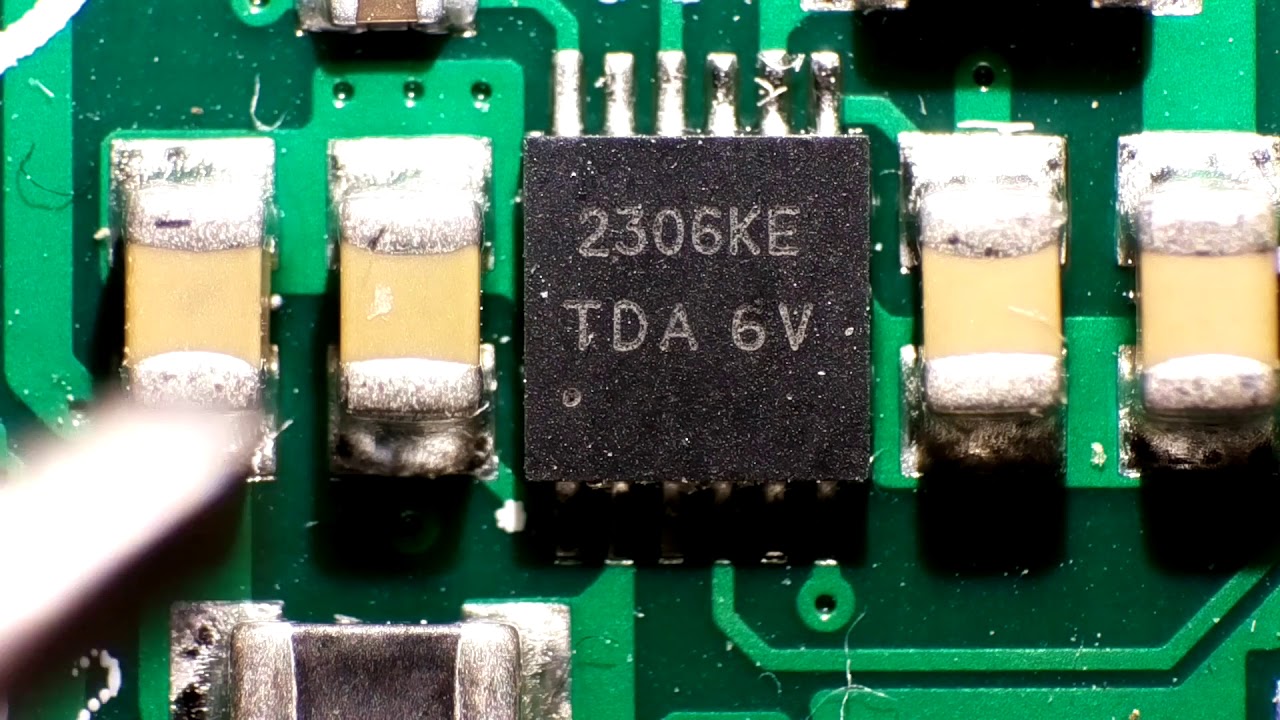
In our tests we set the lens to maximum magnification and placed an WS2812 “NeoPixel” LED measuring 5 mm x 5mm in the center of the image. At this level of magnification we were able to view the circuit pathways of the WS2812 chip at the heart of the LED, a chip that measures 1 mm x 1.3mm.
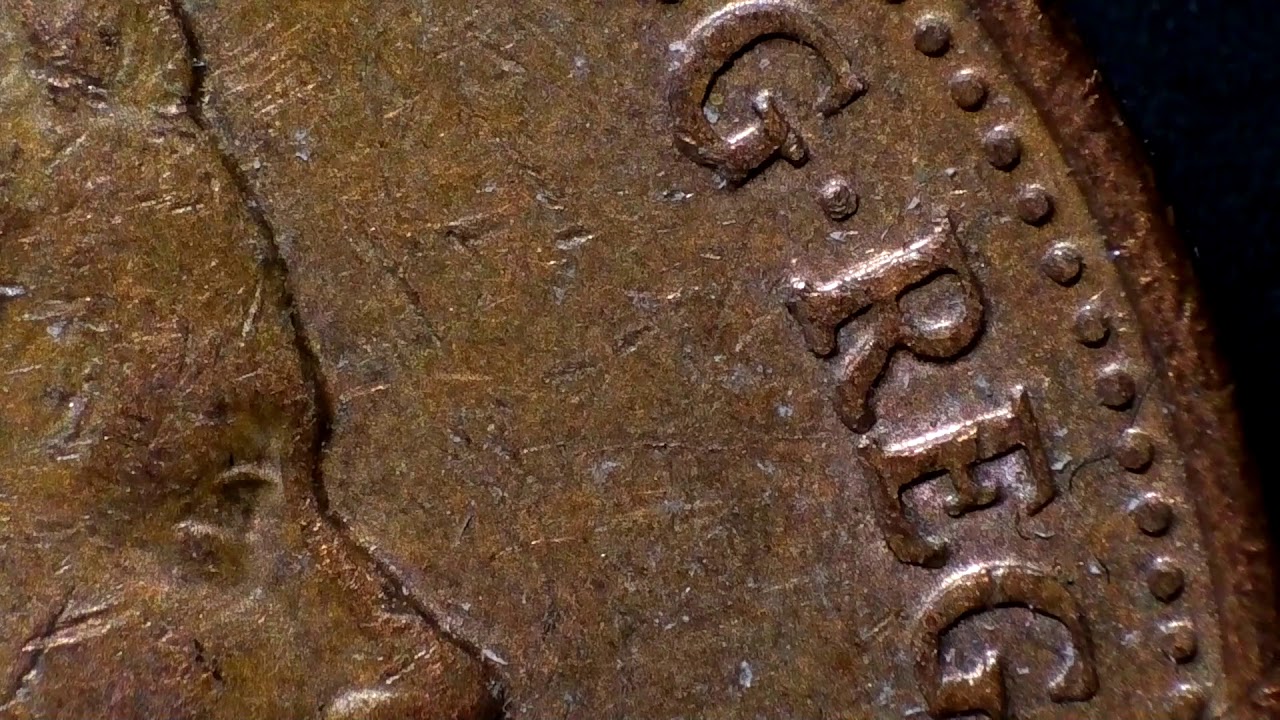
We also recorded a 1080p video of moving around a 2-pence coin and the results were equally impressive.
Uses Cases and Total Cost
The Pimoroni Microscope Lens would be ideal for home or school science lessons, enabling the experiment to be recorded to the Raspberry Pi with just a few lines of code. The lens also lends itself to electronics projects, especially SMD soldering with small surface mount components.
To use the Pimoroni Microscope Lens, you’ll need any Raspberry Pi model. Even a Raspberry Pi Zero W ($10) would be ideal for this project. The HQ Camera is $50, and the lens and stand pack is $49.80. All of this comes to $109.80 for a kit which can capture greater than 4K images, and 1080P video.
If you don’t care about Raspberry Pi, HDMI microscopes are available from under $100 for a basic unit which will capture 1080P images and video. However, Raspberry Pi enthusiasts will most likely have some or most of the components to build this one on hand so their cost will be less.
Bottom Line
This Pimoroni Microscope Lens is a great tool for exploring everything from circuit boards to everyday objects. However, you’ll definitely want the optional stand. The fact that it connects to a Raspberry Pi means that this lens is part of a great setup in the classroom or home workshop and one that you can program or even control remotely.
