Tom's Hardware Verdict
If you have the skills and the knowledge to embed this in a project, then you really should. If not, stick to a Raspberry Pi 4.
Pros
- +
Impressive form factor
- +
Powerful
- +
Compute Module 4 IO Board is well
Cons
- -
Needs skills to get the most from it
- -
Expensive
Why you can trust Tom's Hardware
The Raspberry Pi Compute Module 4 was a bit of a surprise when it was announced, but it is fair to say that it was a pleasant surprise. Squeezing the power of a Raspberry Pi 4 into an even smaller package, the Compute Module 4 is a product designed for the industrial and embedded markets. Sure a hobbyist can make good use of the board, but there are a few caveats in its use.
We were sent two Compute Module 4 units from Raspberry Pi trading: a module with 1GB RAM and 32GB of eMMC, and a Compute Module 4 Lite with 8GB RAM and no onboard storage. We put both of them through their paces including overclocking their CPUs as high as 2.3 GHz to squeeze every last MHz from their cores.
Design of the Compute Module 4
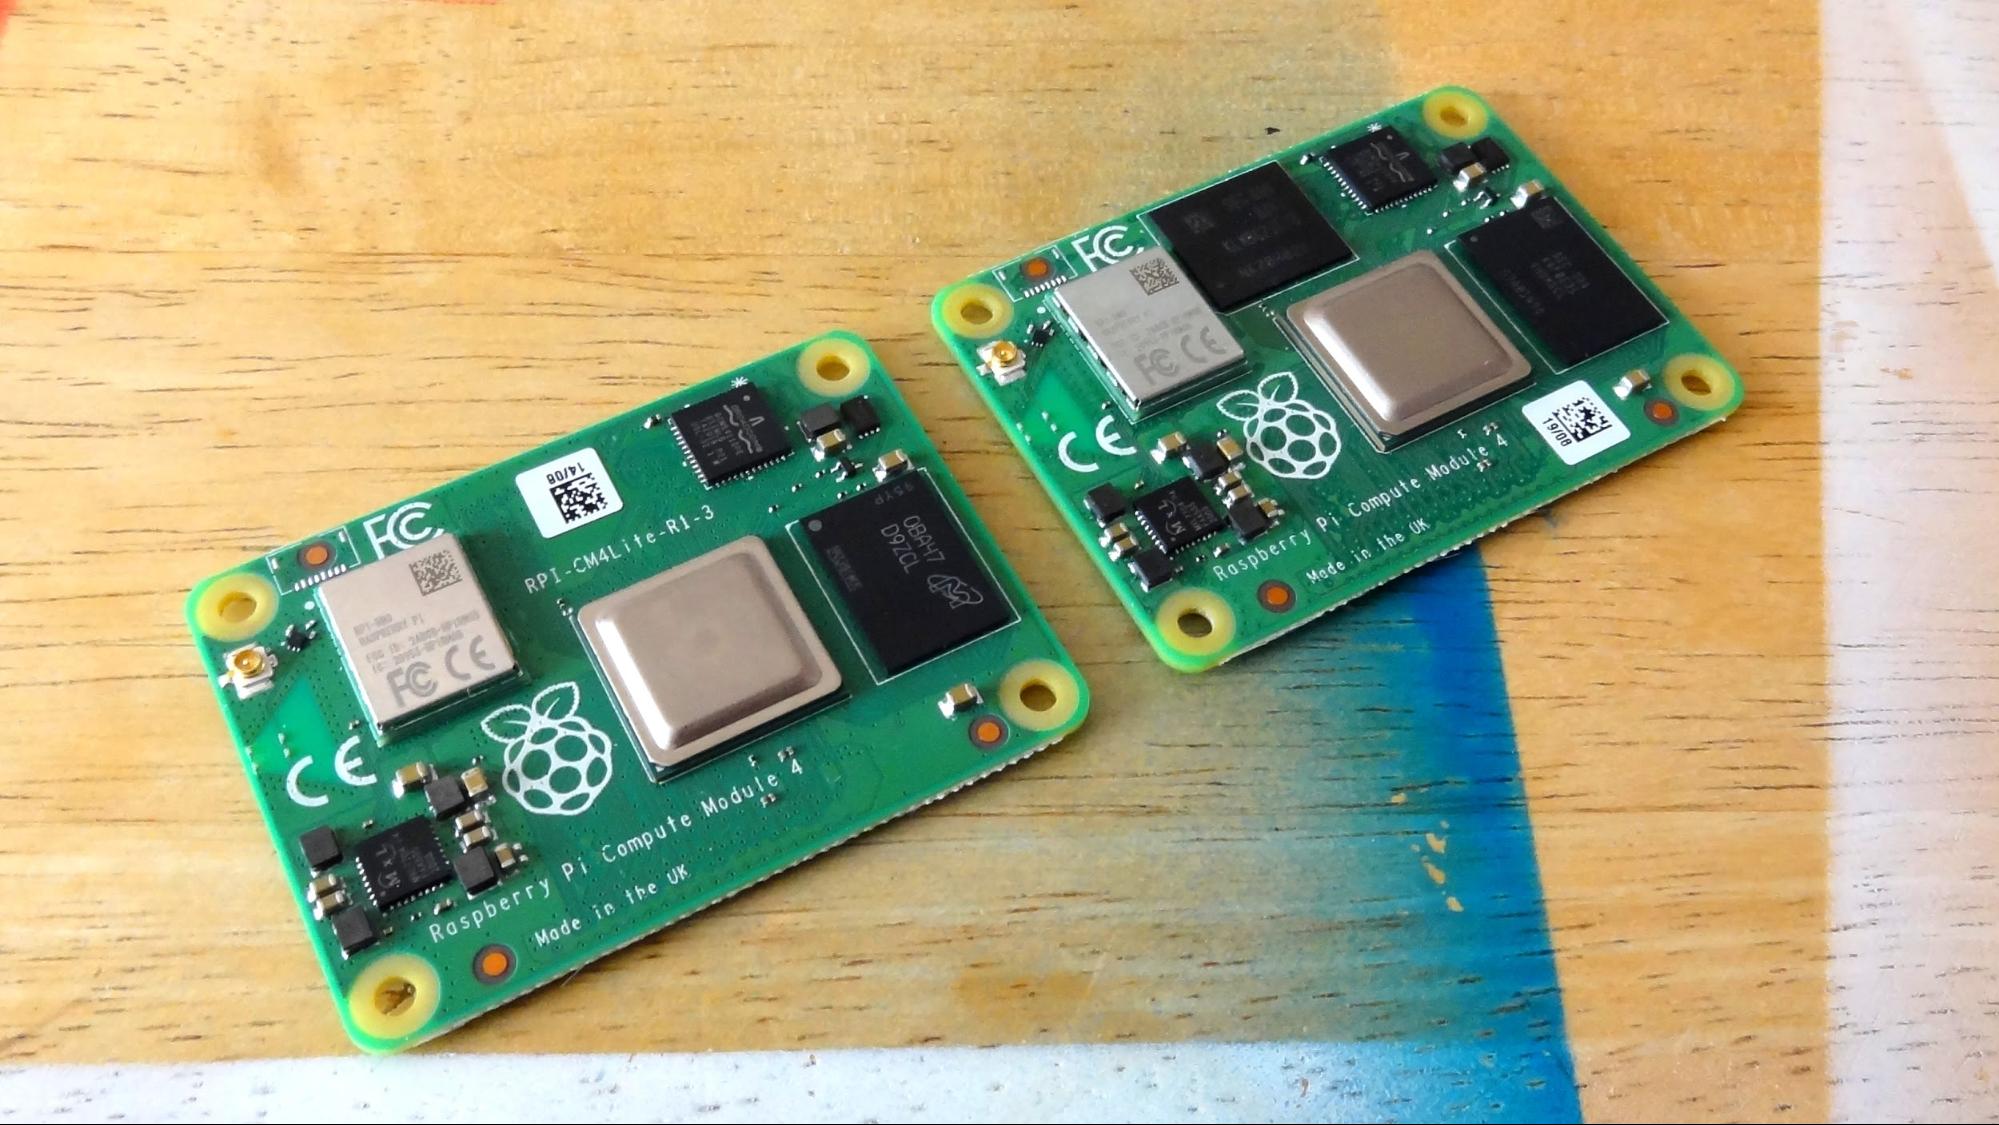
Measuring just 2.1 x 1.5 inches (55 x 40mm) the Compute Module 4 is a compact package for Raspberry Pi 4 hardware. The Broadcom BC2711 SoC is the most visible aspect of the board, and in there we have the quad-core Cortex-A72 (ARM v8) 64-bit SoC @ 1.5 GHz. Depending on the module variant, there are options for embedded flash storage and Wi-Fi / Bluetooth. Boards with flash storage will have a black chip just above the SoC, with a Raspberry Pi branded wireless chip (RPI-RMO) in the top left next to an optional external antenna connector.
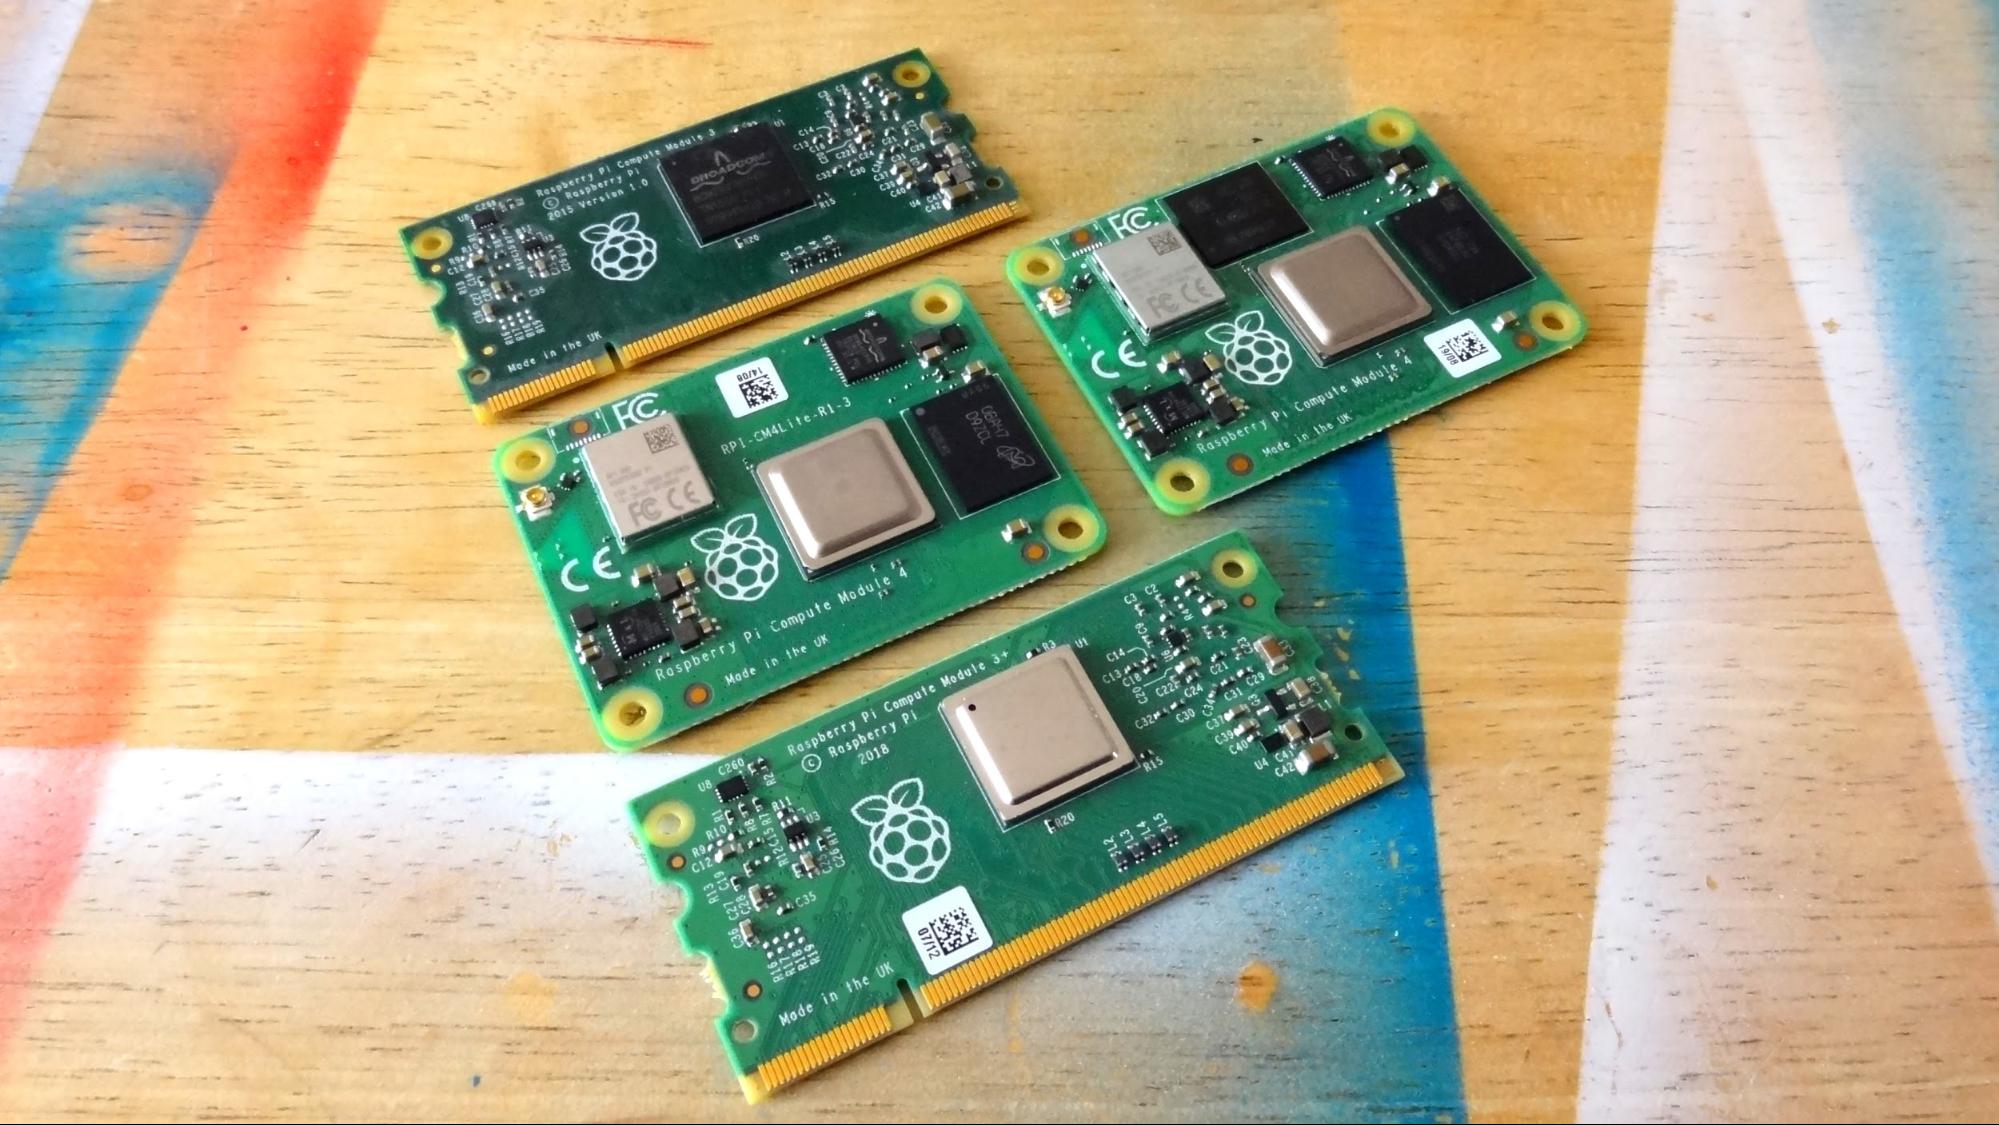
The Compute Module 4 is vastly different from earlier modules, which adopted a SODIMM connector. The Compute Module 4 connects to a carrier IO board using “two high-density perpendicular connectors (one for power and low-speed interfaces, and one for high-speed interfaces).” This new connector breaks compatibility with older IO boards, but companies such as Gumstix have released adapter boards to convert CM4 modules for use in older IO boards, and similar adapters will be used with the Turing Pi 2 cluster computer.
Raspberry Pi Compute Module 4 Specs
| SoC | BCM2711 |
| 1.5GHz quad-core 64-bit ARM Cortex-A72 CPU. | |
| VideoCore VI graphics, supporting OpenGL ES 3.x with 4Kp60 hardware decode of H.265 (HEVC) video. | |
| 1080p60 hardware decode, and 1080p30 hardware encode of H.264 (AVC) video | |
| RAM | 1GB, 2GB, 4GB or 8GB LPDDR4-3200 SDRAM |
| Flash Storage | Optional 8GB, 16GB or 32GB eMMC Flash storage |
| GPIO | 40 GPIO pins, with up to 6 × UART, 6 × I2C and 5 × SPI |
| Connectivity | Single-lane PCI Express 2.0 interface. |
| Gigabit Ethernet PHY with IEEE 1588 support. | |
| 2 x USB 2.0 ports | |
| Dual HDMI interfaces, at resolutions up to 4K. | |
| Dual MIPI DSI display, and dual MIPI CSI-2 camera interfaces. | |
| Optional 2.4GHz and 5GHz IEEE 802.11b/g/n/ac wireless LAN and Bluetooth 5.0 |
Raspberry Pi Compute Module 4 Variants
There are 32 variants of the Compute Module 4 ranging from the $25 Compute Module 4 Lite with 1GB RAM and no onboard storage or Wi-Fi, to a $90 Compute Module 4 with 8GB RAM, Wi-Fi and 32GB of onboard eMMC flash storage. Splitting the variants into two batches, we have 16 modules with and a further 16 without Wi-Fi. Each batch has a model with 1,2,4 and 8GB of RAM and 8, 16 and 32GB eMMC storage options as well as a Lite option that omits the onboard storage.
Choosing the correct variant depends on your intended project. As the Compute Modules are designed for embedded projects, the flexibility provided by such a staggering choice enables projects to be designed for different uses and price points. There is no sense in using a module with 8GB of RAM and 32GB storage if it is going to be used in robotics or simple projects.
Using the Raspberry Pi Compute Module 4
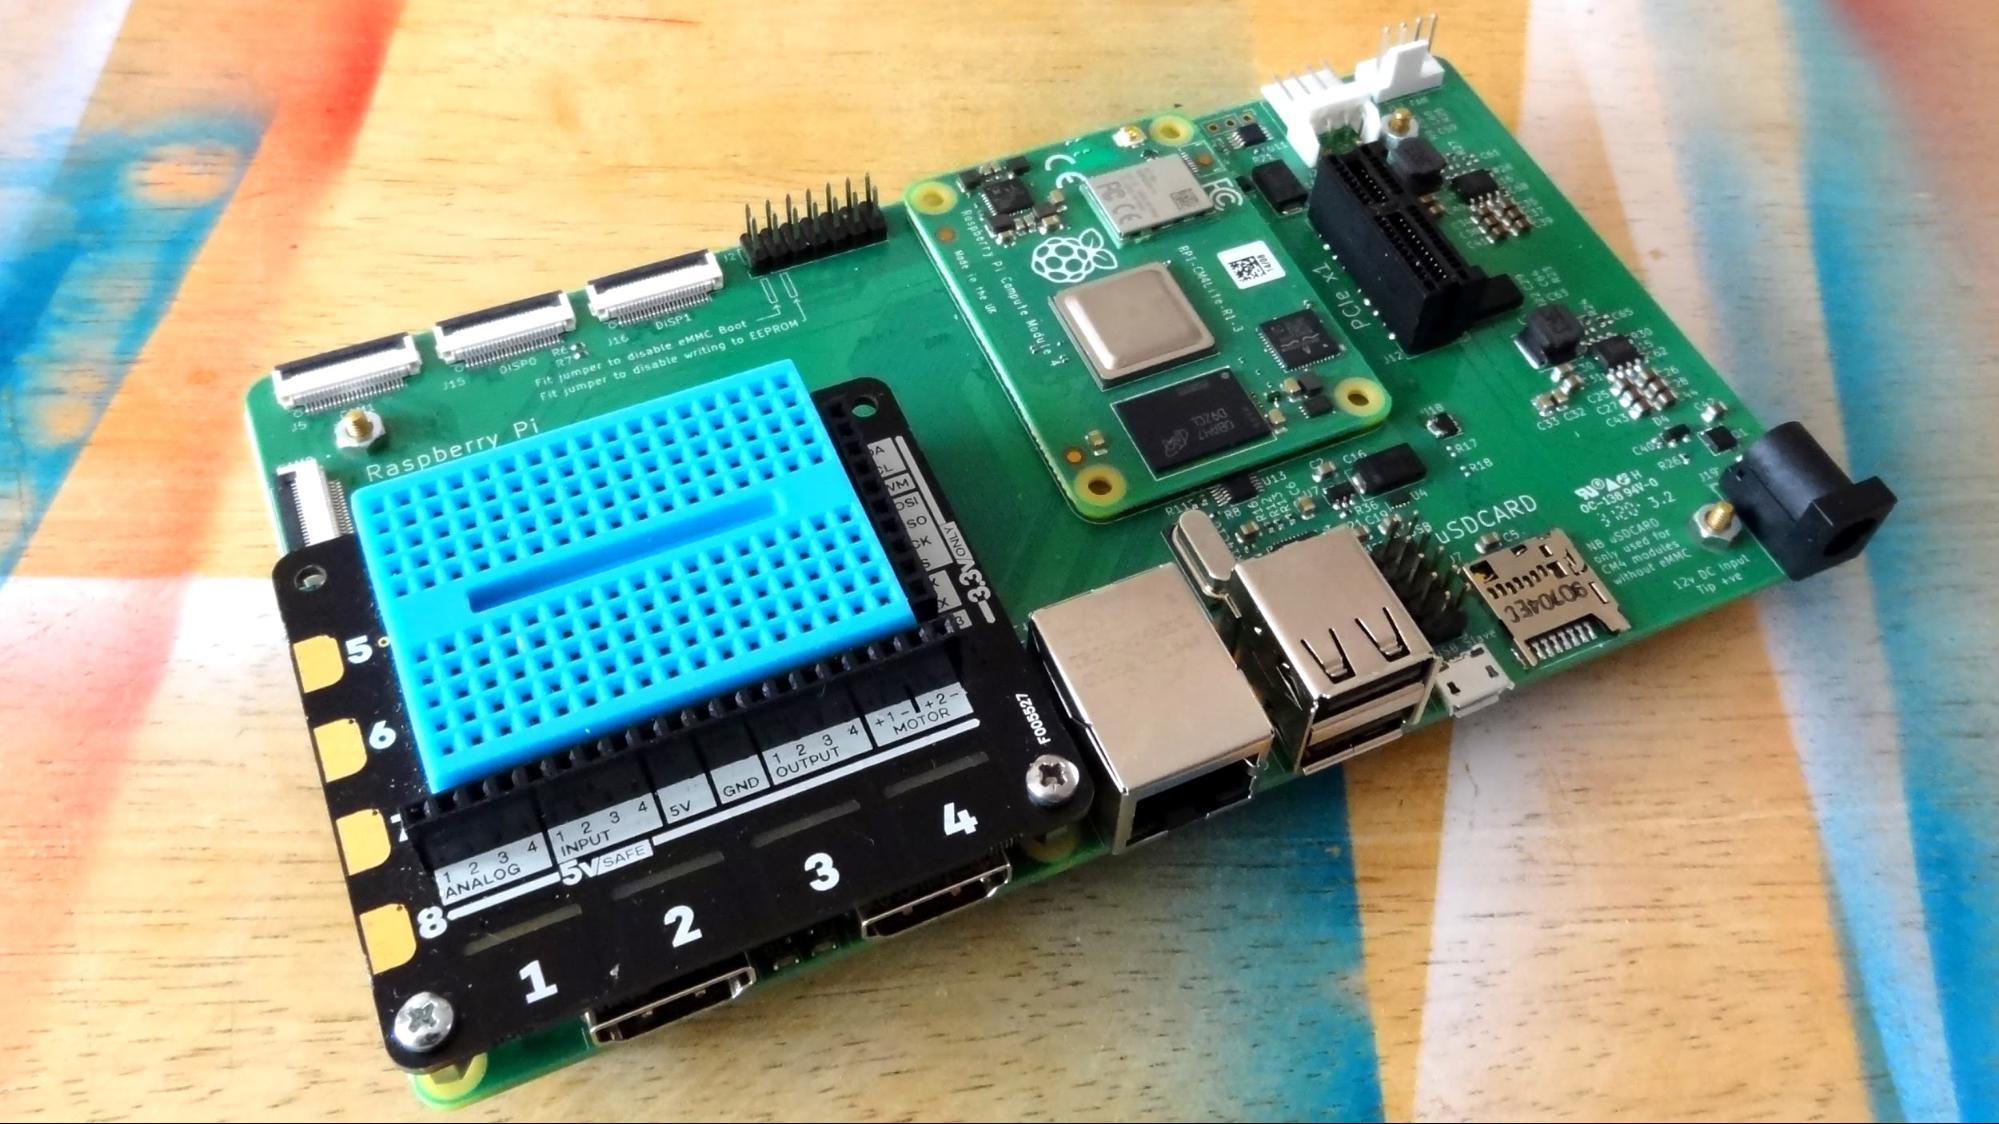
The Compute Module 4, like others before it, is a module that requires a carrier board in order for it to be used. Compute Modules are made for use in embedded systems. For example, some NEC televisions use a Compute Module as their brains. But if we want to develop projects around the Compute Module, then we need to use a carrier board such as the official Compute Module IO Board, which is available separately for $35 but an essential purchase for development.
Get Tom's Hardware's best news and in-depth reviews, straight to your inbox.
Developing projects with the IO Board means that we connect the Compute Module 4 to the connector and depending on if we have a Lite or module with eMMC we either insert a micro SD card and boot, or flash the eMMC using a tool provided by the Raspberry Pi Foundation (see how to set up Raspberry Pi for the first time).
In operation, the Compute Module 4 behaves just like a Raspberry Pi 4, the IO Board also features a GPIO breakout that enables the use of HATs and add on boards. This reveals a difference between earlier Compute Module IO Boards and the new. Older IO Boards provided access to every GPIO pin from the Broadcom SoC, via a non standard GPIO layout. The Compute Module 4 provides a traditional 40 pin GPIO and a PoE header and we tested the GPIO using a Pimoroni Explorer HAT Pro and everything worked as expected.
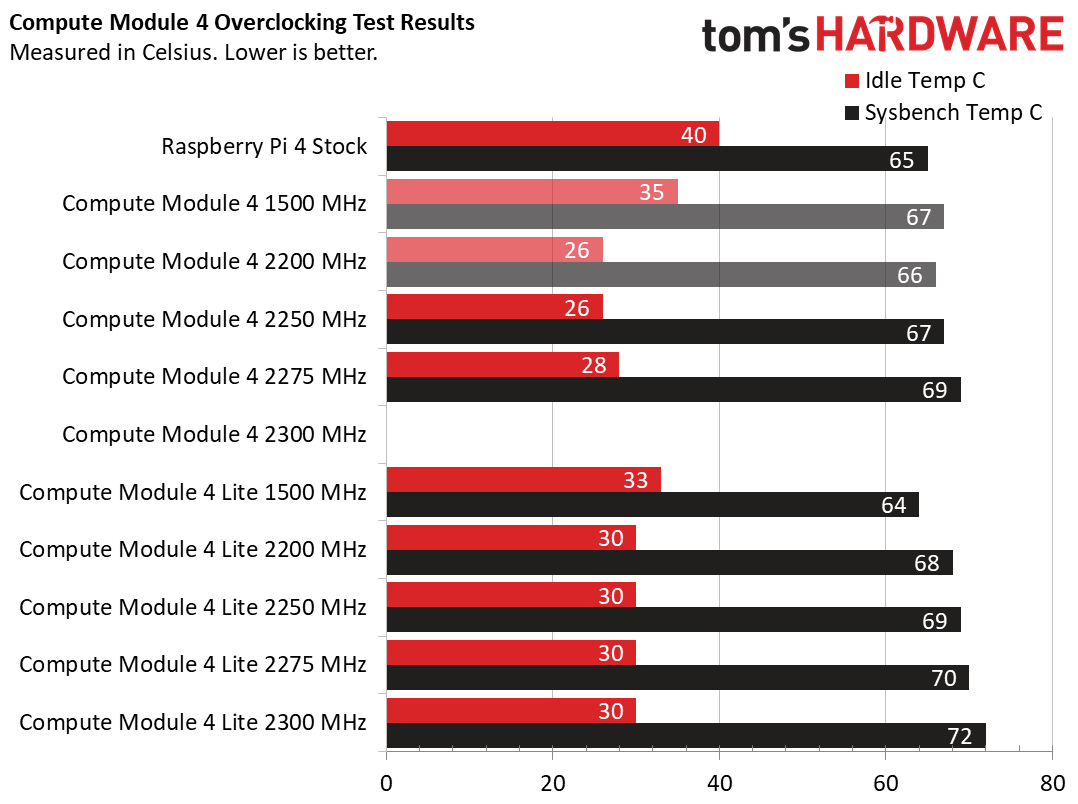
We ran a series of Stressberry tests on our Compute Module 4 and Lite and found that at 1.5 GHz the Compute Module 4 Lite was 33 Celsius, 7 degrees cooler than our stock Raspberry Pi 4. The Compute Module 4 ran a little warmer at 35 Celsius.
During Stressberry testing the Compute Module 4 ran at 67 Celsius, the Lite at 64 Celsius and our stock Pi 4 at 65 Celsius. That’s not much difference between regular Pi 4 and the Compute Modules. We can overclock the Compute Module 4 and the Lite to squeeze extra performance and in our tests we found that the Compute Module 4 Lite was able to overclock to 2.3 GHz!
Of course for the overclocks we had to use cooling and in our case we hacked a Pimoroni FanShim to directly cool the SoC. The IO Board comes with a standard 12V PC case fan connector (J17) which can be controlled in software.
The Compute Module 4 IO Board
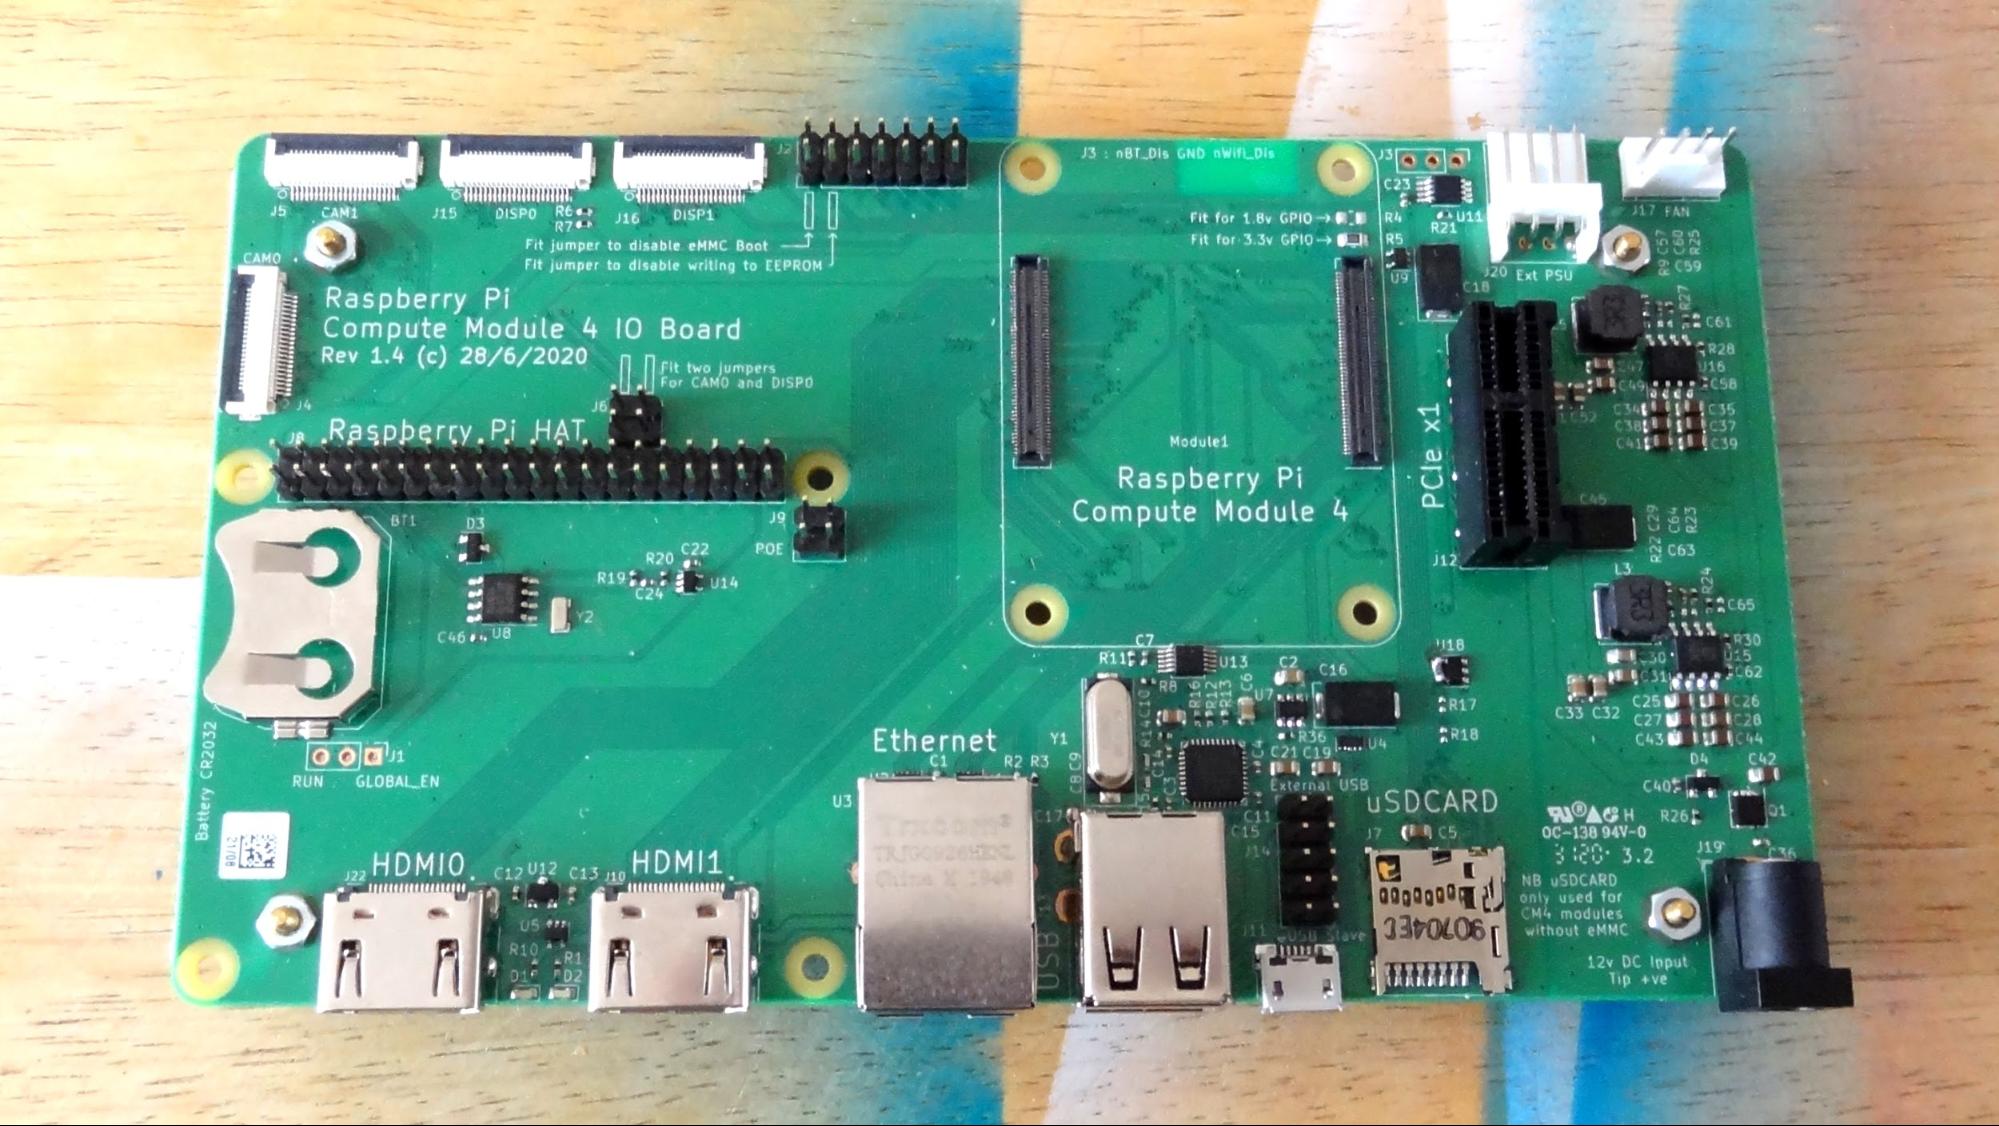
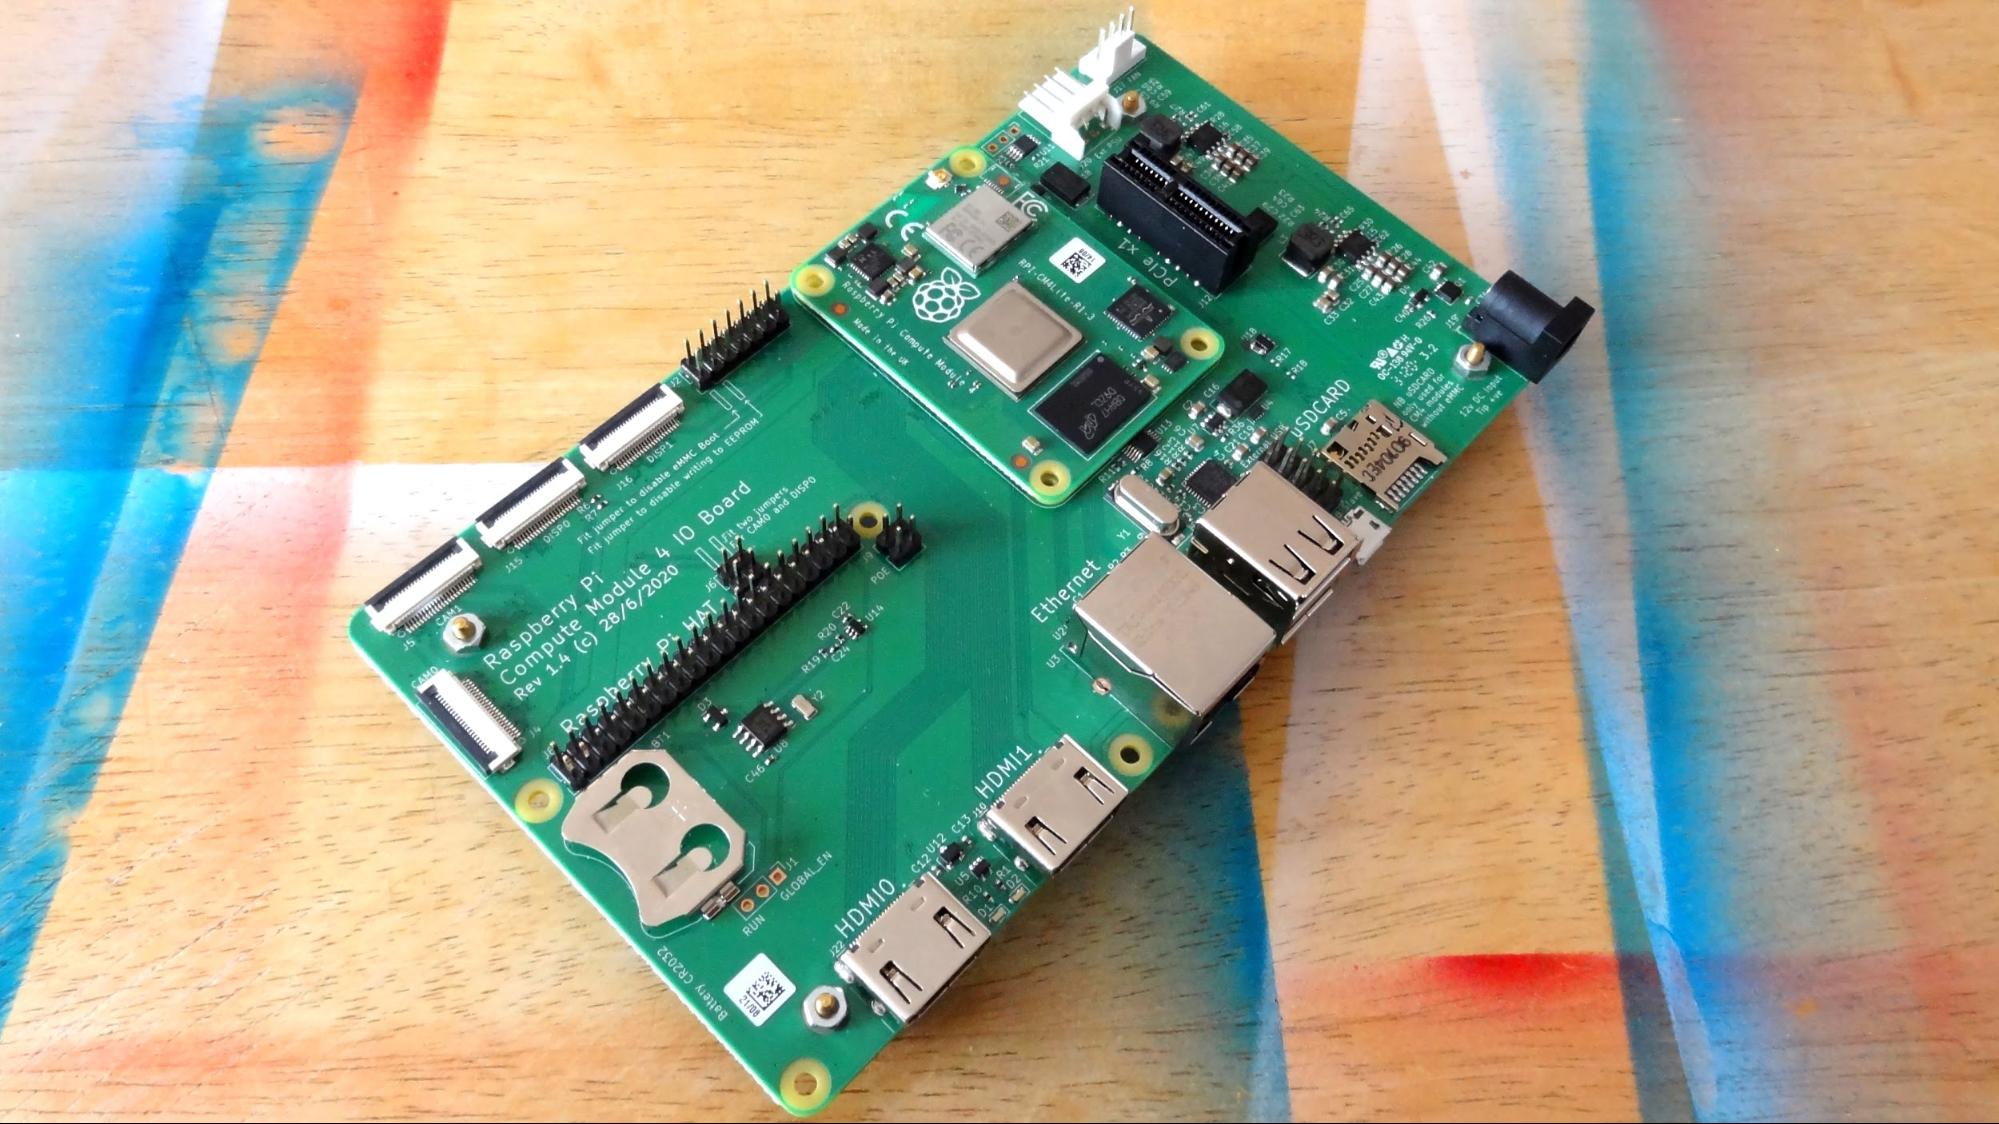
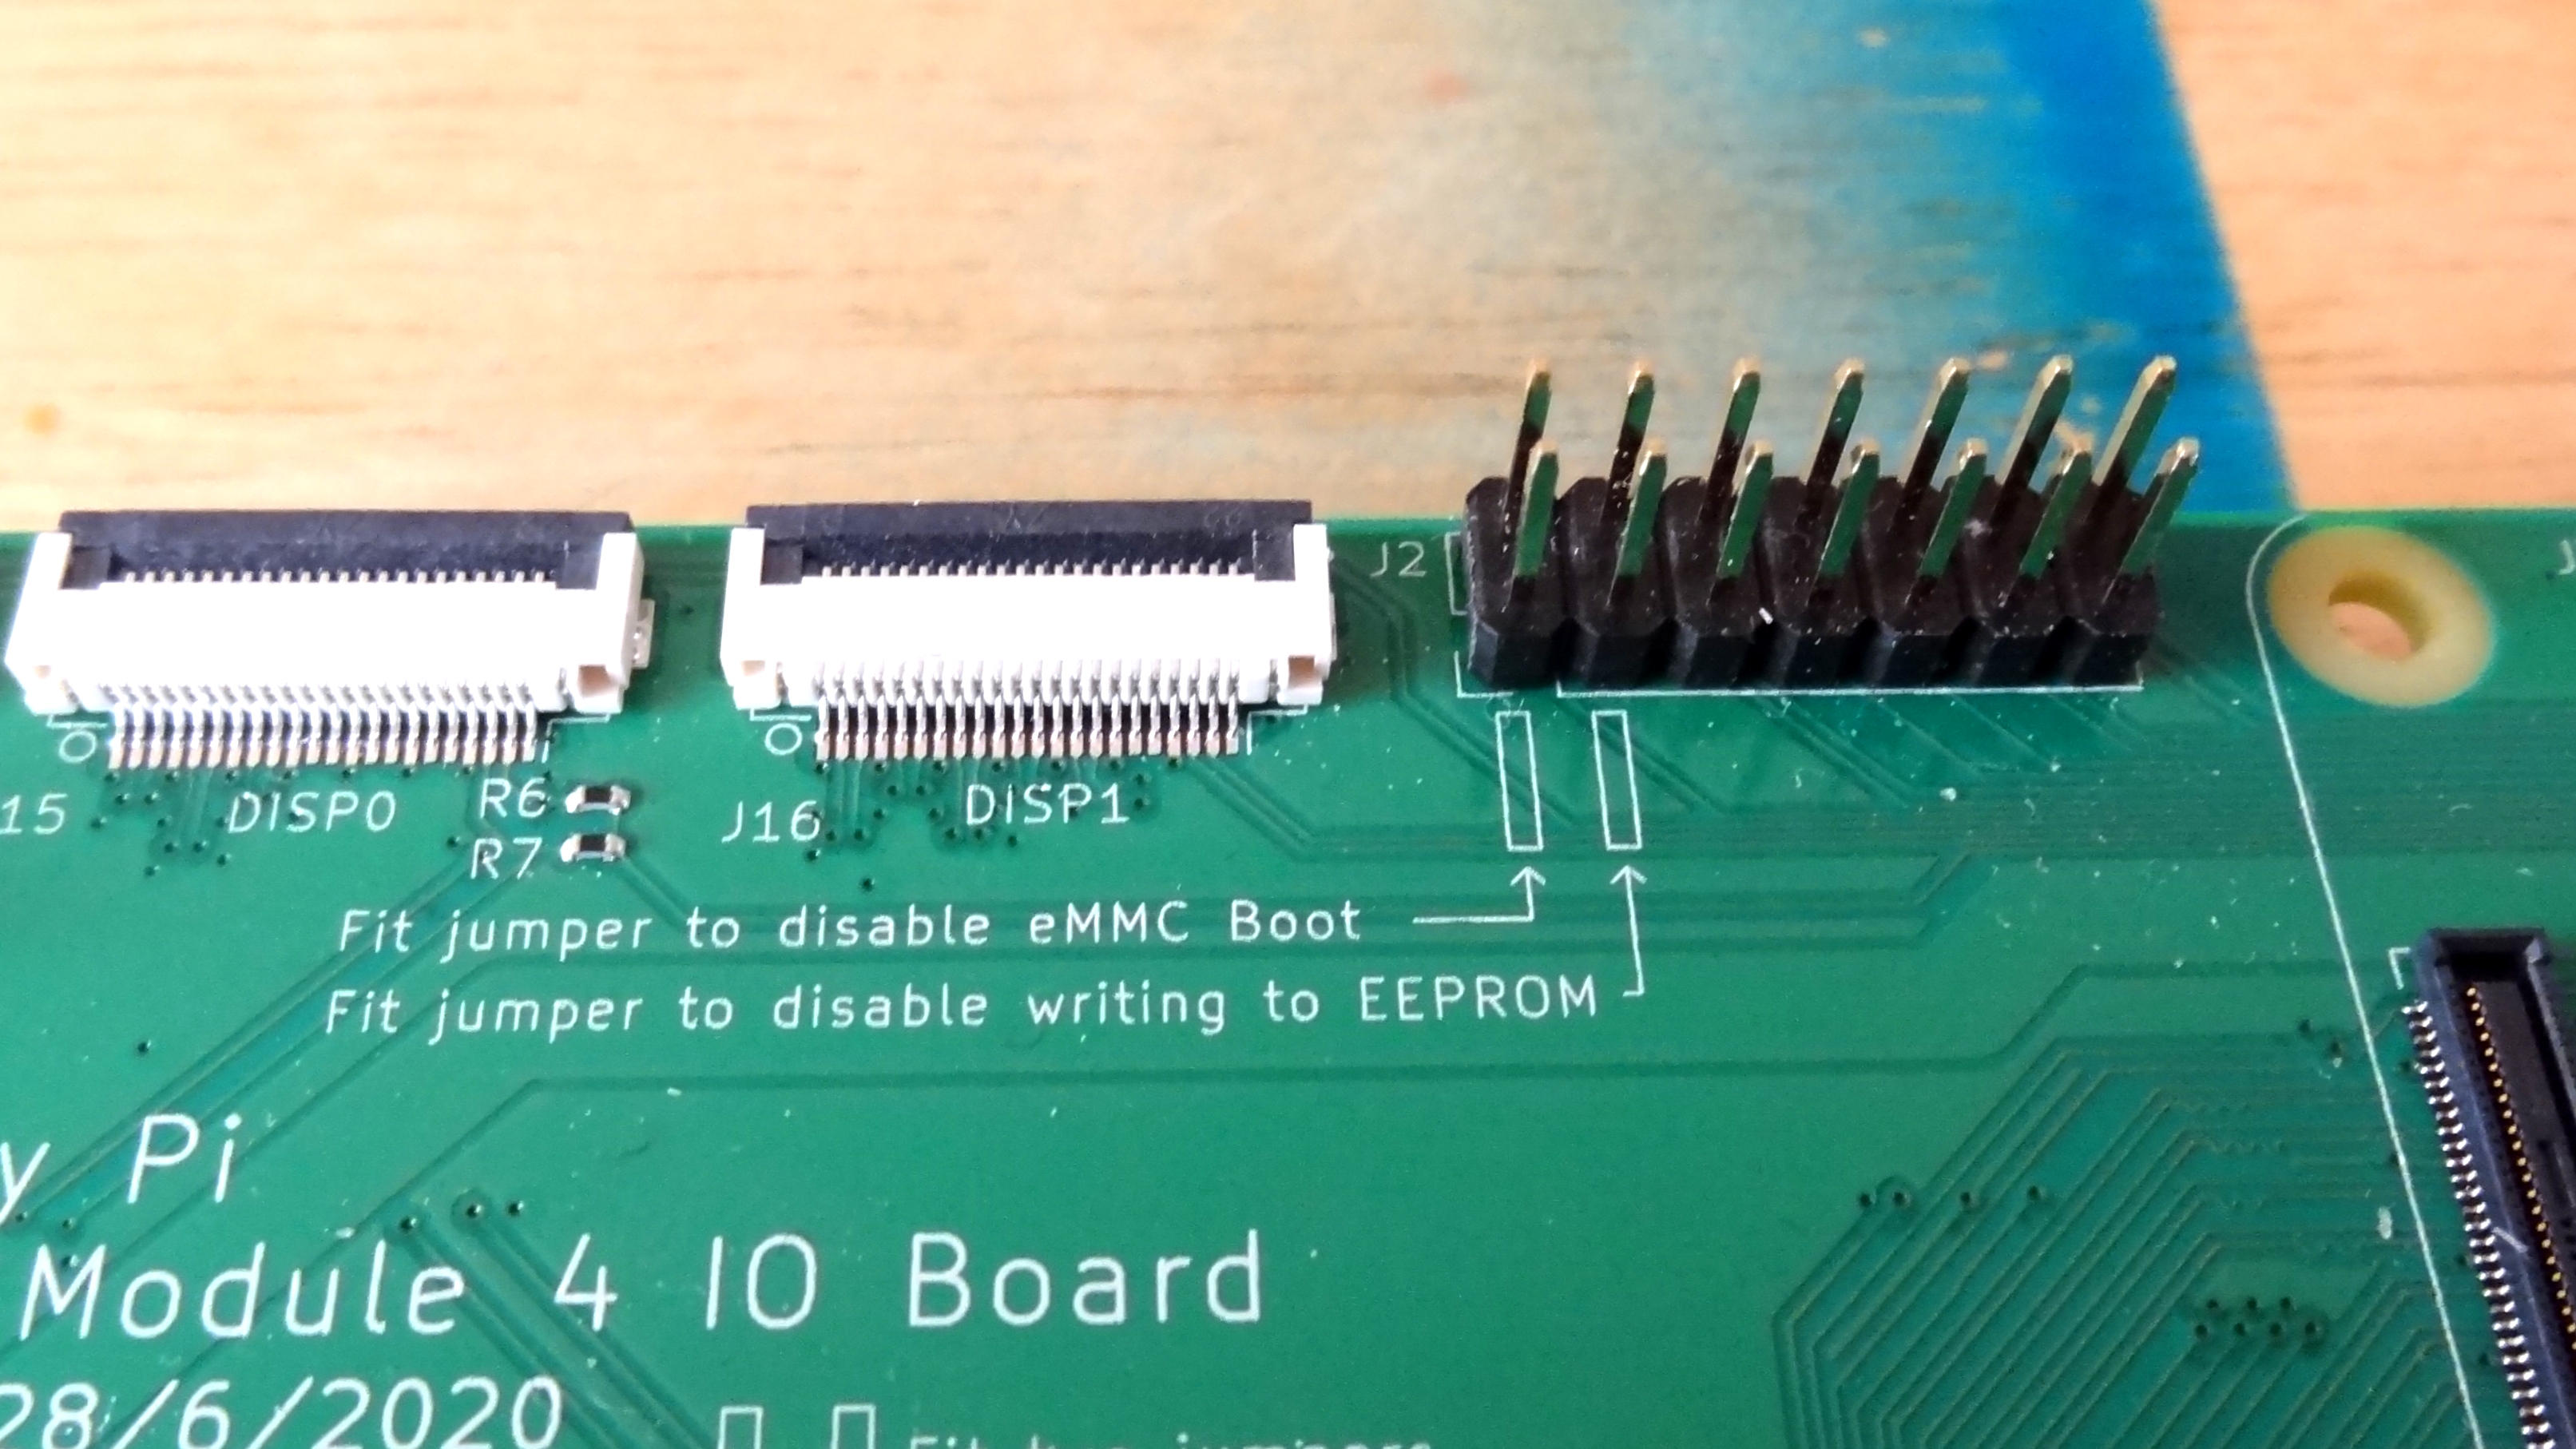
The Compute Module 4 is nothing without a carrier board, and the official board is the Compute Module 4 IO Board which is an essential purchase for your Compute Module 4 development. The IO Board provides the connections needed to work with the Compute Module 4. Around the IO Board we see connectors for two official Raspberry Pi cameras (V1, V2 and the High Quality Camera) but you will need to use the smaller camera flex cables as used with the Raspberry Pi Zero W. Two official displays can also be used at the same time, again requiring a smaller cable.
The Raspberry Pi 40 pin GPIO is present and in the same layout as a typical Raspberry Pi, enabling the use of HATs and add on boards, along with the PoE HAT. Two full size HDMI ports, Gigabit Ethernet and two USB 2.0 ports are present along the side of the board. Next to the USB ports is a single micro USB port, used for connecting the IO Board to a computer where the eMMC can be flashed.
Next to the micro USB port is a micro SD card slot and a breakout for external USB ports to be attached. At the far right of the board is a single DC input which provides 12V DC power to the board, for which you will need a good quality 12V DC power supply. In our tests we used a 12V 2.5A supply and had no issues.
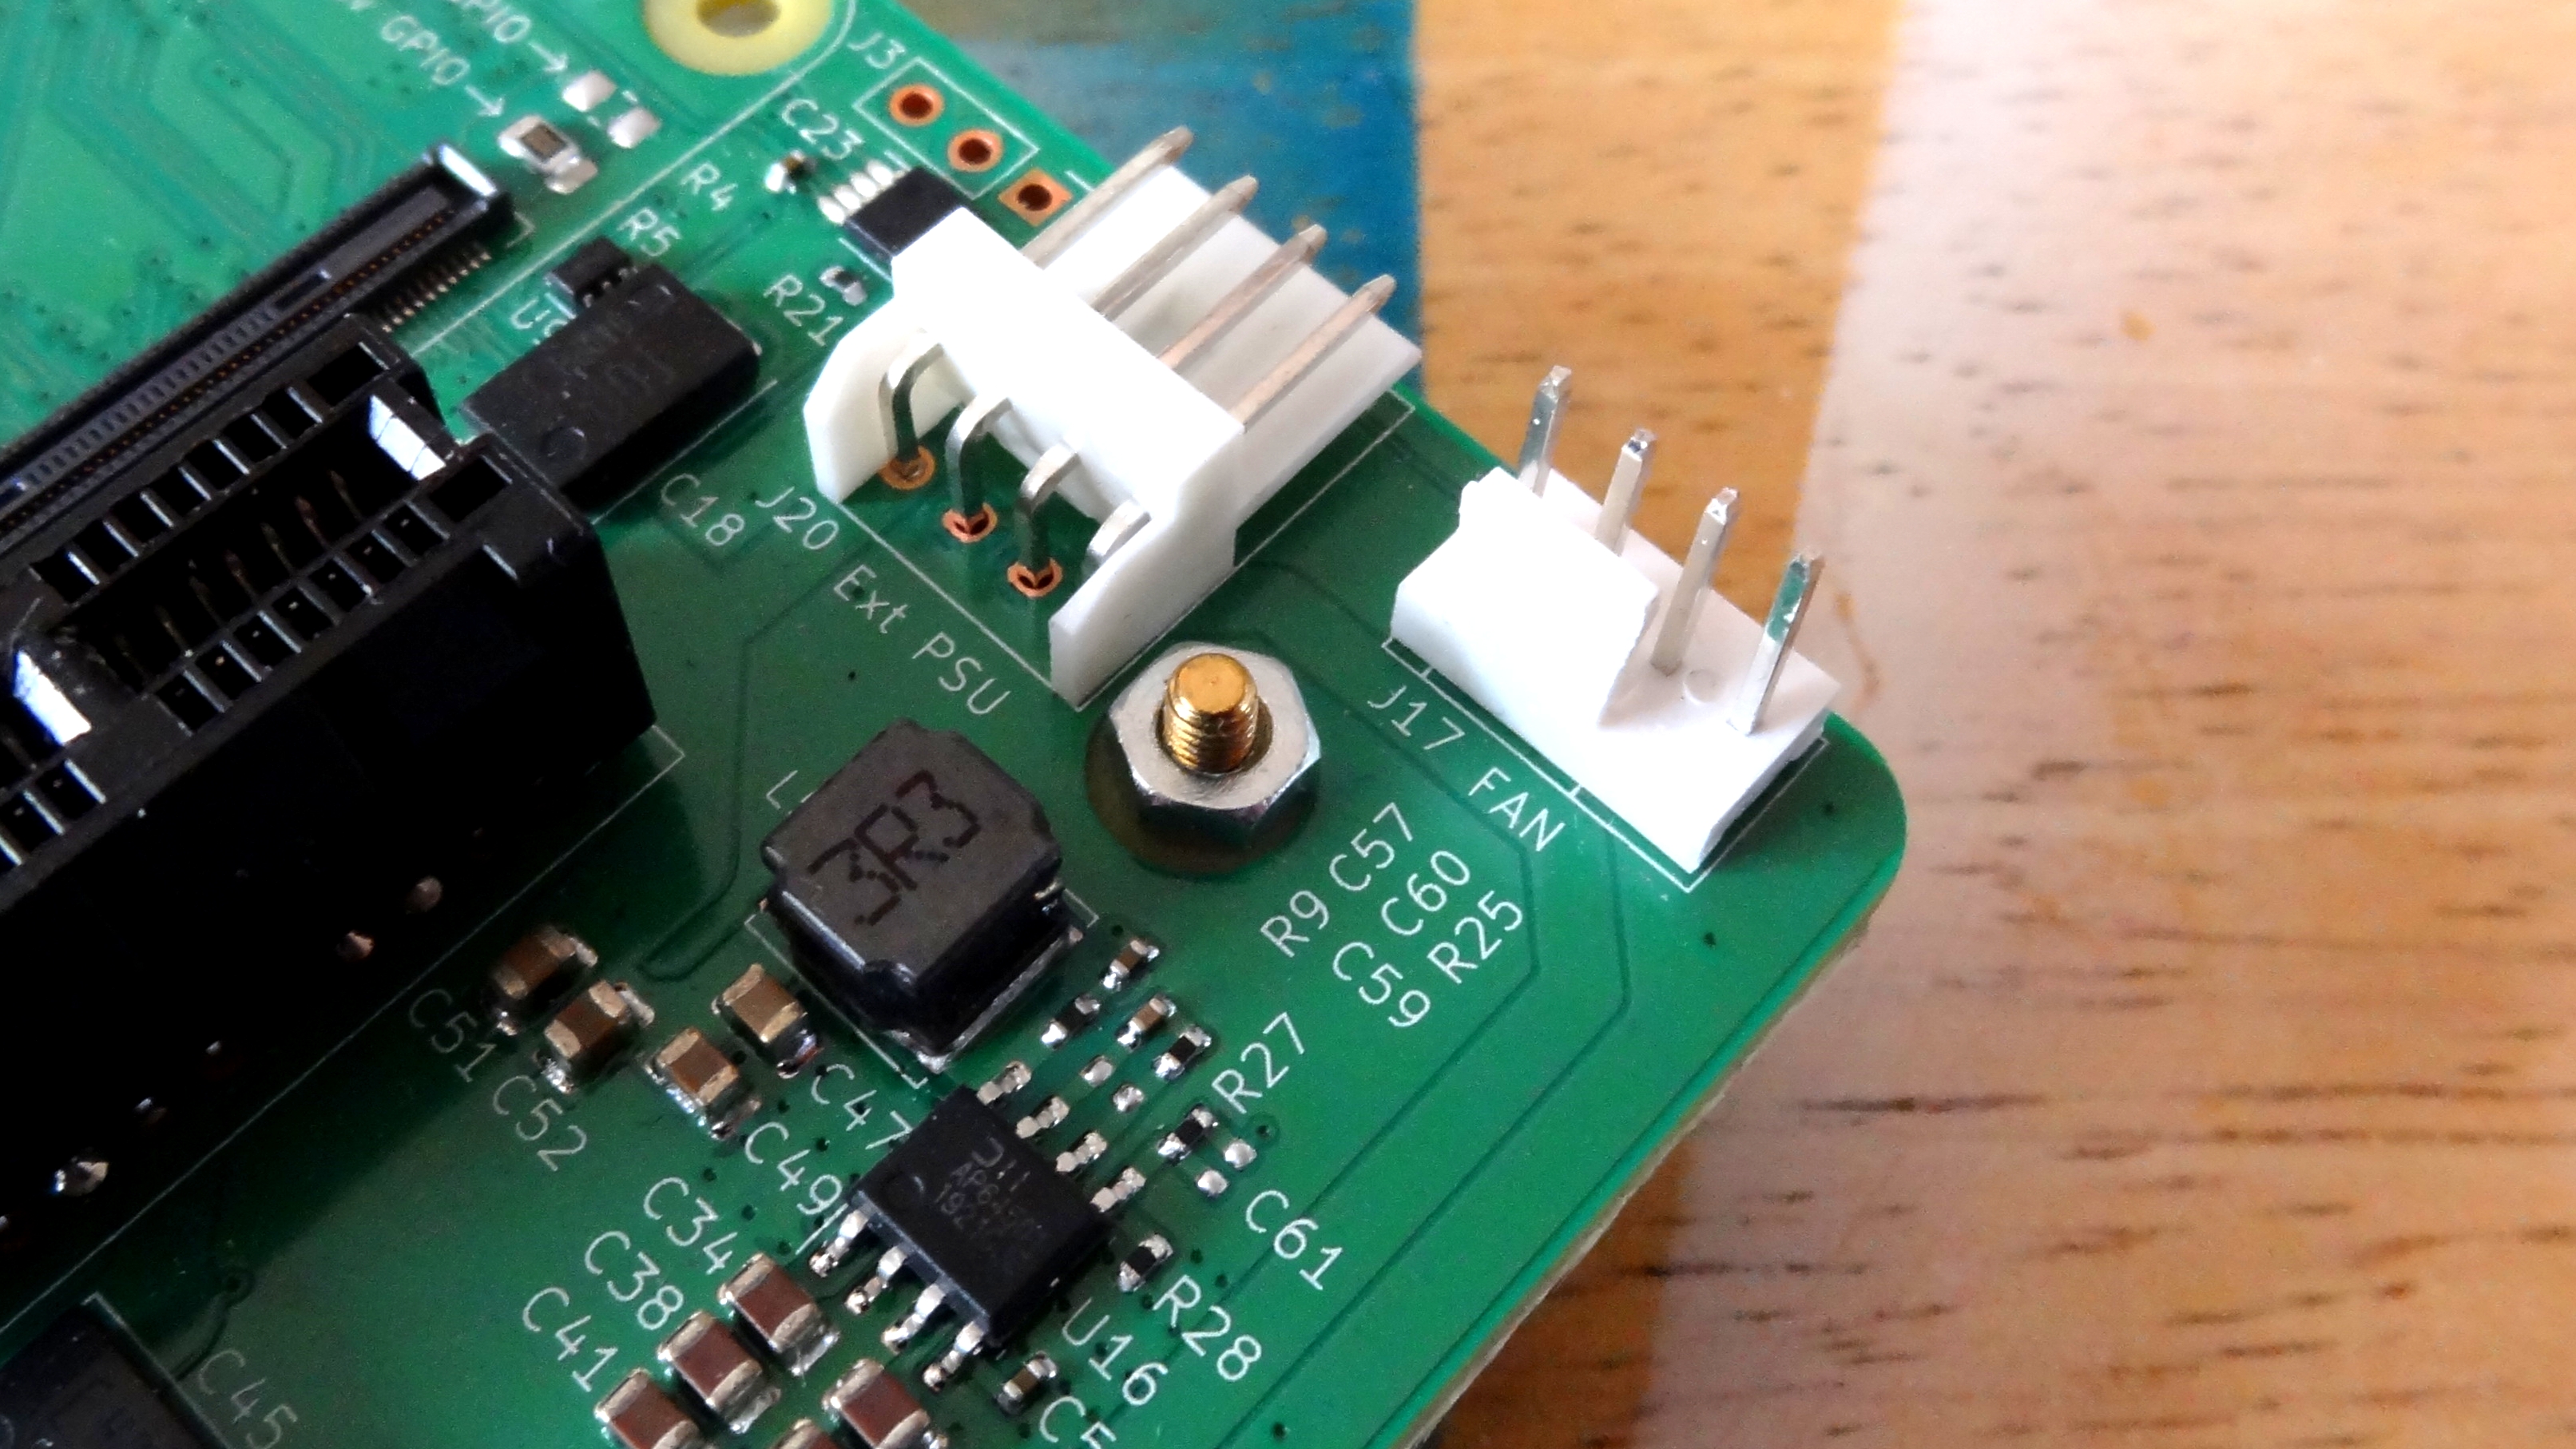
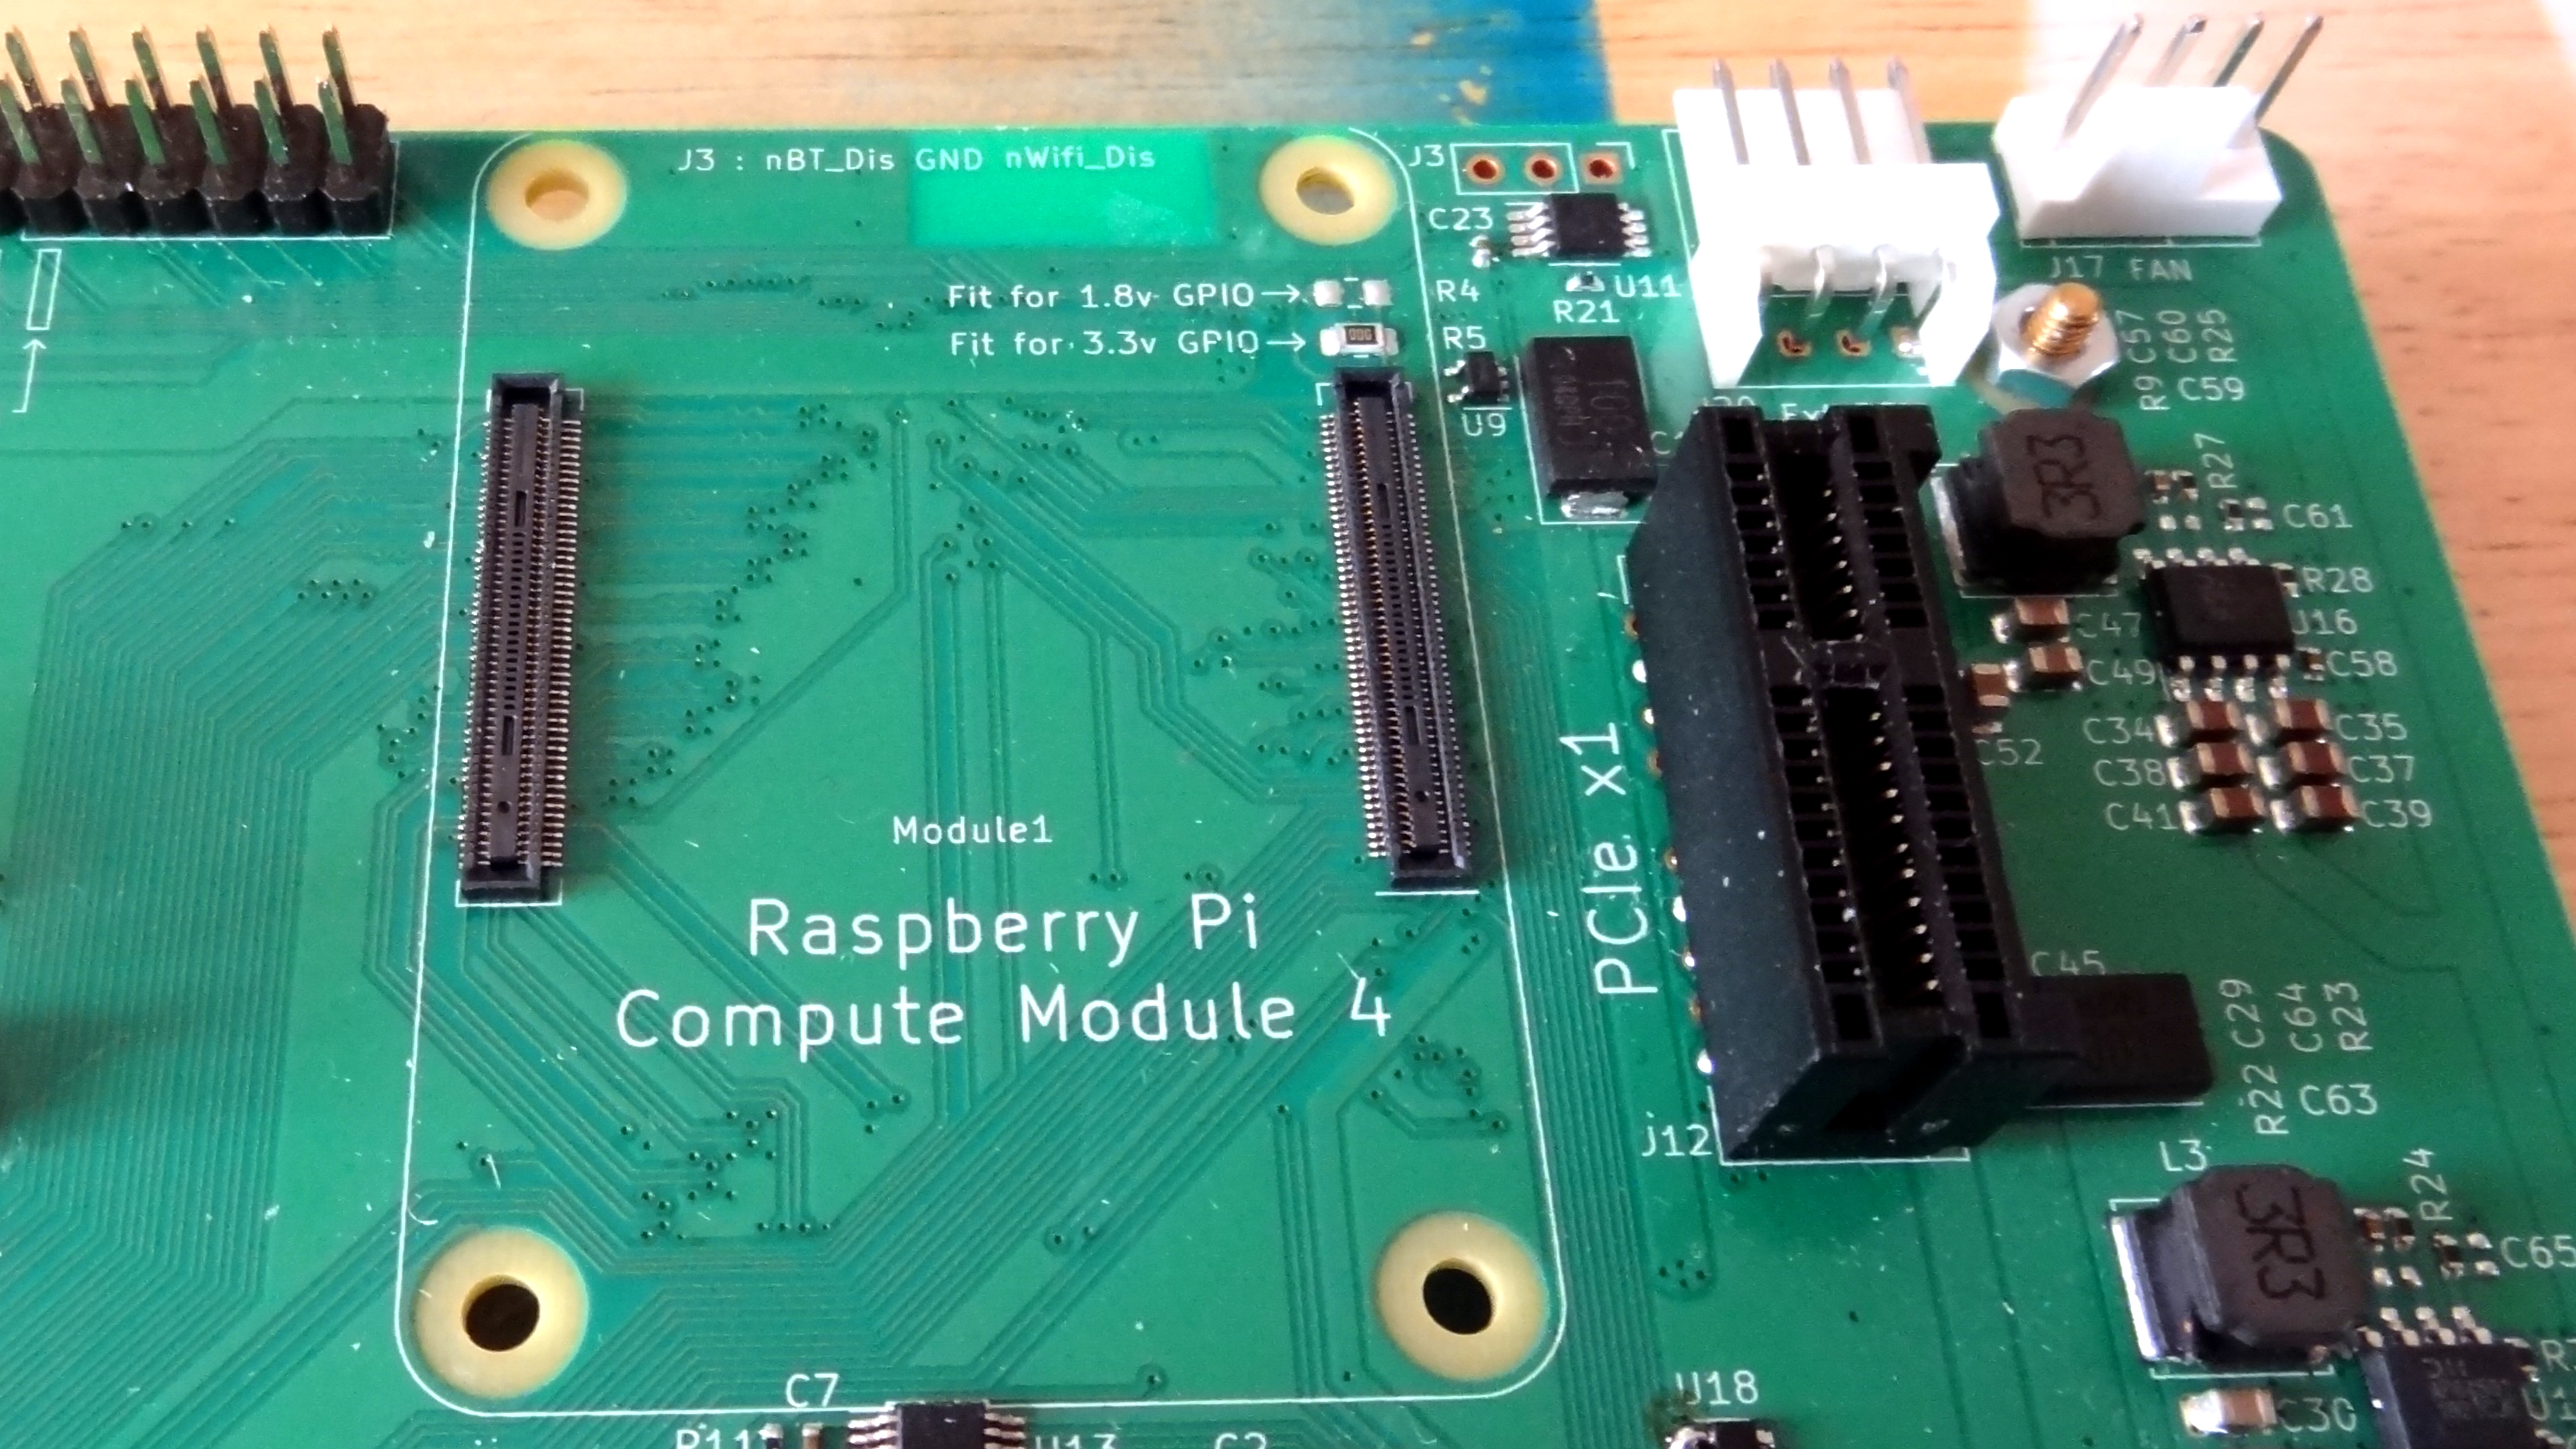
At the top right of the board are two white connectors. ; J17 is a fan connection for a typical PC fan while J20 is an external power supply connection.
The most interesting part of the IO Board is the PCIe Gen 2 x1 slot which can be used with compatible devices, including PCIe SSDs. Right now this is one area which is still being experimented with, and intrepid users such as Jeff Geerling are working to add GPUs and 5 GBPs Ethernet to the Compute Module 4.
Use Cases for the Compute Module 4
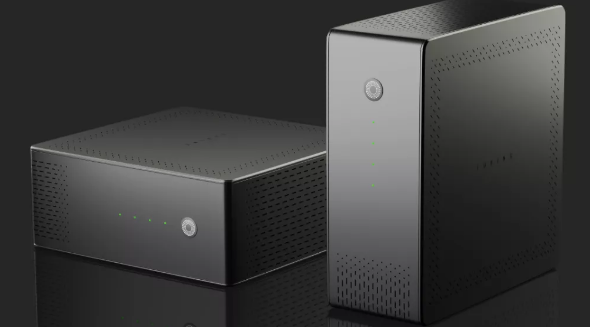
For cluster computing, such as the Turing Pi 2 project, the Compute Module 4 is an exceptionally powerful option.
The Compute Module 4 is built for embedded applications. If your projects are industrial or IoT in nature, then they could benefit from the Compute Module 4. To get the best from this board you will need the skills to design and fabricate your own carrier board, or the knowledge to select and purchase the correct kit.
It is highly likely that enterprising companies will adopt the Compute Module 4 for use in embedded devices. Expect a slew of handheld devices and crowd funded projects powered by this small yet mighty device.
PCIe and the Compute Module 4
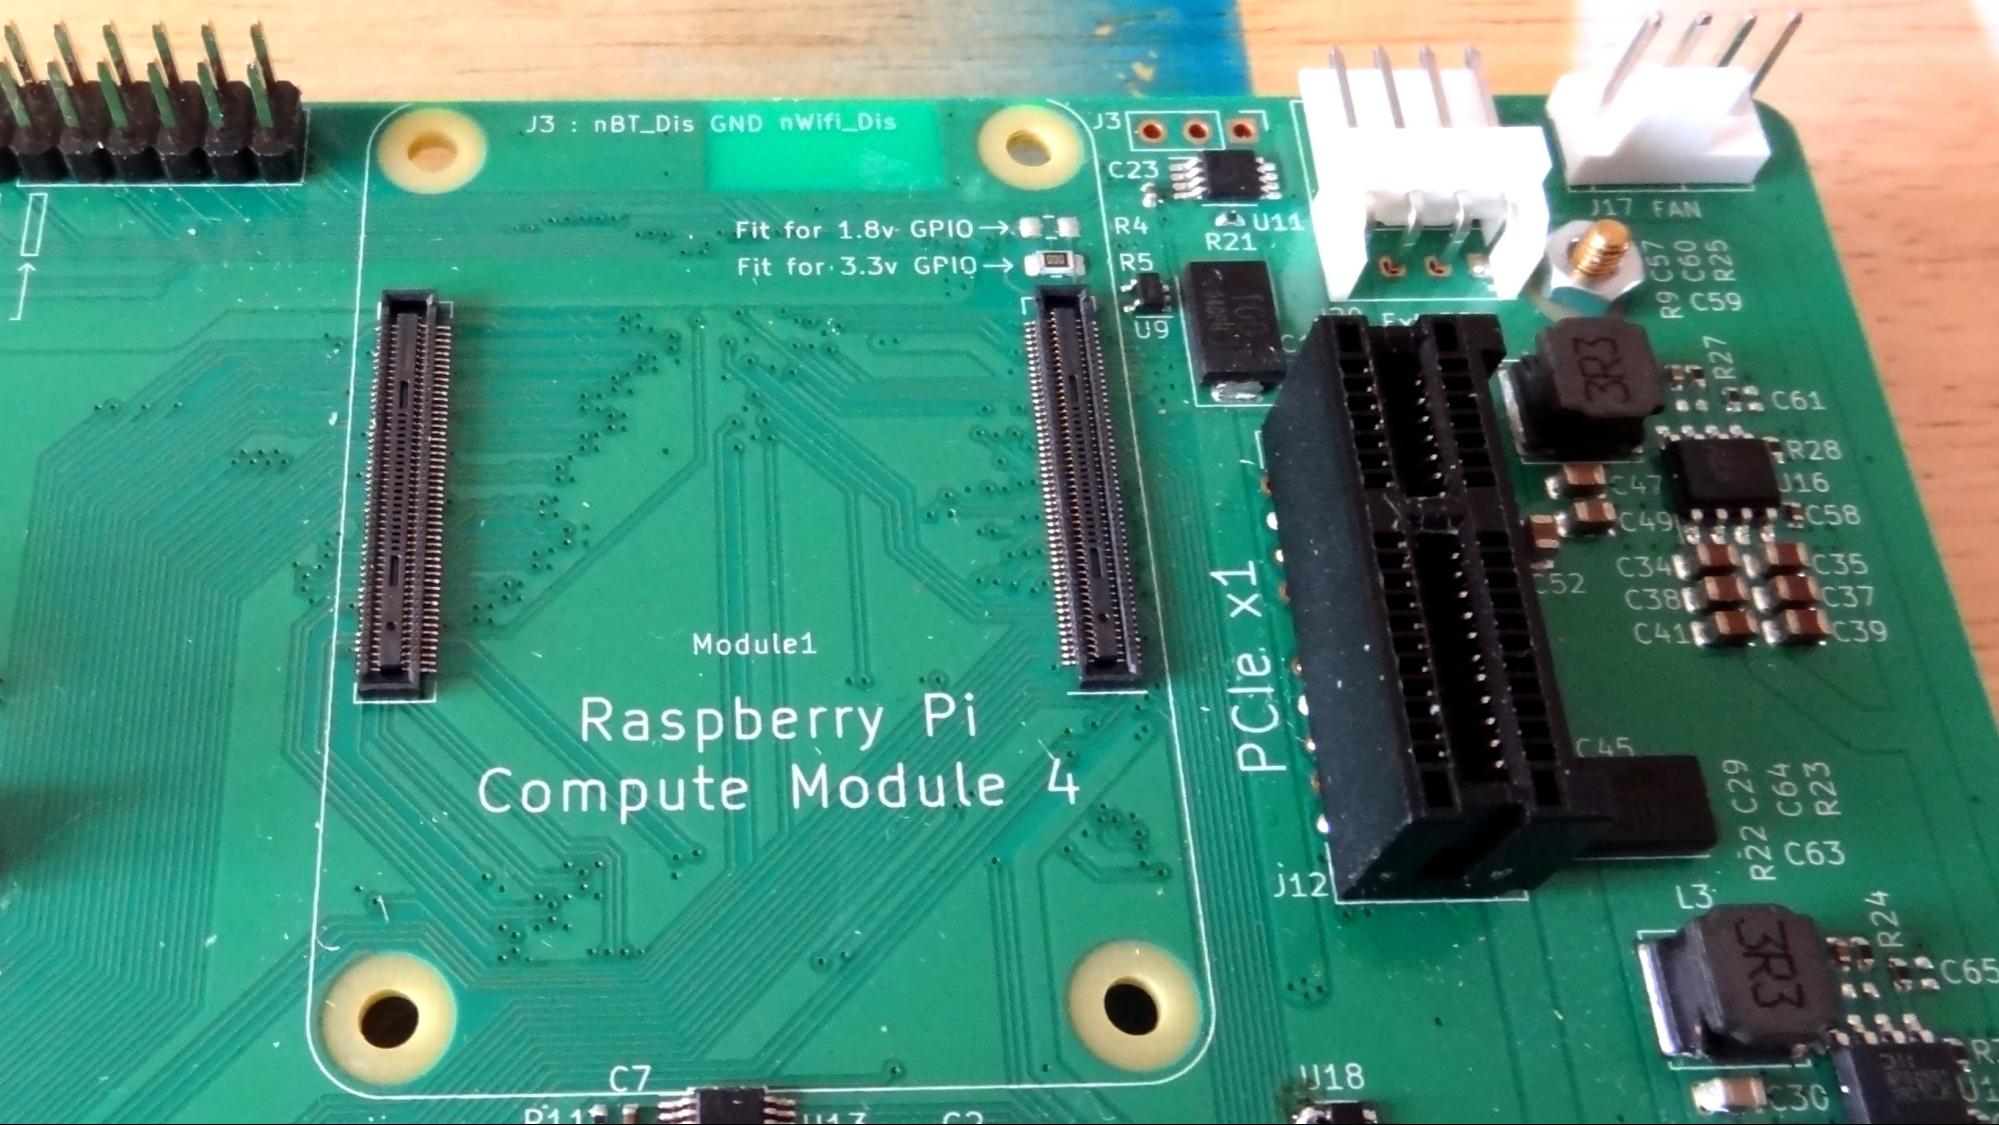
The Compute Module 4 IO Board is the first Raspberry Pi with an exposed and user configurable PCIe Gen 2 x1 slot, enabling users to insert any compatible card including NVMe drives via an adapter.
The Raspberry Pi 4 was the first board to have a PCIe controller and this was connected to the VLI805 used for two USB 3.0 ports. At the time of writing the limits of the PCIe port are still being investigated by hackers such as Jeff Gerrling. In Geerling’s tests, he found that a Samsung EVO Plus NVMe drive was seven times faster than the internal eMMC flash storage of the Compute Module 4.
Bottom Line
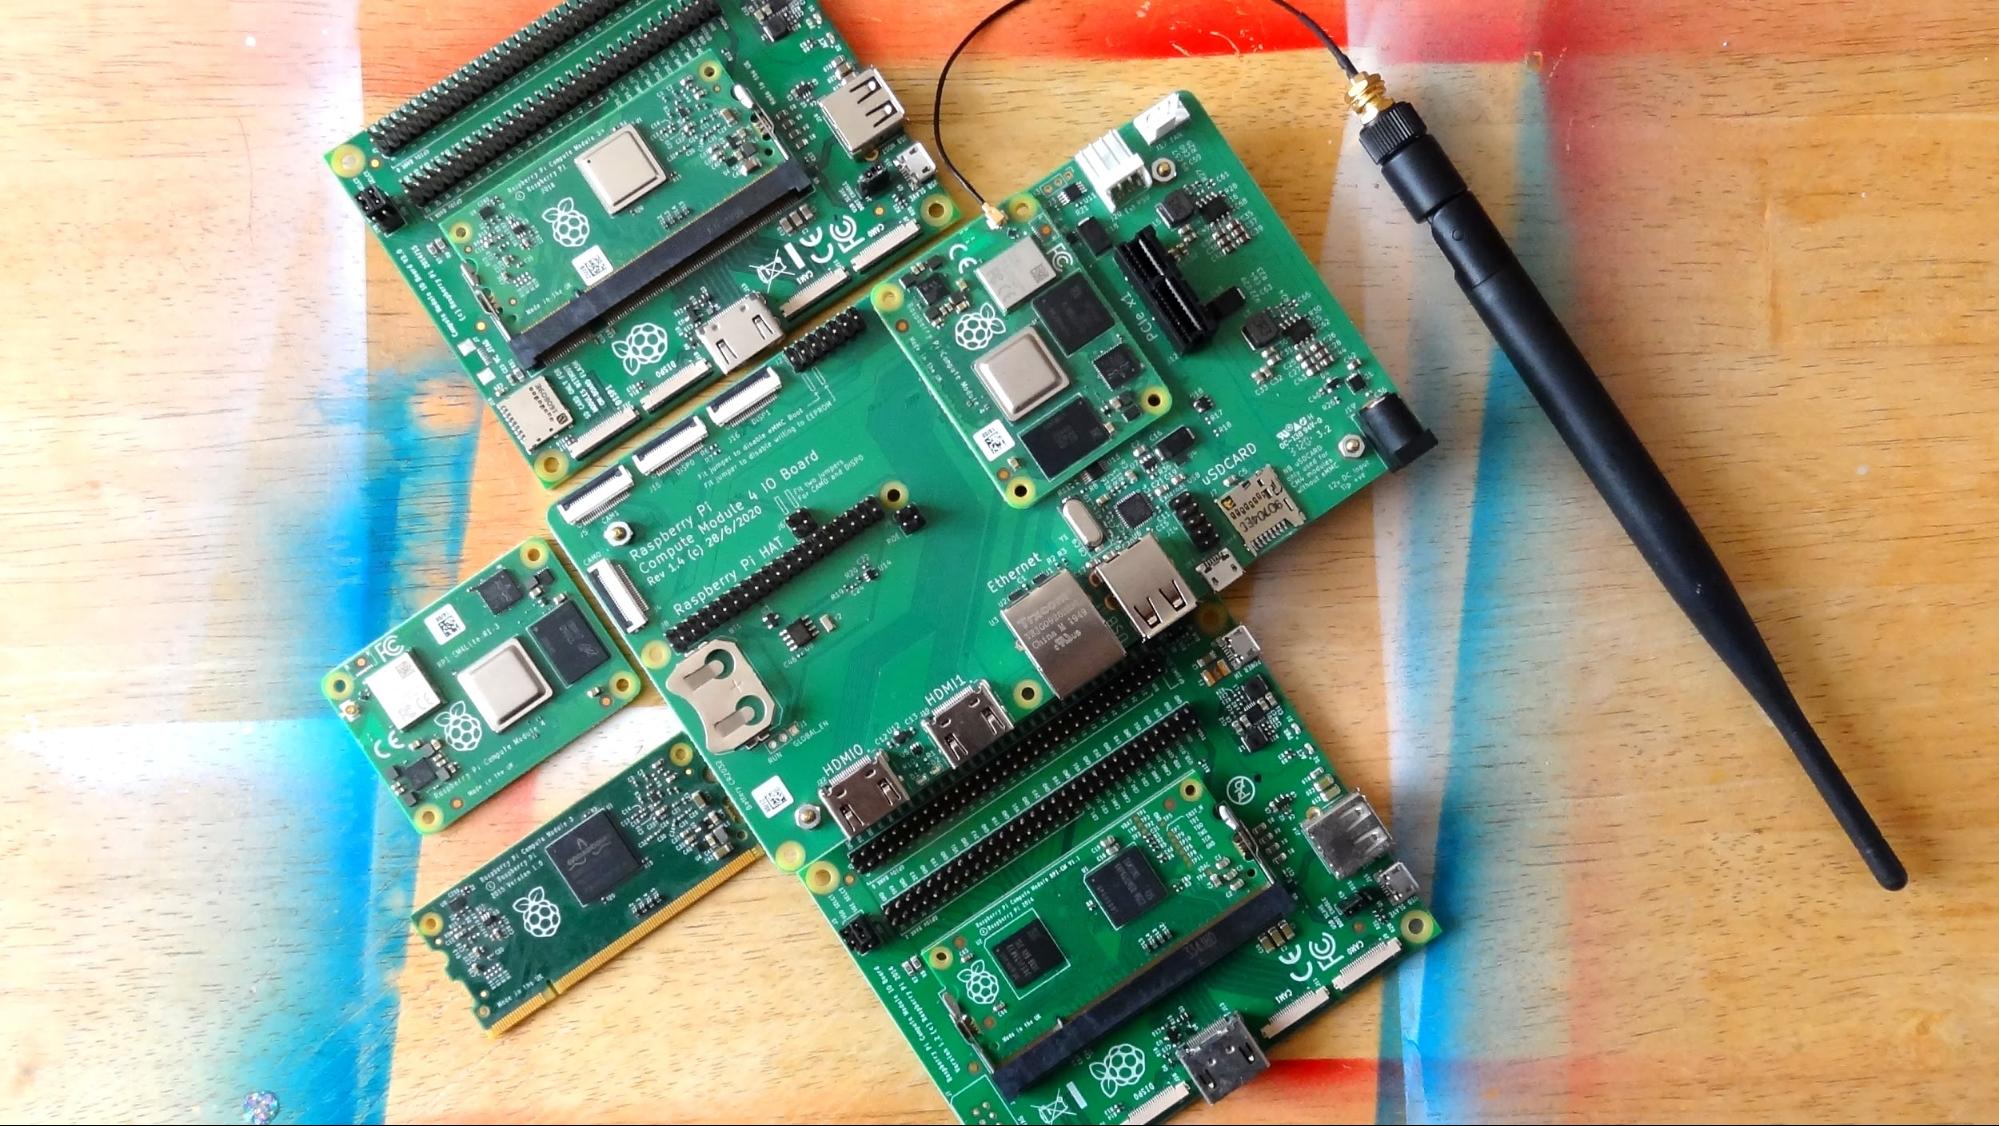
The Compute Module 4 is not for everyone. If you are happy enough using the Raspberry Pi 4 then there is little to entice you into using the Compute Module 4. But if you are in the market to design your own carrier boards, or wish to embed the power of the Pi 4 in a small form factor or want to have direct access to the Pi’s PCIe interface, then the Compute Module 4 is a wise investment.

Les Pounder is an associate editor at Tom's Hardware. He is a creative technologist and for seven years has created projects to educate and inspire minds both young and old. He has worked with the Raspberry Pi Foundation to write and deliver their teacher training program "Picademy".
