Turning Your Printer Into A Paper Shredder (On Purpose)
Get Tom's Hardware's best news and in-depth reviews, straight to your inbox.
You are now subscribed
Your newsletter sign-up was successful
Disassembly And Preparation, Continued
Next is the other side of the printer. This side is where the active cooling (oxygen providing) solution to the printer can be found, as well as the connections and high voltage contact points for the toner cartridge. Remove these items also.
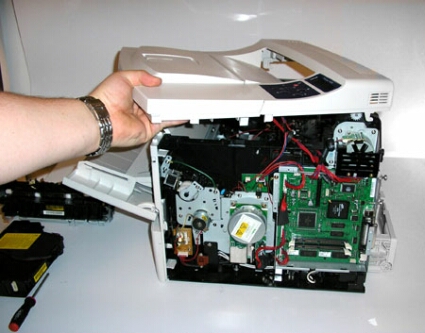
By removing the top we can dig in further and find the laser unit as well as more wiring that needs to be removed. The toner cartridge should be removed at this point if you haven't done so already. Now with this printer, the toner cartridge actually contains a feed roller that is critical to our solution, so we will save the toner cartridge and replace it in the printer/shredder before operating it.
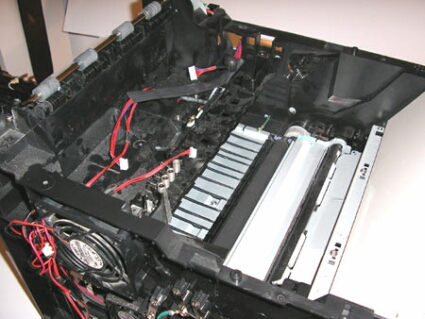
With the toner cartridge and laser unit removed you can see just how much room we have in this printer for tinkering. Remove all circuit boards and wires so there is no chance of them falling into the feeder. While watching this item cannibalize itself might sound super fun, it turns out that it's not very safe or cost effective in the long run.
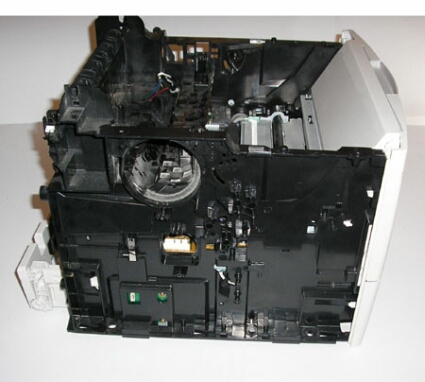
Remove all the fans, circuit boards and wires as well from the side panels of the printer. Remove the main processor unit for the printer and all associated wiring as well. Finally, replace the top cover and side panel on the side with no motors under them, and be sure to screw them down.
Get Tom's Hardware's best news and in-depth reviews, straight to your inbox.
Current page: Disassembly And Preparation, Continued
Prev Page Disassembly And Preparation Next Page Assembly And Fabrication

