Turning Your Printer Into A Paper Shredder (On Purpose)
Get Tom's Hardware's best news and in-depth reviews, straight to your inbox.
You are now subscribed
Your newsletter sign-up was successful
Assembly And Fabrication
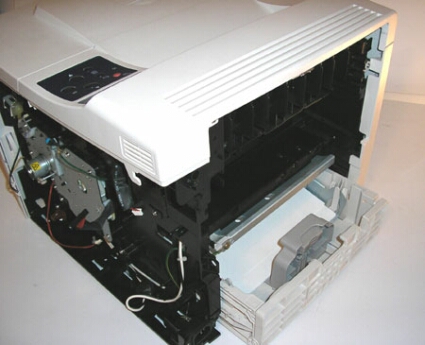
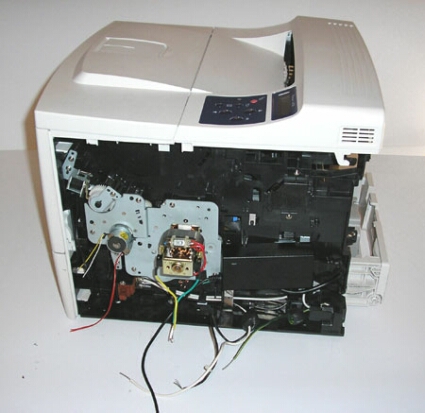
Ok, we have stripped this printer down to its skivvies, and it is now time to have some fun building it out. This printer is, electronically speaking, basically a clean slate (minus a few... um... slate parts). We will now start to add the components that will change its intended purpose to that of our warped geekiness.
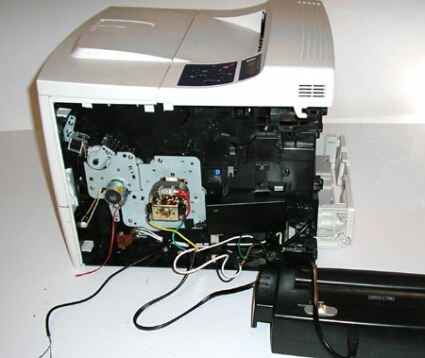
Take a moment to tear apart the second paper shredder you picked up from the Super Mega S-Mart type place. Remove the motor, cutting the leads with ample wire to work with, and position it carefully between the drive gears ("it" being the motor and not your fingers, preferably). Using a sharpie, mark where the holes on the mounting bracket should be and drill the holes with a 1/8th drill bit. Use the existing screws from the paper shredder to mount the motor firmly in place on the previous motor occupant's mounting plate.
Next, cut the plug end off the existing power lead that formerly provided power to the original printer power supply. Strip the wire ends. Do the same to the power leads of the motor, five volt power supply and shredder. Using wire nuts or crimp connectors, permanently attach the wires together to help avoid shorts. These connections need to be secure, as you're dealing with unadulterated 120v AC power here. If you're not familiar, consult an electrician (Remember, this article is for entertainment purposes only, if someone gets killed, dismembered, maimed, emotionally scarred, or electrocuted, it's their own damn fault). Mount the power supply inside the case with a few drops of superglue (inadvertent gluing yourself to the case isn't our fault either).
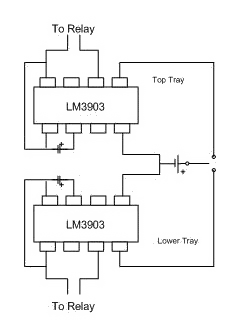
Here is a basic diagram of the circuit that we used. We chose a simple 3909-based oscillator. We used two older LM 3909 ICs we had laying around and one 100-UF, six-volt-electrolytic capacitor. As you can see, the circuit is really simple. We doubled the oscillators to allow independent control to the two paper feeders. The circuit can be made variable with great ease, but with some basic experimentation of the values of the components we were able to find rates that we liked and hard set them.
Get Tom's Hardware's best news and in-depth reviews, straight to your inbox.
Current page: Assembly And Fabrication
Prev Page Disassembly And Preparation, Continued Next Page Assembly And Fabrication, Continued


