Turning Your Printer Into A Paper Shredder (On Purpose)
Assembly And Fabrication, Continued
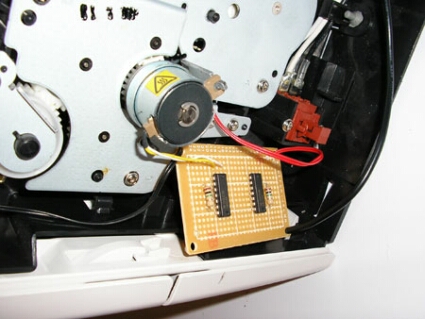
Find a place for the solenoid controller and mount it firmly in the case. We mounted ours in the empty space at the front of the case in the side panel. Carefully solder the leads from the existing solenoids to the board and apply power. Additionally, test with a multi-meter or something similar, not your tongue... trust me. Finally, mount the tray selector switch in an easily accessible place. We mounted ours in the rear of the printer to keep it as aesthetically pleasing as possible (excluding the motor hanging out the side of the case, of course...).
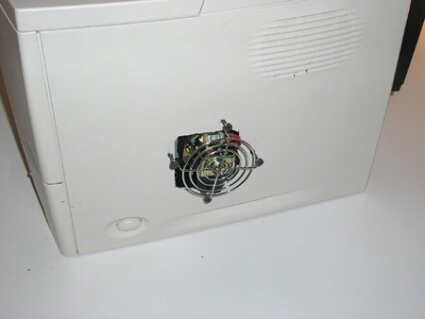
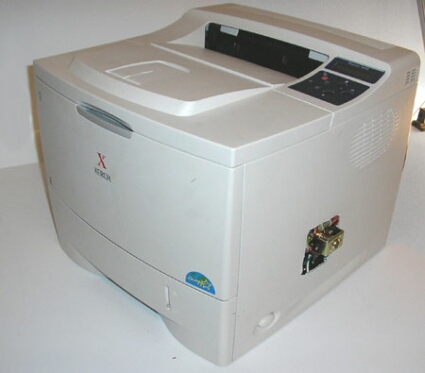
Now you'll test-fit the panel to the case. If you use the motor and printer that we did, you will see that it protrudes out further than the side of the case by about a half of an inch. Use a sharpie to mark the shape of the motor and its position on the inside of the case. Using a dermel tool, cut a hole and test-fit the panel to make sure the motor can fit without rubbing the edges of the panel. It needs airflow as well. As the brushes are physically exposed, you'll want to "unexpose" them. We mounted a simple 80 mm case fan type grill to the case to solve this problem. We didn't get electrocuted (this time).
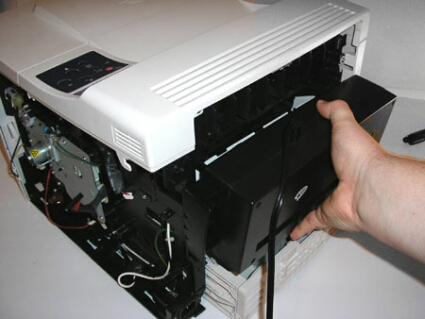
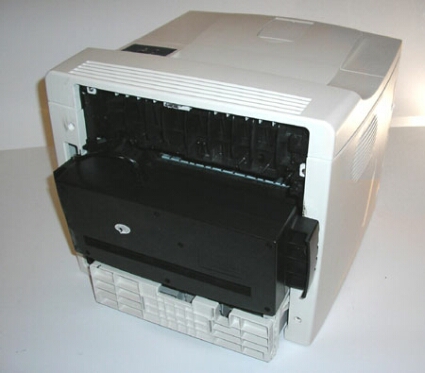
In the rear of the printer, test-fit the paper shredder to the printer; assuming you have all the wiring working (you tested this by now, of course), you can actually run the printer, feeding paper into the paper shredder to help with alignment. Another thing I did to help the reliability factor of this is to create two flanges hanging off the front of the shredder to act as a funnel, thus allowing some variance in paper being fed into the shredder. Additional tolerance is always a good thing to prevent a K22 paper jam.
Finally, replace the side panel of the case. The side panel also provides the mounting surface for the shredder. Using some good, coarse grabber-type drywall screws, screw the shredder to the printer using the side flanges on the shredder as the mount points. We created pilot holes using a nail that we heated in a torch to glowing hot and then melted the four holes clean through both the shredder and printer plastics. (Yes we could have used a drill... but playing with fire is kind of fun). Make sure it's secured really well, as the shredder will vibrate and possibly work the screws out over time.
So there you have it. The main part of the fabrication is done. All we have to do now is test it and there you have it, your very own anti-printer.
Get Tom's Hardware's best news and in-depth reviews, straight to your inbox.
Current page: Assembly And Fabrication, Continued
Prev Page Assembly And Fabrication Next Page Testing And Configuration