How to change your mouse pointer and cursor in Windows 11 or 10
A pointer that's too small or plain white can be harder to see.
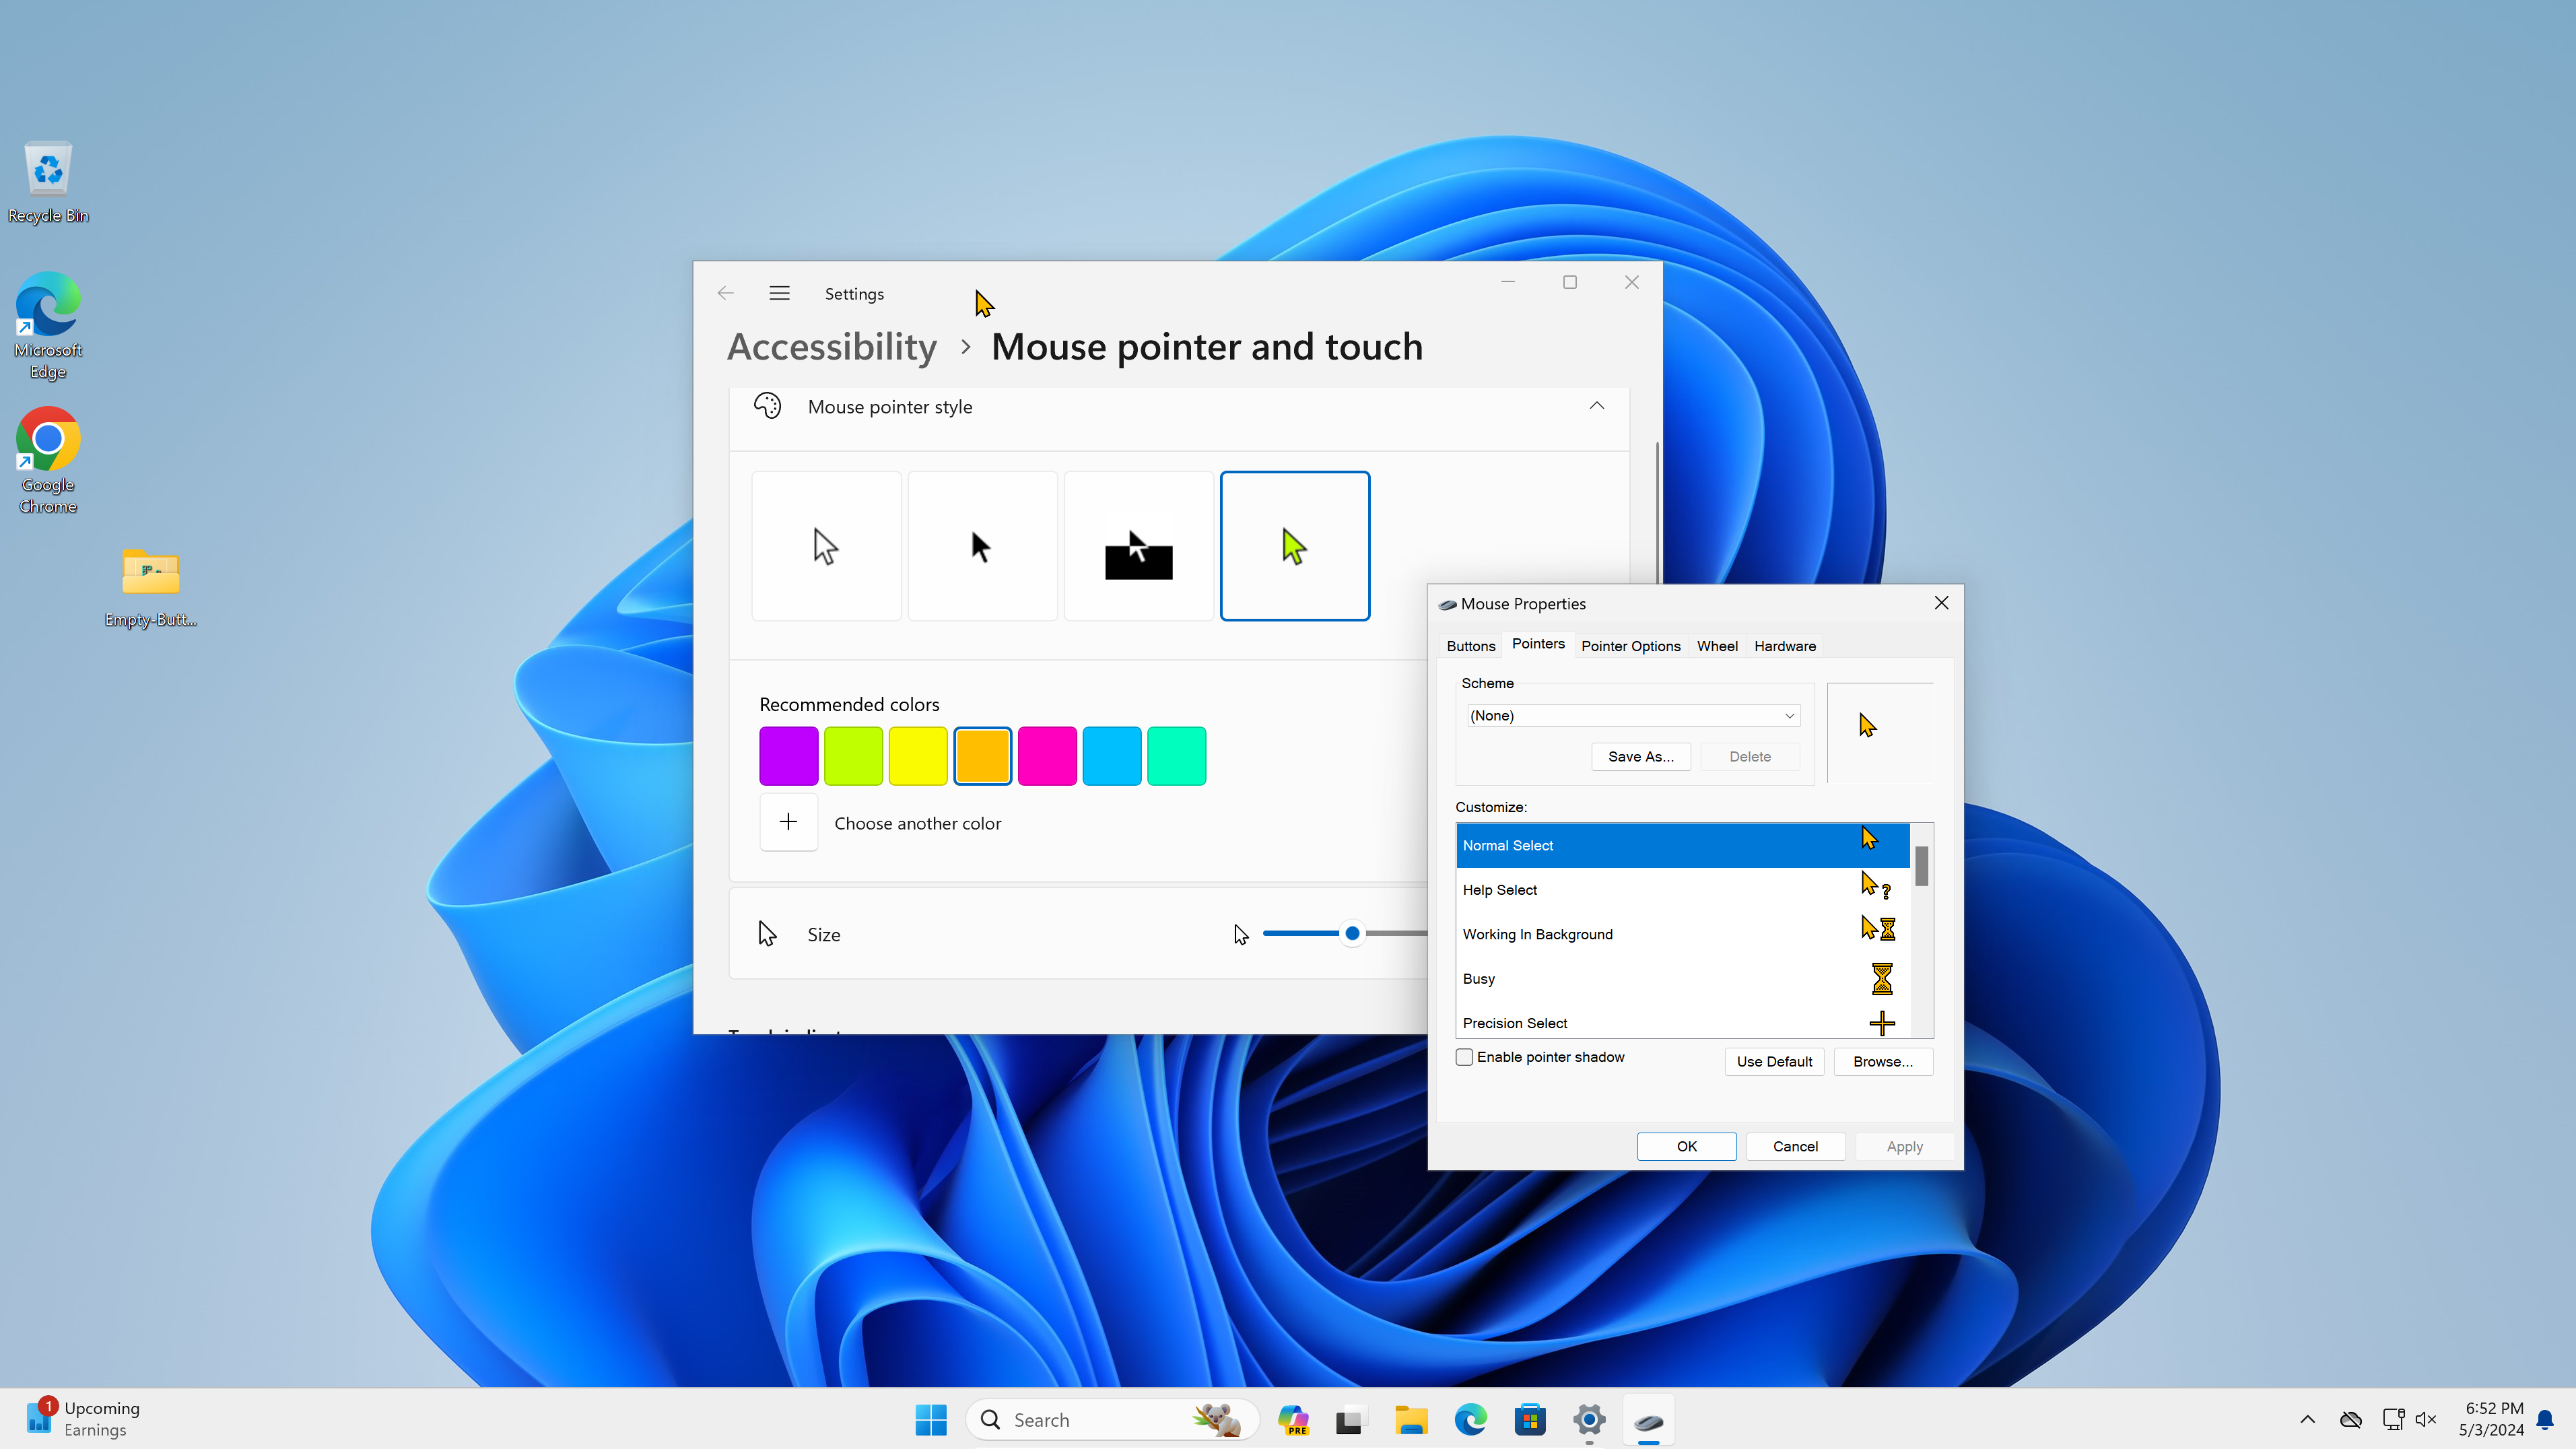
The Windows mouse pointer/cursor is something you look at and rely on all day long, but it's also easily taken for granted. For most users, it's just the default white arrow at a small size. However, if your eyesight isn't great or you have multiple monitors like I do, it can sometimes be difficult to see your mouse pointer.
Fortunately, it's easy to change the size and color of your mouse pointer in Windows 11 or 10. And, if you want to go further, you can even install custom mouse pointers that look different. Below, we'll look at a couple of different ways to customize the cursor, starting with the easiest. We took screenshots in Windows 11, but the steps are the same in Windows 10.
How to Change Your Mouse Pointer using Accessibility Settings
If you just want to change the size and color of your pointer -- the best idea for improving visibility -- you should use the Windows Settings Accessibility menu. Here's how.
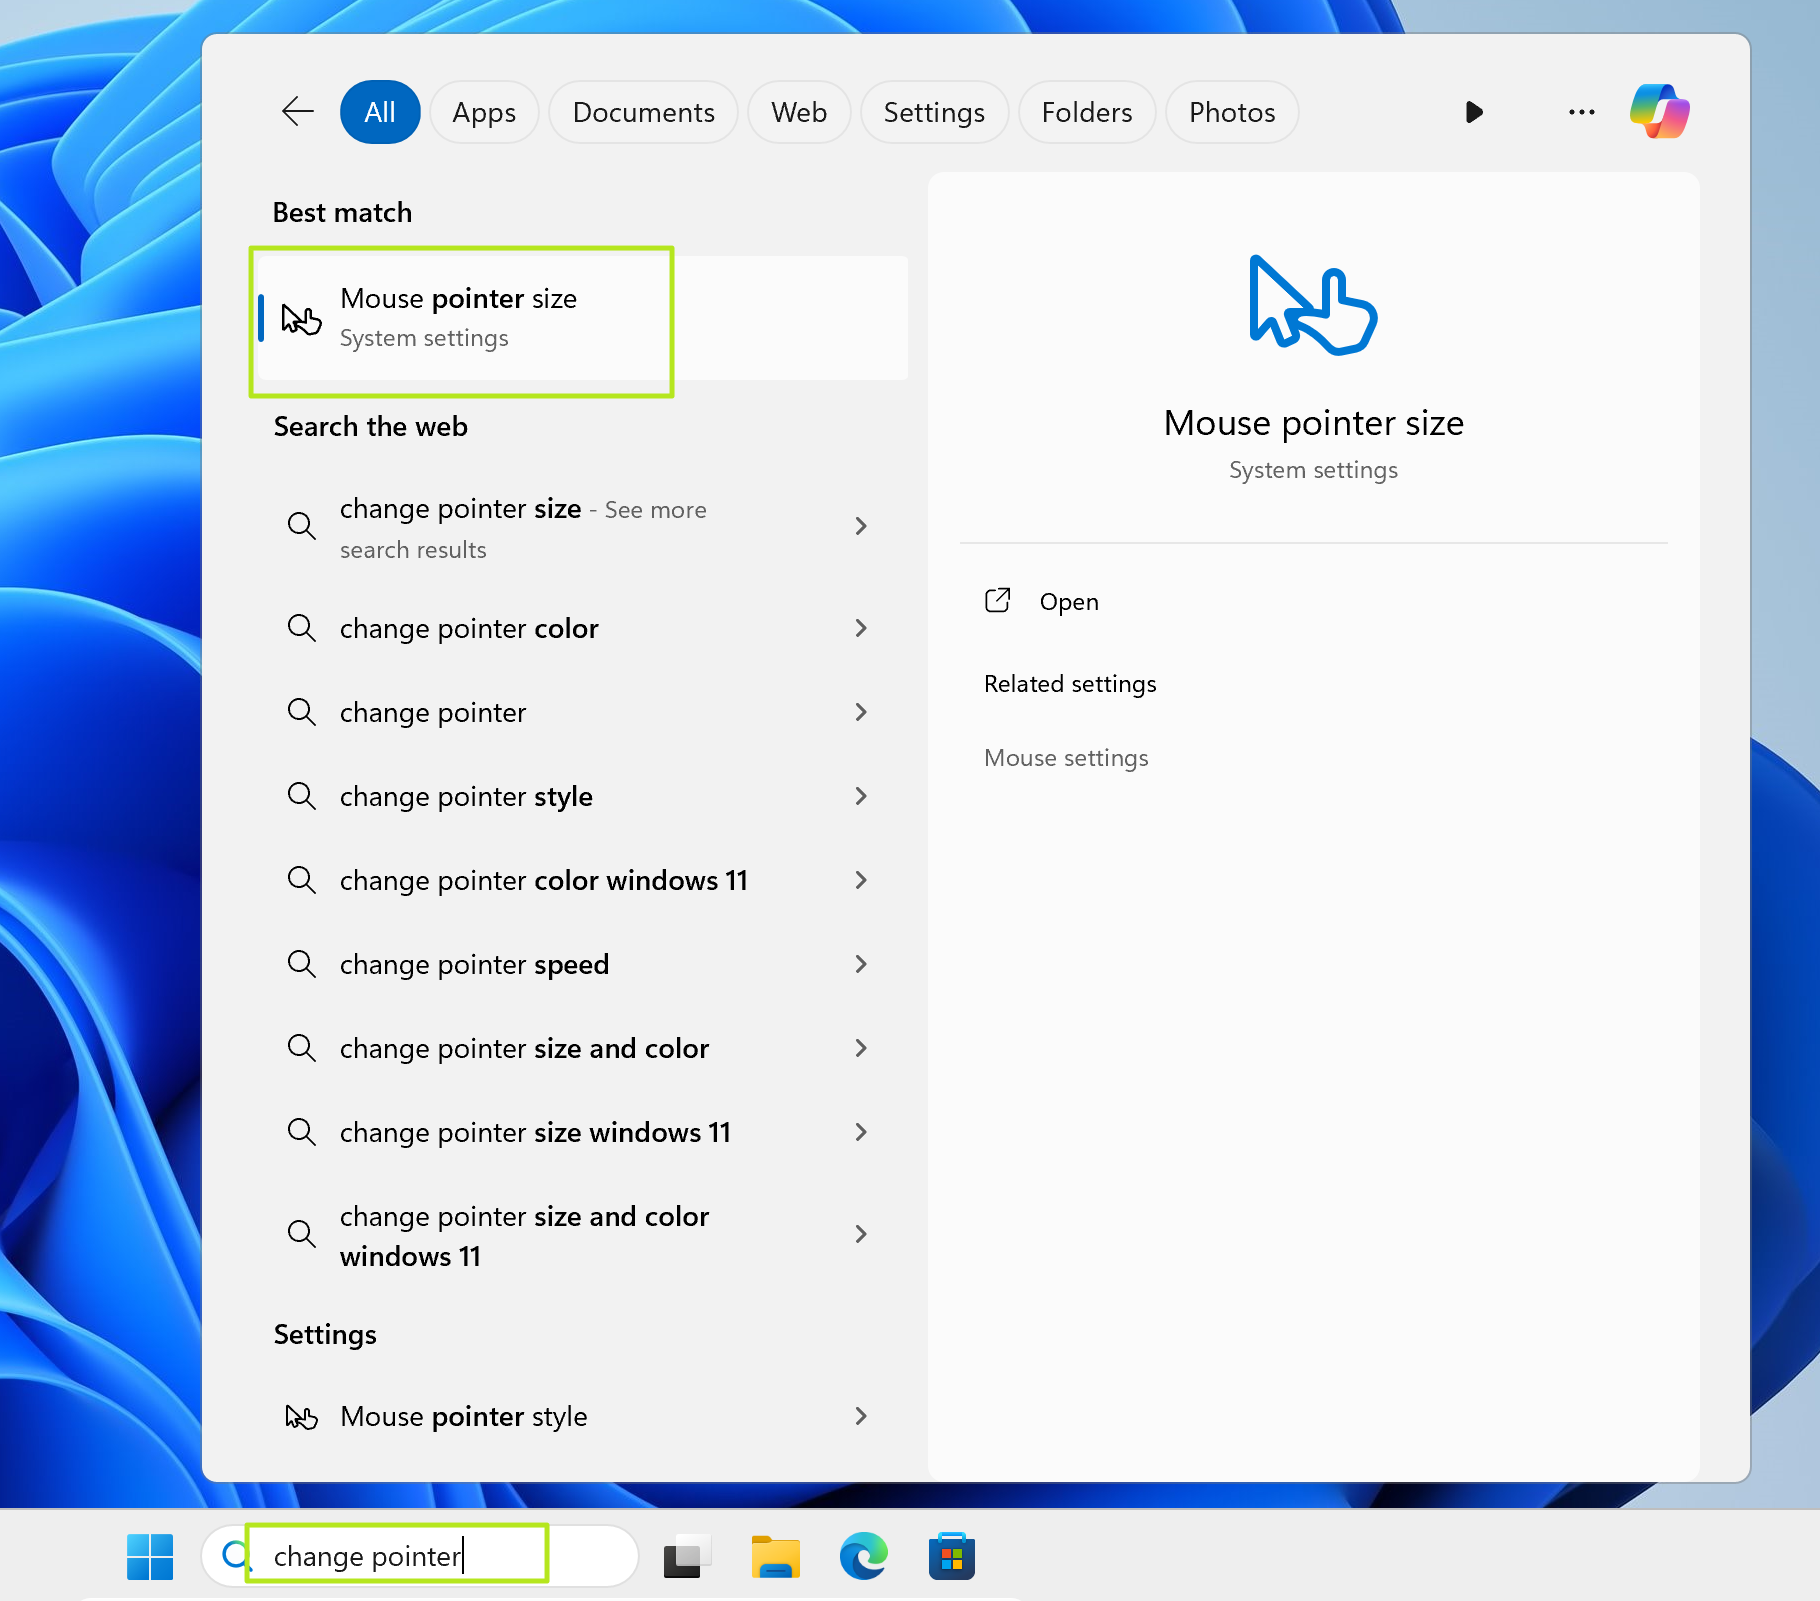
1. Search for "change pointer" in the Windows search menu and click the top result.
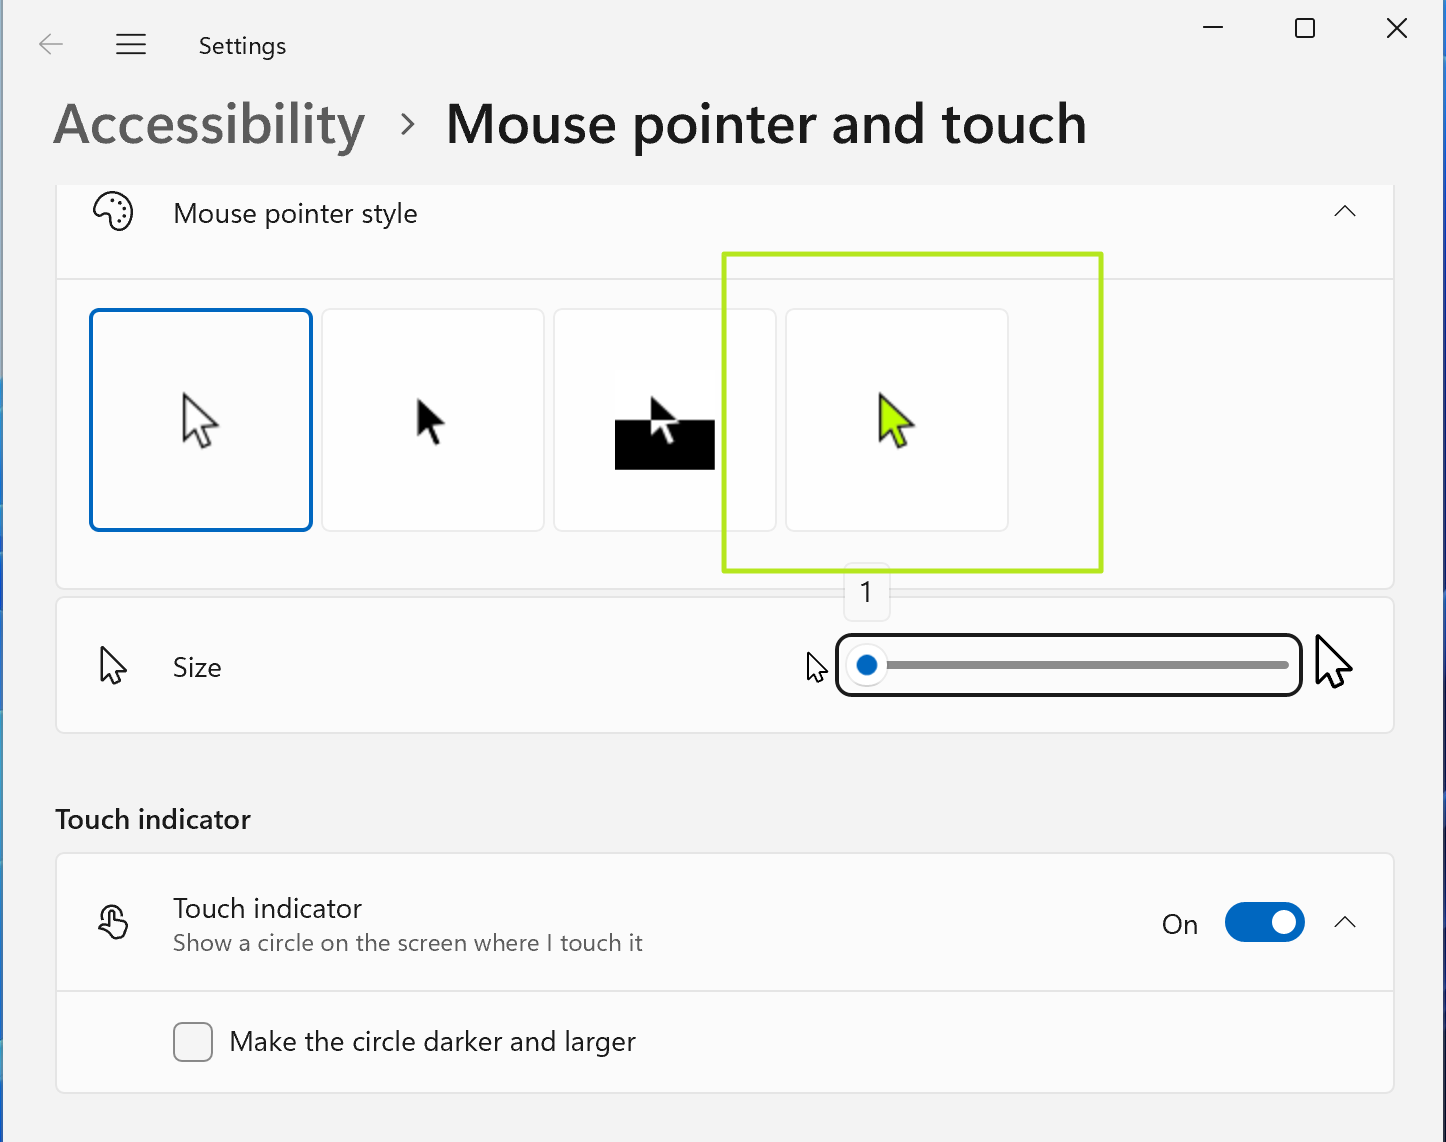
2. Select a mouse pointer style. I recommend picking the colorful pointer option so it will stand out.
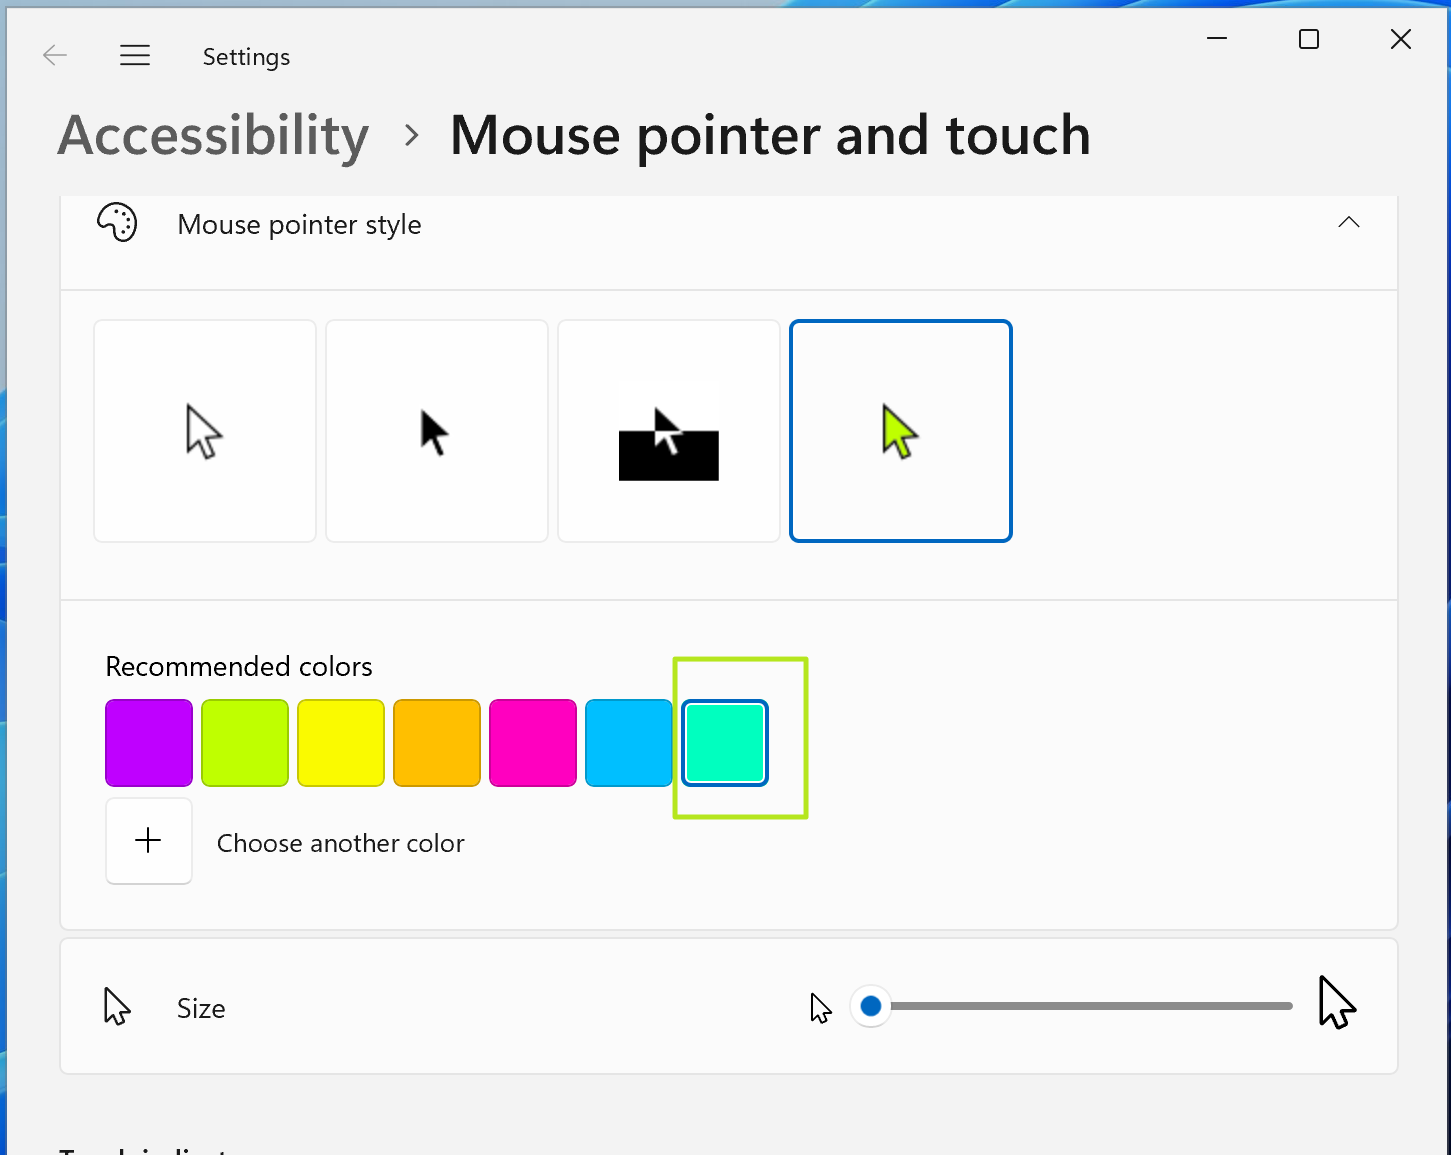
3. Choose a color if you selected the colorful pointer option.
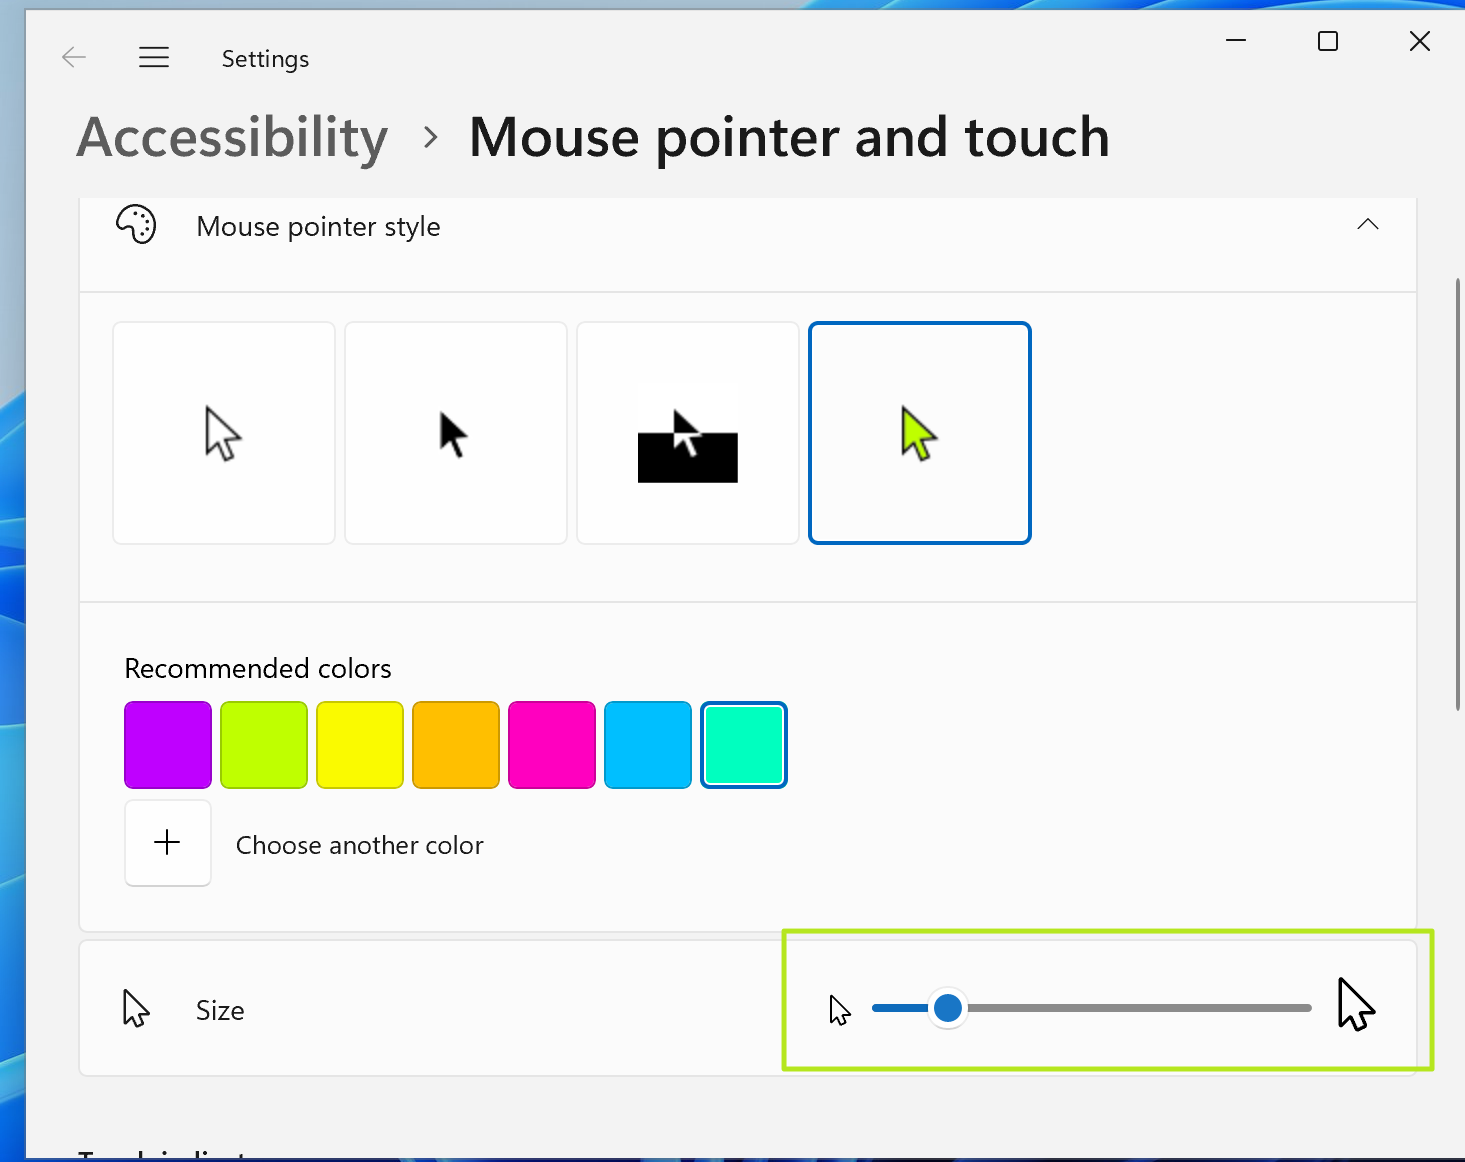
4. Change the size if you want a larger pointer by moving the Size slider to the right. I like size 3 or 4.
Get Tom's Hardware's best news and in-depth reviews, straight to your inbox.
How to Change Your Text Cursor
In the same accessibility menu (see above), you can change the text cursor thickness and / or add a cursor indicator that makes it easier to spot.
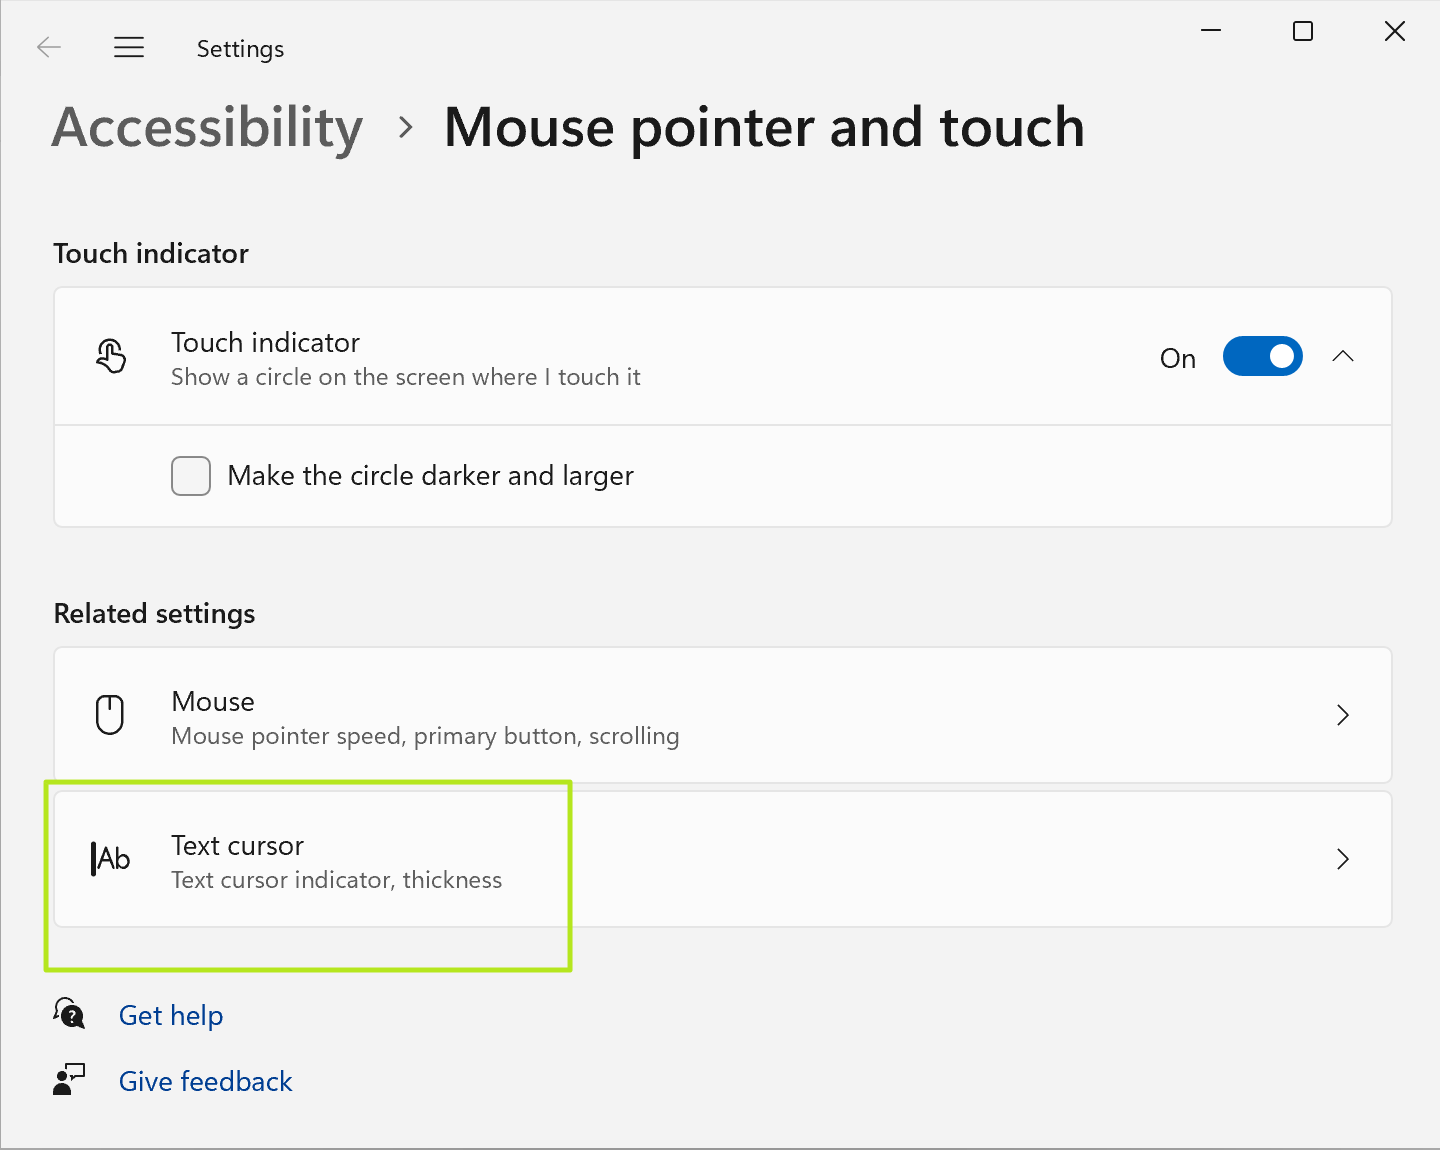
1. Navigate to the Text Cursor Settings menu. You can get there by clicking Text cursor from the Mouse accessibility menu or by searching for "Text cursor."
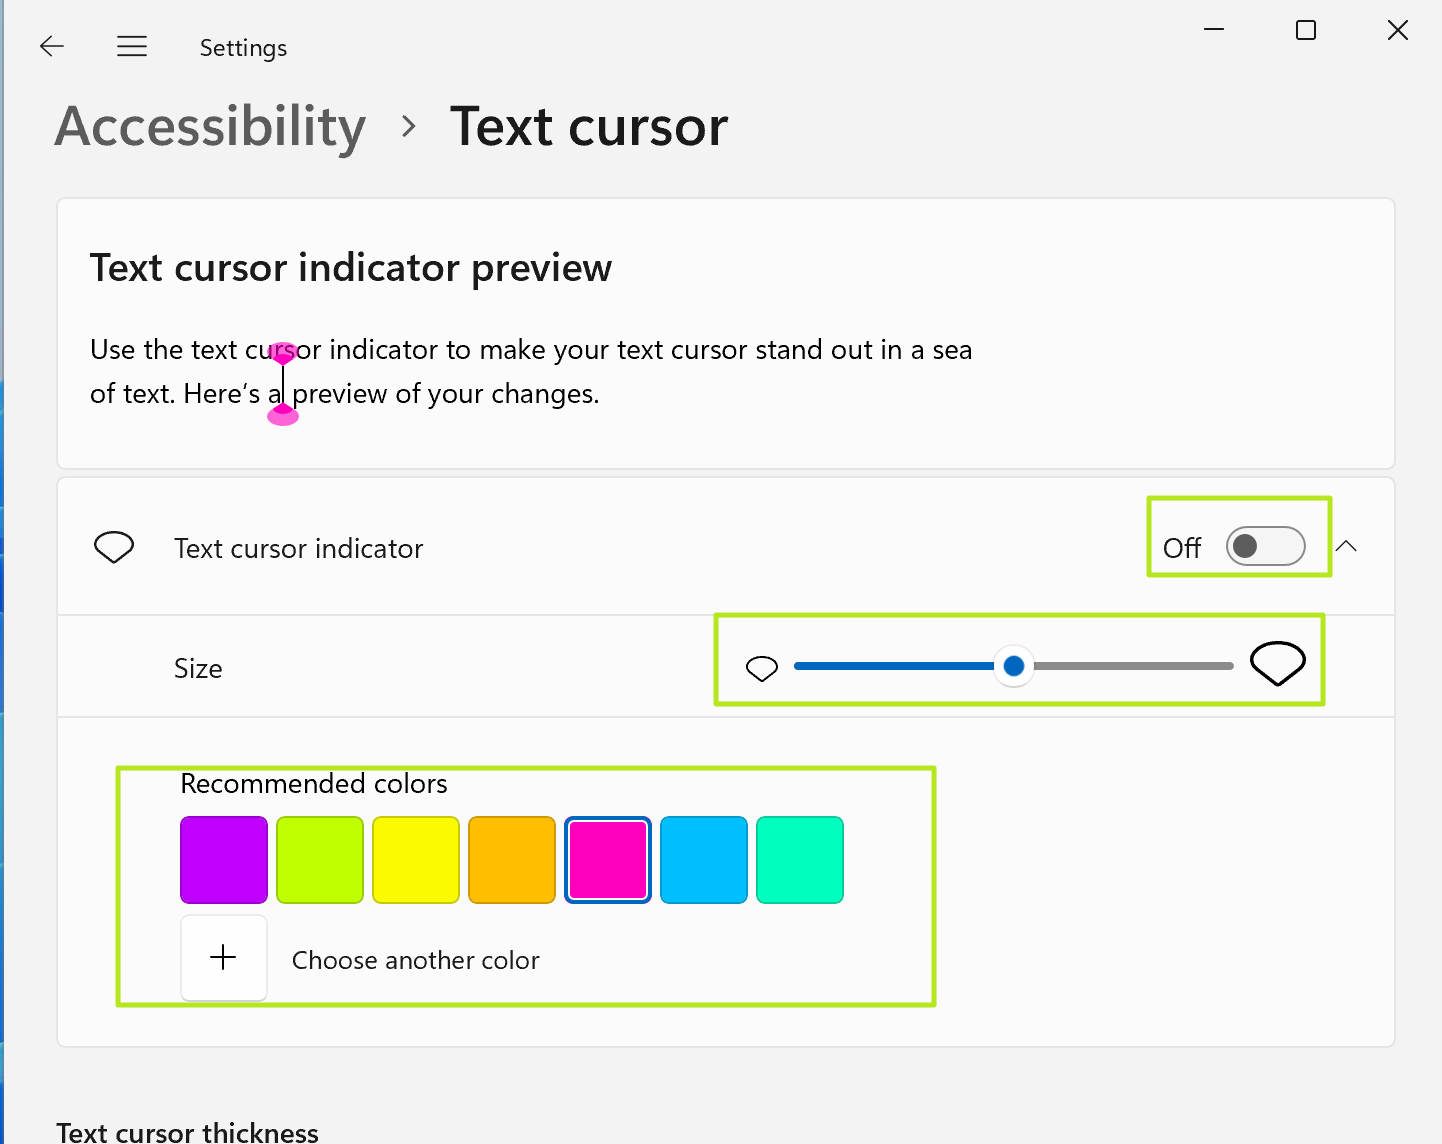
2. Enable the text cursor indicator and set its color and size, if you want an indicator. This is off by default and not needed, unless you want a colorful visual cue to help you locate the cursor.
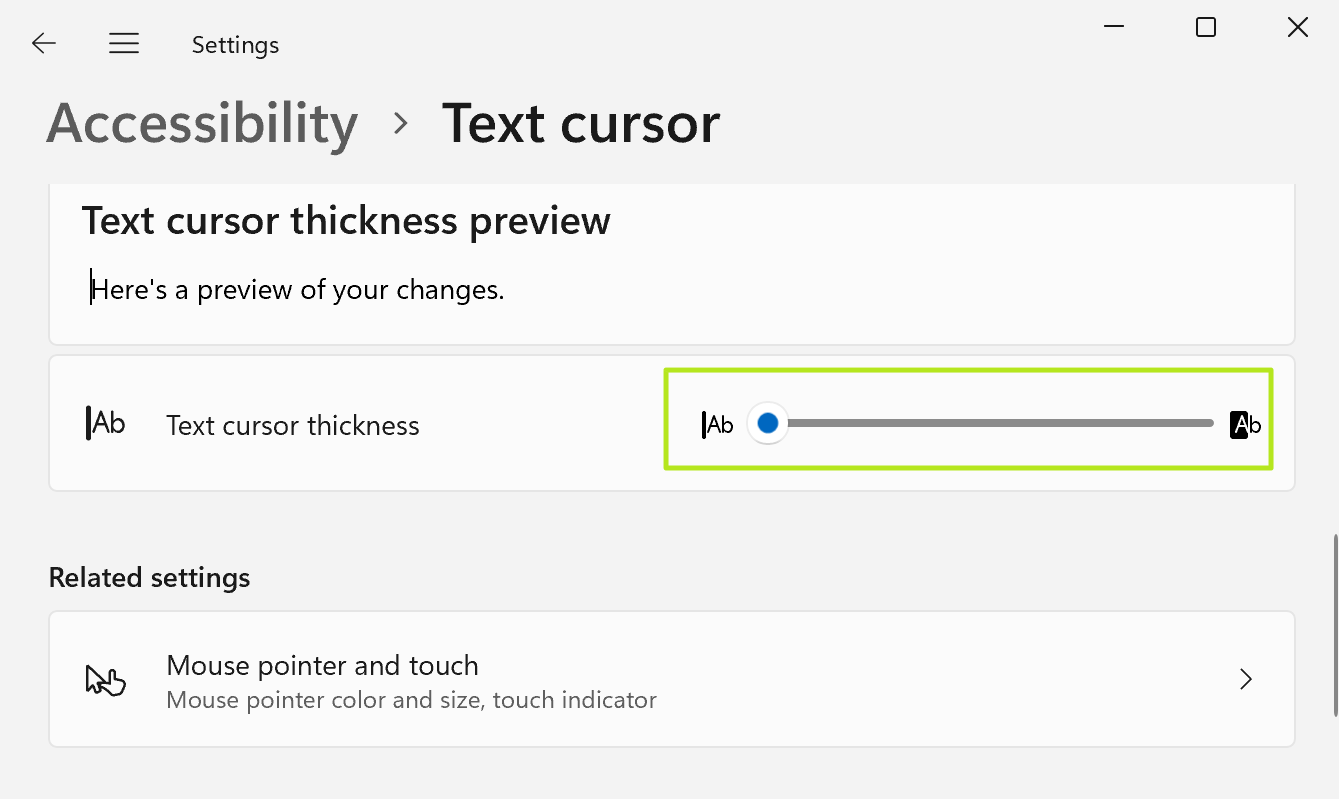
3. Slide the Text cursor thickness slider to the right if you want a thicker cursor.
Use Custom Mouse Pointers and Cursors
If you want a completely different look for your pointer, perhaps a clear arrow or a theme that looks like anime characters, you can download a completely new image or set of images. In addition to the main arrow that you use to click on things, there's icons that appear when something is loading or when you're resizing a window.
1. Download custom cursor files. There's a nice collection of free cursors at Pling.
2. Unzip the downloaded set of cursors.
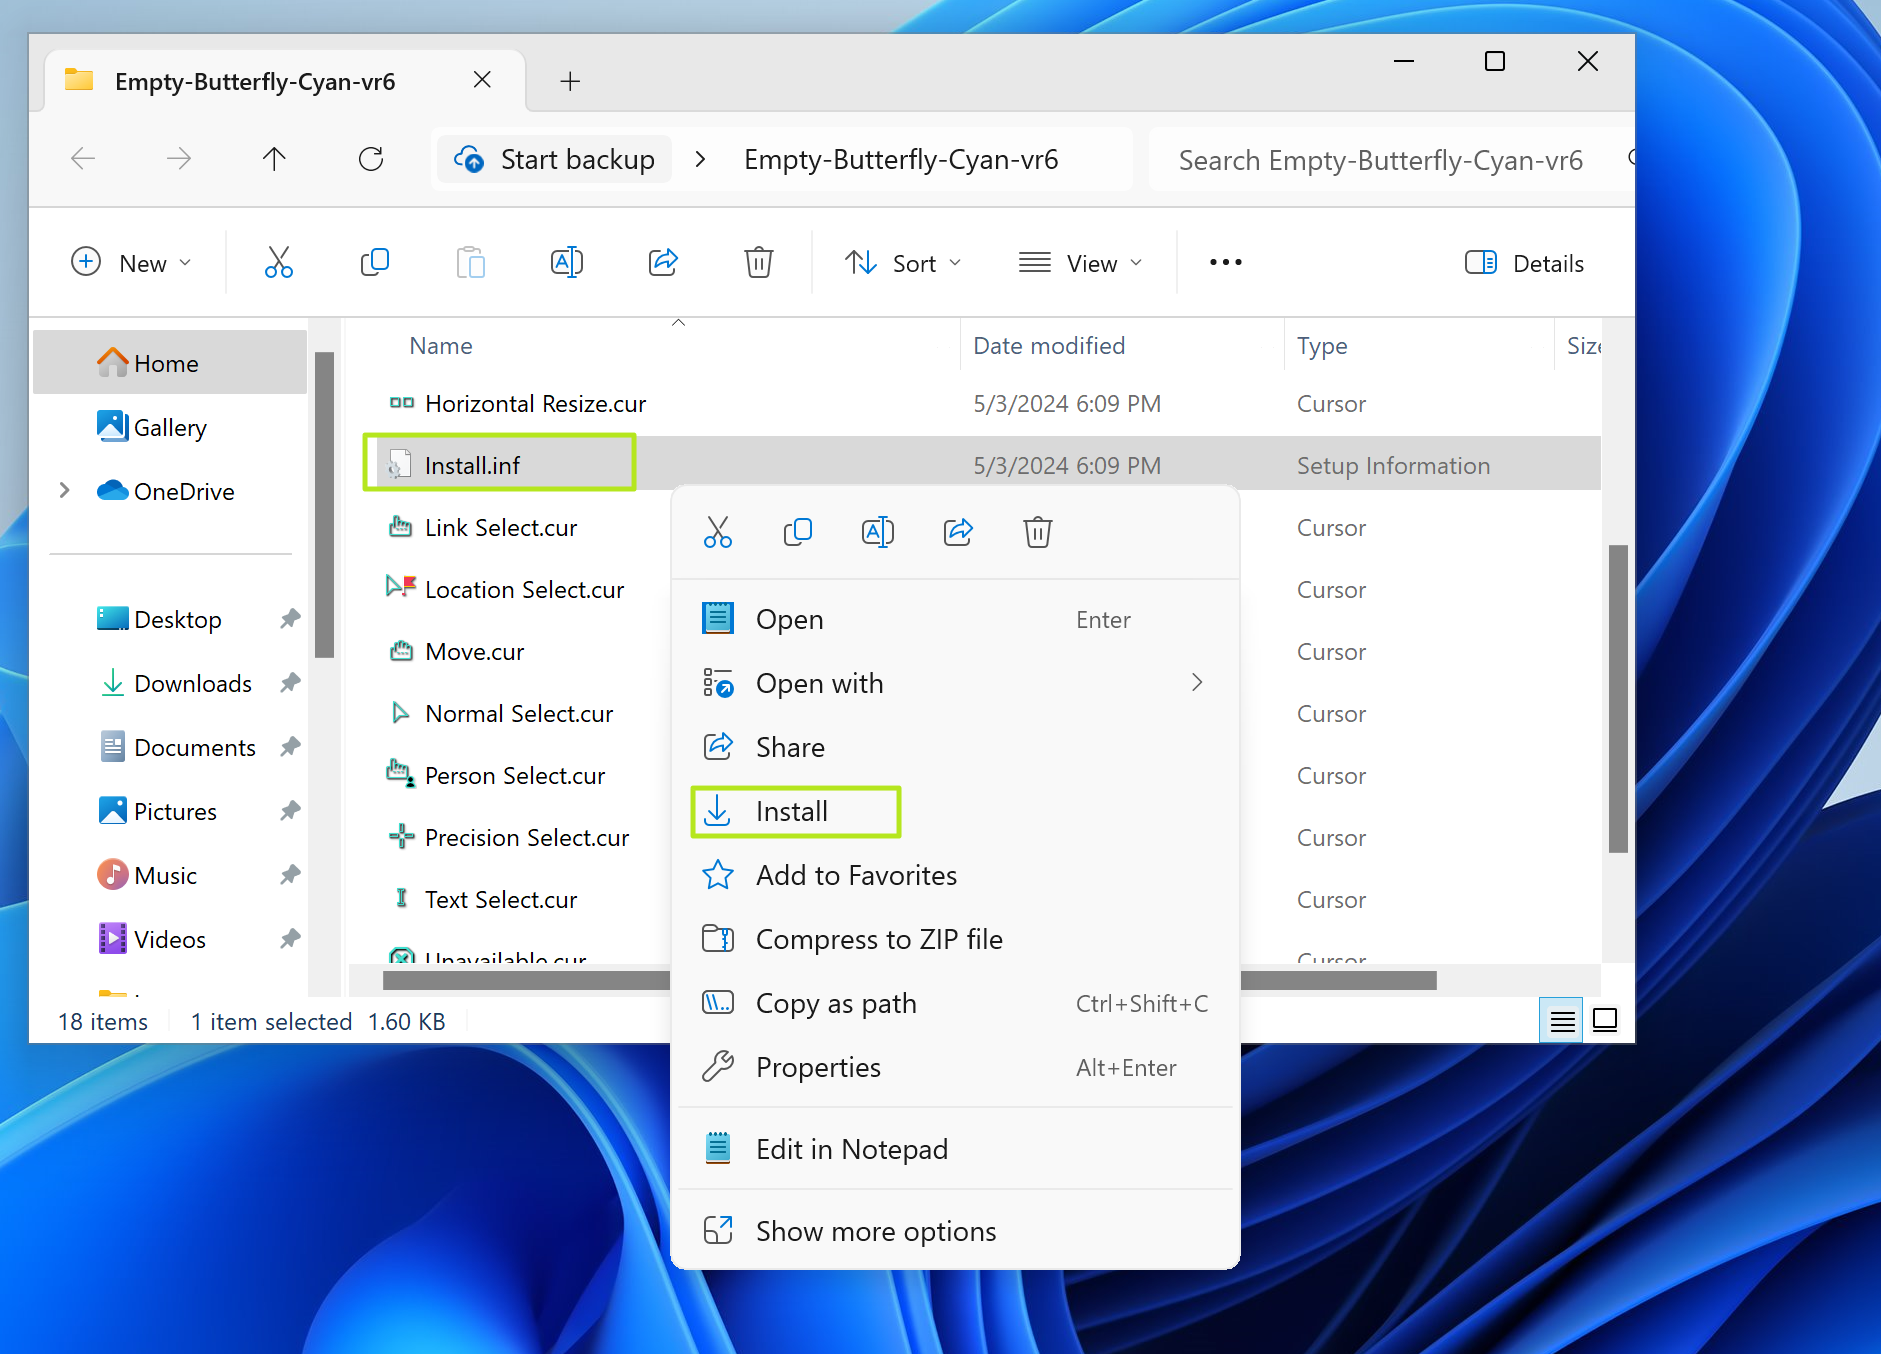
3. Run Install.inf if there's such a file in the unzipped cursor folder by right clicking on it and selecting install. It will install the entire cursor / pointer scheme, complete with the pointers that show up for busy, link select (the finger), resize, etc.
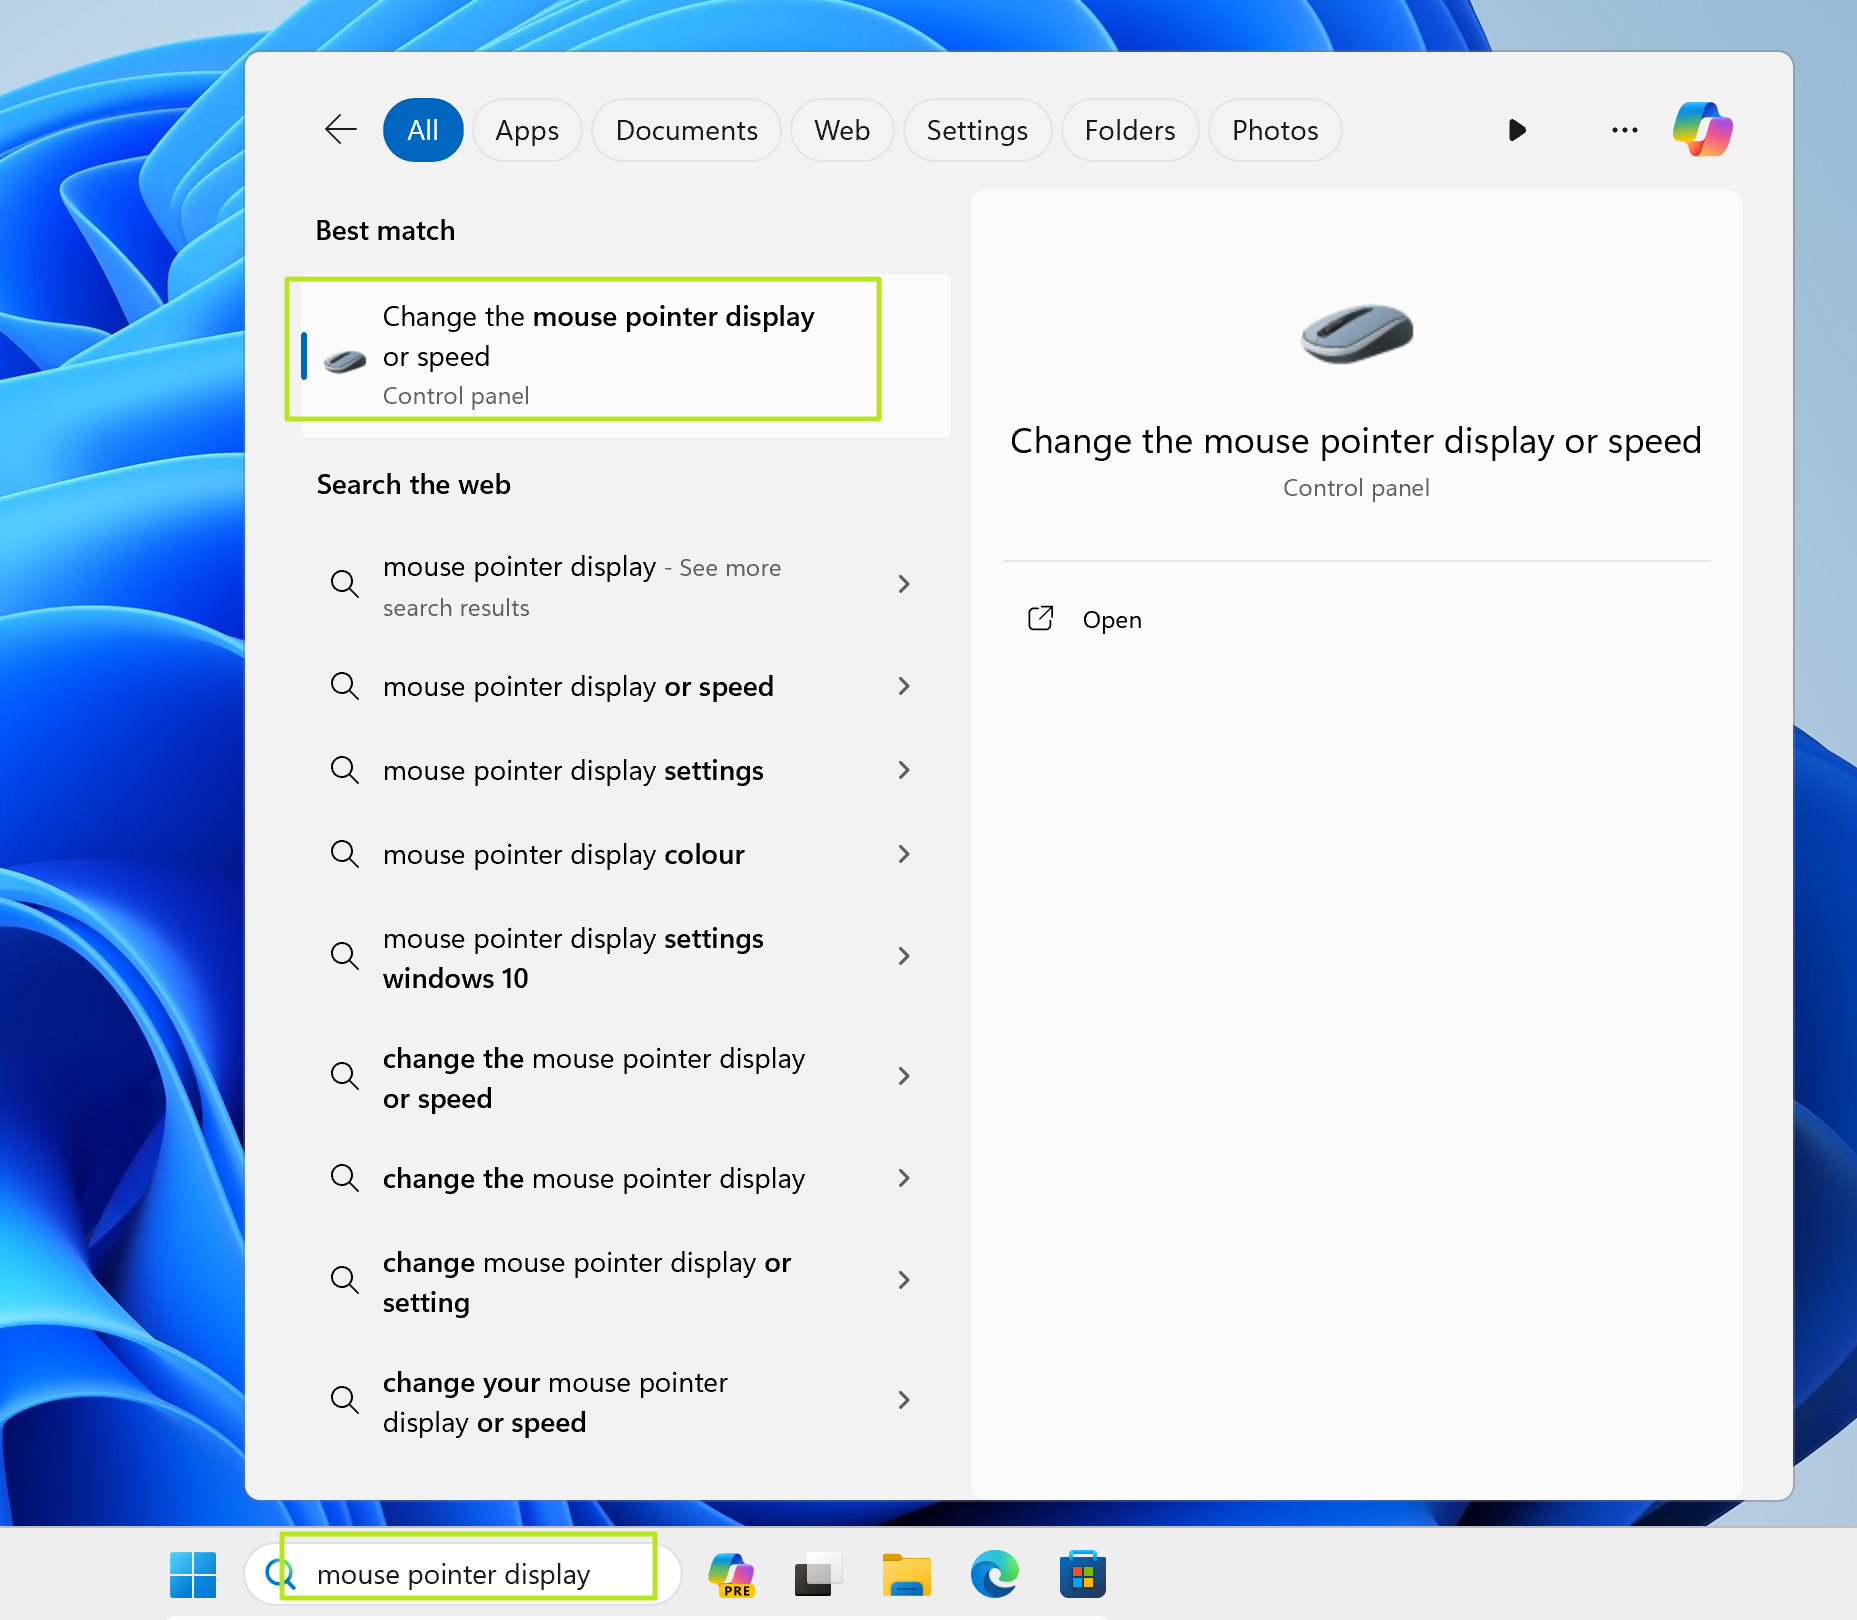
4. Launch the Mouse Properties Control panel app by searching for "mouse pointer display." and clicking the top result.
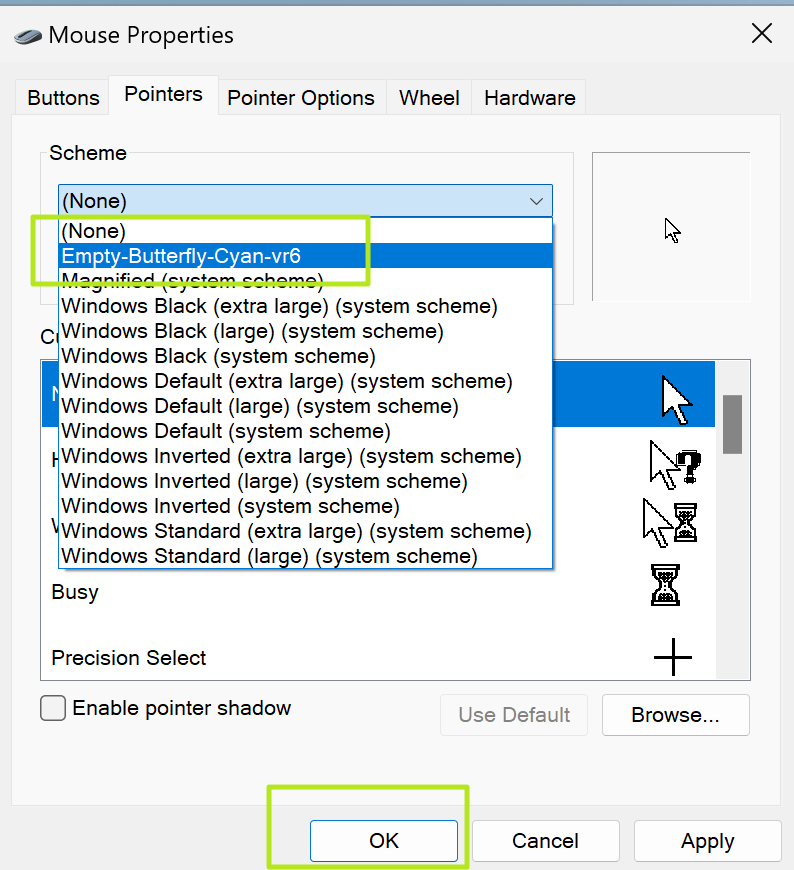
5. Select the Scheme you installed from the Scheme menu on the Pointers tab and click Ok.
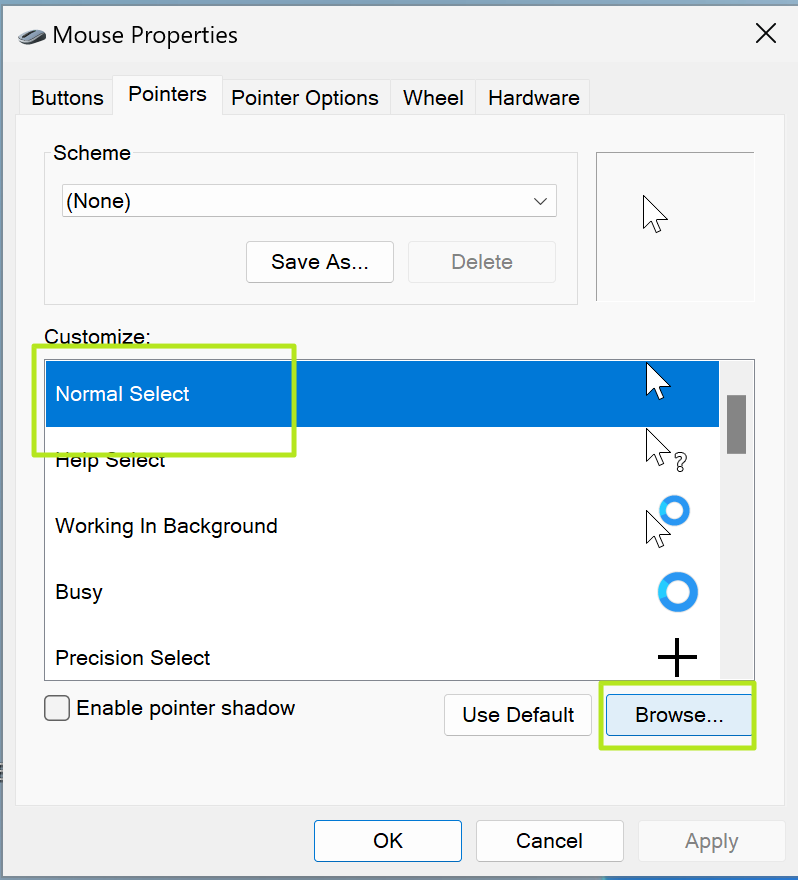
If you don't have a Scheme installed, you can individually select each pointer type and choose a file for it using the Browse button.
If you get bored of the custom pointers, you can change the scheme back to "(None)."
More Windows Tutorials
▪ How to Get Windows 11 for Free (or Under $15)
▪ How to Add Custom Shortcuts to the Windows 11 or 10 Context Menu
▪ How to Add a Dedicated Copilot Key to any Windows 11 or 10 PC, No New Keyboard Required
▪ 11 ways to increase free disk space in Windows 11 or Windows 10
Avram Piltch is Managing Editor: Special Projects. When he's not playing with the latest gadgets at work or putting on VR helmets at trade shows, you'll find him rooting his phone, taking apart his PC, or coding plugins. With his technical knowledge and passion for testing, Avram developed many real-world benchmarks, including our laptop battery test.
