How to Build a Face Mask Detector with Raspberry Pi
Your Raspberry Pi can detect if you are wearing a face mask or not.
One of the worst jobs in the world right now is being a greeter at a retail store who has to tell people to put on their face masks. Instead of making a human check for mask compliance, we can create a Raspberry Pi-powered mask detector that uses image recognition. Then unruly patrons can yell at a Raspberry Pi screen instead.
In this article, we’ll show you how to set up a Raspberry Pi Face Mask Detection System and sound a buzzer when someone is not wearing their face mask. This project was inspired by a video of a mall in Asia where an entry gate could only be activated by a user wearing a face mask.
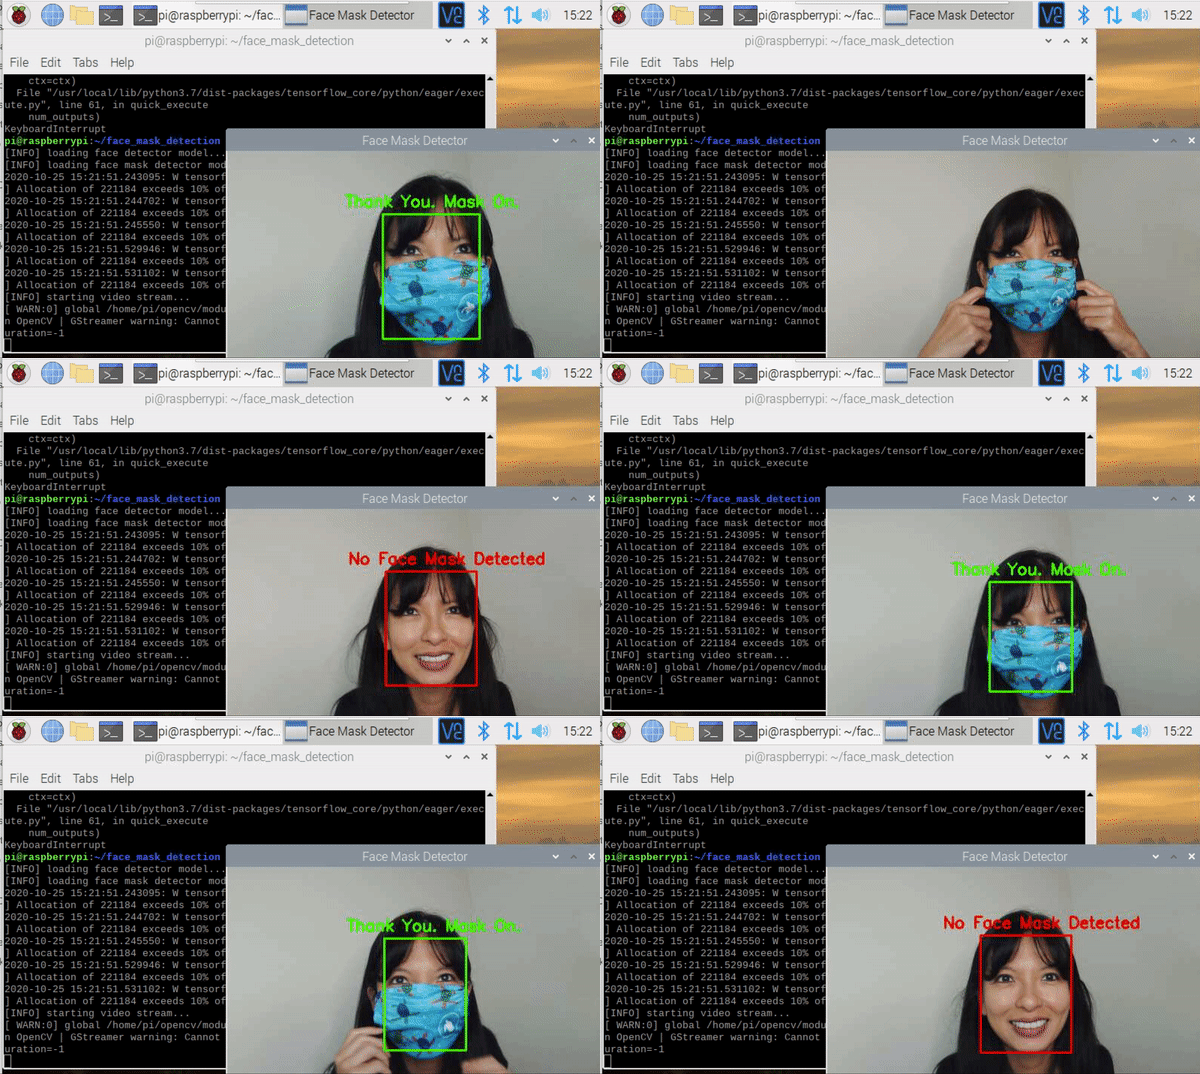
How does the Raspberry Pi Face Mask Detector project work?
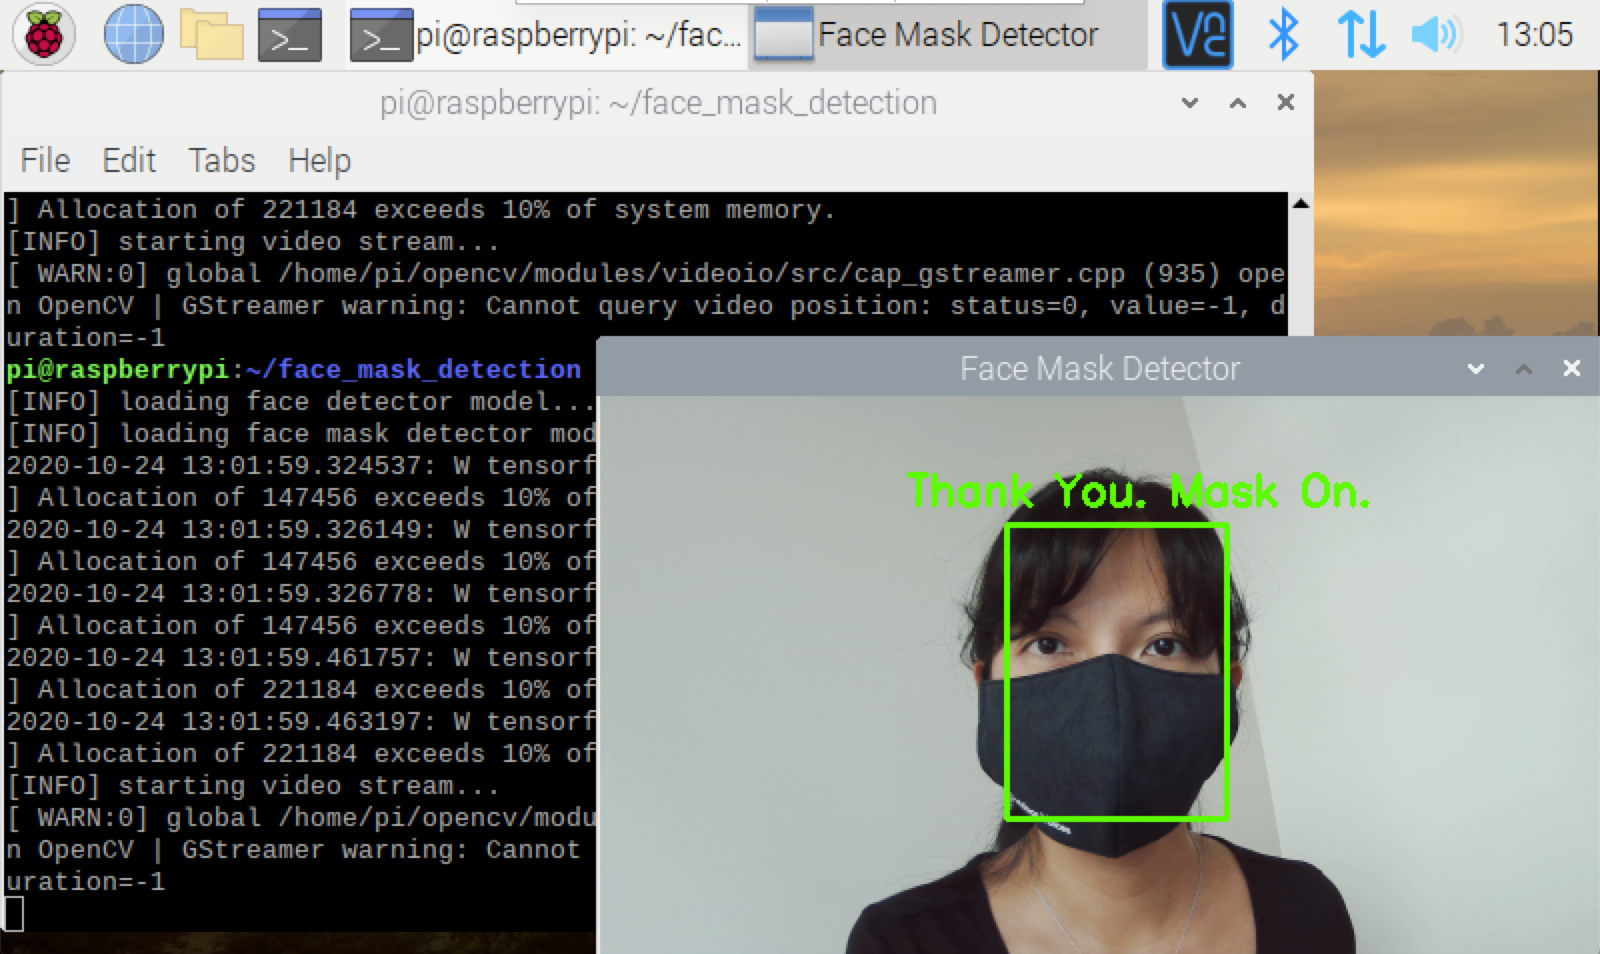
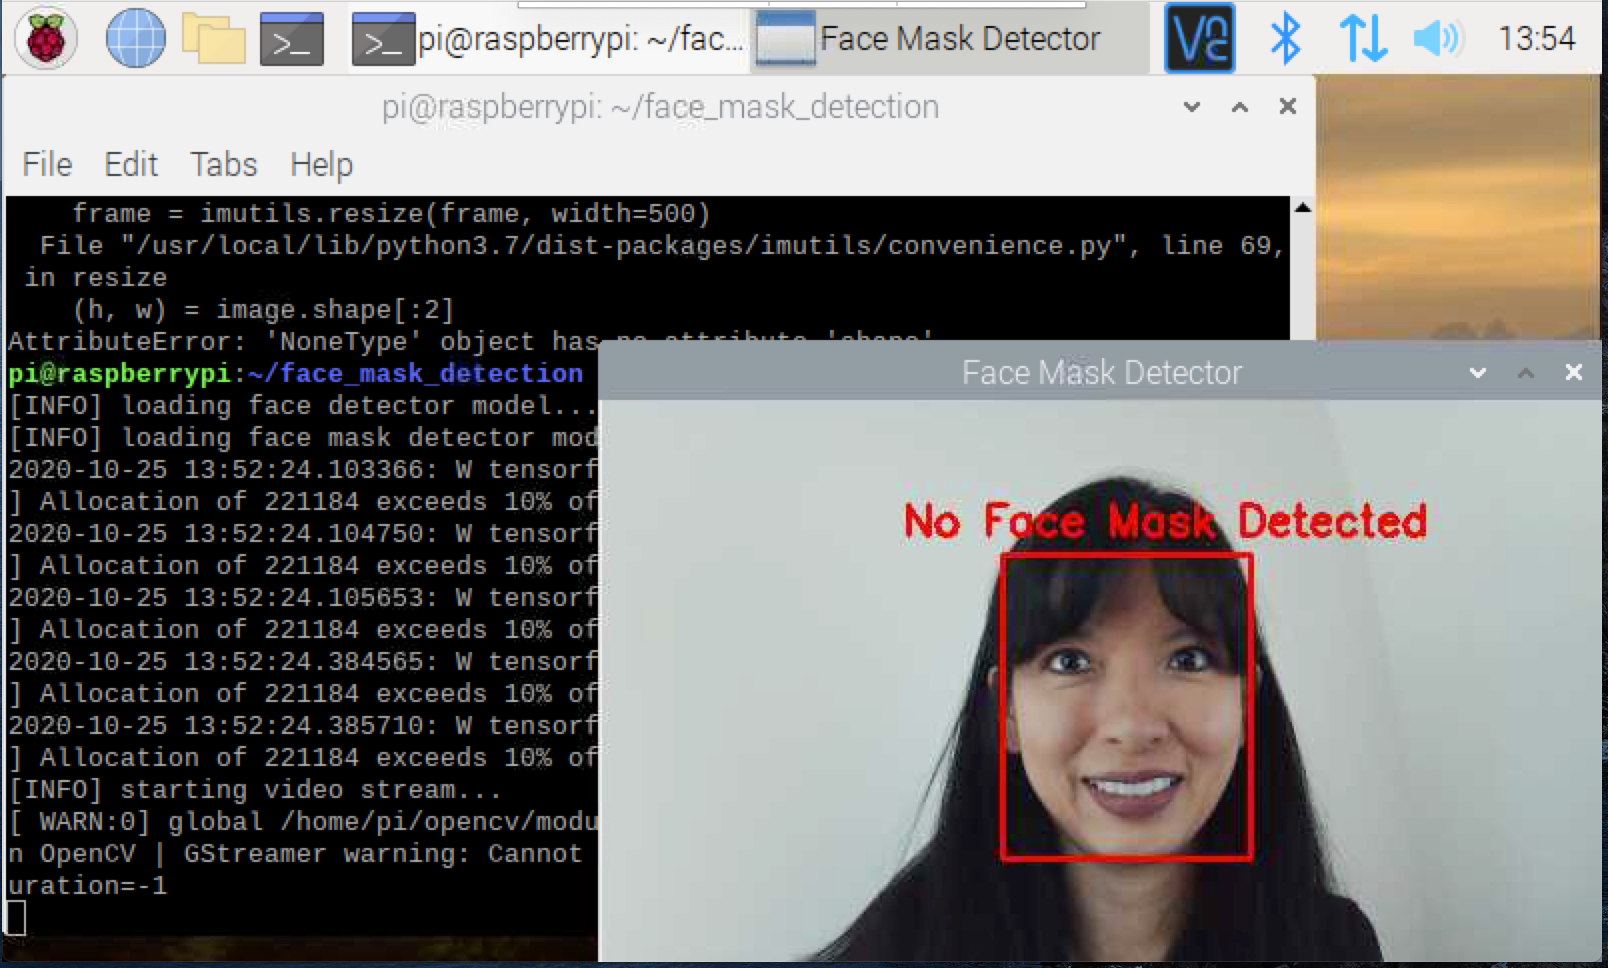
When a user approaches your webcam, the Python code utilizing TensorFlow, OpenCV, and imutils packages will detect if a user is wearing a face mask or not. Users not wearing a face mask will be designated with a red box around their face, and users wearing a face mask will see a green box around their face with the text, “Thank you. Mask On.” Users not wearing a face mask will see a red box around their face with, “No Face Mask Detected.”
How long does the Raspberry Pi mask detector project take?
Starting with a fresh install of the Raspberry Pi OS, to complete all elements of this project will take at least 5 hours. If you completed our previous post on Raspberry Pi Facial Recognition, you can subtract 1.5 hours for the install of OpenCV. Even better, we’ve included a pre-trained model for you to jump directly to a working Pi mask detection system.
ICYMI - Facial Recognition with Raspberry Pi: We recently posted a facial recognition tutorial where we used machine learning to train our Raspberry Pi to recognize specific faces. This tutorial uses many of the same principles of machine learning and AI, but today we are adding TensorFlow to identify an object, specifically a face mask. We recently featured another Raspberry Pi Tensorflow project that determined if a cat was carrying prey to its owner’s door.
Disclaimer: This article is provided with the intent for personal use. We expect our users to fully disclose and notify when they collect, use, and/or share data. We expect our users to fully comply with all national, state, and municipal laws applicable.
What You’ll Need for Raspberry Pi Face Mask Detection
- Raspberry Pi 4 (Raspberry Pi Zero is not recommended for this project, and the Raspberry Pi 3 ran very slowly.)
- 16GB (or larger) microSD card (see best Raspberry Pi microSD cards) with a fresh install of Raspberry Pi OS
- Power supply/Keyboard/Mouse/Monitor/HDMI Cable (for your Raspberry Pi)
- USB Webcam or Raspberry Pi Camera
- Optional: 7-inch Raspberry Pi touchscreen
- Optional: Stand for Pi Touchscreen
The majority of this tutorial is based on terminal commands. If you are not familiar with terminal commands on your Raspberry Pi, we highly recommend reviewing 25+ Linux Commands Raspberry Pi Users Need to Know first.
Get Tom's Hardware's best news and in-depth reviews, straight to your inbox.
Part 1: Install Dependencies for Raspberry Pi Face Mask Detection
In this step, we will install OpenCV, imutils, and Tensorflow.
- OpenCV is an open source software library for processing real-time image and video with machine learning capabilities.
- Imutils is a series of convenience functions to expedite OpenCV computing on the Raspberry Pi.
- Tensorflow is an open source machine learning platform.
1. Install fresh copy of the Raspberry Pi Operating System on your 16GB or larger microSD card. Check out our article on how to set up a Raspberry Pi for the first time or how to do a headless Raspberry Pi install. We tried this project by running ‘sudo apt-get update && sudo apt-get upgrade’ and we failed to build / install OpenCV.
2. Plug in your webcam into one of the USB ports of your Raspberry Pi. If you are using a Raspberry Pi camera instead of a webcam, use your ribbon cable to connect it to your Pi. Boot your Raspberry Pi.
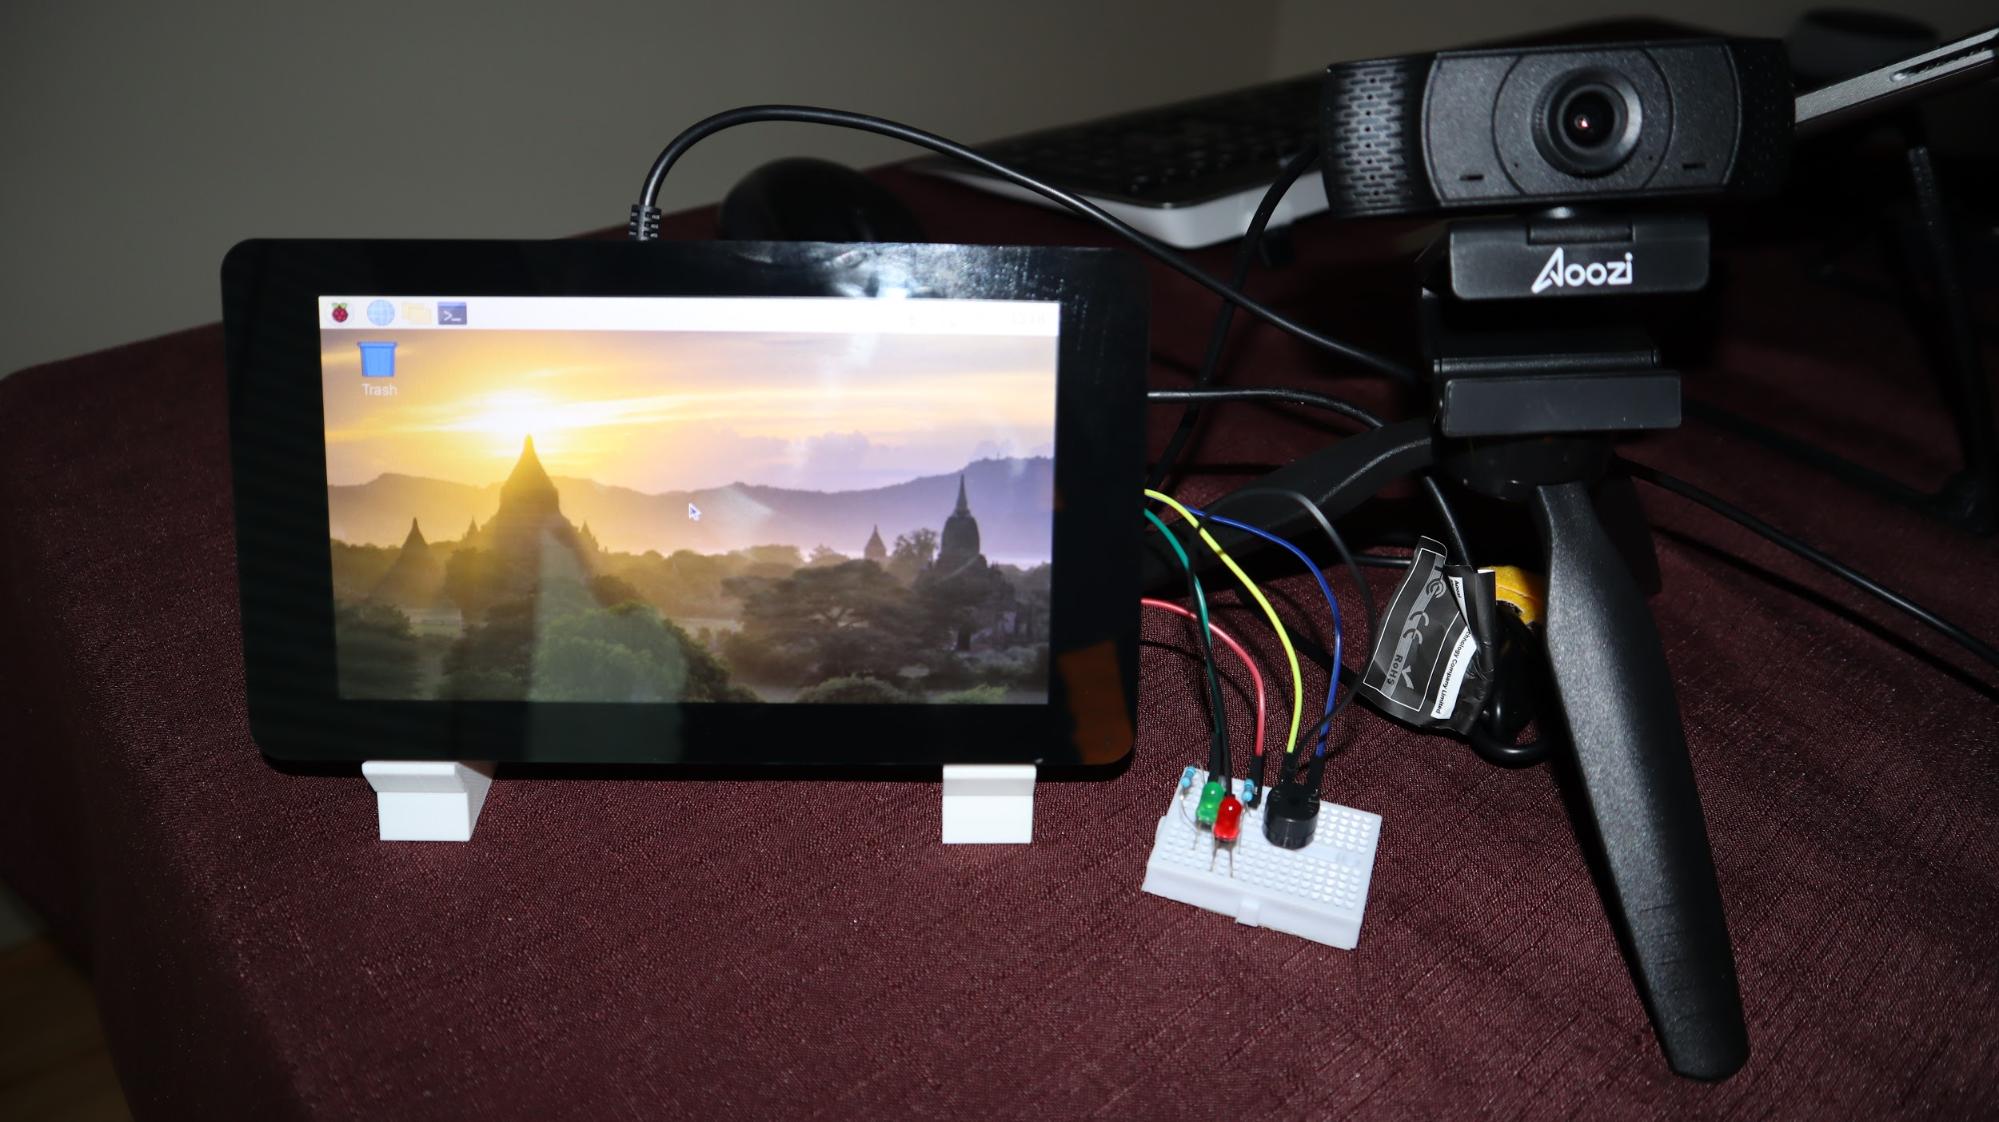
There will be an optional step to add LEDs and a buzzer in the last step.
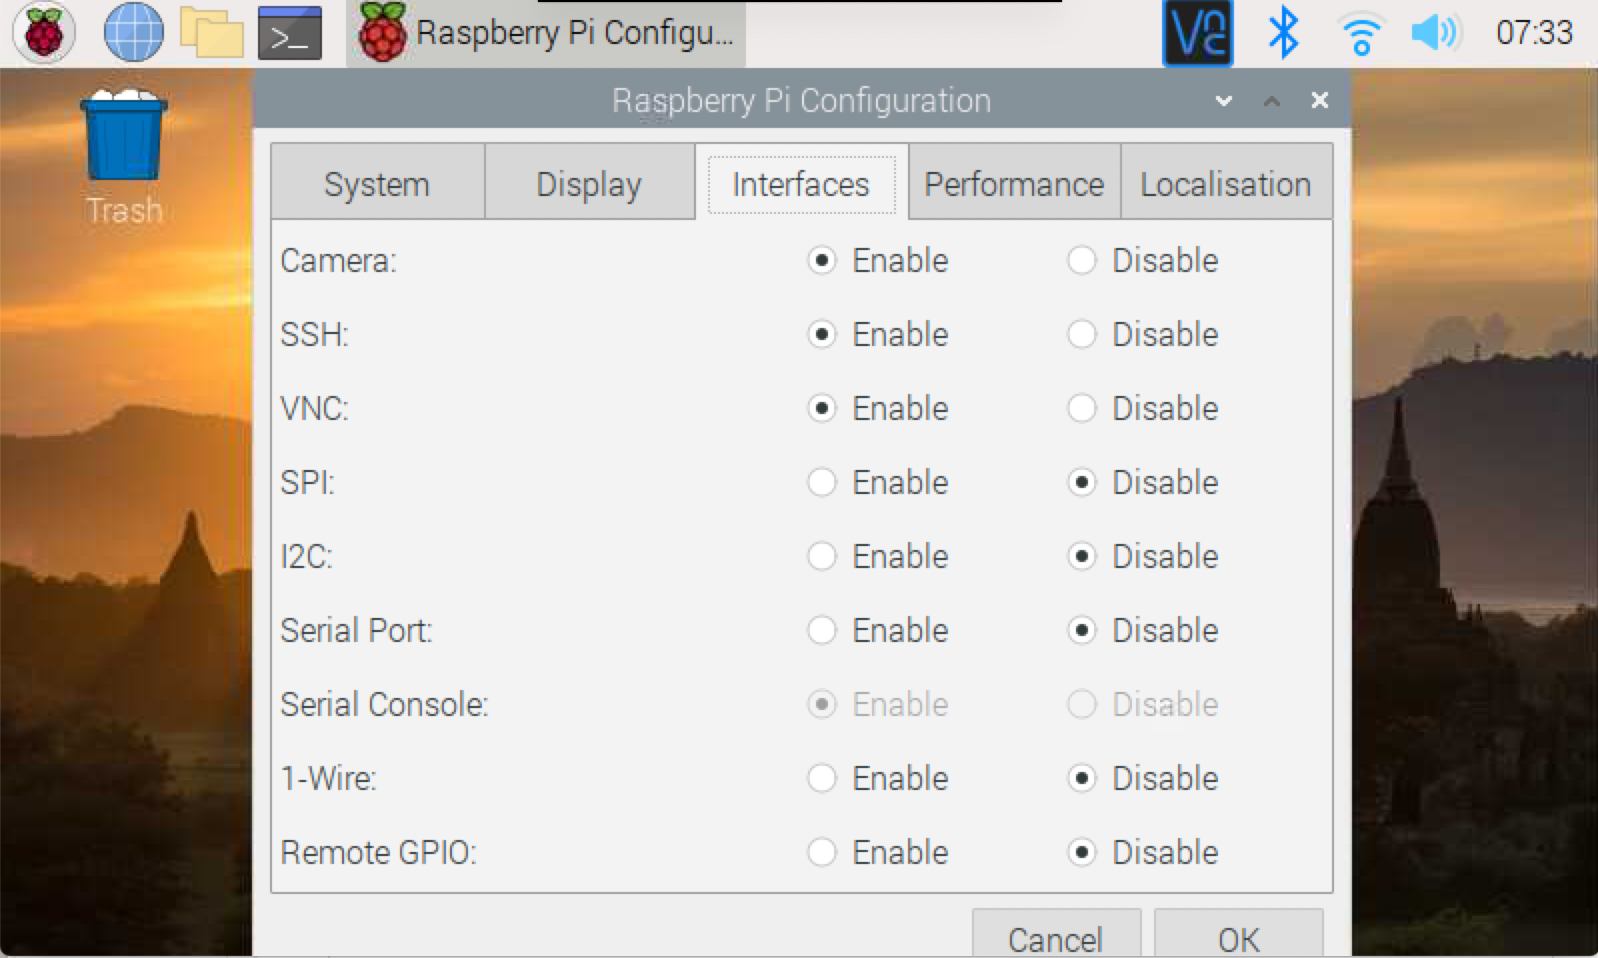
3. If you are using a Pi camera instead of a webcam, enable Camera from your Raspberry Pi configuration. Press OK and reboot your Pi.
4. Open a Terminal. You can do that by pressing CTRL + T.
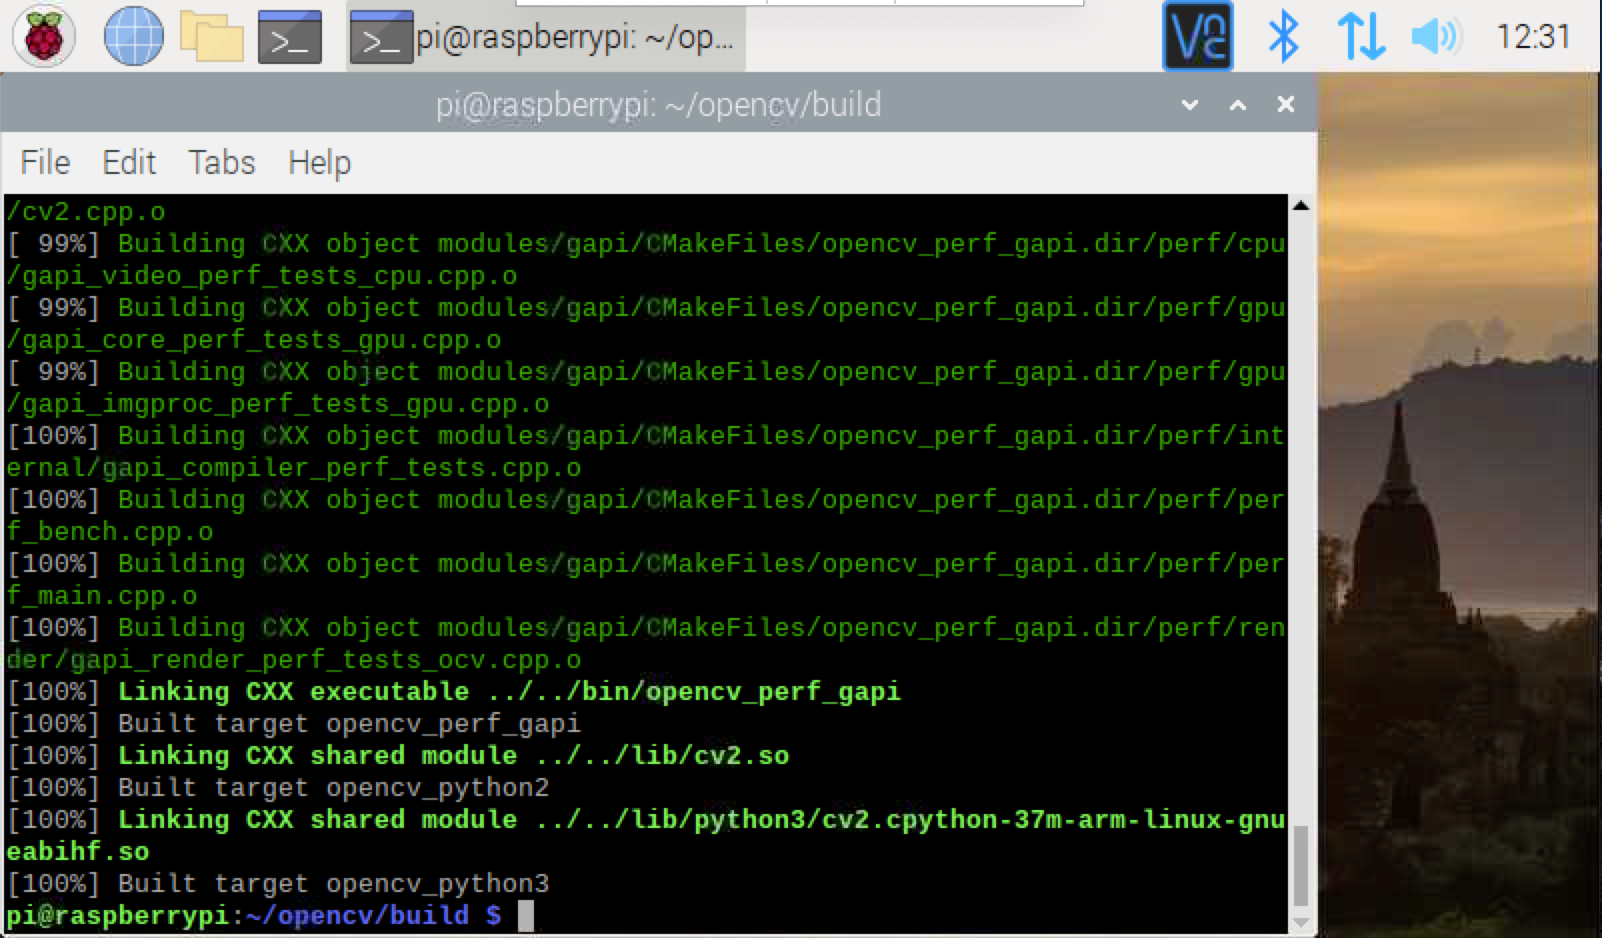
5. Install OpenCV. This step takes about 2 hours. Please see Part 1 of our Raspberry Pi Facial Recognition Tutorial for full instructions on installing OpenCV. Upon completion of installing OpenCV, your terminal should look something like this:
6. Install TensorFlow. This step took about 5-10 minutes.
sudo pip3 install
https://github.com/lhelontra/tensorflow-on-arm/releases/download/v2.1.0/tensorflow-2.1.0-cp37-none-linux_armv7l.whl
7. Install imutils. This step took about 1 minute.
sudo pip3 install imutilsPart 2: Face Mask Detection (Short-Cut Method)
In this section, we will skip training the model and run a pre-made model to identify if you are wearing a face mask or not.
1. Open a new terminal on your Pi by pressing Ctrl-T.
2. Download the code from GitHub.
git clone https://github.com/carolinedunn/face_mask_detection3. Run the pre-made model trained with over 1,000 images. In your terminal change directory (cd) into the directory you just cloned from GitHub.
cd face_mask_detection4. Run the Python 3 code to open up your webcam and start the mask detection algorithm.
python3 detect_mask_webcam.py

If you are using a Pi Camera, enter python3 detect_mask_picam.py
After a few seconds, you should see your camera view pop-up window and see a green box indicating face mask presence.
Or a red box indicating lack of face mask.
You can try experimenting with various face masks, improper and proper wearing of your face mask (i.e. face mask hanging from your ear, or face mask below the nose).
Press ESC to stop the script.
Part 3: Face Mask Model Training (Long Method)
Now that you have your face mask detector up and running, you’re probably wondering, “How does it work?”
Over one thousand photos were used to train the model that detect_mask_webcam.py uses to make the mask or no mask determination. The more examples provided, the better the machine learning because fewer photos = less accuracy.
Photos were divided into 2 folders in our dataset, with_mask and without_mask and the training algorithm created a model of mask vs. no mask based on the dataset. The sample photos provided in the dataset folder you downloaded from GitHub are my own photos.
What if instead of hundreds of photos, we trained our Raspberry Pi Mask Detection system on 20 photos? Fortunately, we have a pre-trained model for you to test out.
From your face_mask_detection folder in your terminal, run the Python 3 code to open up your webcam with the 20 photo model.
python3 detect_mask_webcam.py --model mask_detector-20.model

If you are using a Pi Camera, enter python3 detect_mask_picam.py --model mask_detector-20.model
After a few seconds, you should see your camera view pop-up window and see a green box or a red box. You’ll find this model is not very accurate.
How to train the Raspberry Pi face mask model yourself
As a part of this tutorial, I’ve created a way for you to train the model on your own photos.
In the dataset folder within face_mask_detection on your Pi, check out the two subfolders, with_mask and without_mask.
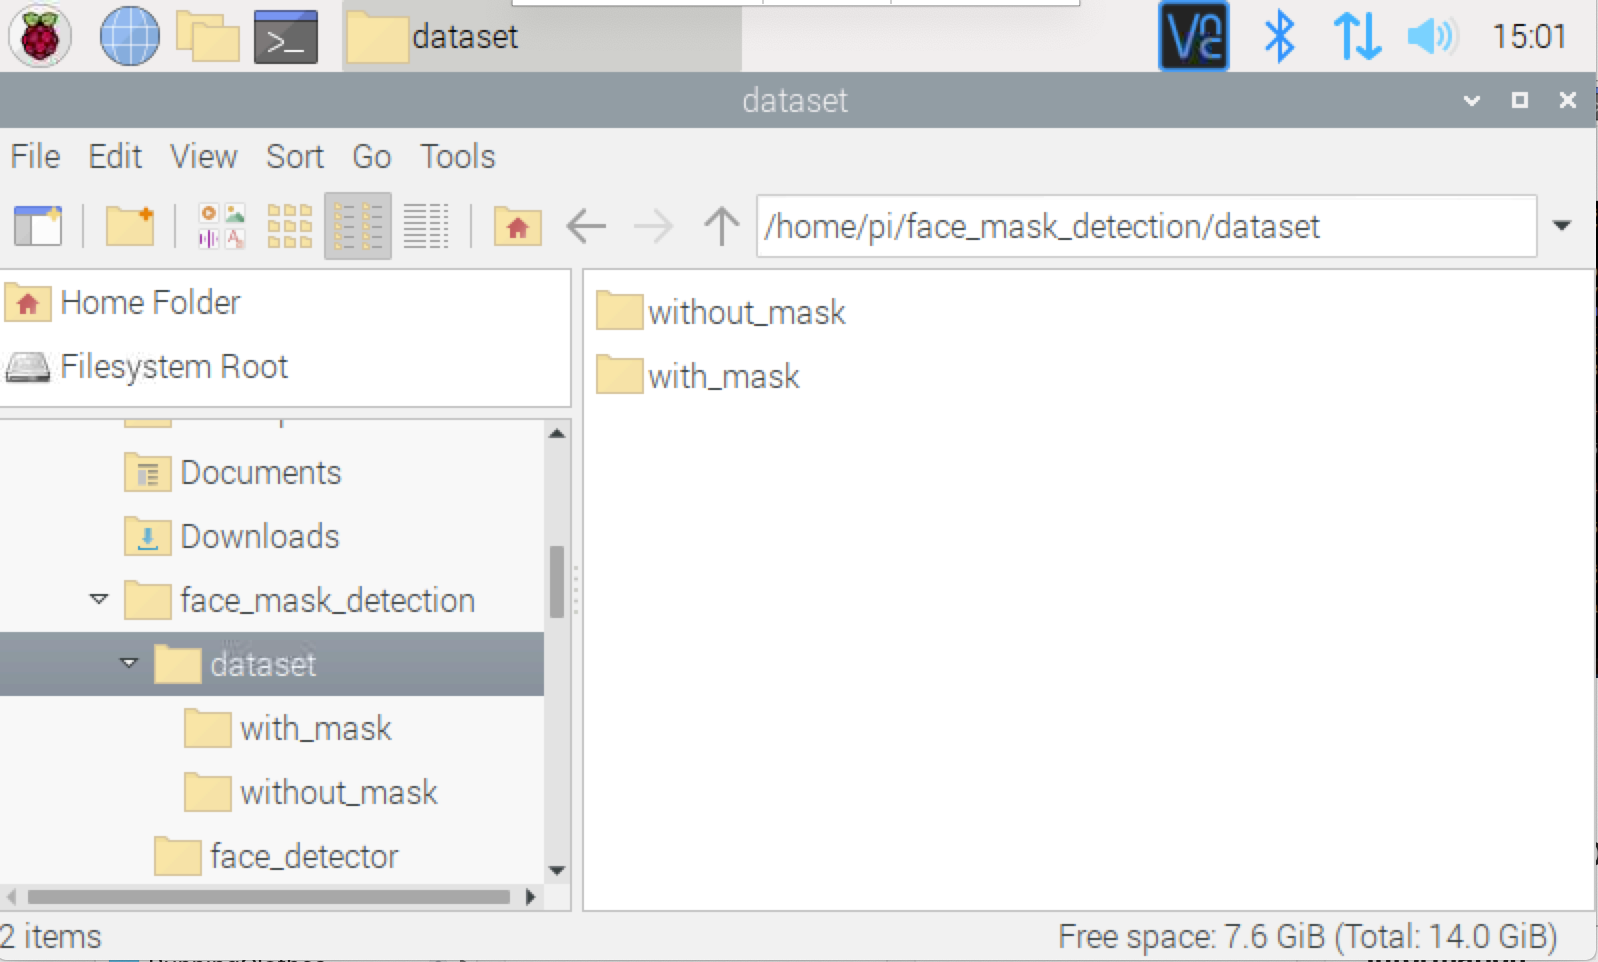
To train the Pi with your photos, simply save your photos (headshots of people wearing or not wearing face masks) to the appropriate folder. Have fun with this and take photos of yourself and your family.
Take your own photos with your Raspberry Pi
1. Open a Terminal, press Ctrl-T.
2. Change directories into the face_mask_detection folder.
cd face_mask_detection3. Run Python code to take photos of yourself wearing a mask, the same for no mask photos.
If using a webcam run:
python withMaskDataset.py
or
python withoutMaskDataset.py
If using a pi camera run:
python withMaskDataset-picam.py
or
python withoutMaskDataset-picam.py
4. Press your spacebar to take a photo.
5. Press q to quit when you are done taking photos.
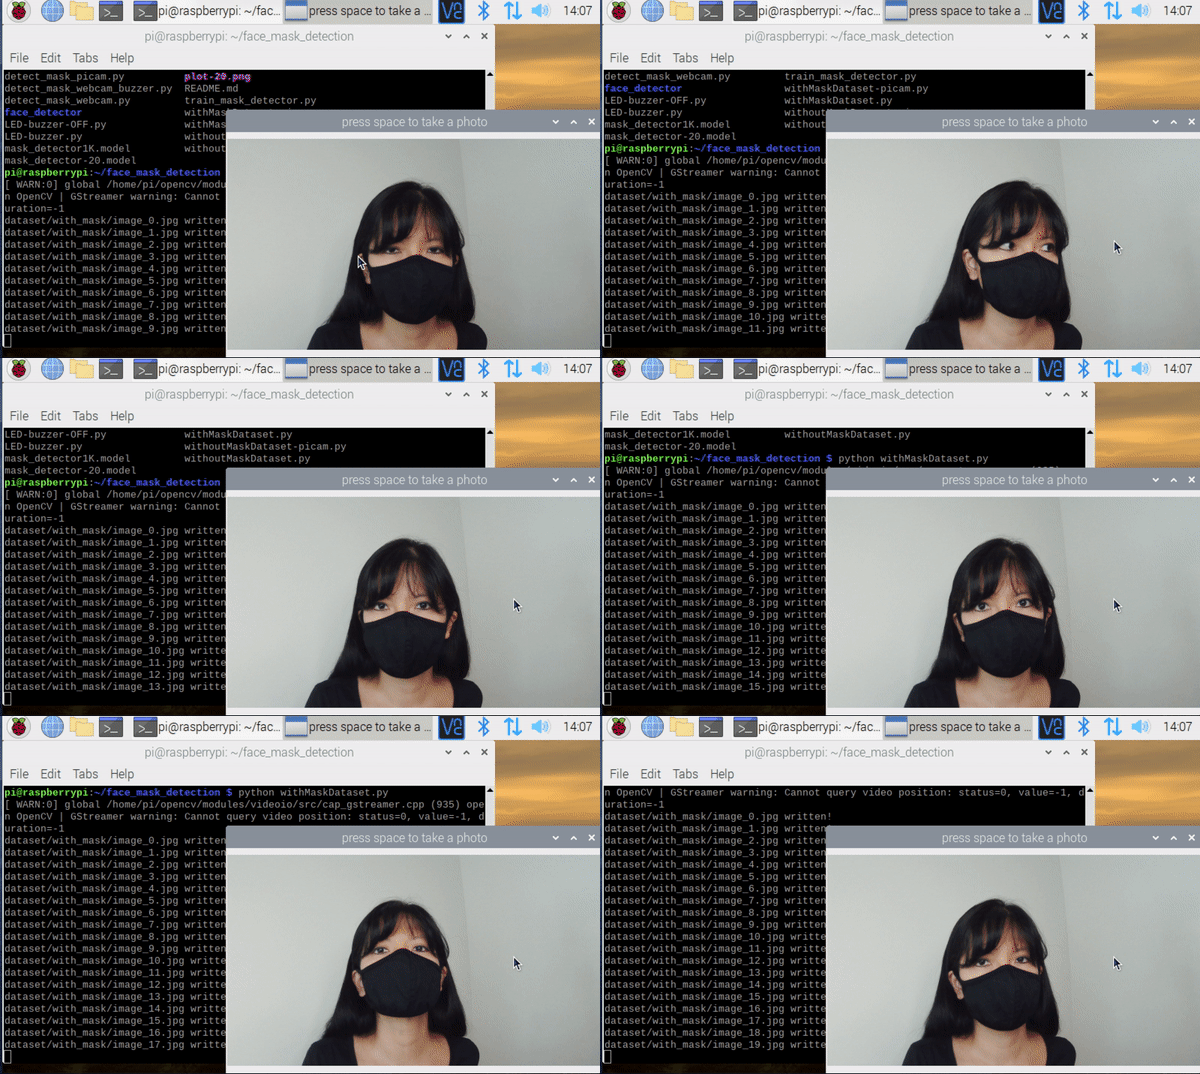
Running these scripts will automatically save photos into their respective folders, with_mask and without_mask. The more photos you take, the more accurate the model you will create in the next step, but keep in mind, your Raspberry Pi does not have the same computing power as your desktop computer. Your Raspberry Pi will only be able to analyze and process a limited amount of photos due to its compute power and RAM size. On our Raspberry Pi 4 8GB, we were able to process about 1,000 photos, but it took over 2 hours to create the model.
Training the model for Raspberry Pi face mask detection
In this step, we will train the model based on our photos in the dataset folder, but we’ll need to install a few more packages first. The maximum number of photos the train_mask_detector.py script will be able to process will vary depending on your model of Raspberry Pi and available memory.
1. Open a Terminal, press Ctrl-T.
2. Install sklearn and matplotlib packages to your Pi.
sudo pip3 install sklearn

sudo pip3 install matplotlib 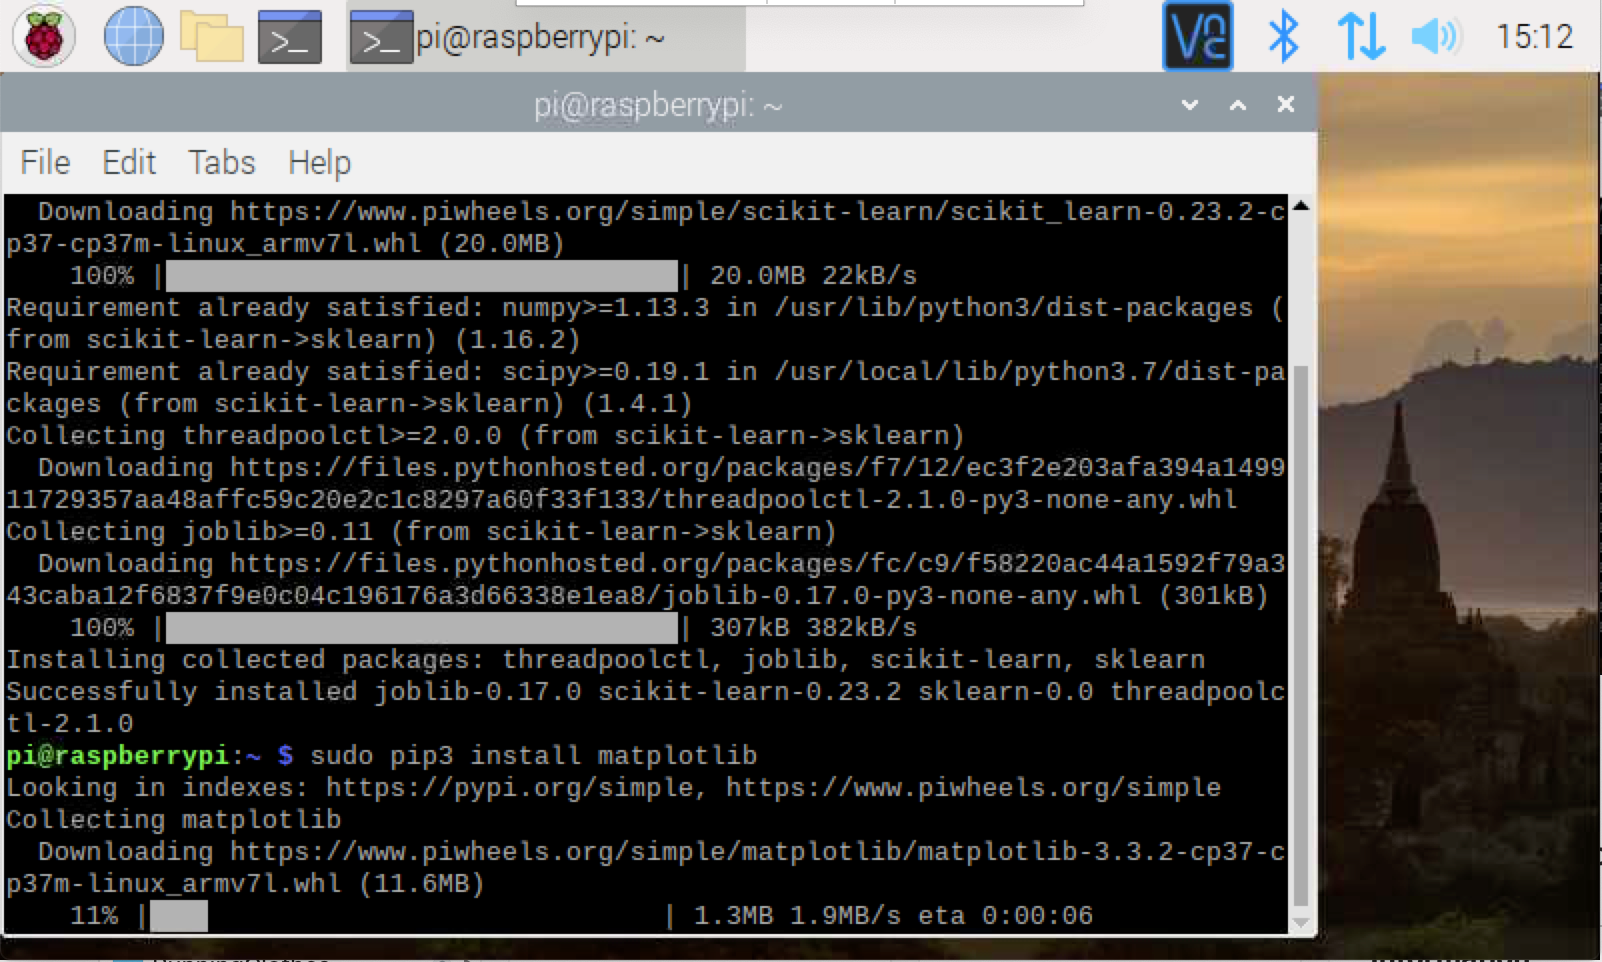
3. Train the model. Keep in mind that, the more photos you have in the dataset folder, the longer it will take to create the model. If you get an “out of memory” error, reduce the number of photos in your dataset until you can successfully run the Python code.
cd face_mask_detection

python3 train_mask_detector.py --dataset dataset --plot mymodelplot.png --model my_mask_detector.model 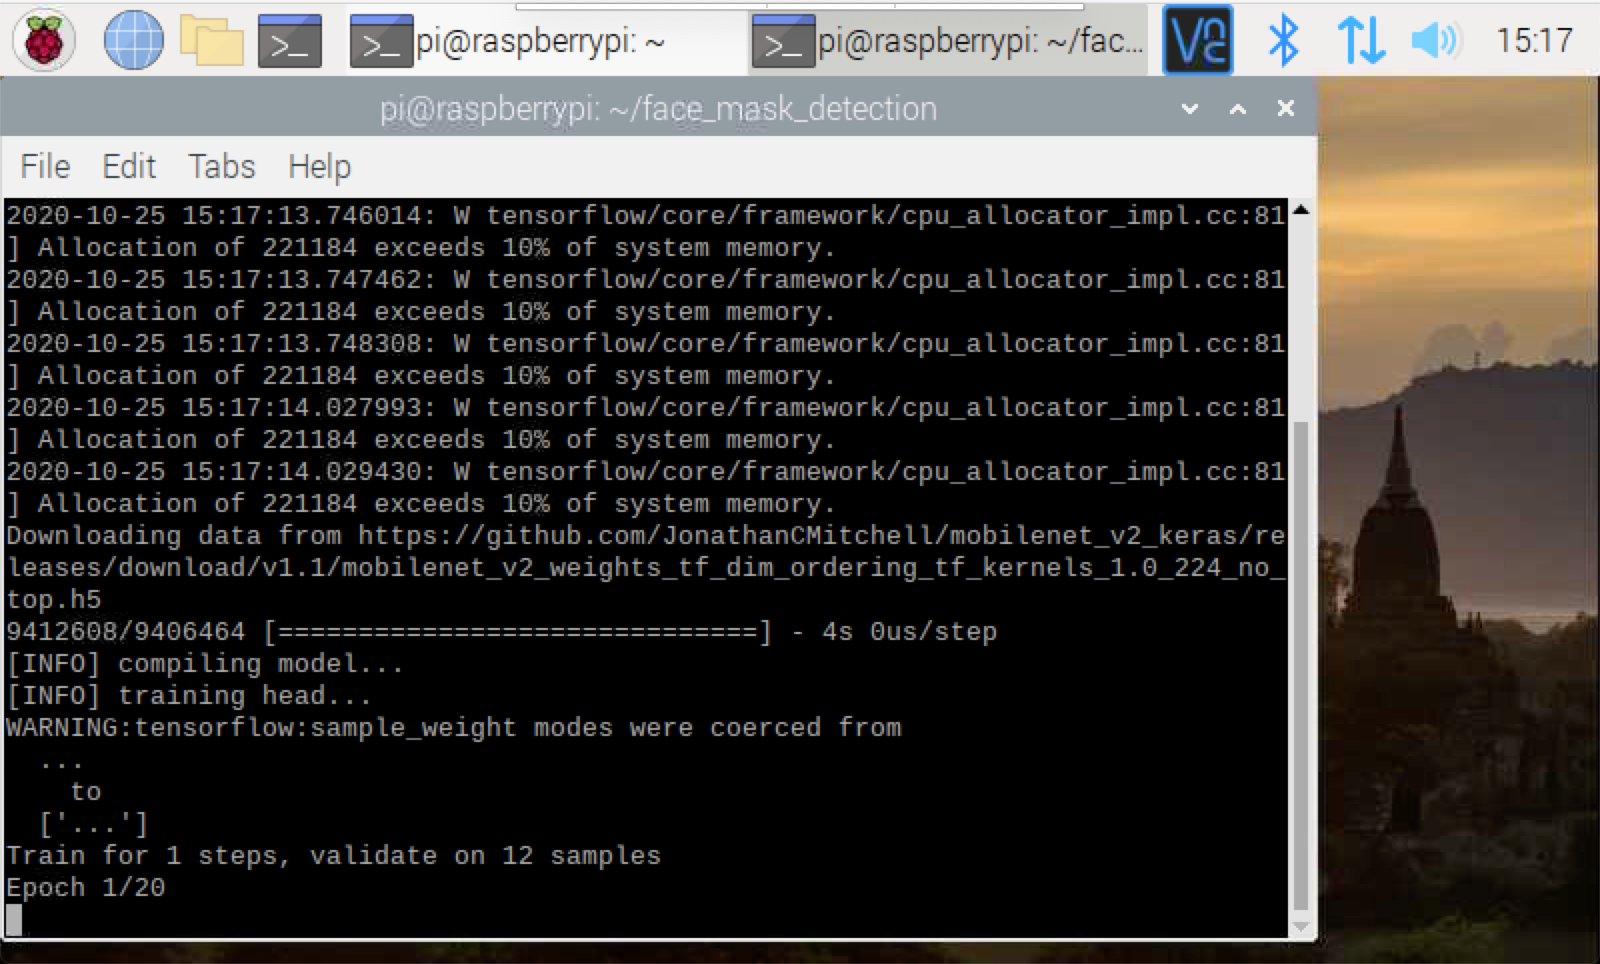
In our testing, it took over 2 hours to train the model with 1,000 images.
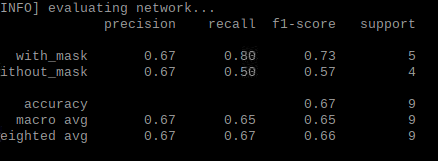
In this example, we trained our model with only 20 images, and the confidence/accuracy is rated at about 67%.
After the script finishes running, you’ll see a new file in the face_mask_detector directory: my_mask_detector.model
4. First let’s check to see how accurate our Pi thinks this model will be. Open the newly created image called mymodelplot.png
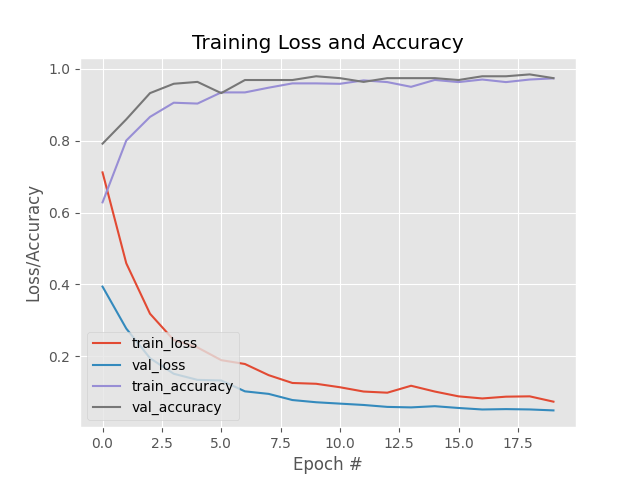
In this image, we trained the model with 1,000 images and the training accuracy was very high.
Testing Your Raspberry Pi face mask model
Now that you’ve trained your model, let’s put it to the test!
Run the same detection script, but specify your model instead of the default model.
From the same Terminal window:
python3 detect_mask_webcam.py --model my_mask_detector.model

If you are using a Pi Camera, enter python3 detect_mask_picam.py --model my_mask_detector.model
How did you do? Let us know in the comments below.
Part 4: Adding a Buzzer and LEDs
Now that we’ve trained our model for Raspberry Pi face mask detection, we can have some fun with the results.
In this section, we add a buzzer and 2 LEDs to quickly identify if someone is wearing their face mask or not.
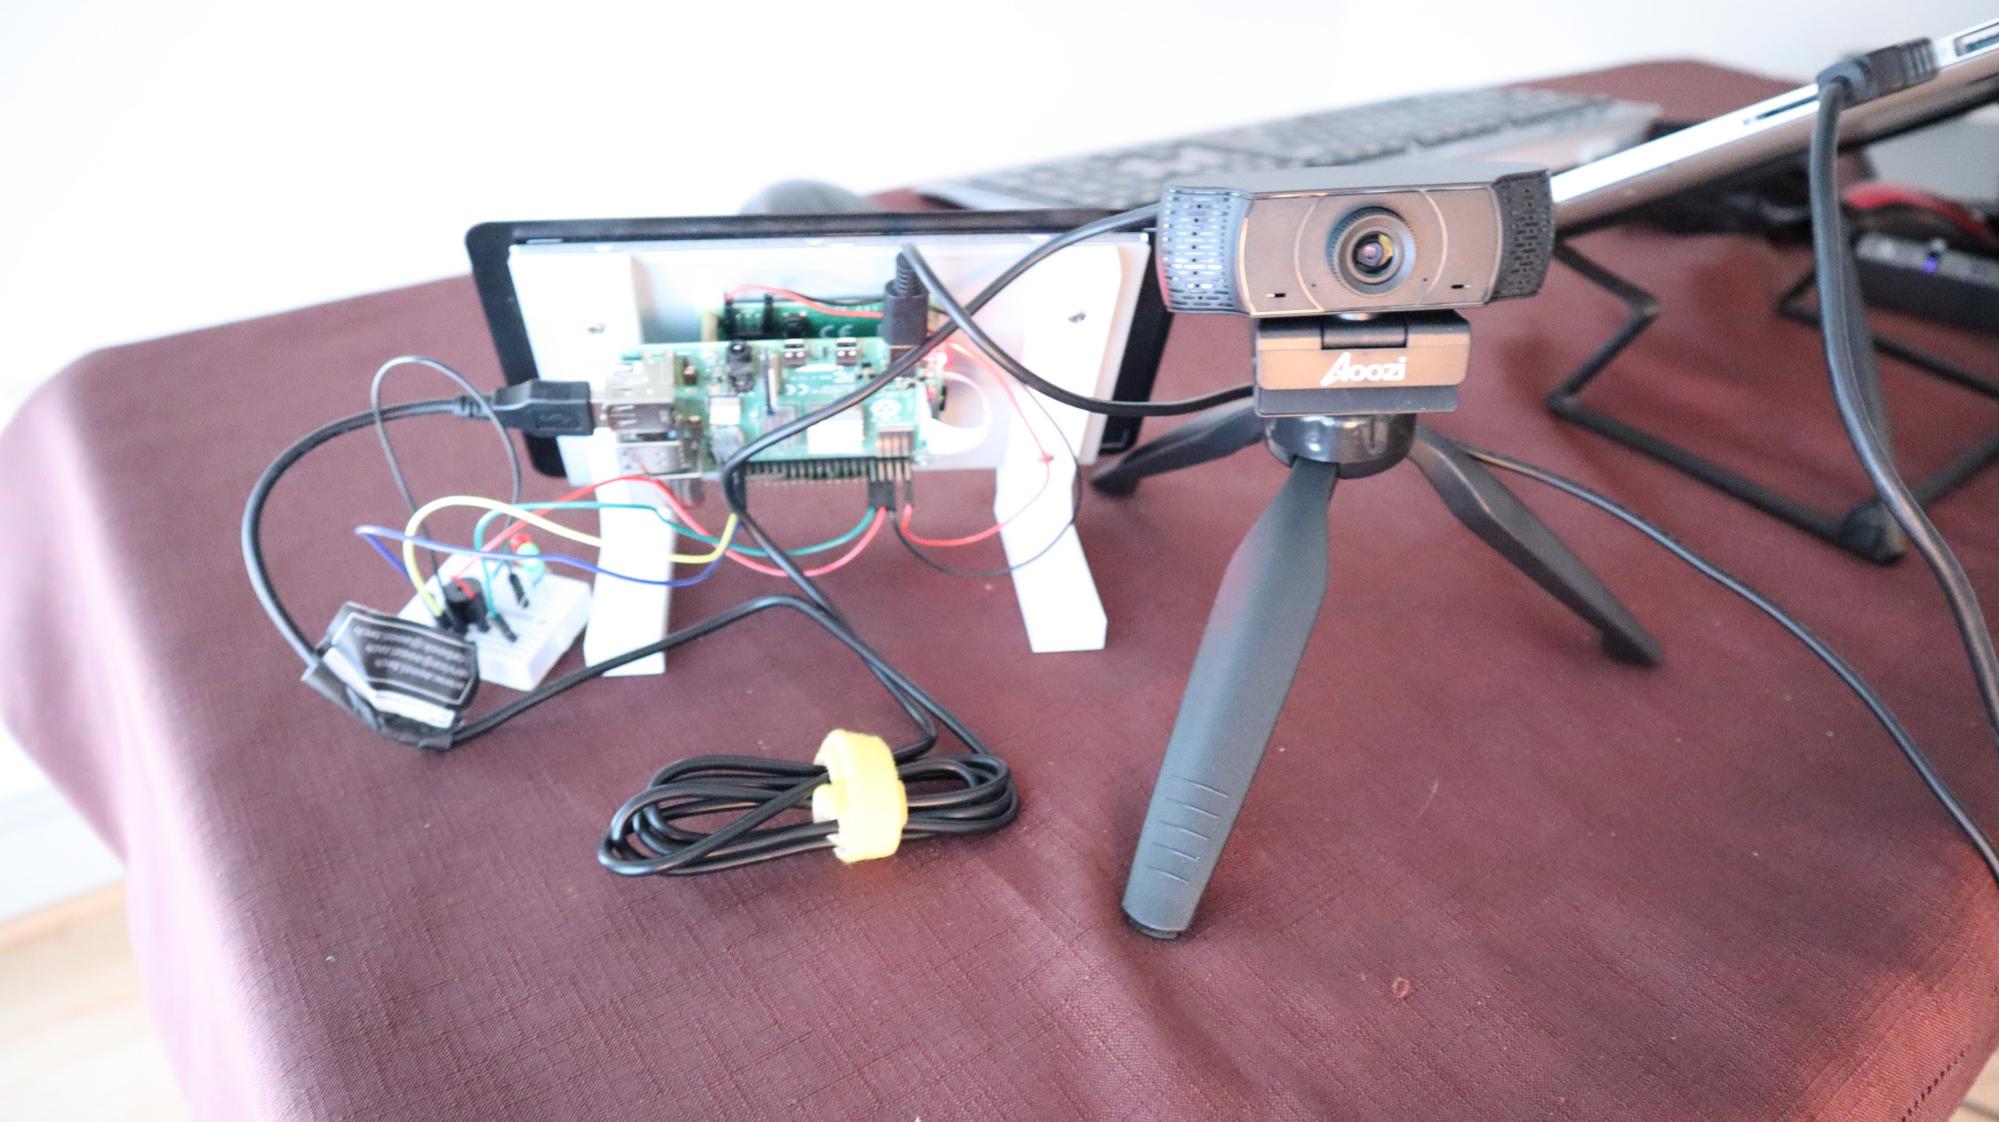
For this step, you’ll add-on:
- Small Breadboard
- Two 330 Ohm resistors (see 330 Ohm resistor color code to identify them)
- 1 Red LED
- 2 Green LED
- 1 Buzzer
1. Wire the LEDs and buzzer as shown in the diagram below. (Always add a resistor between the positive terminal of your LED and your GPIO pin on your Pi.)
a. Red LED will be controlled by GPIO14.
b. Green LED will be controlled by GPIO15.
c. Buzzer will be activated by GPIO 21
d. Connect GND to GND on your Pi.
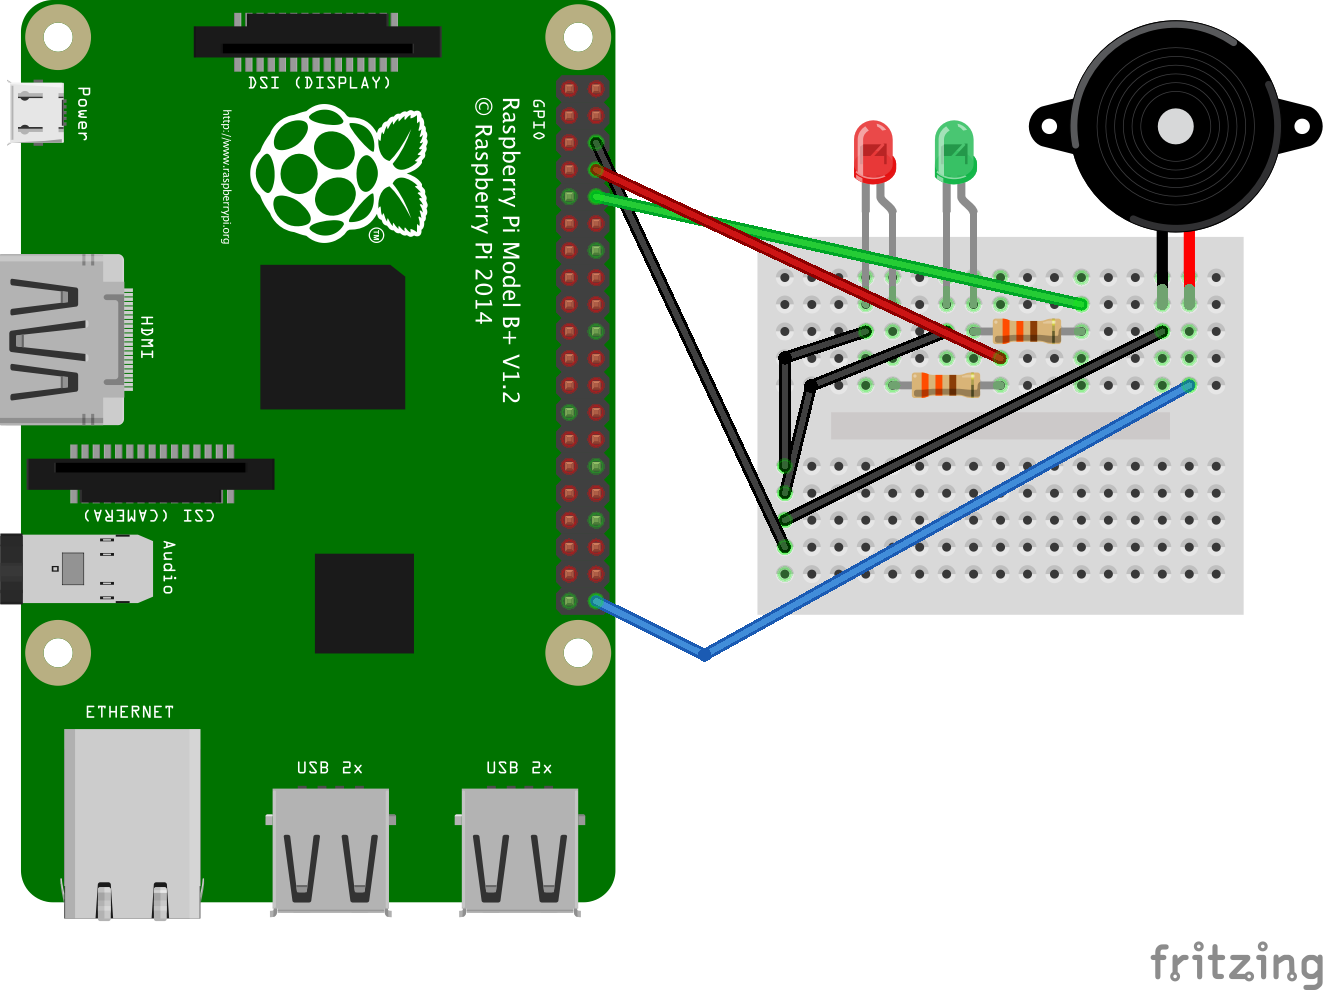
2. Test your LED and buzzer setup by running LED-buzzer.py. Open a new terminal and run the test code by typing:
cd face_mask_detection
python LED-buzzer.py
If you see your LEDs alternate on and off and your buzzer beep. You’ve successfully completed this step and can move on. If the LEDs don’t light up or your buzzer doesn’t work, check your wiring.
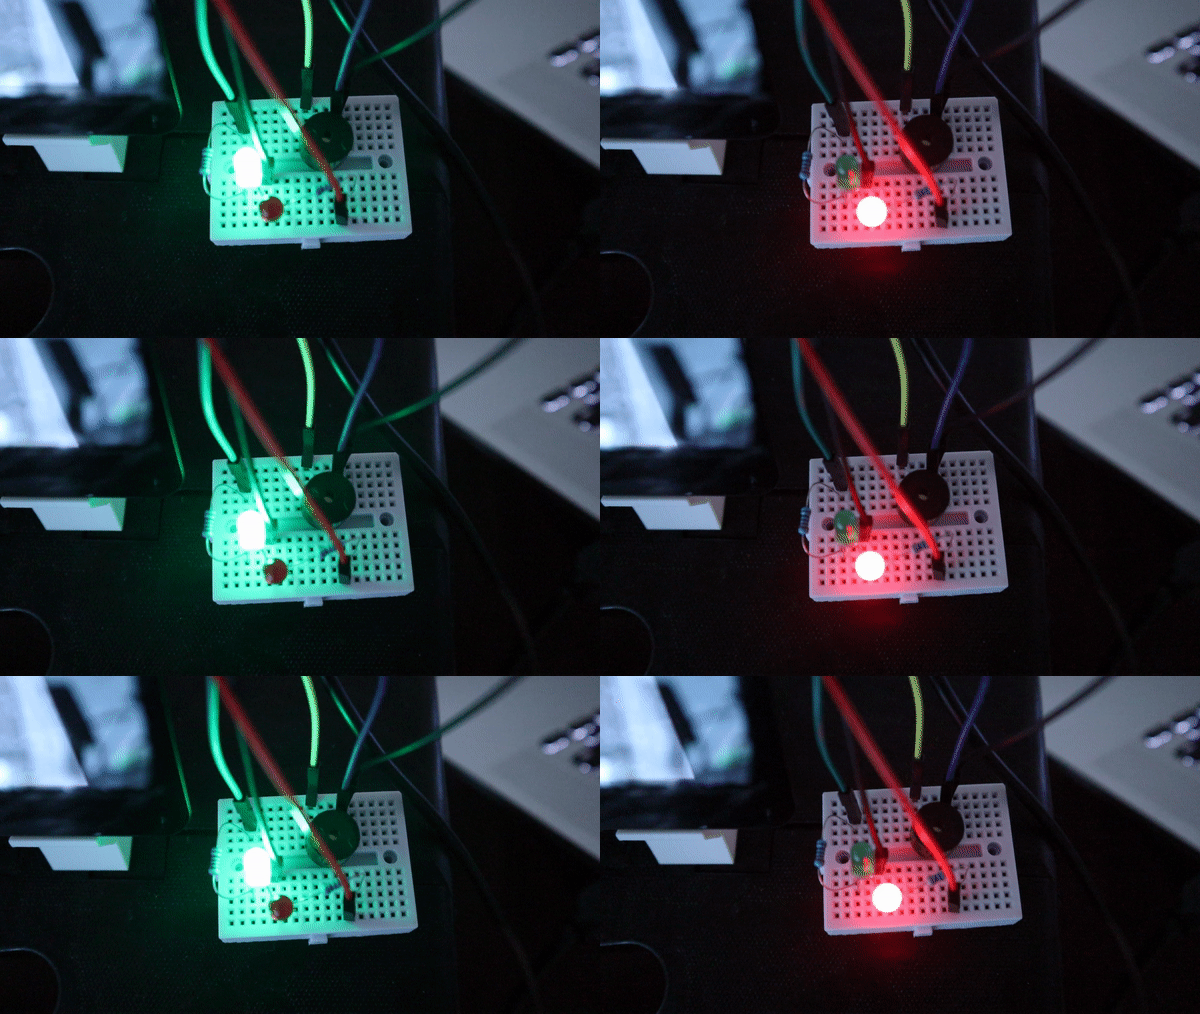
3. If your buzzer stays on after you have pressed Ctrl-C to exit the python code, run python LED-buzzer-OFF.py to turn off the buzzer and the LEDs.
4. Test the Raspberry Pi face mask detection system In the same terminal, run
python3 detect_mask_webcam_buzzer.py

If you are using a Pi Camera, enter python3 detect_mask_picam_buzzer.py

If you’re using your own model, add --model my_mask_detector.model as you did in the previous step.
If everything works correctly, when the script detects you are wearing a face mask, the green LED should turn on. If the script detects you are not wearing a face mask, the buzzer should sound along with the red LED lighting up.
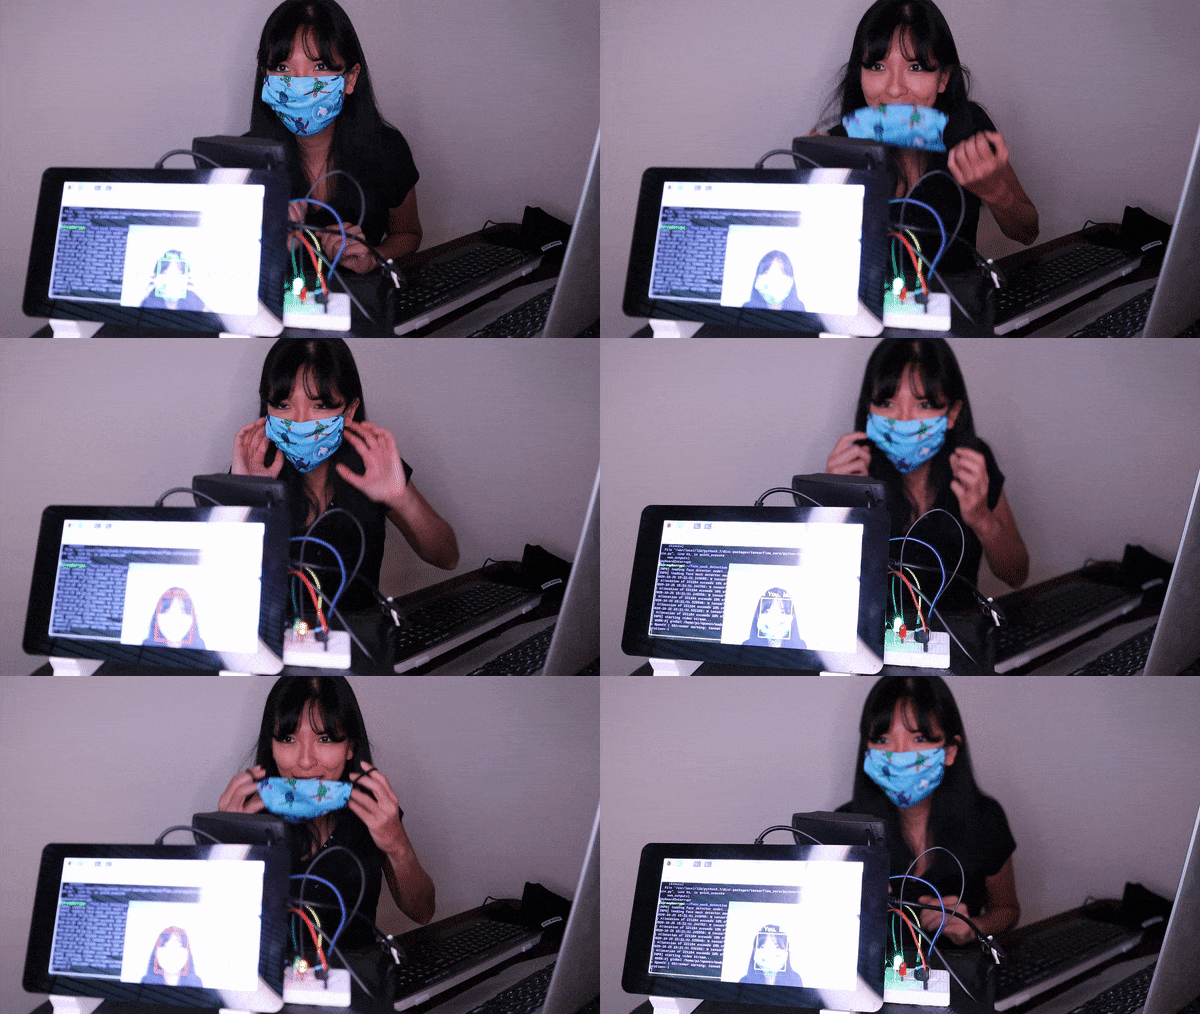
The possibilities for this project are endless. You could continue to train your model with more photos. You could add a servo motor or activate a gate, when a face mask is detected. Or you could try combining this tutorial with the automated email sending code from the Raspberry Pi Facial Recognition tutorial to send an email with a photo when someone enters without a face mask.
Caroline Dunn is a freelance writer for Tom's Hardware. Her expertise lies in covering Raspberry Pi projects, creating video tutorials, writing guides, and exploring other entertaining tech DIY initiatives.
-
Andrew_1313 When i run, I got error :(Reply
loading face detector model...
loading face mask detector model...
Traceback (most recent call last):
File "detect_mask_webcam.py", line 98, in <module>
maskNet = load_model(args)
File "/usr/local/lib/python3.7/dist-packages/tensorflow_core/python/keras/saving/save.py", line 146, in load_model
return hdf5_format.load_model_from_hdf5(filepath, custom_objects, compile)
File "/usr/local/lib/python3.7/dist-packages/tensorflow_core/python/keras/saving/hdf5_format.py", line 166, in load_model_from_hdf5
model_config = json.loads(model_config.decode('utf-8'))
AttributeError: 'str' object has no attribute 'decode' -
andreasc1 it would be good to see if this project can run behind a mirror using the magic mirror project ;)Reply -
kart94 Reply
Hi Andrew,Andrew_1313 said:When i run, I got error :(
loading face detector model...
loading face mask detector model...
Traceback (most recent call last):
File "detect_mask_webcam.py", line 98, in <module>
maskNet = load_model(args)
File "/usr/local/lib/python3.7/dist-packages/tensorflow_core/python/keras/saving/save.py", line 146, in load_model
return hdf5_format.load_model_from_hdf5(filepath, custom_objects, compile)
File "/usr/local/lib/python3.7/dist-packages/tensorflow_core/python/keras/saving/hdf5_format.py", line 166, in load_model_from_hdf5
model_config = json.loads(model_config.decode('utf-8'))
AttributeError: 'str' object has no attribute 'decode'
I too encountered the same error I found out its because of h5py version 3.0.0 , one of the solution I found on git was to remove .decode() from hdf5_format.py . I'll post the git link for your reference.
https://github.com/tensorflow/tensorflow/issues/44467 -
Andrew_1313 Reply
Hi Kart94kart94 said:Hi Andrew,
I too encountered the same error I found out its because of h5py version 3.0.0 , one of the solution I found on git was to remove .decode() from hdf5_format.py . I'll post the git link for your reference.
https://github.com/tensorflow/tensorflow/issues/44467
Its work now. I correct lines: 166, 180, 651, and 655 :) Thanks
i use comands su and nano to edit hdf5_format.py.
Example change line 166"
model_config = json.loads(model_config)#.decode('utf-8'))
" -
Obitech96 hi thereReply
i tried this project with my new raspberri pi4 with 4 Gb of ram
the video with mask detection is lagging too much! and it have a lot of delay....
Some one can help me to improve the detection in less time? thanks a lot
Marco -
rcsc484 Hi, I have already removed the ".decode(UTF-8)" from hdf5_format.py, but it's still not working. When I try to run, it displays this:Reply
loading face detector model...
loading face mask detector model...
Traceback (most recent call last):
File "detect_mask_webcam.py", line 98, in <module>
maskNet = load_model(args)
File "/usr/local/lib/python3.7/dist-packages/tensorflow_core/python/keras/saving/save.py", line 146, in load_model
return hdf5_format.load_model_from_hdf5(filepath, custom_objects, compile)
File "/usr/local/lib/python3.7/dist-packages/tensorflow_core/python/keras/saving/hdf5_format.py", line 169, in load_model_from_hdf5
custom_objects=custom_objects)
File "/usr/local/lib/python3.7/dist-packages/tensorflow_core/python/keras/saving/model_config.py", line 55, in model_from_config
return deserialize(config, custom_objects=custom_objects)
File "/usr/local/lib/python3.7/dist-packages/tensorflow_core/python/keras/layers/serialization.py", line 98, in deserialize
layer_class_name = configTypeError: 'function' object is not subscriptable -
Obitech96 you must only delete .decode(UTF-8) from hdf5_format.py in the line: lines: 166, 180, 651, and 655Reply
say me if it works and if the camera is lagging and if it have some delay -
seonho Hi. Thanks to you, I was able to make a good mask detection program. Thank you.Reply
I want to add one more thing.
If you don't wear a mask, you'll sound a siren.
What additional code should I add if I want to play a video from a file that recommends wearing a mask? -
beatskreig When i am running the detect_mask_picam.py i am getting the following errorReply
loading face detector model...
loading face mask detector model...
Traceback (most recent call last):
File "detect_mask_video.py", line 98, in <module>
maskNet = load_model(args)
File "/home/pi/mask_project/mask-env/lib/python3.7/site-packages/tensorflow_core/python/keras/saving/save.py", line 149, in load_model
loader_impl.parse_saved_model(filepath)
File "/home/pi/mask_project/mask-env/lib/python3.7/site-packages/tensorflow_core/python/saved_model/loader_impl.py", line 83, in parse_saved_model
constants.SAVED_MODEL_FILENAME_PB))
OSError: SavedModel file does not exist at: mask_detector.model/{saved_model.pbtxt|saved_model.pb}
what to do please help -
ceplaska Smart facial Recognition systems support changes in a Person's appearance. Such systems can be very slow if you went all winter with a headdress, and then came without.Reply