A THG Primer: CRT Guide
Setting Up A Monitor, Continued
The first thing to do when setting up (or evaluating) a monitor is adjust the viewable area so that it almost fills the screen. If you have to stretch things a lot to nearly fill the screen, then that can be a sign that the manufacturer is trying to hide edge-conversion or geometric distortion problems. Some monitor manufacturers will sometimes cheat a bit and reduce the viewable screen size, in order to hide problems at the edges. While this can reduce the severity of the problems, you can end up being cheated when it comes to viewable screen area. Under normal conditions, a 17" CRT should give you at least a 16" (measured diagonally) viewing area. If a monitor defaults to anything lower than that, you might be paying for a 17" monitor while only getting a 15". Keep in mind that if you expand an image horizontally or vertically by different amounts, you'll distort the images (circles won't be round and squares won't be square).
The next step is to adjust the brightness. The easiest way to do this is to pull up a black screen, if you have one, then lower the brightness until the display area is almost (but not quite) as black as the surrounding border. You'll probably feel that this makes the image a little on the dim side, as the whites will be a bit more gray than usual. Next, you need to adjust the contrast. White text on black is a good way to test for this. Turn the contrast all the way up and then start lowering it until the whites are nearly white, without being blurry (or until it feels good on the eyes).
Adjusting the size, brightness and contrast properly will probably make your display seem too dark, but after a while you'll find that the images are sharper and colors more accurate.
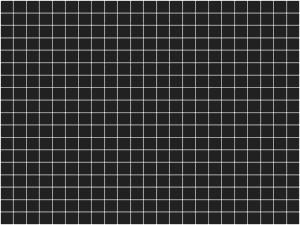
At this point you are 95% finished, but there are some more advanced adjustments you can make. With a crosshatch pattern screen (like that in DisplayMate's Video Torture Test series), you can fine-tune the geometric aspects of the display.

First, adjust the horizontal and vertical size controls to try and get the crosshatch to form as close to a perfect square as possible. Once that is done, go back and adjust the size to nearly fill the screen, and then center the image. Next, if necessary, adjust the rotation (if your monitor allows this) so that the image isn't tilted.
Next, you'll need to adjust the horizontal pincushion controls to eliminate any 'hourglass' or horizontal 'bulge' shape. The edges on the sides of the screen should be as close to perfectly straight as possible. This can be a tricky adjustment, as your monitor may have one side in and the other out, or the left side might be straight while the right side is bowed in or out, or the top or the bottom third of the screen might be curved in or out.
Depending on the monitor controls, you may be able to adjust for any or all of these problems, but again, if you have to make a lot of adjustments, you might consider buying a different monitor.
Stay On the Cutting Edge: Get the Tom's Hardware Newsletter
Join the experts who read Tom's Hardware for the inside track on enthusiast PC tech news — and have for over 25 years. We'll send breaking news and in-depth reviews of CPUs, GPUs, AI, maker hardware and more straight to your inbox.
Current page: Setting Up A Monitor, Continued
Prev Page Setting Up A Monitor Next Page Color TemperaturesMost Popular


