Hands-on with InWin's F5 PC Case: Back-connector motherboard support and wood front panels
Rear-connector support, but not necessarily optimized for hiding all your cables.
If there's one company you can generally count on to be at the cutting edge of PC case design (or at least bring weird and wild case ideas to market), it's InWin. And its full-tower F5, which we saw early this year at CES 2024, looks to continue that trend. It offers up Tetris-like movable panels (two of which are wood in the white model) on its front and support for the Maingear-patented MG-RC or back-connector motherboards (also referred to as BTF by Asus and Project Zero by MSI). I used an MSI Project Zero board for our build with the case, marking the second time I've built a system with the connectors on the back of the motherboard.
The F5 case also ships with three large 140 mm ARGB fans that deliver good airflow front to back, without much noticeable noise. And vertical GPU mounting is supported, though you'll have to supply your own riser cable. Overall, the F5 is an attractive, well-built case for the price – though I wish both the black and white models were priced the same at $149, rather than the white model costing $20 more ($169).
That said, my main issues with the F5's design mostly revolve around its support for back-connector motherboards and its top PSU / radiator chamber. While most people building in this case probably won't be using a motherboard with the connectors at the back, even if you use a traditional board, it's tough to hide all the cables in the front chamber.
And, just as I saw with MSI's Pano M100R PZ case, there's not really enough room behind the motherboard to conveniently route and stow all the cables for a rear-connected build. The extra slack of the PSU cables, in particular, makes for sub-optimal airflow in the top chamber, which is where the F5's case design almost demands that you put a large radiator or AIO for cooling your CPU.
InWin F5 Specs
| Type | ATX Full Tower |
| Motherboard Support | E-ATX (12 inches x 13 inches), ATX, Micro ATX, Mini-ITX |
| Dimensions (HxWxD) | 20.1 x 9.25 x 21.38 inches |
| Max GPU Length | 17.13 inches |
| CPU Cooler Height | 7.1 inches |
| External Bays | X |
| Storage | 2x 3.5-inch and 2x 2.5-inch, or 6x 2.25_inch |
| Expansion Slots | 8 (3 vertical) |
| Front I/O | 1x USB 3.2 Gen 2x2 Type-C, 2x USB 3.2 Gen1 Type-A, Audio combo jack |
| Front Fans | 2x 140 mm PWM ARGB |
| Rear Fans | 1x 140mm PWM ARGB |
| Weight | 28 pounds |
| Warranty | 2 years |
Somewhat swappable front panels
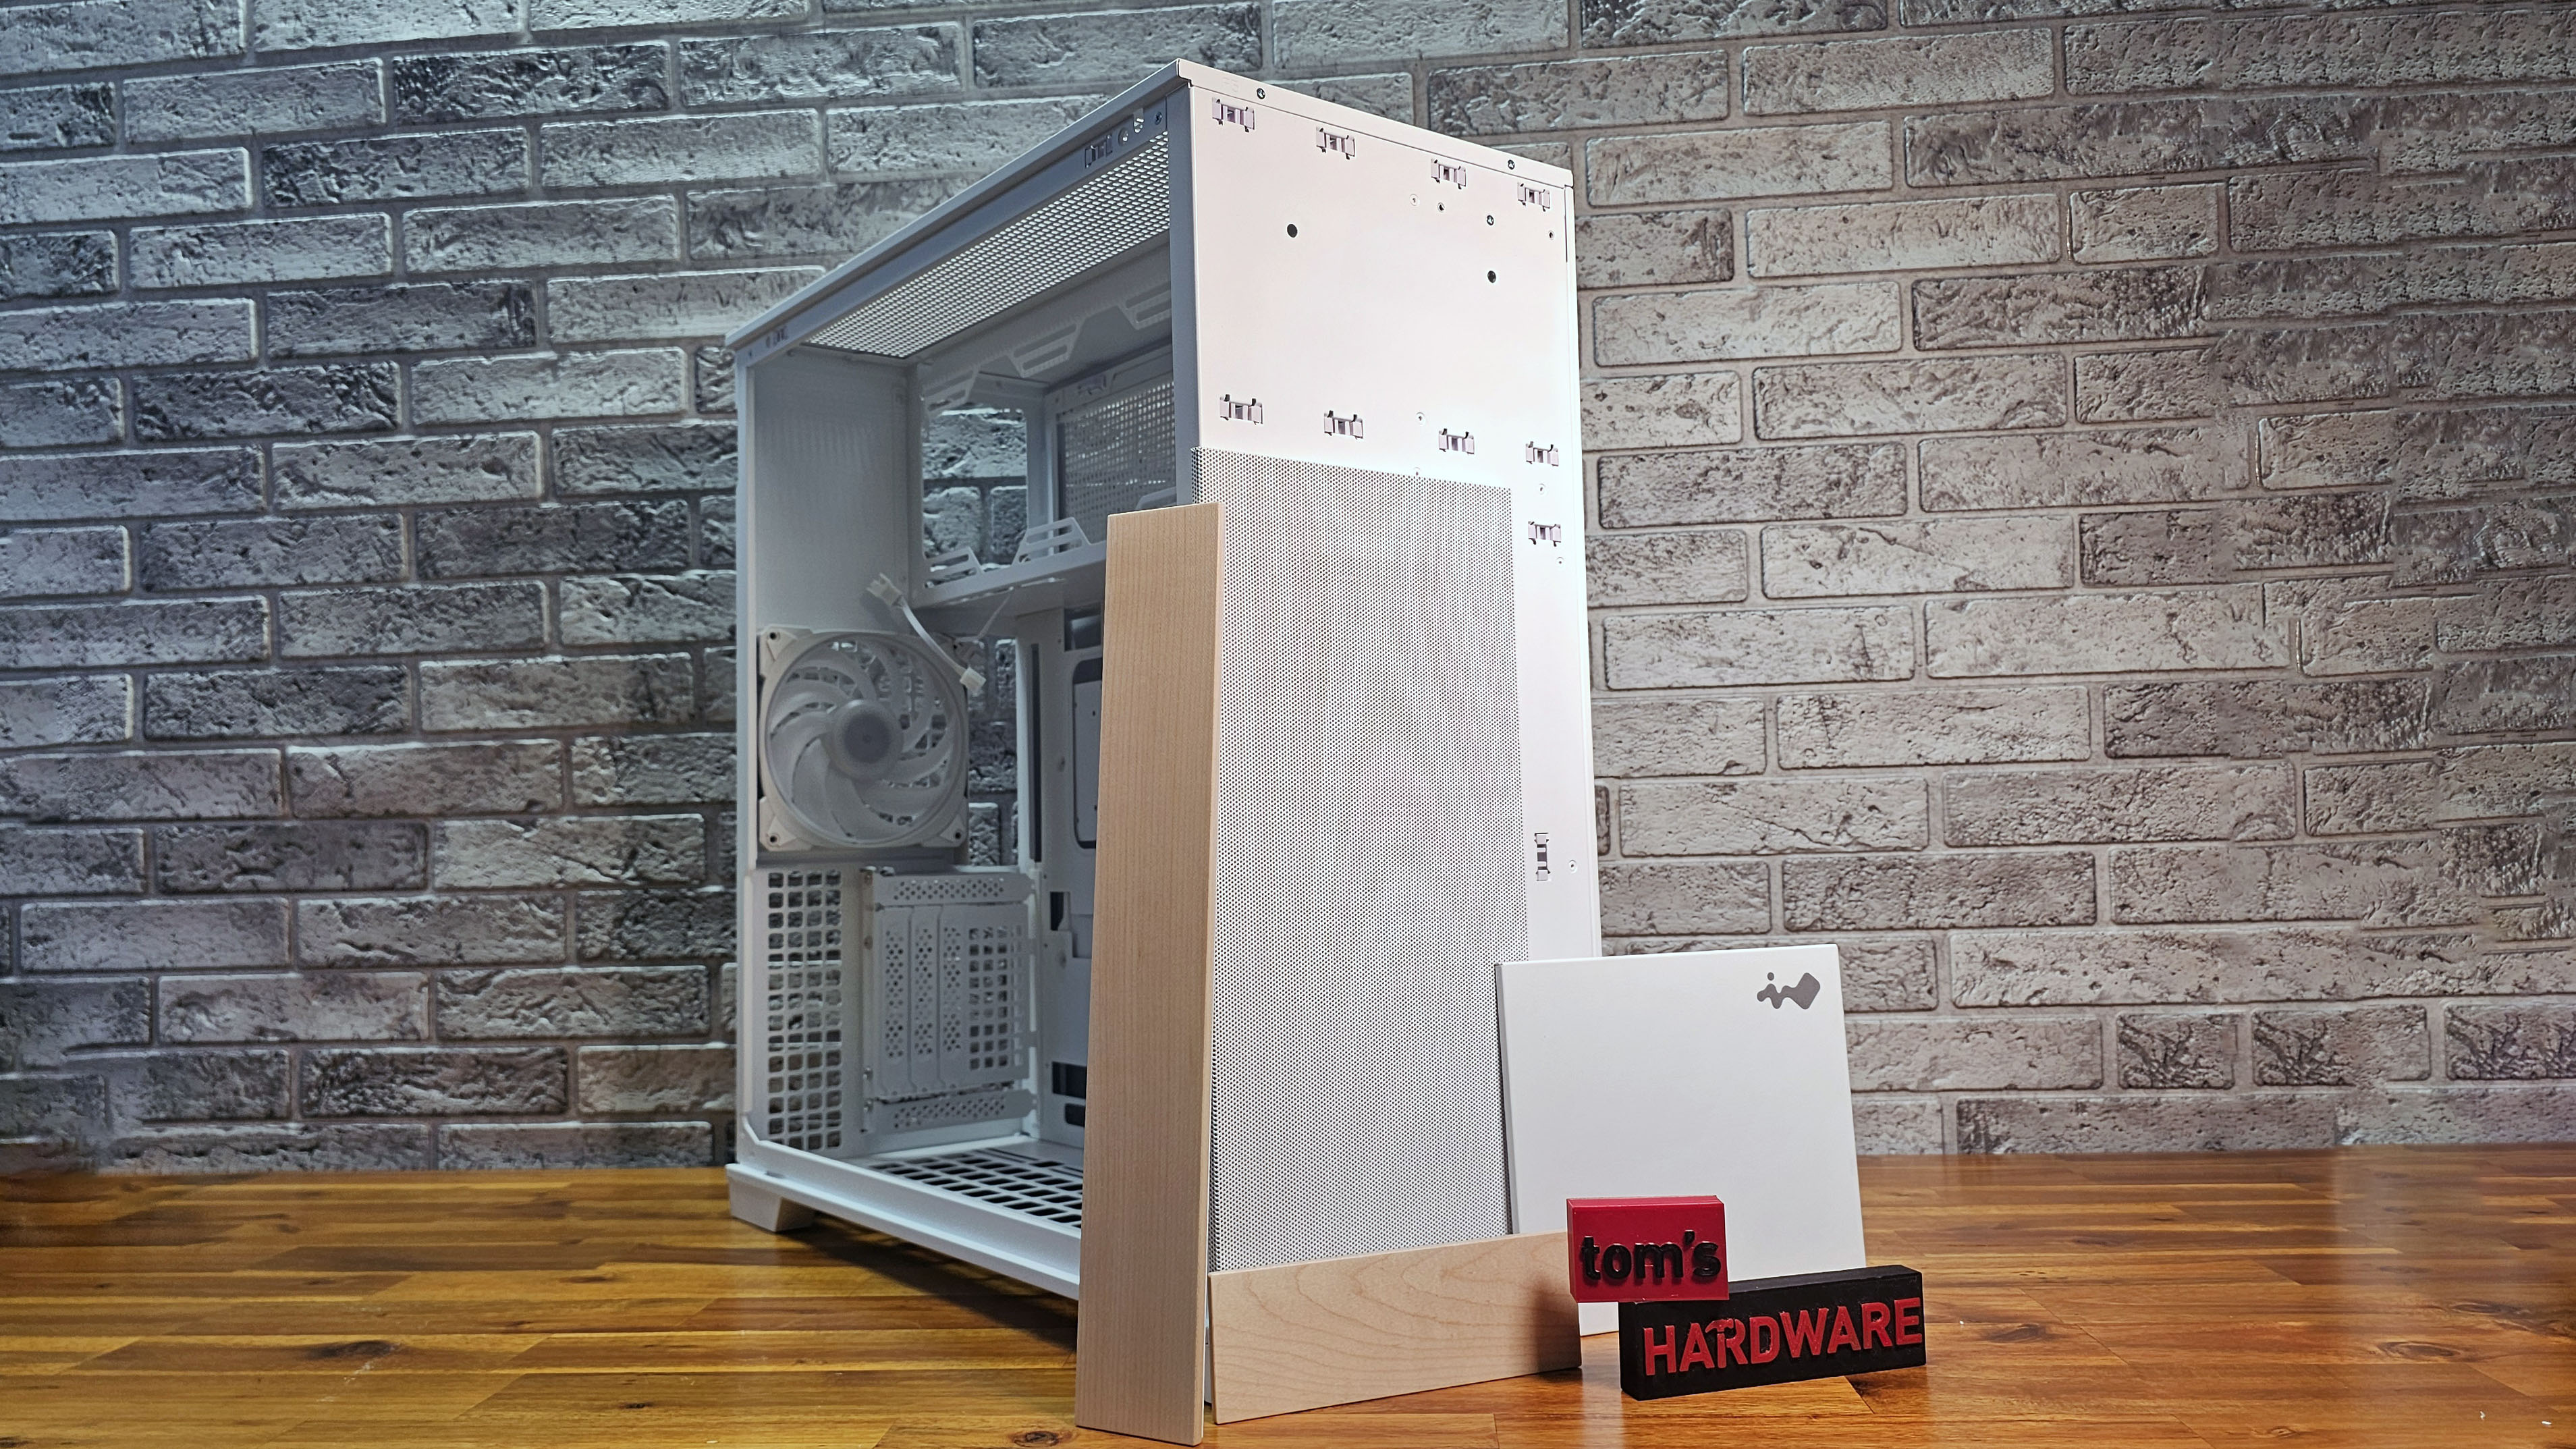
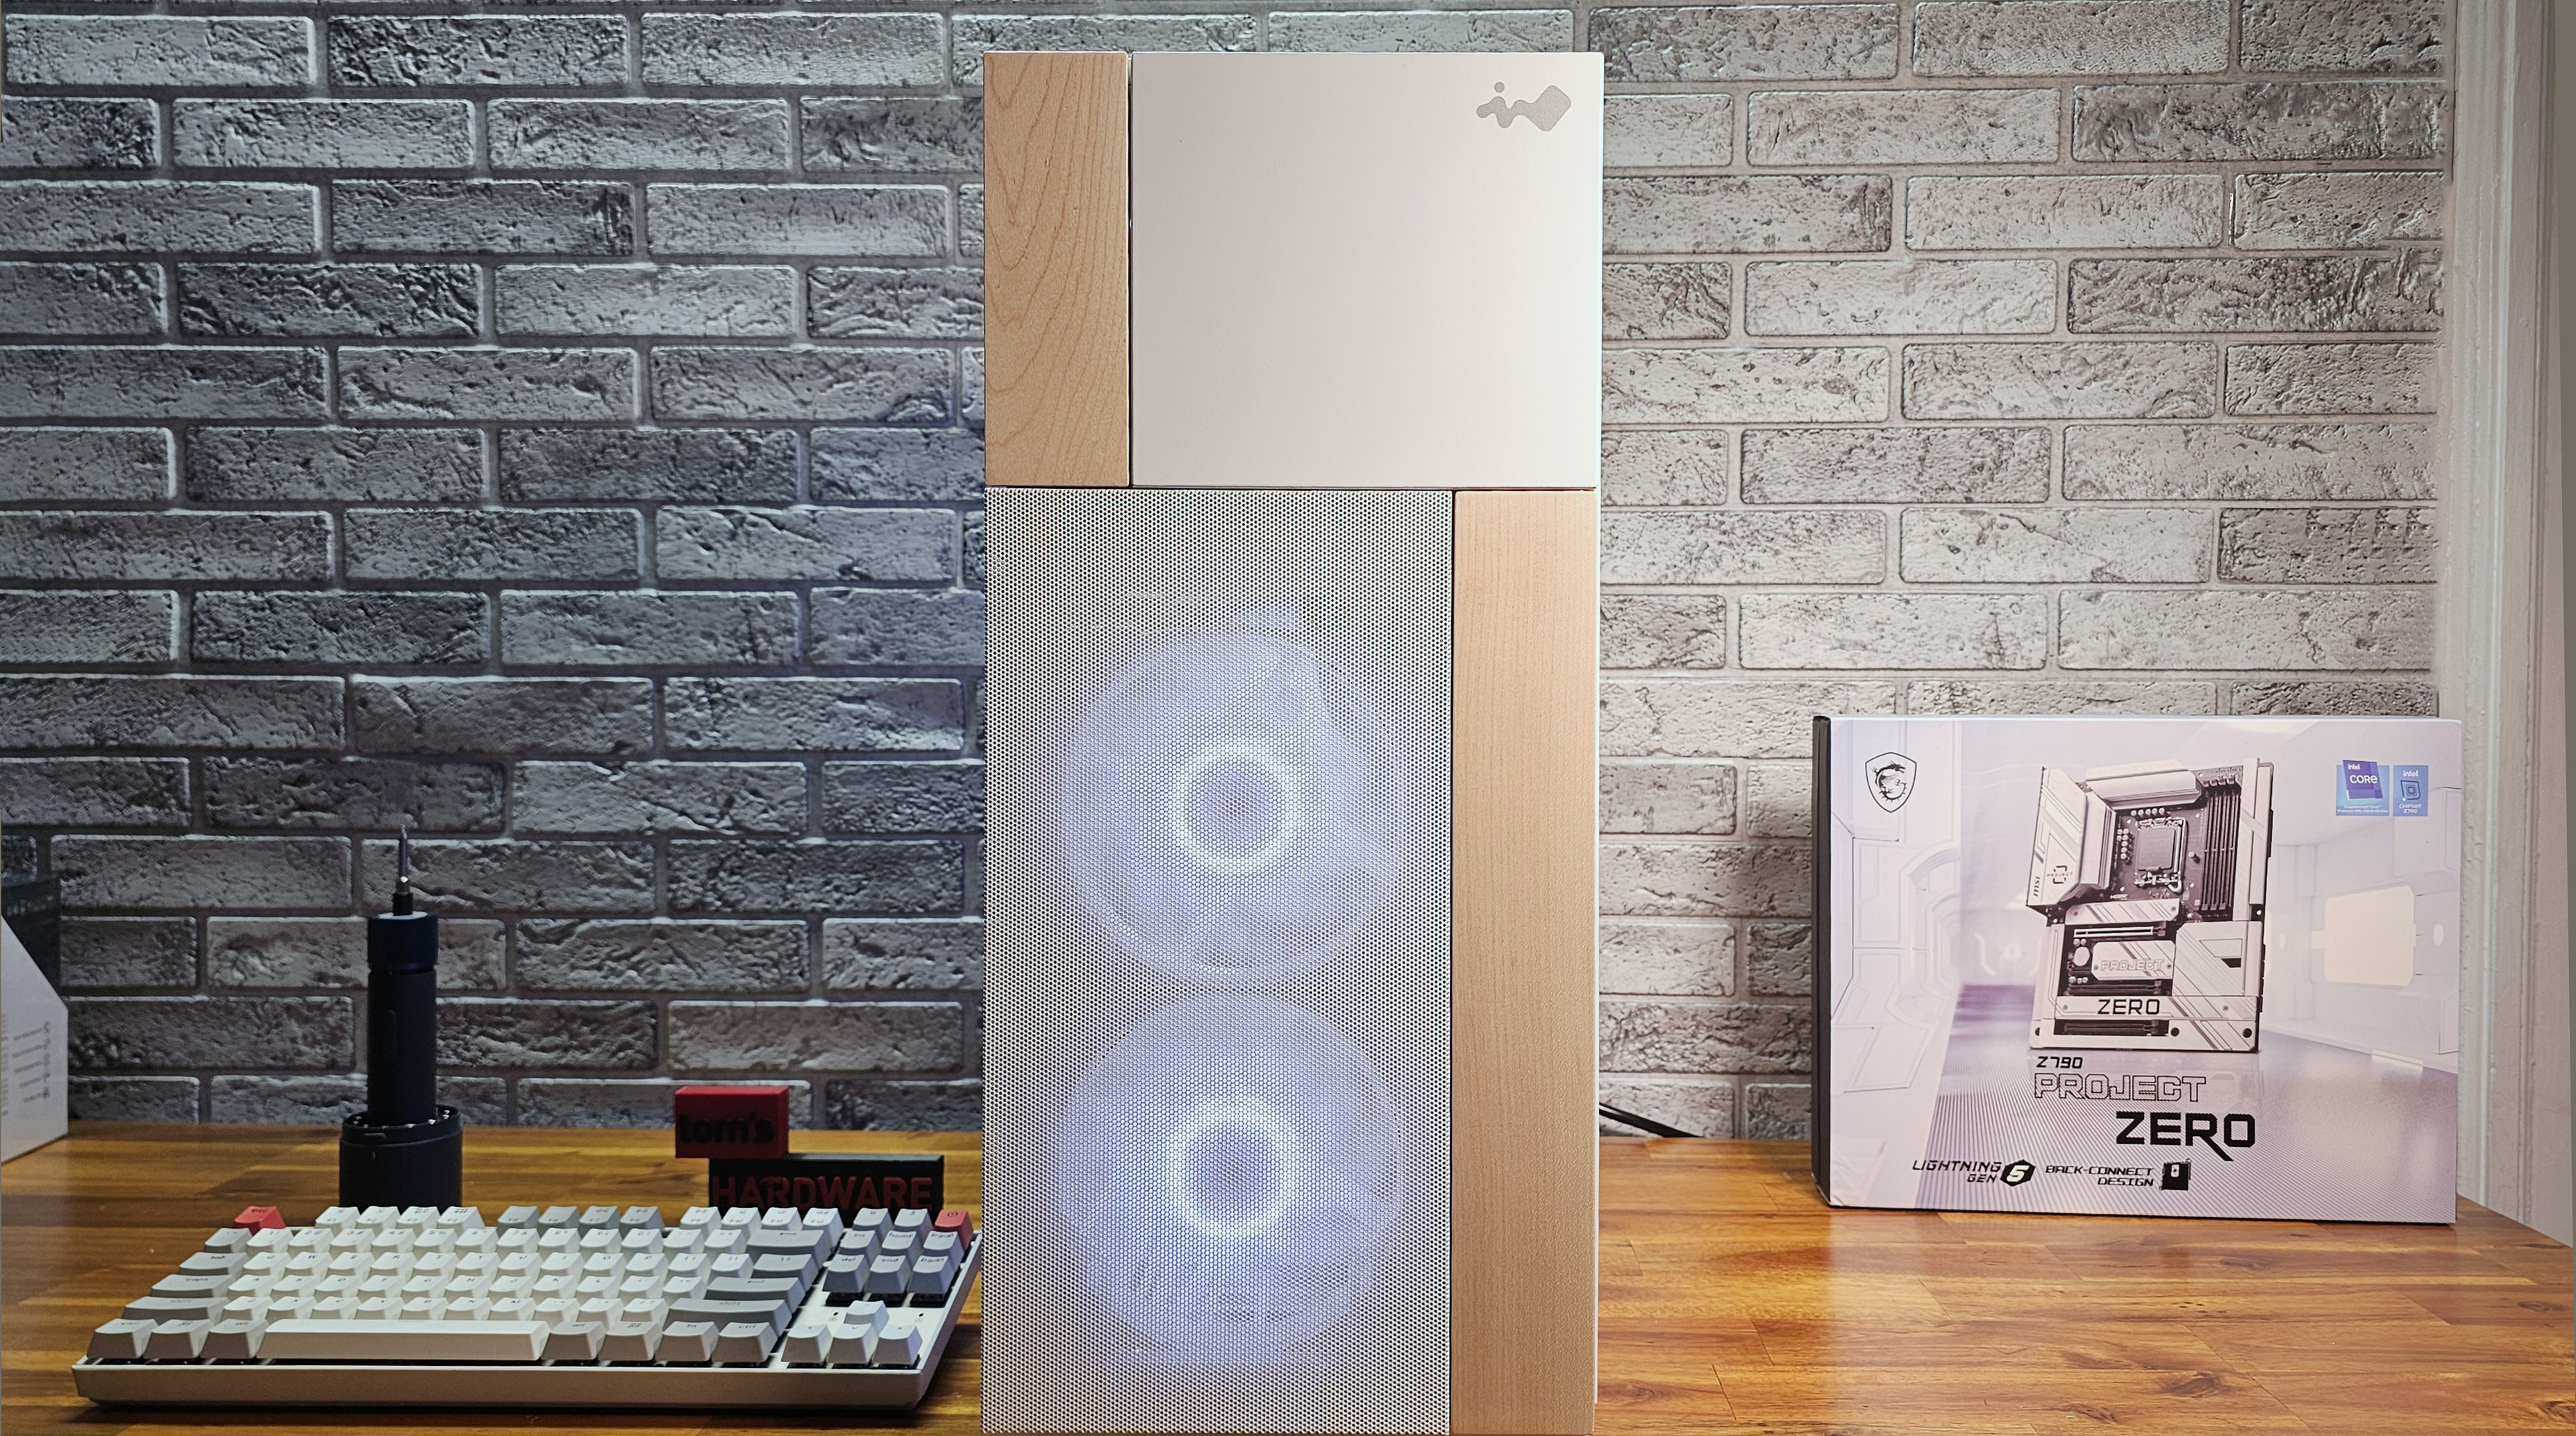
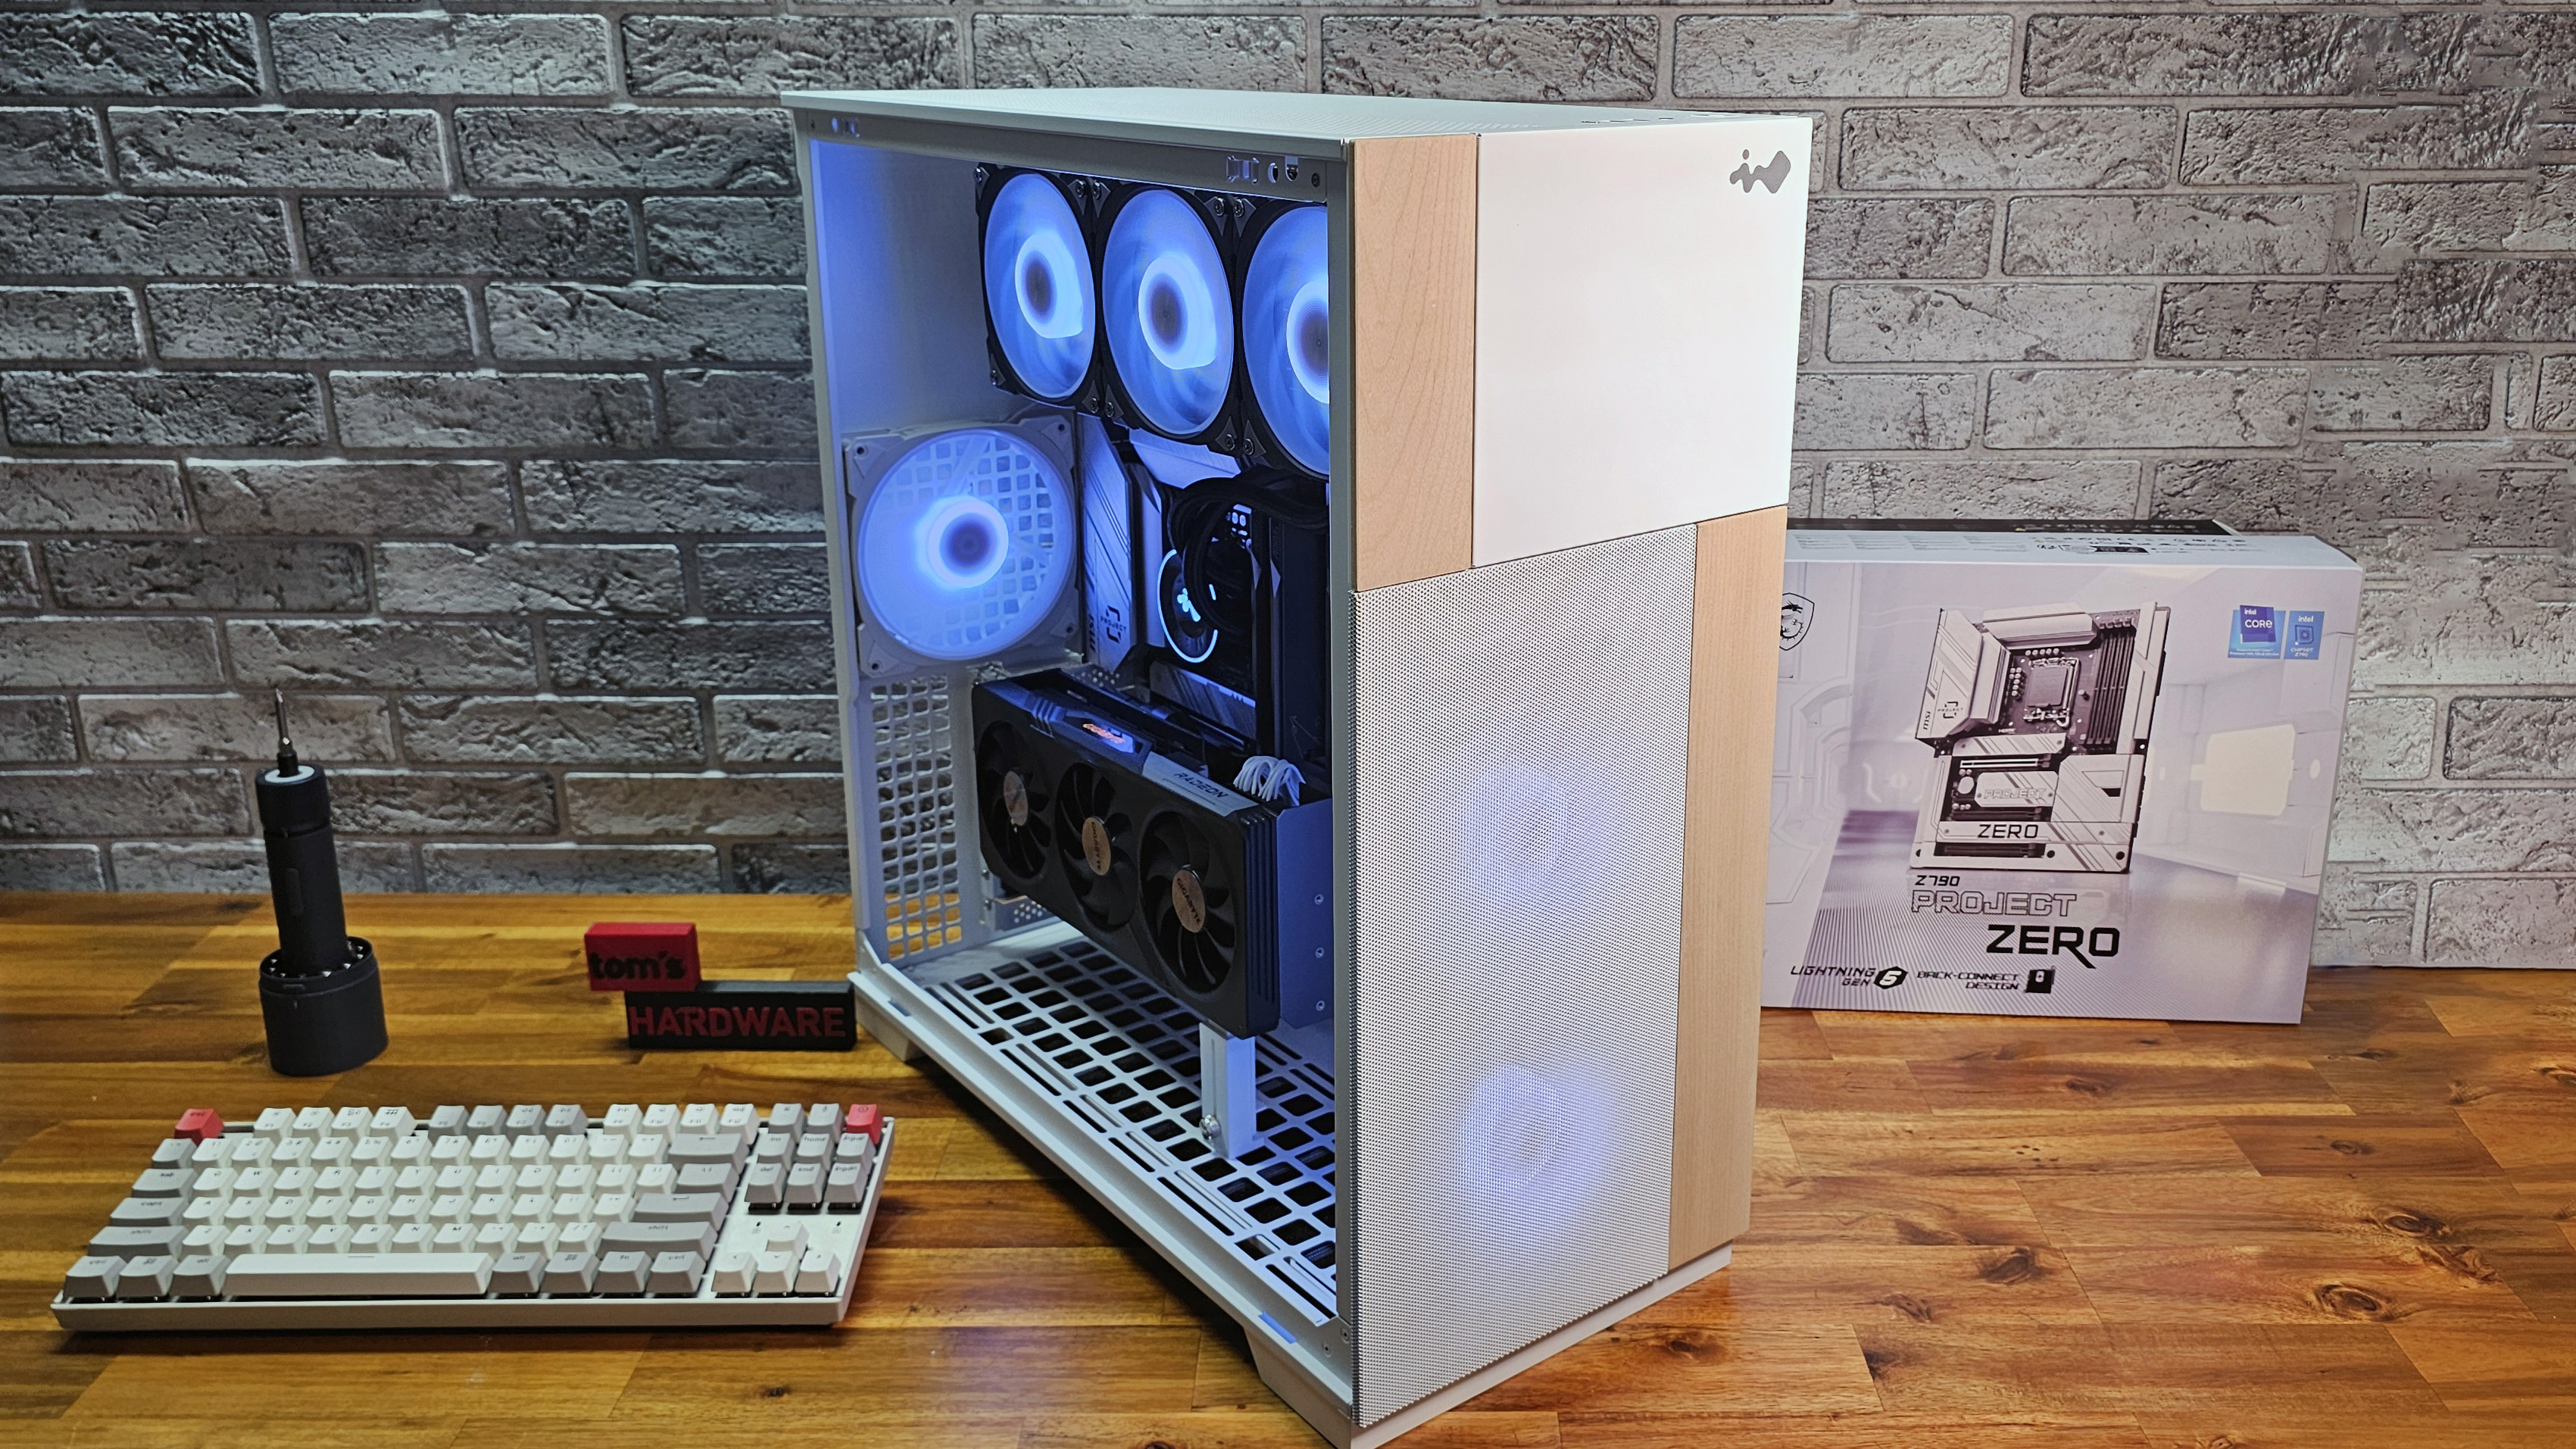
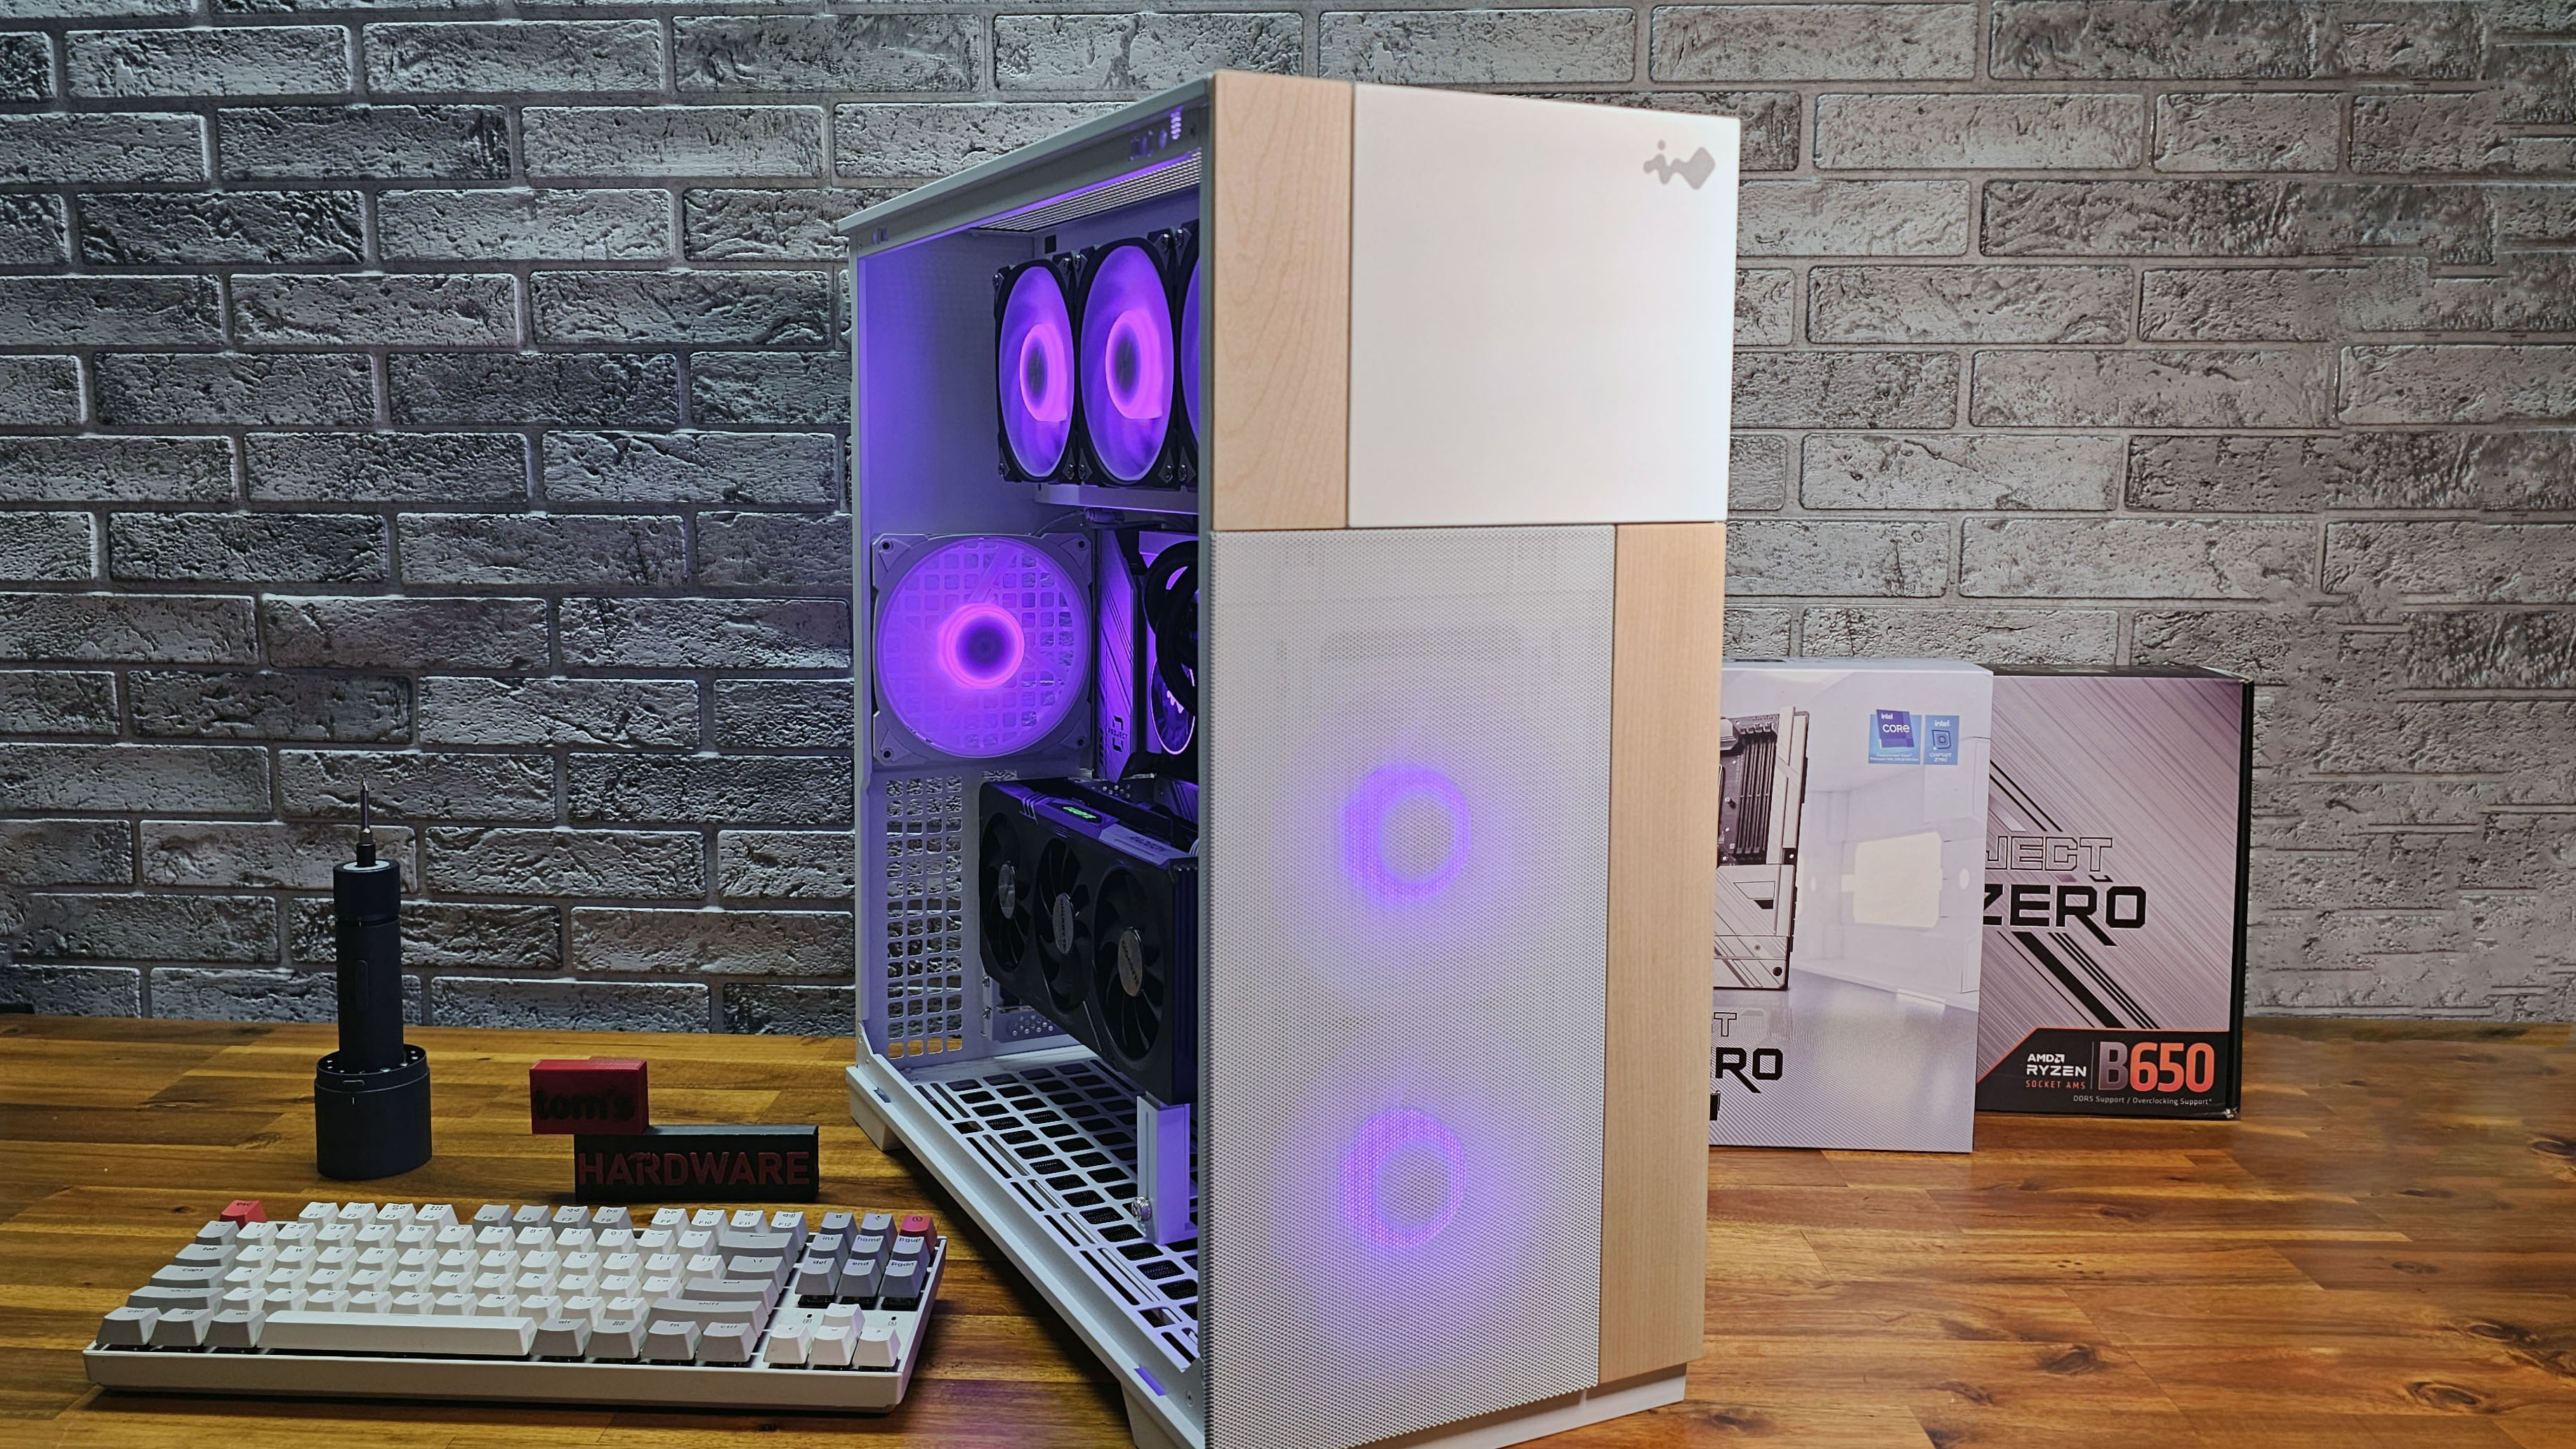
Both side panels and the four modular front panels of the InWin F5 are tool-free and fairly easy to pop off via pegs. The front panel comes in four sections, two of which are wood on the white model. InWin touts the ability to move them around to create different looks – except there's really only two orientations that make sense. You'll want the larger mesh panel on the bottom left, because that's the only area that's open for airflow.
So in short, you can set up the front with the wood panels either with both on the right side and the two larger metal panels on the left, or the bottom wood panel on the right and the top on the left. At least on our review unit, the wood grain of the two narrow panels didn't exactly line up in a way that they looked like they belonged together, so I left one on the left and one on the right. I think this configuration looks the best, anyway.
It would be nice if InWin sold inexpensive panels that you could swap out, made of other materials and in other colors. At least the black model has different shades of blue, but I do prefer the look of the wood, generally. I just wish there were more ways to customize the case's look, given it's one of the key design points.
Get Tom's Hardware's best news and in-depth reviews, straight to your inbox.
Nice included fans, but not great for hiding cables
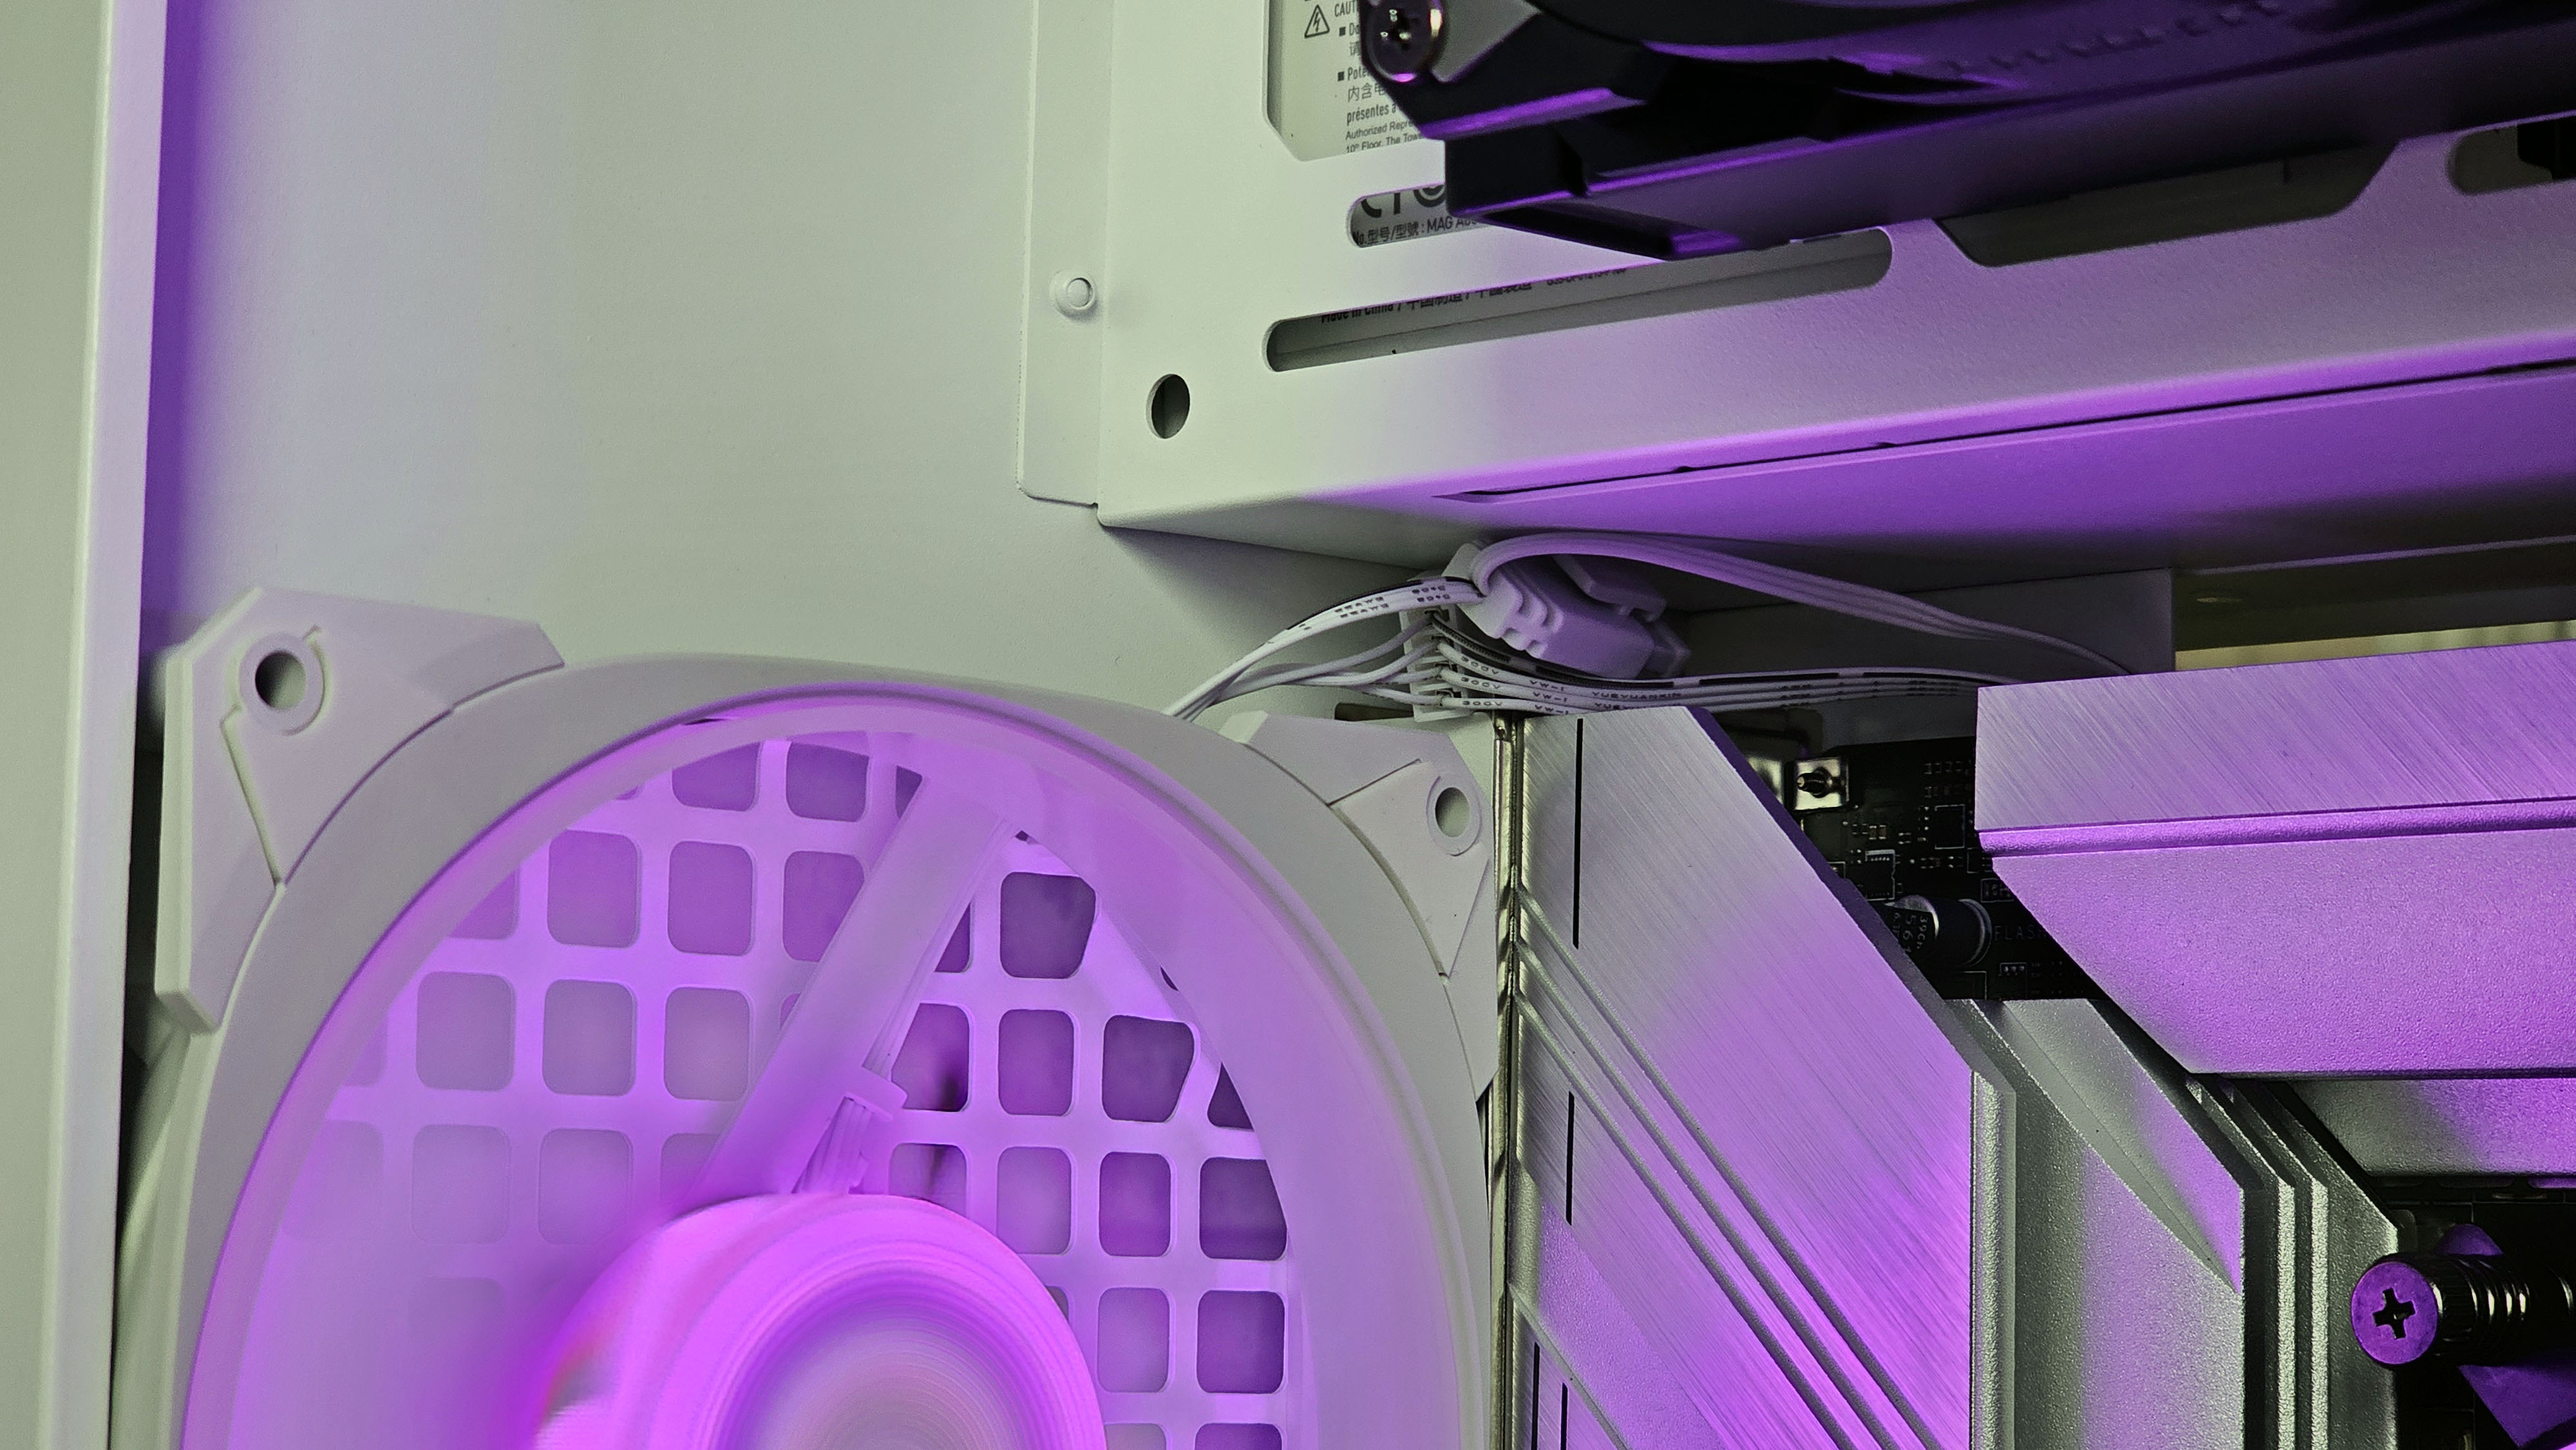
On the plus side, the trio of AN140 fans that InWin includes with this case look good and move a lot of air, without making much noise (bigger, slower-spinning fans and a glass side panel are usually a good combo). They're designed to be daisy-chained, so you can connect them together instead of having to run fan and RGB cables from every fan to the motherboard or a third-party hub.
But these fans clearly weren't designed for rear-connector motherboards where the primary aim is to hide all the wires. Because every fan has two short wires coming off of it, with both male and female fan and RGB connectors at the end of each. Extension cables are also included for routing the connectors to your motherboard, but hiding the connection points and any unused cable leads can be difficult to impossible when they aren't long enough to route behind the motherboard.
Rear-connector (MG-RC) motherboards complicate compatibility
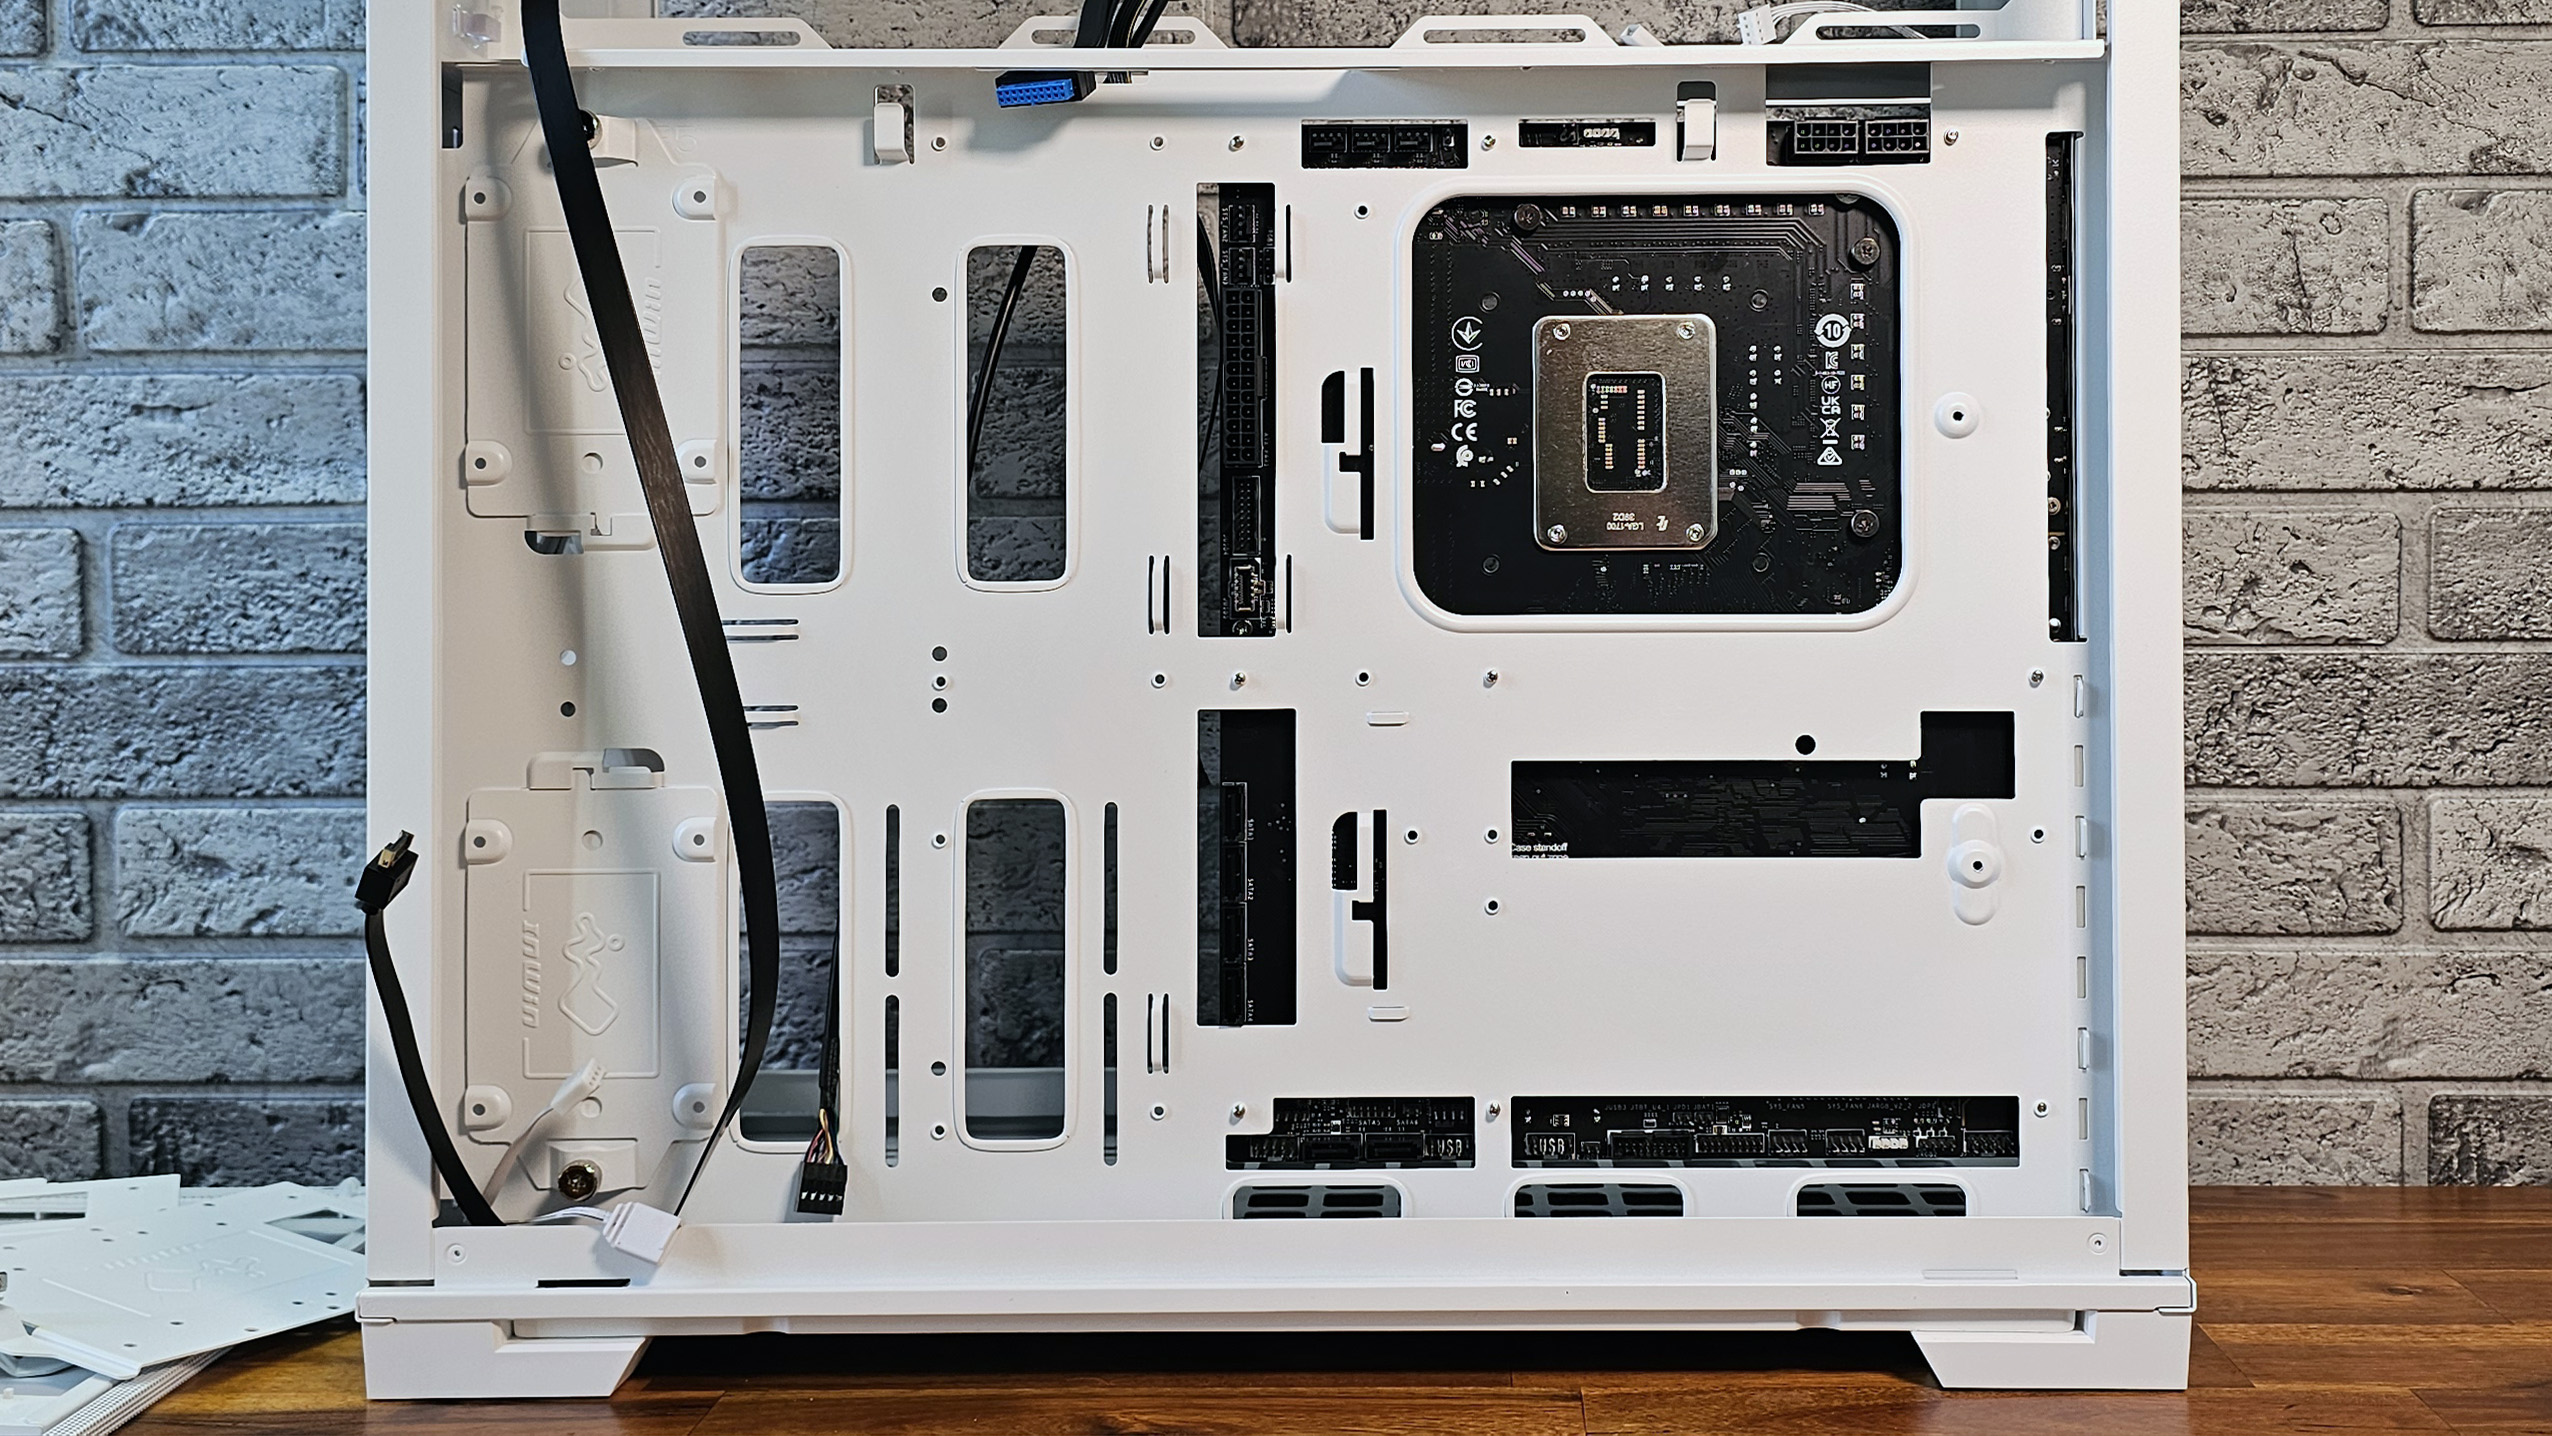
The InWin F5 case technically supports E-ATX (up to 12 x 13 inches), ATX, Micro ATX, and Mini-ITX motherboards. It also supports rear-connector motherboards like MSI's Project Zero boards. It turns out, though, that the case does not support rear-connect Micro ATX motherboards, like the MSI B650M Project Zero board I used for the MSI Project Zero build story I wrote earlier this year. I didn't actually realize this until after I had installed all the motherboard standoffs (something I don't normally expect to have to do in a $150-plus case), and fully installed the motherboard. Everything looked good from the front, but when I then went to start plugging in cables, I realized there was no cutout for the bottom row of headers and connectors.
The case has cutout holes for both ATX and Mini-ITX rear-connector motherboards, just not the mid-sized Micro ATX form factor. So make sure to double-check board compatibility when buying a case for one of the new MG-RC rear connector motherboards. I had to ask MSI to rush me its ATX Z790 Project Zero motherboard so that I continue working on the build for this case.
MSI Project Zero install and initial assembly
With a compatible MSI motherboard in hand, I moved a few of the motherboard standoffs, installed the ATX board, and continued with the CPU and RAM installation. I normally do this before installing a motherboard in the case, but since these boards have all of the header pins and connectors on the back, I don't feel entirely comfortable pressing down on latches and locking mechanisms until the board is installed and supported by the case standoffs. I also installed the M.2 boot drive after the board was installed – mostly because I forgot about it because I'd swapped boards earlier (where I'd already installed a drive) and you can't see M.2 drives under the metal heatsinks of the Project Zero boards (and most boards these days).
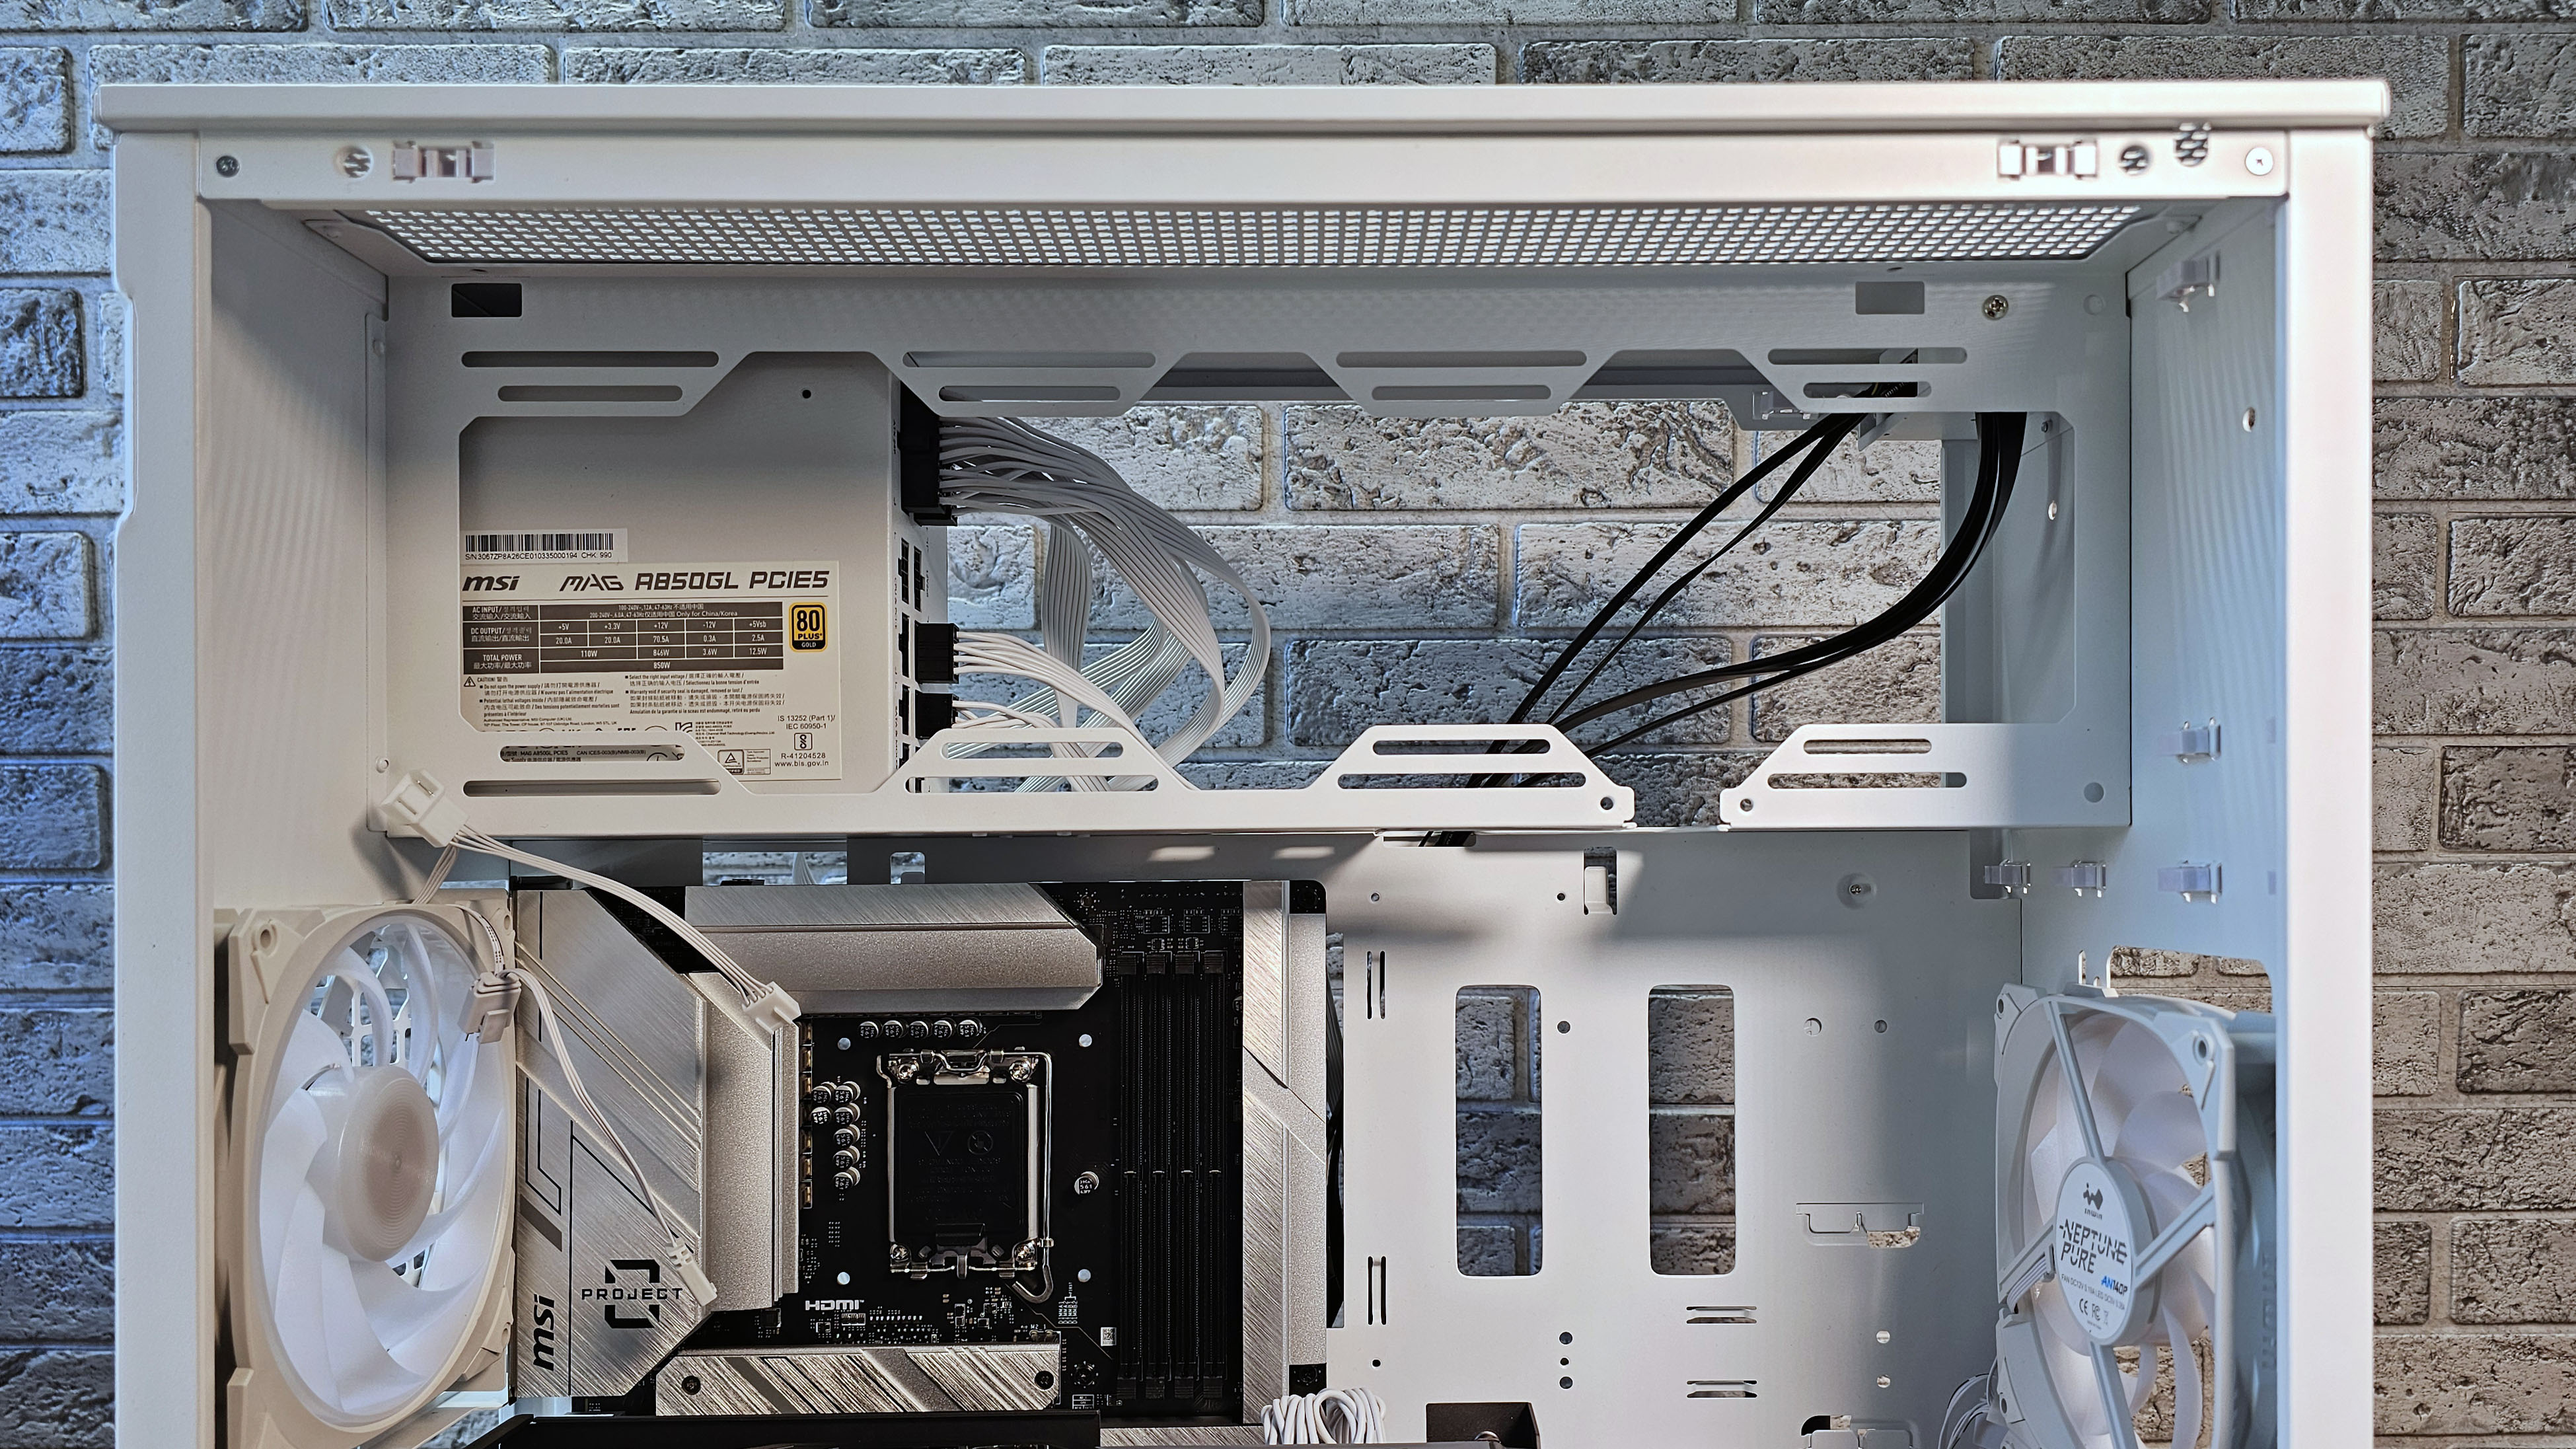
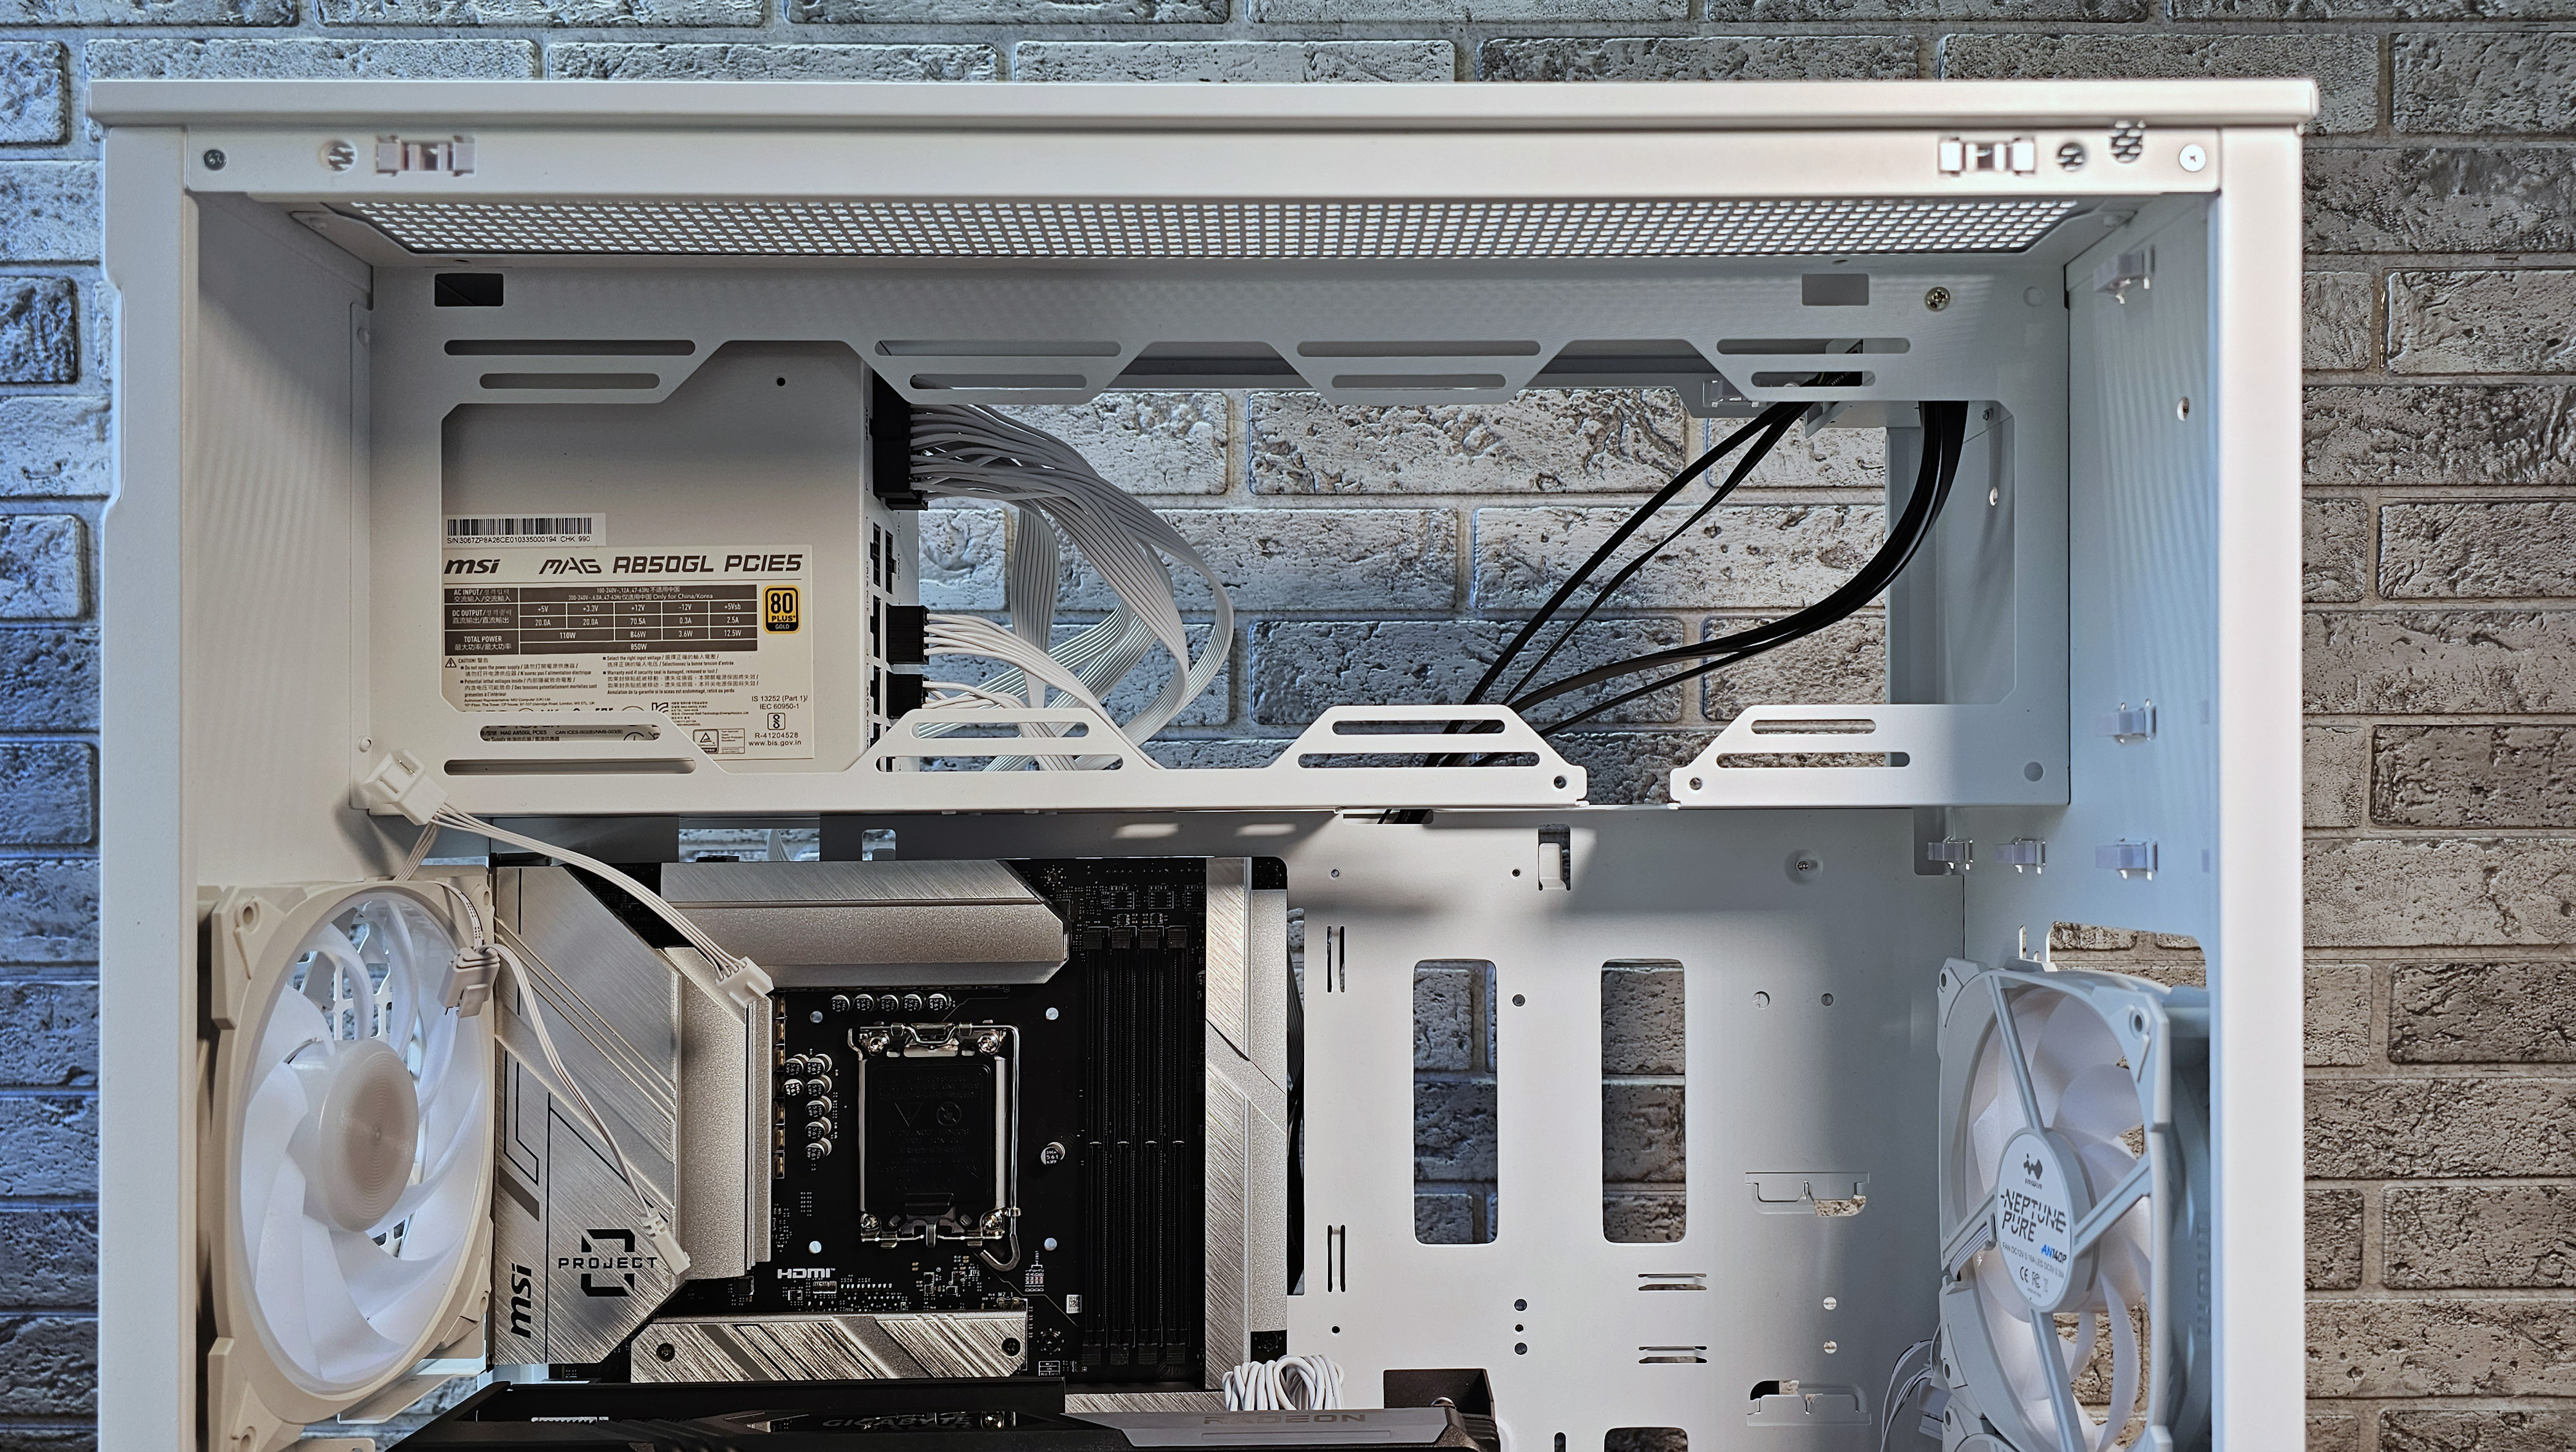
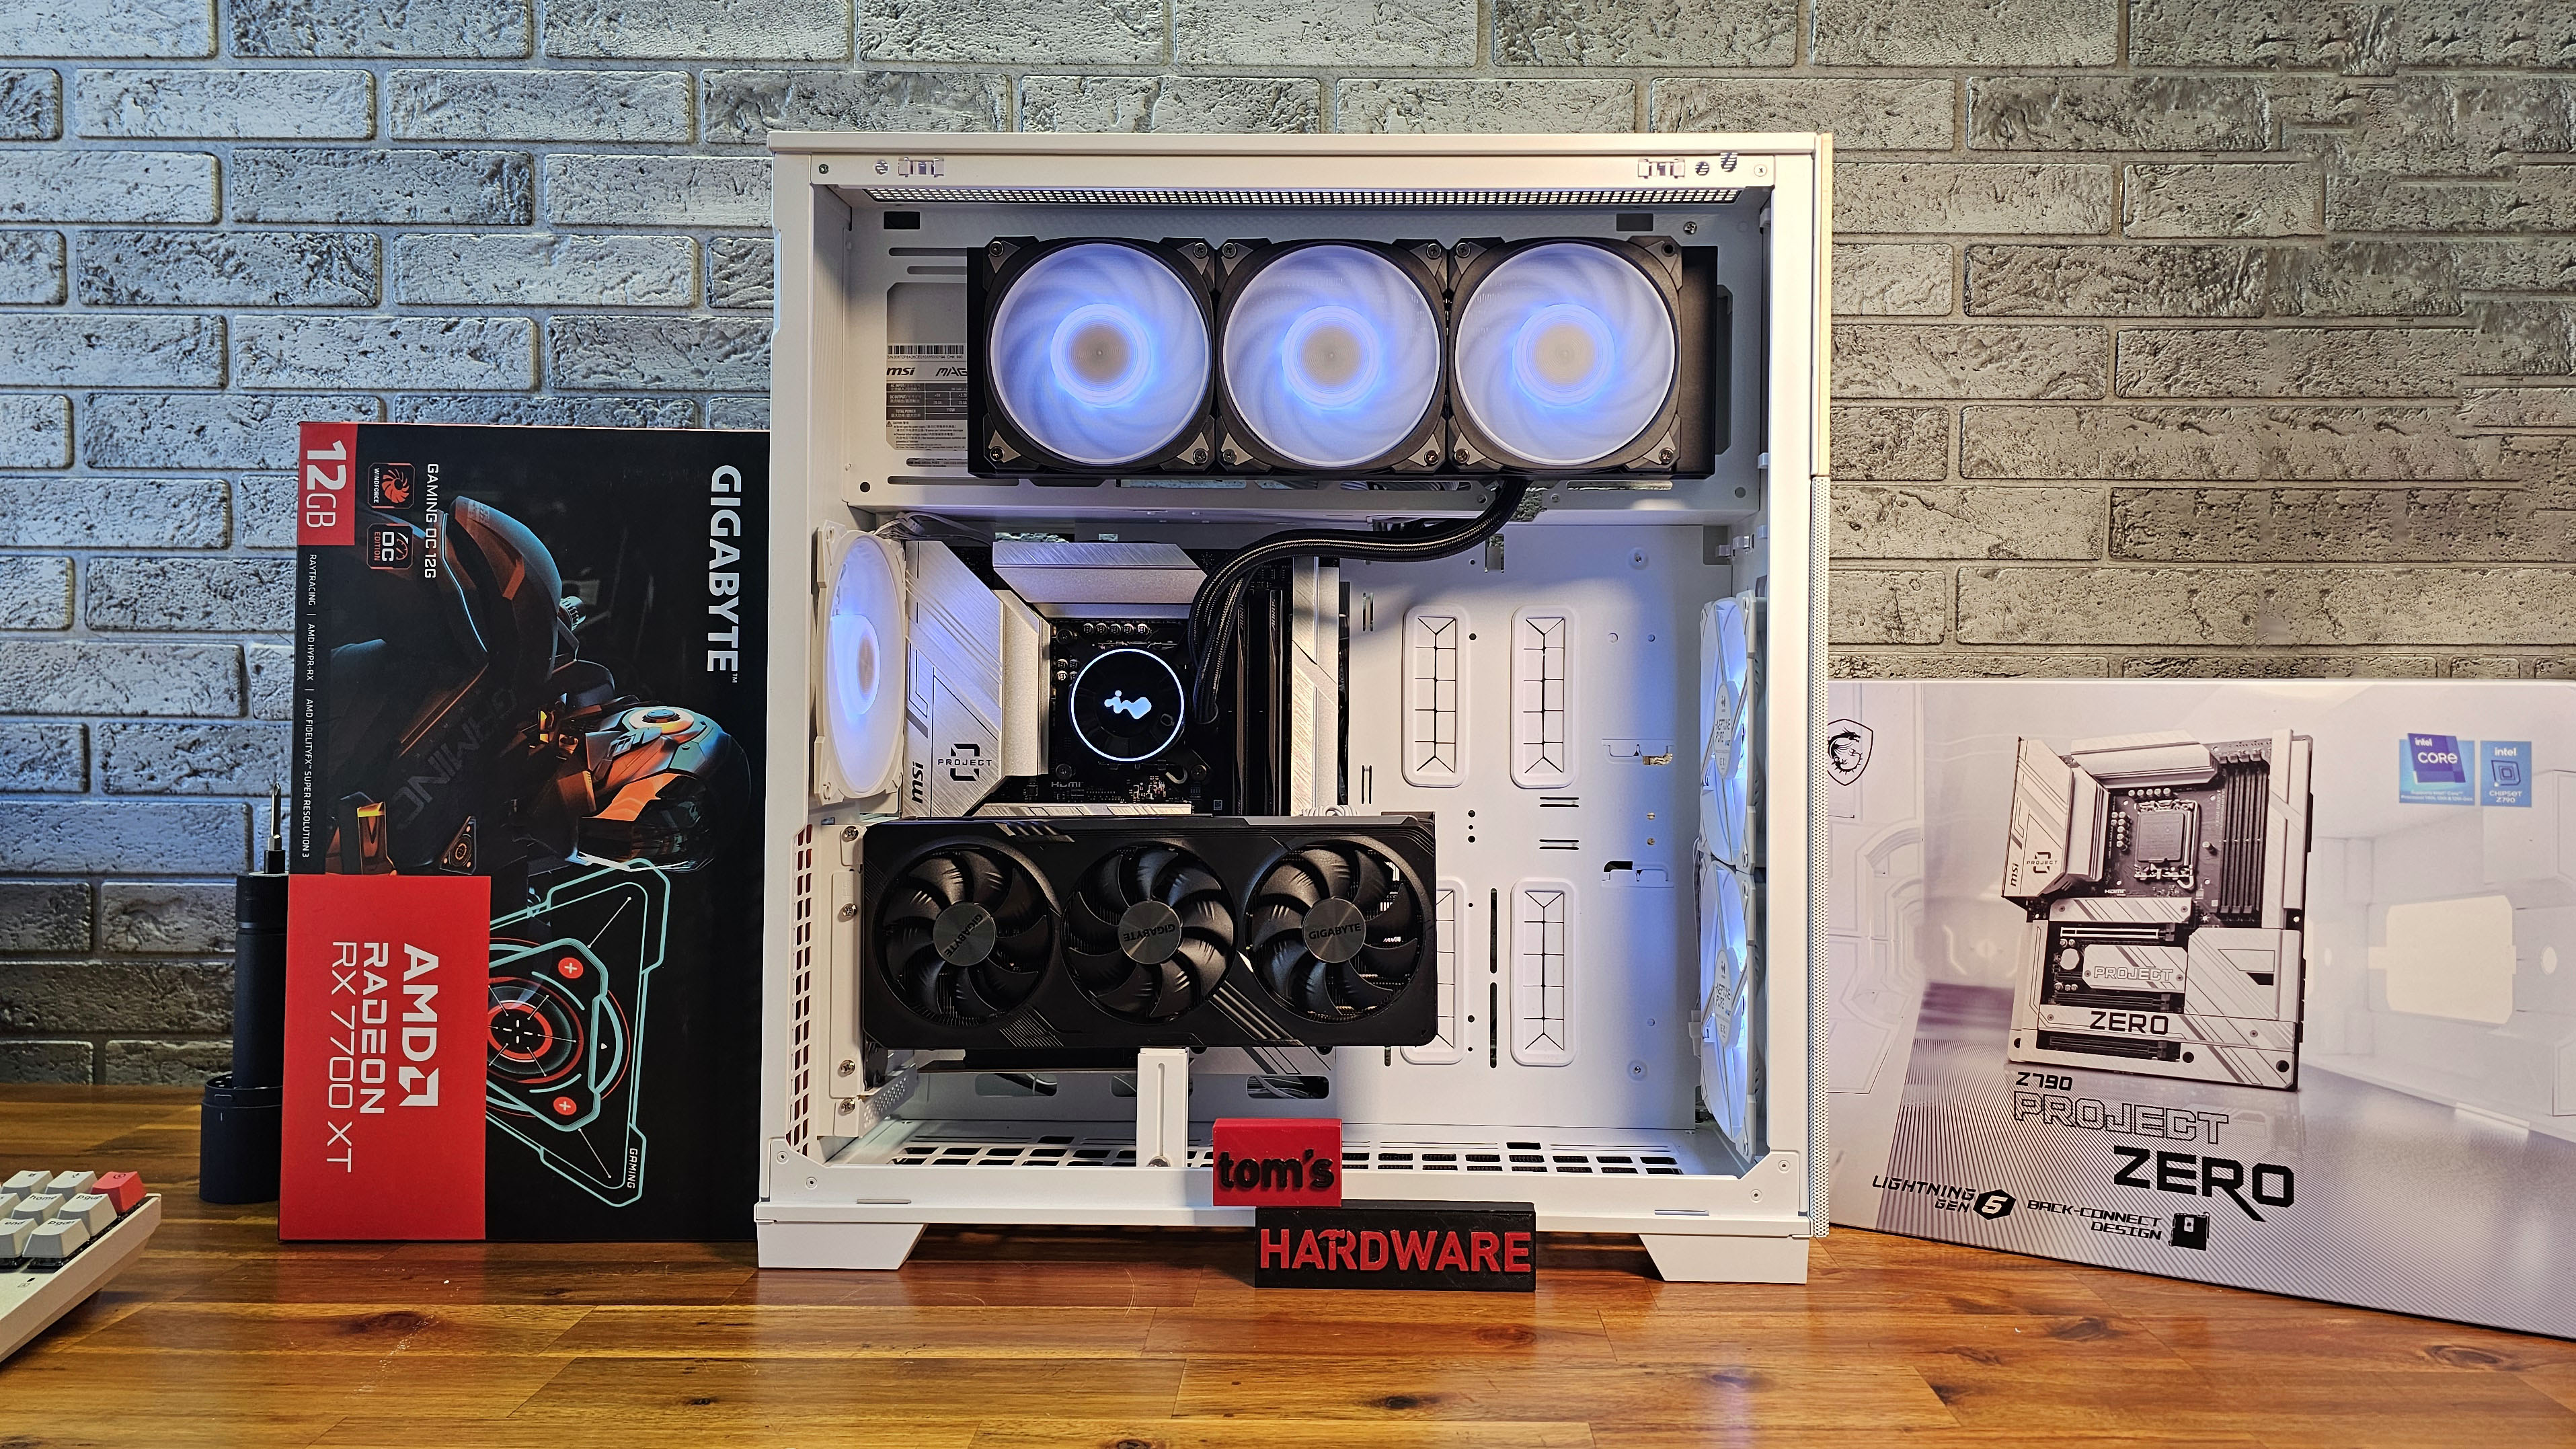
I then installed the power supply. InWin sent one of its own along with the case, but the MSI model I used on the Project Zero story is white, so it looked better with this case. Plus in general, I like to use parts from competing companies to get a better sense of compatibility, rather than using a bunch of parts from the same company that were designed to work together. As you can see in the image above, the PSU placement blocks a chunk of the exhaust area above the motherboard, but it also makes you want to put a fan or radiator there, because otherwise you'll be looking at an ugly PSU sticker and cables.
As with the previous Project Zero build I did, plugging in all the cables behind the motherboard is largely easier and faster than the traditional method of plugging in most things on the front of the board. And that's especially true if you typically try to hide and / or cleanly route your cables.
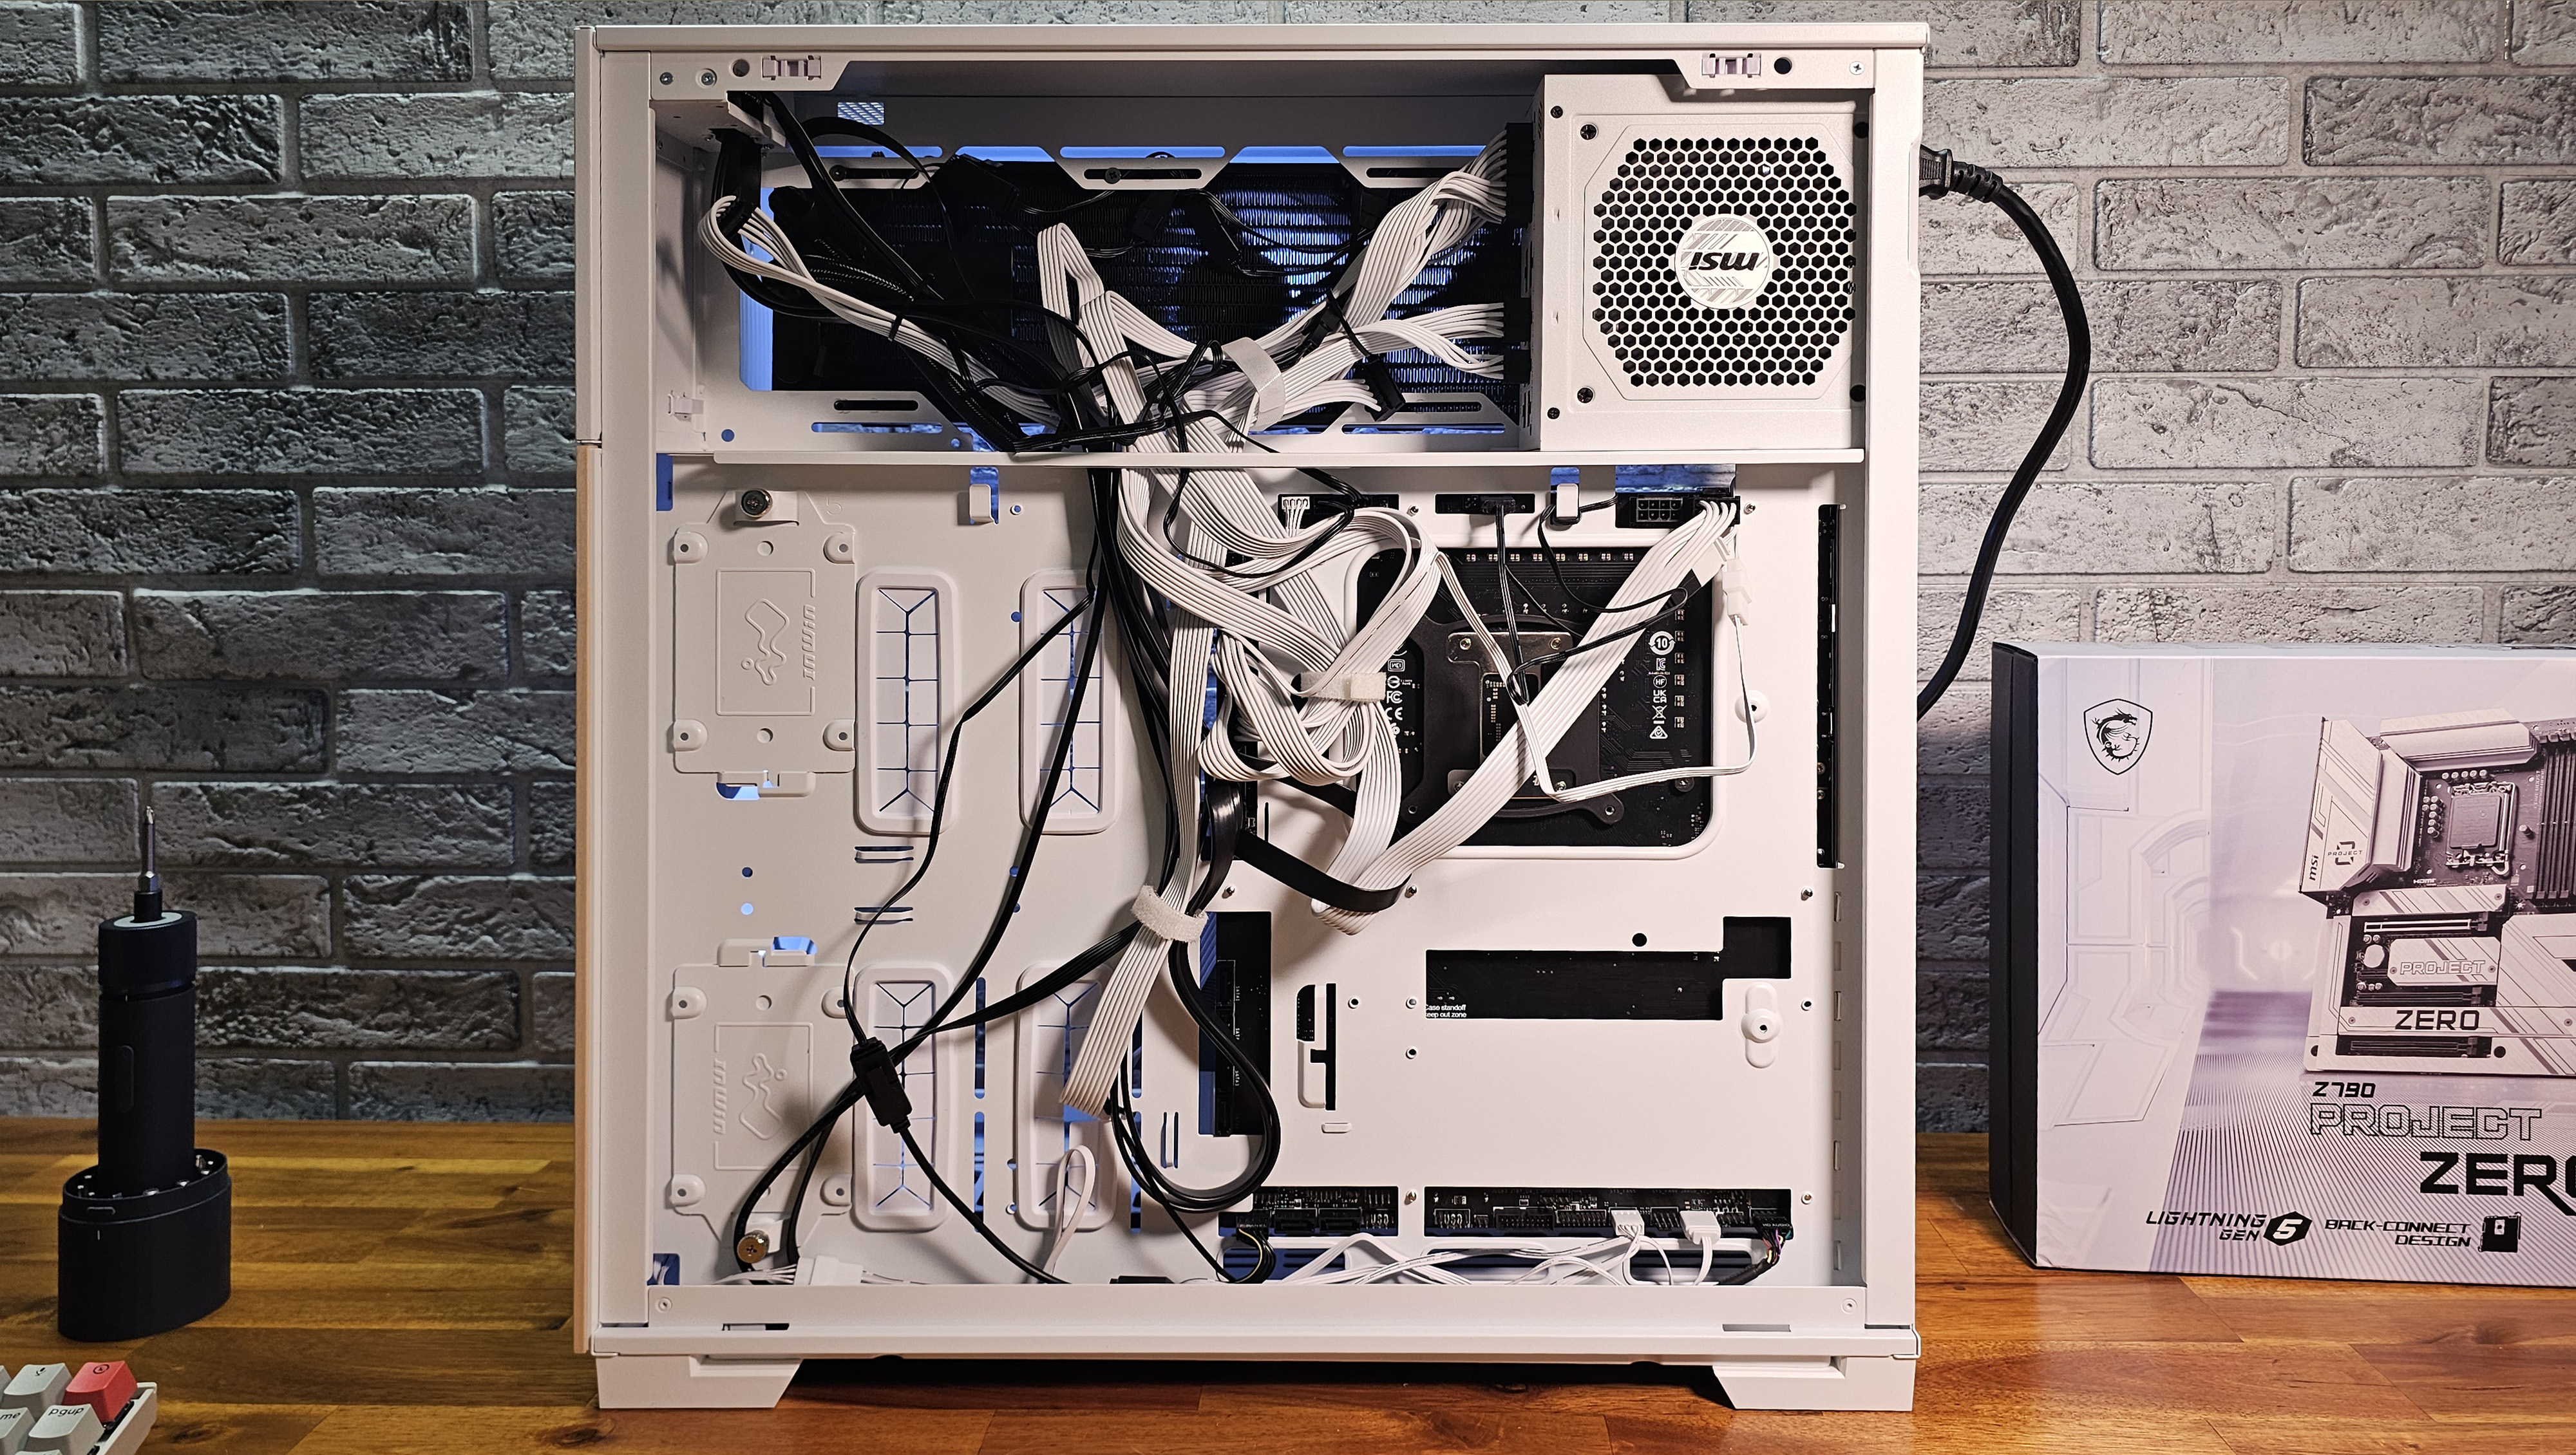
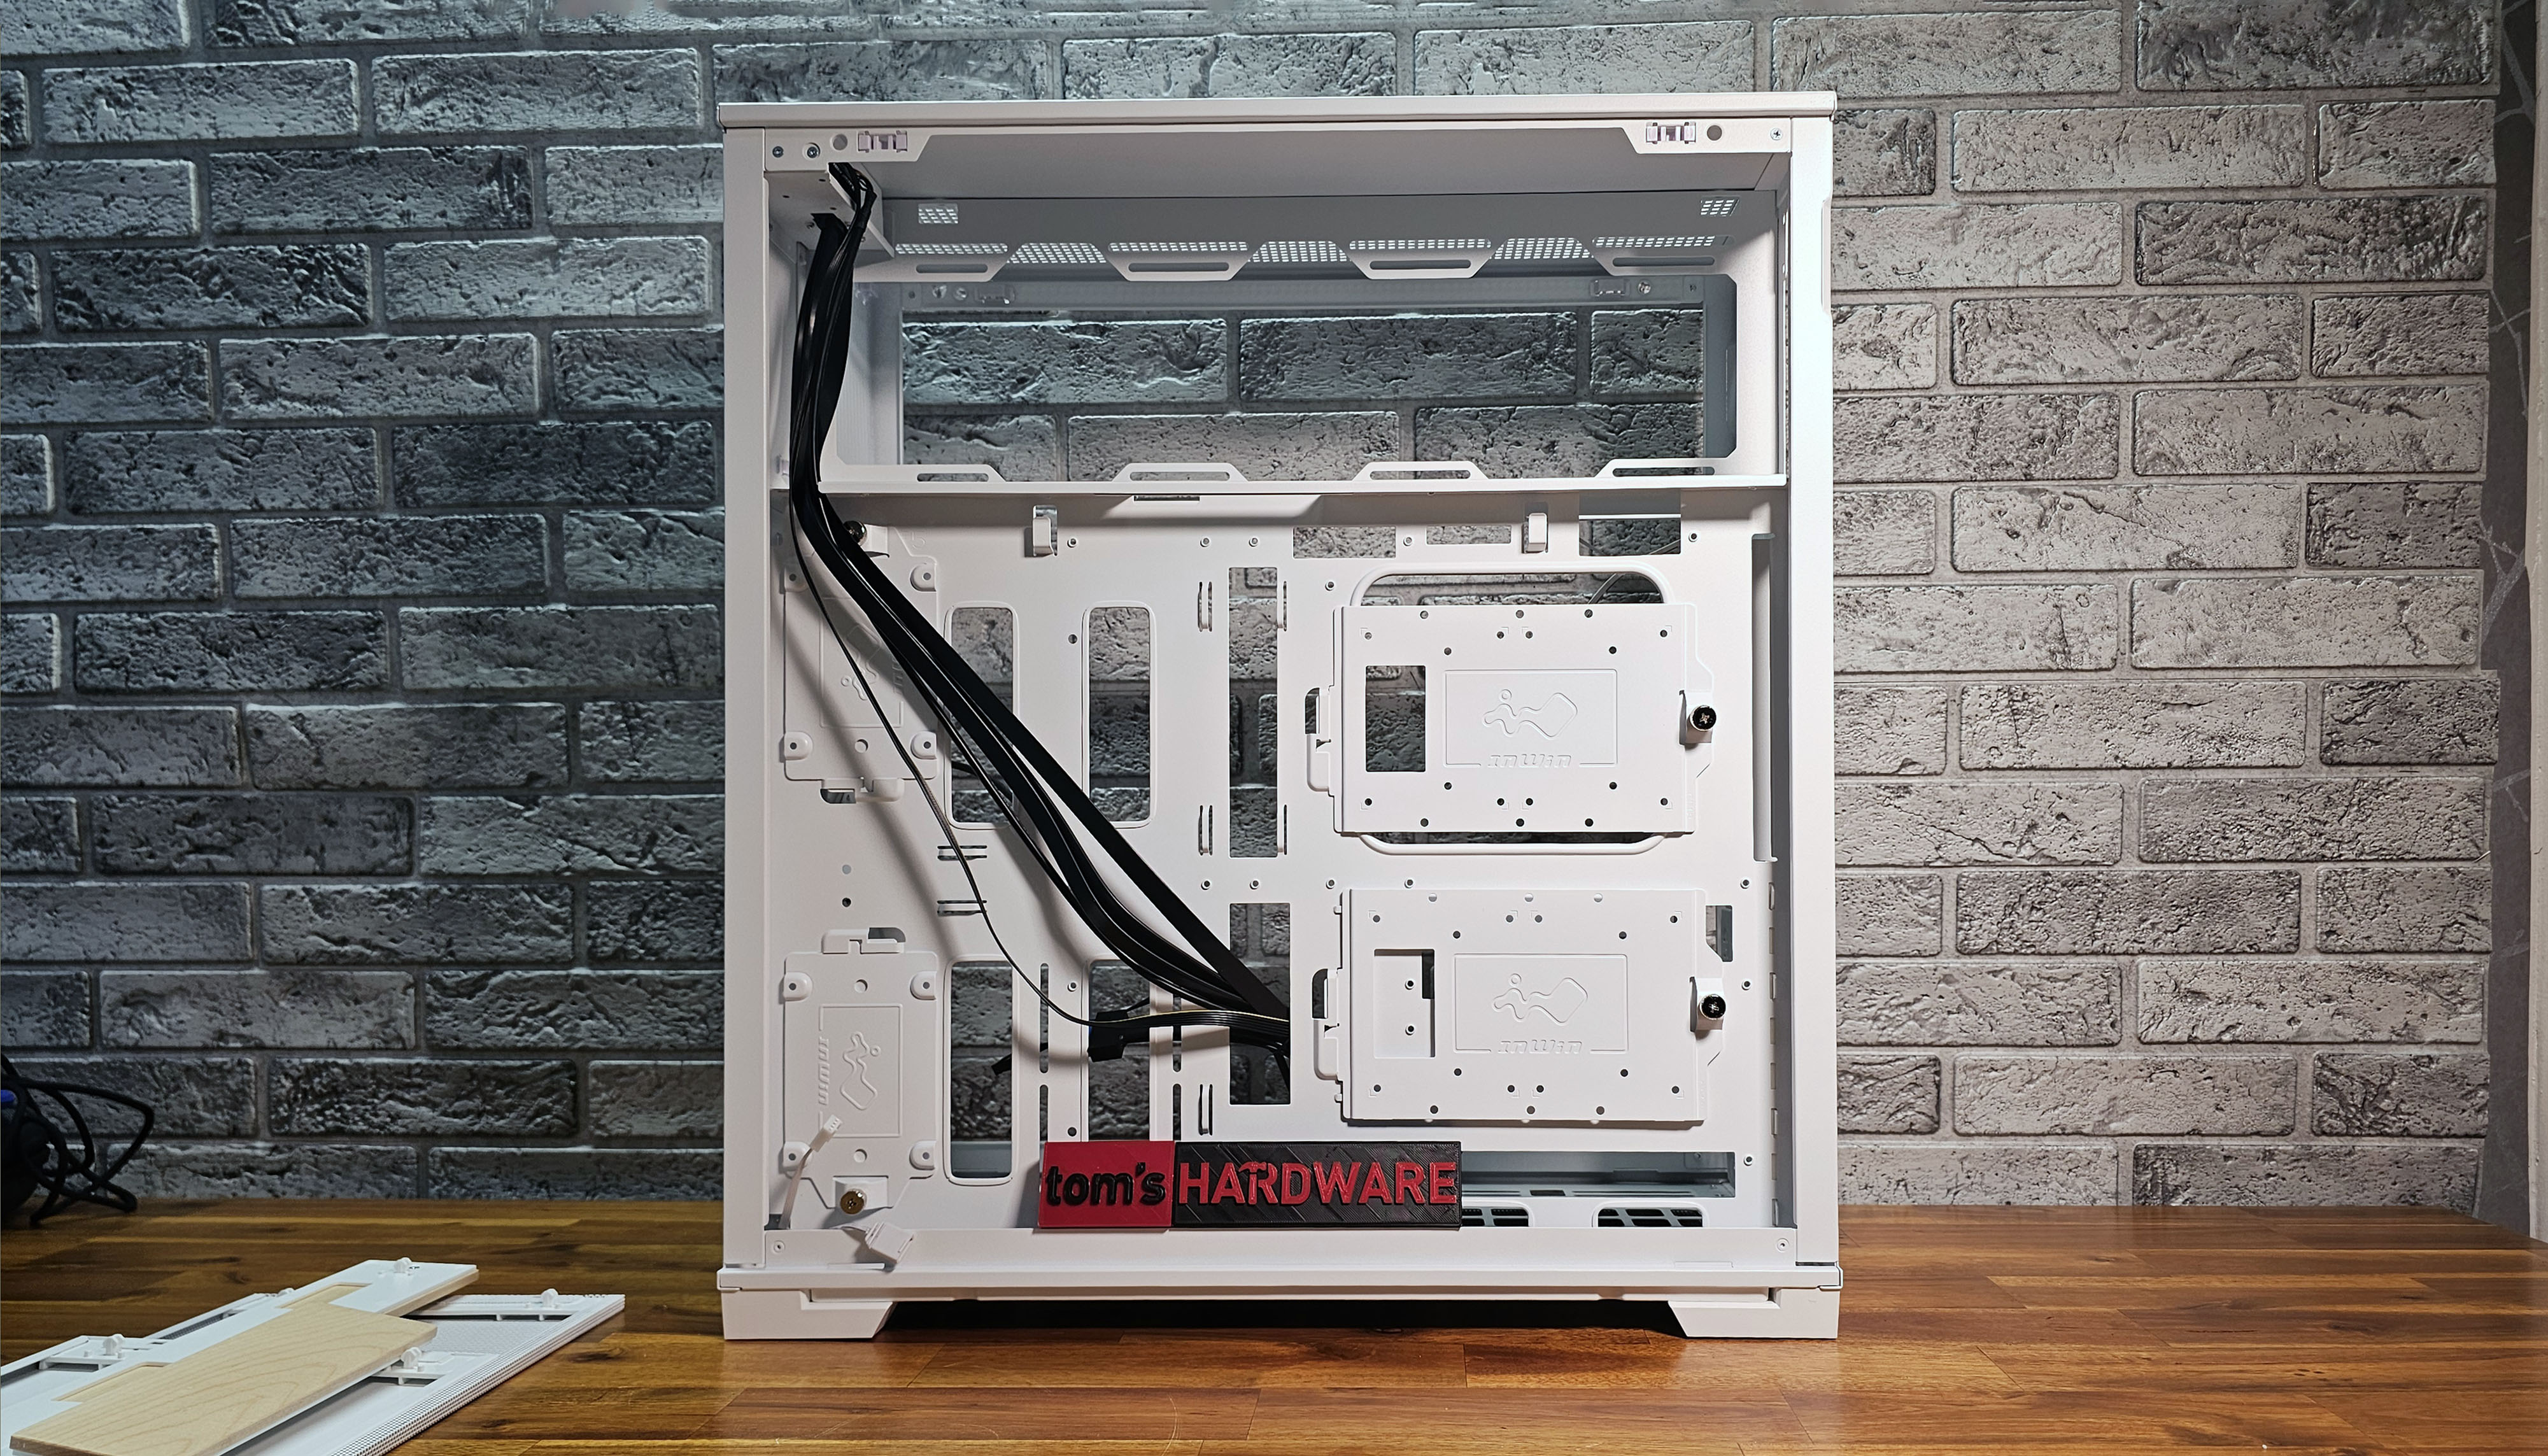
But moving nearly all the cables to the back of the motherboard introduces a few of its own issues. With the F5 specifically, there's only about an inch of clearance behind the board tray, and all connectors and plugs are straight, rather than right-angled. So things like the USB 3 / 19-pin front panel connector and the main motherboard connector make it basically impossible to close the side panel without at least some bulge. And as I discovered most of the way through the build process, when the system suddenly wouldn't power on at all, it's fairly easy to partially unseat the primary motherboard power cable while trying to tie down cable slack. Yes, I could have made the cable mess in the above image at least a little neater if I'd take n more time. But whatever you do, if you're installing a board with rear connectors in this case, you're going to have a hard time keeping them under control.
Top chamber AIO and cable complications
In general, there tends to be extra power connector cable slack when putting together one of these rear-connector builds, because the cables don't have to extend around to the front of the board. And the solution for this on the F5 case seems to be to shove as much as possible into the upper PSU chamber. There's tons of room for it there, but that's also where the heat from an installed radiator gets vented. So having a bunch of messy cables between the radiator and the vented side of the case isn't great for removing heat, and if you install a large radiator up there (360 mm or larger), part of that airflow is already going to be blocked by the power supply.
I installed the 360 mm AIO that InWin supplied in the top portion of the case. I was originally going to install the smaller white 240 mm model from the MSI built, but the top of the F5 case has massive space for up to four 120 mm fans or three 140 mm spinners. So sticking a smaller AIO up there would leave some cables visible from the glass side of the case, as well as the regulatory writing of the sticker on the power supply. In short, as I noted earlier, the F5 case isn't going to look good unless you put a large radiator up top. Even if you put three or four fans up there, they wouldn't accomplish much in terms of cooling, and you'd probably still see the cables behind them. If you care about looks, a big radiator up here is really the only way to go. So factor that expense in if you're considering the InWin F5.
Vertical GPU mounting is an option, as long as you bring your own riser cable
With over 17 inches of clearance, the F5 case should be able to accommodate basically any consumer graphics card. And you can install your card either the traditional way or vertically. If you want to do that latter, as I did here, you'll have to supply your own PCIe riser cable, and remove and rotate the PCIe slot bracket. If you do this, also note that you're left with just one spare slot above and one slot below the graphics card.
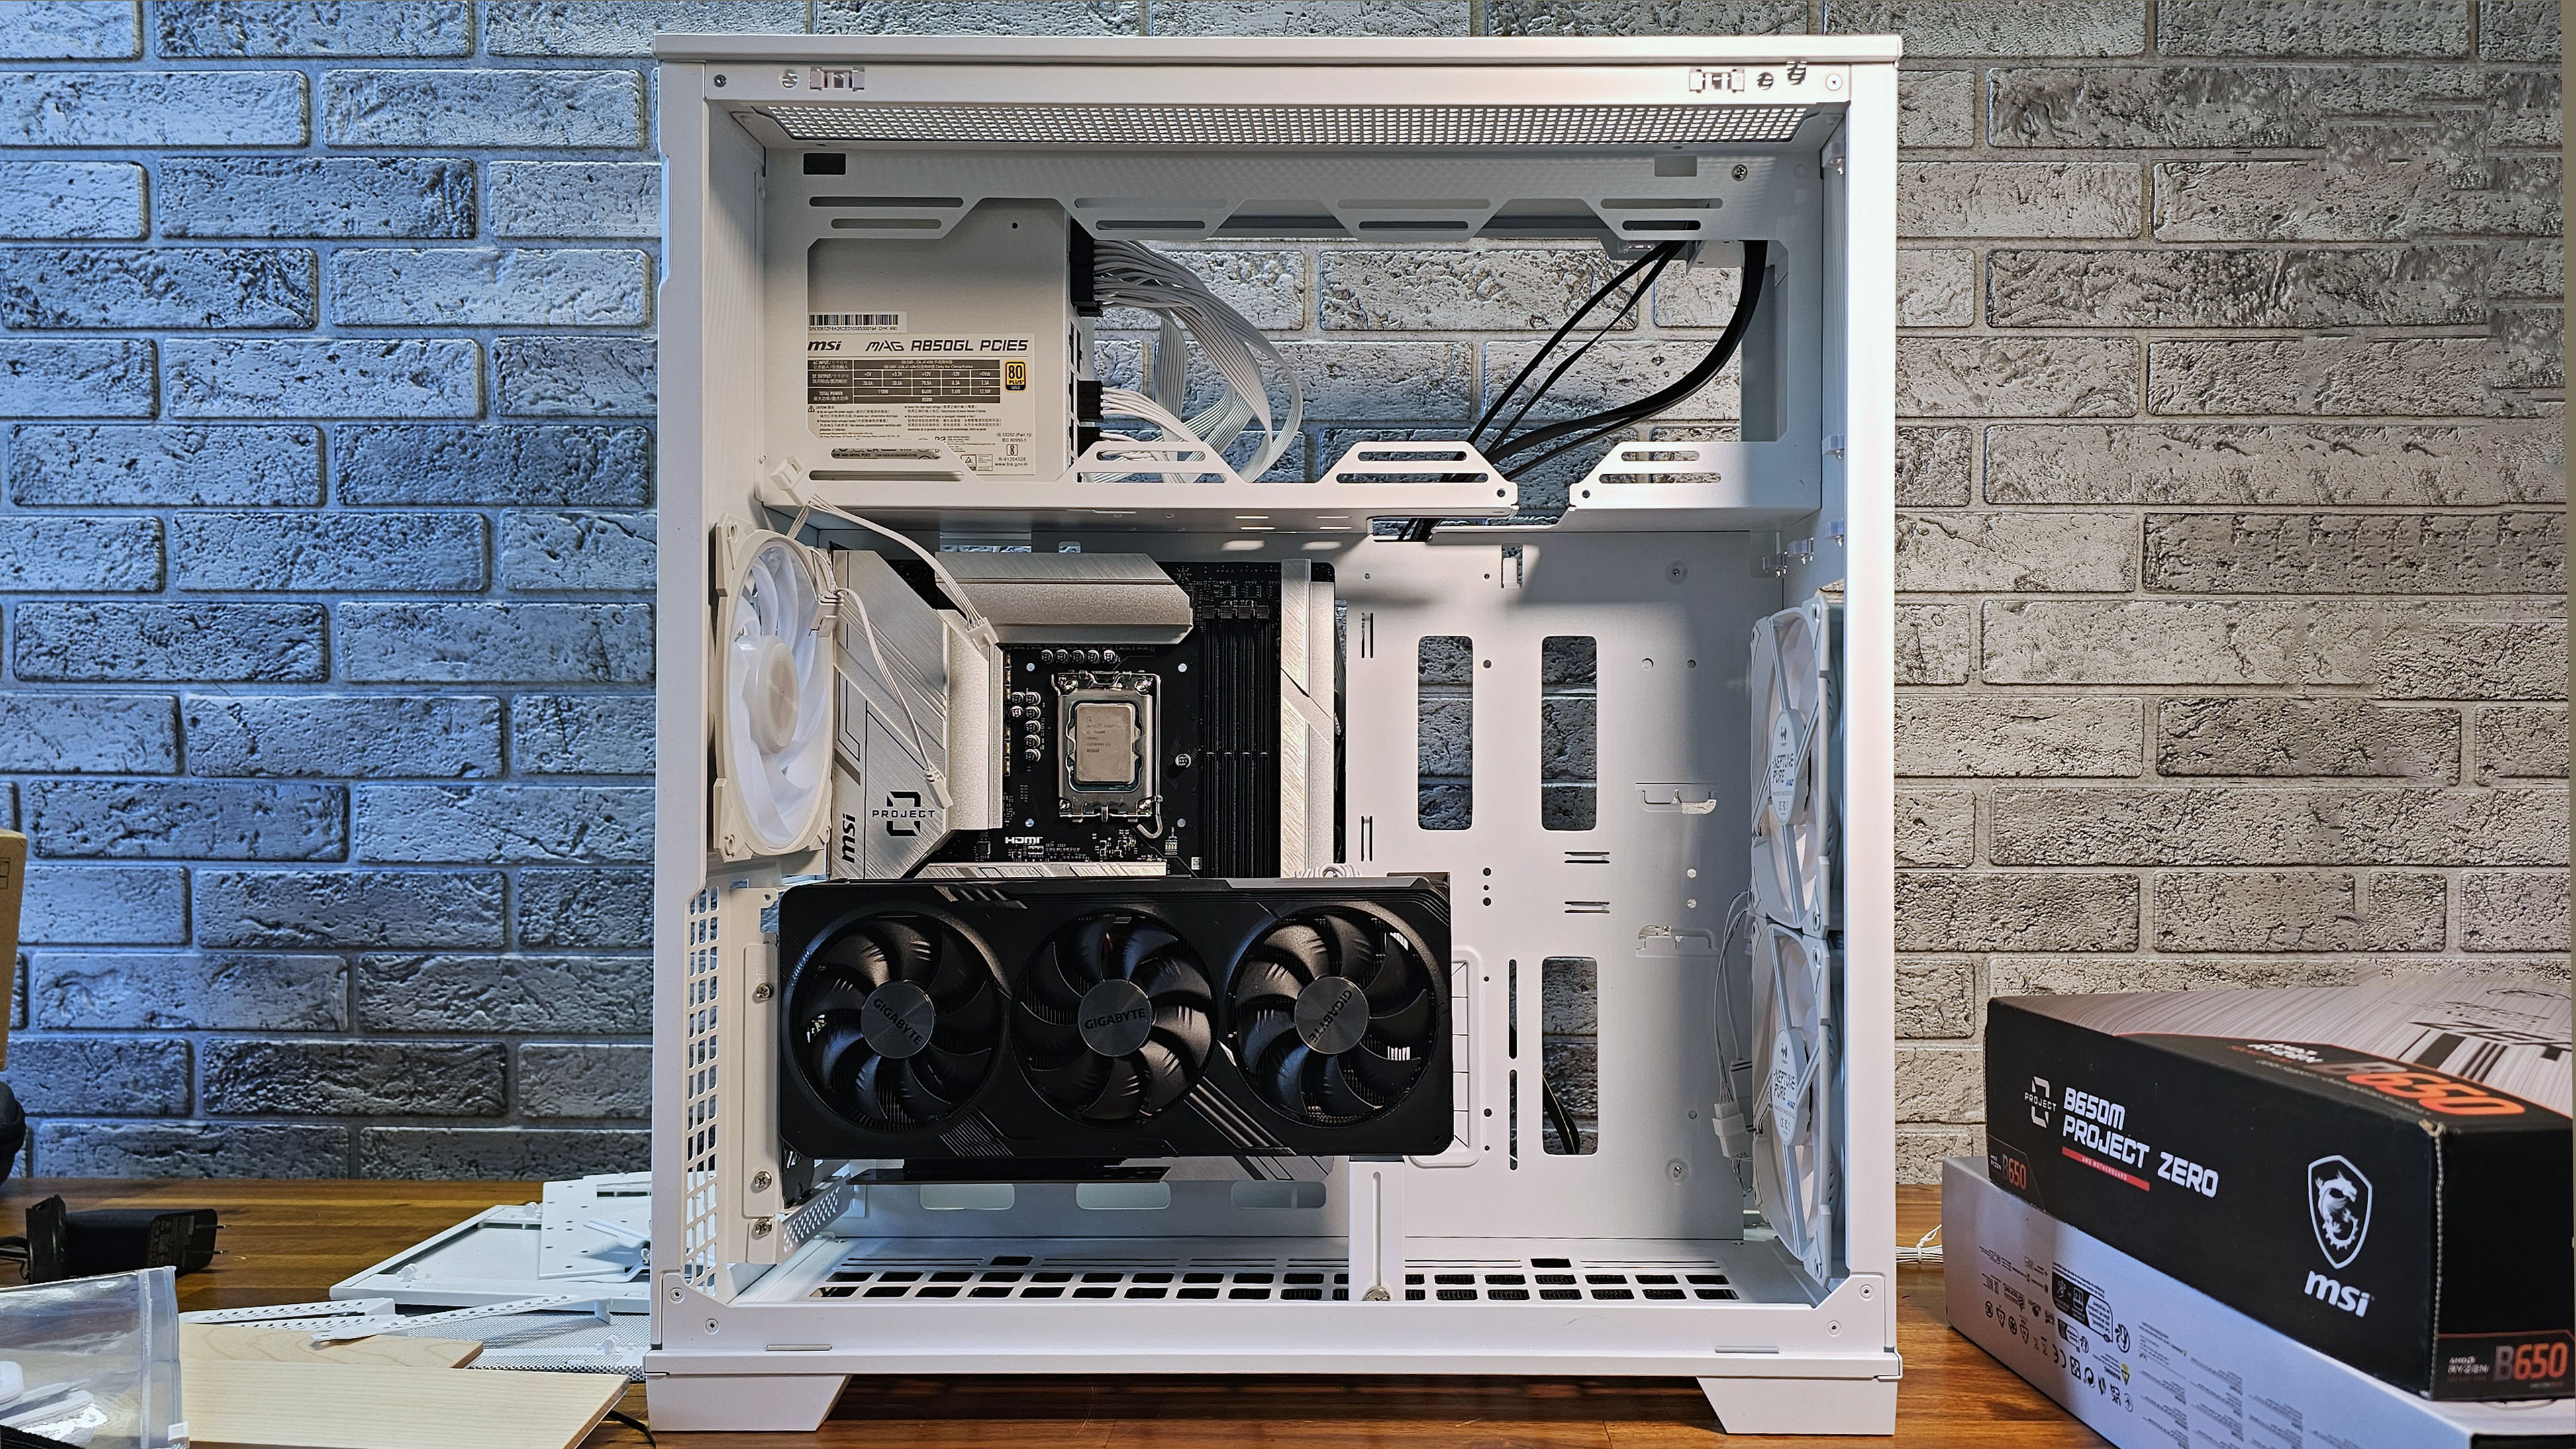
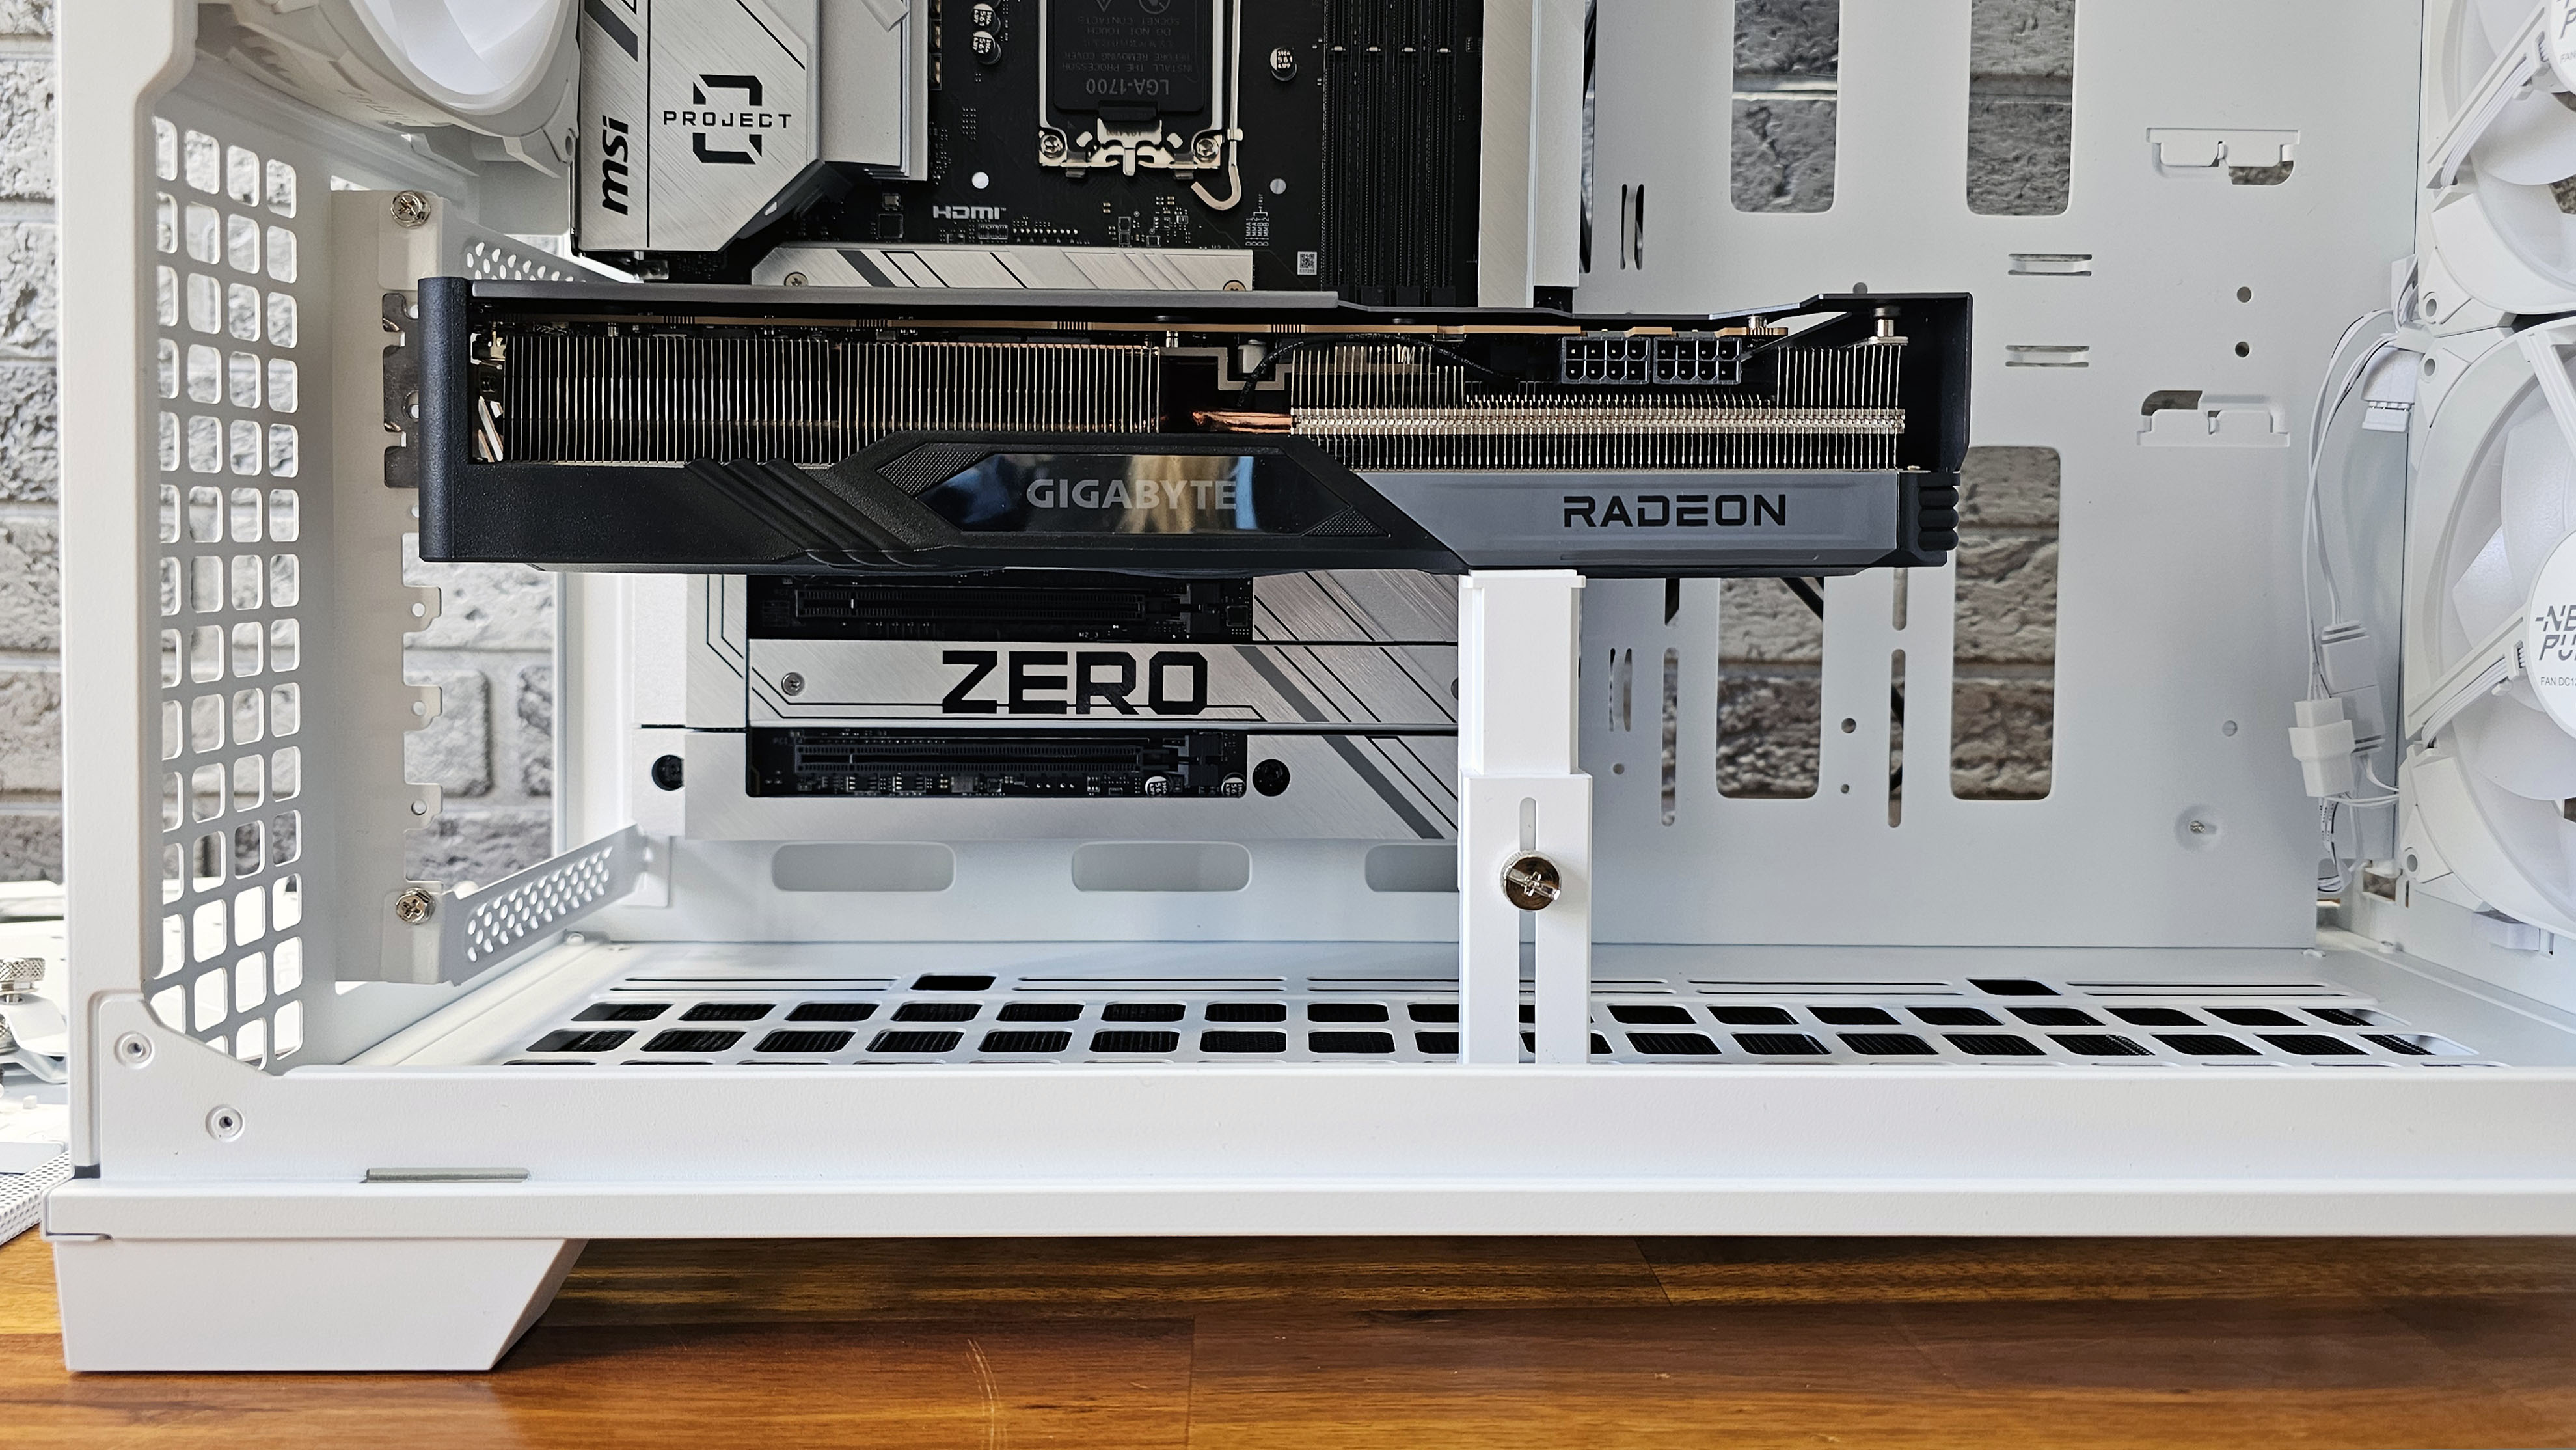
I installed our Gigabyte Radeon RX 7700 XT graphics card both ways, but decided to stick with the vertical orientation because it looks better that way, and this case is largely about looks. InWin does include a magnetic anti-sag bracket with the case. It's a simple device made up of two pieces of plastic clamped together with a thumb screw, with a magnet in its base to hold it in place. But it works, and I found it helped keep our large card level even when it was mounted vertically.
Storage beyond M.2 will complicate cable problems behind the motherboard
The InWin F5 technically offers quite a bit of drive storage, beyond whatever M.2 slots are available on your motherboard. Two large panels that screw into the back of the motherboard tray (on the right in the image below) can house two 3.5-inch hard drives or four 2.5-inch drives. Additionally, smaller removable trays near the front of the motherboard area (visible on the left in the image below) can house two more 2.5-inch hard drives or SATA SSDs.
But even with just M.2 drives connected in this case, there was barely enough room for the necessary wires using our rear-connected build. Routing cables for multiple SATA drives here would make the back of the case even more cramped and cluttered. In particular, running SATA power connectors to multiple points on the back of the case here feels like it would be particularly difficult, due to the inch of clearance and all the cables back here already. Of course, plugging extra drives in would probably be easier if you were using a traditional motherboard, because there would be fewer cables and less slack behind the board. But even then you're still probably going to wish, as I did, that InWin had designed this case with at least another half-inch of clearance at the back.
Finished build thoughts
With the GPU installed, I plugged in all the necessary cables (the F5 has a nice fused block for the front-panel connectors). I then powered the system up and confirmed it was booting into the BIOS and all the fans were working, before powering the system down to do some final cleanup. I spent a few minutes zip-tying some of the many cables up, to at least somewhat improve the air path for the radiator, but there's no way to avoid stashing a bunch of PSU cables up top. I also tried as best I could to hide the cables and connectors from the case fans, as well as the three fans up top on the radiator. There, I was able to remove the top screws of the AIO and at least partially tuck the wires and connectors down behind the radiator so they (mostly) weren't visible from the front.
But the way these fan cables are designed just isn't the best for hiding cables. Even for normal builds, it would be nice if InWin made the daisy chain cables on its fans a little longer. They're handy if you're connecting another fan right next to them, but unattractive and hard to hide when you're not. And despite the daisy chain abilities of the fans, I still had to dig around and find an ARGB header splitter cable. Because the MSI motherboard only has two headers, and with the case fans in the front and back, plus the fans on the radiator, I needed three plugs for the fan lights.
Conclusion
When it comes to its use for rear-connector (MG-RC) motherboards, the InWin F5 offers up plenty of room for improvement. And that isn't that surprising considering how new these kinds of motherboards are. The InWin F5 design was almost certainly retro-fitted to be compatible with these new kinds of boards, rather than designed for them from the beginning. I'd like to see fans with longer initial leads on their daisy chain cables, more room at the back for all the cable clutter that comes with moving so much business to the back, and possibly cutouts for Micro ATX motherboards as well as ATX and ITX. It's unclear, though, if that last request would make the back panel too flexible and prone to bending or breaking.
Those issues aside, the F5 is an attractive case that feels solid and has a fair amount of GPU, cooling and storage configurability. The three included 140 mm RGB fans also look good while moving a lot of air without making too much noise. The F5 is probably better suited to builds with traditional motherboards with connectors on the front, though. That way, the limited space behind the board wouldn't be such an issue. Just be sure to factor in the cost of a large radiator to mount up top. Because without one, no matter which kind of motherboard you use, you'll be staring at a big hole, some PSU cables, and whatever other wires you have to stash in the large top chamber. This case is definitely designed for builds with large radiators.
MORE: Best PC Cases
MORE: Best Mini-ITX Cases
After a rough start with the Mattel Aquarius as a child, Matt built his first PC in the late 1990s and ventured into mild PC modding in the early 2000s. He’s spent the last 15 years covering emerging technology for Smithsonian, Popular Science, and Consumer Reports, while testing components and PCs for Computer Shopper, PCMag and Digital Trends.
-
strobolt Does this thing have side panels? In all pictures it seems both side panels are off so makes me wonder if they're included at all...Reply -
envy14tpe Saw this at Computex and have been waiting for production. The one question is...does the bottom support rad with vertical GPU. This might be make or break for me.Reply -
islandwalker Reply
I have just measured and there is just barely two inches of clearance between bottom of the case and the riser cable plug. So depending on the radiator and fans you plan on using, it might JUST fit (especially if you opt for slim fans), but I wouldn't assume it would fit or perform particularly well if you managed to get a radiator in there with a vertical GPU.envy14tpe said:Saw this at Computex and have been waiting for production. The one question is...does the bottom support rad with vertical GPU. This might be make or break for me. -
envy14tpe Reply
Thanks for doing that. I'm assuming fan and rad are 30cm + 28, so it looks sad for normal fans. I don't remember any slims with rgb. Nonetheless, I'm pretty set on it, for GPU and CPU loop.islandwalker said:I have just measured and there is just barely two inches of clearance between bottom of the case and the riser cable plug. So depending on the radiator and fans you plan on using, it might JUST fit (especially if you opt for slim fans), but I wouldn't assume it would fit or perform particularly well if you managed to get a radiator in there with a vertical GPU.
I wish I had an In Win rep I could ask about this. Honestly I think it is a major question these days...can it support liquid cooling while vertical. -
MyXPC Cable of Water Cooling is still the ugly unsolved issue back-to-back does not bring a solution to.Reply -
Notton Reply
The tubing? I thought that was supposed to be cool when exposed, kind of like exhaust pipes turbo chargers.MyXPC said:Cable of Water Cooling is still the ugly unsolved issue back-to-back does not bring a solution to.
I guess you can put the CPU on the backside of the mobo, like some companies already do. -
MyXPC Reply
Indeed tubbing of AIO.Notton said:The tubing? I thought that was supposed to be cool when exposed, kind of like exhaust pipes turbo chargers.
I guess you can put the CPU on the backside of the mobo, like some companies already do.
Some are masking the best of the hardware.
But also slightly cut the case airflow. -
pixelpusher220 The thermals have to be seriously affected by the case. Maybe if you put the top radiator forcing straight up. That upper left corner just begs for an exhaust fan.Reply
