The Sytrin SHF1 Hard Drive Cooler
Installation

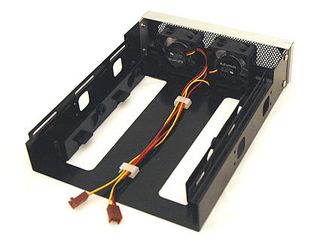
The SHF1 before hard drive installation
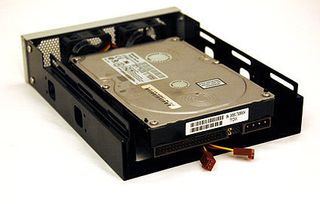
Installation is very simple. The SHF1 suspends the hard disk on two rails connected to four rubber grommets to dampen vibration. The hardest part is squeezing the drive between the tight grommets, but it's really not very difficult. Once it's in, simply insert and tighten the four screws to fasten the drive to the rails.

The SHF1 with a 3½" hard drive installed
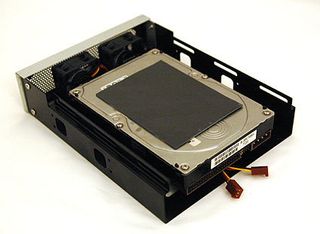
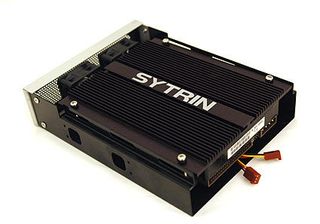
Next, peel the protective film off of the sticky thermal pad, and apply it to the top of the drive. With the thermal pad on, the heatsink can now be screwed on to the top of the unit with four long screws, tightly enough to ensure good heat transfer but not so tight as to stress the drive. With this step complete, the hard drive installation for the SHF1 is complete.

The thermal pad placed on the hard drive...

...and then the heatsink is screwed on, completing the install
In most cases, this is all the preparation required before the SHF1 is installed. However, the SHF1 has extra brackets for additional configuration options if the user wants to provide even more cooling than the two fans that come with the SHF1 offer. They could also accommodate a second drive. The option to expand the unit's usability is very nice, but it does require more fans than the SHF1 ships with, so we will concentrate on using the unit with a single hard disk.
Stay on the Cutting Edge
Join the experts who read Tom's Hardware for the inside track on enthusiast PC tech news — and have for over 25 years. We'll send breaking news and in-depth reviews of CPUs, GPUs, AI, maker hardware and more straight to your inbox.
With the hard drive installed, the SHF1 simply needs to be slipped into a 5½" drive bay. If active cooling is desired, the final touch is to attach the fan power leads to a single molex connector off of the power supply, and the SHF1 is good to go.

The SHF1 installed in the ATX case, running and with illuminated fans
It is important to note that when the SHF1 is running, the two 40 mm fans are so quiet that I couldn't really tell if they added to the ambient noise of the case or not. There's really no reason to operate the SHF1 passively as the fans certainly don't make any racket when they're powered up.
Most Popular

