How To Back Up Your Data in Windows
Back up your PC data using the free built-in tools in Windows OS.
Get Tom's Hardware's best news and in-depth reviews, straight to your inbox.
You are now subscribed
Your newsletter sign-up was successful
Windows offers multiple built-in methods to back up your PC so you don't lose your precious data files in the event of a hardware failure or accidental erasure. But choosing a backup plan without knowing its pros and cons is a recipe for disaster. Not all backup methods on Windows are created equal, and each has a specific use case.
If you want to keep a backup of your entire drive so that you can restore everything – the OS, the apps, the settings and the data – onto a replacement disk, see our article on how to make a full system image backup in Windows. However, for regular backups, it’s often preferable to keep copies of your data files only.
Microsoft bundles three types of backup solutions for a Windows PC: Backup & Restore, File History, and OneDrive (Cloud Backup). The first two do not require an internet connection, while cloud backup with OneDrive needs an active internet connection to work properly. We will discuss each in detail to help you clearly understand them. Let's begin.
Back Up Your PC Using File History
Microsoft introduced File History in Windows 8 to offer a slightly better backup solution for personal files. Unlike the old Backup and Restore feature (see below), it can preserve older versions of files so you can go back to an earlier draft of a document or an earlier version of your code. By default, File History only saves the data in the User's folder, including Downloads, Videos, Documents, Music, Desktop, OneDrive files, and more folders. So, all the folders that contain your personal data on the C: drive are safe and backed up every hour.
You must use an external hard disk for File History because it automatically backs up files every hour. So, you will have multiple backup versions of personal files, which requires more storage space.
Unlike the Backup and Restore feature, File History stores the files in an unencrypted format. It doesn't create a big single archive file and stores and creates folders. So, you can use File Explorer to view, copy, and modify any file or folder inside the FileHistory folder on the external hard drive. Or, you can use the Restore personal files option on the Control Panel's File History page.
To use File History on your Windows PC, repeat the following steps:
Get Tom's Hardware's best news and in-depth reviews, straight to your inbox.
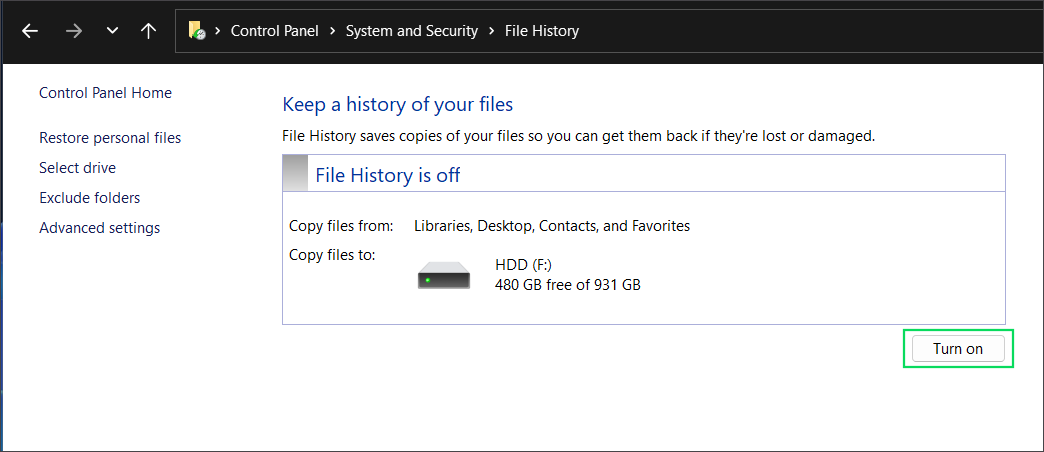
1. Navigate to Control Panel->System and Security->File History.
2. Click the Turn On button to enable File History. It will begin copying the files to your external hard drive and will do so every hour.
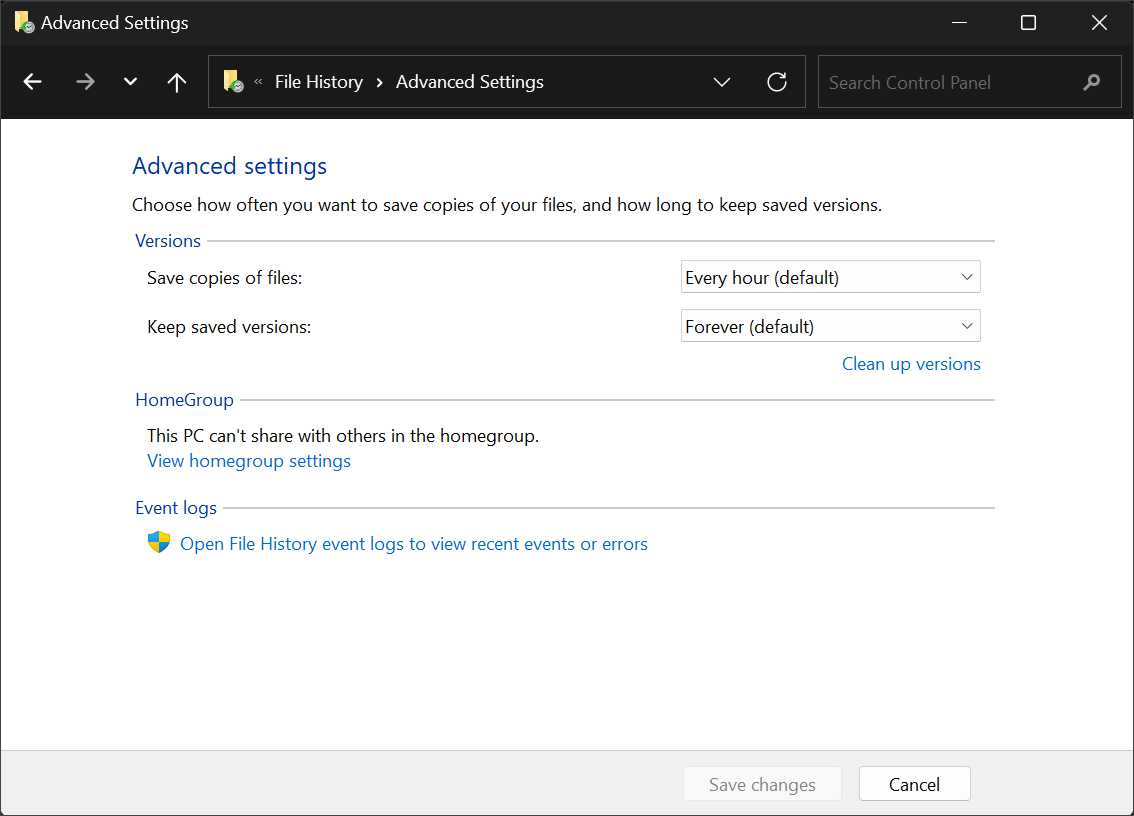
You can change this schedule by clicking Advanced Options to alter the backup frequency and deleting old copies.
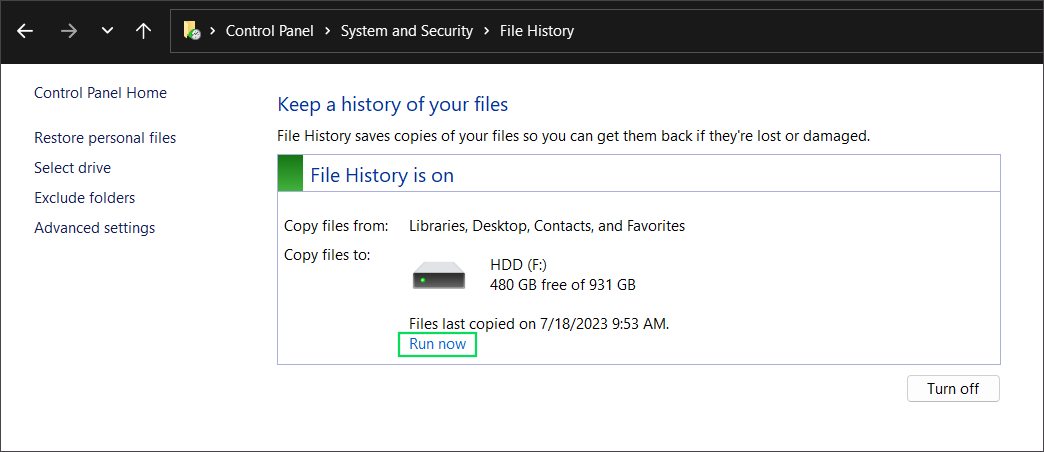
3. Click the Run now button to force create a file backup anytime.
File History is great for preserving the data in the C:\users\ folder but ignores the data on other locations and drives. You can manually add folders to the Library folder using File Explorer to force File History to back up those too.
Back Up Your PC Using OneDrive
Microsoft's OneDrive is now deeply integrated into Windows 11. You can back up the User folder and your system preferences, settings, and apps using a Microsoft Account on your Windows PC. This approach will help you save your crucial files in the cloud and sync them across all the devices signed in with the same Microsoft Account.
It is also useful while reinstalling Windows or setting up a new PC because you can sign in with the same Microsoft Account. The setup will configure Windows to use all the previous settings and preferences, and you can reinstall all the Microsoft Store apps in one click.
To use OneDrive on your Windows PC, repeat the following steps:
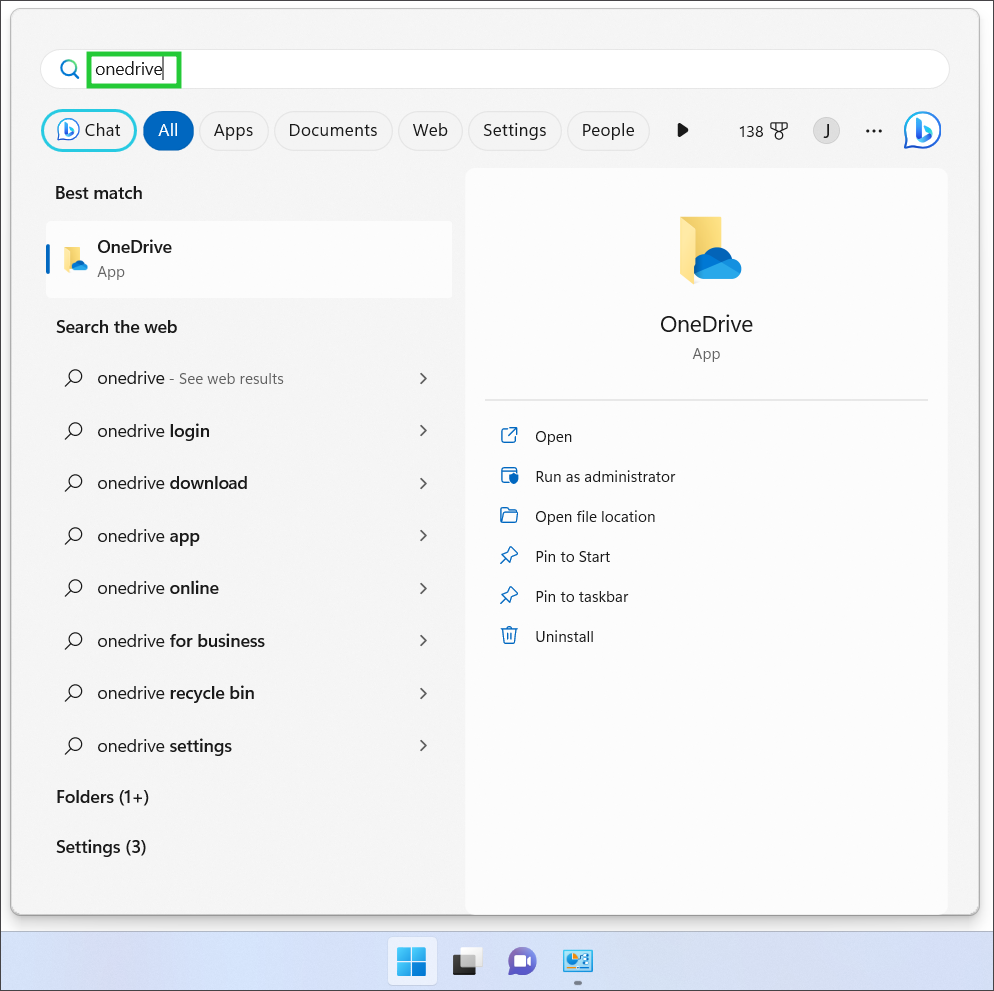
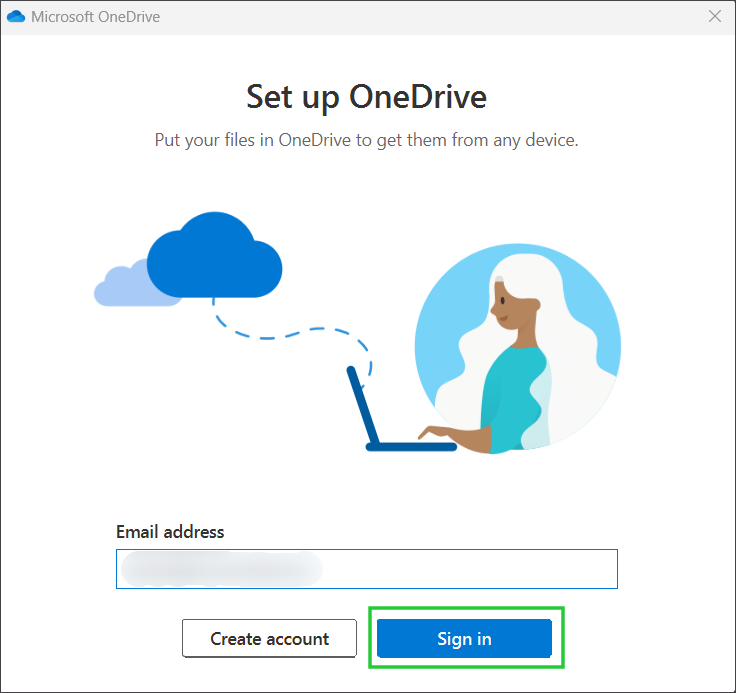
1. Launch OneDrive. You can do this by searching "OneDrive" in the Start menu and pressing the Enter key.
2. Sign in using your OneDrive email address or Create a new Account.
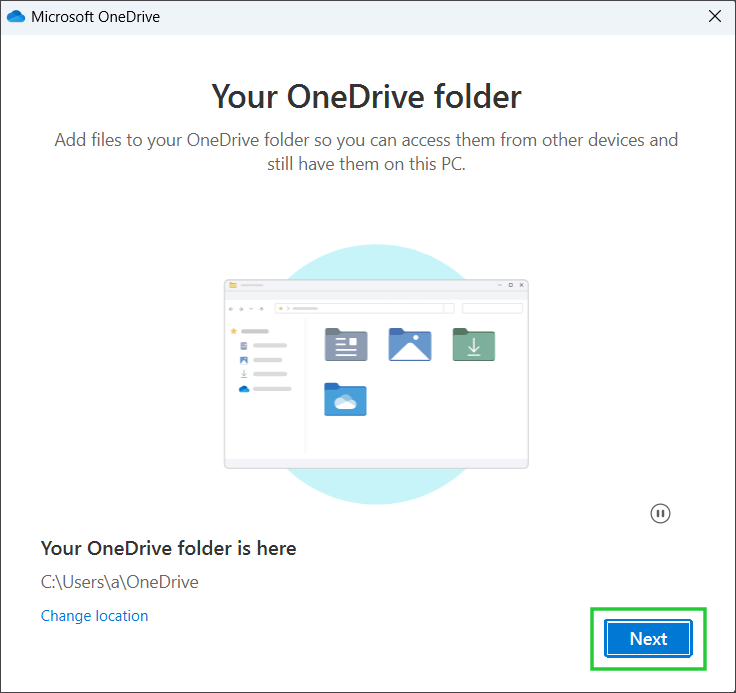
3. Click Next.
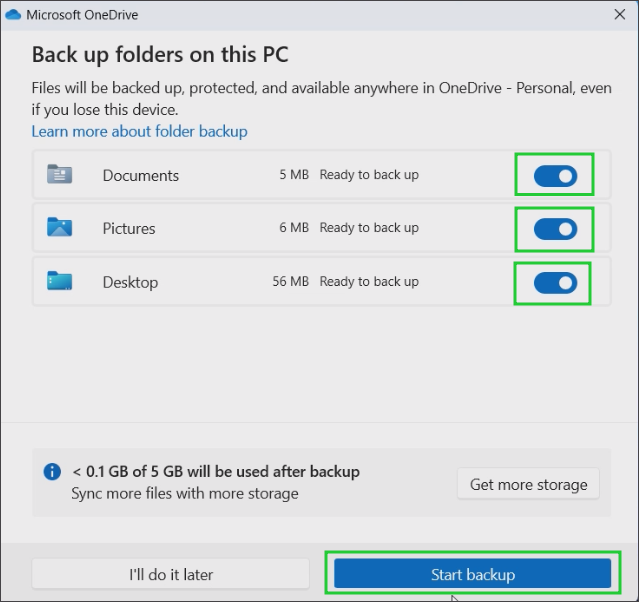
4. Enable the toggles of all folders you want OneDrive to back up. Click the Start backup button.
By default, it adds only the Documents, Desktop, and Pictures folders, but you can add more folders afterward. Wait for OneDrive to upload all the folders. Click Next repeatedly.
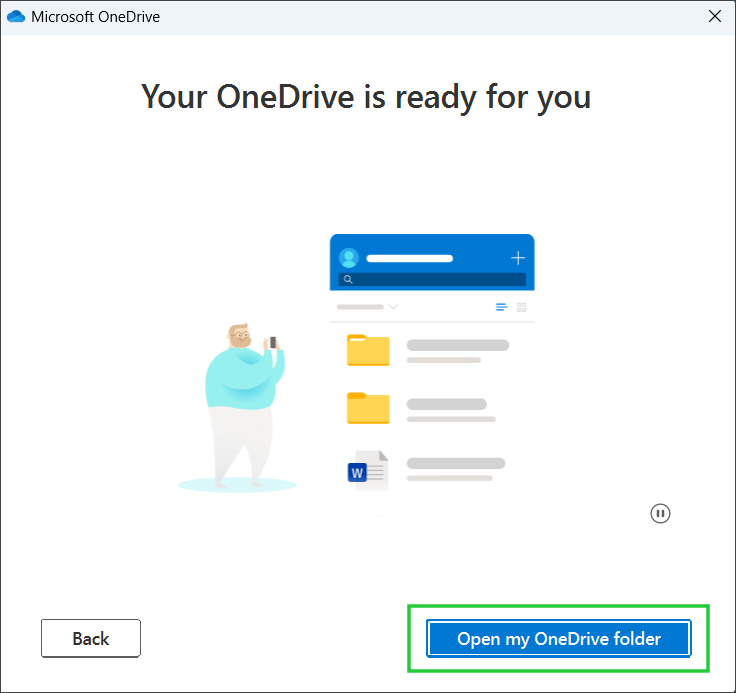
5. Click the Open my OneDrive folder button to view all the uploaded files of OneDrive in File Explorer. If you want to add more folders, drag and drop any folder to the OneDrive folder.
OneDrive is useful because you rely on cloud storage and can access your files with or without a Windows PC. But it requires a decent internet connection with ample bandwidth to upload files. It cannot save your installed programs and has a meager 5GB storage limit in the free tier. You can upgrade to get 1TB of cloud storage, but compared to the other two Windows backup options, you will have to pay for it.
Back Up Your PC Using Backup and Restore
Backup and Restore is a legacy backup option in Windows which still exists in the Control Panel. It was designed for Windows 7, but still is available and works in Windows 11. You can use it to either back up your data folders or create a full system image you can restore from if your boot drive fails. However, we recommend using third-party disk imaging software for a complete image and employing Backup and Restore for your files – perhaps all the content of your Document, Photos, Video and Music libraries.
Backup and Restore lets you save the data from all internal drives on an external drive (perhaps one of the best external SSDs) or a USB Flash Drive. The latter will only be useful for small files with a slow copying speed. We recommend you use an external hard drive that can accommodate bigger backups.
Another great thing about the Backup and Restore option is that you can schedule automatic backups. It detects changes in files and saves the newer ones as well. Backup and Restore will create three files: a Windows backup file, a mediaID.bin file, and a "WindowsImageBackup" folder. The size of the Windows backup file depends on the data stored in C and other drives and can be more than 3 GB. The "WindowsImageBackup" folder is about 11 GB.
You can view and restore the contents stored inside the backup file using the Restore option on the Control Panel's Backup and Restore page. Restoring a particular file, folder, or even a drive is possible. However, you cannot view or modify the files and folders inside the backup file directly using File Explorer due to the encrypted nature of the backup.
To use Backup and Restore on your Windows PC, connect the external hard disk to your PC and repeat the following steps:
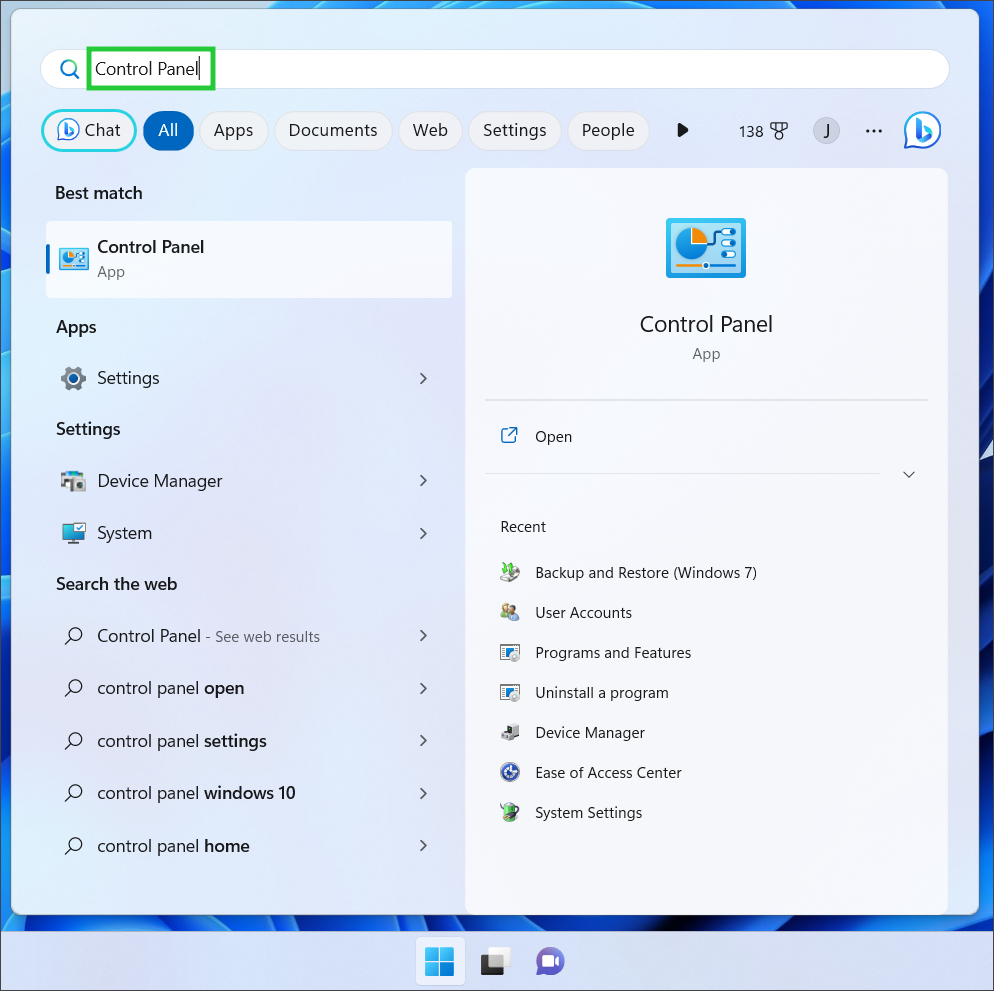
1. Open Control Panel. The easiest way to do so is by searching for "Control Panel" using the Start menu or Windows Search and clicking on the first relevant search result.
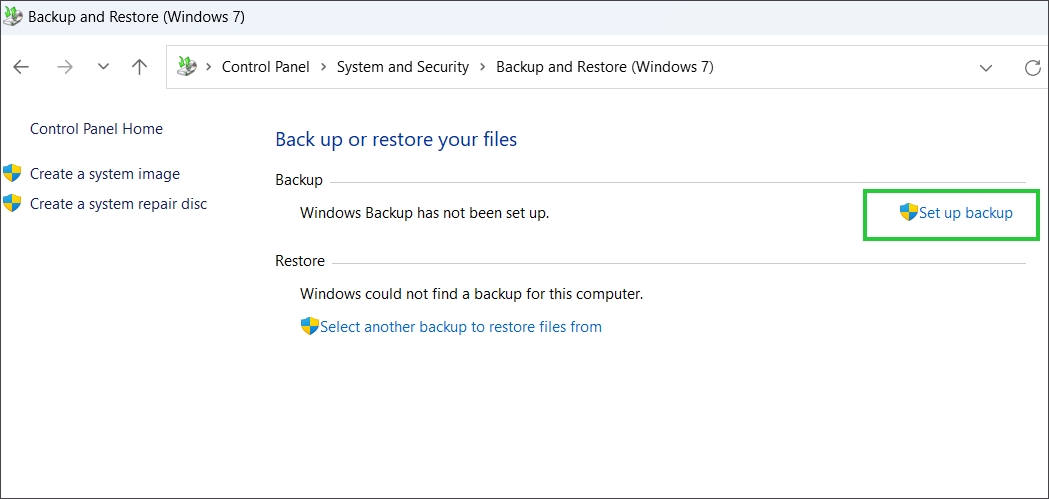
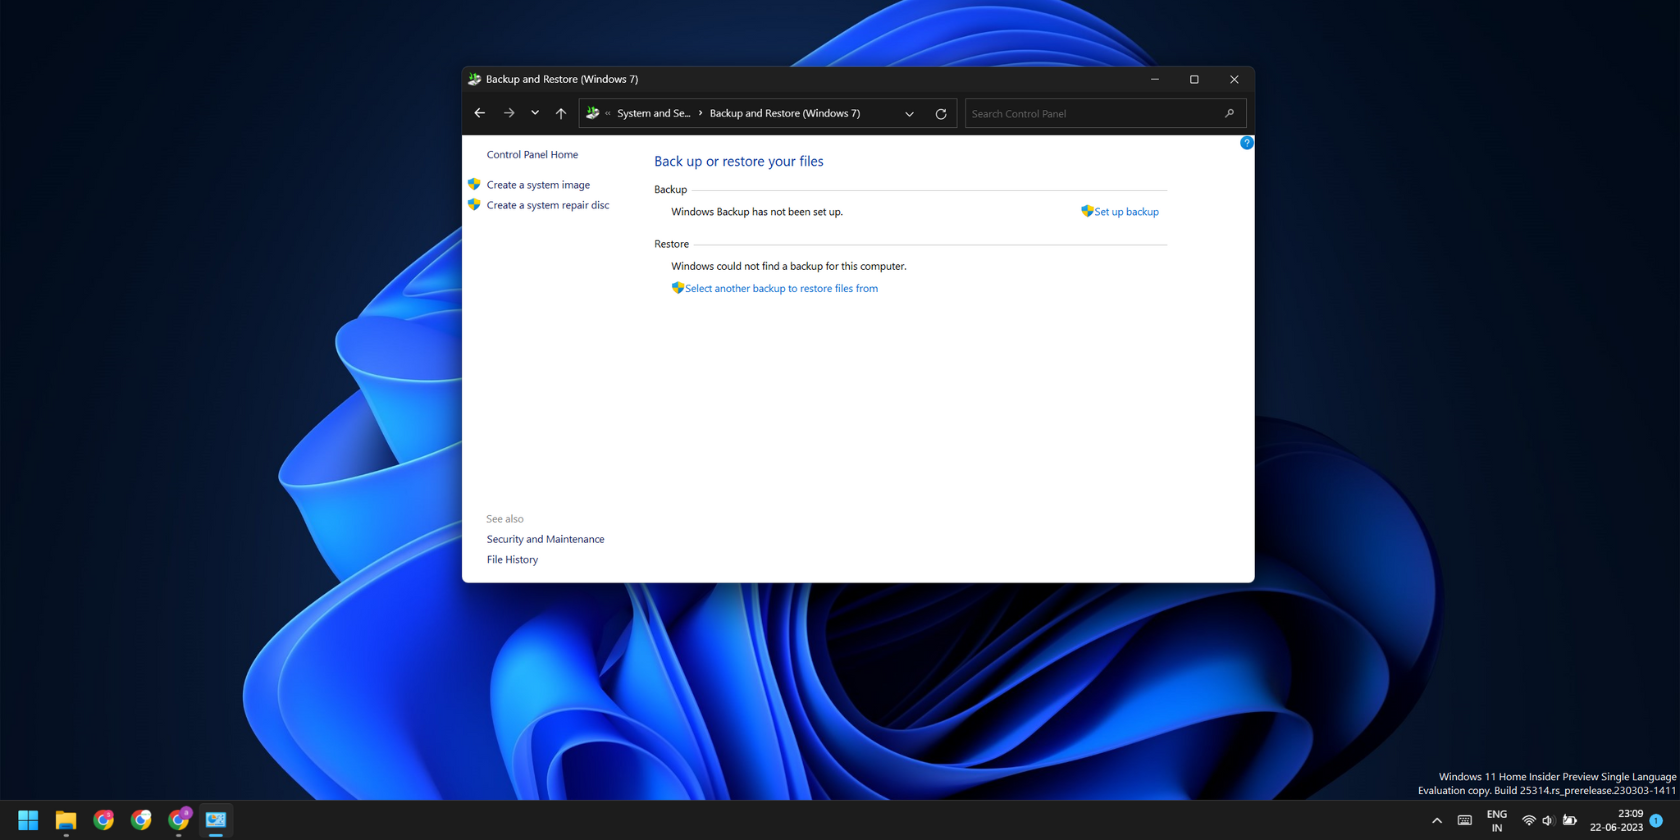
2. Navigate to System and Security->Backup and Restore (Windows 7).
3. Click the Set up backup option.
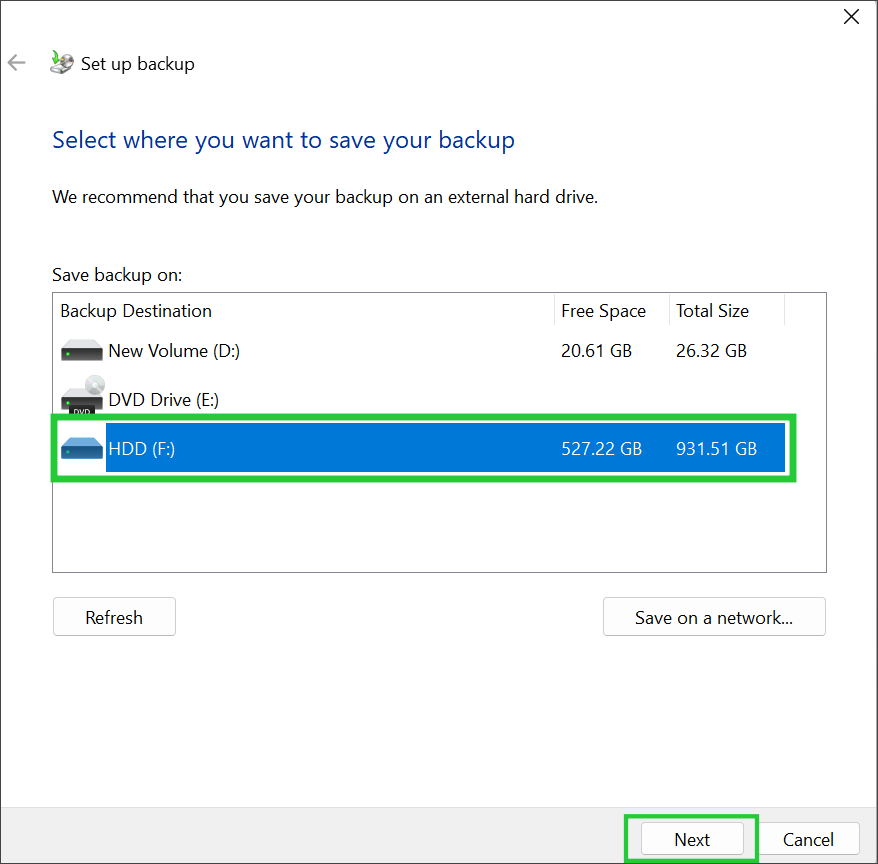
4. Select the external hard drive name from the list and click Next.
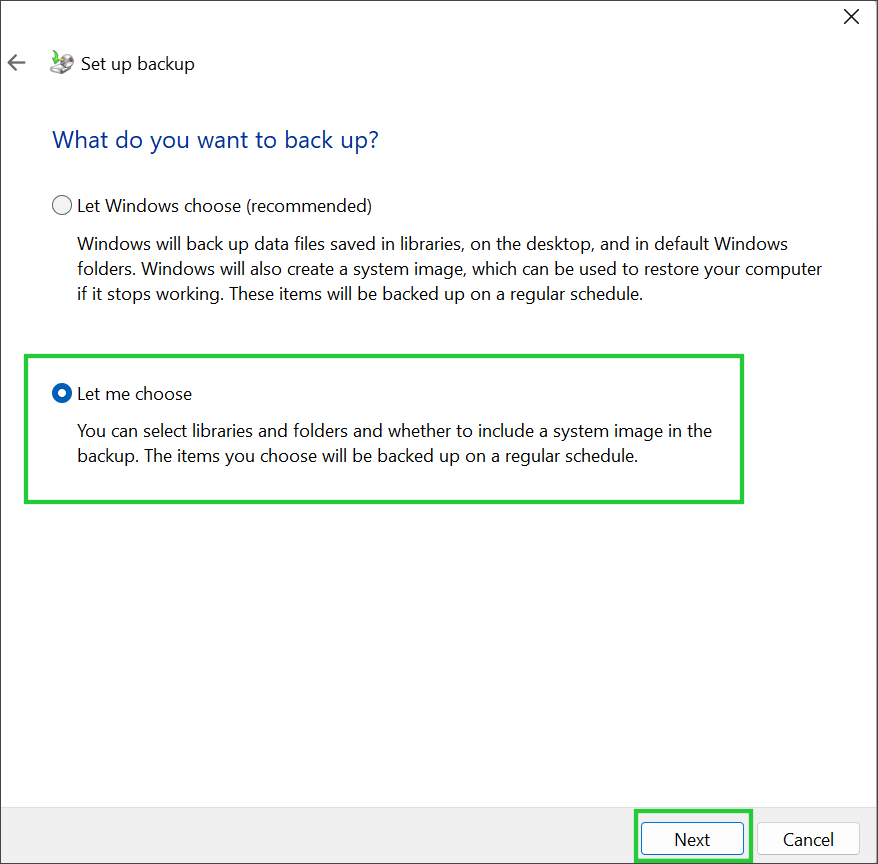
5. Click the Let me choose radio button to personally select all the files you want to backup from the C drive and other drives. Click Next.
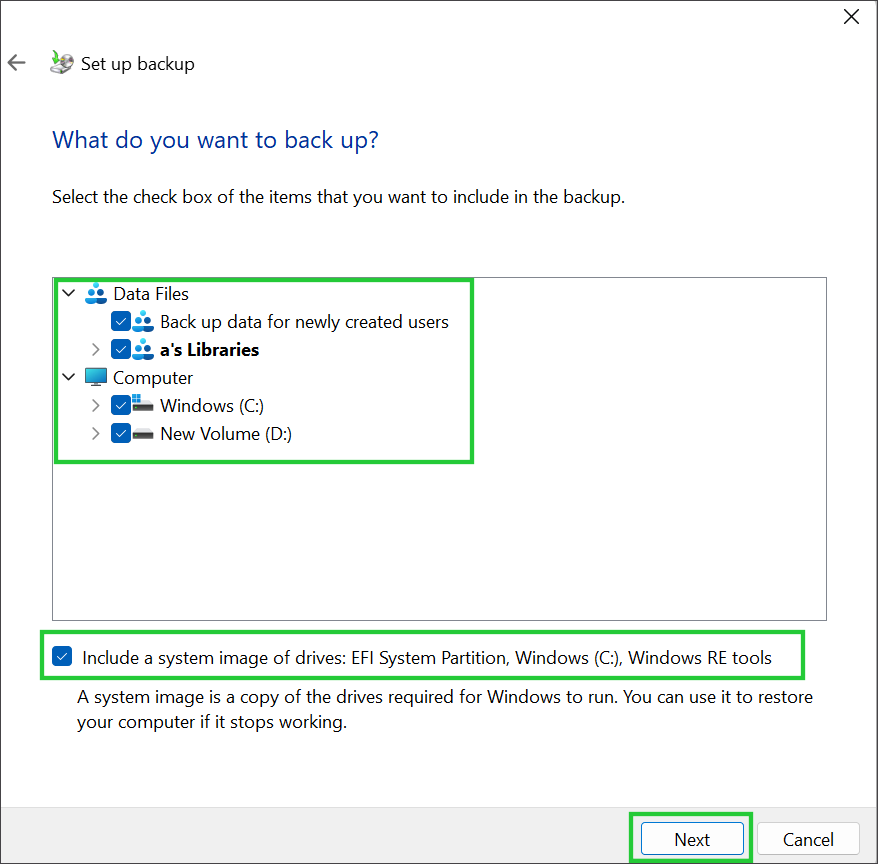
6. Select the C drive and other drives. Keep the Include a system image of drives: EFI System Partition, (C:), Windows RE tools checkbox selected, and click Next.
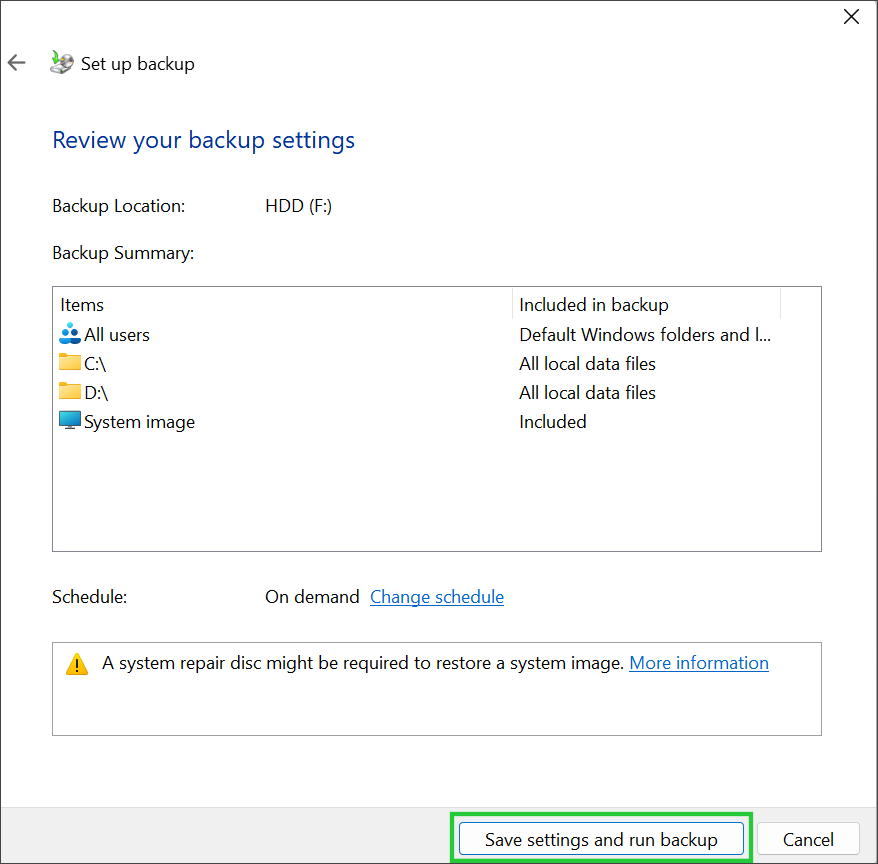
7. Click the Save settings and run backup button.
By default, Windows will run an automated backup every Sunday at 7:00 PM. We recommend you go with the default settings unless you handle a lot of new important files daily. To change this schedule, click the Change schedule button and pick the backup's preferred day, frequency, and time.
Always keep the external hard drive connected to your PC all the time or on the scheduled backup date, never to miss an automatic update. You can restore individual files or folders whenever you need using the Backup and Restore section in the Control Panel. If your PC encounters a major issue, you can use the system image backup to restore all its drivers, files, and installed programs in a few clicks.
The legacy Backup and Restore feature with scheduled backups is a decent option if you run into an issue. File History is useful for preserving personal files and saving multiple versions. Lastly, OneDrive paired with appropriate Windows 11 backup settings can benefit while reinstalling Windows 11.
Abhishek Mishra is a freelance writer for Tom's Hardware. He specializes in Windows, crafting guides and explanatory articles.
