How To Make a Raspberry Pi Pico W Resistor Clock
Decode Resistor Color Codes to Tell the Time
Resistor color codes are an essential part of maker education. The color code system has been in continuous use since the 1930’s and was introduced by the Radio Manufacturer’s Association as a compact method for marking numerical values on small components. The code contains only 10 colors, but it can still be a challenge to remember their values unless you use them every day.
This project helps you use the resistor code every day to tell the time, and uses a Raspberry Pi Pico W to connect to an NTP (Network Time Protocol) server over Wi-Fi for the current time. Once this is done, the Pico W uses the WS2812B Neopixel strip to display the current time as resistor code colors. By looking at the code in action every day, you will soon be decoding resistor values faster in your sleep!
For this project you will need
- Raspberry Pi Pico W
- Adafruit NeoPixel Stick - 8 x 5050 RGB LED with Integrated Drivers
- ND Black tinted plastic, or a piece of clear acrylic and a black sharpie
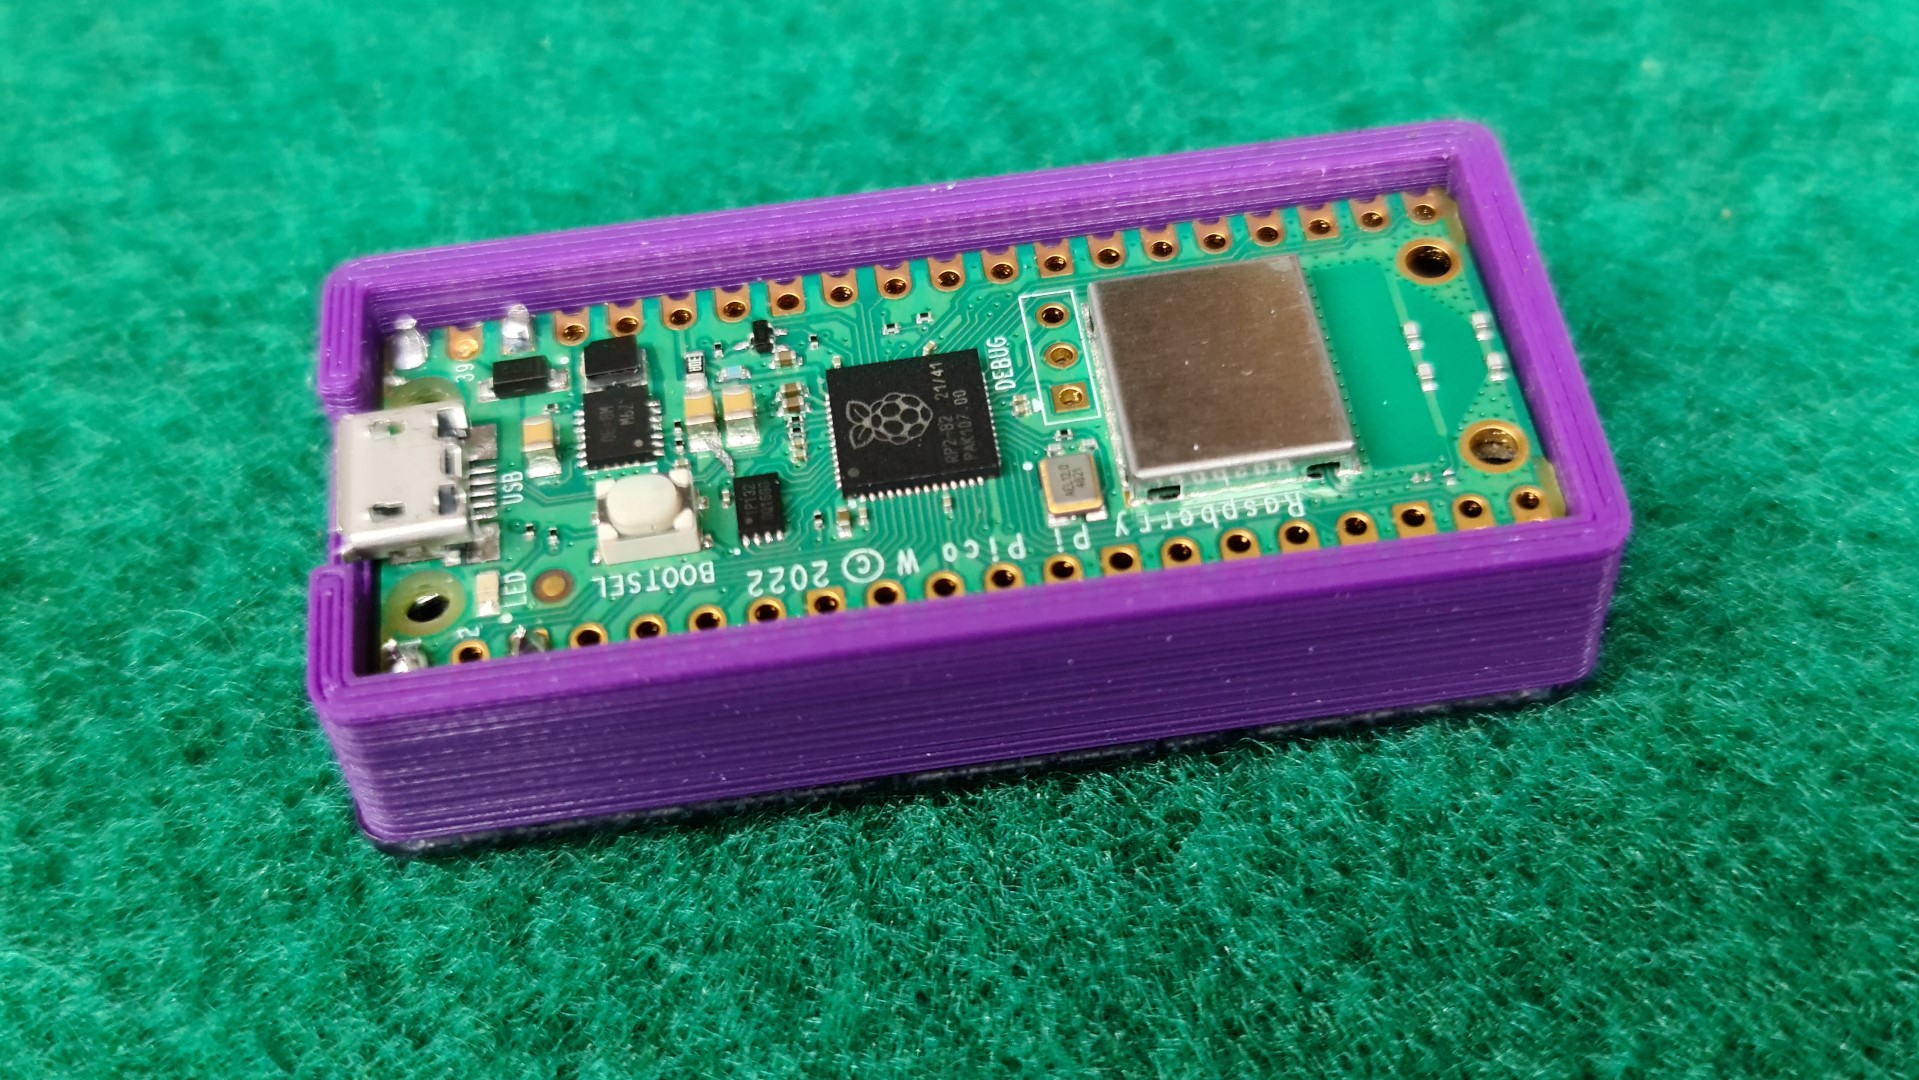
- 3D Printed case part for the Pico W
- Super / Cyanoacrylate glue
- 3mm thick Double Sided Foam Tape
Connecting the NeoPixel Strip
WS2812B individually addressable RGB LEDs, commonly referred to as “NeoPixels” are super-bright and easily controllable LEDS that can be any color. They are often used to add mood lighting to a project and they can also be used in cosplay costumes and props.
Adafruit’s Neopixel Strip needs 5V to drive the LEDs, but can accept a 3.3V logic signal on the data line.
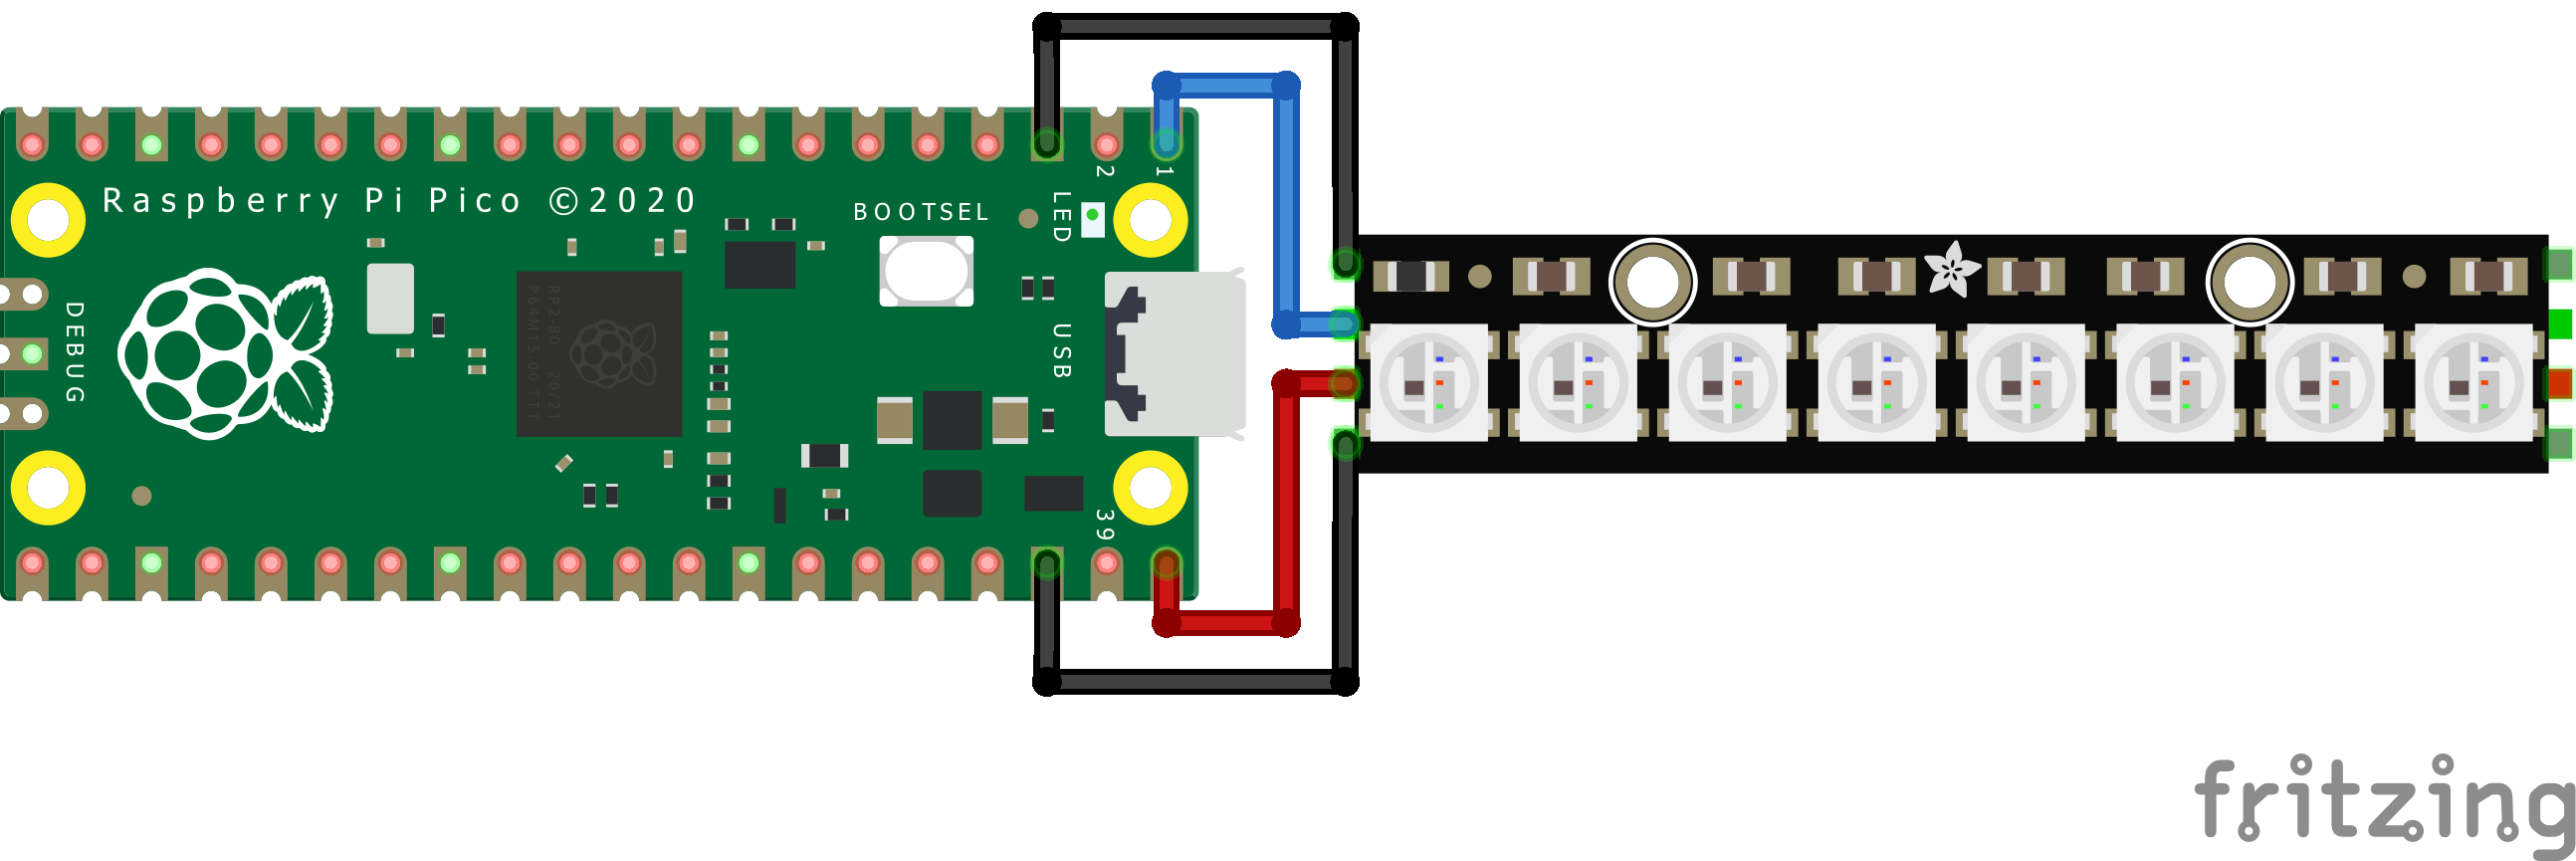
| Wire Color | Raspberry Pi Pico GPIO | NeoPixel |
|---|---|---|
| Red | VBUS | 5V |
| Blue | GPIO0 | Data In |
| Black | GND | GND |
The wiring for the resistor clock is simple, with only GND, Data and Power required to connect the NeoPixel to the Pico W. Connecting the wire so that they fit within the 3D printed case can be a little bit tricky.
1. Begin with the Pi Pico and the Neopixel stick face upwards, with the input end of the NeoPixel near to the USB socket.
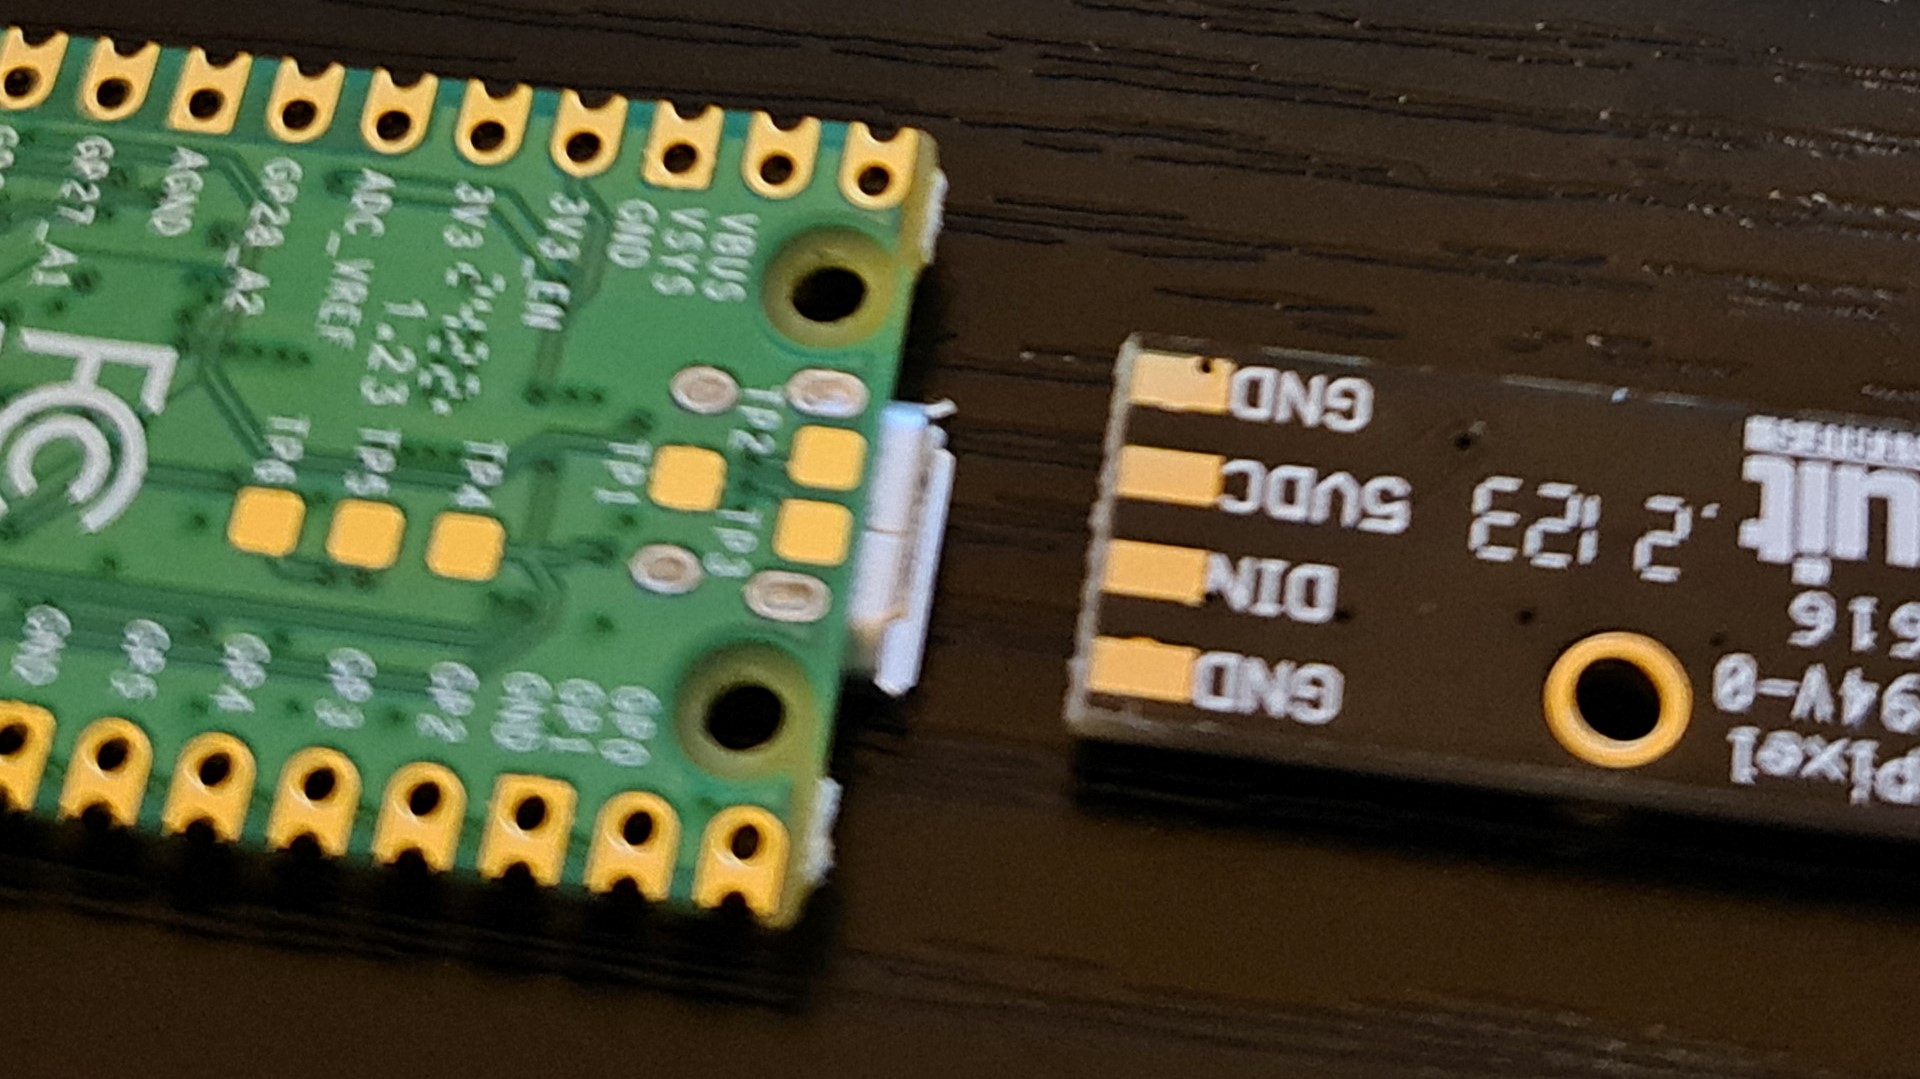
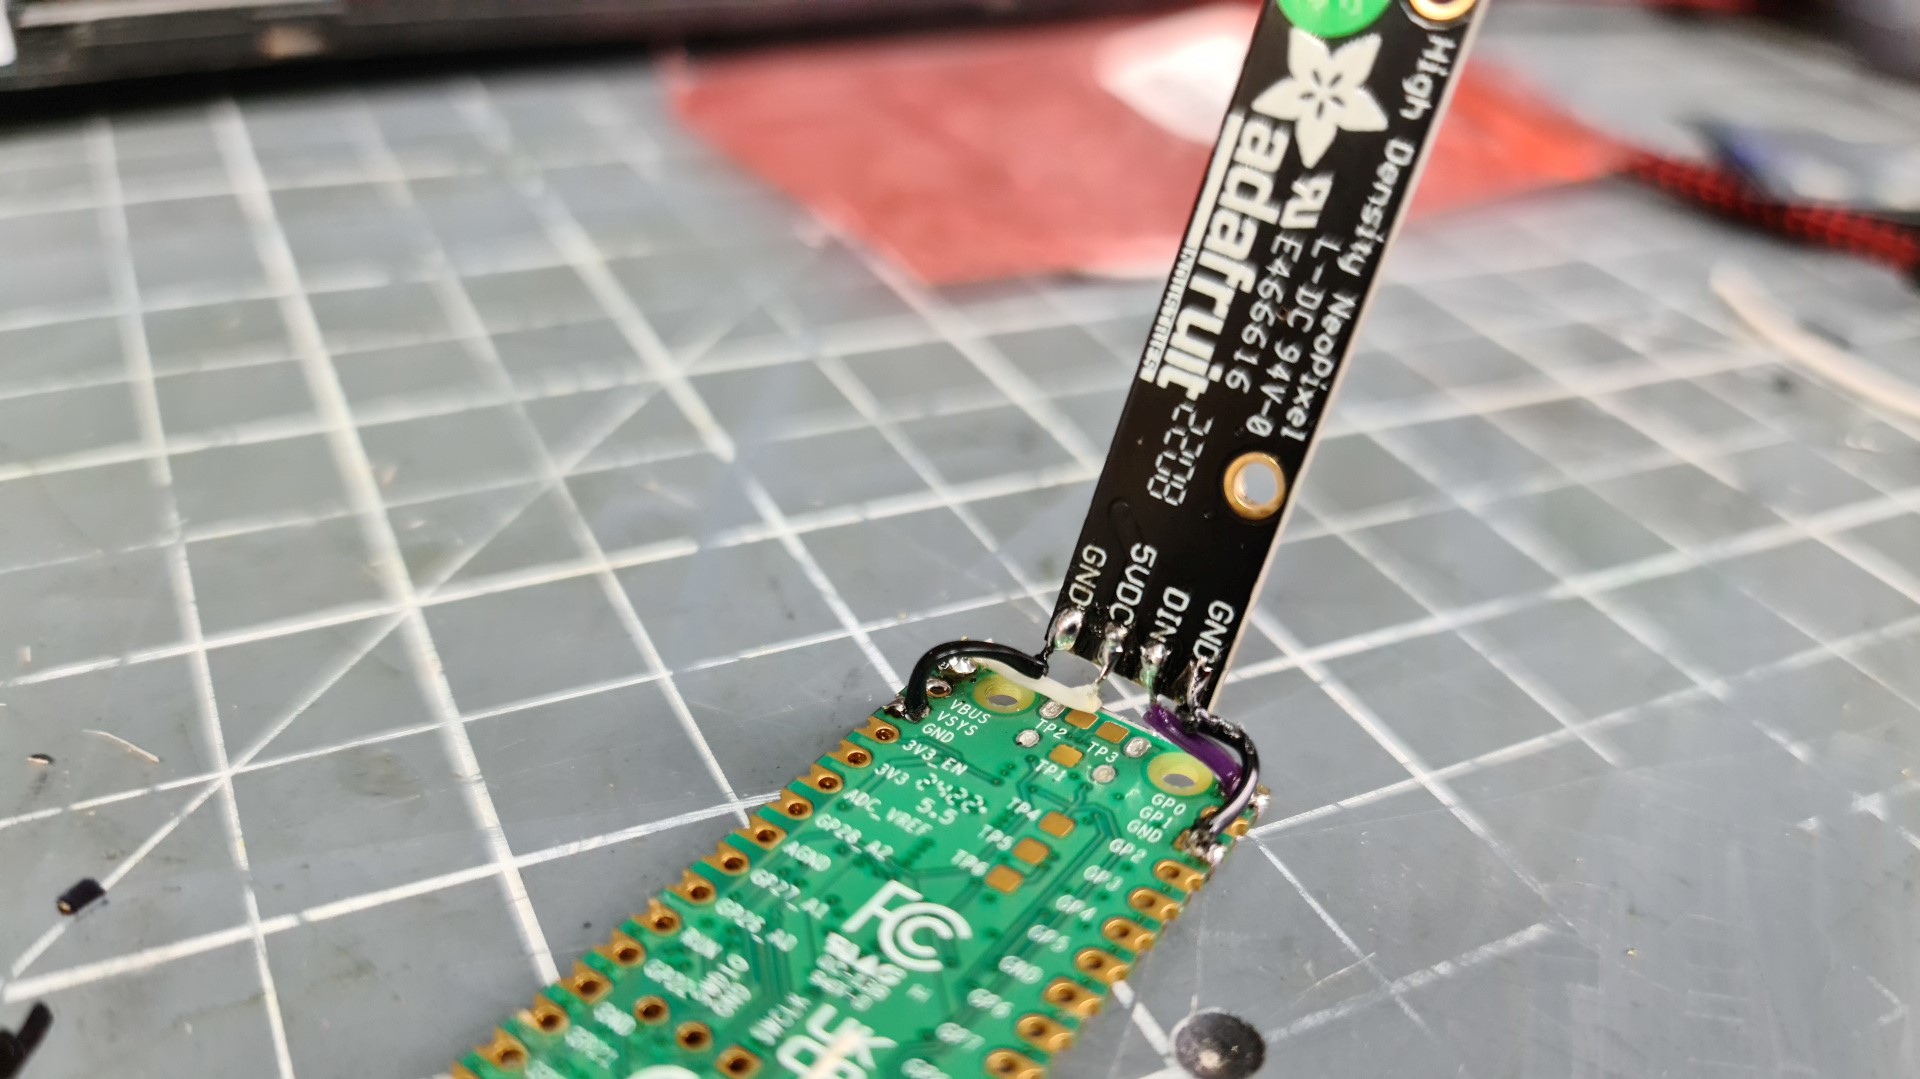
2. Connect the wires as shown in the circuit diagram, leaving just enough cable to fold the whole display assembly onto the back of the Raspberry Pi Pico W. The wires will need to be soldered, an easy task for most makers. If you don't have a soldering iron, or fancy an upgrade, take a look at our list of the best soldering irons. Be careful here, because the Neopixel strip has connections on both ends so that they can be chained together. One end of the strip is the input, while the other is the output. You should be soldering wires to the input end.
Get Tom's Hardware's best news and in-depth reviews, straight to your inbox.
3. Fold the display assembly onto the back of the Pi Pico W, so that the row of LED lights is aligned with the midline of the Pico.
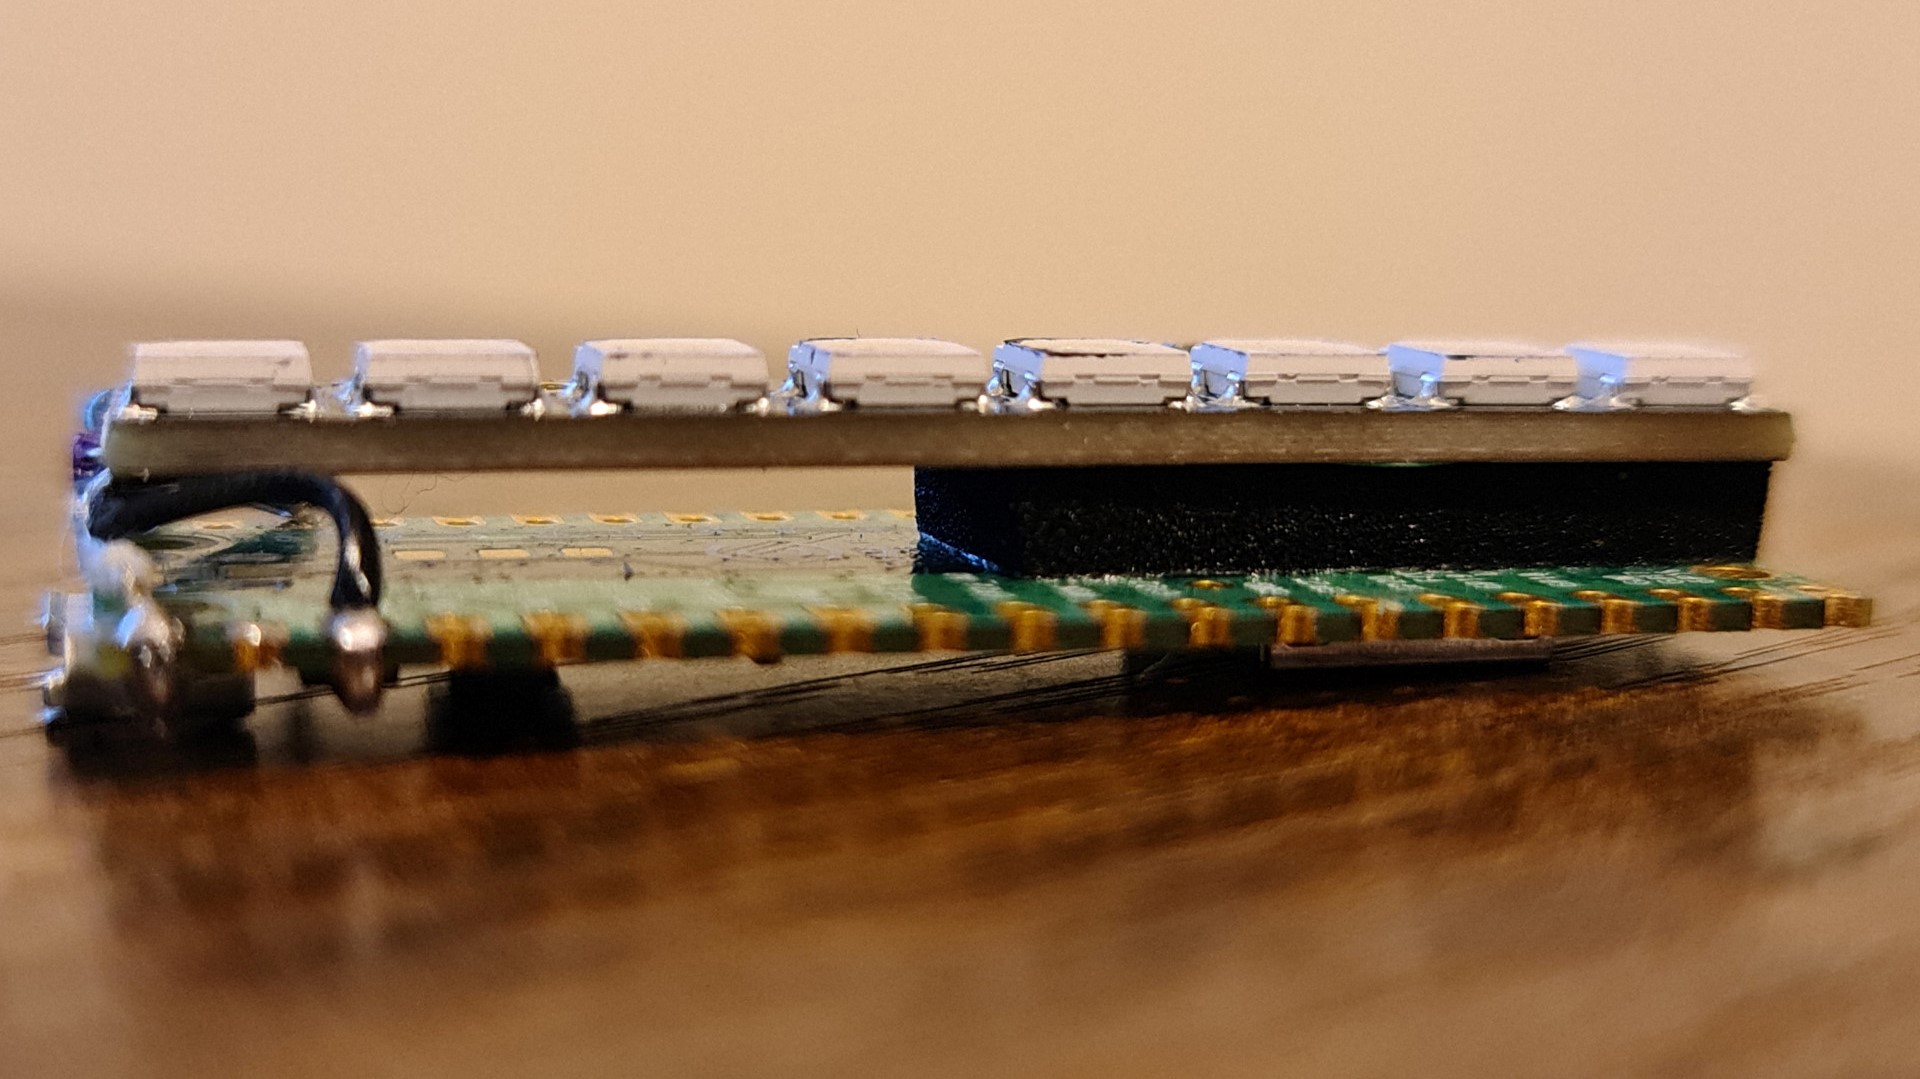
4. Fix the LED strip in place using a small square of double sided foam tape. The foam enables the NeoPixel strip to sit parallel to the Raspberry Pi Pico W with room underneath to tuck any excess cable.
Assembling the Enclosure
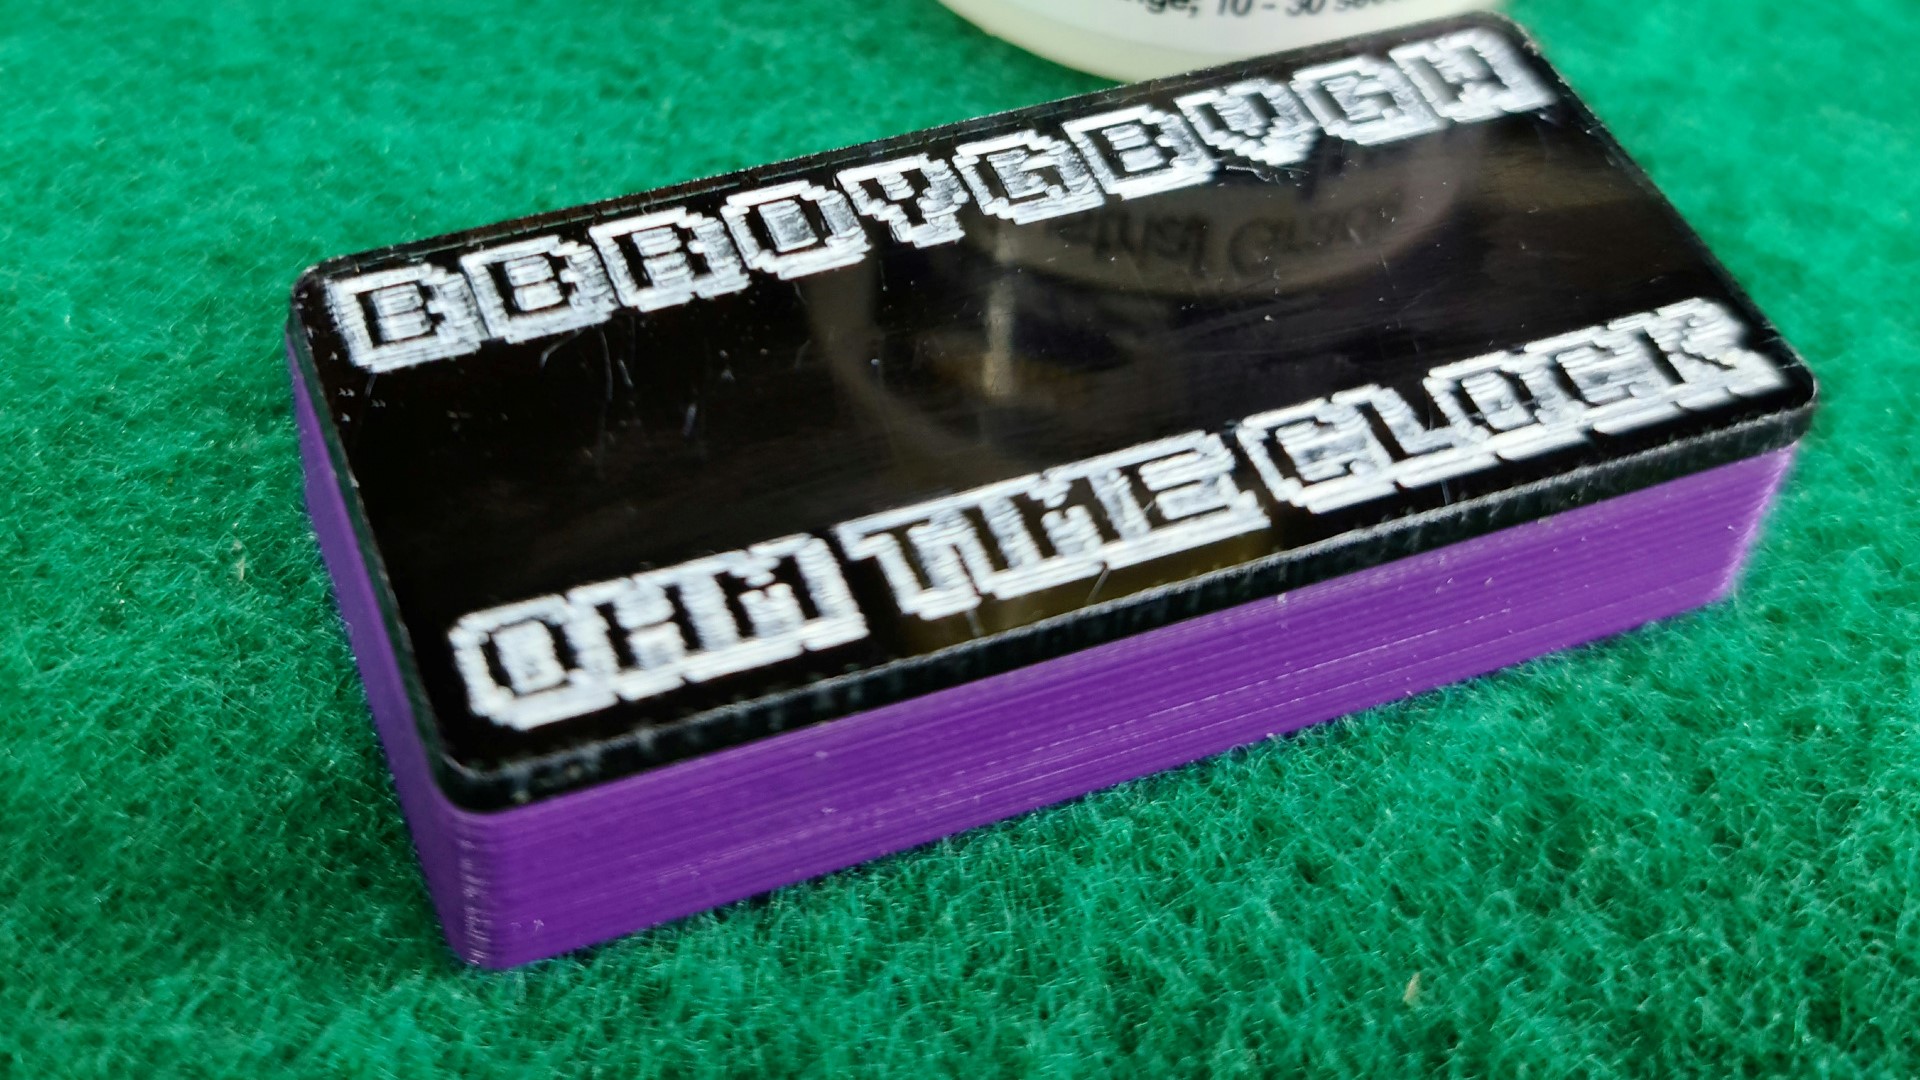
For most projects, the box you put everything into isn’t too important. The Resistor clock is a bit different because we need to do something a little bit crafty to get all of the colors we need. The resistor code is designed for marking with paint, and it uses some colors that are a bit tricky to get by mixing the light from LEDs. Most notably, black, brown, and gray aren’t the sort of colors you can get from an LED. Placing a piece of black tinted plastic in front of the LEDs helps here, so that when the LED is off, the plastic will be black, but as soon as the LED is on, you will see the colors. The dark tint will reduce the luminosity of the LEDs, making it easier to differentiate between colors like brown and orange.
1. 3D print the Raspberry Pi Pico case part. You can sand, fill, and finish the outside of the case however you think is best.
2. Insert the Pico-W with the USB socket located in the notch on the case, so that the Pico and NeoPixel fit inside the printed case.
3. Trim two pieces of tinted acrylic to fit the top and bottom of the 3D printed case. If you have access to a laser cutter, you can use this to cut and etch the plastic.
4. Add a drop of superglue to the top (the side where the LEDs are) corners of the 3D printed case, and glue the tinted plastic in place. If you’ve used a Sharpie to color the plastic, put the side with the Sharpie ink towards the inside of the case.
5. Glue the other plastic into place on the rear of the 3D printed case. You can use low temperature hot-glue on this side of the case if you prefer, so that the Pico W can be removed more easily in future.
Setting Up the Raspberry Pi Pico W
The Raspberry Pi Pico uses MicroPython to control the Neopixel stick and to connect to NTP servers via a Wi-Fi connection.
1. Follow this guide to download and install the MicroPython firmware to the Raspberry Pi Pico W, and then setup Thonny
2. Create a new file in Thonny and call it wifidetails.py. This file will be used to store the connection details for the wireless network.
3. Add the following lines to the wifidetails.py, replacing the MYSSID and MYPASS with the SSID and password for your wireless network.
ssid = ‘MYSSID’
password = ‘MYPASS’
4. Save the file to the Raspberry Pi Pico W.
5. Create a new file in Thonny and call it main.py. This is the file that will run when the clock is plugged in. MicroPython is configured to run main.py when the board is powered on.
6. Import the modules that will get you connected to the NTP server, including the login details from the wifidetails.py file that you just created.
import time
import ntptime
import network
from wifidetails import ssid, password
7. Import the modules to access the GPIO pins and control the NeoPixels.
from machine import pin
Import neopixel
8. Create a Python dictionary containing RGB values for each color in the resistor color code. You might need to tweak these values to get the best match from the tinted plastic you are using. A dictionary is a data storage object that uses a key to retrieve a value, in this case we are using a number, 0 to 9, as the key to retrieve the corresponding value.
rc = {0:(0,0,0),
     1:(36,12,0),
     2:(255,0,0),
     3:(255, 65, 0),
     4:(255,255,0),
     5:(0,255,0),
     6:(0,0,255),
     7:(255,0,255),
     8:(2,2,2),
     9:(255,255,255),
     }
9. Create an object, np, to tell our code that the NeoPixels are connected to pin 0 on the Raspberry Pi Pico W.
np = neopixel.NeoPixel(Pin(0),8)np = neopixel.NeoPixel(Pin(0),8)10. Setup and begin the connection to the Wi-Fi network using the ssid and password details from wifidetails.py.
wlan = network.WLAN(network.STA_IF)
wlan.active(True)
wlan.connect(ssid, password)
11. Wait for the Wi-Fi network to finish connecting.
max_wait = 10
while max_wait > 0:
   if wlan.status() < 0 or wlan.status() >= 3:
       break
   max_wait -= 1
   print('waiting for connection...')
   time.sleep(1)
12. Check that the network connected successfully, and fail gracefully if there is a problem. If the network connection is good, the IP address of the clock is printed to the Python shell.
if wlan.status() != 3:
   raise RuntimeError('network connection failed')
else:
   status = wlan.ifconfig()
   print(status[0]) #print the IP address of the clock
13. Get the time from an NTP server using the ntptime module, and reset the Pico W’s RTC (real time clock) to match it.
ntptime.settime()14. Create a loop to read the time from the real time clock and store it in a variable, ct. Then use string formatting to store the time as a 6 digit string we can iterate through to set the NeoPixel RGB values.
while True:
   ct = time.localtime()
   timestring = '{:0>2}{:0>2}{:0>2}'.format(ct[3], ct[4], ct[5])
15. The timestring variable is now a string with the format “HHMMSS”. We iterate through this string to set the RGB values stored in the rc dictionary to the first 6 NeoPixels on the strip, then we write the changes to the NeoPixels. This is the end of the main loop, so we add a delay to ‘tick’ the clock and reduce the load on the Pico W.
   for i in range(6):
       np[i] = rc[int(timestring[i])]
   # update the neopixels
   np.write()
   time.sleep(1)
16. Save the code to the Raspberry Pi Pico W and click Run to start. The project will get the current time and the NeoPixels will change color to indicate the time. Whenever the Pico is powered up, the code saved in main.py will automatically run.
Complete Code Listing
import time
import ntptime
import network
from wifidetails import ssid,password
from machine import Pin
import neopixel
# setup neopixel colors
rc = {0:(0,0,0),
     1:(36,12,0),
     2:(255,0,0),
     3:(255, 65, 0),
     4:(255,255,0),
     5:(0,255,0),
     6:(0,0,255),
     7:(255,0,255),
     8:(2,2,2),
     9:(255,255,255),
     }
#connect the neopixel
np = neopixel.NeoPixel(Pin(0),8)
# activate the Wireless
wlan = network.WLAN(network.STA_IF)
wlan.active(True)
wlan.connect(ssid, password)
# Wait for connect
max_wait = 10
while max_wait > 0:
   if wlan.status() < 0 or wlan.status() >= 3:
       break
   max_wait -= 1
   print('waiting for connection...')
   time.sleep(1)
if wlan.status() != 3:
   # Failed to connect
   raise RuntimeError('network connection failed')
else:
   # print the ip address
   status = wlan.ifconfig()
   print(status[0])
# Get and set the time from ntp
ntptime.settime()
while True:
   # get the time and format it as a string of 6 digits
   ct = time.localtime()
   timestring = '{:0>2}{:0>2}{:0>2}'.format(ct[3], ct[4], ct[5])
   # assign the resistor code color to each neopixel based on timestring
   for i in range(6):
       np[i] = rc[int(timestring[i])]
   # update the neopixels
   np.write()
time.sleep(1)
Andrew is a stay-at-home dad, writer, editor, and professional maker. With a constantly evolving workshop, Andrew makes, modifies, and mends his way through projects with his daughter by his side. Several decades of industry experience and a PhD. from the Ironbridge Institute mean that Andrew’s publications cover an eclectic range of topics including ancient Babylonian writing systems to prop-making, accessibility aids, medical devices and well-being, password security, 3D scanning, and 3D printing. Andrew’s skill set includes additive and subtractive manufacturing, laser cutting, programming in over 40 years worth of popular languages and frameworks, microprocessors, electro-mechanical devices, marine engines, and a range of manual and CNC machine-shop tools. Based near Ironbridge in England (the birthplace of the industrial revolution), Andrew has a fondness for heritage manufacturing techniques and the aesthetics of the late 19th and early 20th century.
