How To Create a Multiboot USB Drive for Linux
Choose your distro at boot time.
Get Tom's Hardware's best news and in-depth reviews, straight to your inbox.
You are now subscribed
Your newsletter sign-up was successful
There are hundreds, if not thousands of active Linux distributions and although many of the desktop distributions look the same, featuring the same set of applications or even desktop environments, there’s still a lot which separates them. This is why, for most novice Linux users, distro hopping – the practice of frequently switching between Linux distributions, is the only sane course to find one they’re comfortable with. Although many distributions now provide Live-installable images, making it possible to try the distribution without installing it first, constantly formatting USB drives to make room for the next distribution is quite cumbersome.
With Ventoy, you can easily create multi-boot USB drives in almost no time at all. Even better, the tool works with Windows, in addition to Linux. Released under the GPLv3 license, Ventoy features a browser-based graphical GUI, but can also be run from the terminal if that is your preference.
How To Install Ventoy
Ventoy isn’t offered in the software repositories of most distributions. But that doesn’t mean that installing it is difficult. In this tutorial we shall use the Linux version, but there is also an installation candidate for Windows.
1. Go to Ventoy’s release page and download the latest version for your OS. Linux users will need to download the tar.gz archive.
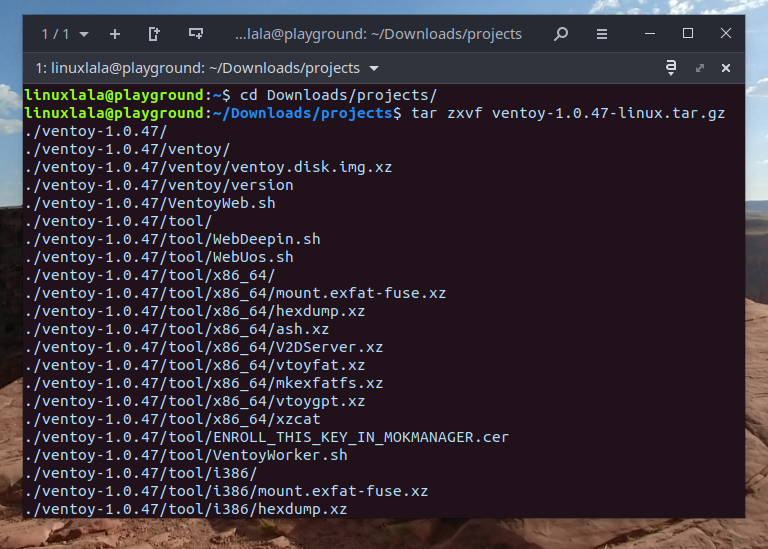
2. Open a terminal and extract the files from the downloaded tarball. Change into the directory where you downloaded the tarball and run the following command.
$ tar zxvf ventoy-1.0.47-linux.tar.gz 3. Navigate into the extracted ventoy-1.0.47 directory. Change the version number to match your download.
$ cd ventoy-1.0.47/
4. Set the following two files to be executable.
Get Tom's Hardware's best news and in-depth reviews, straight to your inbox.
$ chmod +x Ventoy2Disk.sh VentoyWeb.sh
There are two ways to use Ventoy. Via a browser window, or via the terminal. We’ve detailed them both for you. If you are new to this, the easiest way is via the browser.
How To Use Ventoy via a Web Browser
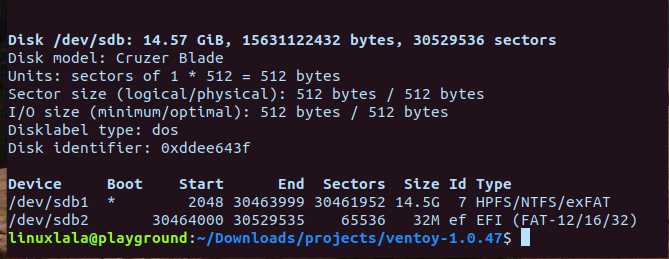
1. Plug in the USB drive you wish to use with Ventoy. If you have multiple USB devices or disks, we recommend you run the following fdisk command to identify your USB device. You will need to scroll through the output to locate your drive. In our case, the plugged-in USB device is identified as /dev/sdb.
$ sudo fdisk -l
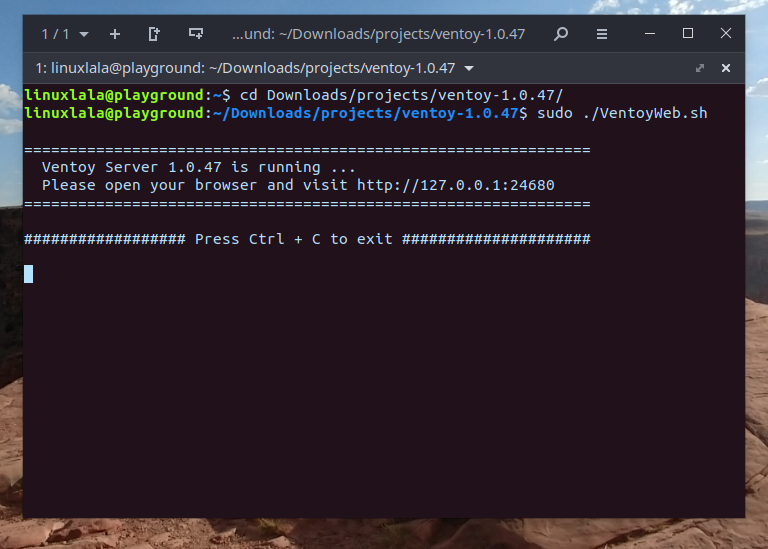
6. To run Ventoy via a web browser, run this command.
$ sudo ./VentoyWeb.sh
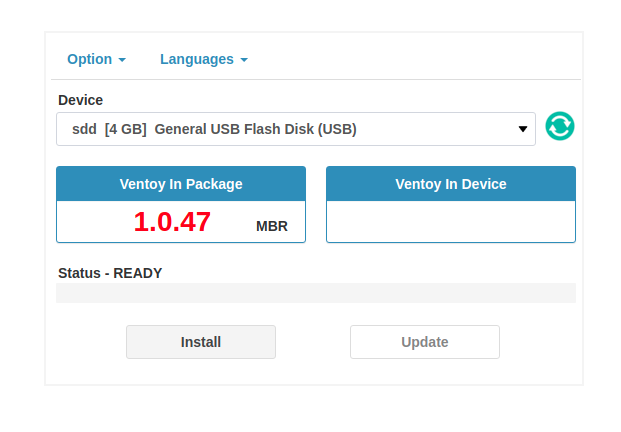
7. Open your browser window and type in the URL provided by Ventoy. The Ventoy server automatically identifies the connected USB drives, so select the one where you wish to install Ventoy under the Devices pull-down. You can configure various options such as enable secure boot, define partition type (MBR or GPT), etc. from the Options button at the top left.
8. Click the install button to install Ventoy to the selected USB drive. The process will take a few minutes to complete and when finished a new drive “Ventoy” will appear in the File Manager / Windows Explorer window.
9. Download any ISO images for Linux distros and copy them to the Ventoy drive.
10. Reboot your machine / power up a second machine with the Ventoy drive attached. You will need to press a key to enter the boot menu for your machine. For example on Lenovo machines we press F12.
11. Select your USB device as the boot device and press Enter.
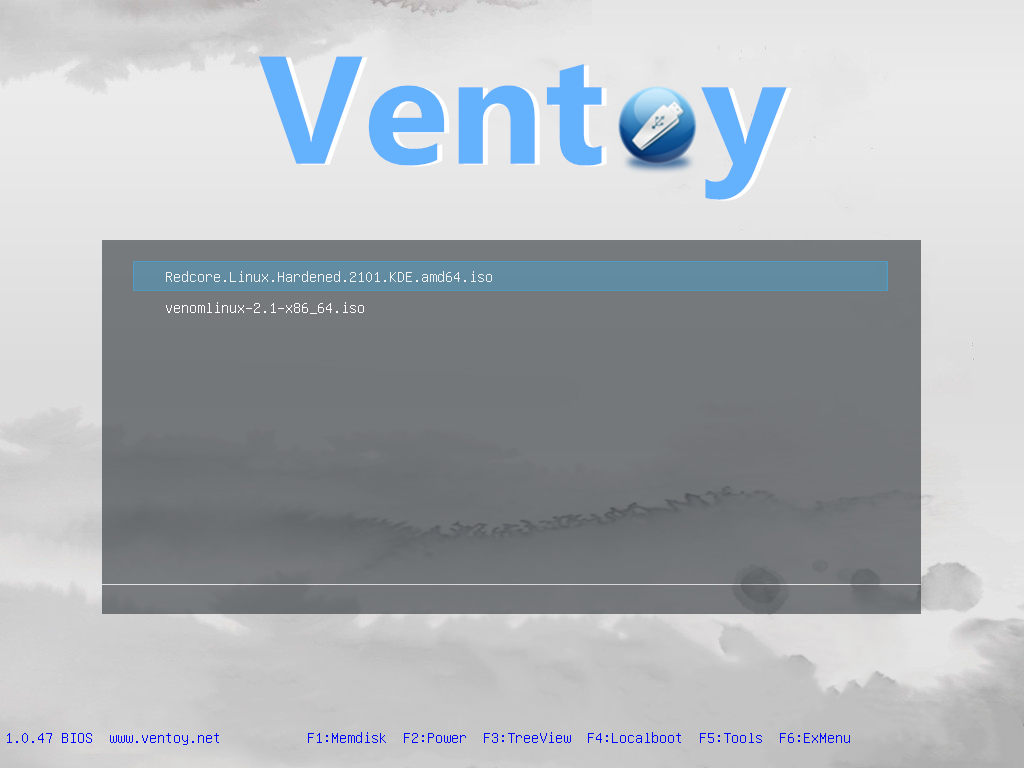
12. Ventoy will boot and show a list of the ISOs on the drive. Select an ISO and press Enter to boot.
How To Use Ventoy via the Terminal
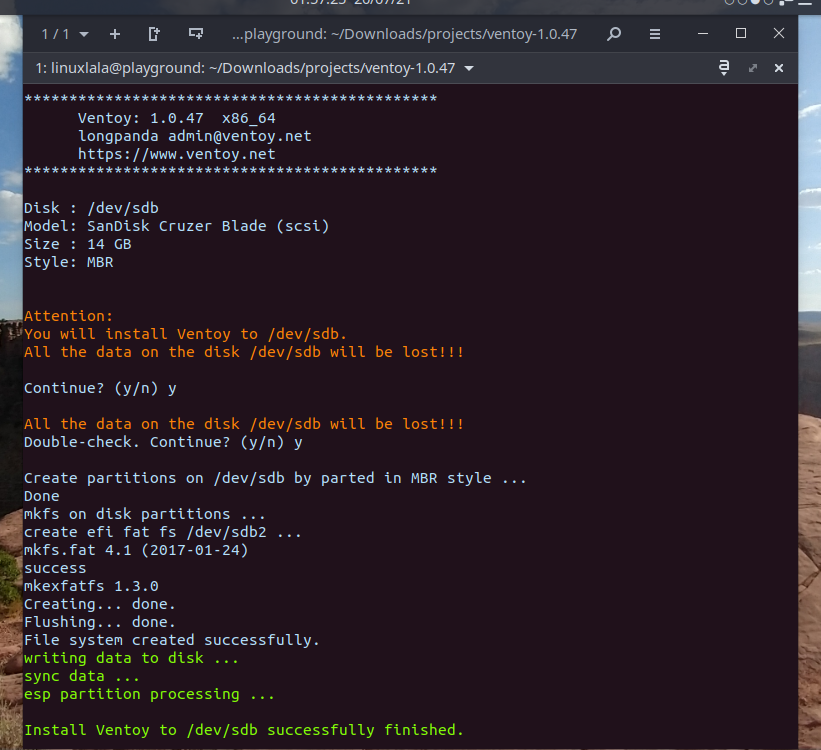
1. Run the Ventoy2Disk command, passing the drive that you wish to use as a parameter. In our example our drive was mounted at /dev/sdb but your will be different.
$ sudo ./Ventoy2Disk.sh -i /dev/sdb
2. Make sure you correctly identify the USB device. Ventoy will ask you twice to confirm the device. This is because all data will be lost once you install Ventoy to the specified USB drive.
3. Identify the Ventoy partition by running the sudo fdisk -l command. There are two partitions in the USB drive. The first partition is the larger of the two, and where ISO files are stored. Depending on your distribution, the partition would be mounted as /media/username/Ventoy.
$ sudo fdisk -l
4. Copy all the downloaded ISO files for distributions you wish to run into this partition.
5. Reboot your machine / power up a second machine with the Ventoy drive attached. You will need to press a key to enter the boot menu for your machine. For example on Lenovo machines we press F12.
6. Select your USB device as the boot device and press Enter.
7. Ventoy will boot and show a list of the ISOs on the drive. Select an ISO and press Enter to boot.

Shashank Sharma is a freelance writer for Tom’s Hardware US, where he writes about his triumphs and joys of working with the Linux CLI.
-
coolestcarl Although I just use Virtual Box to create virtual machines of various distros, its nice to see a well made tool to enjoy a native experience of booting a linux distro from usb. Hopefully with Nvidia (and hopefully followed by AMD and Intel) loosening the walled garden of gpu passthrough in virtual machines, we are slowly approaching a moment when we can truly have unlimited freedom on what os (or os distro) we want to run with the only restriction being dictated by the performance of the hardware components and quality of the drivers.Reply -
satai One of my favorite tools.Reply
An other good part - you can transfer other data next to .iso files unlike when you have a common bootable flash drive. -
Aaron Priest You can use a persistence file with most Linux distributions too to preserve your settings without needing to install, very convenient for a portable troubleshooting tool to use on multiple computers.Reply
