How to Build a Raspberry Pi-Powered Digital Photo Frame
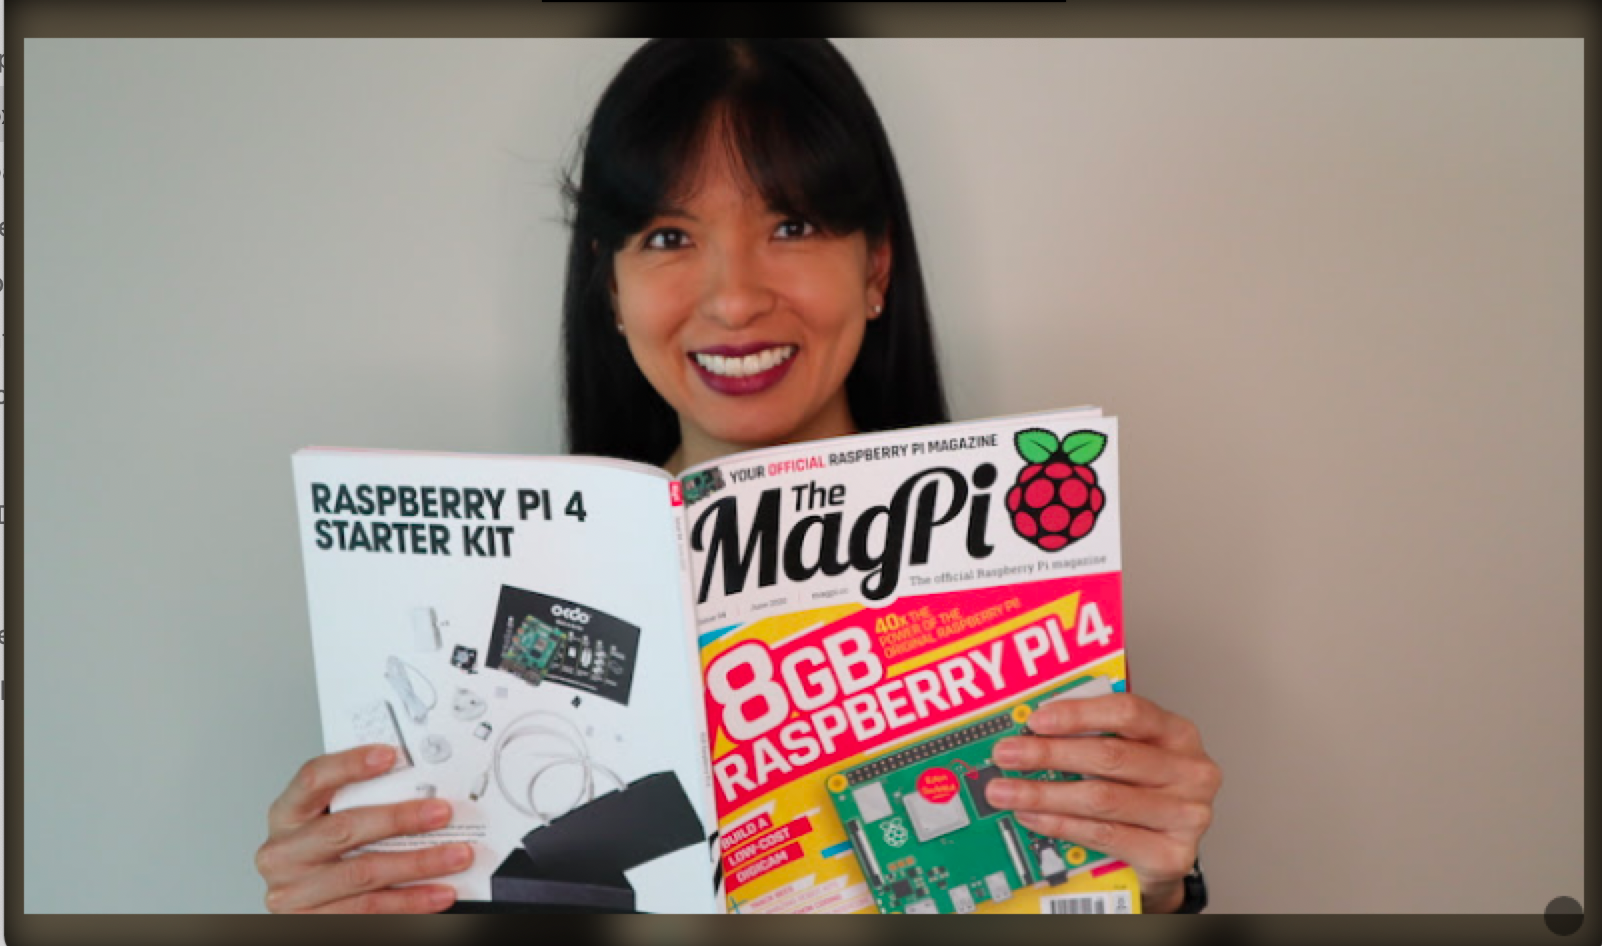
Build your own digital photo frame with a Raspberry Pi.
A digital photo frame is a small screen that can sit on your desk in your office or in your kitchen displaying your favorite pictures, changing at regular intervals. The first commercial digital photo frame was introduced in the 1990s shortly after the digital camera. Digital photo frames made a comeback in popularity during 2020, perhaps because people were staying at home more.
In this tutorial, we’ll turn our Raspberry Pi into a digital photo frame using MagicMirror and the GooglePhotos module. If you have just upgraded to a Raspberry Pi 5, then this project is a great way to reuse an older Raspberry Pi 4.
Please note, we will skip installation of the 2-way mirror in the original Magic Mirror project. Consider this project, “Magic Mirror, without the mirror.”
What You’ll Need
- A Raspberry Pi 4 or Raspberry Pi 3B+, or the new Raspberry Pi 5. Raspberry Pi Zero W is not supported.
- 8 GB (or larger) microSD card (see best Raspberry Pi microSD cards) with a fresh install of Raspberry Pi OS with Desktop. Raspberry Pi Lite is not supported.
- Power supply/Keyboard/Mouse/Monitor/HDMI Cable (for your Raspberry Pi)
- HDMI monitor, 7” Raspberry Pi Touchscreen, or 3.5” or 5” TFT screen.
- Stand for your Touchscreen or TFT screen. Here’s one I 3D printed for this project.
- Your Gmail account.
Timing: Plan for a minimum of 1 hour to complete this project.
The majority of this tutorial is based on terminal commands. If you are not familiar with terminal commands on your Raspberry Pi, we highly recommend reviewing 25+ Linux Commands Raspberry Pi Users Need to Know first.
Setting up Your Google Photos Album
To get started with this project, you’ll need to set up a Google Photo Album. We suggest that you create a new Photo Album and add 5 to 10 photos. You can add more photos later. The more photos in your album, the longer your Raspberry Pi digital photo frame will take to load.
- On your preferred browsers on your existing laptop or desktop computer, navigate to https://photos.google.com/
- In the left menu column, click Albums.
- Click Create Album.
- Name your album something easy to remember. I recommend “MagicMirror” for your album name.
- Once you have created your album, add 5 to 10 photos to your MagicMirror photo album. You can drag and drop to upload new photos or select from your existing photos to add.
Basic Magic Mirror Install on Raspberry Pi
1. Connect your screen, mouse and keyboard to your Raspberry Pi.
2. Boot your Raspberry Pi. If you don’t already have a microSD card see our article on how to set up a Raspberry Pi for the first time or how to do a headless Raspberry Pi install.
Get Tom's Hardware's best news and in-depth reviews, straight to your inbox.
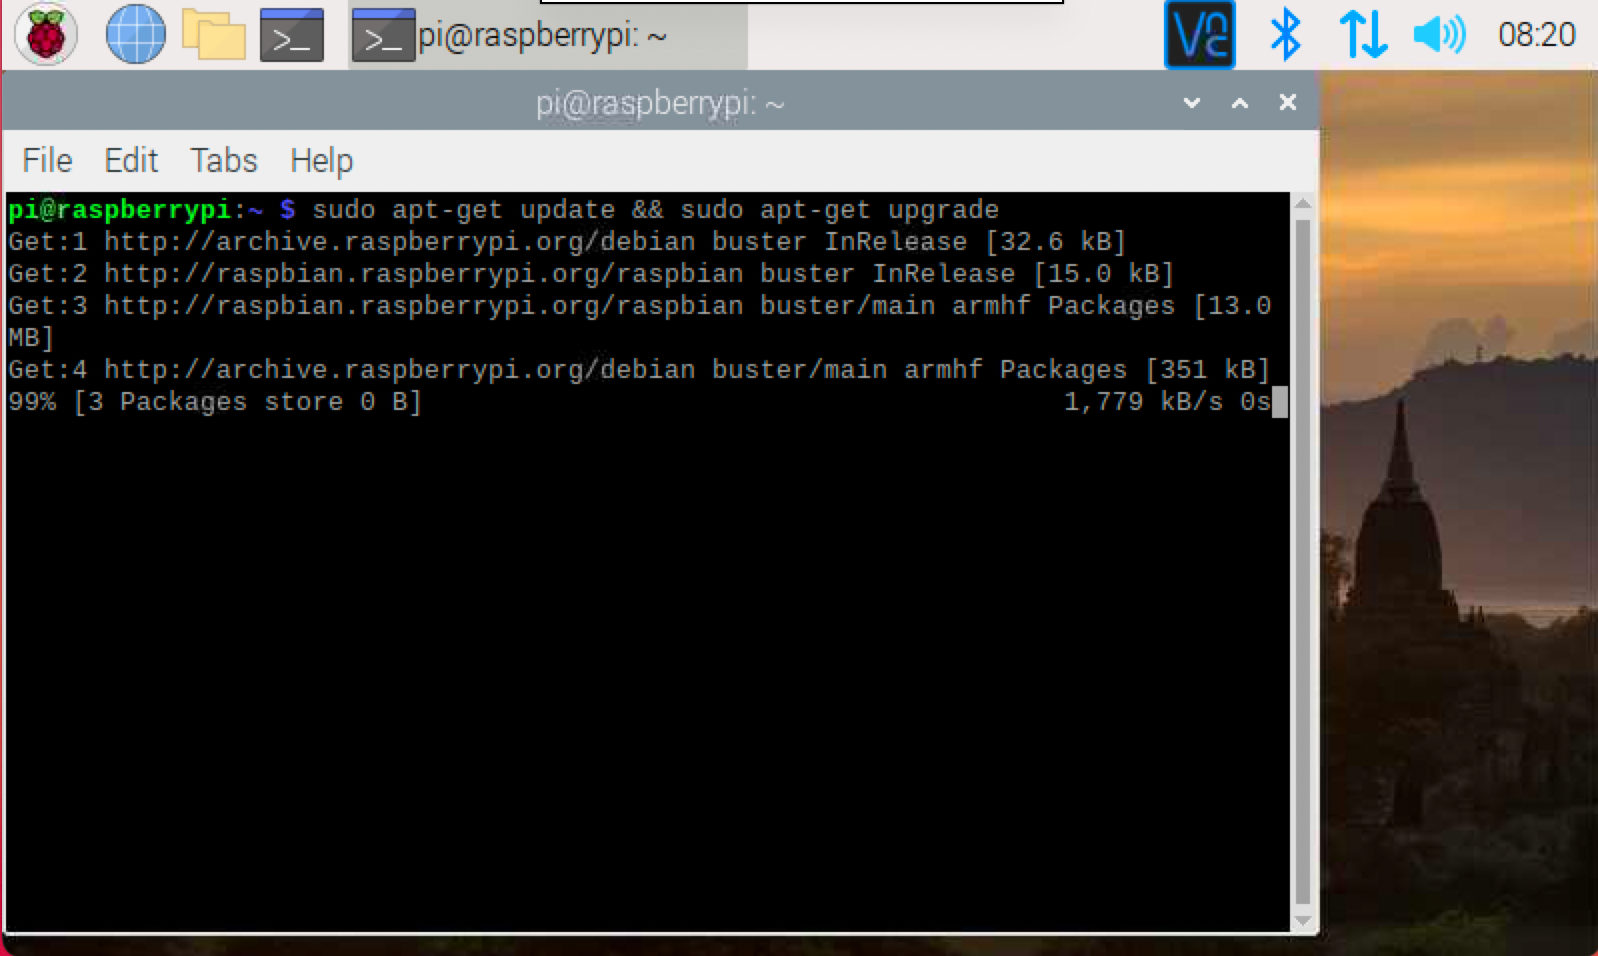
3. Update Raspberry Pi OS. Open a terminal and enter:
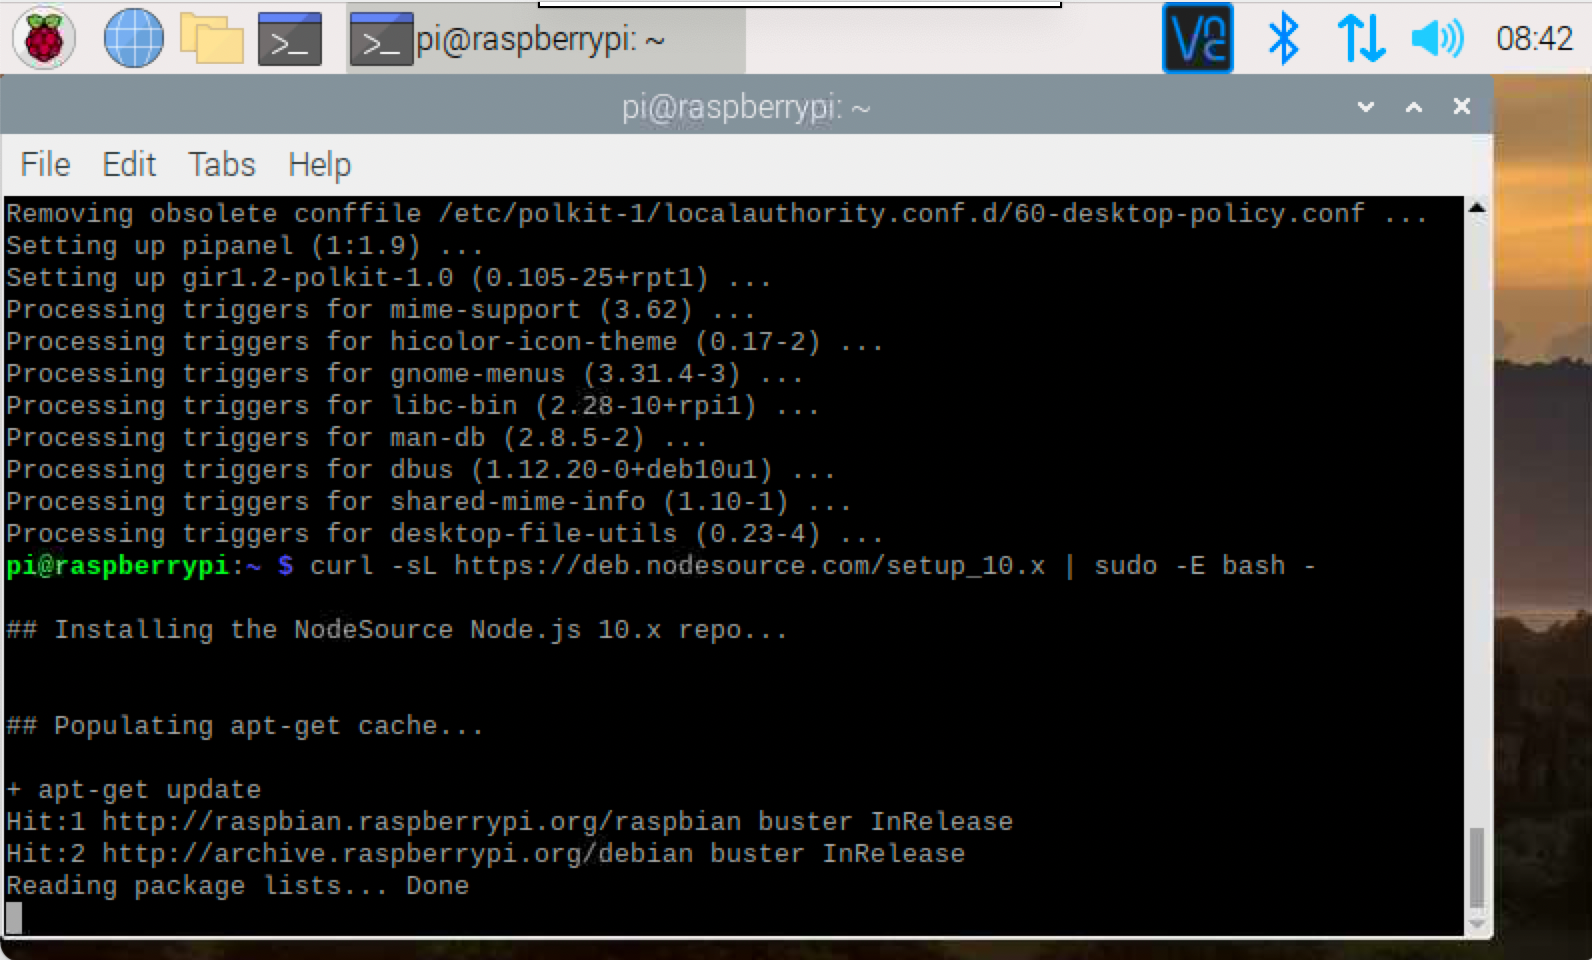
sudo apt-get update && sudo apt-get upgrade4. Perform a basic installation of Magic Mirror on our Raspberry Pi with the instructions from the official Magic Mirror page. The commands should execute fairly quickly with npm install taking the longest depending on your Raspberry Pi model and internet speed. On a Raspberry Pi 4 with high speed internet, npm install took approximately 5 minutes to execute.
curl -sL https://deb.nodesource.com/setup_10.x | sudo -E bash -
sudo apt install -y nodejs
git clone https://github.com/MichMich/MagicMirror
cd MagicMirror
npm install
cp config/config.js.sample config/config.js
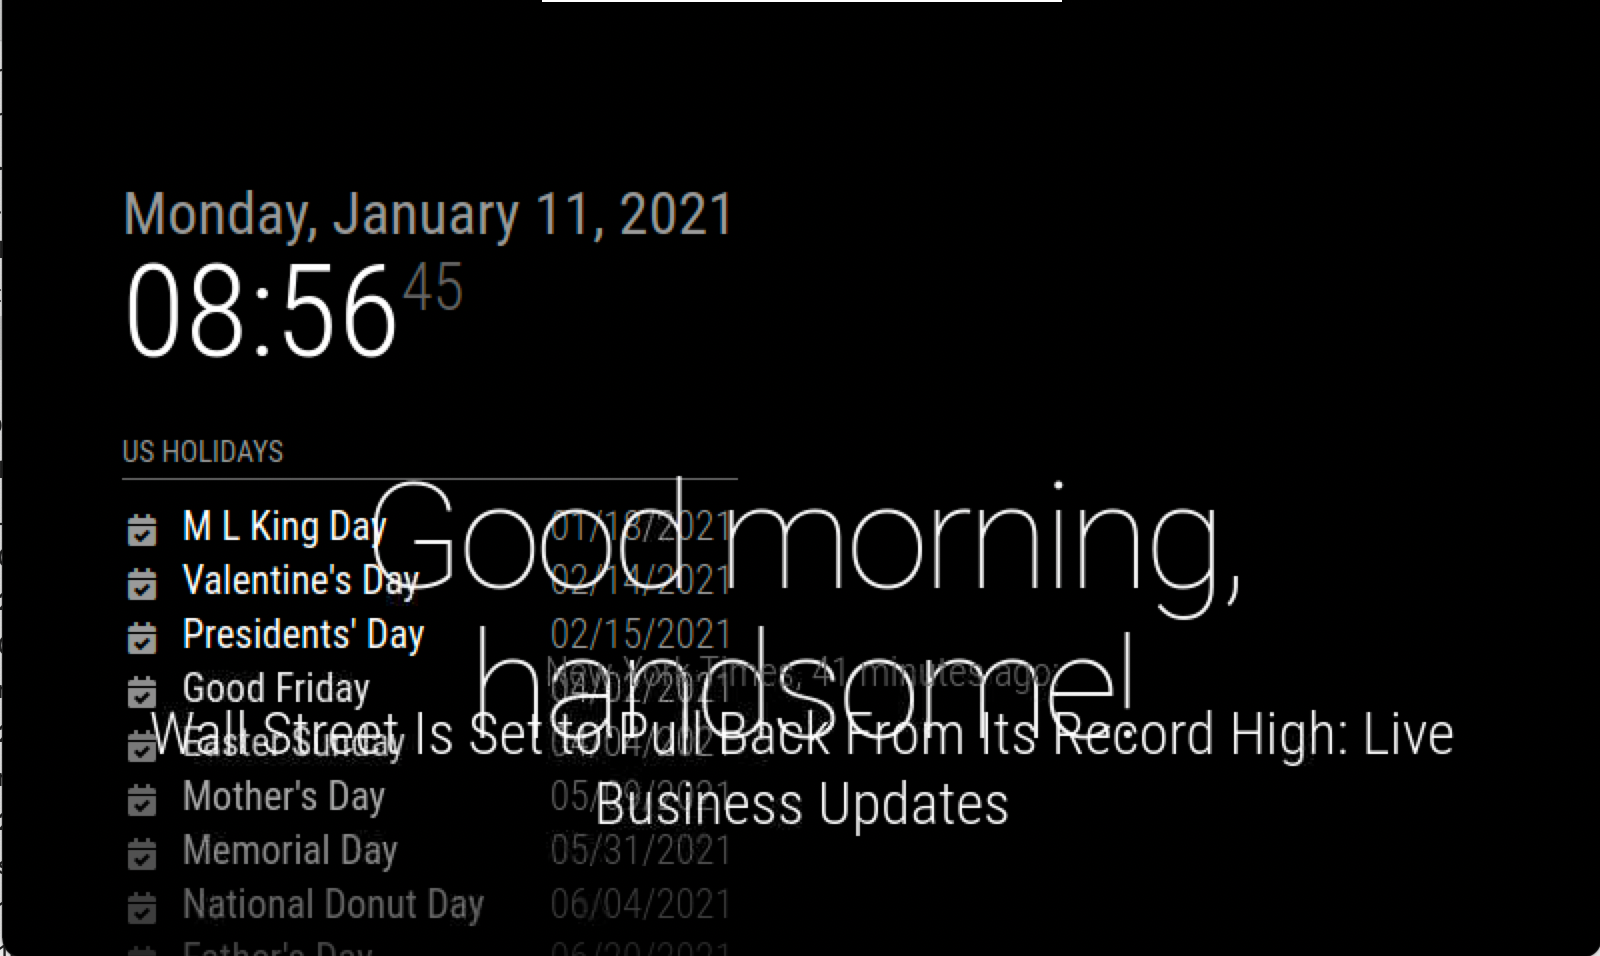
npm run startYour Raspberry Pi screen should now be filled with the default Magic Mirror screen.
5. Hit Ctrl-M to minimize and return to the Pi desktop.
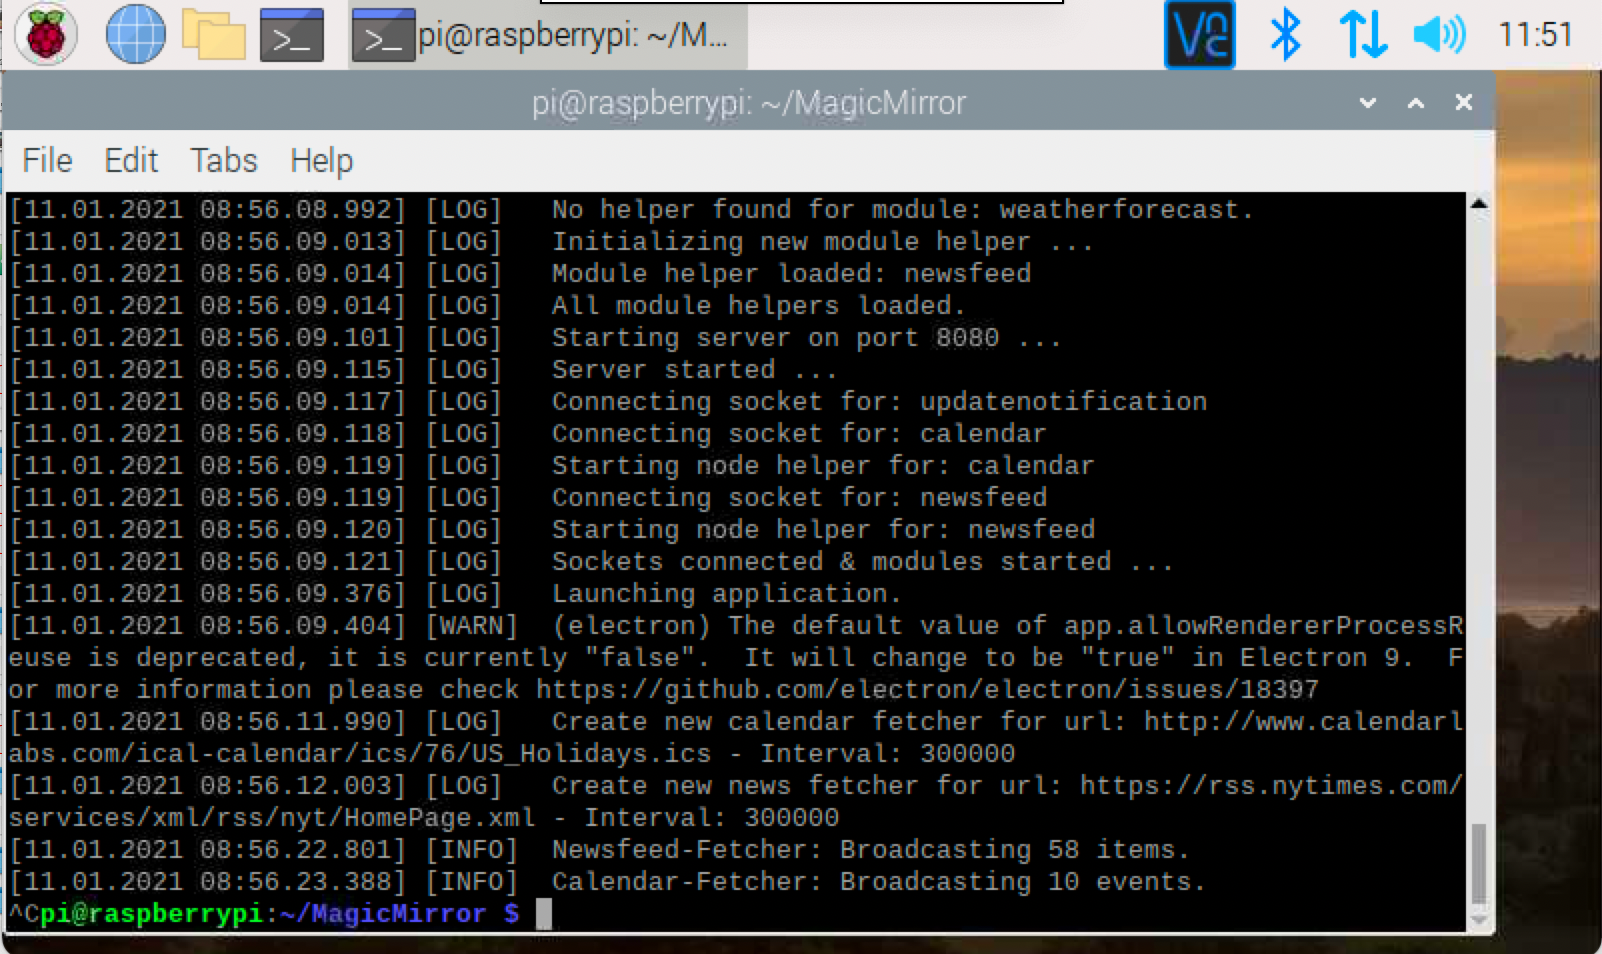
6. Press Ctrl-C to stop Magic Mirror. This step is necessary to install the module that will show our Google Photos.
Google Photos Installation on Magic Mirror
1. In the Pi terminal, install the Google Photos module.
cd ~/MagicMirror/modules
git clone https://github.com/eouia/MMM-GooglePhotos.git
cd MMM-GooglePhotos
npm install
2. Open your Chromium browser and navigate to Google API Console. Login with your gmail account credentials. Full Link: https://console.developers.google.com/
3. Create a new project with a name of your choice. I named my project ‘MagicMirror123’.
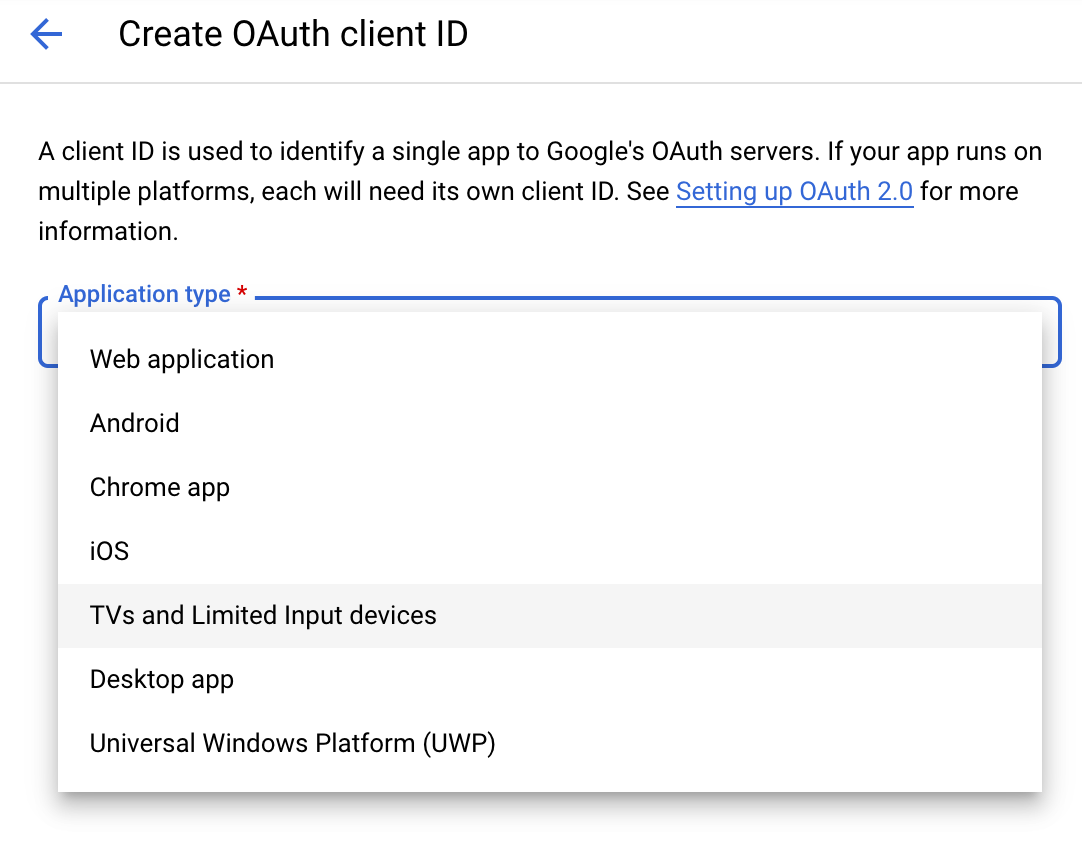
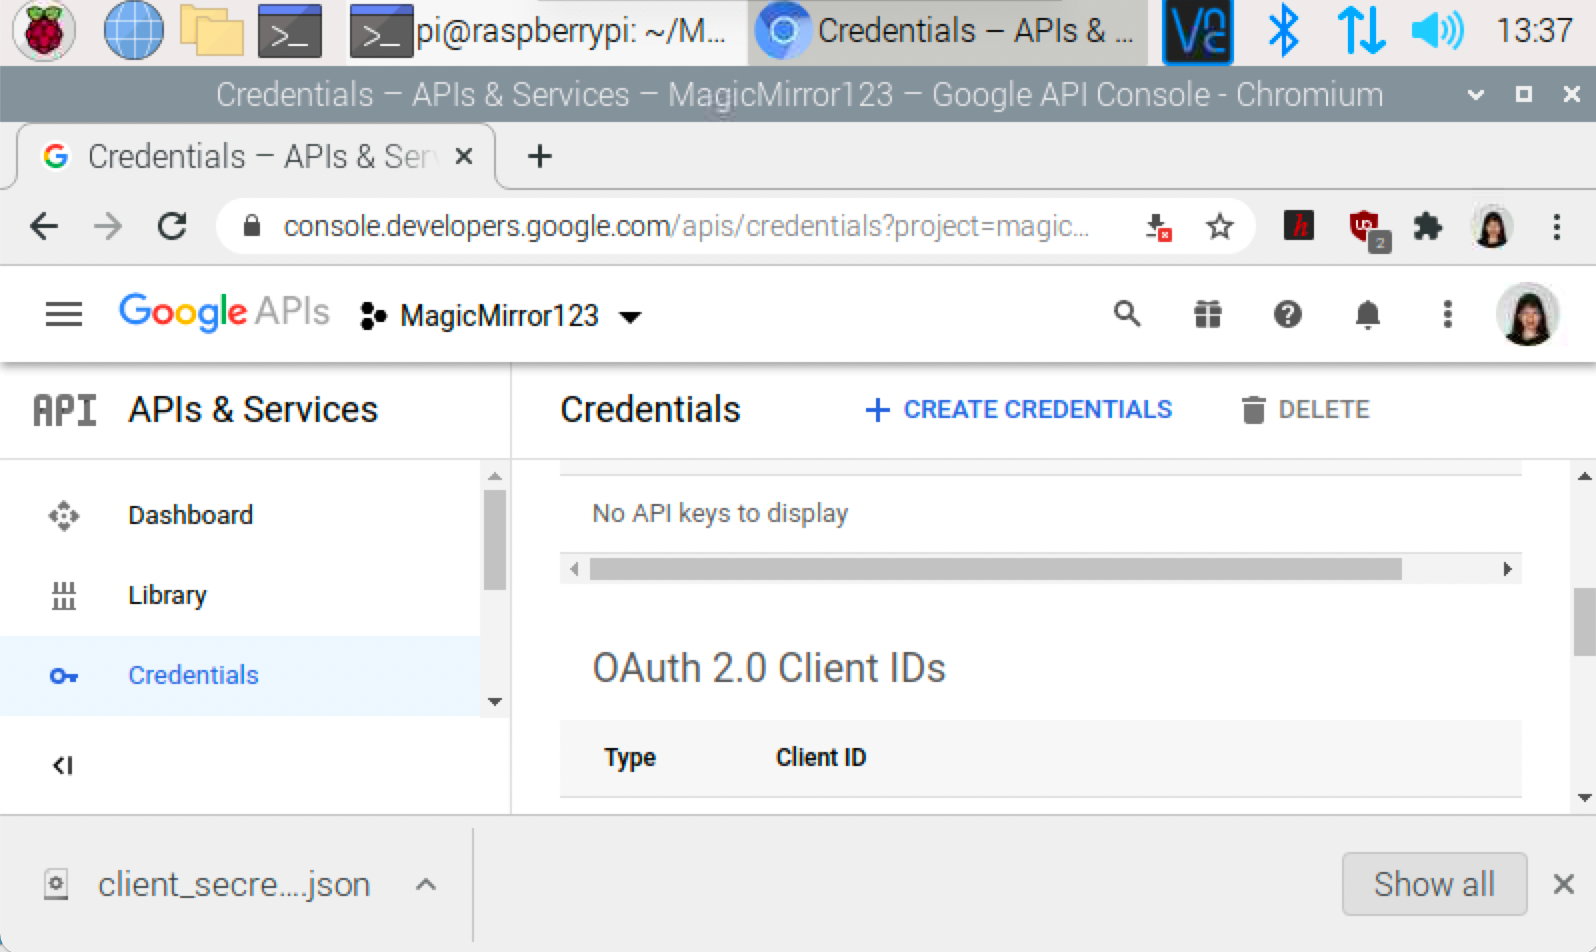
4. Click ‘+ Create Credentials’ and select ‘OAuth client ID’.
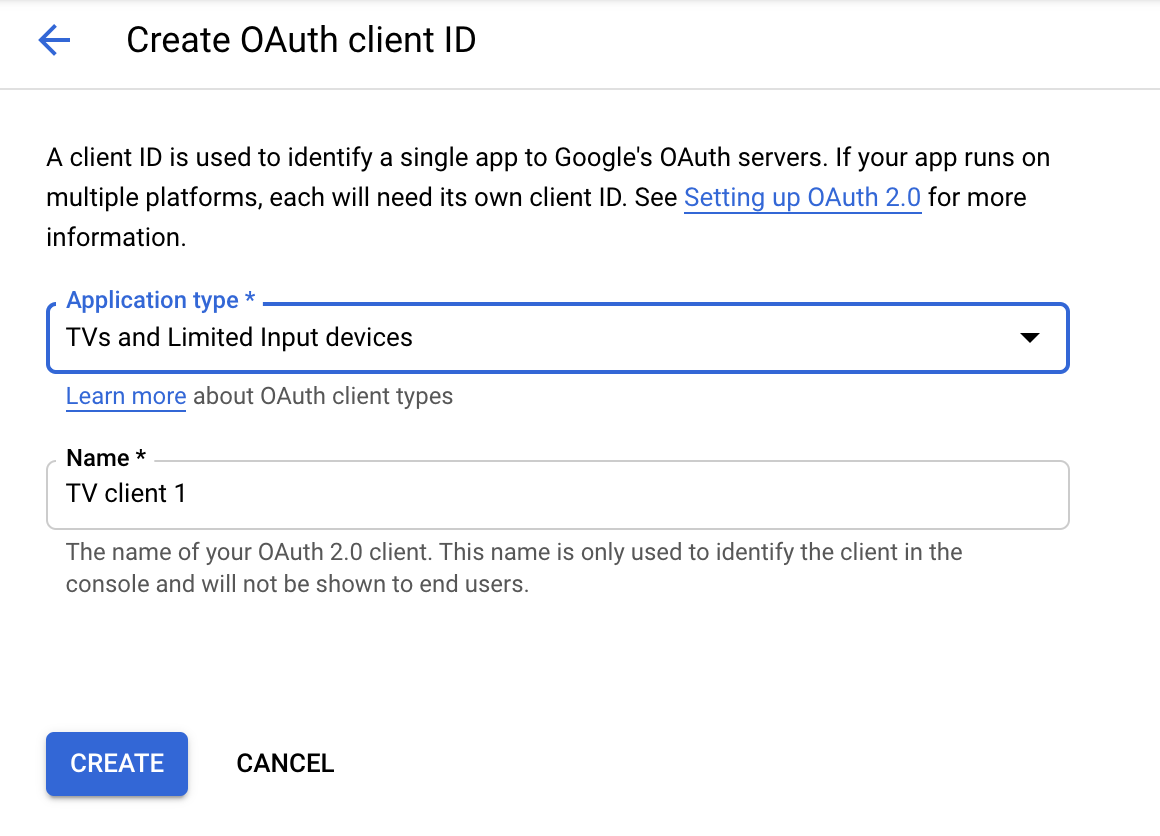
5. For Authorization Type, select ‘TVs and Limited Input devices’ from the dropdown menu
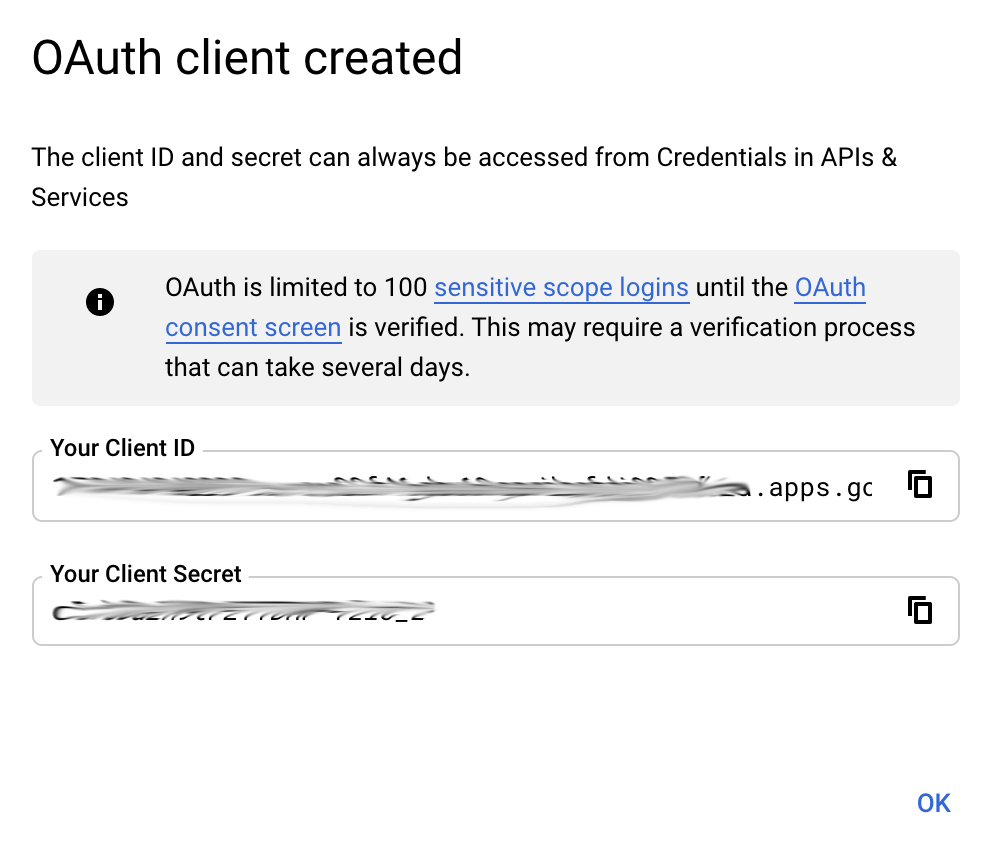
6. Click ‘Create’ to create your OAuth client ID.
7. Click ‘OK’ to return to the main Credentials page for your project.
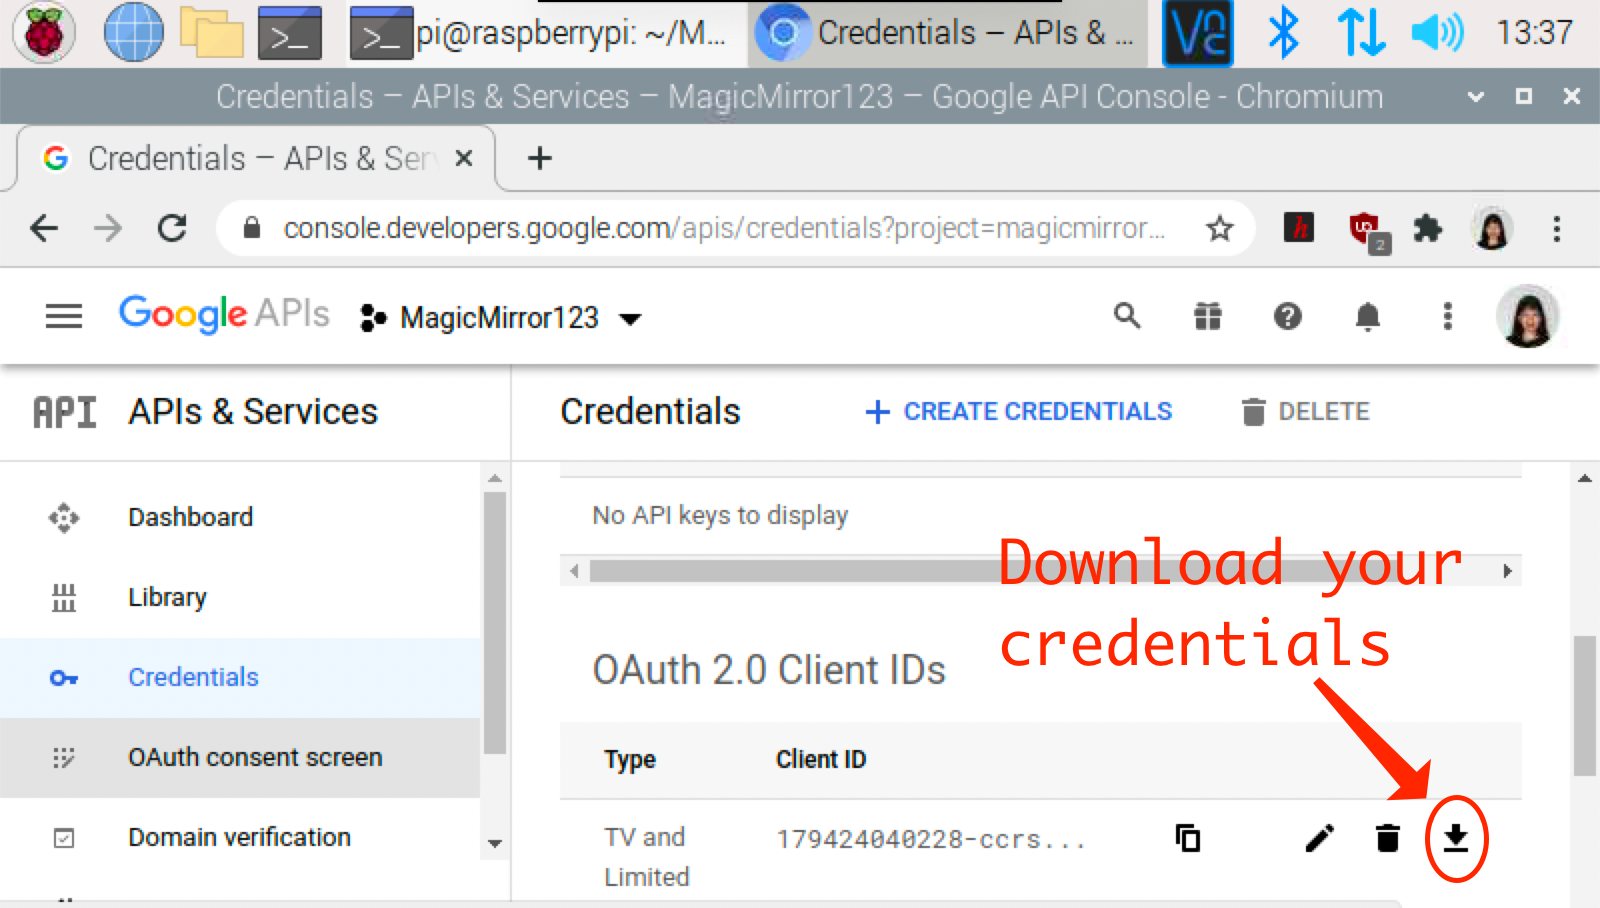
8. On the OAuth 2.0 Client ID you just created, click the down arrow to download your credentials.
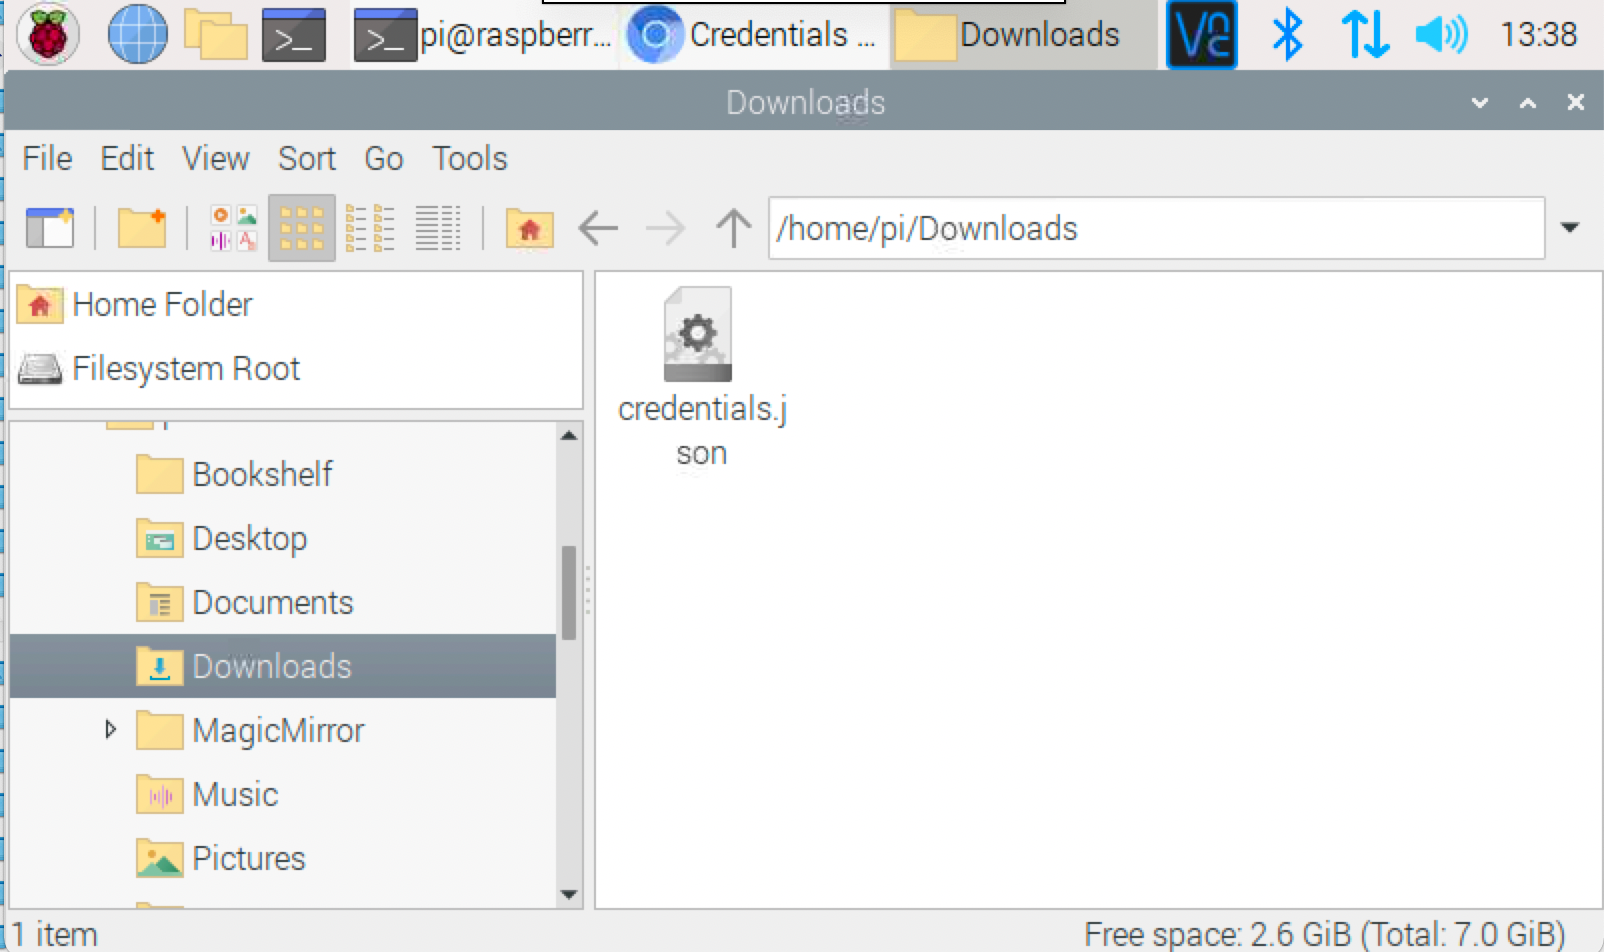
9. Open your File Manager from your Raspberry Pi desktop, navigate to Downloads and rename the file you just downloaded from ‘client_secret-x.json’ to ‘credentials.json’.
10. Move your newly renamed ‘credentials.json’ file to your MagicMirror/modules/MMM-GooglePhotos folder.
11. In your Terminal, run the following command to authenticate your Pi.
cd ~/MagicMirror/modules/MMM-GooglePhotos
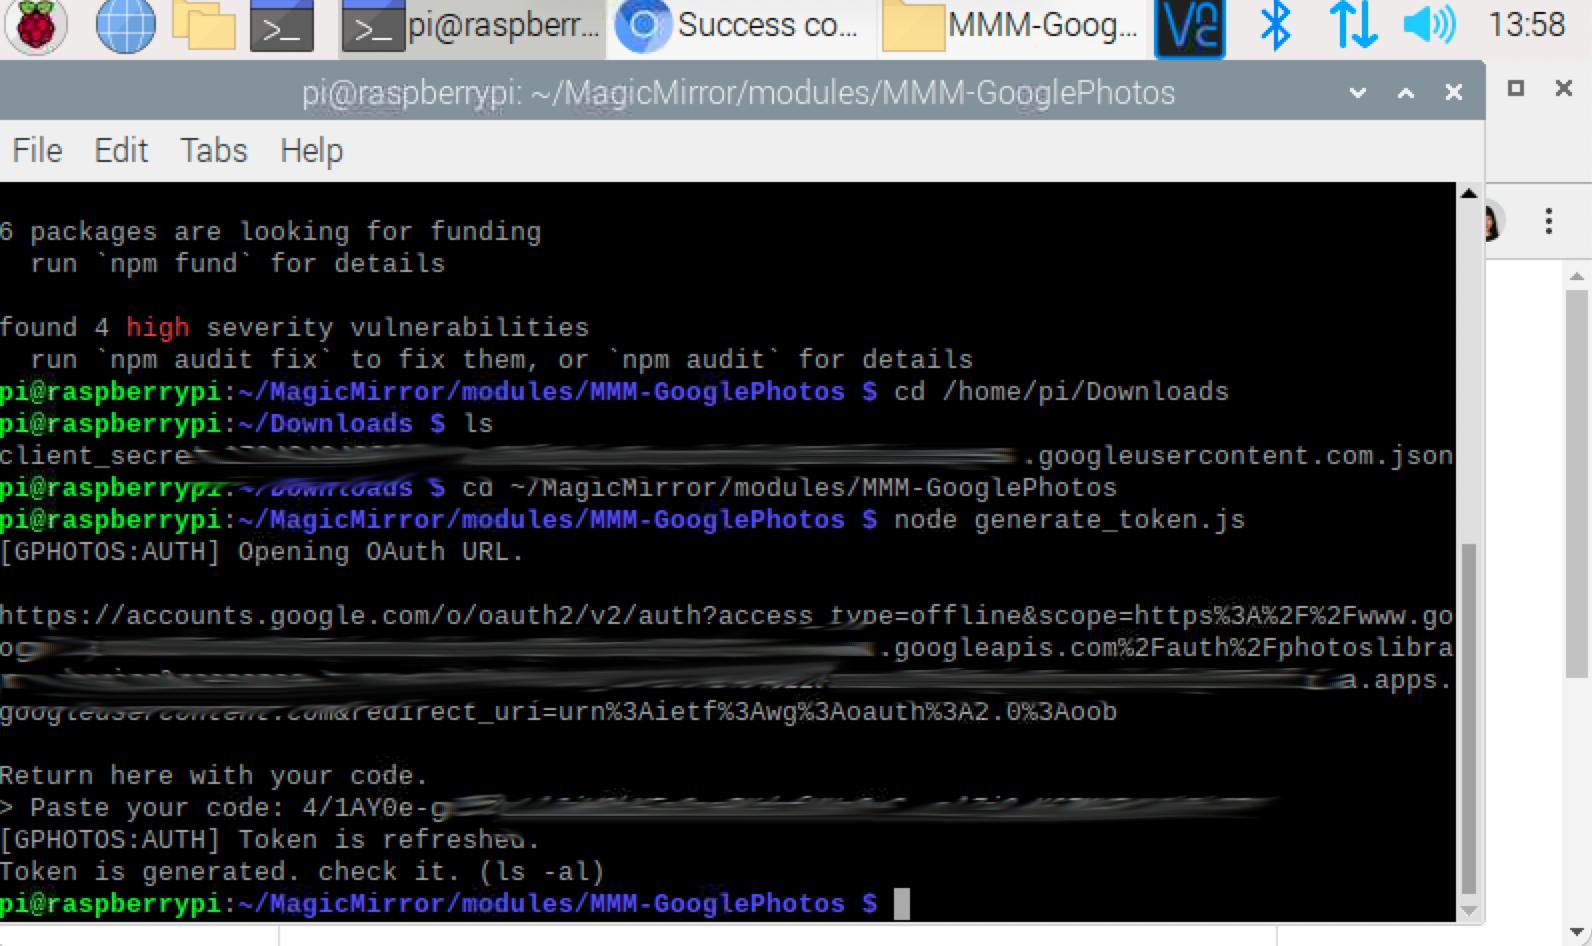
node generate_token.js
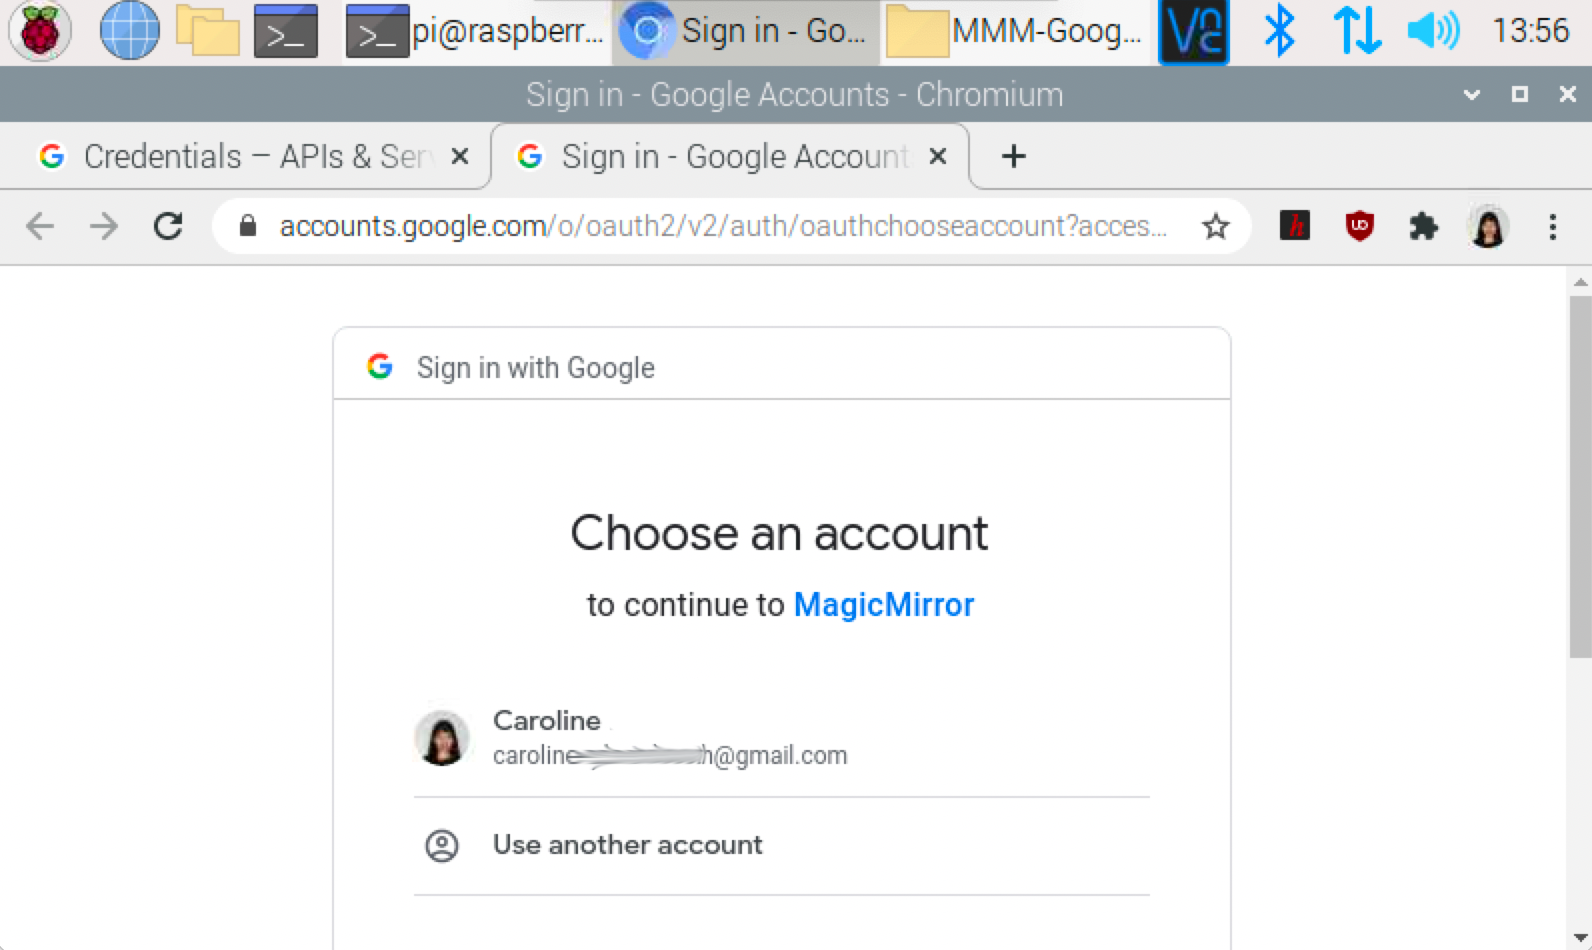
12. Select your account when Google prompts you to authorize your device.
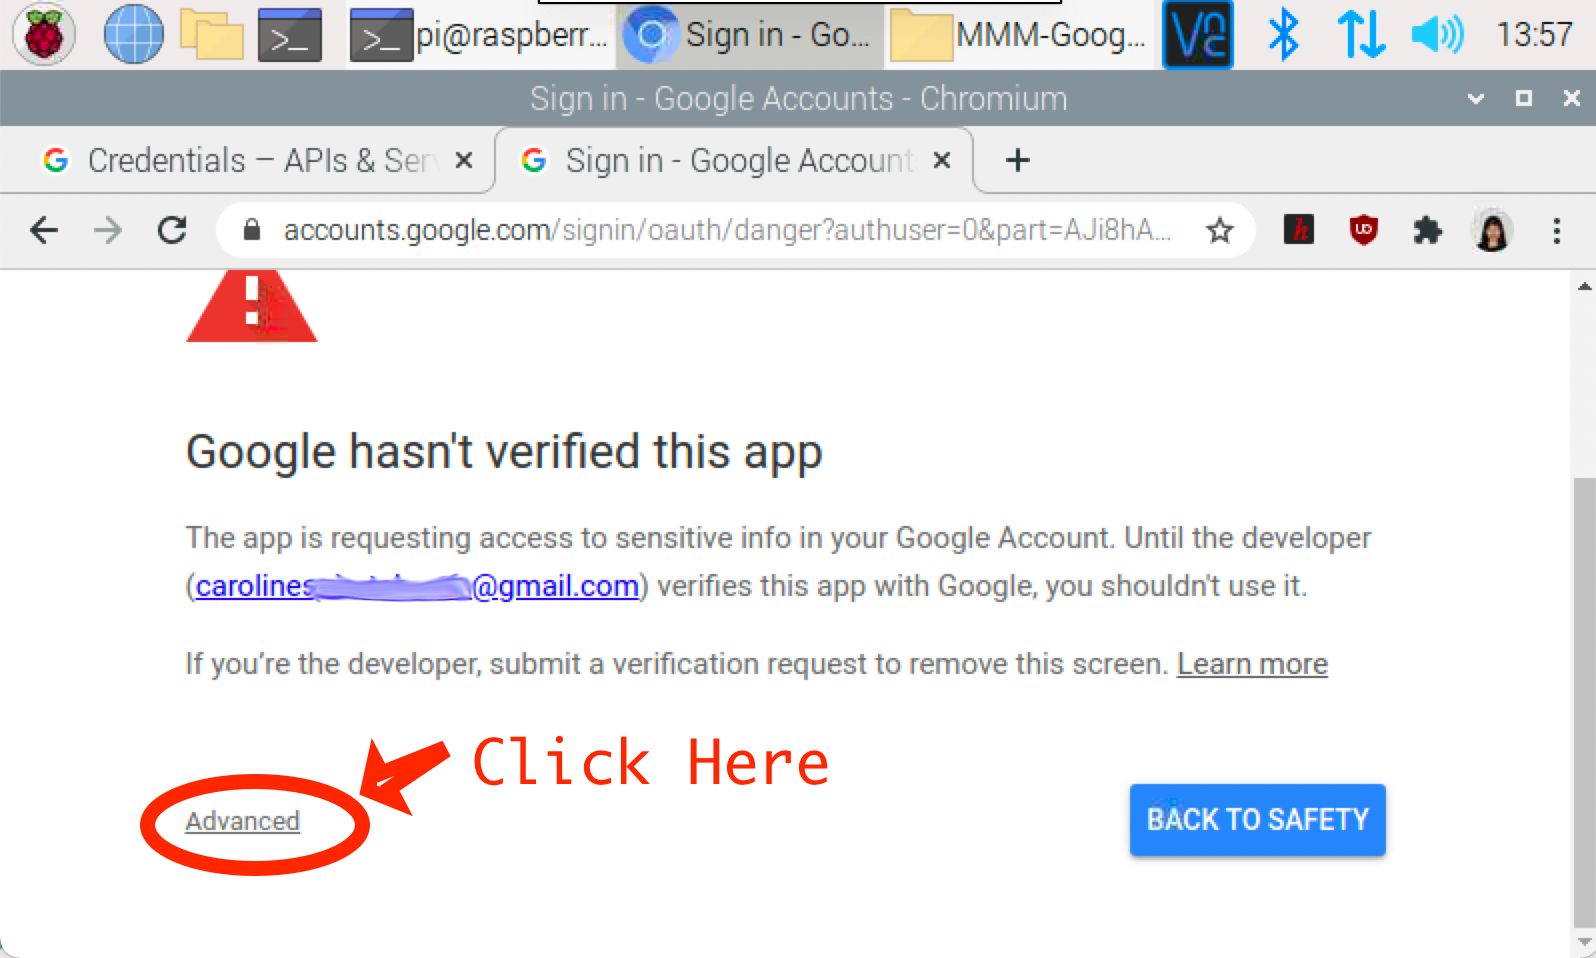
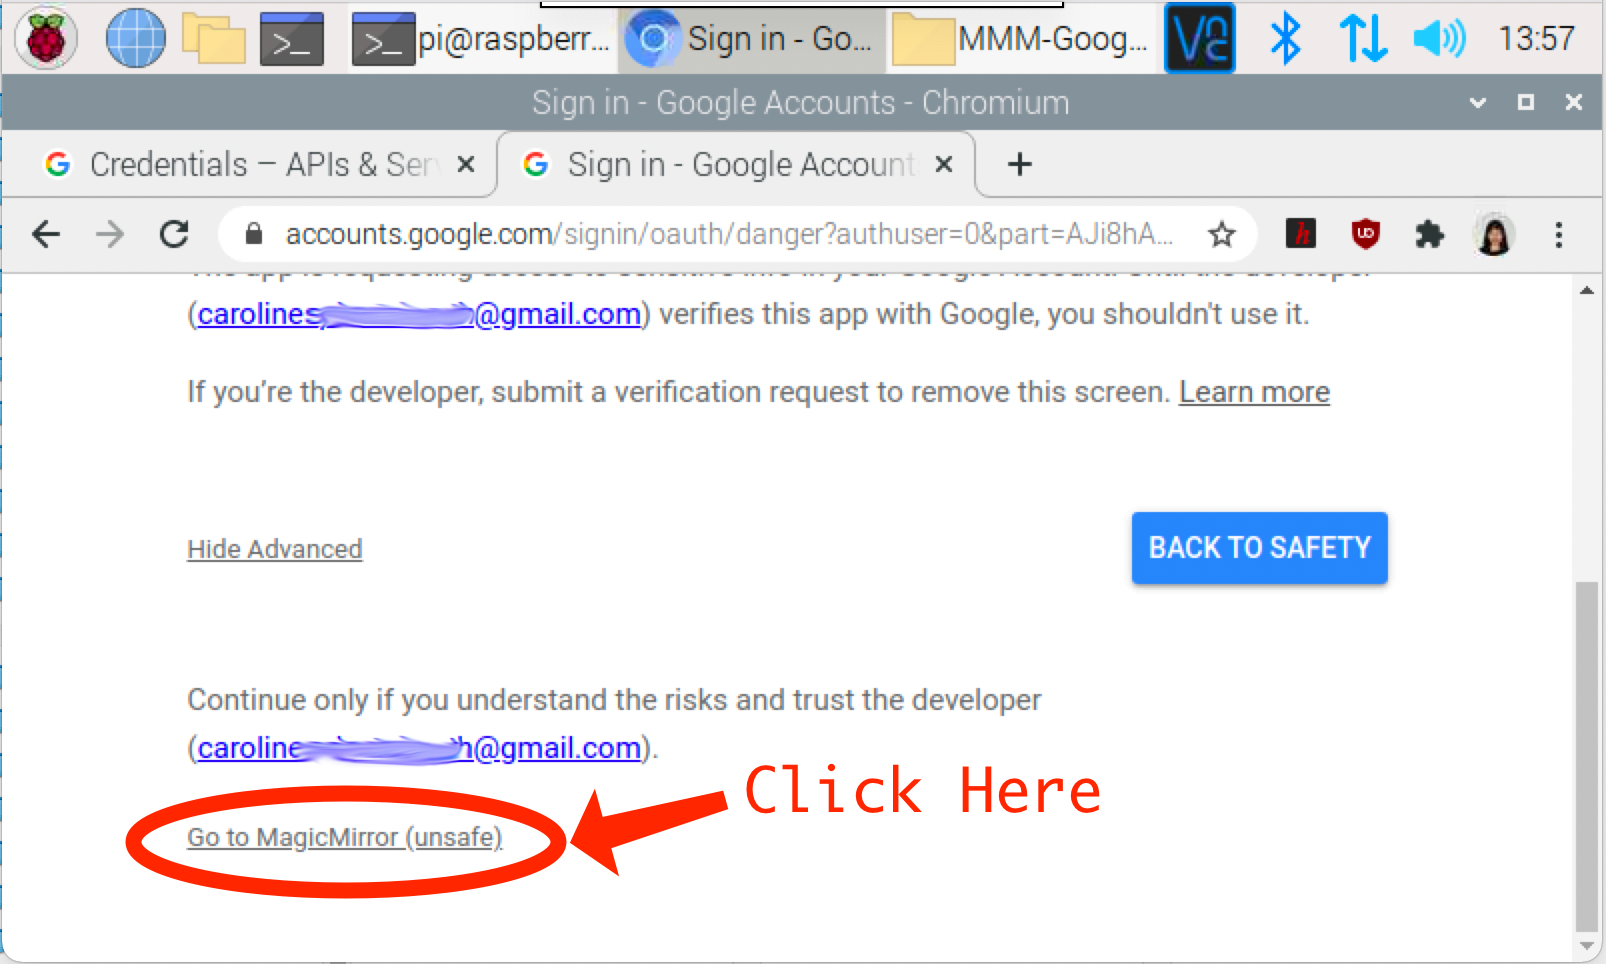
13. Scroll down, click ‘Advanced’ and then ‘Go to MagicMirror (unsafe)’.
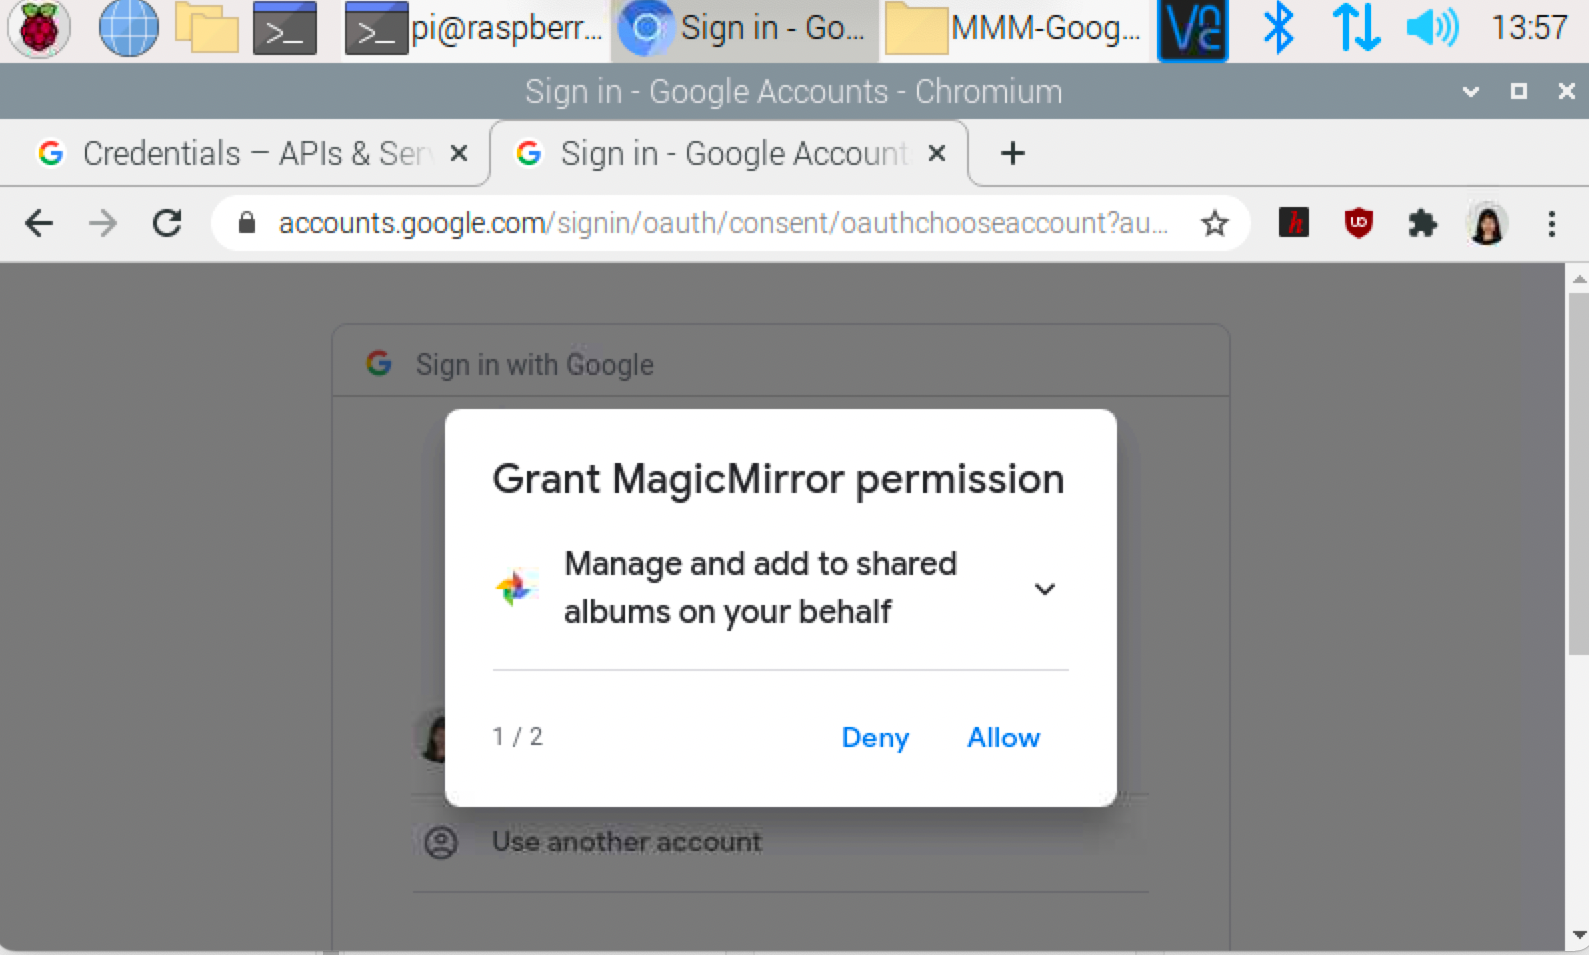
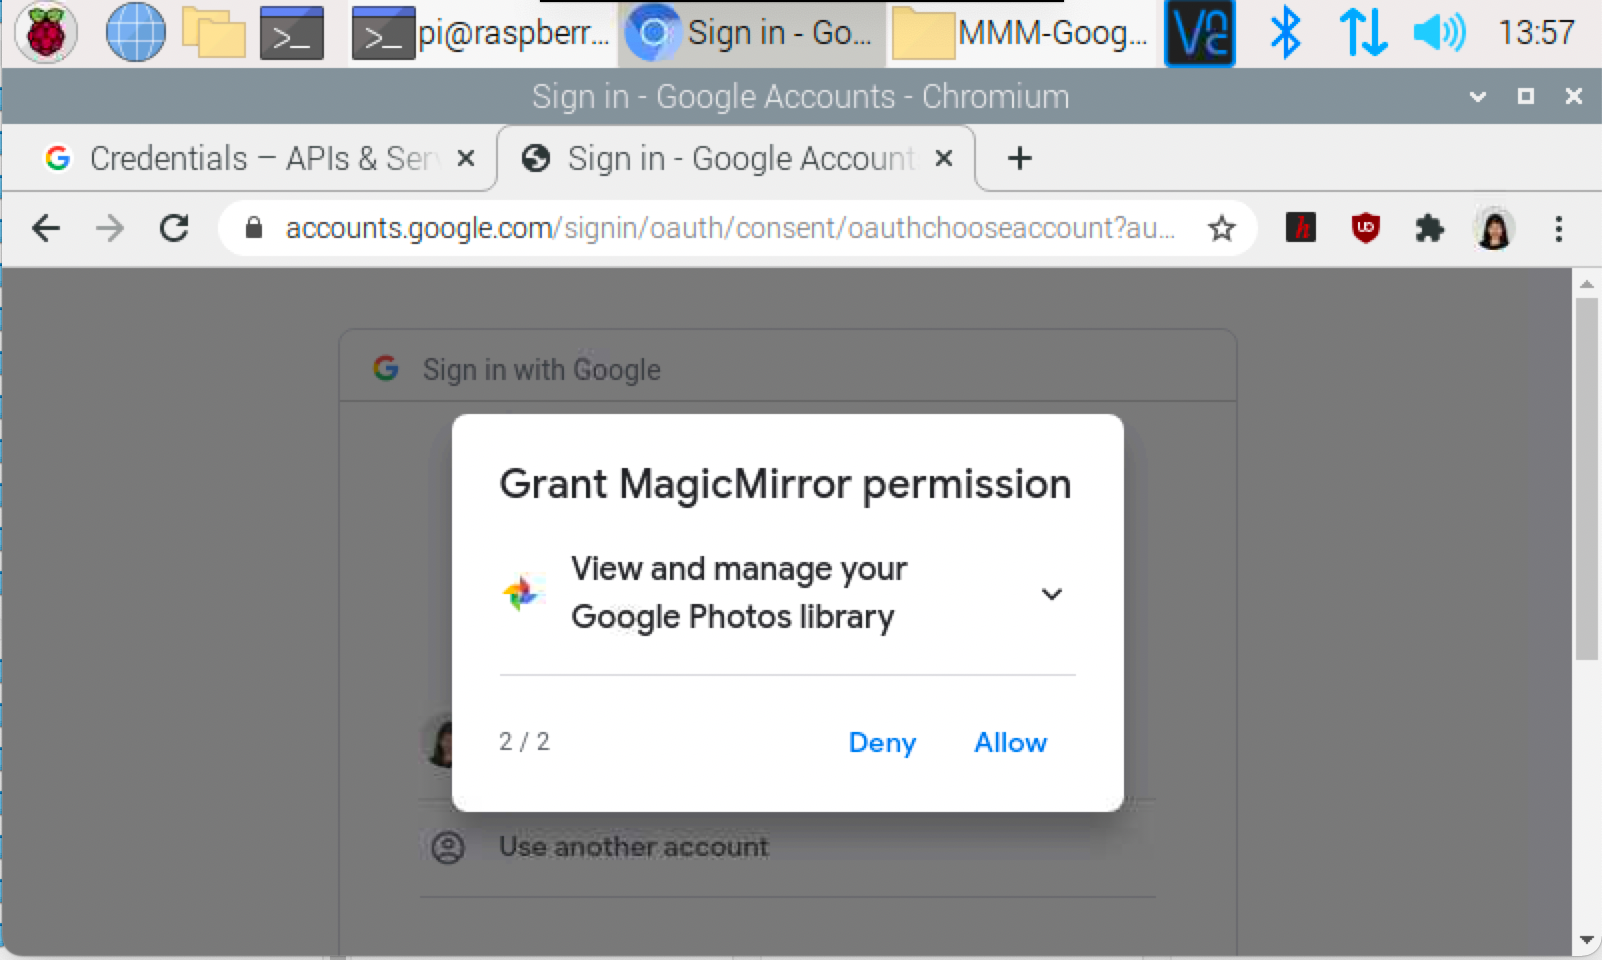
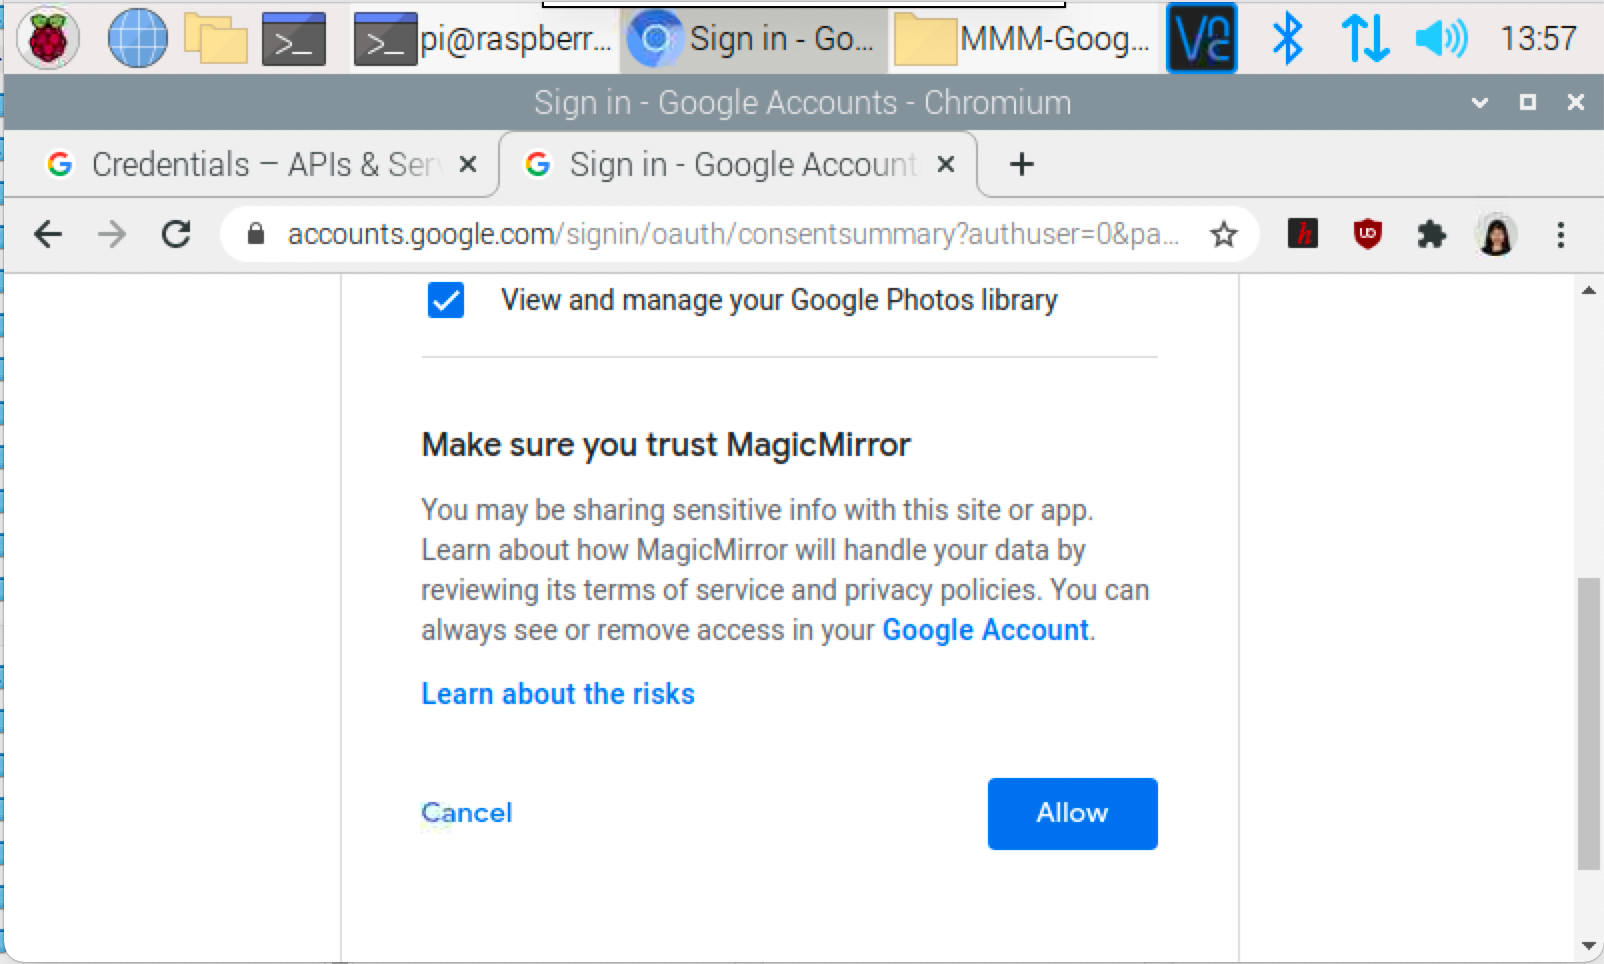
14. Grant MagicMirror permissions on the following screens by clicking ‘Allow’ for each prompt.
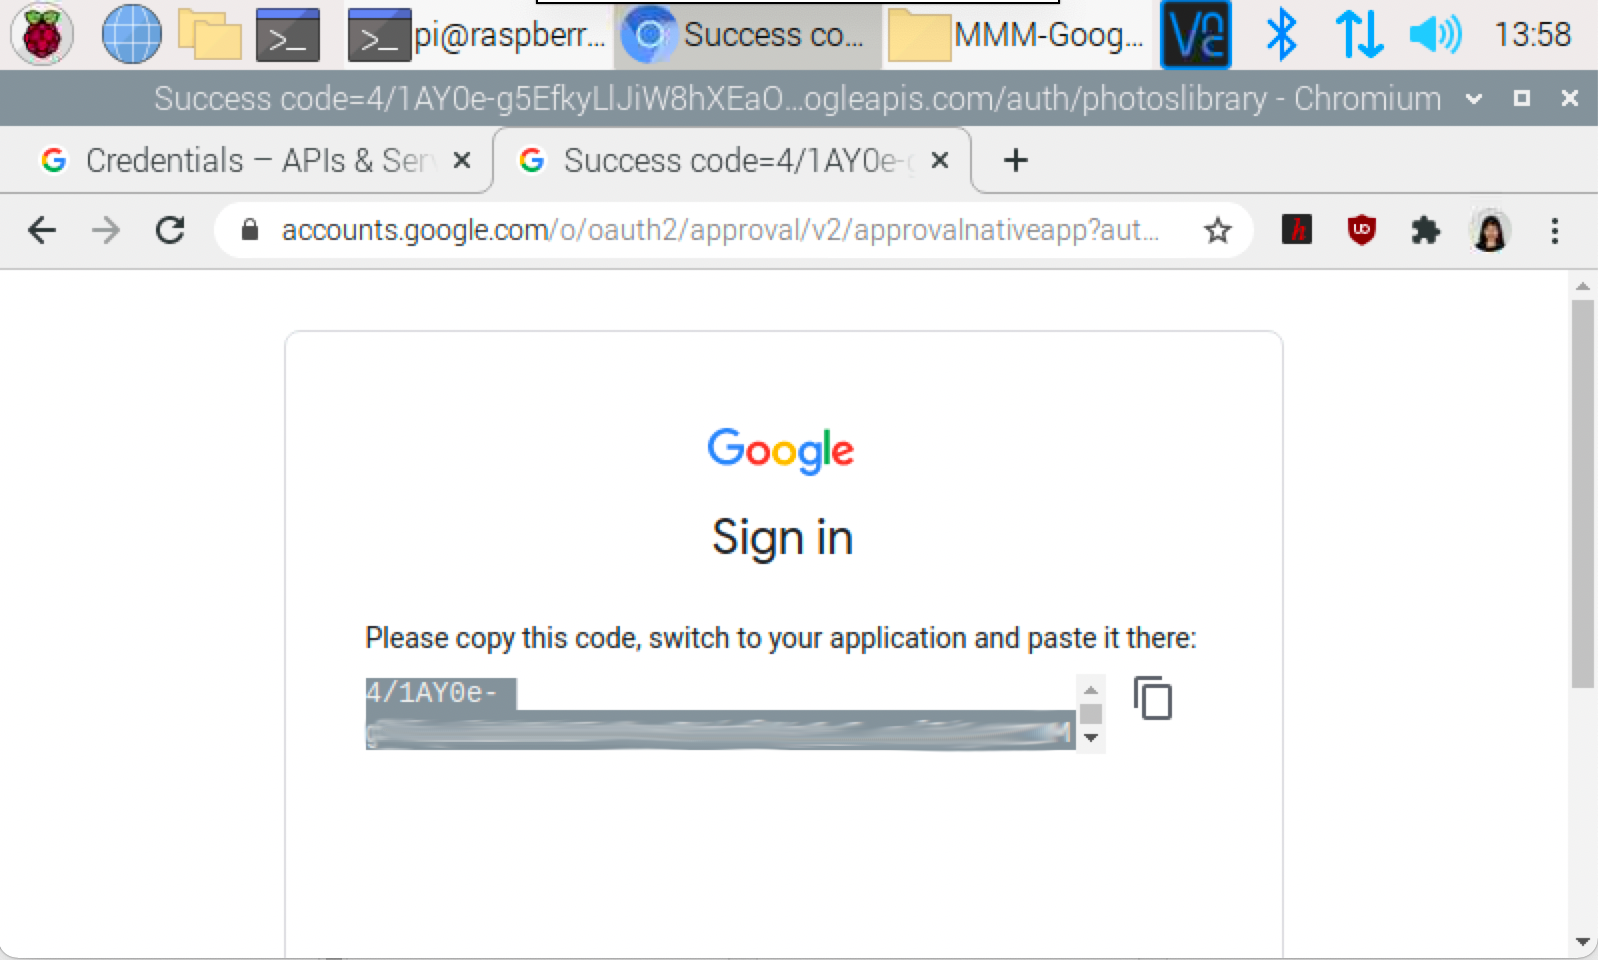
15. Copy your Success code and paste it into your terminal. Press Enter.
16. Open your File Manager and navigate to /home/pi/MagicMirror/modules/MMM-GooglePhotos or type ‘ls’ in your Terminal (within the MMM-GooglePhotos directory) to view all files. If you see token.json as a file within this folder, you have successfully authorized your device to access your Google Photos.
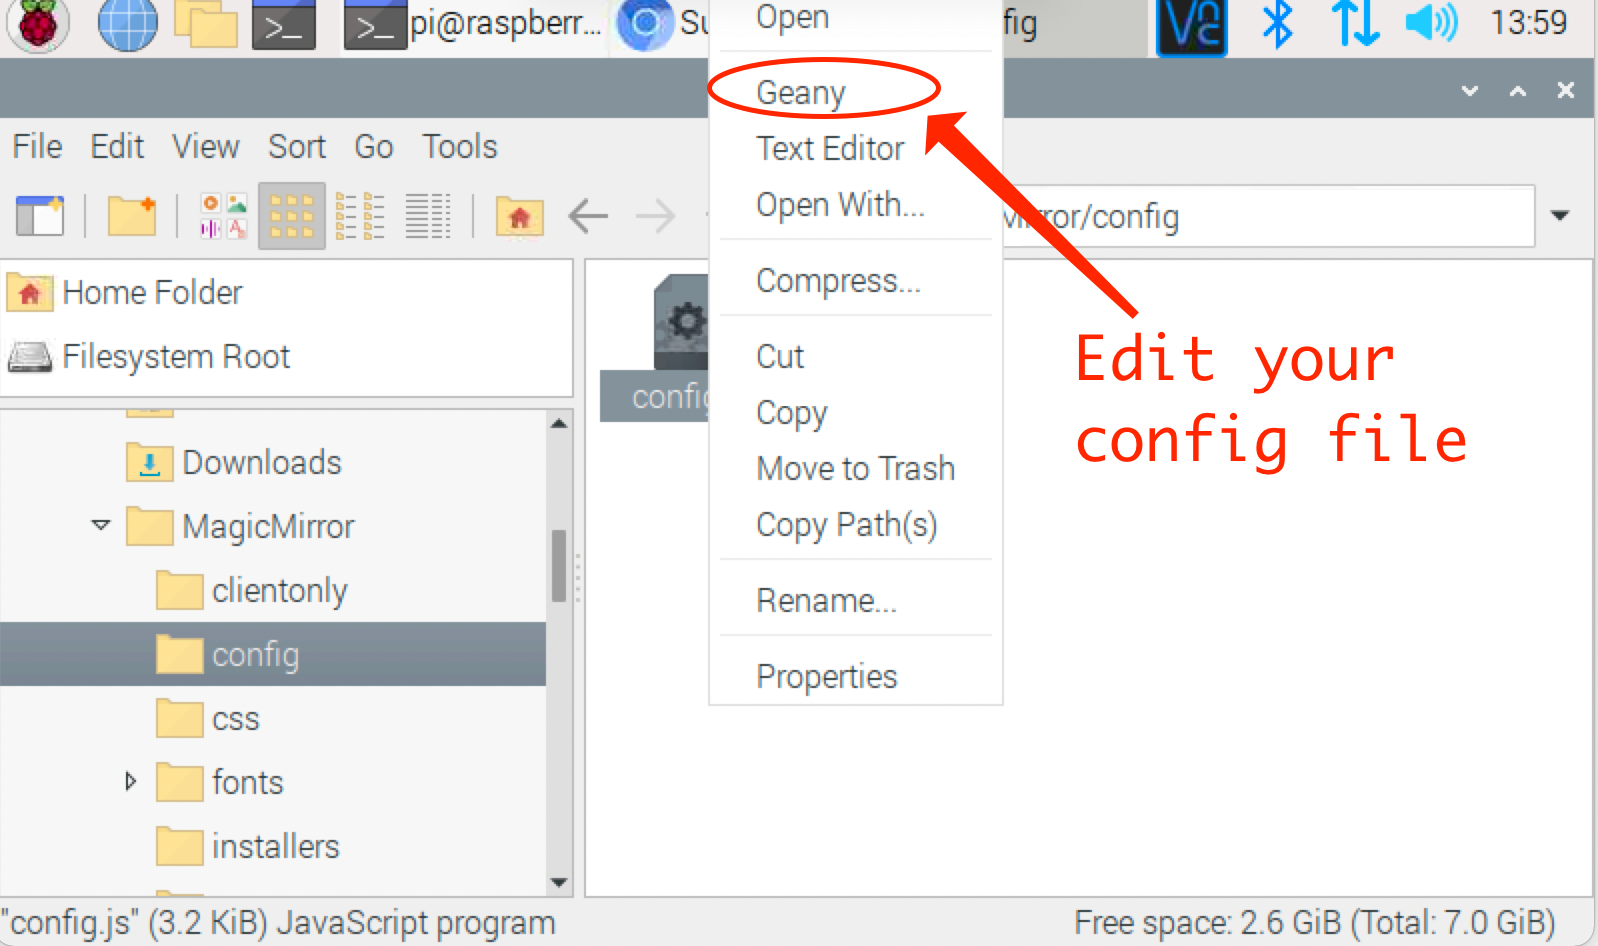
17. Open the config.js file for editing in the /home/pi/MagicMirror/config folder.
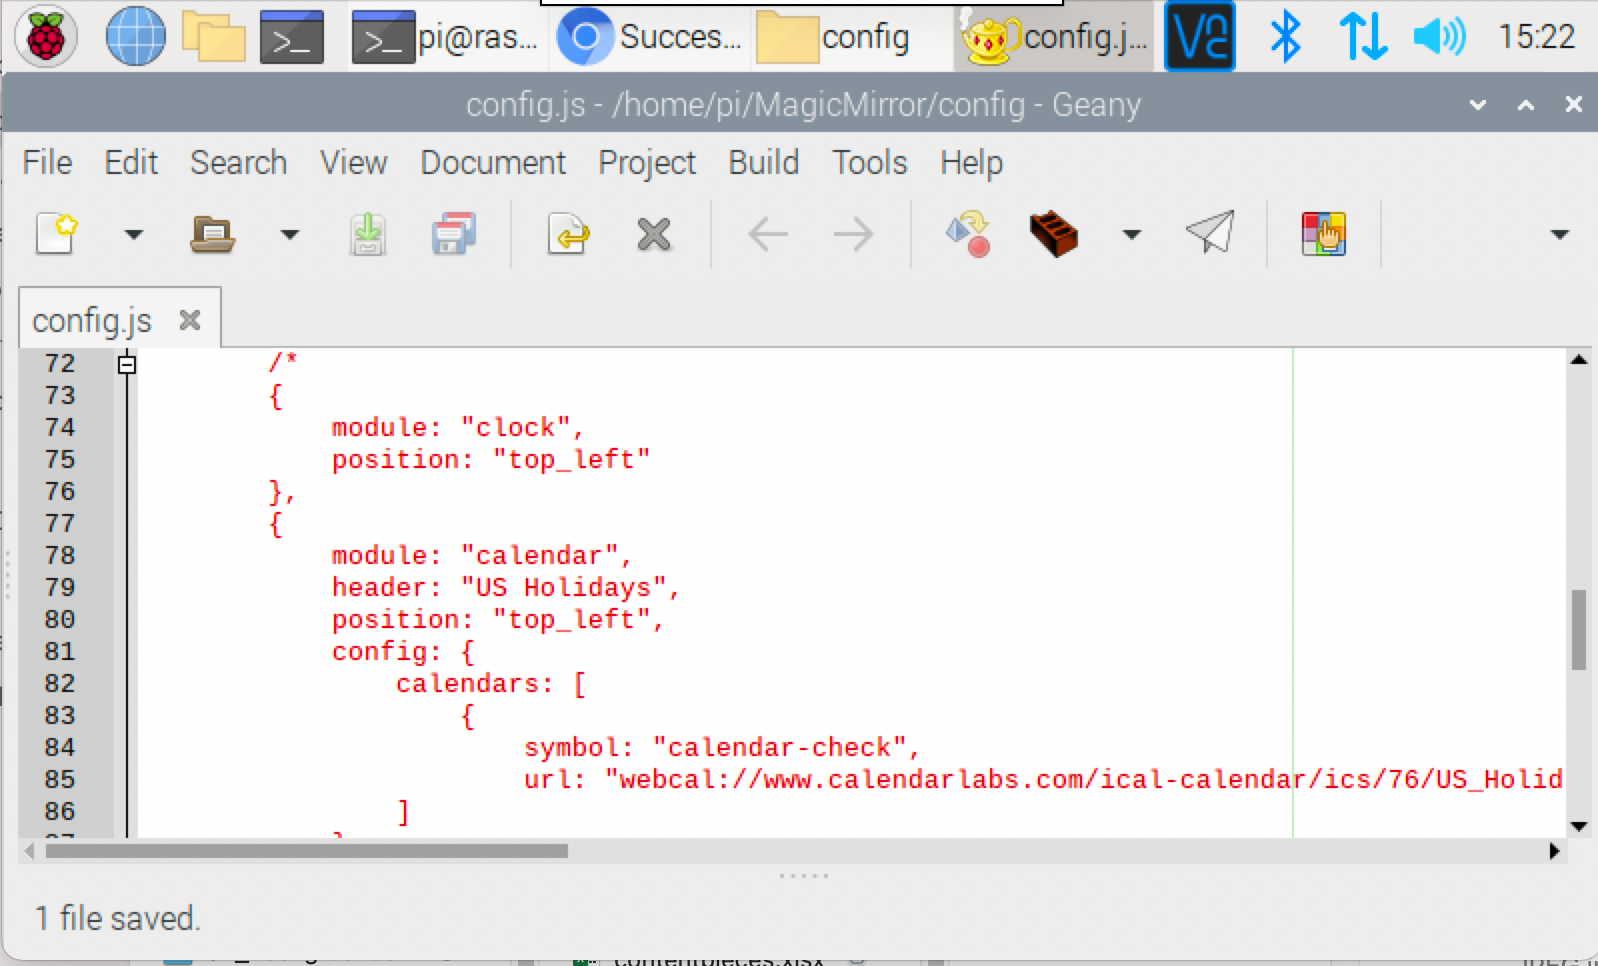
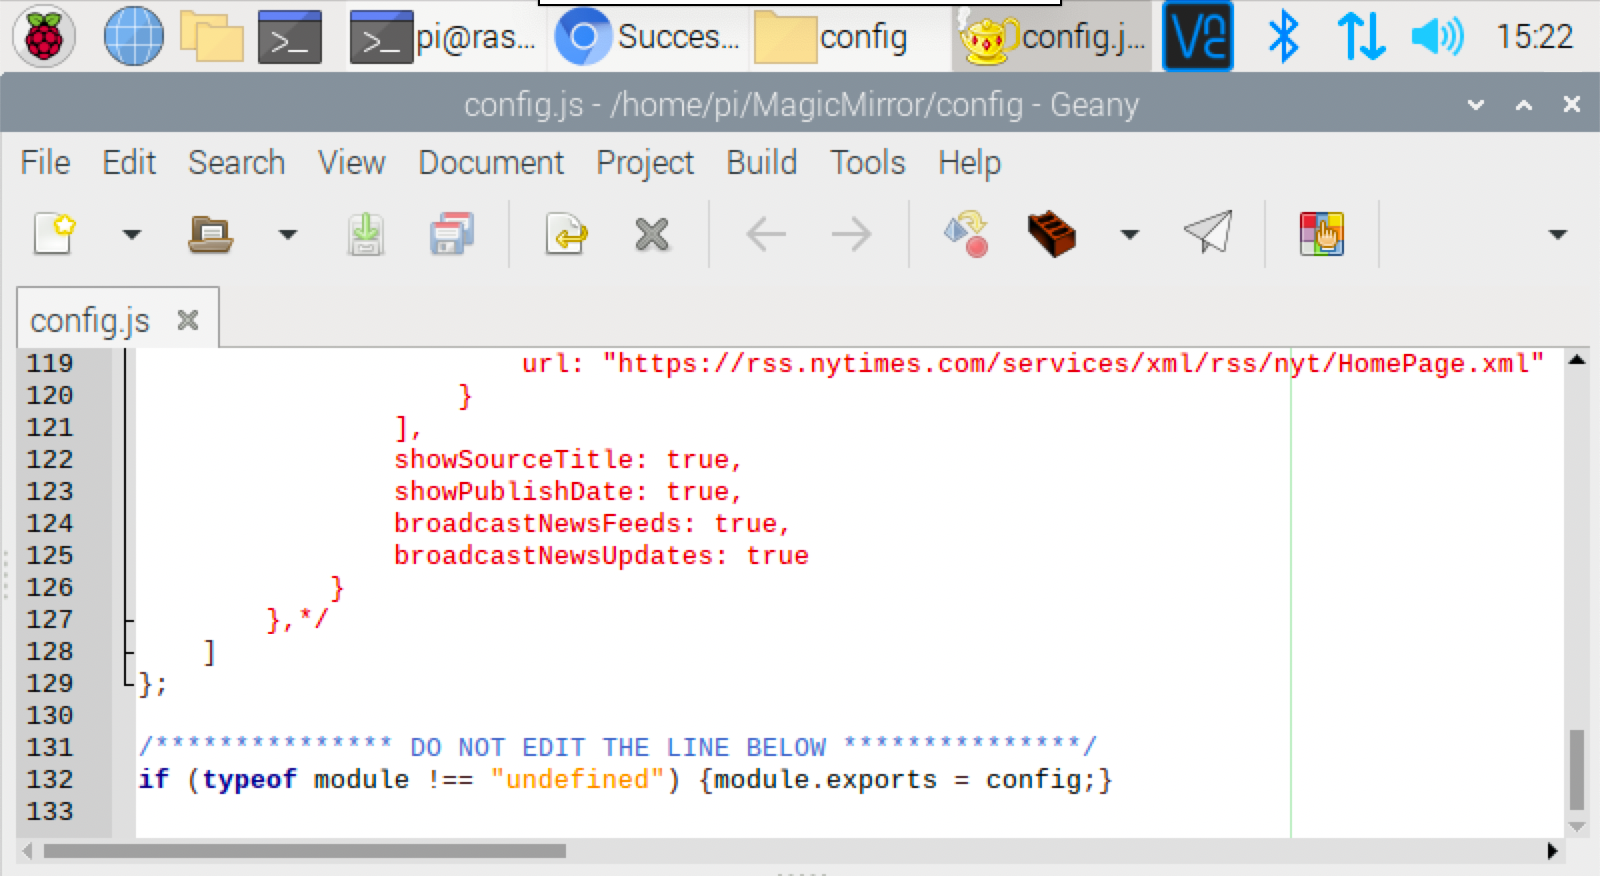
18. In your config.js file, comment out all modules except for notifications by adding ‘/*’ before the Clock module and ‘*/’ after the Newsfeed module.
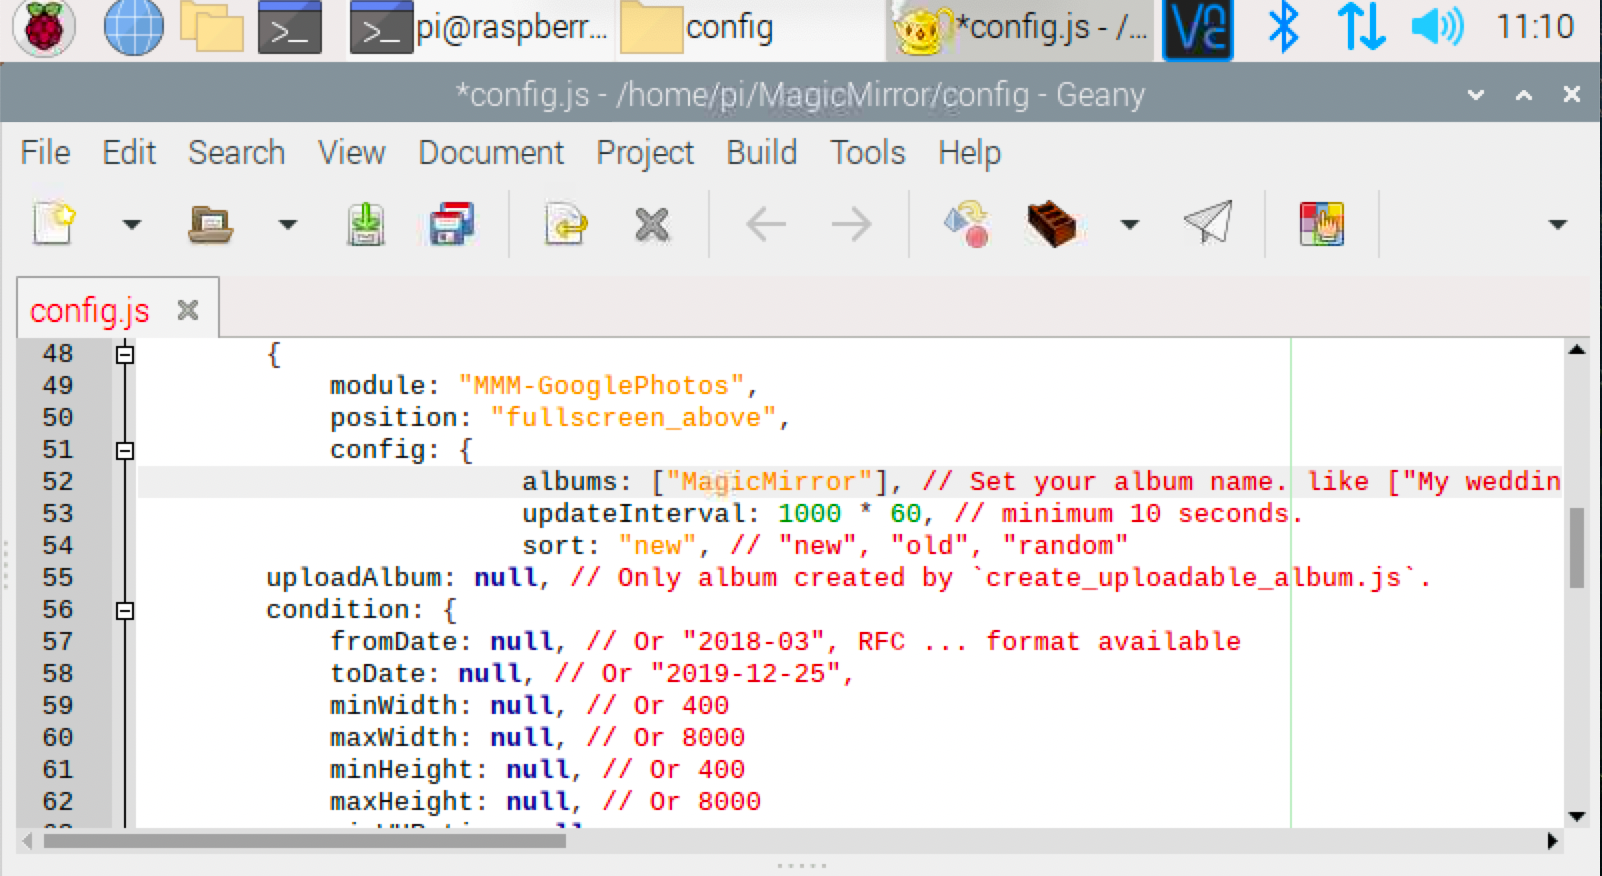
19. Add the code for MMM-GooglePhotos into the modules section of your config.js file.
{
  module: "MMM-GooglePhotos",
  position: "fullscreen_above",
  config: {
		albums: ["MagicMirror"], // Set your album name.
		updateInterval: 1000 * 60, // minimum 10 seconds.
		sort: "random", // "new", "old", "random"
		uploadAlbum: null, // Only album created by `create_uploadable_album.js`.
		condition: {
			fromDate: null, // Or "2018-03", RFC ... format available
			toDate: null, // Or "2019-12-25",
			minWidth: null, // Or 400
			maxWidth: null, // Or 8000
			minHeight: null, // Or 400
			maxHeight: null, // Or 8000
			minWHRatio: null,
			maxWHRatio: null,
		},
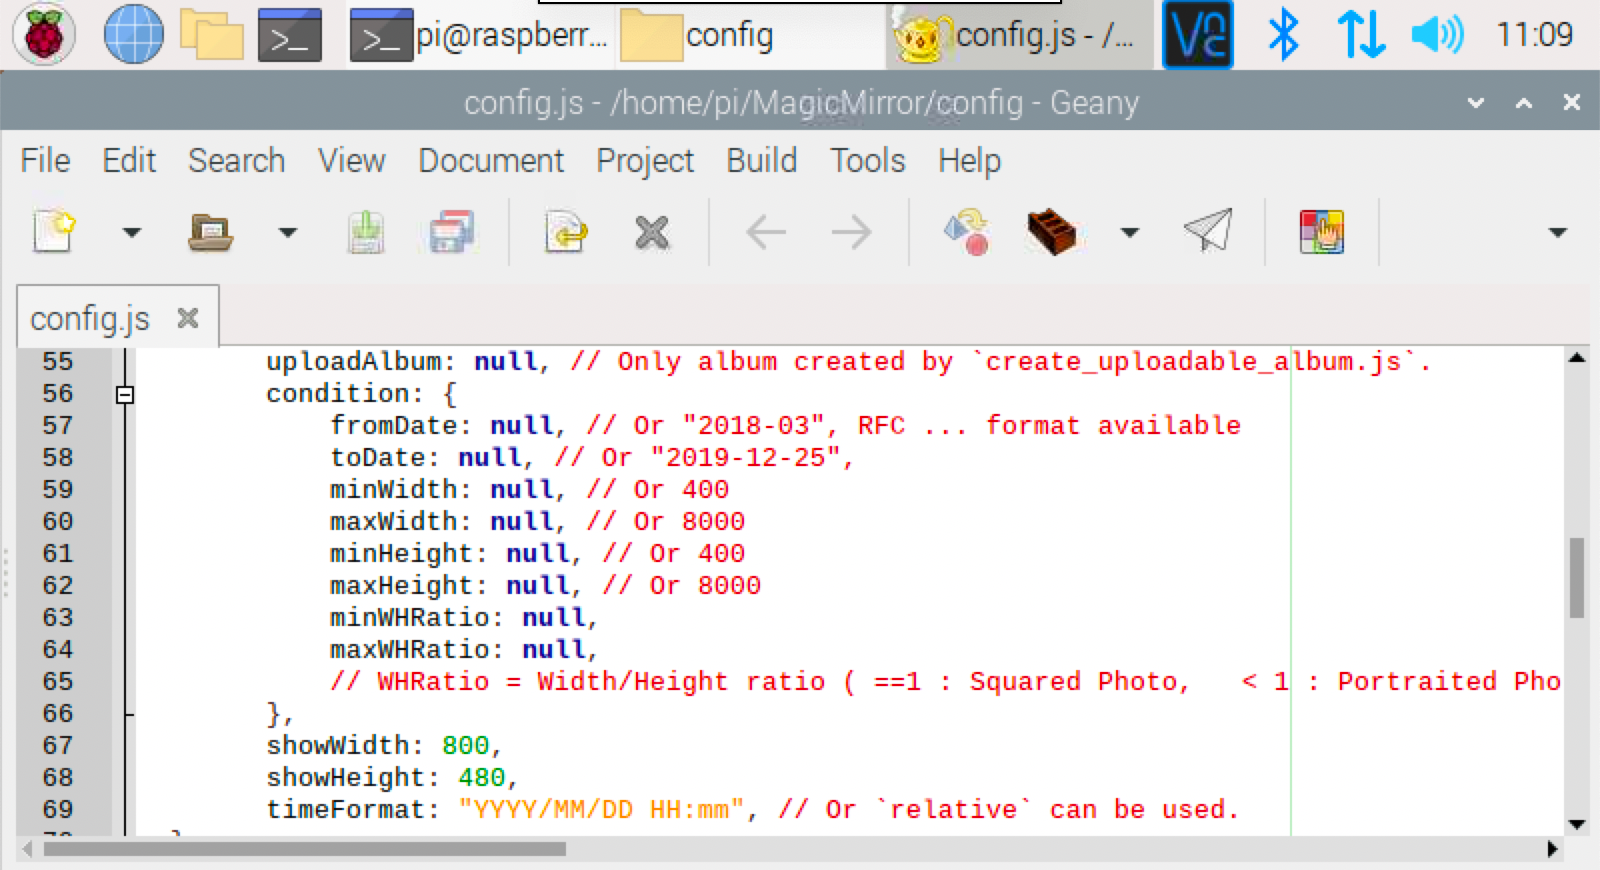
		showWidth: 800, // Set this to the resolution of your screen width
		showHeight: 480, // Set this to the resolution of your screen height
		timeFormat: "YYYY/MM/DD HH:mm", // Or `relative` can be used.
  }
},
20. In the config section of MMM-GooglePhotos, enter the name of the album you created at the beginning of this project in the ‘albums’ parameter.
21. Set the order in which you wish to view your photos in the ‘sort’ parameter.
- New = latest images will display first
- Old = images will display from oldest to newest
- Random = images will display in random order
22. Set the frequency to change the images in the ‘updateInterval’ parameter. The default is 60 seconds.
23. Set the resolution of the screen that you are using in the parameters ‘showWidth’ and ‘showHeight’. The default resolution for the 7” Raspberry Pi screen is 800 x 480.
24. Save your changes in config.js.
25. In your terminal, run the command ‘npm run start’ to restart your Magic Mirror. There will be a 30 second or more delay while your Pi pulls images from your Google Photos album. Your Pi will need to stay connected to the internet to display your images.
26. To stop Magic Mirror, press Ctrl-M followed by Ctrl-C in the terminal. You can continue to make adjustments in your config.js file until you are happy with the way that your images are displayed.
27. At this point, you can start adding more images to your Google Photos album. Your Raspberry Pi Magic Mirror digital photo frame should automatically update with any new images.
Launch Magic Mirror on Boot
If you reboot your Pi, you’ll need to enter the command ‘npm run start’ each time you want to start your digital photo frame. Let’s set our Raspberry Pi to display our digital photo frame on boot.
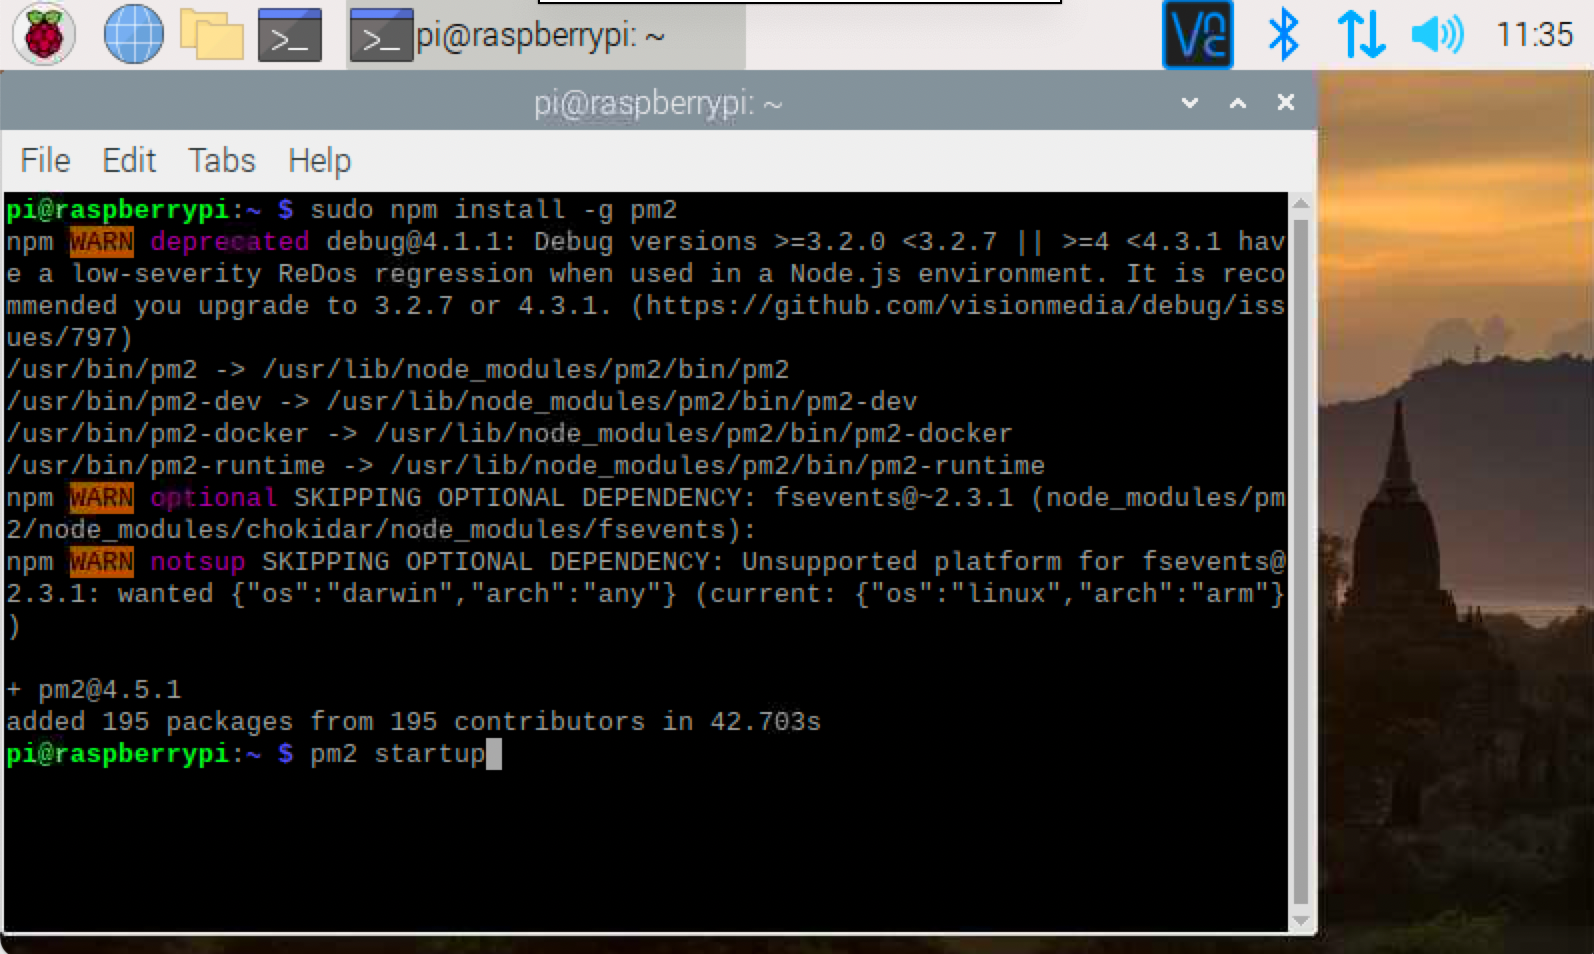
1. Install PM2 by running the following commands in your Raspberry Pi terminal. PM2 is a daemon process manager to keep your applications running continuously. In this project we will utilize PM2 to continuously run Magic Mirror for our digital photo frame.
sudo npm install -g pm2
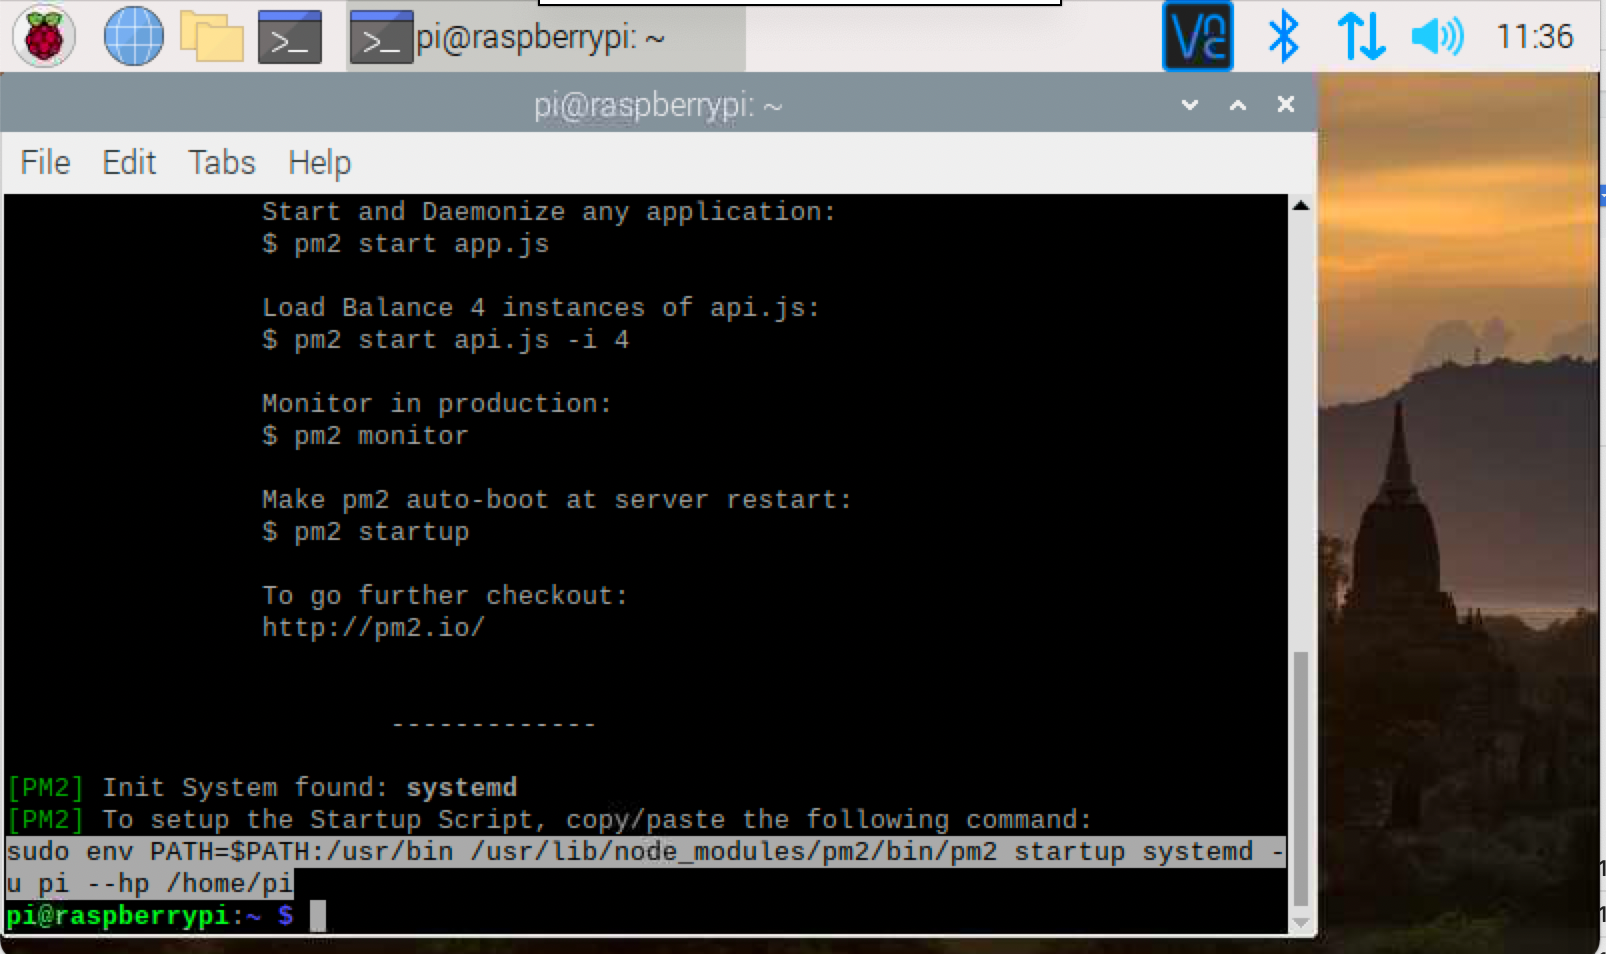
pm2 startup2. Your terminal will provide the next command. Copy and paste the command into your terminal.
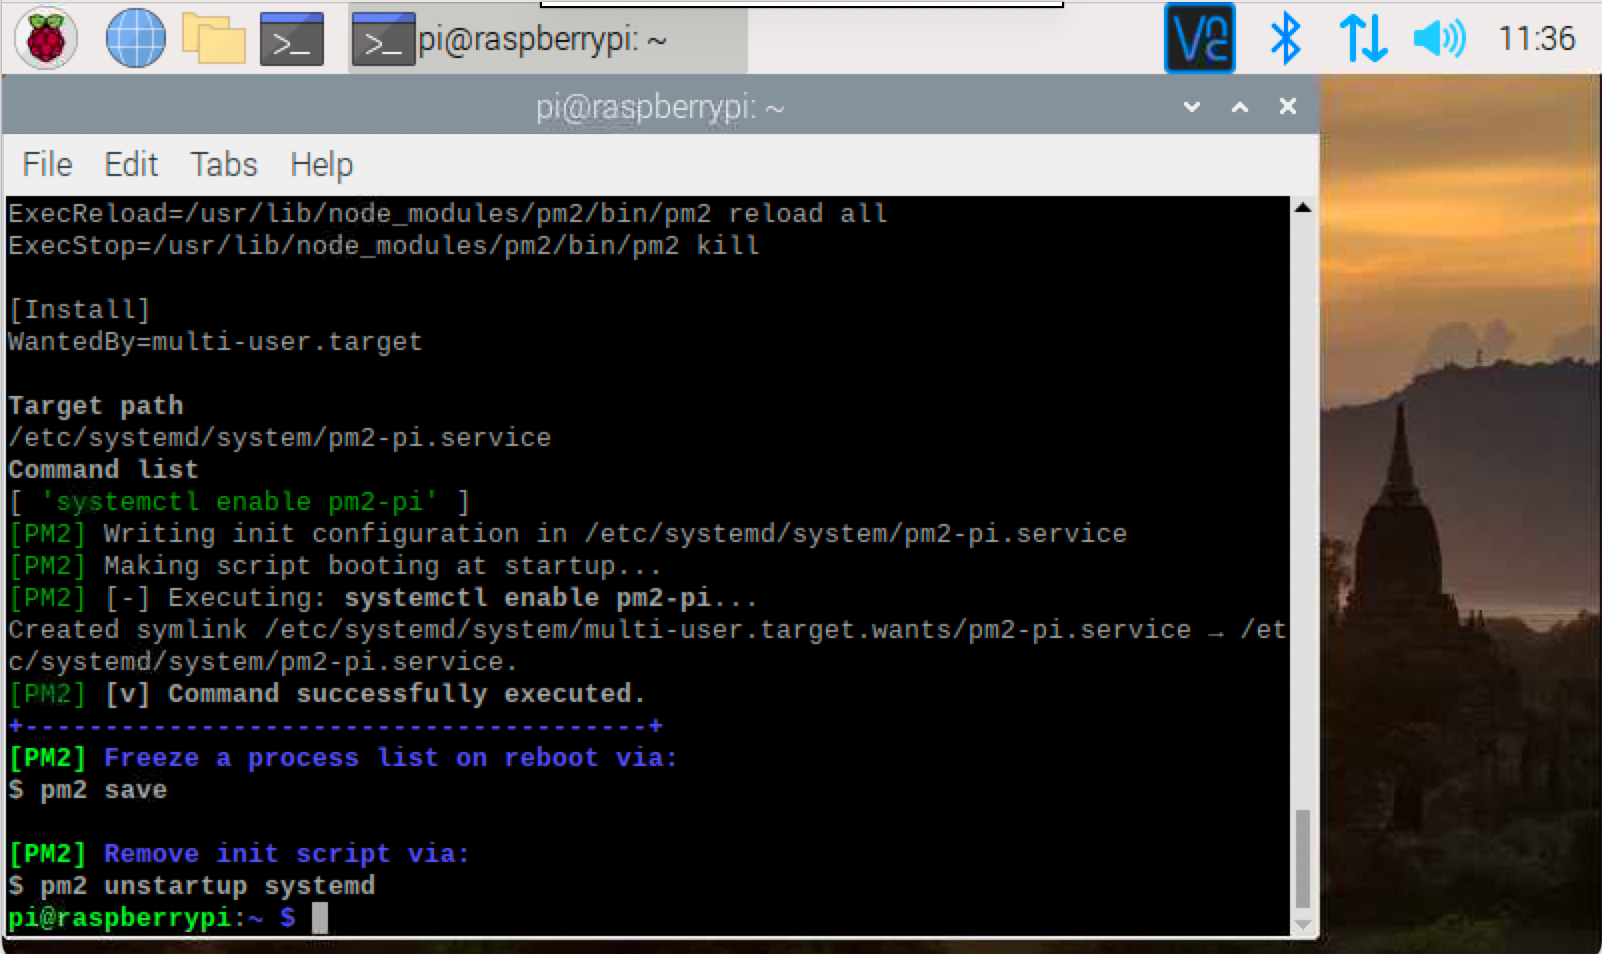
sudo env PATH=$PATH:/usr/bin /usr/lib/node_modules/pm2/bin/pm2 startup systemd -u pi --hp /home/pi3. Create a shell script named mm.sh.
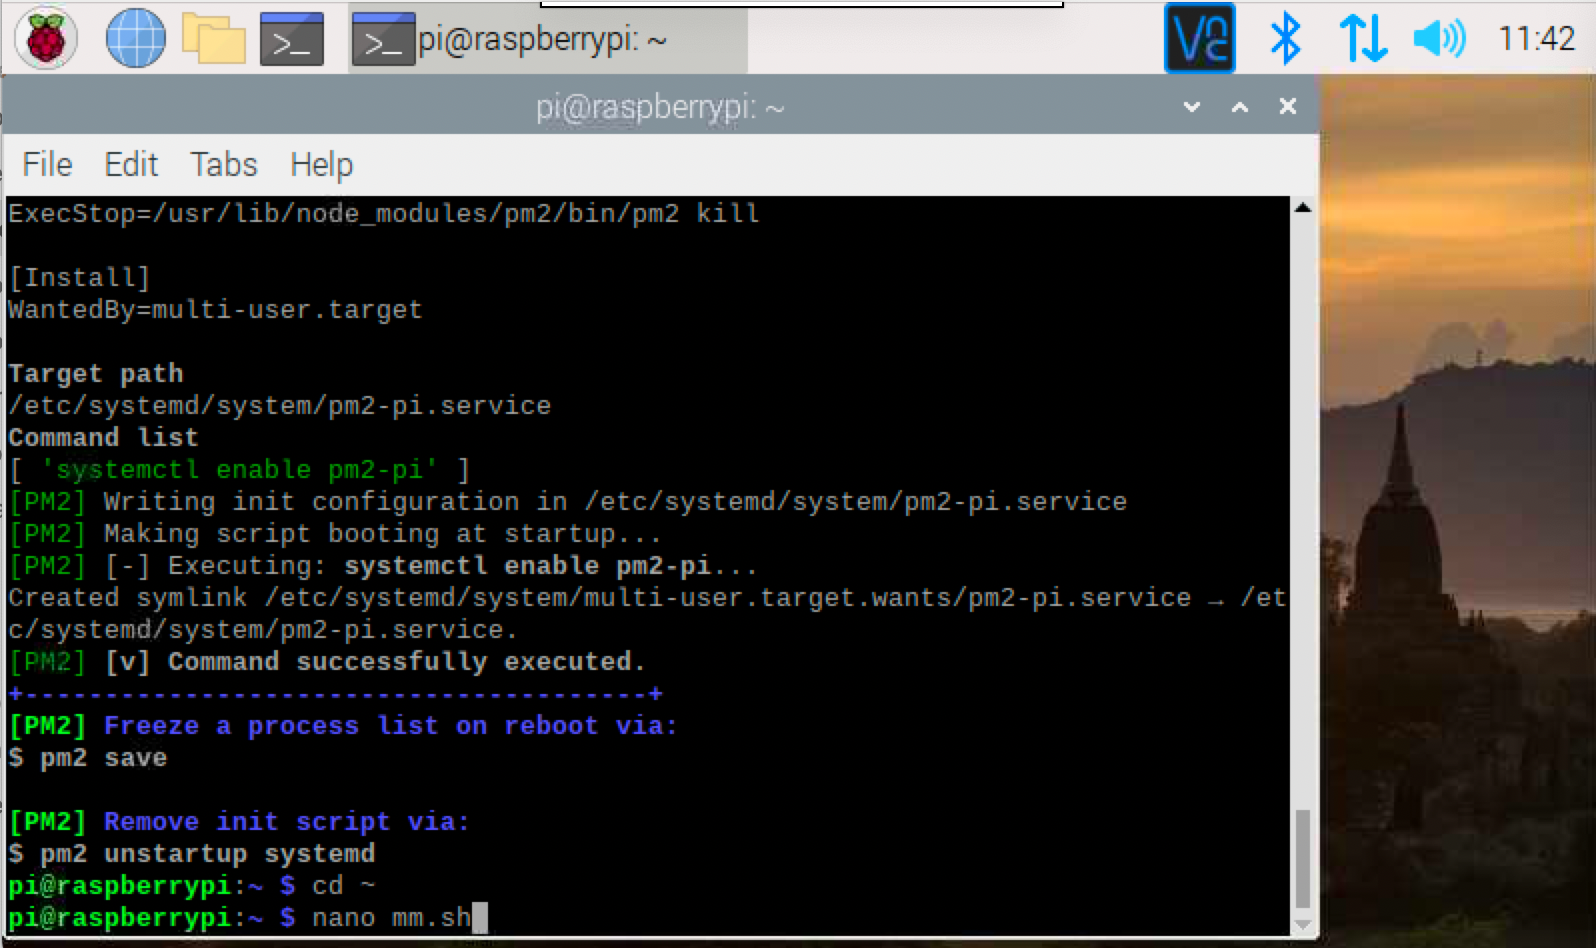
cd ~
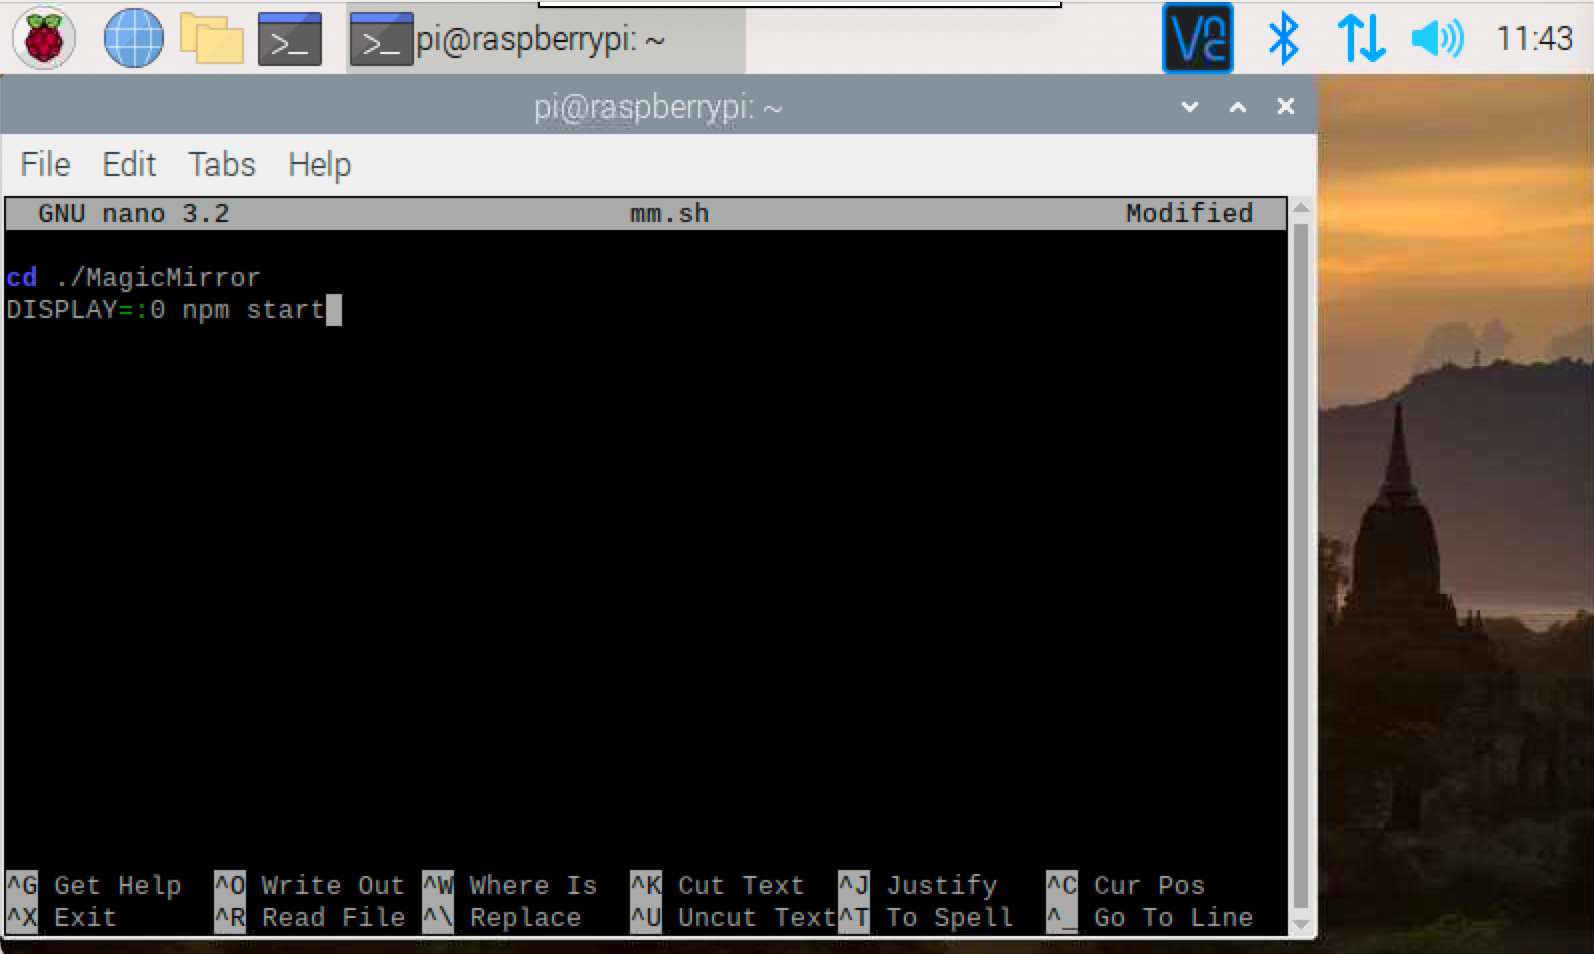
nano mm.sh4. Within mm.sh enter the commands to start Magic Mirror.
cd ./MagicMirror
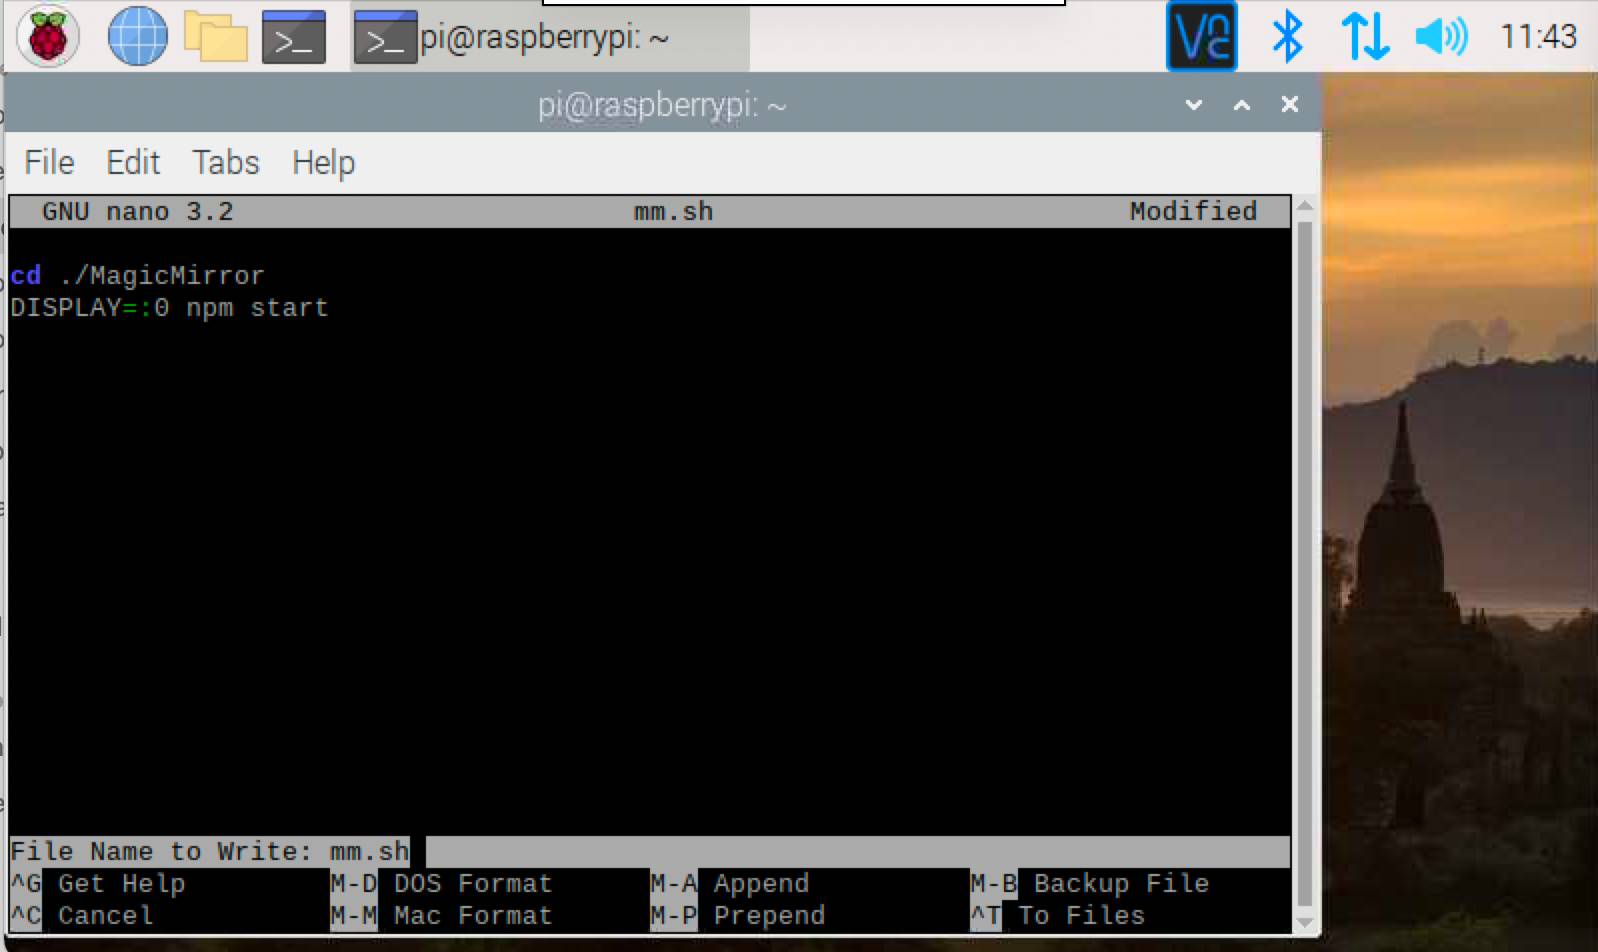
DISPLAY=:0 npm start5. Press Ctrl-X to exit, ‘y’ to Save mm.sh, and Enter to return to the Terminal.
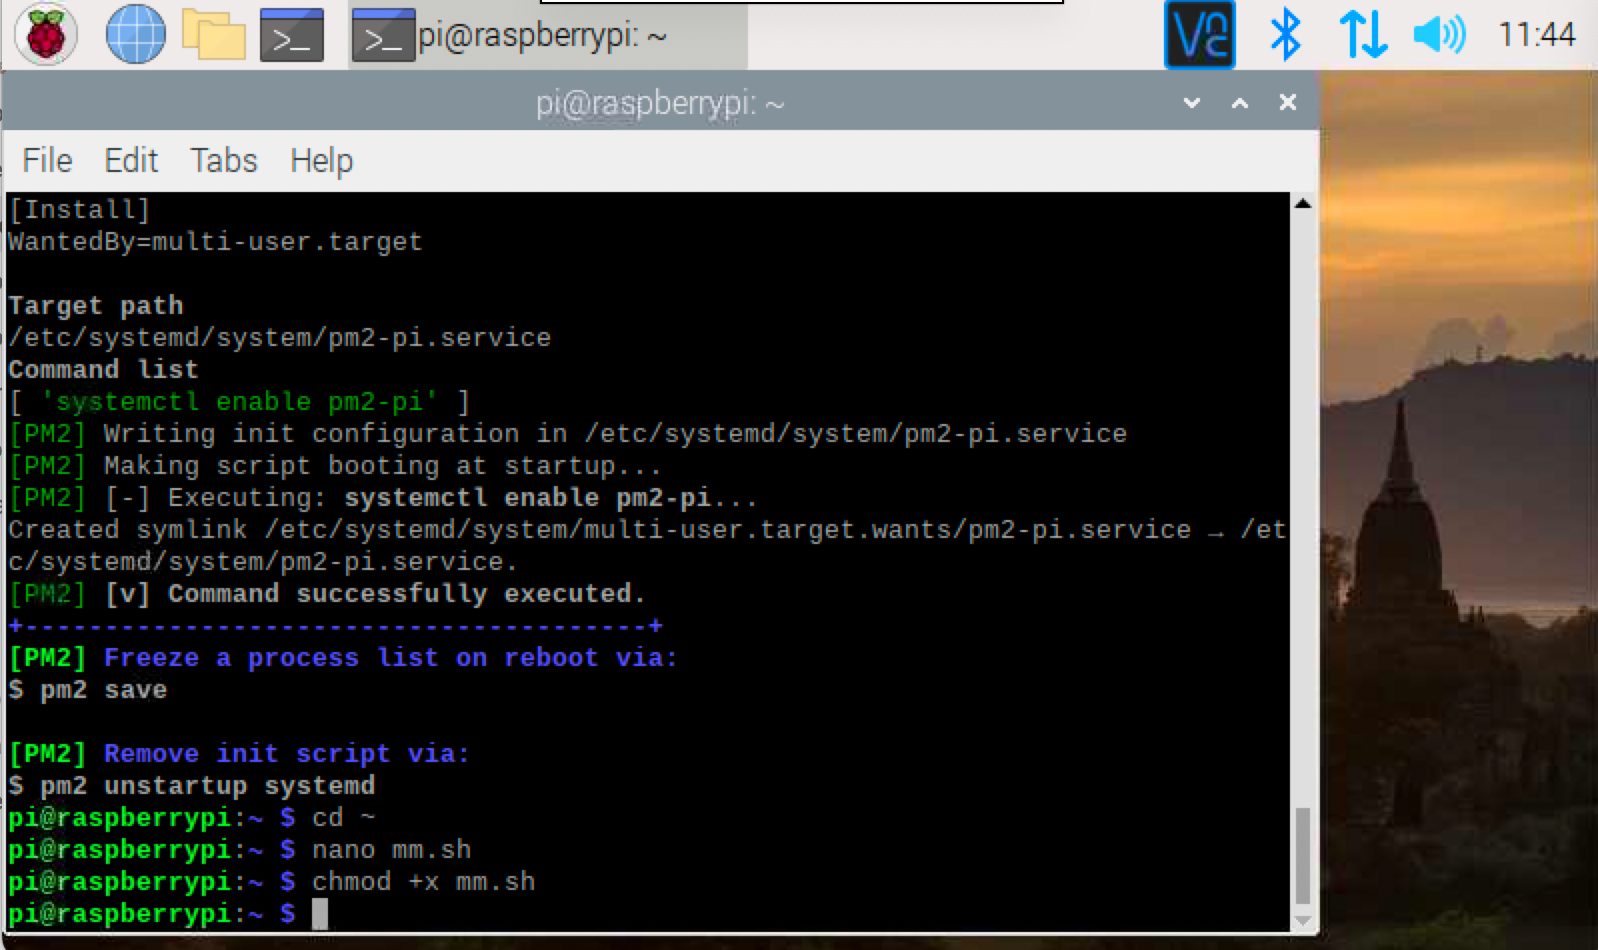
6. Make mm.sh an executable file with the chmod command.
chmod +x mm.sh7. Start your Magic Mirror with PM2.
pm2 start mm.shYour Magic Mirror should automatically start running again. You can test your auto start functionality with a reboot now.
Disable Screen Blanking
You may find that after setting up your automatic digital photo frame that your Raspberry Pi screen goes blank after 10 minutes. In this case, you can disable screen blanking.
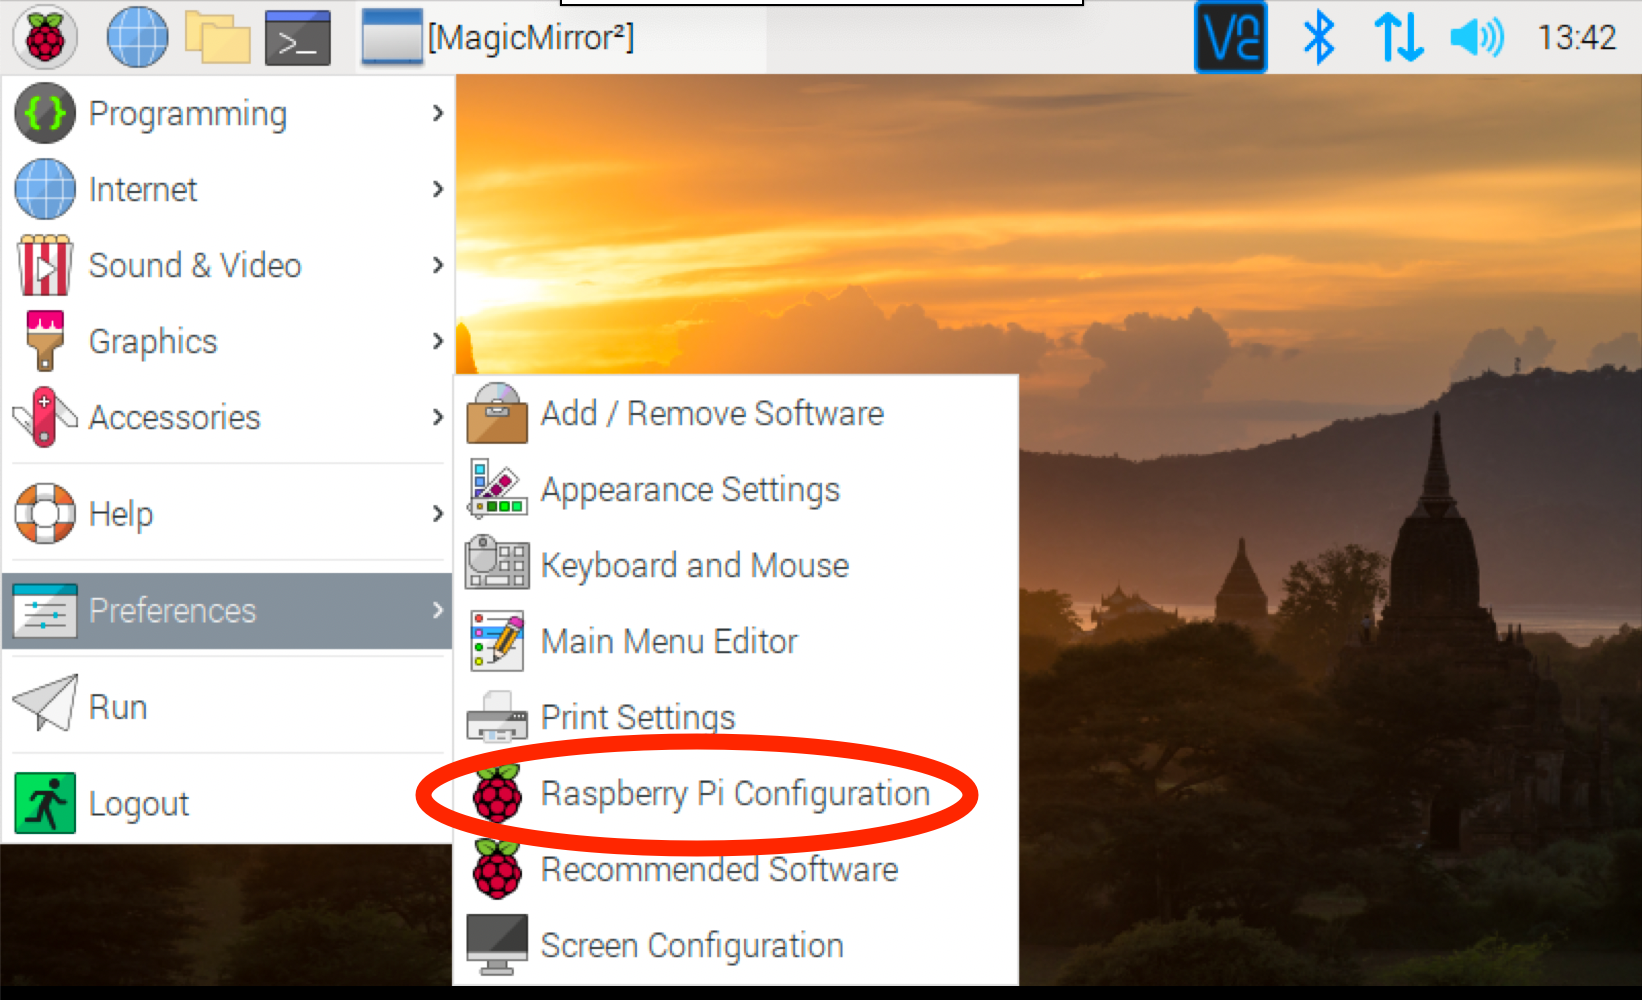
1. Navigate to the Raspberry Pi Configuration menu. From your Raspberry Pi start menu, click ‘Preferences’ and select ‘Raspberry Pi Configuration’.
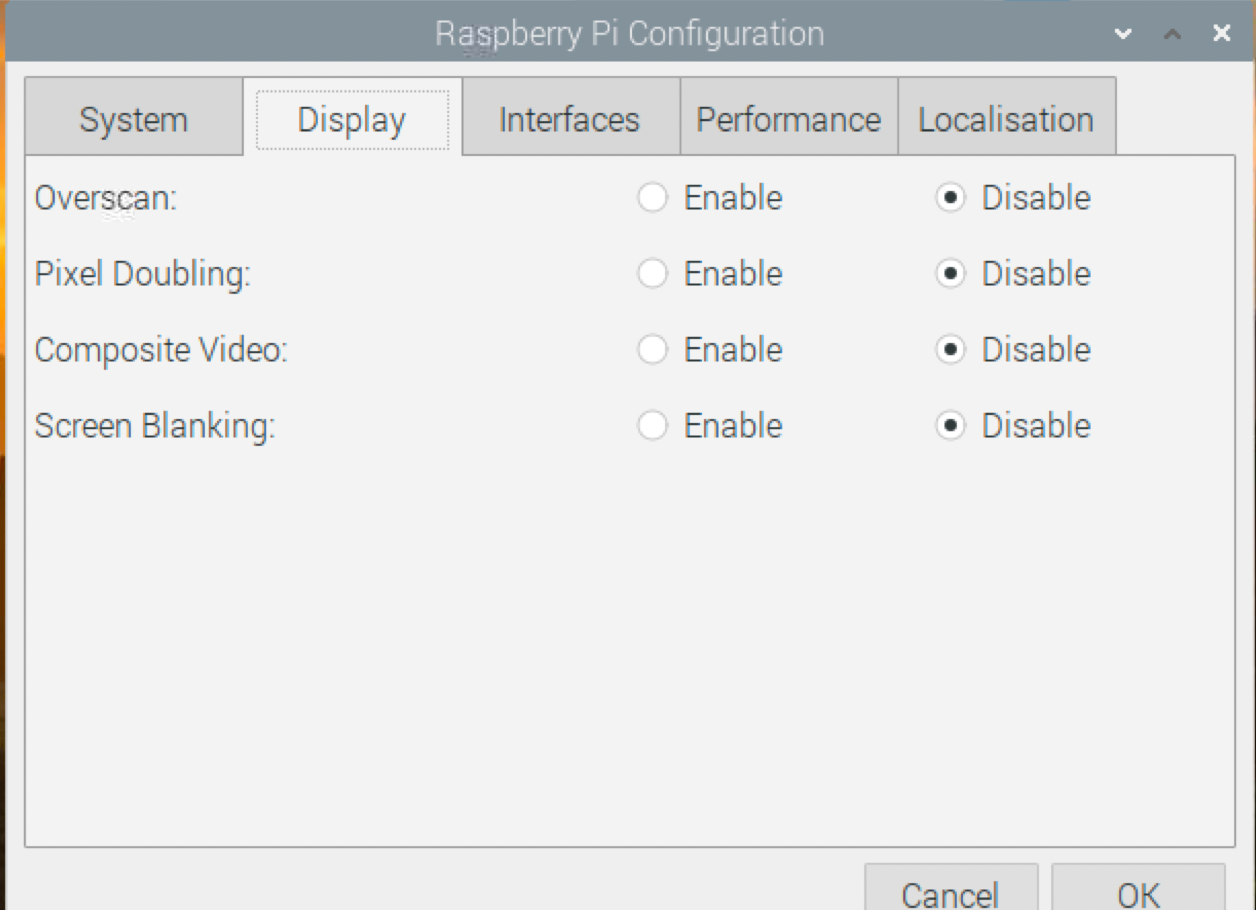
2. Toggle Screen Blanking to Disable on the Display tab. Select the ‘Display’ tab. For ‘Screen Blanking’ select Disable. Click OK.
3. Click Yes when you are prompted to Reboot.
Caroline Dunn is a freelance writer for Tom's Hardware. Her expertise lies in covering Raspberry Pi projects, creating video tutorials, writing guides, and exploring other entertaining tech DIY initiatives.
-
ad9fd Reply
This would undoubtedly be a good learning exercise. However with the 7 inch screen it uses costing £77 but a new 7 inch digital photo frame costing only £27 on ebay the main learning experience is that buying is often a better option than building.Admin said:In this project, we’ll build a digital photo frame with our Raspberry Pi with photos updating dynamically from Google photos.
How to Build a Raspberry Pi-Powered Digital Photo Frame : Read more -
torbjorn.lindgren Reply
Yeah, both of those have ABYSMAL resolution, specifically 800x480!ad9fd said:This would undoubtedly be a good learning exercise. However with the 7 inch screen it uses costing £77 but a new 7 inch digital photo frame costing only £27 on ebay the main learning experience is that buying is often a better option than building.
1990's called and wanted their crappy screens back! :)
The original author should be ashamed of suggesting building a photo frame with a 7"/800x480 display, I would consider that resolution a the very best marginal even for a 5" display.
But.. that just reinforces that from an economics point it makes very little sense given that you can get a 7" photoframe with 1920x1080 resolution (including shipping) for less than the 7"/800x480 display, never mind the other components! -
kellyhirano ReplyAdmin said:In this project, we’ll build a digital photo frame with our Raspberry Pi with photos updating dynamically from Google photos.
How to Build a Raspberry Pi-Powered Digital Photo Frame : Read more
The instructions miss a pretty key item from the MMM-GooglePhotos docs under "Get token.js" on https://github.com/ChrisAcrobat/MMM-GooglePhotos#get-auth-and-albumid
Between your steps 3 and 4, you need to enable the Google Photos Library API, otherwise the OAuth creds won't allow access to those APIs and you end up with a 403 in your log (viewable by pm2 log). -
Grifi74 Reply
Thank you for the post. It really helps.kellyhirano said:The instructions miss a pretty key item from the MMM-GooglePhotos docs under "Get token.js" on https://github.com/ChrisAcrobat/MMM-GooglePhotos#get-auth-and-albumid
Between your steps 3 and 4, you need to enable the Google Photos Library API, otherwise the OAuth creds won't allow access to those APIs and you end up with a 403 in your log (viewable by pm2 log). -
pontiac_bandit Excellent project! I was able to finish this today, but unfortunately my screen is stuck on 'Loading...' after I do the npm run start. Is it because my internet might be slow? I hardly have 20 photos in my sample album. Any ideas?Reply
Final Edit: I was able to use @kellyhirano 's advise and fix the issue. I now have an RPi powered digital photo frame :)
Edit2: This is the exact error I am getting
Stuck on Loading forever - githubmemory
Edit: Actually, I see the following error in my terminal
Failed to fetch git data for MMM-GooglePhotos: Error: block timeout reached -
Skorry I attempted this today, but when it entered Google Cloud Platform I was presented with many configuration questions that aren't addressed in this article. It could be that GCP has updated things significantly in the past few months. Anyway, I don't where to begin to troubleshoot it. I give up.Reply -
martinkleinaustria Worked fine for me since October but now I tried again after a long break and I again hang at the "Loading..." page though the Google API's are all activated.Reply
From the Log:
(node:1140) UnhandledPromiseRejectionWarning: Error: invalid grant
any help appreciated
Martin -
gpejsa I am a bit late to this project, but hope someone reads this to offer some suggestions. I have the hardware together (the screen and the raspberry pi) and have installed all the updates and have the Magic Mirror installed and updated. I have created the OAuth Client ID with TVS and Limited Input Devices and named the client TV Client 1 like in the instructions. I generated the credentials (which appeared to work) and renamed them and placed them in the MagicMirror/modules/MMM-GooglePhotos folder. I then CD'd to the correct folder and issued the node generate_token.js command and got the following error message:Reply
TypeError: cannot read property '0' of undefined /home/pi/MagicMirror/modules/MMM-GooglePhotos/Gphotos.JS:133
The above error is repeated with variations. I re-ran the OAuth a few times and even went so far to include the API for googlephotos, but nothing seemed to work. Any suggestions/hints would be gratefully accepted!!
Geof -
xvmodvx To the people saying the difference in price, the mistake was saying you need a touch screen. You can use any screen because you're not interacting with it once it's finished so you can use an old monitor or tv that you otherwise were going to throw away and have a lot bigger screen than the ones you're talking about. Think before talking crap about people. 🙂Reply -
willowpje I decided to do this today but I found out the repository for the GooglePhotos module in the article is old and read-only. It's a fork of https://github.com/hermanho/MMM-GooglePhotos. I ran into a bunch of issues with the other repository, but if you use this one and follow the instructions in the readme there, it works perfectly.Reply
