


Do you need a digital hydrometer to monitor the temperature and humidity in your home or office? Instead of buying one, now you can make your own with a Raspberry Pi Pico microcontroller board. When the project is complete, string the DHT sensor through a window for the most accurate weather readings (or use this project to monitor your indoor temperature).
In this tutorial, we utilize the Raspberry Pi Pico microcontroller to read temperature and humidity data and display the data on our 16x2 LCD screen. Unlike every other Raspberry Pi, the Pico (see our Raspberry Pi Pico review) is a microcontroller board, rather than a full-fledged Linux computer. That makes it great for handling lightweight projects, involving sensors and other electronic components, especially those that use analog input, something other Pis can’t handle without an add-on board.
The Pico board can be programmed with C/C++ or MicroPython. We have chosen C/C++ for this tutorial. As a bonus, this tutorial also includes a basic installation of Pico SDK and cmake. If you wish to see this tutorial in MicroPython, please let us know in the comment section.
What You’ll Need
- Raspberry Pi Pico Micocontroller
- Raspberry Pi 4 or Raspberry Pi 3B+, or the new Raspberry Pi 400
- 8 GB (or larger) microSD card (see best Raspberry Pi microSD cards) with a fresh install of Raspberry Pi OS with Desktop.
- 16x2 1602 LCD Display with I2C backpack
- DHT22 Temperature and Humidity Sensor (DHT11 produced erroneous readings in my testing for the project)
- Set of jumper wires (M-to-F, M-to-M, and F-to-F)
- Breadboard
- Header Pins (for the Raspberry Pi Pico)
- MicroUSB cable to power and transfer files from your Raspberry Pi and your Pico board
- Monitor/Power supply/Keyboard/Mouse/Monitor/HDMI Cable (for your Raspberry Pi)
- Optional: Power bank charger or USB wall adapter
Timing: This project is estimated to take at least 1 hour to complete, but we have included the final package file (UF2 file) as a ‘short-cut’ method.
The majority of this tutorial is based on terminal commands. If you are not familiar with terminal commands on your Raspberry Pi, we highly recommend reviewing 25+ Linux Commands Raspberry Pi Users Need to Know first.
Setting up your Raspberry Pi Pico
1. This project requires pin connections to your Pico board. If you have not already done so, you’ll need to solder pins to your Raspberry Pi Pico. Connect your screen, mouse and keyboard to your Raspberry Pi.
2. Boot your Raspberry Pi. If you don’t already have a microSD card see our article on how to set up a Raspberry Pi for the first time or how to do a headless Raspberry Pi install.
3. Update Raspberry Pi OS. Open a terminal and enter:
sudo apt-get update && sudo apt-get upgradeTest your Pico board with the C/C++ Blink sample code found here.
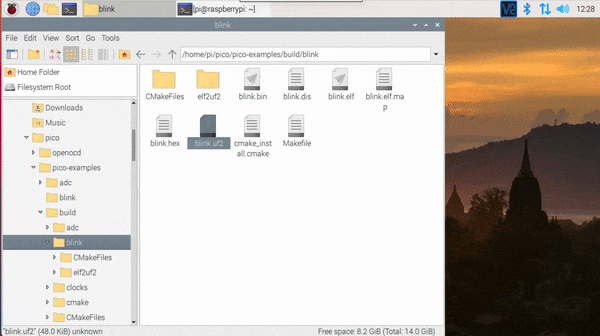
4. Download the blink.uf2 file from the C/C++ Getting Started guide.
5. While holding down the BOOTSEL button on your Pico board, connect your microUSB from your Pico board to your RaspberryPi.

6. Drag and drop the blink.uf2 file from your Downloads folder to RPI-RP2 removable media. Now watch the on-board LED on your Pico board start to blink. You can disconnect your Pico board from your Raspberry Pi for the next step.
Connect Your Pico to LCD screen and DHT22 Temp and Humidity Sensor
1. Place your Pico board on your breadboard.
2. With your jumper wires, connect GND from the Pico to the GND rail, Connect pin 36 / 3.3V to the power rail.
3. Connect your DHT22 sensor to the breadboard and connect GND to the GND rail, power to the power rail and the OUT signal to GPIO15 / Pin 20 (for 3 pin DHT sensors). If you are using a 4-pin DHT22 then include a 10K ohm resistor (see resistor color codes to identify) as shown in the circuit diagram.
4. For your LCD screen, connect SDA to Pin 6 and SCL to Pin 7.
5. To power your LCD screen, connect LCD VCC to VBUS (pin 40) on the Pico and LCD GND to the GND rail of your breadboard.

Short Cut Method - Pico Weather Station
If you are in a hurry to get your Pico Weather Station up and working, you can download the compiled UF2 build file here. Please note that using the compiled file does not allow you to customize the text or change the signal pins.
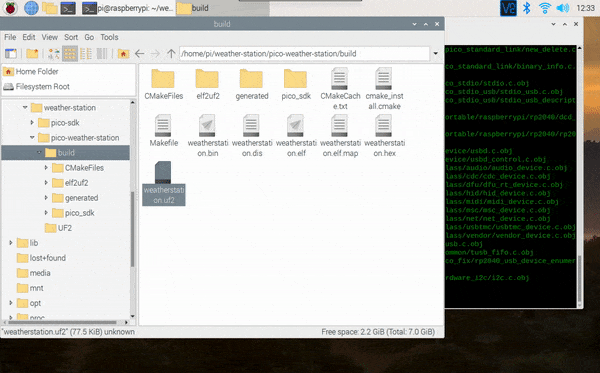
1. Download weatherstation.uf2 from here.
2. Disconnect your Pico board from your Raspberry Pi.
3. Hold down the BOOTSEL button while connecting your Pico board to your Pi. You should see a pop-up and RPI-RP2 appear as removable media.
4. Drag and drop weatherstation.uf2 to your Pico labeled RPI-RP2 from your downloads folder in your file manager.
In a few seconds (to a minute) you should see your room temperature and humidity display on the LCD screen.

Full Instructions: Raspberry Pi Pico Weather Station
This method produces the same outcome, an LCD that displays temperature and humidity, but you will learn how to compile source code for the Pico board. This method also includes a basic installation of the pico-sdk for users starting from scratch. For a more comprehensive installation with more examples, check out “Getting started with Raspberry Pi Pico C/C++ dev” PDF here.
1. Open a Terminal on your Raspberry Pi desktop (press Ctrl-T).
2. We’ll start by creating a directory and cloning the code we need to compile C/C++ for the Pico board with the following commands.
mkdir weather-station
cd weather-station
git clone -b master https://github.com/raspberrypi/pico-sdk.git
cd pico-sdk
git submodule update --init
cd ..
git clone https://github.com/carolinedunn/pico-weather-station

3. Install cmake with the appropriate dependencies for Pico. This step could take around 5 minutes on a Raspberry Pi 4.
sudo apt update
sudo apt install cmake gcc-arm-none-eabi build-essential

4. Now is a great time to take a look at the source code we’ll use to build our weather station.
Optional: Navigate to /home/pi/weather-station/pico-weather-station and open weatherstation.c with Geany in your File Manager to review the source code.

Code Notes for weatherstation.c
- weatherstation.c is the main source file for our project today.
- Line 17: We set our Pico to read our DHT from GPIO15. You can set up multiple DHT’s or change your GPIO pin here.
- Line 199-200: This printf statement is for troubleshooting purposes and can only be accessed via minicom. Accessing readings via minicom will be discussed in the troubleshooting section.
- Line 202: We will display Farenheit readings in this weather station. You can change the reading to Celsius.
- Line 211: Display an updated temperature at 2 second intervals (or 2000 milliseconds).
Compile the C/C++ code and transfer to Pico
5. In the same terminal from Step 3, enter the following commands to build your UF2 file.
cd pico-weather-station
mkdir build
cd build
export PICO_SDK_PATH=../../pico-sdk
cmake ..
make


6. Navigate to /home/pi/weather-station/pico-weather-station/build

7. Disconnect your Pico board from your Raspberry Pi.
8. Hold down the BOOTSEL button while connecting your Pico board to your Pi. You should see a pop-up and RPI-RP2 appear as removable media.
9. Drag and drop weatherstation.uf2 to your Pico labeled RPI-RP2 from your downloads folder in your file manager.
In a few seconds (to a minute) you should see your room temperature and humidity display on the LCD screen.

Once you get your Pico Weather Station working, you can add an LED or a buzzer if the temperature or humidity goes above (or below) a threshold.
Battery Operated and Portable Solution
You can now power the Pico without use of the Raspberry Pi. Simply unplug the USB from the Raspberry Pi (connected to the Pico) and plug in to your power bank charger or USB power adapter.

Troubleshooting Guide
- LCD screen is powered on but blank: Adjust the potentiometer on the reverse side of your LCD screen.
- Temp and Humidity are always zero: Adjust the timing in line 156. if (count > 46).
- LCD screen is working, but I’d like to see the raw temp/humidity data: Open a new terminal and type in the following commands:
sudo apt install minicom
minicom -b 115200 -o -D /dev/ttyACM0

Running minicom will tax the Pico’s 2040 chip. Data will freeze and you will see a few bad data readings. This is ok.