Raspberry Pi Scratch Coding: Control Sensors and Motors
Use sensors with block-based code.
A block-based language designed for kids, Scratch is a great way to introduce coding. With it we can learn how to create games and control electronics via the Raspberry Pi’s GPIO. As good as Scratch 3 is there is only so much that we can do with the GPIO, and the GPIO is the best feature of the Raspberry Pi. So how can we take our Scratch GPIO projects further? For that we need S3GPIO.
S3GPIO is Scratch 3 GPIO and it was created by Simon Walters, a Raspberry Pi community member who has campaigned for children to learn coding and electronics with Scratch. Walters’ first foray into the GPIO for Scratch was ScratchGPIO, based upon Scratch 1.4. This old version is still available, but based on an older version of the language.
In this how-to, we shall install S3GPIO and learn how to use an ultrasonic sensor as a controller for a DC motor, effectively setting the speed based on our distance from the sensor. We will also learn how to create an emergency stop for the motor and incorporate motor control into a sequence of code.
All of the steps in the tutorial can be used with multiple motors, we just need to connect two more GPIO pins to the L9110S in order to independently control the motors.
For this project you will need
- A Raspberry Pi 3 / 4 / 400
- The latest Raspberry Pi OS
- HCSR04-P Ultrasonic sensor (3V model of the HCSR04)
- L9110S Motor Controller
- DC Motor
- External micro USB breakout power supply for motor
- 7 x Female to female wires
- 2 x Male to female wires
- An Internet connection
The complete code for this project can be downloaded from our Github repository.
Connecting the Components
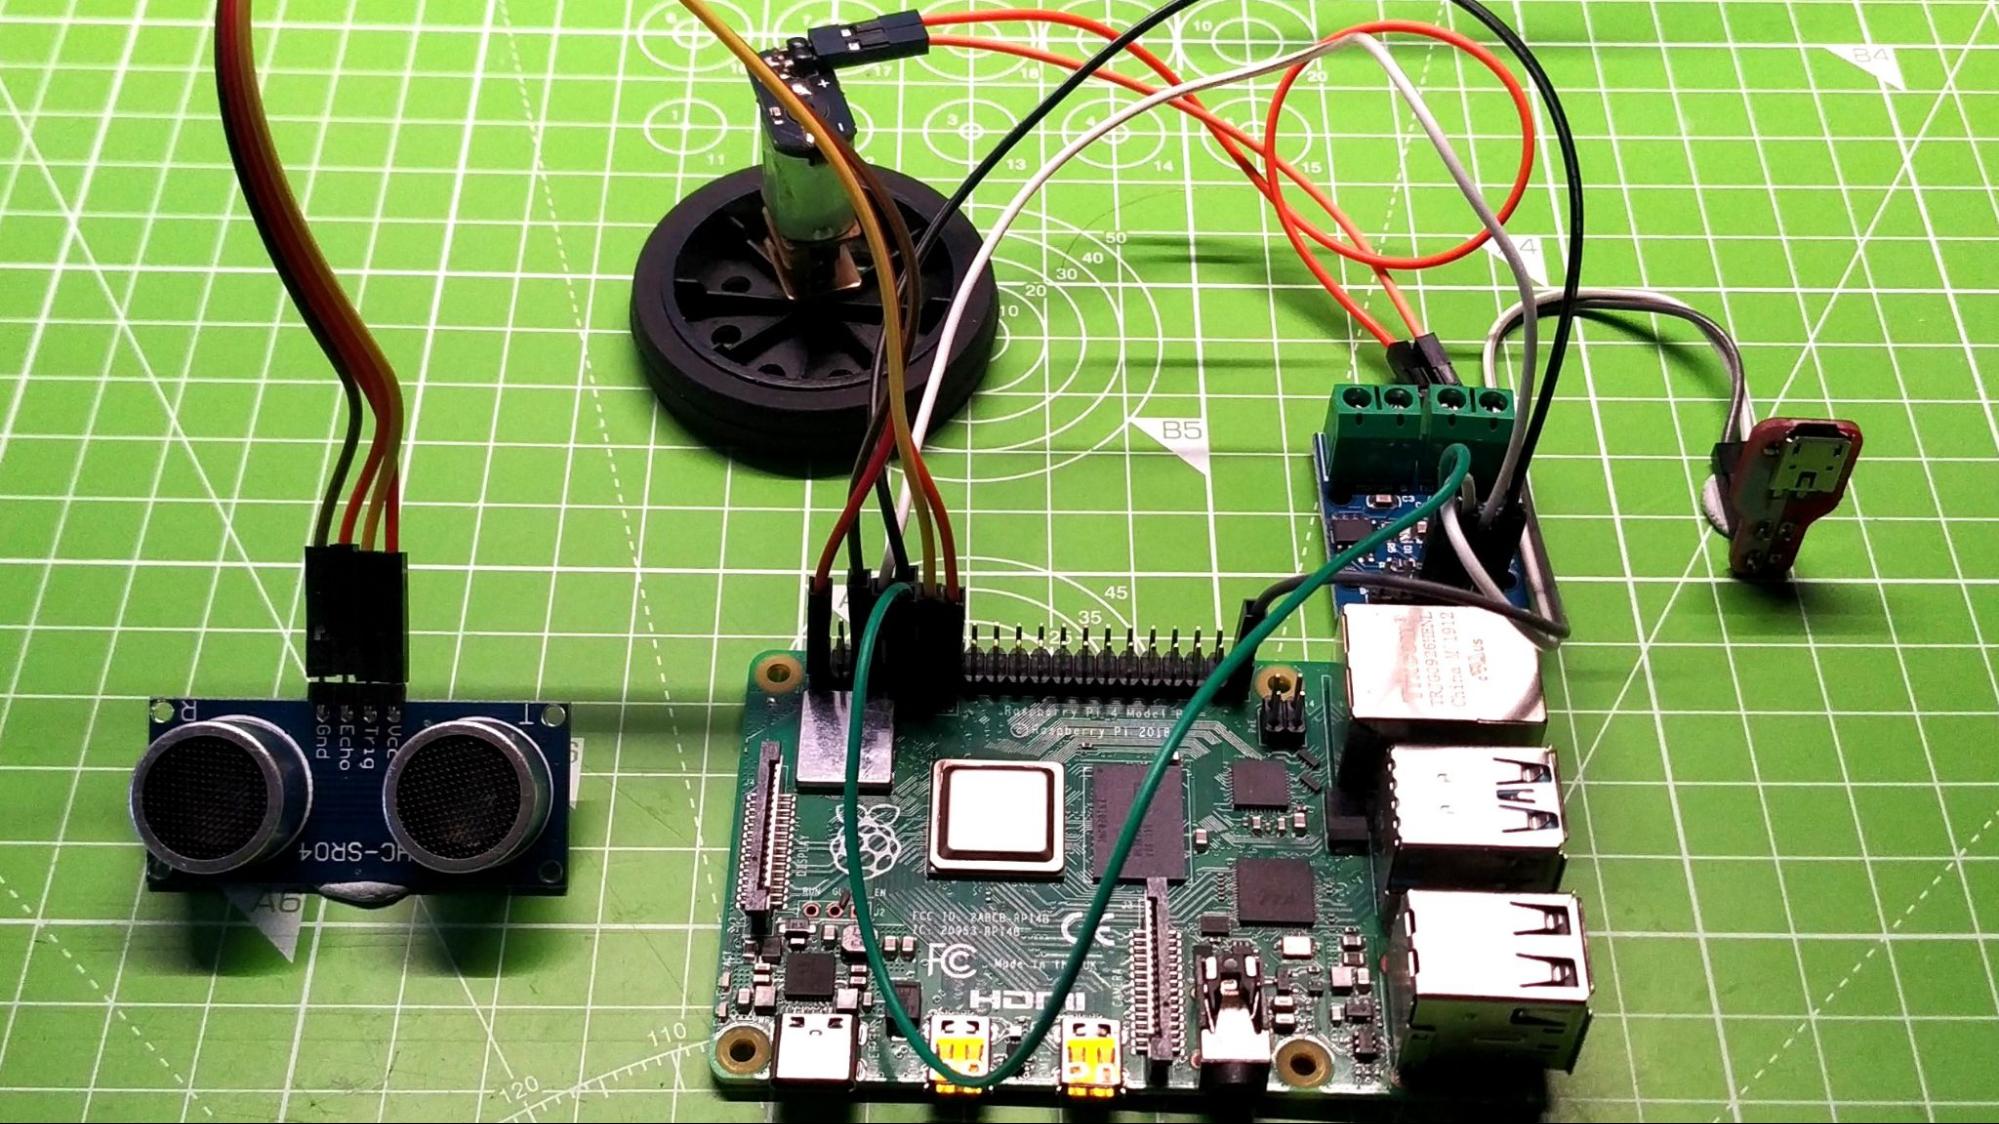
Connecting the electronic components is relatively simple, but the sheer amount of wires may seem confusing. We’ll break it down into sections. S3GPIO uses physical pin numbering, not the BCM numbering standard set by the Raspberry Pi Foundation. This means that we have two columns of 20 pins. Holding the Pi with the USB ports pointing to the floor, the two columns start with pin 1 at the top left, and pin 2 at the top right. The left column is the “odd” column, with pins following an odd number pattern; 1,3,5,7,9 etc. The right column is the “even” column, with numbers progressing 2,4,6,8 etc.
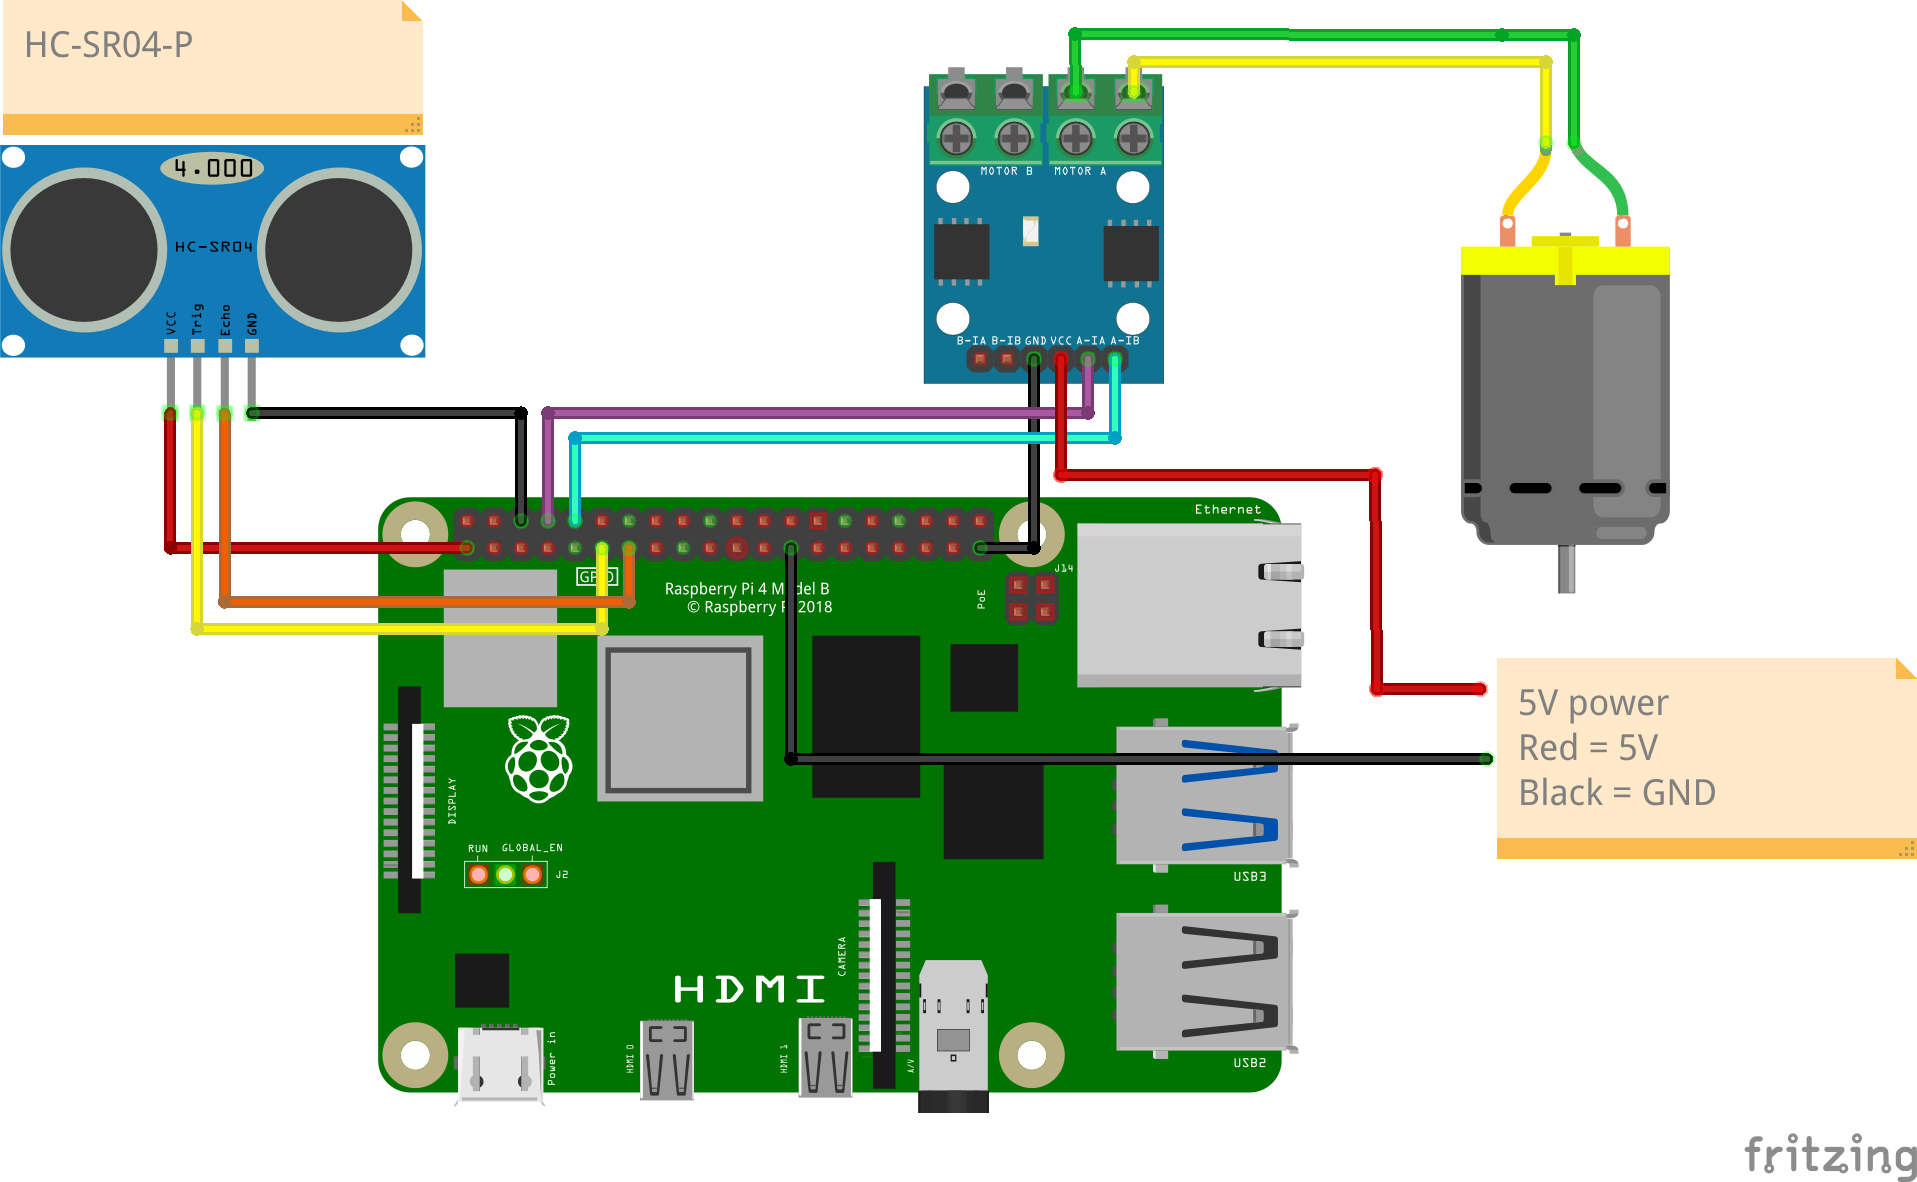
1. Using female to female jumper wires, connect the HC-SR04P ultrasonic sensor to the Raspberry Pi as follows:
Get Tom's Hardware's best news and in-depth reviews, straight to your inbox.
- GND to any GND pin on the Raspberry Pi
- Vcc to 3V (Pin 1)
- Trigger to pin 11
- Echo to pin 13.
2. Connect the terminals of the motor to MOTORA terminals (it doesn’t matter which way) of the L9110S. Screw them into place so they are snuggly attached.
3. Connect GND on the L9110S to any GND pin on the Raspberry Pi. This creates a common ground reference, necessary for the project to work.
4. Connect + of an external 5V micro USB power supply to the VCC of the L9110S motor controller.
5. Connect the - (GND) pin of the power supply to any GND pin on the Raspberry Pi.
6. Connect two female to female jumper wires that connect the A1-A and A1-B terminals of the L9110S to pins 8 and 10 on the Raspberry Pi. This means we can use the GPIO to control the L9110S, causing the motor to whir into life.
We now have an externally powered motor, which is connected to the Raspberry Pi, enabling us to control it from S3GPIO. We also should have an HCSR04-P ultrasonic sensor connected and ready for us to use as a speed controller. Please consult the diagram for this project to ensure that your connections are correct.
Installing S3GPIO
1. Power up your Raspberry Pi and open a terminal. Enter the following command to download an installation. Note that this command will download the installer, whichis typically a big security risk for production machines, but in this case it is safe.
wget https://git.io/vMS6T -O isgh8.sh
2. Run the command to install S3GPIO.
sudo bash isgh8.sh
3. Reboot your Raspberry Pi for the changes to take effect.
4. Double left click on the S3GPIO icon and select “Execute in Terminal” to launch three applications. A web server, ScratchGPIO and the Chromium browser with a special S3GPIO extension will all be launched, and it could take a few moments until you see S3GPIO.
5. Click on “See Inside” to open the online S3GPIO editor.
Creating the Project
S3GPIO has the same interface as Scratch 3, but it also has a series of S3GPIO blocks in “My Blocks” that we shall make use of.
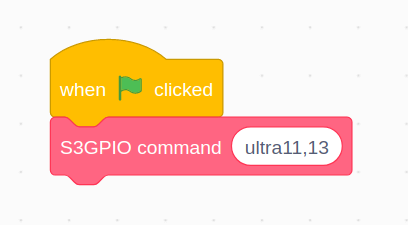
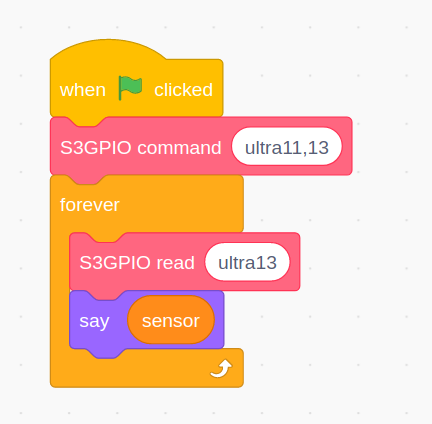
1. From the Events section, drag “When Green Flag Clicked” into the coding area. This is the start of our code and will test the HCSR04-P ultrasonic sensor.
2. From My Blocks, drag S3GPIO command and connect it to the previous block. In the white box, type ultra11,13 These are the pins for the trigger and echo on the sensor.
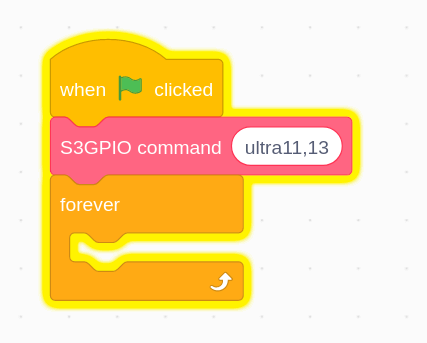
3. Drag in a Forever loop from Control and connect it to the previous blocks.
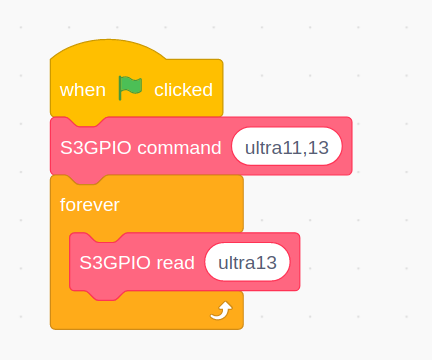
4. From My Blocks, drag S3GPIO read and place it inside the forever loop. In the white box, type ultra13 this will read the echo pin of the ultrasonic sensor, and behind the scenes it will be converted to a measurement in centimeters.
5. From Looks, drag a Say Hello! block and place it under the previous. From Variables, drag sensor and place it over the “Hello!” this will say the ultrasonic sensor distance reading.
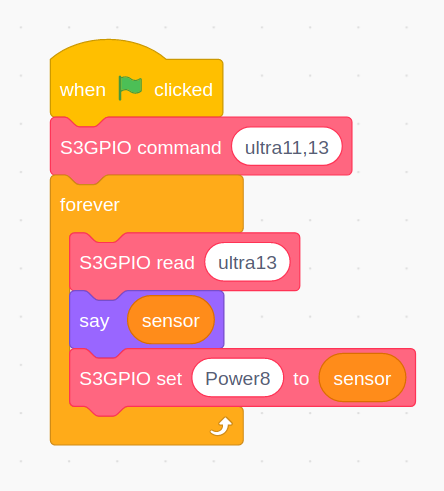
6. From My Blocks, drag S3GPIO set to _ to _ and place it under the previous block. In the first blank, type Power8, and in the second place another sensor block from Variables. This will set the motor pin connected to pin 8 to the value returned by the sensor.
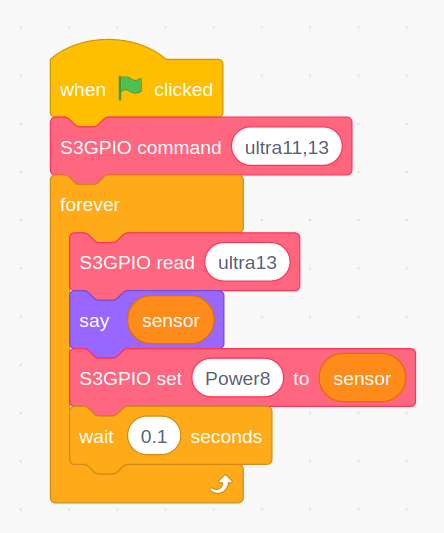
7. From Control, drag a wait 1 seconds block, connect it to the previous block and edit the block to wait for 0.1 seconds. Your code should now look like this.
With the code done, let's click on the Green Flag to start. The motor should come to life. Now move your hand nearer to the two “eyes” of the sensor, the motor will slow. Click on the stop button (top right of the stage) but the motor will not stop! We need to make a brake.
Adding More to the Code: Building a Brake
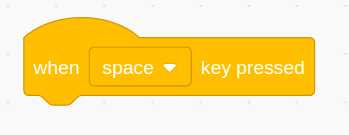
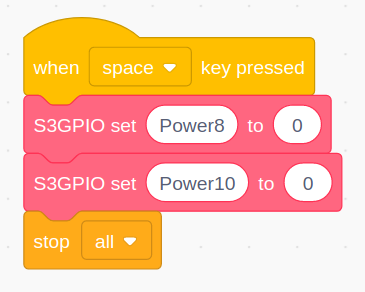
1. In a new section of code, place a When Space Key is Pressed block, found in Events.
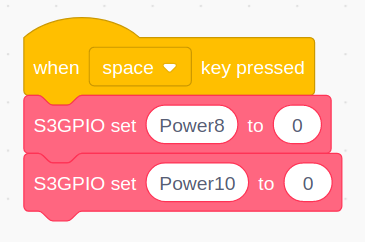
2. From My Blocks, drag two S3GPIO set _ to _ blocks and connect them to the previous. Change the first S3GPIO set to Power8 to 0, and the second to Power10 to 0.
3. From Control, drag Stop all and place it under the previous block. Your code should now look like this.
Click on the Green Flag and test that the sensor responds to your hand. The motor should go fast or slow depending on where your hand is. When you’re ready, press the spacebar to stop the motor.
Adding More to the Code: Creating a Sequence
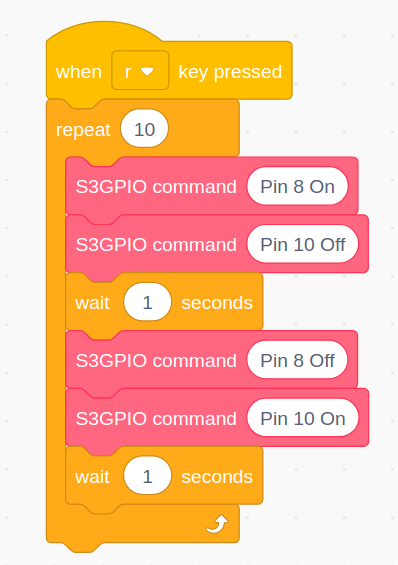
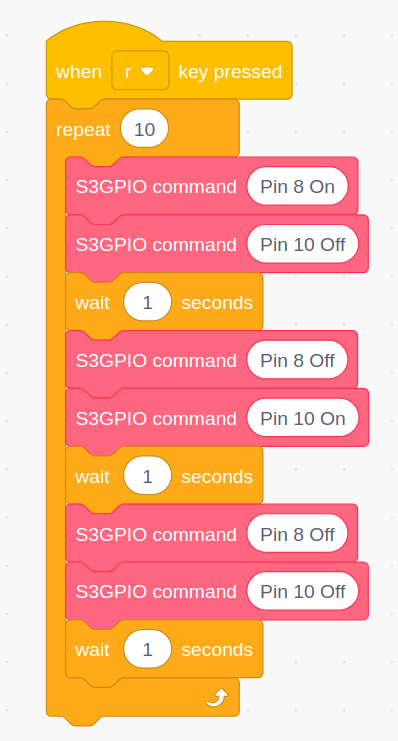
As well as using the sensor, we can control the motor using a series of instructions, a sequence. This sequence will spin the motor in one direction, then reverse before finally stopping the motors. The sequence will iterate (loop) 10 times before it ends and awaits the user to trigger the sequence again.
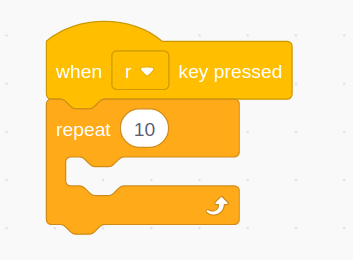
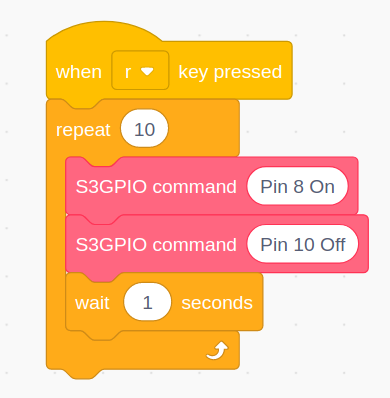
1. From Events, drag When space key pressed and start a new sequence of code. Change the space key to an r using the dropdown.

2. From Control, drag repeat 10 and place it under the previous block.
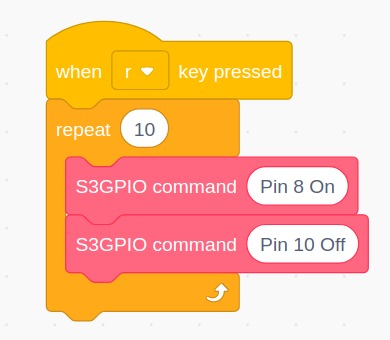
3. From My Blocks, drag two S3GPIO command blocks and place them inside the loop. Change the first to Pin 8 On, and the second to Pin 10 Off.
4. From Control, drag Wait 1 Seconds and place it under the previous blocks inside the loop.
5. Right click on the top S3GPIO block and select duplicate. It will duplicate the three blocks that we have just created. Place these three new blocks inside the loop, under the previous. In these blocks, change Pin 8 On to Off, and Pin 10 Off to On.
6. Repeat the duplicate for these three blocks and place the newly duplicated three under them, still inside the loop. Set the S3GPIO commands so that both are off.
This project first appeared in an issue of Linux Format magazine.

Les Pounder is an associate editor at Tom's Hardware. He is a creative technologist and for seven years has created projects to educate and inspire minds both young and old. He has worked with the Raspberry Pi Foundation to write and deliver their teacher training program "Picademy".
