How To Use The New Arduino IDE 2.0
The latest Arduino IDE has all the cool features
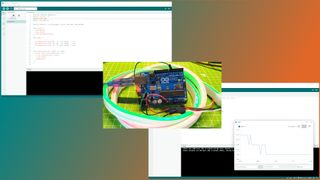
The Arduino IDE 2.0 has been in beta since early 2021 and, in those early days, we took it for a test drive and liked what we saw. When Arduino announced that 2.0 was moved to a stable release, we just had to take it out for another spin.
Arduino IDE 2.0 brings a number of improvements to the original IDE. Most notably a refreshed user interface. Here are a few more end user improvements.
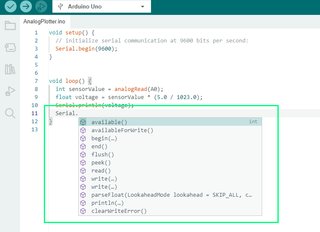
The Arduino IDE 2.0 introduces code autocompletion, useful when typing in large sections of code. As we type, the IDE suggests possible keywords / commands that we can use. This feature has been a standard in many other IDEs, and is a welcome addition to Arduino IDE 2.0.
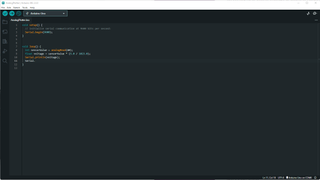
If you like your code editors dark, then Arduino IDE 2.0 has a plethora of themes to choose from.
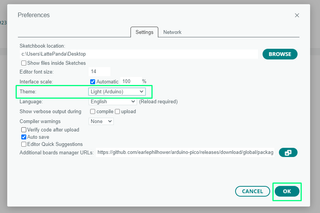
Found in the File >> Preferences menu. Change the theme to your liking and every facet of the editor will accommodate your request.
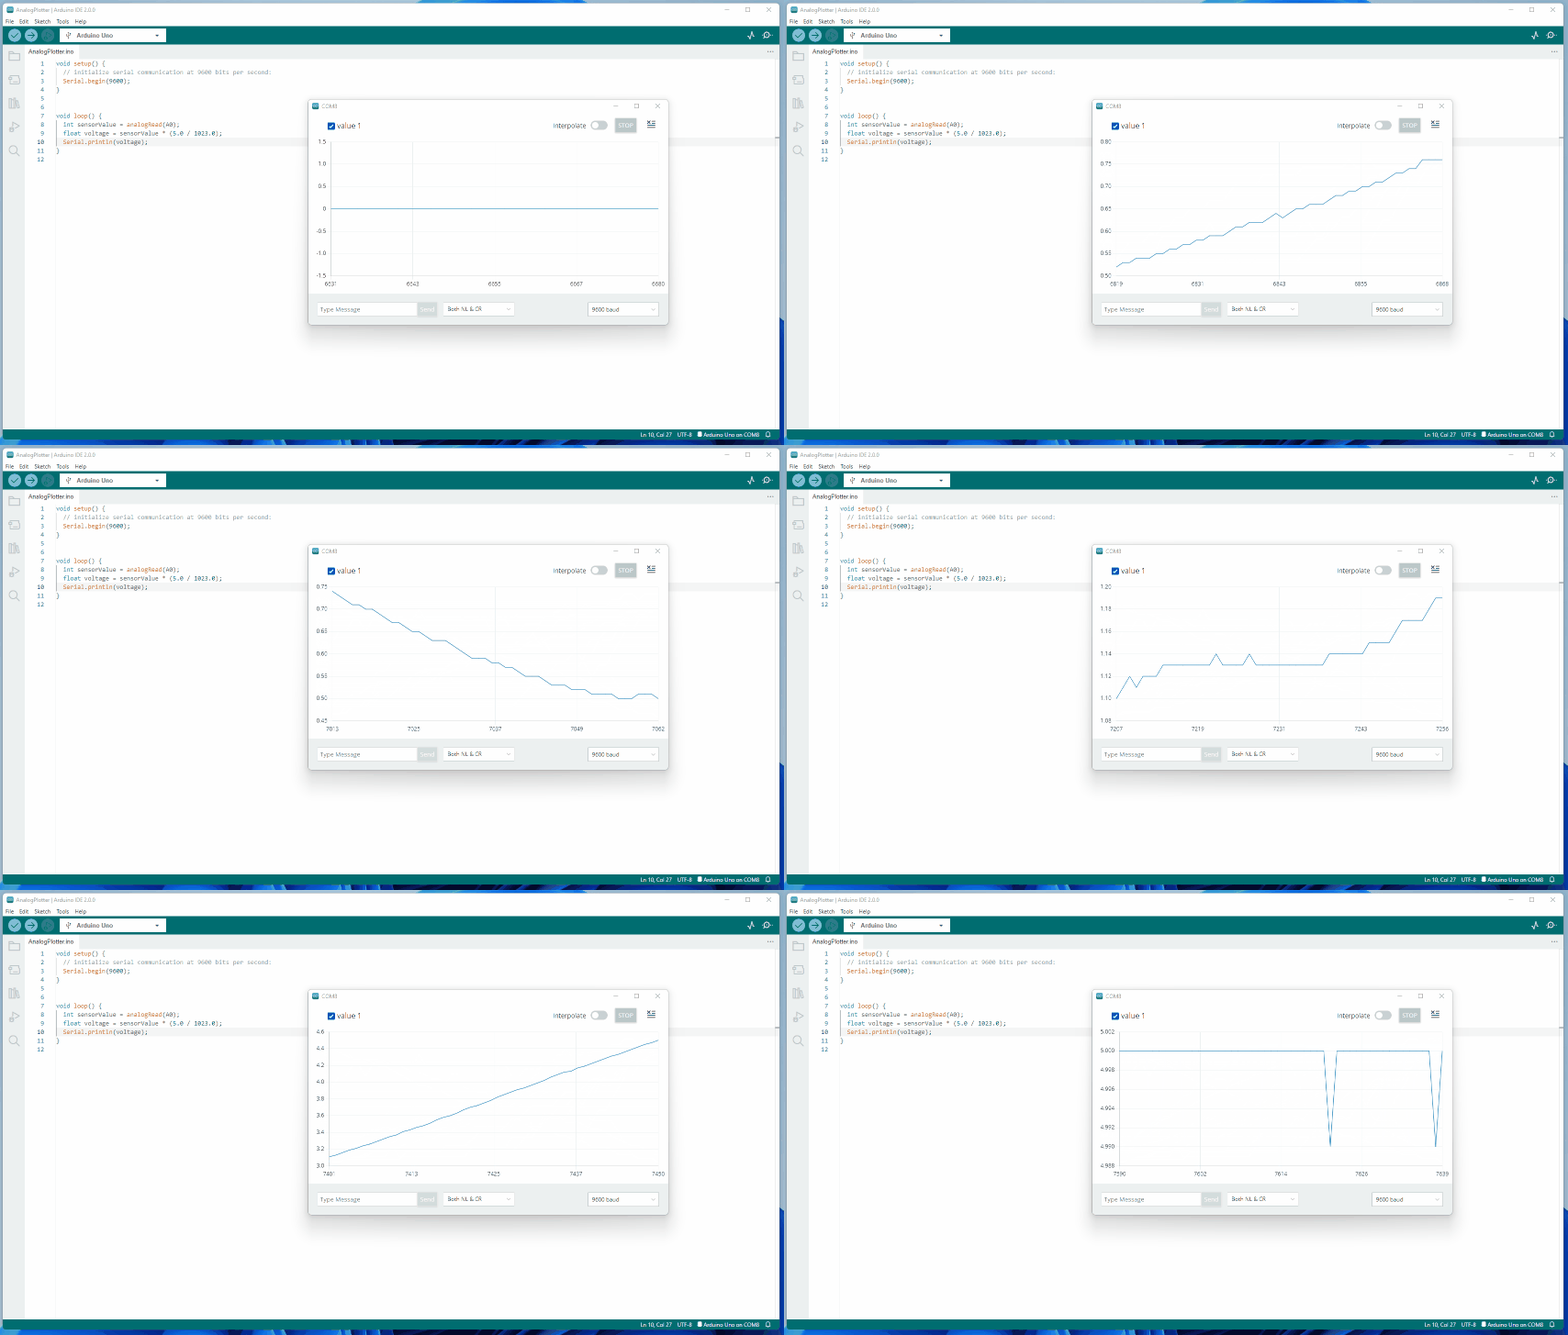
Finally, the Serial Plotter has received an update and now it looks stunning. The serial plotter is useful to measure and interpret analog signals and voltages.
Under the hood, Arduino IDE 2.0 sees improved compilation time and in-app updates for our boards and software libraries. Talking of updates, Arduino IDE 2.0 can also be updated from the app, saving us the trouble of downloading the latest version from the Arduino website.
Stay On the Cutting Edge: Get the Tom's Hardware Newsletter
Get Tom's Hardware's best news and in-depth reviews, straight to your inbox.
Getting to Know Arduino IDE 2.0
The best way to understand the new IDE is to use it. In this how to we will download and install the new IDE and then use it to create a fun project using NeoPixels.
1. Open a browser and go to the official Arduino website to download the installer for your operating system. We’re using Windows 11, and so downloaded the 64-bit version for our computer.
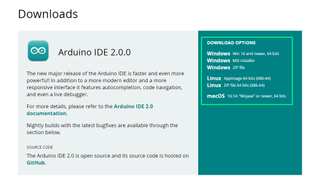
2. Follow the install process and, when complete, start the Arduino 2.0 IDE.


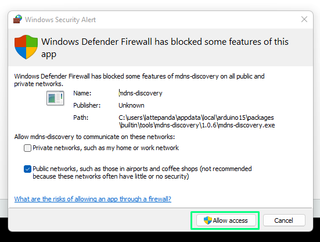
3. Allow the Arduino IDE through your firewall. The IDE will communicate with its servers to ensure that we have the latest version and software libraries.
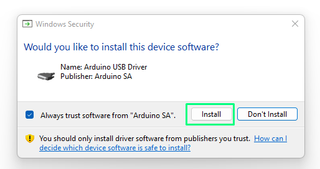
4. When prompted, install the USB driver. This enables the Arduino IDE to communicate with many different development boards, such as Arduino Uno and Raspberry Pi Pico.
The New Arduino 2.0 IDE
The new IDE has seen many “front of house” improvements, and we have to say that it looks incredible. Whether you are new to Arduino or a seasoned pro, we’ve put together a quick reference on where to find the new features.
The Arduino 2.0 IDE has seen a significant redesign, but the most basic elements remain the same.
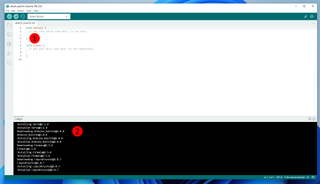
1. This is the Sketch area (Sketches are Arduino parlance for our project files) where we write the code that makes our project.
2. The Output area is where we see output from installing new software libraries and debug information as our code is flashed to a microcontroller.
What has changed is to the left of the application. A new vertical menu contains quick access to a number of once hidden, but well used features.
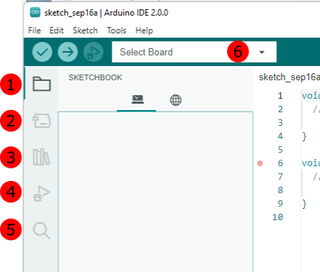
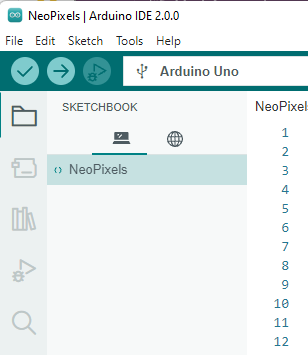
1. Sketchbook: Here all of the sketches (our projects) are contained for fast access. Our Sketchbook contains the demo project for this how to.
2. Boards Manager: The Arduino IDE can be used with many different boards and here is where we can install support for them.
3. Library Manager: This is where we can install, update and remove software libraries for our projects. For example we can install libraries to control NeoPixels, Wi-Fi and sensors.
4. Debug: Running the debug tool will show any errors in our code.
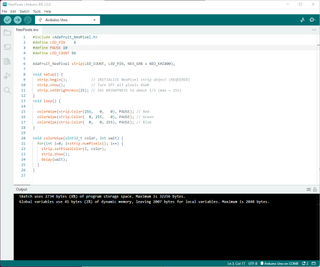
5. Search: Use this to find a specific value in your project. Here we use search to look for a specific constant that we use to control the speed of our demo project.
6. Board Selection: The Arduino IDE can work with many different boards and this dropdown makes it easy to change boards, and locate the correct COM port.
Configuring a Board, Installing Software
Learning a new IDE, especially one that looks as good as Arduino IDE 2.0 is best done by undertaking a project. We get to learn all of the new features, and improve our workflow.
To test the Arduino 2.0 IDE we created a simple project that uses Adafruit’s NeoPixel library for Arduino boards to create a quick RGB LED light show for the dark nights.
1. Connect your Arduino Uno (or compatible) to your computer. Using a genuine Arduino is the best option, but compatible boards will work just as well.
2. Select your Arduino from the Board selection dropdown. This will configure the board and port ready for use.Other types of boards may require additional configuration.
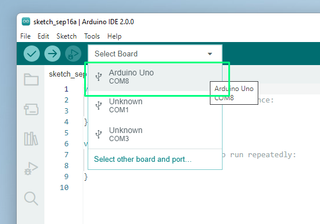
3. Skip this step if using a genuine Arduino. From the Boards dropdown, click “Select other board and port”.
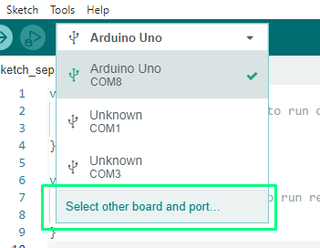
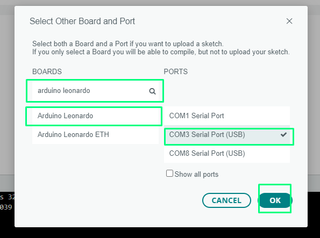
4. Skip this step if using a genuine Arduino. Search for your board, then select it and the correct port. If unsure on the port, check our guide for more information.
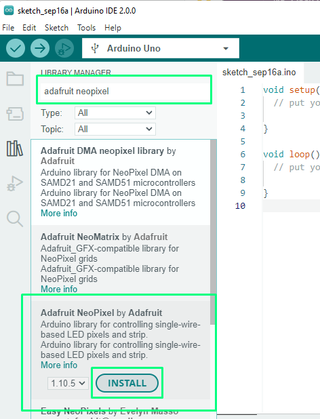
5. Click on the Library Manager and search for Adafruit NeoPixel. Select Adafruit NeoPixel from the list and click Install.
Creating a NeoPixel Project
NeoPixels, Adafruit’s term for WS2812B addressable RGB LEDs, are a great way to introduce microcontrollers and the new Arduino IDE. Why? Simply, they are great fun. We can control the color and brightness of each RGB LED to create animations and effects.
For This Project You Will Need
- An Arduino Uno (or compatible)
- NeoPixels We recommend Adafruit’s NeoPixels as they are high quality.
- 3 x Male to male jumper wires
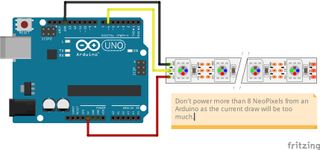
The circuit for this project is simple. Our NeoPixels are connected to the three GPIO pins on the Arduino. If you have never soldered before, fear not as soldering connections to your NeoPixels is straightforward. Take a look at our How To Solder Pins to Your Raspberry Pi Pico guide which will give you the basics. If you need a soldering iron, Pinecil V2 is a great iron for all budgets and levels of users.
| Wire Color | Arduino GPIO | NeoPixel |
| Red | 5V | VCC / V / 5V |
| Yellow | 6 | Data In |
| Black | GND | GND |
Connecting up to eight NeoPixels to an Arduino Uno is perfectly safe, but any more and you should consider external power for the NeoPixels
We shall use Adafruit’s NeoPixel library to control a short chain of NeoPixels, changing their color from red to green and then blue.
1. Click on File >> New to create a new sketch. Clear the contents of the sketch.
2. Include the Adafruit NeoPixel library in the sketch. Python programmers will be familiar with this, in Python we import a module of code.
#include <Adafruit_NeoPixel.h>3. Create three constants that will contain the GPIO pin used for the NeoPixel data pin, a pause (in ms) and the number of LEDs in our chain. We are using GPIO pin 6, and we want a 10 ms pause between each LED color change and we have 96 LEDs in our chain. Best practice is to keep the number of LEDs below eight if using the 5V supply on the Arduino. In our example we briefly used 96 to illustrate how a long strip of NeoPixels works.
#define LED_PIN    6
#define PAUSE 10
#define LED_COUNT 96
4. Declare the NeoPixel object and passing the number of pixels (LEDs), what GPIO pin is used, configuration of the LED (RGB or GRB) and the bitstream of the pixels (typically 800 Hz).
Adafruit_NeoPixel strip(LED_COUNT, LED_PIN, NEO_GRB + NEO_KHZ800);5. Create a function, setup, and use it to initialize the NeoPixels, turn off the LEDs and then set the brightness to 25. Brightness is a value between 0 and 255. The value of 25 is 10% brightness.
void setup() {
 strip.begin();
 strip.show();
 strip.setBrightness(25);
}
6. Create a function, loop, and use it to set the color of the LEDs to red, green and blue using a wipe action (we will later create this function). Use the PAUSE constant to add a 10 ms delay.
void loop() {
 colorWipe(strip.Color(255,   0,   0), PAUSE); // Red
 colorWipe(strip.Color(  0, 255,   0), PAUSE); // Green
 colorWipe(strip.Color(  0,   0, 255), PAUSE); // Blue
}
7. Create the colorWipe function that uses the color and delay time as arguments.
void colorWipe(uint32_t color, int wait) {8. Inside the function, create a for loop that will iterate through all of the LEDs in the strip, setting the color of each pixel before pausing for 10 ms and then moving to the next LED.
 for(int i=0; i<strip.numPixels(); i++) {
   strip.setPixelColor(i, color);
   strip.show();
   delay(wait);
 }
}
Complete Code Listing
#include <Adafruit_NeoPixel.h>
#define LED_PIN    6
#define PAUSE 10
#define LED_COUNT 96
Adafruit_NeoPixel strip(LED_COUNT, LED_PIN, NEO_GRB + NEO_KHZ800);
void setup() {
 strip.begin();
 strip.show();
 strip.setBrightness(25);
}
void loop() {
 colorWipe(strip.Color(255,   0,   0), PAUSE); // Red
 colorWipe(strip.Color(  0, 255,   0), PAUSE); // Green
 colorWipe(strip.Color(  0,   0, 255), PAUSE); // Blue
}
void colorWipe(uint32_t color, int wait) {
 for(int i=0; i<strip.numPixels(); i++) {
   strip.setPixelColor(i, color);
   strip.show();
   delay(wait);
 }
}
Les Pounder is an associate editor at Tom's Hardware. He is a creative technologist and for seven years has created projects to educate and inspire minds both young and old. He has worked with the Raspberry Pi Foundation to write and deliver their teacher training program "Picademy".
-
MakerIot2020 Interesting that they choose an Eclipse-based platform. VS Code, as you mentioned, does however run quite fast, but suffers from serious cluttering and complexity issues, distracting from what we really want to do there, namely code...Reply
The new Arduino IDE 2.0, may suffer from the same in the future, due to feature creep, etc etc...
As an alternative, have you ever had a look at Embeetle IDE ( https://embeetle.com ) , a Free to use embedded IDE, that is not cluttered, still stays super fast,
To be honest, chip support is not very big yet, but it is getting better all the time.
Would it be possible for "Tom's Hardware" to actually do a review on that? To give the makers out there another, less well-known option...
Just my 2 cents-- My apologies if anyone was offended or If it seems like spam.. which it is most definitely not..
