CyberPower LX1500GU-FC UPS Tear-Down
Behind The Battery Door
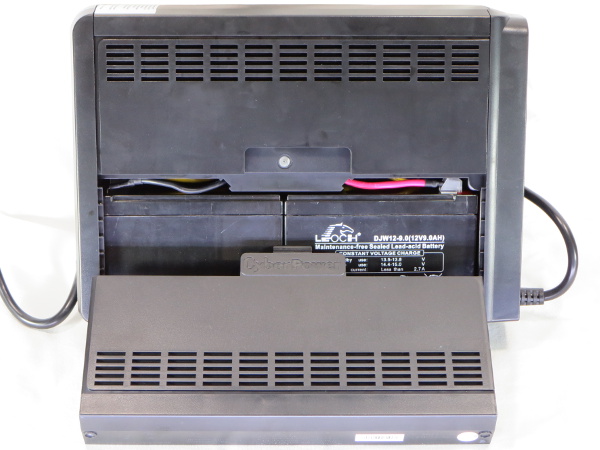
To access the battery compartment, you must first undo the two screws found on the bottom. Pull the half-panel down until it clears the side rails before you can lift the cover off. What you find in there is a pair of Leoch 12V 9Ah batteries. Their model number, DJW12-9.0, does not appear to be standard stock, and the closest match I could find on their site is the LP12-9.0.
There's no fancy battery pre-packaging or connector. The two batteries sit right there with cables going straight to their spade terminals.
Batteries Out
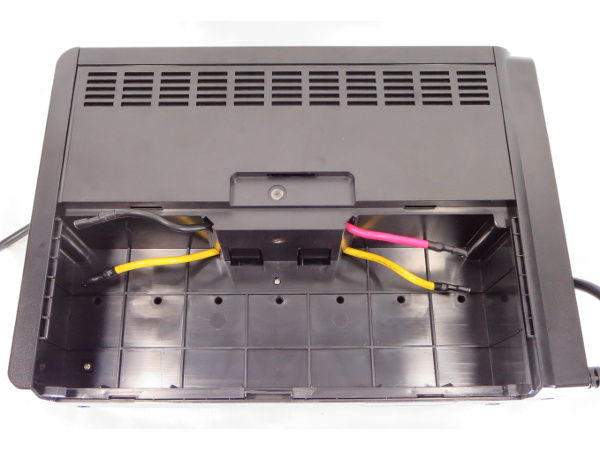
Getting those connectors on and off in the tight space over the batteries is more difficult than it should be. You have to twist the right battery out to access the positive terminal before you can pull the power source further out to unplug the yellow wire. Once that is done, you can remove the first battery and move the second one to the right slightly to unhook it from behind the front frame. After that, you can twist it out and repeat.
The sharp plastic molding around the cable holes bites into wire insulation and complicates the process. Smoothing the holes would also reduce wear on the wires' insulation.
Breakable Slot
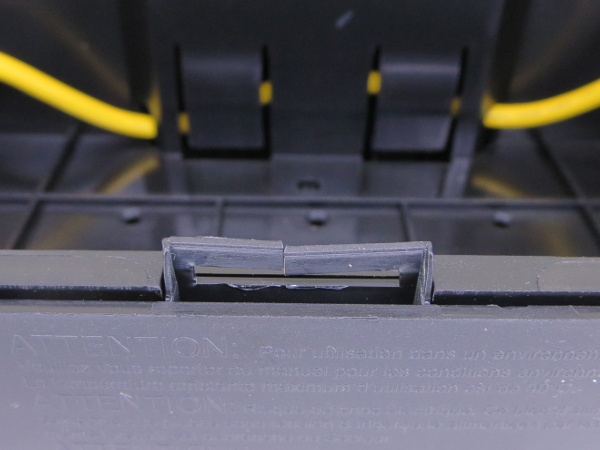
If you were wondering about my comments that the UPS' base should be braced with more foam, this is why I said that. The middle of the battery door hooks into this tab from below to keep the door from bowing out. At some point during shipping, the box must have fallen on its side. Since there is no packaging supporting the middle of the panel, the batteries' weight broke the flimsy slot. You can see the plastic turn white in the inside corners from strain.
The tab and slot should have been thicker, and the slot split in two to limit leverage.
Battery Door
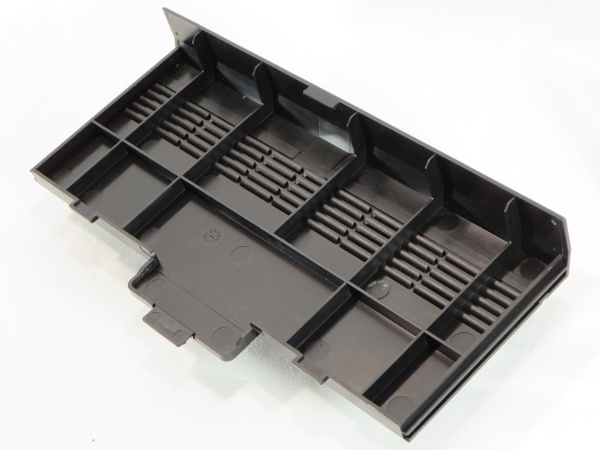
Irregular rib spacing causes the door to warp most visibly around the area with three vent rows when force is applied near the middle. That also happens to be where the bottom locking tab is located, and where the batteries might put the most force. Since the battery door is primarily held in place by a nice track at each end, the door should have had two wider longitudinal ribs to redirect lateral force from the batteries there.
Get Tom's Hardware's best news and in-depth reviews, straight to your inbox.
Reinforcement through the rest of the unit is generally shallower, but still feels adequate against external forces when the unit is fully assembled.
Battery Power Levels
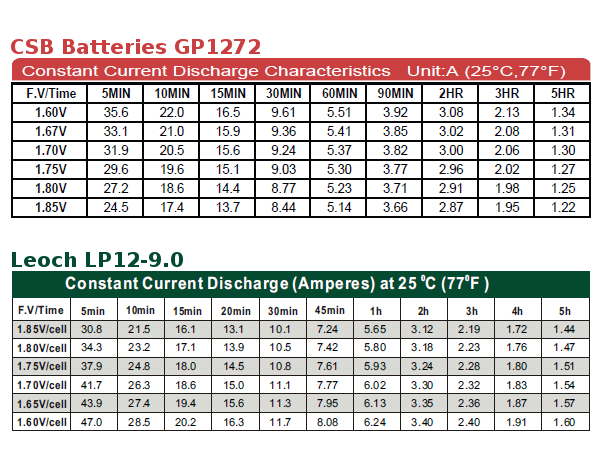
How do the Leoch batteries used in CyberPower's UPS stack up against the CSB batteries in APC's? If we scale CSB's specifications by 9/7.2 to extrapolate what a 9Ah CSB battery's performance would be like for a one-hour constant current discharge, we get 6.89A for CSB versus 6.24A for Leoch. Ah-to-Ah, CSB beats Leoch by 10 percent. Repeating the comparison with a 15-minute discharge rate, which is more representative of what a UPS might encounter powering a high-end gaming PC and related accessories, we get 20.6A for CSB versus 20.2A for Leoch. That puts CSB only 2 percent ahead. It looks like Leoch batteries should be on par with CSB's at medium to high loads.
With the regular user/buyer tour out of the way, it's time to get into the more interesting stuff.
Lost?
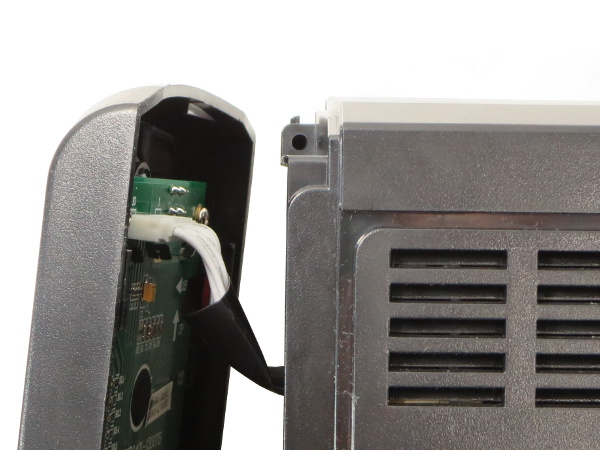
The left screw inside the battery compartment unlocks the front panel, which can then be lifted and pulled away, revealing a hidden screw hole in the top corner with no screw in it (at least on my unit). Was it accidentally forgotten? Deemed redundant due to the top sticker? Superseded by the sticker because the transformer's weight causes the screw mount to break?
Once the front and rear covers are out of the way, two tabs at the bottom of the battery compartment release the inner shell and top half of the housing. From there, you can gently pry it up while repeatedly tapping the top seam with a plastic screwdriver until the wide clips under the top of the cover disengage.
Peekaboo
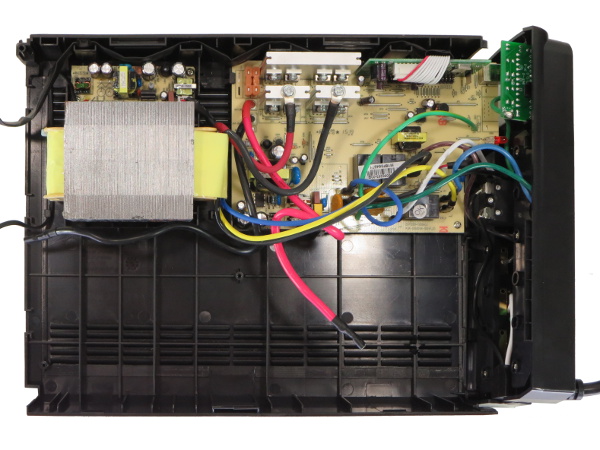
And what do we find? One small power PCB with three small heat sinks, one small 5V power supply board for the USB ports, a modestly-sized phenolic board for the high-current components with a small FR4 riser for control logic and one large transformer. CyberPower's LX1500 is a much simpler critter than the old APC BX1000.
Behind The Rear Cover
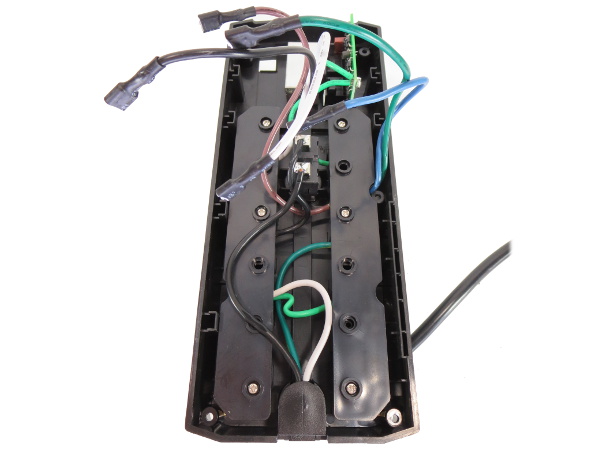
Behind the outlets, we find a plastic cover. We also find that the live wire from the power cord goes through the breaker and then straight to protected outlets. While this may not seem like much, putting the MOVs half a meter downstream from the first device requiring protection via extra wiring can reduce their effectiveness by 100V or more due to the added resistance and inductance.
Remember when I said this UPS has too many "surge-only" outlets due to its thin wire gauge? It's time to revise that "it shouldn't have any" due to a sub-par implementation.
And what is that I see near the bottom-left corner?
Pinched
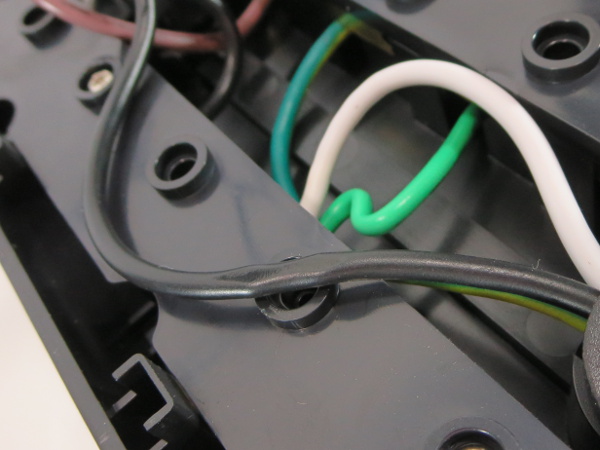
The live wire was cut too long, and instead of trimming it down to length before soldering it to the breaker, it was simply tucked between the battery compartment wall and rear cover. That's fine except for the part where the wire ended up straddling one of the screw cups and got pinched hard enough to visibly compress its insulation. When you tuck wires away, make sure you are not putting them where they may get crushed. Tape them down in a safe place if you have to.
Breaker Bad
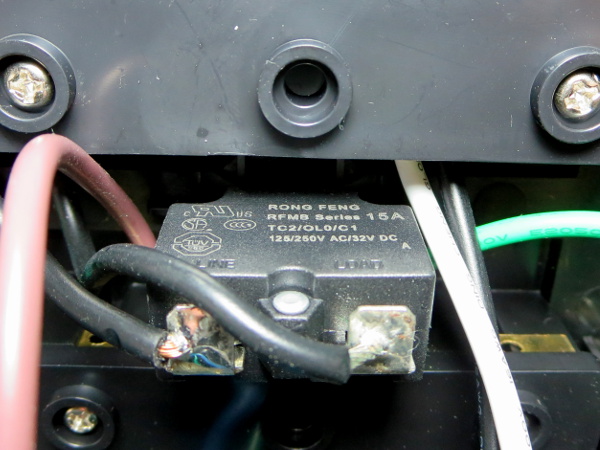
CyberPower continues to impress, but not for good reasons. There's a 15A breaker on a power cord that should not be used to carry more than 13A. While two or three extra amps before tripping may not be enough to turn a cord into a safety hazard, it is still disappointing to see that CyberPower could not be bothered to use breakers that match the cord's UL rating. When you run 15A through a six-foot #16 power cord, it dissipates around 12W. This may not sound like much, but it is still enough to get noticeably warm, especially if the cord has limited airflow around it.
-
Nuckles_56 This was really interesting thanks Daniel, I was surprised how many corners they cut when building this and I guess if I decide to buy a UPS, I'll have to do some serious research to ensure that the one I buy isn't like thisReply -
Daniel Sauvageau Reply
If you buy an UPS for the UPS function only, you can ignore the gimmick extras and that makes it ok-ish in my book. To get 9AH batteries from APC or Tripp-Lite, you need to spend 20-30% more,17616866 said:I was surprised how many corners they cut when building this -
Onus I would love to see a teardown of one of Cyberpower's APFC units. My Delta-built SG-650 WILL NOT run on a cheap UPS, but runs fine on a Cyberpower 1500PFCLCD (and on a smaller one as well). I'm curious as to how close to true-sine it really is; I believe it is a clipped-triangle, but I don't have an oscilloscope myself to check it.Reply
What I saw in this review was not a "modified sine wave;" it looked a lot like a square wave with some funk at the corners.
-
gamebrigada I'm raging about cyberpower right now. Started buying their stuff about 2 and a half years ago because of good pricing. I have probably a dozen UPS's from them, 3 have failed in the past 3 months. Not looking good for the brand so far. Especially when I've never had an APC ups fail for any reason other than its batteries, with 10 year old models still holding their own.Reply -
Epsilon_0EVP Not being extremely knowledgeable in electrical circuitry, I find it extremely alarming that every teardown of a surge protector or battery backup I have seen on this site points out glaring manufacturing issues, cut corners, and overall shoddy design and workmanship. It makes me question how much safer my electronics actually are when connected to these devices, given that I seem to be eliminating one possible point of failure by introducing another one. Could anyone more knowledgeable provide some thoughts on this?Reply -
ammaross I disregard the ethernet and coax passthrus (for obvious, and now shown, reasons). However, I'd love to see a teardown of the Pure Sine wave units from CyberPower and APC (APC is my pref brand, but not usually a cheap to aquire, whereas CP is usually on a great sale somewhat often).Reply -
Daniel Sauvageau Reply
Most of them, sure. All of them? No. The SurgeArrest Performance, both the old model from 10+ years ago and the newer model currently on the market are quite decent for $30-40 US. For $10-20 more, the Tripp-Lite isobar knocks build quality up a few notches with proper power outlets, extruded aluminum body and beefier filter inductors. (Although the "isolated outlet banks" turned out to be questionable.) The SurgeX unit kicked that up a few more notches, although its $400 price tag is a "little" steep.17618830 said:Not being extremely knowledgeable in electrical circuitry, I find it extremely alarming that every teardown of a surge protector or battery backup I have seen on this site points out glaring manufacturing issues, cut corners, and overall shoddy design and workmanship.
Right now, I'm trying to keep an eye on sales. While I was putting the LX1500 story together, I missed a sale on the PFC variant for only $10 extra. I didn't want to buy $400+ worth of UPS before knowing whether interest would be there. -
Daniel Sauvageau Reply
They call it "modified sine" because the bipolar return-to-zero waveform has lower total harmonic content than a plain square wave. It may not look sinusoidal but as far as the Fourrier transform is concerned, it should be close enough for most purposes.17618266 said:What I saw in this review was not a "modified sine wave;" it looked a lot like a square wave with some funk at the corners.
As for the "funk at the corners", that's likely the transformer's inductance resonating with the PSU's EMI filter capacitors. There isn't much of it on the APC since the old BX1000 drives HVDC to its output through an H-bridge, not much bulk inductance for load caps to resonate with there.
