Gigabyte Aorus AX370-Gaming 5 Motherboard Review
Why you can trust Tom's Hardware
Test Setup, BIOS & Overclocking
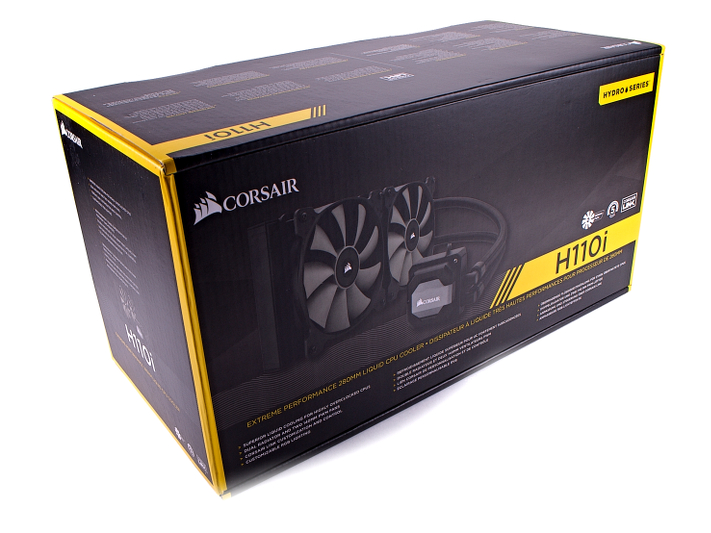
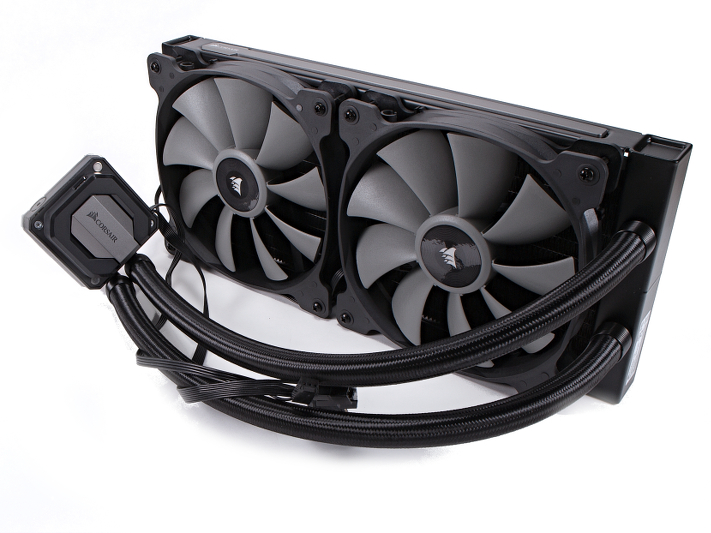
Along with the review sample, Gigabyte sent out a PR kit to further enhance our test experience and add some more comparison data to our X370 review series. The biggest addition to the test bench is a Corsair H110i all-in-one cooling solution. This 280mm radiator solution uses the Corsair Link software to program the LED, fan speed, and pump rate while monitoring various sensors available to the interface.
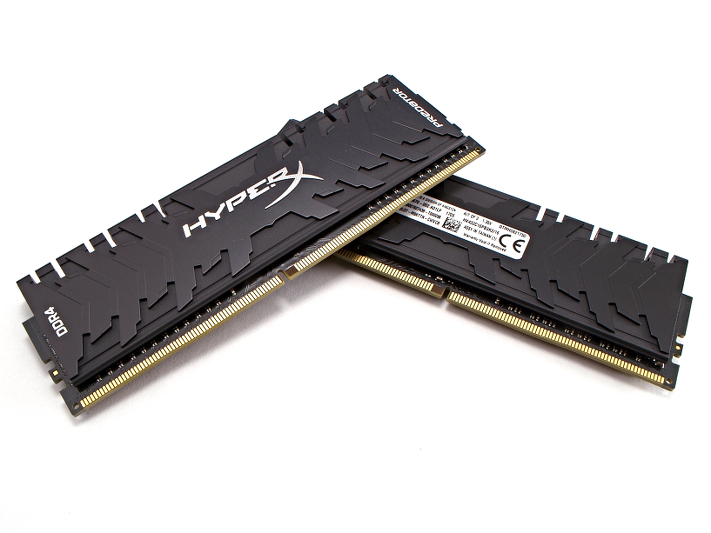
Gigabyte also teamed up with HyperX to send two Predator 2x8GB DDR4 3200MHz RAM kits. This single rank SK Hynix DRAM has been reported to hit 3200MHz on this particular motherboard model, so we look forward to seeing what our Ryzen sample can drive.
Test System Configuration
| Sound | Integrated HD Audio |
|---|---|
| Network | Integrated Gigabit Networking |
| Graphics | NVIDIA |
| Chipset | AMD X370 |
Benchmark Settings
| Synthetic Benchmarks and Settings | |
| PCMark 8 | Version 2.7.613Home, Creative, Work, Storage, Applications (Adobe) |
| SiSoftware Sandra | Version 2016.03.22.21CPU Arithmetic, Multimedia, CryptographyMemory Bandwidth |
| DiskSPD | 4k Random Read, 4k Random Write128k Sequential Read, 128k Sequential Write |
| Cinebench R15 | Build RC83328DEMOOpenGL Benchmark |
| CompuBench | Version 1.5.8Face Detection, Optical Flow, Ocean Surface, Ray Tracing |
| 3D Tests and Settings | |
| 3DMark 13 | Version 4.47.597.0Test Set 1: Skydiver, 1920x1080, Default PresetTest Set 2: Firestrike, 1920x1080, Default PresetTest Set 3: Firestrike Extreme, 2560x1440 Default Preset |
| Application Tests and Settings | |
| HandBrake CLI | Version: 0.9.9Sintel Open Movie Project4.19 GB 4k mkv to x265 mp4 |
| LAME MP3 | Version 3.98.3Mixed 271MB WAV to mp3Command: -b 160 --nores (160 Kb/s) |
| Adobe After Effects CC | Release 2015.3.0Version 13.8.0.144PCMark driven routine |
| Adobe Photoshop CC | Release 2015.5.020160603.r.88 x64PCMark driven routine (light and heavy) |
| Adobe InDesign CC | Release 2015.4Build 11.4.0.90 x64PCMark driven routine |
| Adobe Illustrator | Release 2015.3.0Version 20.0.0 (64-bit)PCMark driven routine |
| Blender | Version 2.68aBMW 27 CPU Render BenchmarkBMW 27 GPU Render Benchmark |
| 7-Zip | Version 16.02THG-Workload (7.6 GB) to .7z, command line switches "a -t7z -r -m0=LZMA2 -mx=9" |
| Game Tests and Settings | |
| Ashes of Singularity | Version 1.31.21360High Preset - 1920x1080, Mid Shadow Quality, 1x MSAACrazy Preset - 1920x1090, High Shadow Quality, 2x MSAAHigh Preset - 3460x1920 Mid Shadow Quality, 1x MSAACrazy Preset - 3460x1920, High Shadow Quality, 2x MSAA |
| F1 2015 | 1920x1080, 2015 Season, Abu Dhabi Track, RainUltraHigh Preset, 16x AF3460x1920, 2015 Season, Abu Dhabi Track, RainUltraHigh Preset, 16x AF |
| Metro Last Light Redux | Version 3.00 x64High Quality, 1920x1080, High TesselationVery High Quality, 1920x1080, Very High TesselationHigh Quality, 3460x1920, High TesselationVery High Quality, 3460x1920, Very High Tesselation |
| The Talos Principle | Version 2672521920x1080, Medium Preset, High Quality, High Tesselation, 4x AF1920x1080, Ultra Preset, VeryHigh Quality, VeryHigh Tesselation, 16x AF3460x1920, Medium Preset, High Quality, High Tesselation, 4x AF3460x1920, Ultra Preset, VeryHigh Quality, VeryHigh Tesselation, 16x AF |
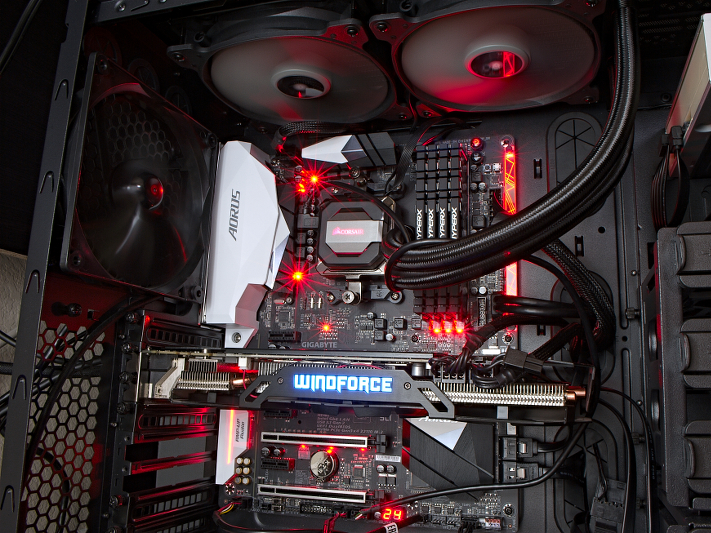
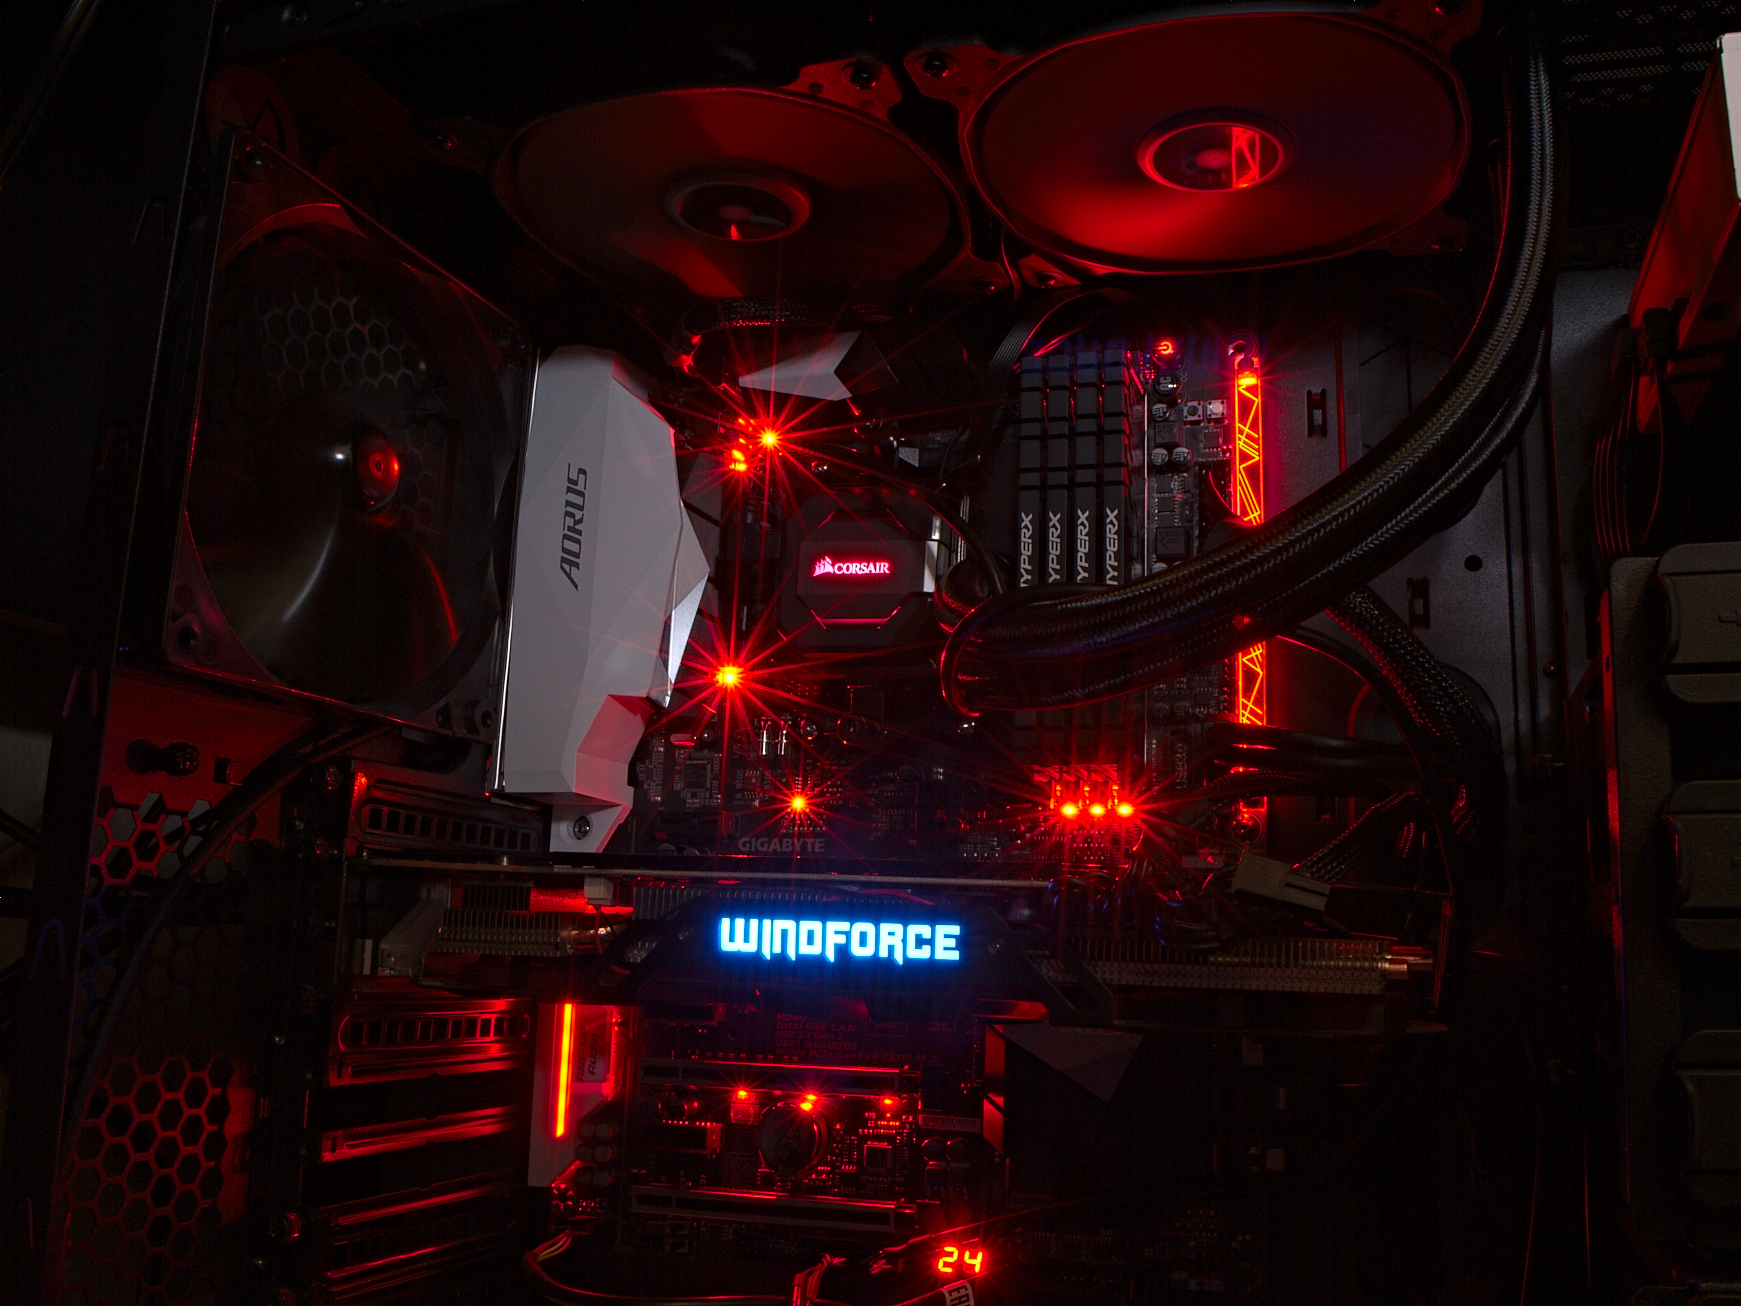
The “Tumbler” is still our enclosed test rig, hosting our GTX 970 GPU, OCZ RD400 M.2 drive, Corsair AX860 PSU, and various other drives. The Noctua heatsinks are taking a short break, but rest assured they’ll get their chance to go up against the H110i.
BIOS And Overclocking
I've preferred Gigabyte’s more traditional BIOS façade in previous reviews. Plain text in a logical arrangement gets my computer mojo going. This AX-370-Gaming 5 UEFI takes that same approach and tacks on a 90s futuristic motif in an attempt to modernize the interface.
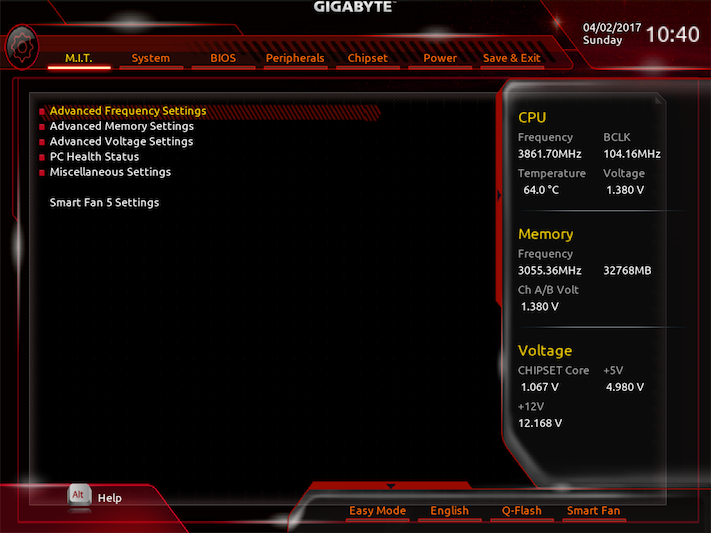
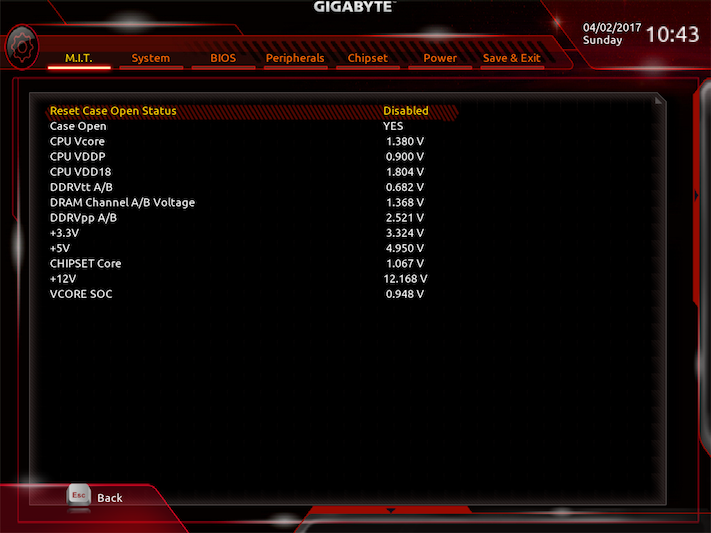
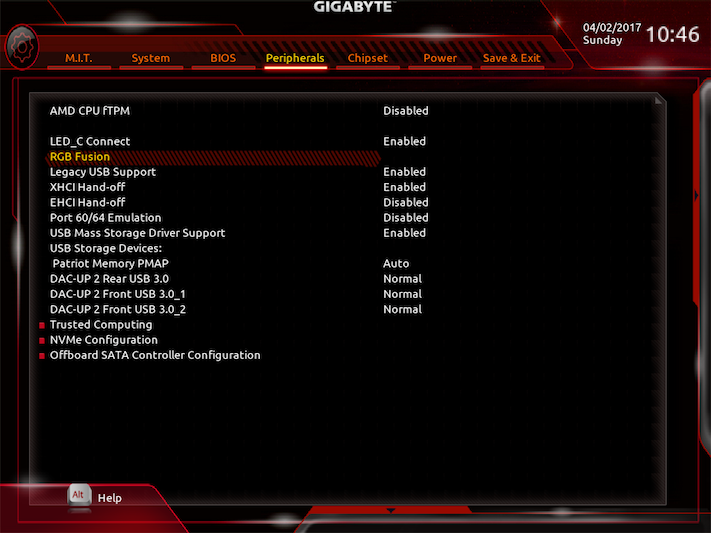
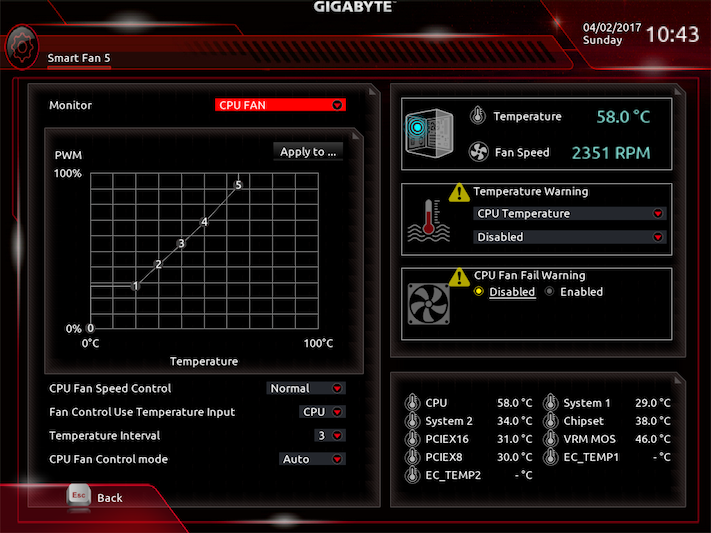
Although we do appreciate the text based feel and the removal of the super-low-level Zen, the lack of descriptions, prompts for +/-, or menu selections make this UEFI pretty confusing. If Gigabyte would have provided a text overlay describing the selection methods and moved away from the 1024x768 window we'd have been much more thrilled (though that could be because I use DisplayPort).
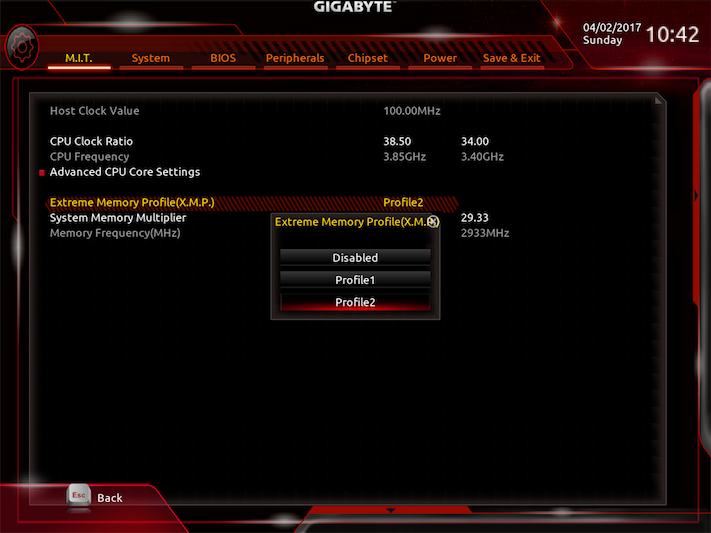
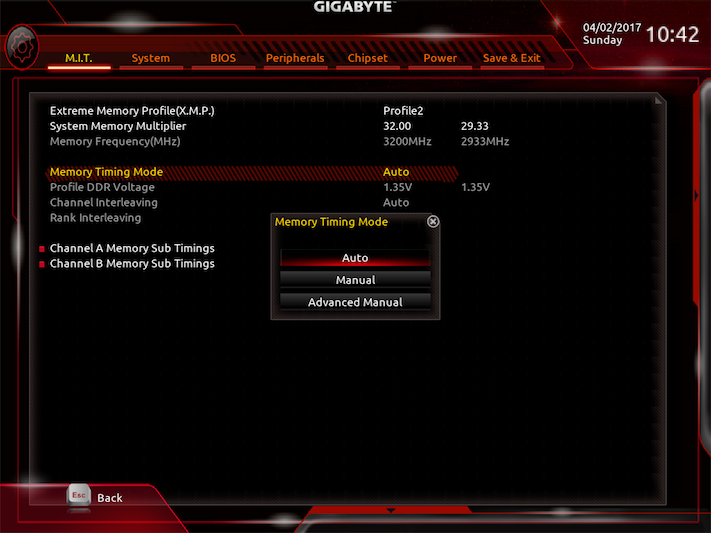
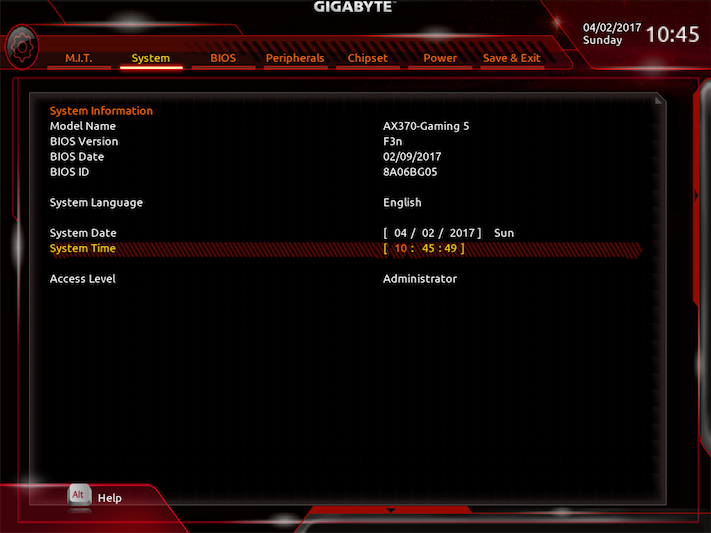
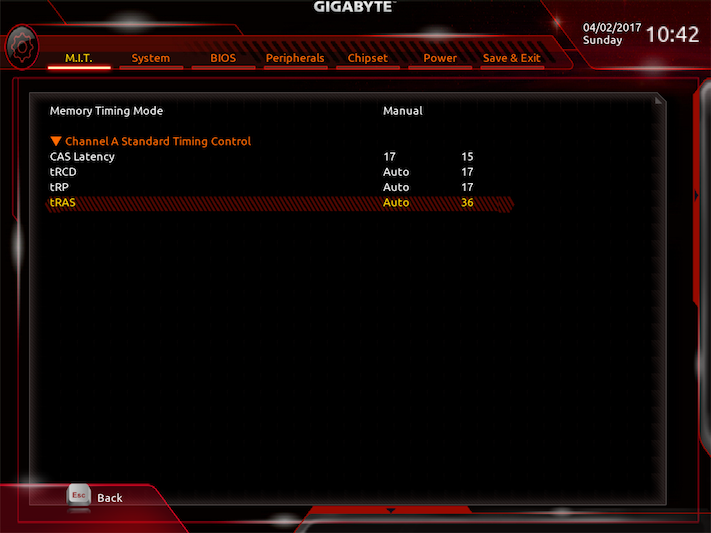
In our attempt at overclocking memory, we are once again battling against early release UEFIs and stability issues. With the first attempt, these HyperX Predator DIMMs do not want to run anywhere above DDR4-2400MHz. Browsing to the Gigabyte support page, UEFI version F5d boasts “improve DDR compatibility,” so we download that and give it a whirl. Again, neither of the XMP SPD settings work and manually adjusting various frequencies and timings fails to improve the situation. We contacted HyperX directly and the company confirmed that this kit could hit 3200MHz on the F4 version of the UEFI. Abandoning the “improve DDR compatibility” version did in fact enable us to get to the XMP Profile2 at DDR4-2933MHz, but 3200MHz was unachievable. Our guess: this Ryzen sample just can’t play with the big boys in the overclocking department. Upon further inspection, it turns out the Gigabyte download link pointed us to release F3n, and that’s not confusing at all (/sarcasm).
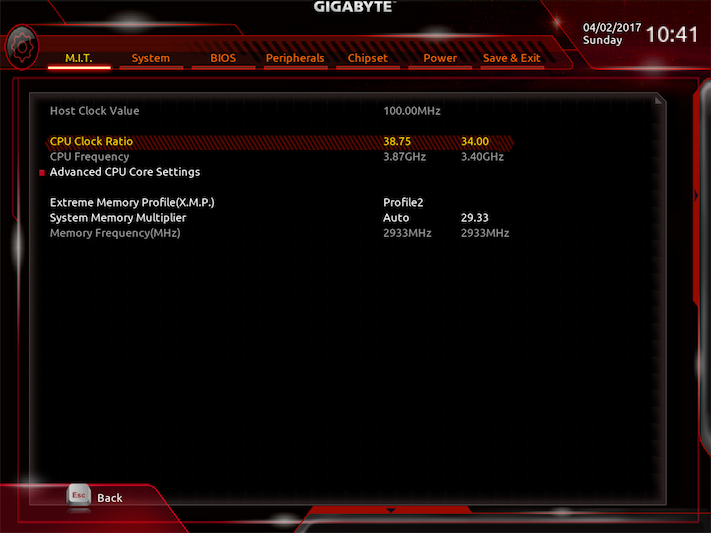
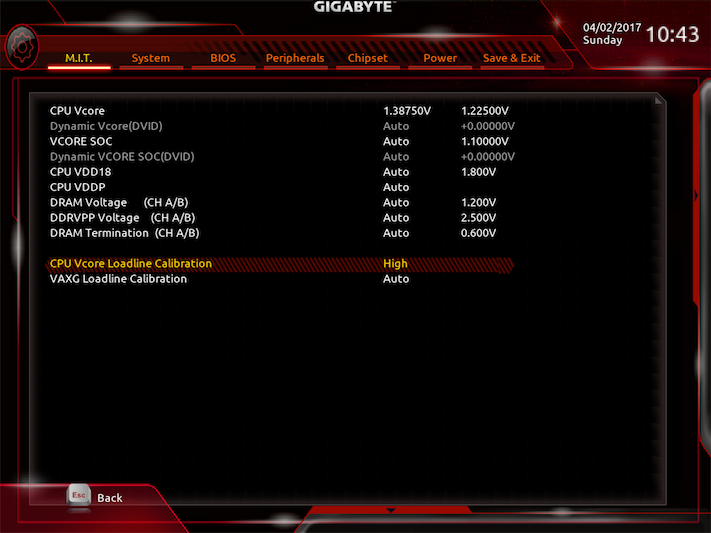
Our Ryzen overclocking approach from previous reviews still applies, but with the improved cooling solution we expect to hit something higher than 3850MHz! As usual, increasing the clock multiplier to 38 results in a comfortable system setting in terms of stability and temperature. The Gigabyte AX-370-Gaming 5 lets us increase clock rates in 25MHz increments, so increasing three clicks to 3875MHz lets us launch Prime95 and run for about 10 minutes before dropping to the black screen. Increasing voltages to 1.375V lets the system run for another 30 minutes, so we make the jump to 3900MHz. Disappointment follows success when our screen goes black after an hour. Increasing the loadline setting to High, we gain 30 minutes, but still Prime95 bests our components and cooling solution. After more tinkering with settings to get 3900MHz to stabilize, the 38.75MHz multiplier is the only point at which the overclock would run overnight without fault.
Get Tom's Hardware's best news and in-depth reviews, straight to your inbox.
MORE: Best Motherboards
MORE: How To Choose A Motherboard
MORE: All Motherboard Content
Current page: Test Setup, BIOS & Overclocking
Prev Page Features & Specifications Next Page Benchmarks & Final Analysis-
elbert Kind of a low overclock. I wonder if the Prime95 is version 26.6. Ryzen is new but somewhat more close design wise to intels than past chips. Every version of prime95 after 26.6 has had issues with Intel so the same could be true for Ryzen.Reply
Good review tho as all motherboards were tested the same so still an even test to determine which can overclock more. Motherboard prices tho seem a bit high compared to what AMD's Suggested price range was during launch. The B350's are higher than the $79~99 and X370's all start out above what AMD first stated low price range tho no top price for the x370. -
Andres_27 Same board and cpu models, mine reached 4ghz (though I have to crank up the fans for it to be stable) on the 1700x, and I've had no problems getting my Corsair Vengeance LPX to reach its xmp profile of 3000mhz.Reply -
ammaross Shame Jacob didn't test with an RX480 (or in crossfire). Nvidia has some odd behavior on Ryzen for some reason. Shame the Gigabyte board has some quirks compared to ASRock; it has some nice features that slightly edge out the Taichi.Reply -
eyupo92 I have Gaming 5 and do not recommend it at all.Reply
My CPU is Ryzen 7 1700 with stock (LED )cooler and RAM is 2 x Crucial Ballistix Sport DDR4 2400 ( it is on QVL list) and GPU is RX 460 4GB. It is connected to 850 watt Thermaltake PSU and housed in a Zalman Z12 Plus case. My SSD's + HDD's are connected through a 4-bay IcyDock 2.5" hot-swap HDD cage which I installed on a 5.25 drive bay on my case. Theoretically, I should not have any reason to open the side panel of the case ever again.
Theroretically the Ryzen 7 1700 is supported with BIOS F3 ( original BIOS the motherboard came with), now I am running on latest BIOS F5 ( Agesa 1.0.0.4.a )
The problem is this damn thing freezes and gets stuck on an undocumented BIOS POST code on every startup. Does it freeze on Windows ? No. This damn thing freezes on logo screen or when you enter BIOS. You enter BIOS, click on a few arrow keys to move around it and baaamm... it freezes. When it freezes, it stays so, restarting does not help, shutting down and restarting does not help etc. I shut it down, wait for 5 minutes, then it starts to boot.
It has lots of fancy features for sure. The On/Off button, CMOS clear button, OC button, restart button located at the top right and 7 segment POST LED display in bottom left are very helpful if you build assemble your motherboard by placing the CPU and RAM AND IF YOU POWER IT UP BEFORE YOU INSTALL IT ON YOUR CASE. After you install it on your case and close the side panels, they are useless.
I had read Ryzen had issues and deduced that I needed a CMOS Clear button to cope with frequent BIOS issues. But a Clear CMOS button is useless unless you can use it without opening your case, and some Asus motherboards do have them located on the back panel of motherboard - but god, they are expensive.
I had two alternatives to choose from : MSI Gaming Carbon Pro or this one. I selected this one for the presence of Clear CMOS key only. And it turned out to be useless.
Another thing I constantly experience is the motherboard freezes and displays a POST message "b4 : USB device hot plug-in" . Did you understand what the problem is? I did not either.
Not only are the BIOS POST code definitions are cryptic and useless, the LED's are not readable at all. Some error codes displayed on motherboards bottom left corner is not even documented even like the one I hve given above. And after two weeks, I still can not figure out what the displayed code is, from my chair I incline a bit down and can see some lights which are obstructed by the GPU ! So I push the case a bit to the right, incline a bit more downwards, and there I see something unrecognizable. Why ? Because instead of a LCD display, there is a regular POST LED installed. So I see something, I try to deduce what it looks like ( the POST documentation in manual lists them as "B4" but what I can see is something like this: https://encrypted-tbn3.gstatic.com/images?q=tbn:ANd9GcS... I am not even sure about the orientation of the code; I just know that I am looking at it from top. Does it display b4 or something like Ah? God knows.
*** Removed two sentences related how angry I get at that point and on which frequency I get this angry based on feedback from moderation team. I have left this so that future readers might have a feeling how frustrated I get ***
The main m.2 socket - where you will put your precious, highly expensive NVMe drive is located exactly under your GPU slot, you can not see the slot at all let alone change it without removing the GPU. You might not see this in even in this reviews pictures unless you look for it, or heck even if you have the board in your hands you might not visualize this. It is not easy to imagine how it will look like with the GPU installed. Well, almost all GPU's starting with RX 460 and GTX 1050 are dual socket GPUs - meaning they not only cover their own slot, but also the slot below them too. Which happens to be the exact place where main m.2 PCIe 3.0 x4 NVMe drive is supposed to go in.
NVMe drives tend to get very hot, and those idiots decided to put them just beneath another very hot component. So, I did not risk my NVMe drive at all; I will need to order some third party passive m.2 cooler before doing that. In times like this *** removed four words again based on feedback from moderation team ***
This point applies to all motherboards - Intel and AMD alike : There are lots of ports, but as it happens, a port being there and having a working, compatible device to go in that port, and putting the device into that port and making all connections.. does not mean it will work. Somehow, things like PCIe lanes come into play.
"The only nitpick with X370 is that it has only eight PCIe lanes of its own. Coupled with the 24 PCIe lanes of Ryzen—16 for graphics, four for NVMe, and four to communicate with the chipset—users have 32 lanes to work with. "
For example, if you put a PCIex4 device in a specific x16 port, all three PCIe x1 ports become unavailable. If you connect a SATA m.2 drive into main m.2 slot, SATA3_3 port ( there are 8 ports, 0 to 7 ) becomes unavailable. If you manage to get a U.2 NVMe drive and connect it to its U.2 port, the main m.2 port becomes unavailable and so on. Lots of limitations are exist.
Now, I love this motherboards features :
- You might not care about LED lighting ( I certainly hated the idea ), but if you have a case with a glass side panel or with a mesh top, you will start caring. LED lighting is much more likeable than I imagined.
But, beware - you can set different areas of motherboard in different colors - but you can not set CPU cooler LED color. Somehow, it is set automatically based on god knows what. For example, as shipped motherbaord had LED colors set to red, and CPU cooler LED color was dark green - why, god knows. Since my case was shipped with two case fans with blue LED's, it was a mess. I set all motherboard LED's to blue as well; now the CPU cooler LED color is a very faint orange. Why, god knows.
*** Update : this time a useful one, really. The problem was twofold : I have Ryzen 7 1700 that comes with Wraith Spire cooler and that I had inserted the LED cable to the CPU LED socket without taking orientation into consideration.
Based on some other posts on this question, I recognized that there is a correct orientation to insert that cable into that slot and this is actually documented in the motherboard manual. With correct orientation and STATIC preset, the CPU LED appears in the same color as all other motherboard LED' - and there is no way to select CPU color using RGB Fusion from BIOS or Windows. and as you might have guessed, I wanted to set cooler LED to a different color - to red actually, which would look good. Just as I am writing this, I thought why I would like Red Cooler LED on a blue LED background, and recognized that the "on/off" button on the motherboard has a beautiful red lighting and unconciously I was influenced by it. Some youtube videos appear to show that Asrock RGB LEd might have the ability to set a different color to CPU cooler, but I can not be sure.
If I had Wraith Max cooler, supposedly I could download a windows application that would allow me to set cooler LED to another color. If you happen to have a Wraith Max cooler, you can check AMD website, probably it is related to the second cable that is attached to motherboard. ***
Also to note: RGB Fusion can be set both from BIOS and Windows. If you set it in Windows using Gigabyte App, then your settings become active only after Windows boots - in my case green CPU LED, red mobo LED's and blue case fan LED's are active until Windows boots up and all LED's turn to blue and CPU LED turns to faint orange . If you set it on BIOS however, your settings are applied the moment PC is booted up, all LED's are blue and CPU LED is faint orange. Though even then, if different colors are set up on BIOS and Windows, Windows takes over after it starts.
- There are 8 SATA ports, and they are very important to me. If I ever get my hands on a U.2 drive, I can try it as well. So, good for me. MSI Carbon had only 6.
- It is beautiful to look at.
Sh*t... I recongized that the only reason I have to keep this board is that I can not give it back.
I wish I had purchased MSI X370 Gaming Carbon Pro. Sure, it would have its problems and I would need to short some pins to clear CMOS ( Gaming 5 has one of these pins too ) but at least its main m.2 location was not exactly beneath the GPU slot.
To sum up: unless you need this as a test bed like I do, stay away from it. If you need it as a test bed, well you will be treated like a tester and every boot will be a "test case" and you will want to ... -
eyupo92 If you just look at their pictures, you might think MSI main m.2 slot is close to GPU slot as well; but it is not exactly under it AND they supply you with a thin layer of tin called MSI M.2 Shield to make up for possible heat.Reply
We all had heard or experienced the effect of heat build up on components and their performance in some form. This is a prime case illustrating that point.
https://www.computerbase.de/2017-04/m.2-ssd-kuehler-test/2/
First, the article is in German, second the tested m.2 drives are m.2 NVMe type and third it is actually testing whether “tins sold as m.2 coolers do have any effect on performance”.
This all started with MSI bundling a thin layer of tin named “m.2 shield” with select motherboards and started the drums louder and louder. Then some after market coolers started to show up. The press were not able to verify MSI’s claims to which MSI responded by “you should not look at the temperature difference only, look the effect on the performance”.
M.2 disks, whether they are SATA, PCIe x2 or PCIe x4 NVMe types, have a heating problem. As they are shipped in “open PCB” format, there is nothing to prevent or spread the developed heat. In my testing for 2,5” SATA SSD’s and m.2 SSD’s I have also observed that reported m.2 temperatures are mostly 10-15 C higher than 2,5” disks.
According to the article, most of the heat arises from the controller chip, and once the controller chip reaches a certain temperature, throttling begins and throughput performance drops to preserve the disk getting damaged.
On SATA SSD’s ( whether they are 2,5” or m.2 or mSATA types ) there are three layers of performance coming from three layers of cache/buffer employed : there is a DRAM cache ( usually between 128 MB and 1 GB ) where the highest and advertised performance of 500+ MB/s occurs, there is SLC cache ( mostly some portion of the MLC/TLC chips are modified to act like SLC chips ) with size between 4 to 32 GB where performance is lower than DRAM cache but can be between 500 to 300 MB/s, and there is the actual MLC/TLC chip speeds. To see the actual performance of the disk, you need to read or write files bigger than SLC cache size at least. There is an effect of heat/temperature build up as well, but no one bothered to investigate the effects beyond SLC cache.
On NVMe drives on the other hand, there is no such buffer/cache levels. But if you read or write big enough amount of data, then you observe performance drops. This comes from the effects of heating.
So, this article set out to find out what were the effects of this m.2 coolers on performance and how it was related to temperature. They created a set of 5 minute read / write loads and applied this two two different m.2 NVMe drives with different NAND and controller chips; with no cooler attached and different coolers attached.
The graphs are simple enough, on the same chart throughput rate and temperature are displayed against time in seconds. You can see the temperature rising and what how the throughput reacts. You can see there are multiple levels of performance as throttling kicks in at multiple levels.
First, let us take the elephant in the room – a 5 minute read /write workload is unrealistic for a NVMe drive; depending on their sizes, these drives will read and write themselves multiple times in 300 seconds and there are no such files that you will ever write - how can you a file that is 5 times bigger than the target drive ? But this does not take anything from the methodology or the results and their usefulness.
They have found out that even the “thin layer of tin” ( = MSI m.2 Shield ) has a positive effect on the performance as it slows down the heat development, and other heat spreaders almost completely prevent the disk to reach the temperatures where throttling kicks in.
The following table lists the results in a compact form. “ohne” means “none”, “Kühler” means “Cooler”, “Übertragene Daten / Zeit bis zur Drosselung” means “Trasferred Data / time to throttling kicks in”, “keine Drosselung” means “no throttling”, “Prozent” means “Percent”.
Eingesetzte SSD SSD-Kühler Übertragene Daten / Zeit bis zur Drosselung
Samsung 950 Pro ohne ca. 170 GB / 74 Sekunden
Samsung 950 Pro MSI M.2 Shield ca. 294 GB / 128 Sekunden (+73 Prozent)
Samsung 950 Pro Alphacool HDX M.2 keine Drosselung
Samsung 950 Pro Aqua Computer kryoM.2 evo keine Drosselung
Samsung 950 Pro Aqua Computer kryoM.2 micro keine Drosselung
Patriot Hellfire ohne ca. 33 GB / 22 Sekunden
Patriot Hellfire MSI M.2 Shield ca. 131 GB / 87 Sekunden (+295 Prozent)
Patriot Hellfire Alphacool HDX M.2 ca. 369 GB / 246 Sekunden (+1.018 Prozent)
Patriot Hellfire Aqua Computer kryoM.2 evo keine Drosselung
Please feel free to click on the charts and tables on the original article and decide on their usefulness for giving you a feel of what is going on the disk. -
ammaross Reply19616049 said:Shit... I recongized that the only reason I have to keep this board is that I can not give it back.
I wish I had purchased MSI X370 Gaming Carbon Pro.
I'm glad I cancelled my preorder for the Aorus and got the Fatal1ty Professional Gaming then. :) -
papality Why don't your Ryzen reviews ever accompany an AMD video card? I do believe the R5 580 just came out as well, a comparison of that or even a 480 would probably be more interesting than a 970 at this point in that GPU's lifecycleReply -
footman I bought this board to go with my new 1700 and DDR 3200 ram and after a frustrating week, too it back to Fry's and replaced it with the MSI Carbon Pro (which you really should review). The MSI was also frustrating, especially as it has no reset CMOS button! Bios reset must be done by removing the battery or jumping a pin (seriously MSI, how stupid!). The latest MSI bios 1.3 and 1.4 take advantage of the latest AGESA 1.0.0.4a code and are pretty good. A-XMP finally works, I have been able to get my Cas 14 PC 3200 ram to run at 3200mhz with correct timings, boot times have improved dramatically and overclocking is improved, but I believe that I have been lucky with my Ryzen 1700, which overclocks to 4.00ghz easily with 1.3875vcore OCCT stable. Perhaps Gigabyte will release better bios updates making this board more stable.Reply
The Ryzen release was a shambles and this can be blamed on AMD not releasing the AGESA codes in a timely fashion to the motherboard manufacturers in time for cpu and motherboard release. -
eyupo92 A CMOS Clear button on motherboard back panel must be standard item for motherboards based on overclockable or highly customizable chipsets. They can put a removable plastic cover on top of it to minimize accidental pressing. But will anybody listen ?Reply -
TheTerk Thanks for all the input guys! @EYUPO92, sounds like you write reviews too. Let's keep the discussions to this Gigabyte board and only use other anecdotal data as reference only.Reply
Fortunately, the only things I ran into were troubles with the RAM. My NVMe and various disks were detected fine, which are 2x SSDs and 2x HDDs.
As for GPUs, this GTX 970 is working just fine, and from the data I've reviewed about the Polaris 580, I would only be making a sideway jump in performance for the sake of switching to AMD.
