How To Calibrate Your HDTV
You've already seen our instructional guides for calibrating computer monitors. In today's story, we help get you started dialing your HDTV as well. From beginner to expert, we have you covered with a handful of different approaches.
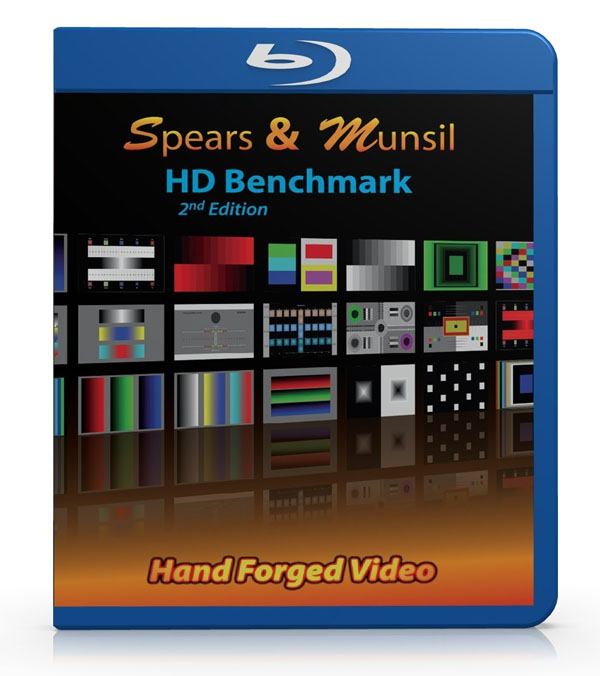
Hands-On: Basic Calibration With Spears & Munsil HD Benchmark
We know that not everyone has access to colorimeters, pattern generators, and expensive software. But you can still improve your HDTV greatly by investing around thirty bucks in a good test disc.
If you have a Blu-ray player and the Spears & Munsil HD Benchmark, you can properly adjust the brightness, contrast, color, tint, sharpness, and color temp presets on any HDTV without a meter. Many displays will be pretty close to accurate after this basic setup.
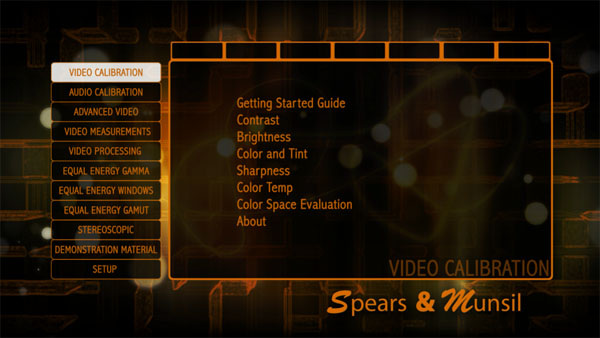
The disc is organized into logical menus and there’s a ton of material here. But all you need for a basic calibration is what’s in the first one: Video Calibration.
The list of tests is the same as the image parameters we’ve already talked about. Each one has associated patterns that will help you set that particular control.
The first thing you should do is set your TV to its Movie or Cinema mode. If you have a THX-certified display, select the THX mode. Movie modes almost always provide the best starting point for a calibration, whether you use a meter or not.
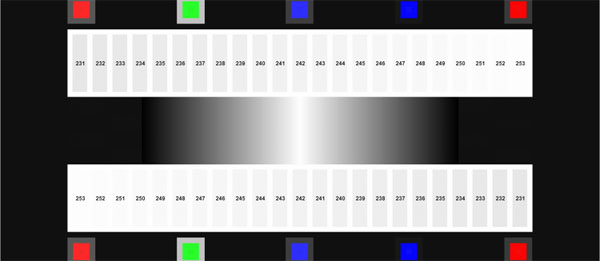
Contrast is pretty easy to set on any HDTV. Look at the two horizontal white bars. Inside them, you should see smaller vertical bars that get lighter on the top or darker across the bottom. If you can’t see them all, turn down the contrast slider until you can, then turn it back up a click or two. If you can see all the bars, do the opposite. With this pattern, you can maximize contrast while retaining all available highlight detail.
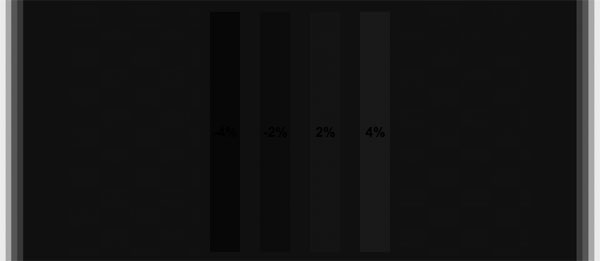
Brightness is a little tougher. First, you should adjust your room’s lighting so it represents your usual viewing environment. If you watch mostly at night, draw the curtains or wait until after sundown to calibrate your TV. Like the contrast pattern, you want to see all four bars. Then, lower brightness until you can only see the two bars on the right. You will have achieved your display’s lowest possible black level that retains full shadow detail.
Get Tom's Hardware's best news and in-depth reviews, straight to your inbox.
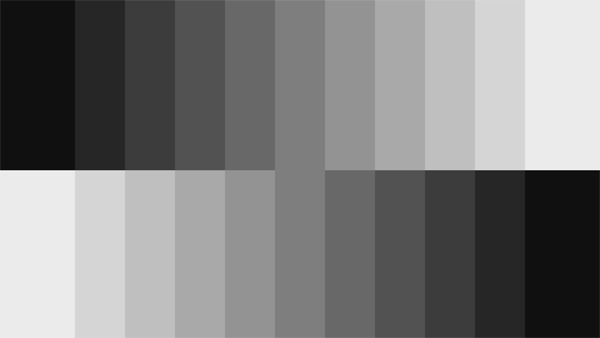
We always recommend you set white balance with a meter, but you can choose a color temp preset based on your observation of a pattern like the one above. It shows 11 brightness steps from zero to 100 percent. Display it and let your eyes adjust for a minute. If it looks neutral to you (without any perceivable tint), your color temp is set correctly. If it looks too red then choose a higher setting like normal or cool. If it looks blue, go the other way. Chances are, warm will look the best.
Finally, we set color and tint. Now you’ll find out what that blue filter in the box is for.
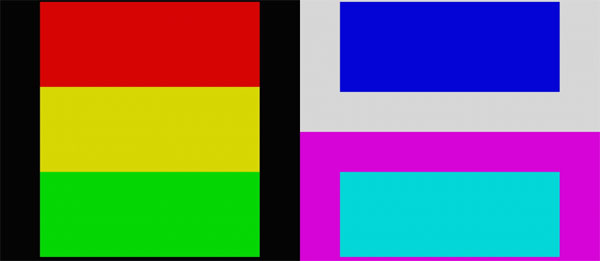
If you don’t have a blue filter to look through, it’s best to skip this part. Most HDTVs don’t need much adjustment, if any, to either color or tint in their movie modes. If you have the filter, look through it at the above pattern. If you see a solid black square and a solid blue square, awesome! You’re done. If you see something in the black square, raise or lower the color control until it disappears. If you see something in the blue square, adjust tint until it’s a solid blue. You may not achieve perfection; remember that these controls adjust all six colors simultaneously, even when only one or two might be off. Use them sparingly.
After completing the steps, go back and readjust brightness and contrast again. You might find it necessary to change them a click or two to achieve maximum dynamic range. It really can be that easy, and if you have a reasonably accurate display to start with, you’re 90 percent there.
Of course, we know many enthusiasts chase that last 10 percent. In the next few pages, we’ll talk about the SpyderHD package, which includes a meter, test pattern disc, and other tools for $349. Whether you’re calibrating an HDTV or a projector, the Spyder is a good value-oriented solution.
Current page: Hands-On: Basic Calibration With Spears & Munsil HD Benchmark
Prev Page SMPTE Standards And How They Govern What You Watch Next Page SpyderHD Walkthrough, Part 1
Christian Eberle is a Contributing Editor for Tom's Hardware US. He's a veteran reviewer of A/V equipment, specializing in monitors. Christian began his obsession with tech when he built his first PC in 1991, a 286 running DOS 3.0 at a blazing 12MHz. In 2006, he undertook training from the Imaging Science Foundation in video calibration and testing and thus started a passion for precise imaging that persists to this day. He is also a professional musician with a degree from the New England Conservatory as a classical bassoonist which he used to good effect as a performer with the West Point Army Band from 1987 to 2013. He enjoys watching movies and listening to high-end audio in his custom-built home theater and can be seen riding trails near his home on a race-ready ICE VTX recumbent trike. Christian enjoys the endless summer in Florida where he lives with his wife and Chihuahua and plays with orchestras around the state.
-
vmem Thanks for the detailed and great write up. it is inspiriting as alwaysReply
Though honestly, for the "average" consumer, I find it hard to justify spending $350 to calibrate a $500 or so monitor set up and maybe a $800-1200 TV. I feel this is the type of thing you have to really get into (and end up doing it for free for your friends and family) -
rdc85 Well I'm using the pic for calibrating the monitor right now :D...Reply
looks like my brightness and contrast slights off -
crisan_tiberiu the question is: why arent the producers calibrate the TVs right out of the factory? why? is it so hard to make a preset for the TVs? 99% of the TVs that come out of a factory will have the same "crappy" default settings. And sorry, i wont spend 350$ to calibrate my TV ^^ no wayReply -
shahrooz well the first time I saw a calibrate your something's screen article was a year ago. Back then I found out "one does not simply calibrate the screen of something"Reply -
The_Icon This is something I have been wanting for a long time now. Is there any good free tool to calibrate both the HDTV and my monitor? The TV is connected to my PC as well.Reply -
vmem Reply14324342 said:the question is: why arent the producers calibrate the TVs right out of the factory? why? is it so hard to make a preset for the TVs? 99% of the TVs that come out of a factory will have the same "crappy" default settings. And sorry, i wont spend 350$ to calibrate my TV ^^ no way
They do calibrate the TVs (any manufacturer worth their salt anyway). the problem is two fold: first all TVs / monitors are relatively low margin because the market is highly competitive. unless you're paying a premium for "professional" monitors such as the Dell ultrasharp series, most panels will be calibrated the 'easy' way to some factory pre-set that is considered "good enough".
the second thing is that everyone's lighting conditions are different. maybe your room is brighter than mine and you like having the traditional type of bulbs that have a yellow / orange hue and I use white light bulbs. these things have a huge impact on how your TV looks, so at the end of the day the consumer will always need to do some calibration if you want perfect color reproduction.
