How to Use a Tablet or Phone as a Second Monitor in Linux

Phone as a Second Monitor in Linux
(Image credit: Tom's Hardware)

Not everyone has the desk space– never mind the finances – to afford the luxury of a dual-monitor setup. Adding a second display can, however, revolutionize the way you use your PC.

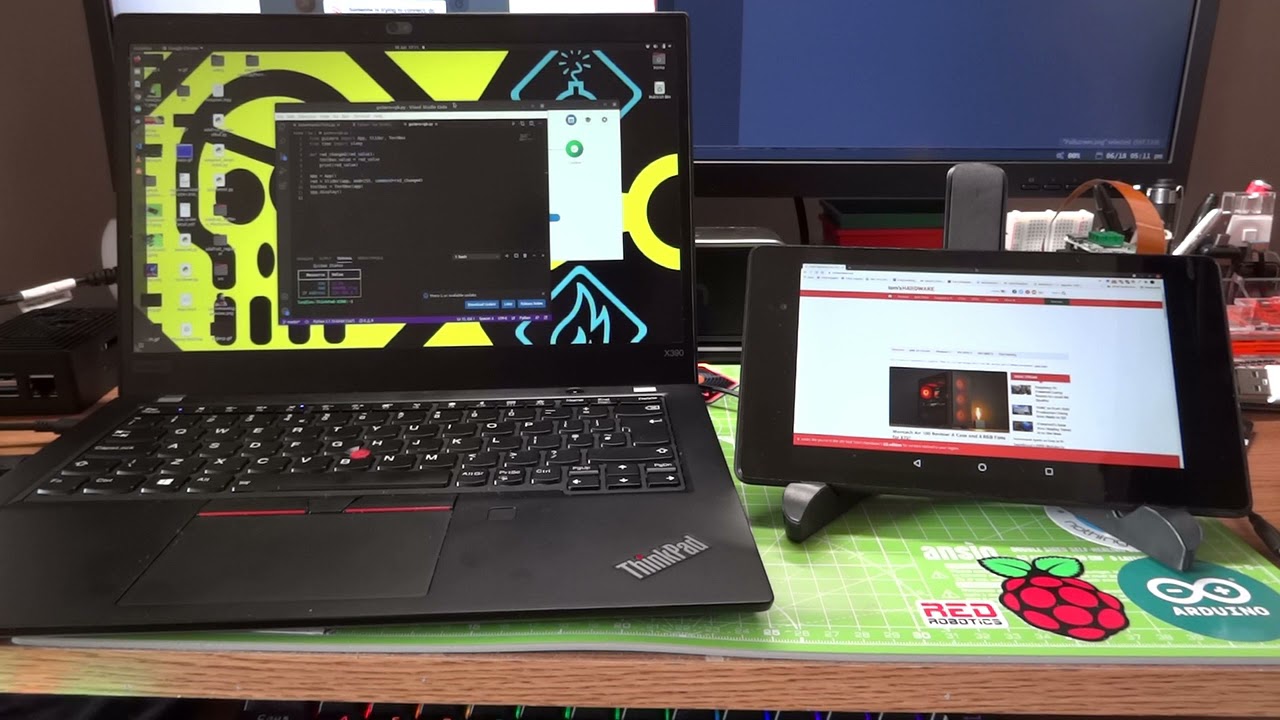
Deskreen is a free Linux application that provides a clever workaround to this problem, one that makes it possible for you to view multiple windows at once across additional displays without spending anything. Simply put, it enables you to convert other devices, including phones, tablets, laptops, and even smart TVs, into wireless, secondary displays for your computing tasks.

Deskreen transmits your display – both X and Wayland windowing systems are supported – to your mobile devices over your local (wired or wireless) network using the WebRTC protocol. Most of the heavy lifting is done by your PC, so even older phones and tablets should work with it. The key requirement for your mobile is that it has a web browser that supports WebRTC – on Android, that means running Chrome 28 or later, or Firefox 22 or later. If you’re hoping to use an old iPhone or iPad, it’ll need to run iOS 11 or later.

For This Project You Will Need

  • Computer running Linux
  • Tablet or mobile device with a recent browser and barcode scanner app.
  • 5-GHz Wi-Fi or Ethernet

Before we can use Deskreen, we need to download and configure a BASH script that will configure a virtual display. Please note that this script is compatible with the X Window system only. Newer Ubuntu releases ship with Wayland set as default. To change this click on the cog / Settings icon and select “Ubuntu”.

1. Open a terminal and download the Git repository for the Virtual Display Linux script. 

git clone https://github.com/dianariyanto/virtual-display-linux.git

2. Change directory to the downloaded repository.

cd virtual-display-linux

3.  Set the vdl-monitor to be an executable

sudo chmod +x vdl-monitor

4. Open vdl-monitor.conf in nano.

nano vdl-monitor.conf

5. Set the resolution for screen1 to match that of the device that you wish to use. We used an old Android tablet with a 1080p resolution. Press CTRL + O, then press Enter and finally CTRL X to save and exit the file.

6. Run the vdl-monitor script. You will be prompted to reboot, do so and when back to the desktop, open a terminal window. 

./vdl-monitor

7. Run vdl-monitor to start the virtual display. You can check that you now have two displays by opening the Screen Display application found in the Control Panel.

We now have a virtual 1080p monitor ready for use. To use it we need to download and configure Deskreen.

To Install Deskreen 

1. Download the app image version of Deskreen from www.deskreen.com

2. Go to the Downloaded file, right click on the file and select Properties. Next to Execute tick “Allow executing file as a program”. This will make the file executable.

(Image credit: Tom's Hardware)

3. Double click on Deskreen app to launch the application. When prompted, confirm your language.

4. Deskreen presents a screen with a QR code and URL. Using your tablet / device scan the QR code with the barcode scanner or type the URL into the browser.

(Image credit: Tom's Hardware)

5. On your computer a prompt will appear asking us to confirm the connection. Accept the connection

(Image credit: Tom's Hardware)

6. Deskreen can share an entire screen or an application window. In this case we wish to share the entire screen. Click on Entire Screen to share. 

(Image credit: Tom's Hardware)

7. Two screens will be offered. Screen 2 is the virtual screen. Click on Screen 2 to share. 

(Image credit: Tom's Hardware)

8. Confirm that you wish to share Screen 2. 

(Image credit: Tom's Hardware)

9. The browser on your tablet will now show Screen 2. Click on the full screen icon to get the maximum screen real estate. 

(Image credit: Tom's Hardware)

Deskreen works well but there is a caveat. You will need 5-GHz Wi-Fi or an Ethernet connection to get the best from this setup. Slow connections will cause lag between your displays.

This tutorial was first published in an issue of Linux Format magazine.

  • ezst036
    This is quite a useful how-to.

    Also, users of a second monitor might want to consider setting up a multiseat system, which means that two people can use one single computer simultaneously. (also need another mouse and keyboard)

    Multiseat can be set up in the command line using systemd and there are also UI programs available so that the process can be point-click-done.
    Reply
  • bloodroses
    I see someone has a Zero Cool wallpaper, right Dade Murphy?

    Hack the Planet!!! :LOL:
    Reply
  • ballsofteal
    This killed my X! I have an AMD iGPU, I needed to delete 20-intel.conf in order to make X work again. Could my hardware be at faulr or are there alternative steps I can take so this works on AMD hardware?
    Reply
  • zfgf
    ballsofteal said:
    This killed my X! I have an AMD iGPU, I needed to delete 20-intel.conf in order to make X work again. Could my hardware be at faulr or are there alternative steps I can take so this works on AMD hardware?
    My X also got destroyed! I dont have amd hardware ,so ts not an amd Problem ig. Thx for writing how you solved it btw!
    Reply
  • nissens
    So this is what I've done precisely. Got so eager (and dead tired btw) that I followed the instructions like a total moron without reading the details. Nearly bricked my computer, Good I could log into second console and undo what I screwed up.
    No offence to the developer, just a warning: always read the readme files before you do anything. Think of yourself as a Linux guru? Think again :D
    This is not for NVidia cards. I will have to test it anyway on a second machine that has a Intel I945 built in graphics chip.
    Reply
  • iTzMeteor
    nissens said:
    So this is what I've done precisely. Got so eager (and dead tired btw) that I followed the instructions like a total moron without reading the details. Nearly bricked my computer, Good I could log into second console and undo what I screwed up.
    No offence to the developer, just a warning: always read the readme files before you do anything. Think of yourself as a Linux guru? Think again :D
    This is not for NVidia cards. I will have to test it anyway on a second machine that has a Intel I945 built in graphics chip.

    I had a problem with this software too. I'm quite a newbie with linux... how did you fixed it?
    Reply
  • sean.seoltoir.ss
    ballsofteal said:
    This killed my X! I have an AMD iGPU, I needed to delete 20-intel.conf in order to make X work again. Could my hardware be at faulr or are there alternative steps I can take so this works on AMD hardware?

    Join the club! :)

    I made the mistake of trying to install it on a Raspberry Pi4 and ended up with a command line interface with none of my drives mounted... Don't know if I had internet access, but without a GUI, it's not much use... Was getting ready to figure out how to manually mount a drive in order to backup everyone on the Pi4... Noted the README file in the virtual-display-linux directory and saw where it mentioned that it only worked on Intel based machine and to remove the 20-intel.conf file... Removing it and rebooting the Pi4 got me back to a GUI...
    Reply