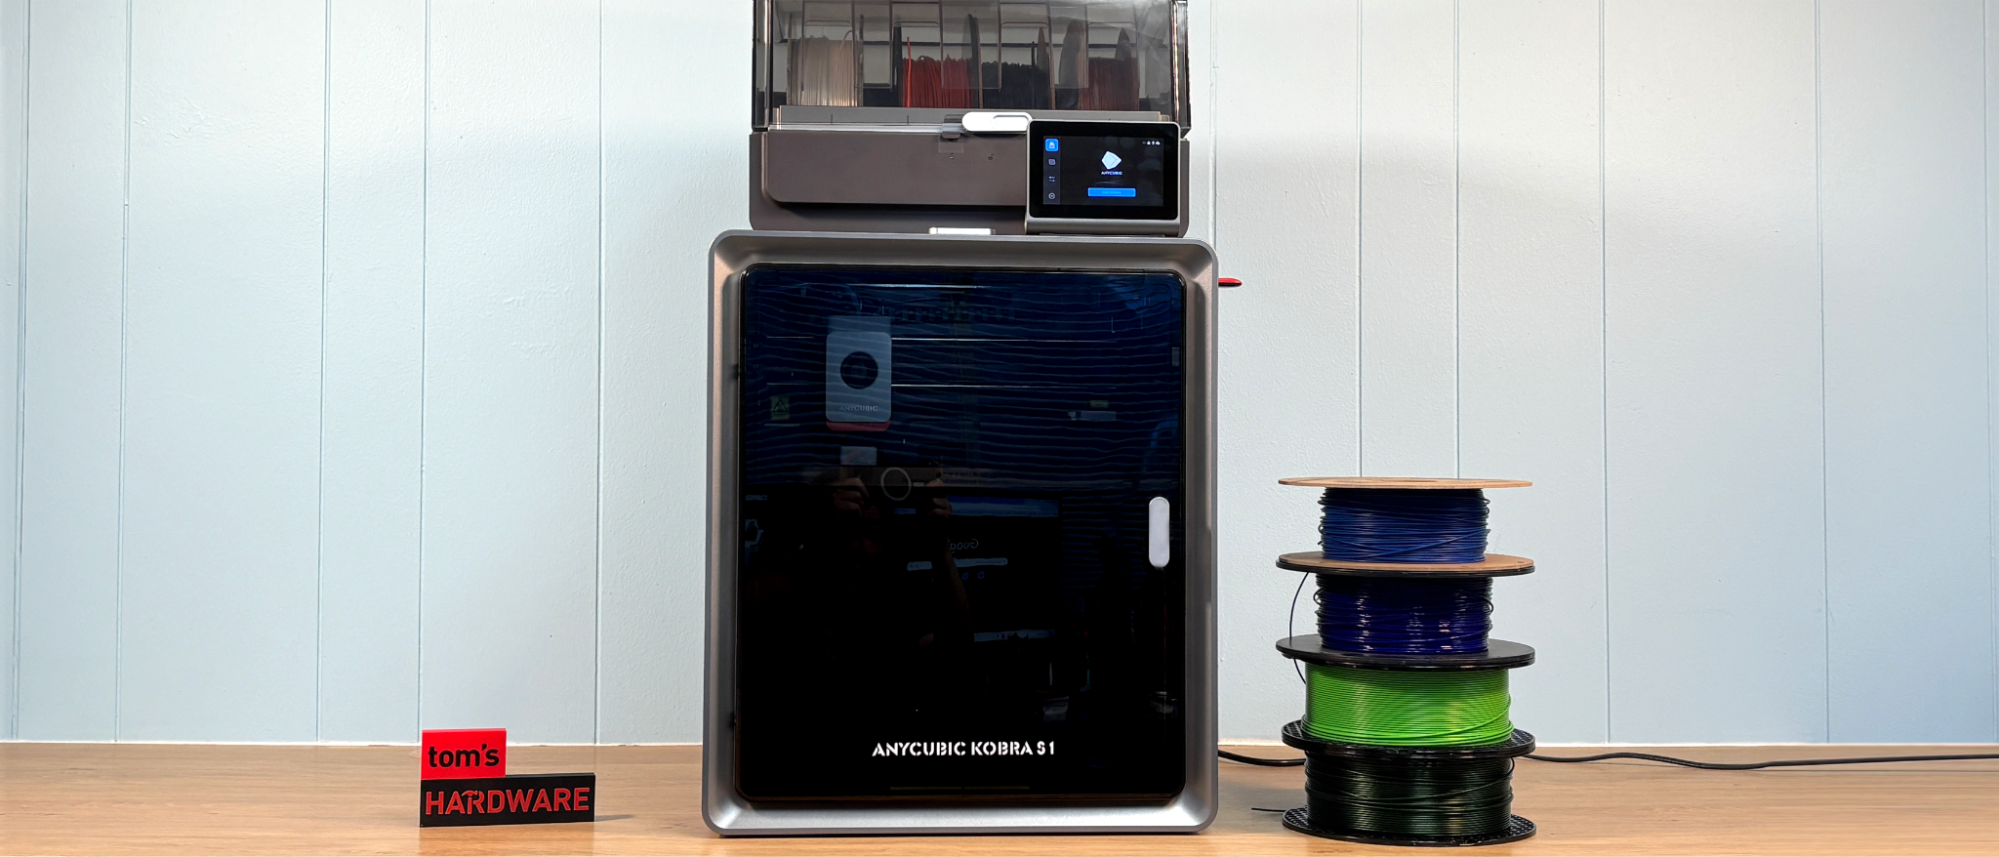
Tom's Hardware Verdict
The Anycubic Kobra S1 a Core XY machine with multicolor capabilities that I really want to love, but brings me to tears every time I run a four color print. It’s heated “ACE” spool holder is awesome, and the machine is very dependable. But the slicer needs work, as won’t tell me how much material It's going to waste, which makes setting up prints extremely difficult.
Pros
- +
Core XY speed
- +
High Flow Hotend
- +
Four Color “ACE” with built-in dryer
- +
Fully Enclosed with activated carbon filtration
Cons
- -
Purge amount is unknown
- -
Filament purge only adjustable mid-print via printer’s touch screen
- -
Filament loading can be a chore
Why you can trust Tom's Hardware
Anycubic joined the Core XY party with a worthy entry of its own, the Kobra S1. After hundreds of hours of printing, this machine has joined a select group of printers I trust to just set it and forget it. I’ve had very few print fails, and those were mostly caused by filament color bleeding due to insufficient purge. This is quite remarkable because one of my concerns with this machine is the massive amount of filament it wastes while changing colors.
The slicer is the weakest link. I could forgive it for wasting extreme amounts of filament – after all, so do my Bambus' if I don’t tweak them – but it won’t tell me how much filament is being purged during color changes. This is extremely problematic as it can easily burn through the same amount of filament in “poop” as it does with print. Loading up a big multicolor print becomes a gamble. Will I have enough material? I have no clue.
Like Bambu Lab machines, the Kobra S1 cuts filament before retracting it, which creates chunks of melted filament in the nozzle that have to be pushed out before the new color can start. Light colors need more purge than dark colors. Bambu Studio and Orca Slicer both give the user fine control over these settings from the slicer, where as Anycubic only lets you change the overall amount from the printer itself. This is not as useful as you might think.
The slicer also lacks the ability to use a “purge object,” which is an extra model made entirely of color swaps to soak up some of that wasted material. The poop problem could be solved with an update to the Anycubic Slicer or by making it compatible with third-party OrcaSlicer.
The Kobra S1 works very well as a single-color printer, and the heated spool holder has been extremely useful for running engineering materials. The Kobra S1 is currently on sale for $699, with a retail price of $829, but the slicer flaws keep this printer off our list of the best 3D printers.
Specs
Build Volume | 250 x 250 x 250mm (9.8 x 9.8 x 9.84 inches) |
Material | PLA/PETG/TPU/ABS/ASA (up to 320 degrees) |
Extruder Type | Direct Drive |
Nozzle | .4mm High Flow |
Build Platform | Double sided PEI Spring Steel, Heated |
Bed Leveling | Automatic |
Filament Runout Sensor | Yes |
Connectivity | USB, LAN, Wi-Fi, App |
Interface | Color Touch Screen |
Machine Footprint | 400 x 410 x 490mm (15.7 x 16.1 x 19.3 in) |
Machine Weight | 18kg (39.6 lbs) |
Included in the box: Anycubic Kobra S1
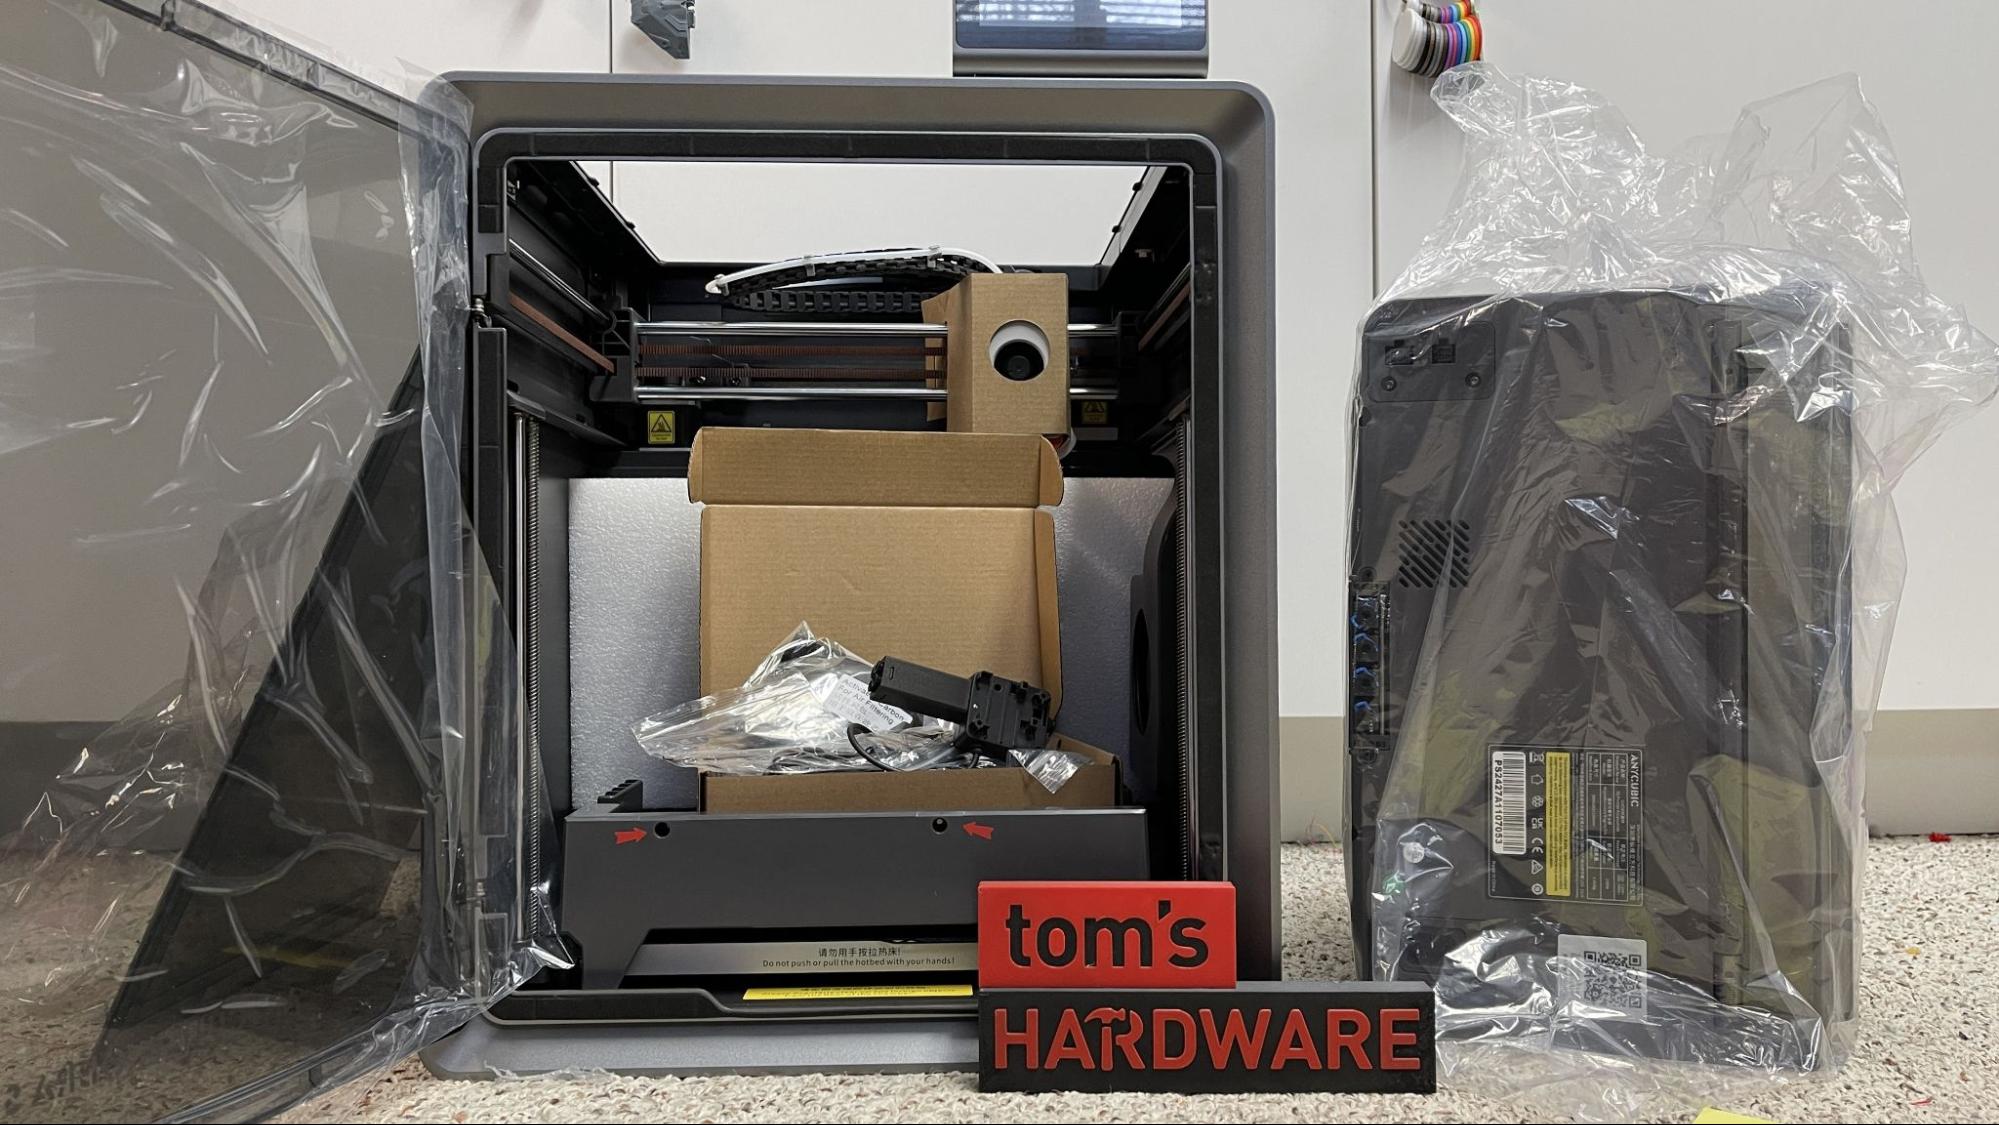
The Anycubic Kobra S1 we received was mostly assembled and securely packaged. The ACE Pro is shipped inside the printer body. Included are two power cords, one for the printer and one for the ACE Pro, a signal cable, and four Bowden tubes for connecting the printer to the ACE Pro. There is a filament hub with two screws, an optional single-spool holder with two screws and hex keys to install them. Also included are an activated carbon filter, nozzle cleaner, grease, spare nozzle cleaners, cable organizers, a USB drive with a copy of the slicer for Windows and Mac, and a paper copy of the manual.
We also received a printable AC Wireless Speaker Kit.
Assembling the Anycubic Kobra S1
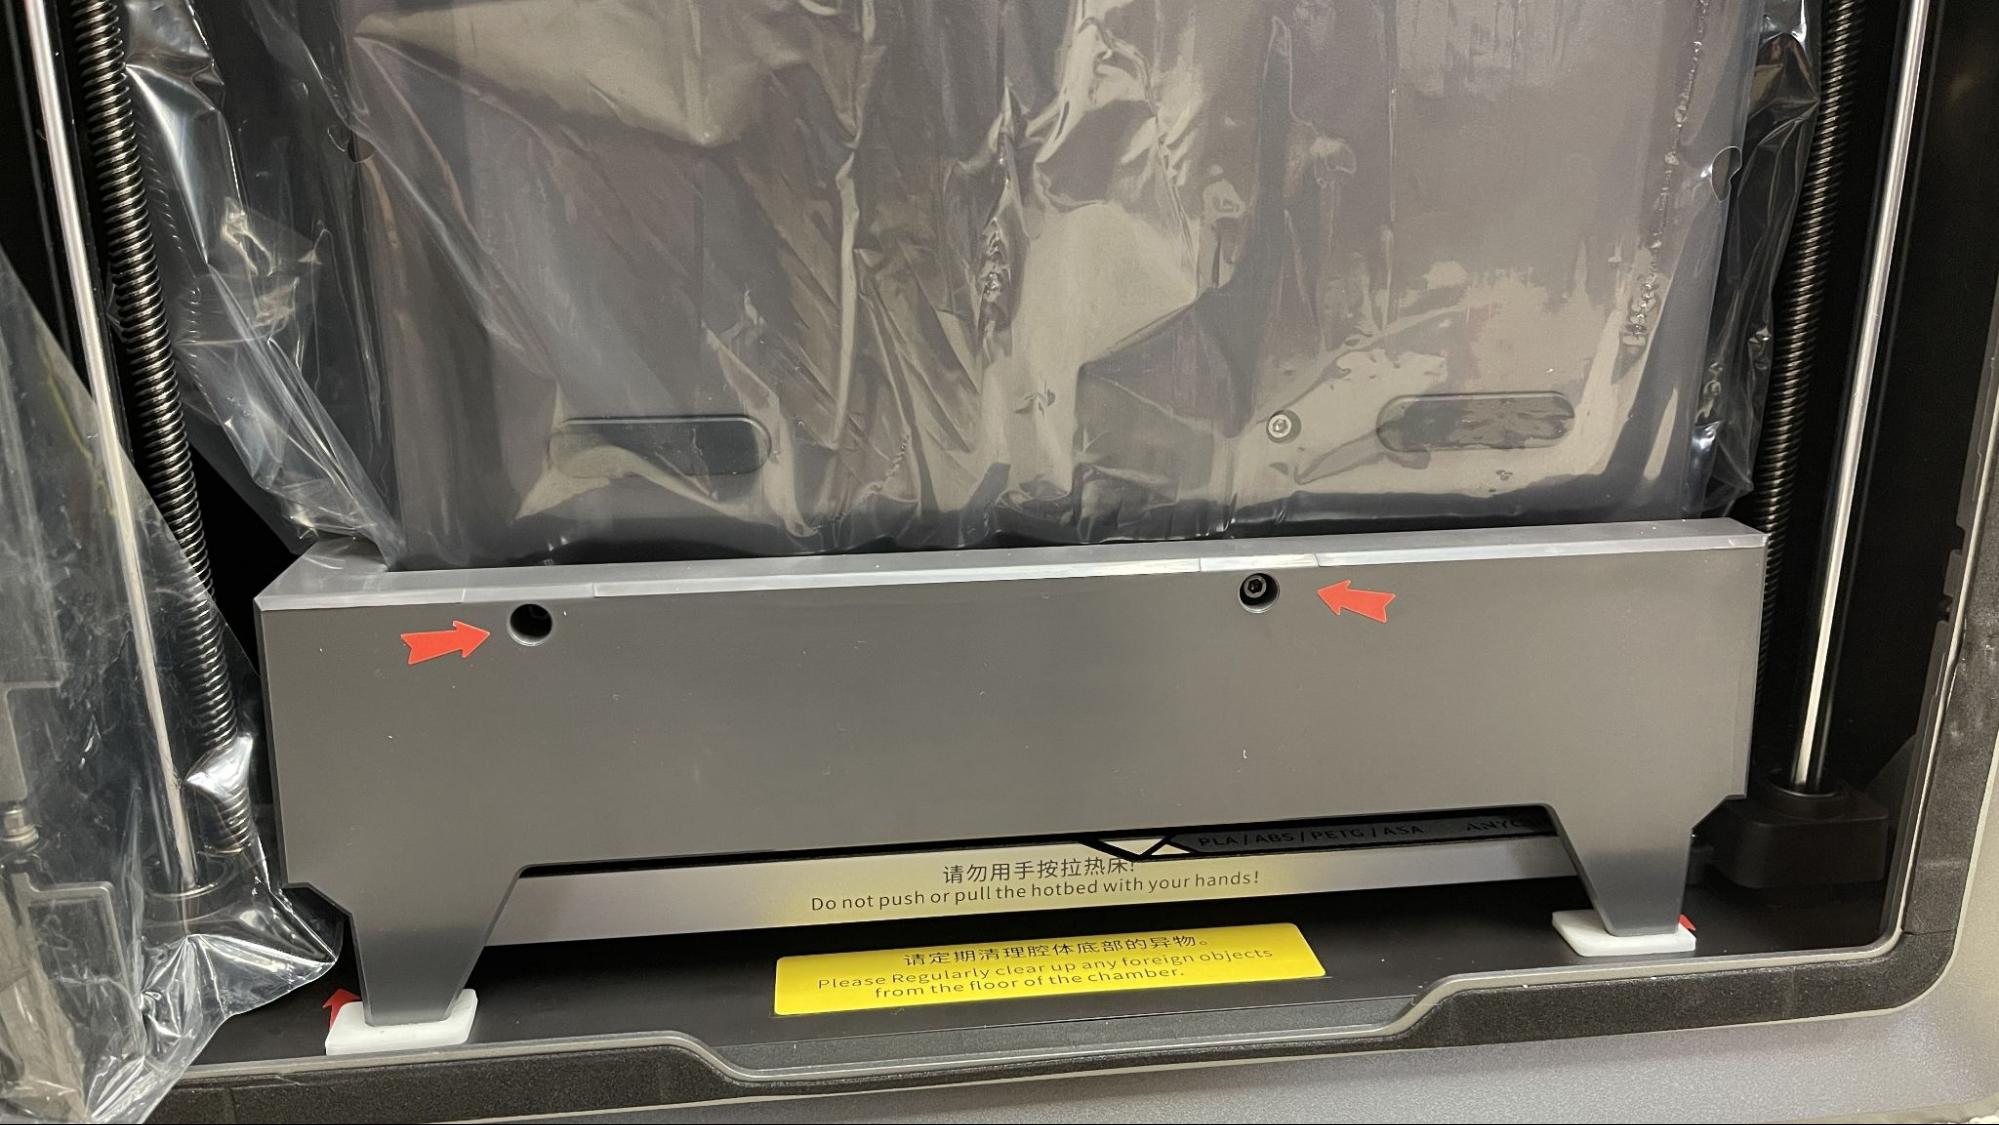
The Anycubic Kobra S1 came mostly assembled. Two screws need to be removed from the front to unlock the ACE Pro which is removed through the top of the unit. There are then four screws to remove the ACE Pro cushioning from over the bed and three screws to unlock the bed. All of these are well marked with red arrows, making removal simple.
Get Tom's Hardware's best news and in-depth reviews, straight to your inbox.
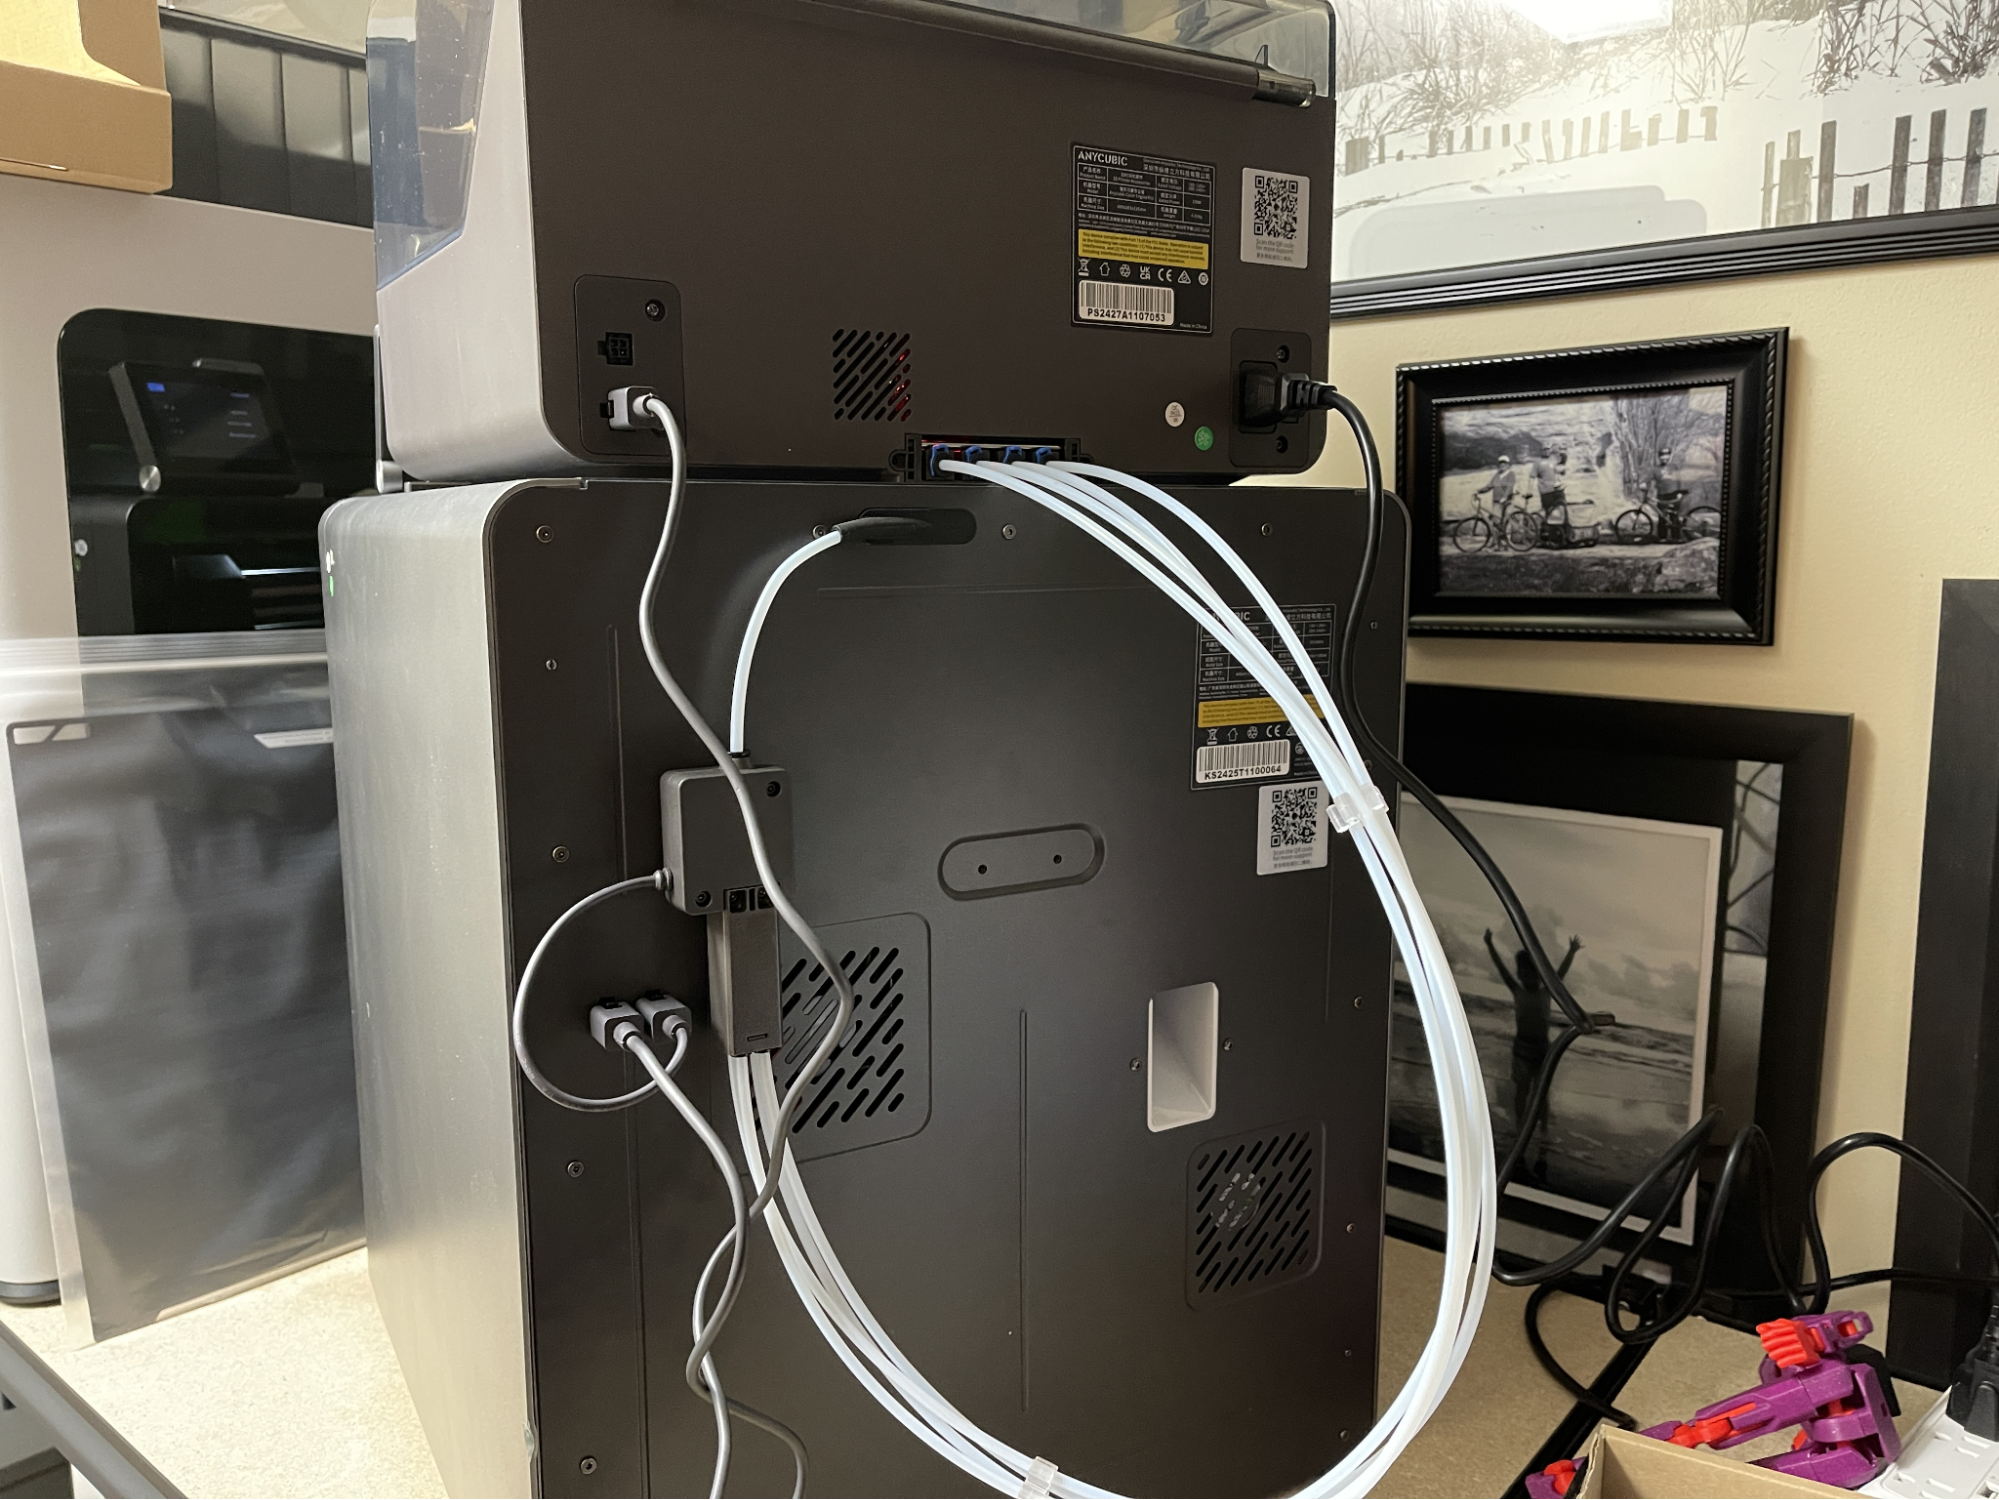
The filament hub is keyed to install correctly and attached to the back of the printer with two m2.5x25 screws. The attached Bowden tube from the print head is inserted into the top of the buffer, while the filament tubes from the ACE Pro attach to the four ports at the bottom of the hub. The most annoying part of the assembly is removing the four blue clips from the ports in the back of the ACE Pro. Needle-nose pliers make the job a little less fiddly. This makes for a tidier installation than the Kobra 3 and Kobra 3 MAX (currently under review), which have all four Bowden tubes from the ACE Pro running to the tool head. The four-pin cable from the filament hub plugs into a keyed port near it on the back of the printer. The six-pin signal cable to the ACE Pro plugs in next to it. Given the difference in size, it is impossible to choose the incorrect port. The activated carbon filter is installed inside the printer.
Leveling the Anycubic Kobra S1
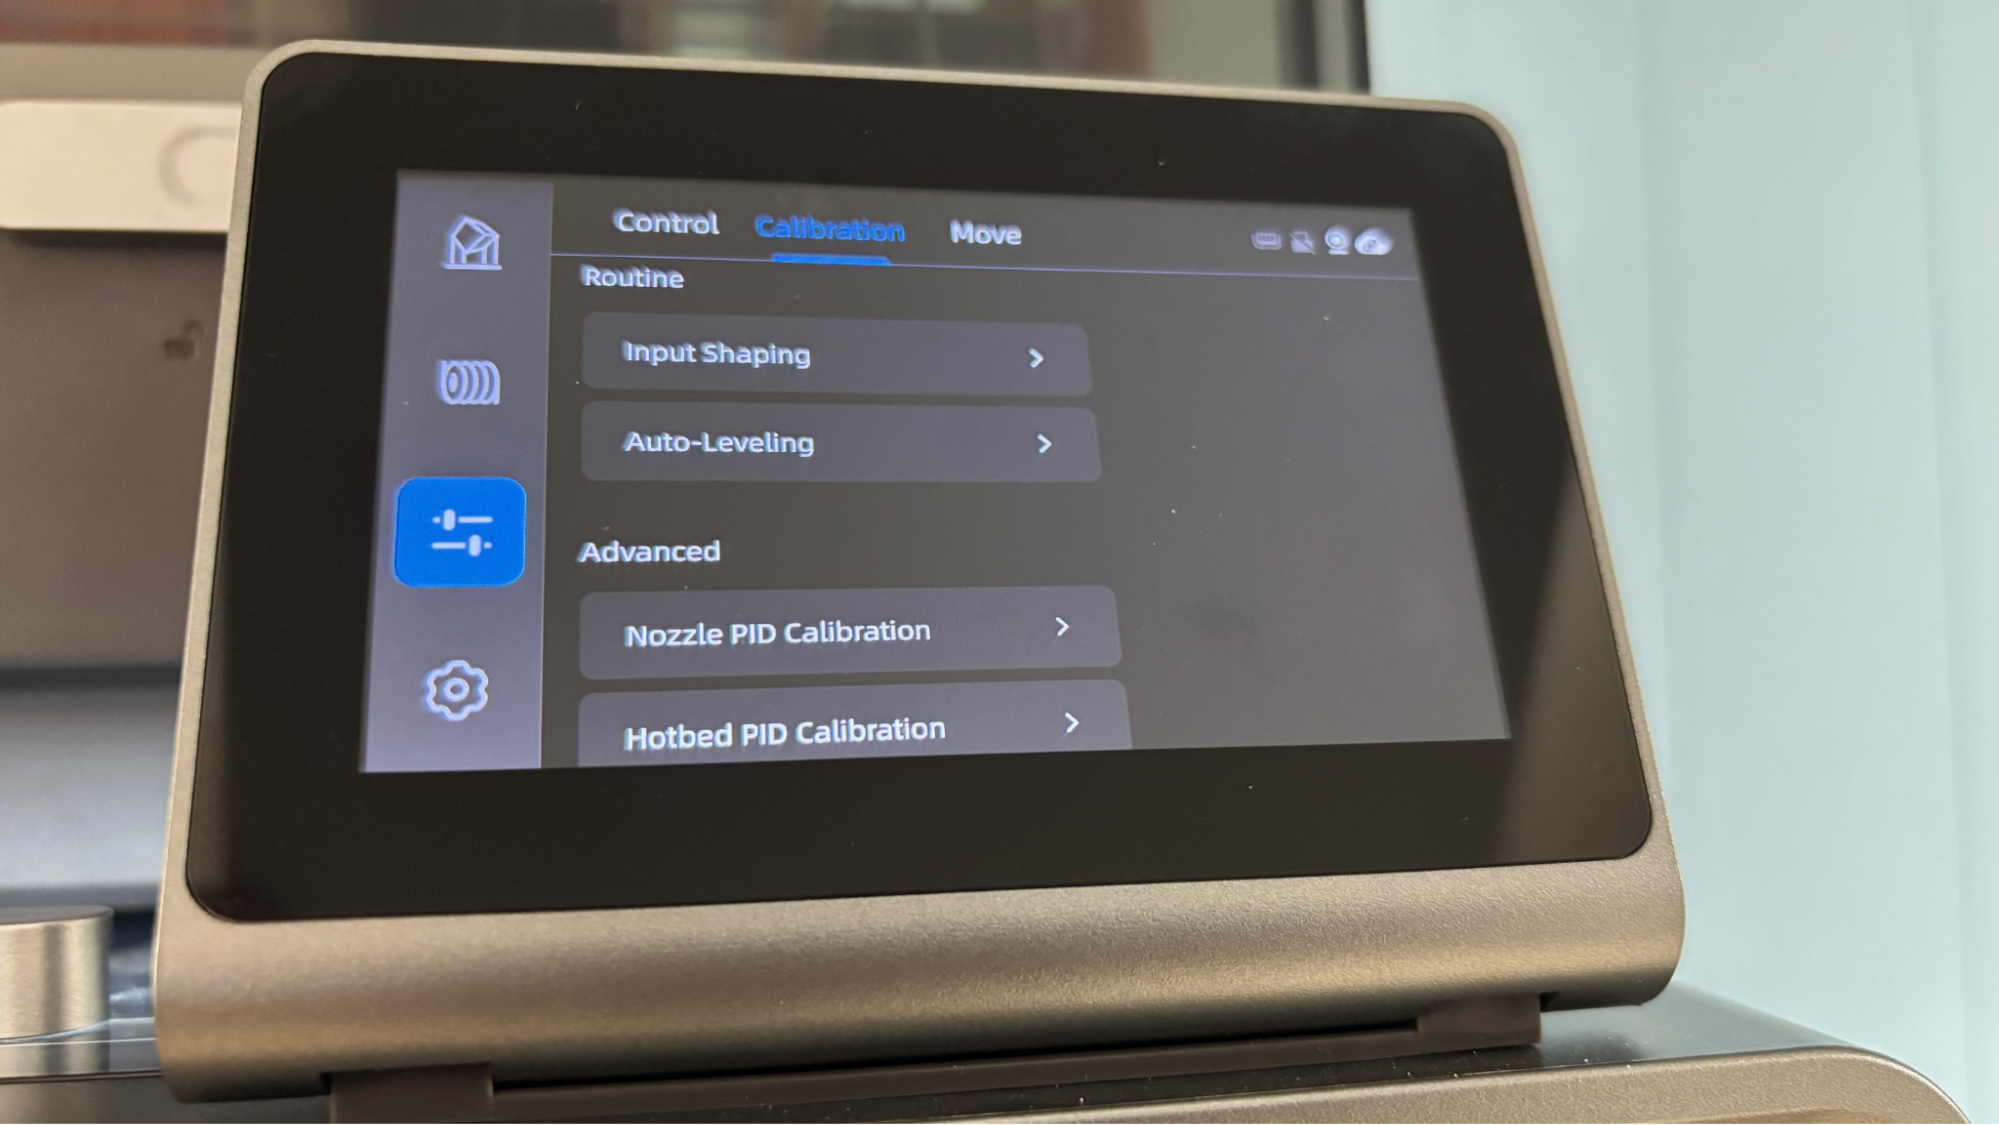
Leveling the Anycubic Kobra S1 is done automatically with the initial calibration, including resonance compensation and PID tuning. Anycubic’s LeviQ3.0 auto leveling works fine as it taps the bed and set the Z-axis offset perfectly. The initial prints showed good first layers across the board. At the start of each print, the software allows you to re-level and set AI-spaghetti detection. I did not see the need to re-level often. The AI detection is overly sensitive and given the lack of print failures I did not enable it often.
Loading Filament in the Anycubic Kobra S1
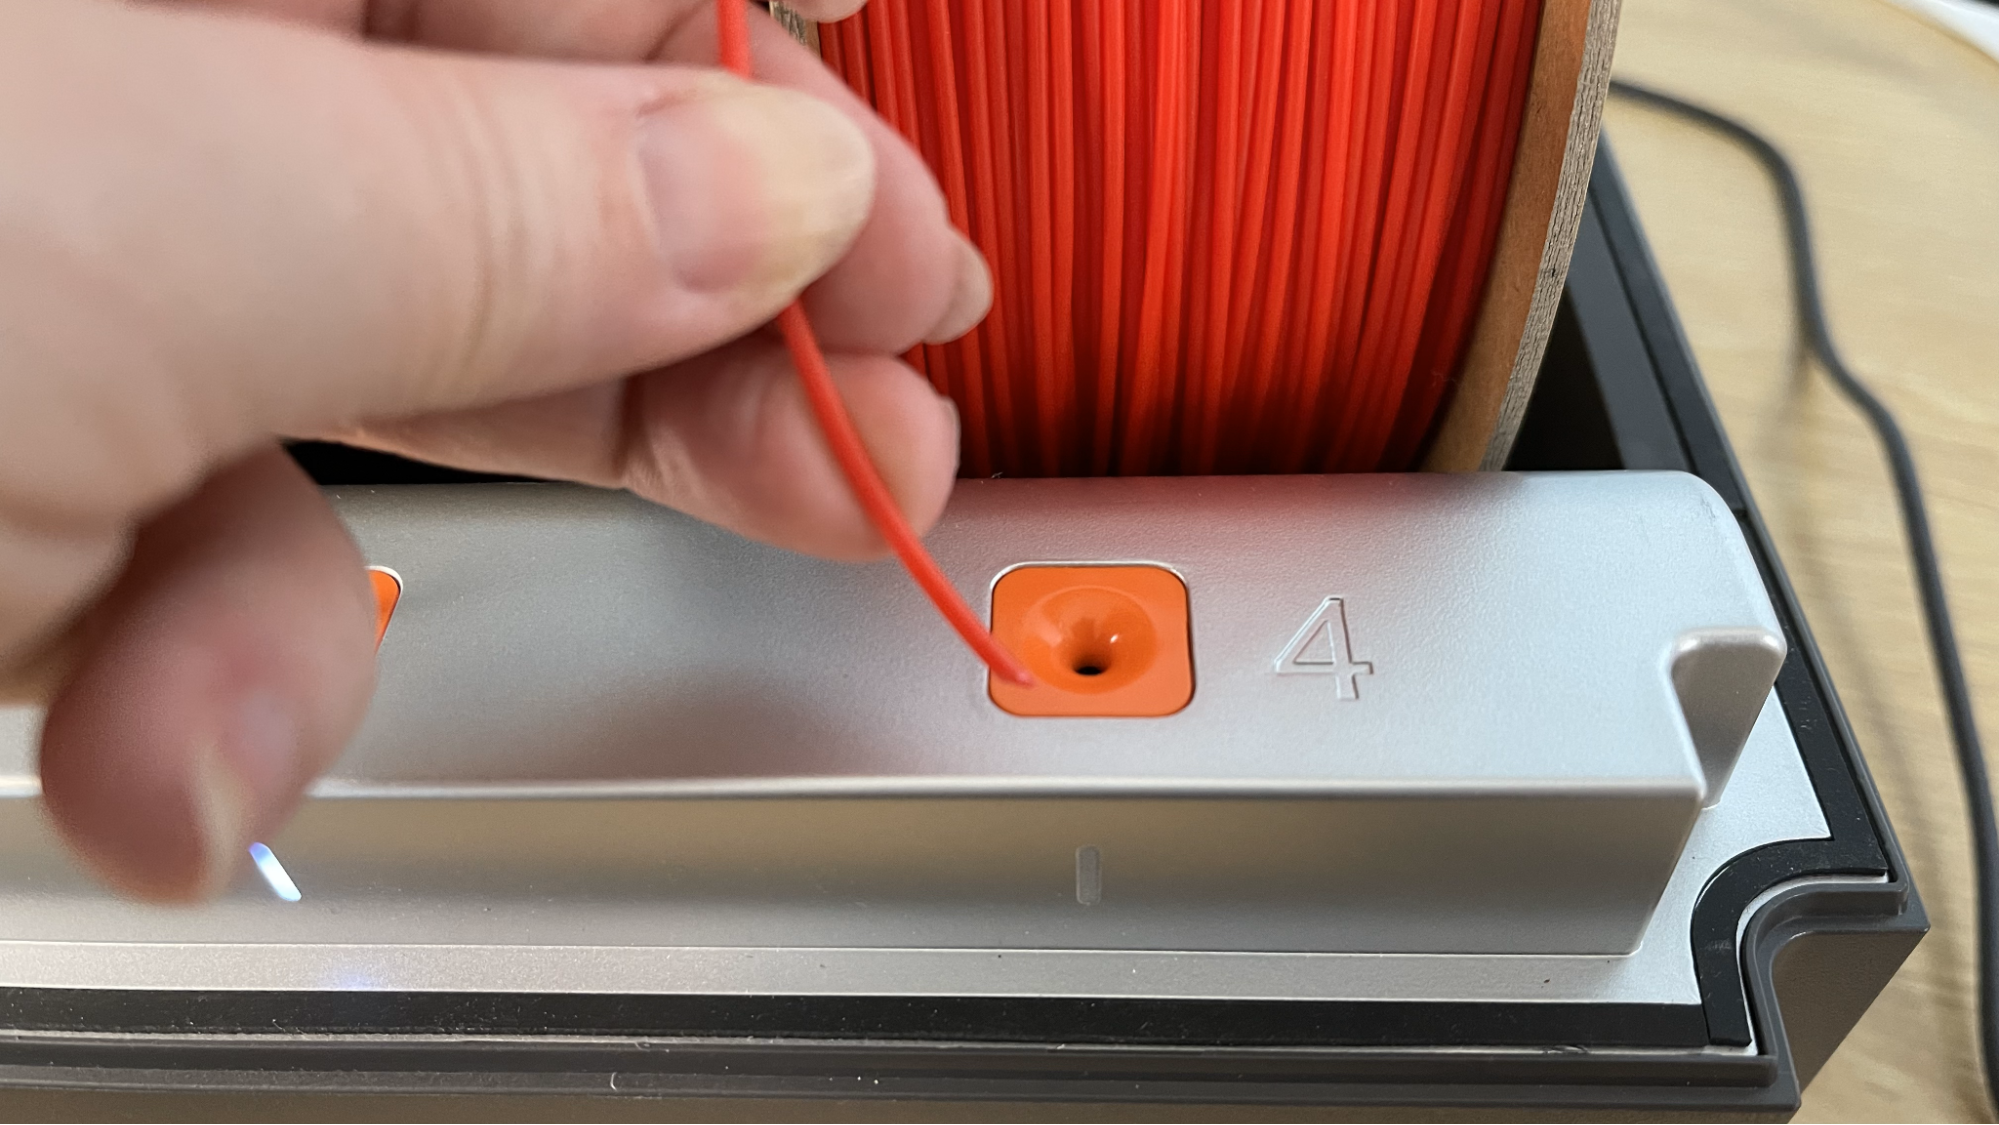
The Anycubic Kobra S1 has a direct drive tool head with a reverse Bowden and a built-in filament runout sensor. When using a single spool on the spool holder, you disconnect the Bowden tube from the top of the filament hub and run filament directly to the toolhead.
When using the ACE Pro (Anycubic Color Engine), spools are placed in any of the four slots. The filament is then inserted into the holes in the front of the machine. Getting the filament to feed is often a bit tricky. Inserting filament into slots 3 and 4 specifically can take multiple attempts, with the ACE Pro feeding additional filament into the adjacent slot instead of the one you’re trying to load. It will eventually work, but it can be frustrating.
Anycubic filament has RFID tags to automatically identify the filament type and color. When using third-party filament, you need to enter the material’s information from the printer’s screen and sync it to the slicer.
Design of the Anycubic Kobra S1
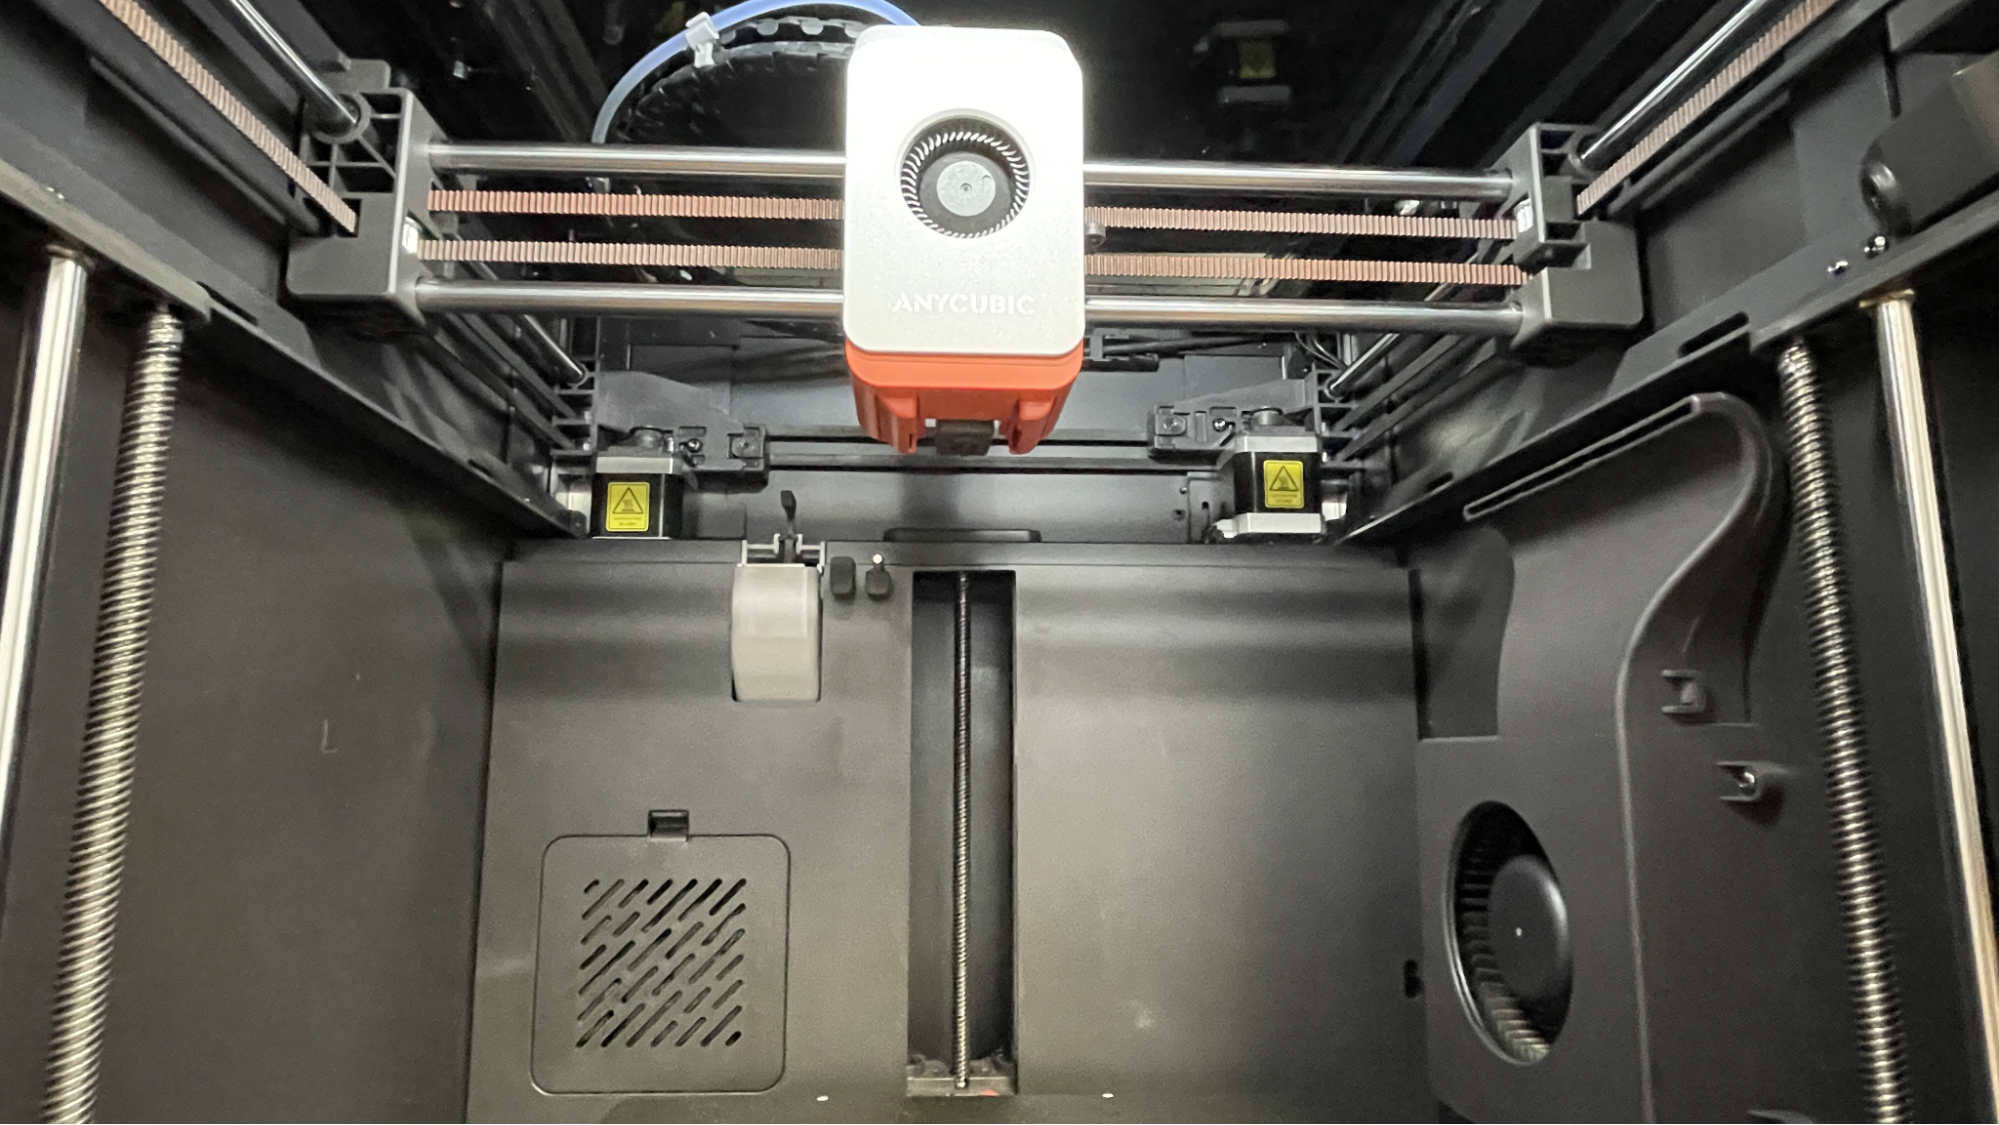
The Anycubic Kobra S1 with an ACE Pro perched on top looks very similar to a Bambu Lab X1 or P1S. The Kobra S1 has a clear polycarbonate door and top lid. The printer has a steel frame covered by plastic panels. The door closes solidly with magnets, and there is no sensor to stop the printer if the door is opened. The touch screen comes preinstalled and can tilt from full vertical to full horizontal. The combo comes with one ACE Pro, but if a second ACE Pro is added, it can print up to eight colors.
The design of the ACE Pro is unique. It offers active filament drying – even while printing – up to 55C, which is enough to dry PLA and TPU. PETG, ASA, and ABS require more heat, as do more technical filaments like Nylon and PC. However, the ACE Pro can keep these dry while running if they are already in good shape.
The system does an excellent job detecting tangled filaments and will pause a print if user intervention is needed. It can be set to continue a print with another spool if the current filament runs out.
While the Anycubic Kobra S1 is enclosed and does maintain chamber heat well, it does not have active chamber heating. Despite this, it was able to print technical filaments like PC amazingly well when heating the ACE Pro to 55 °C and running the dryer while printing. This led to perfect PC prints on par with the Qidi X Plus 4. PC was run through a drying cycle on a standalone dryer prior to printing.
The Anycubic Kobra S1 has a fast CoreXY motion system with linear rods and a single z-axis stepper motor driving three belted lead screws and running on three guide poles. The S1 has a parts cooling fan in the tool head, a large cooling fan mounted to the side of the case, and a rear-mounted case fan vented out the back with an activated carbon filter. There was enough cooling to run PLA with the door closed, though I prefer to keep it open just in case.
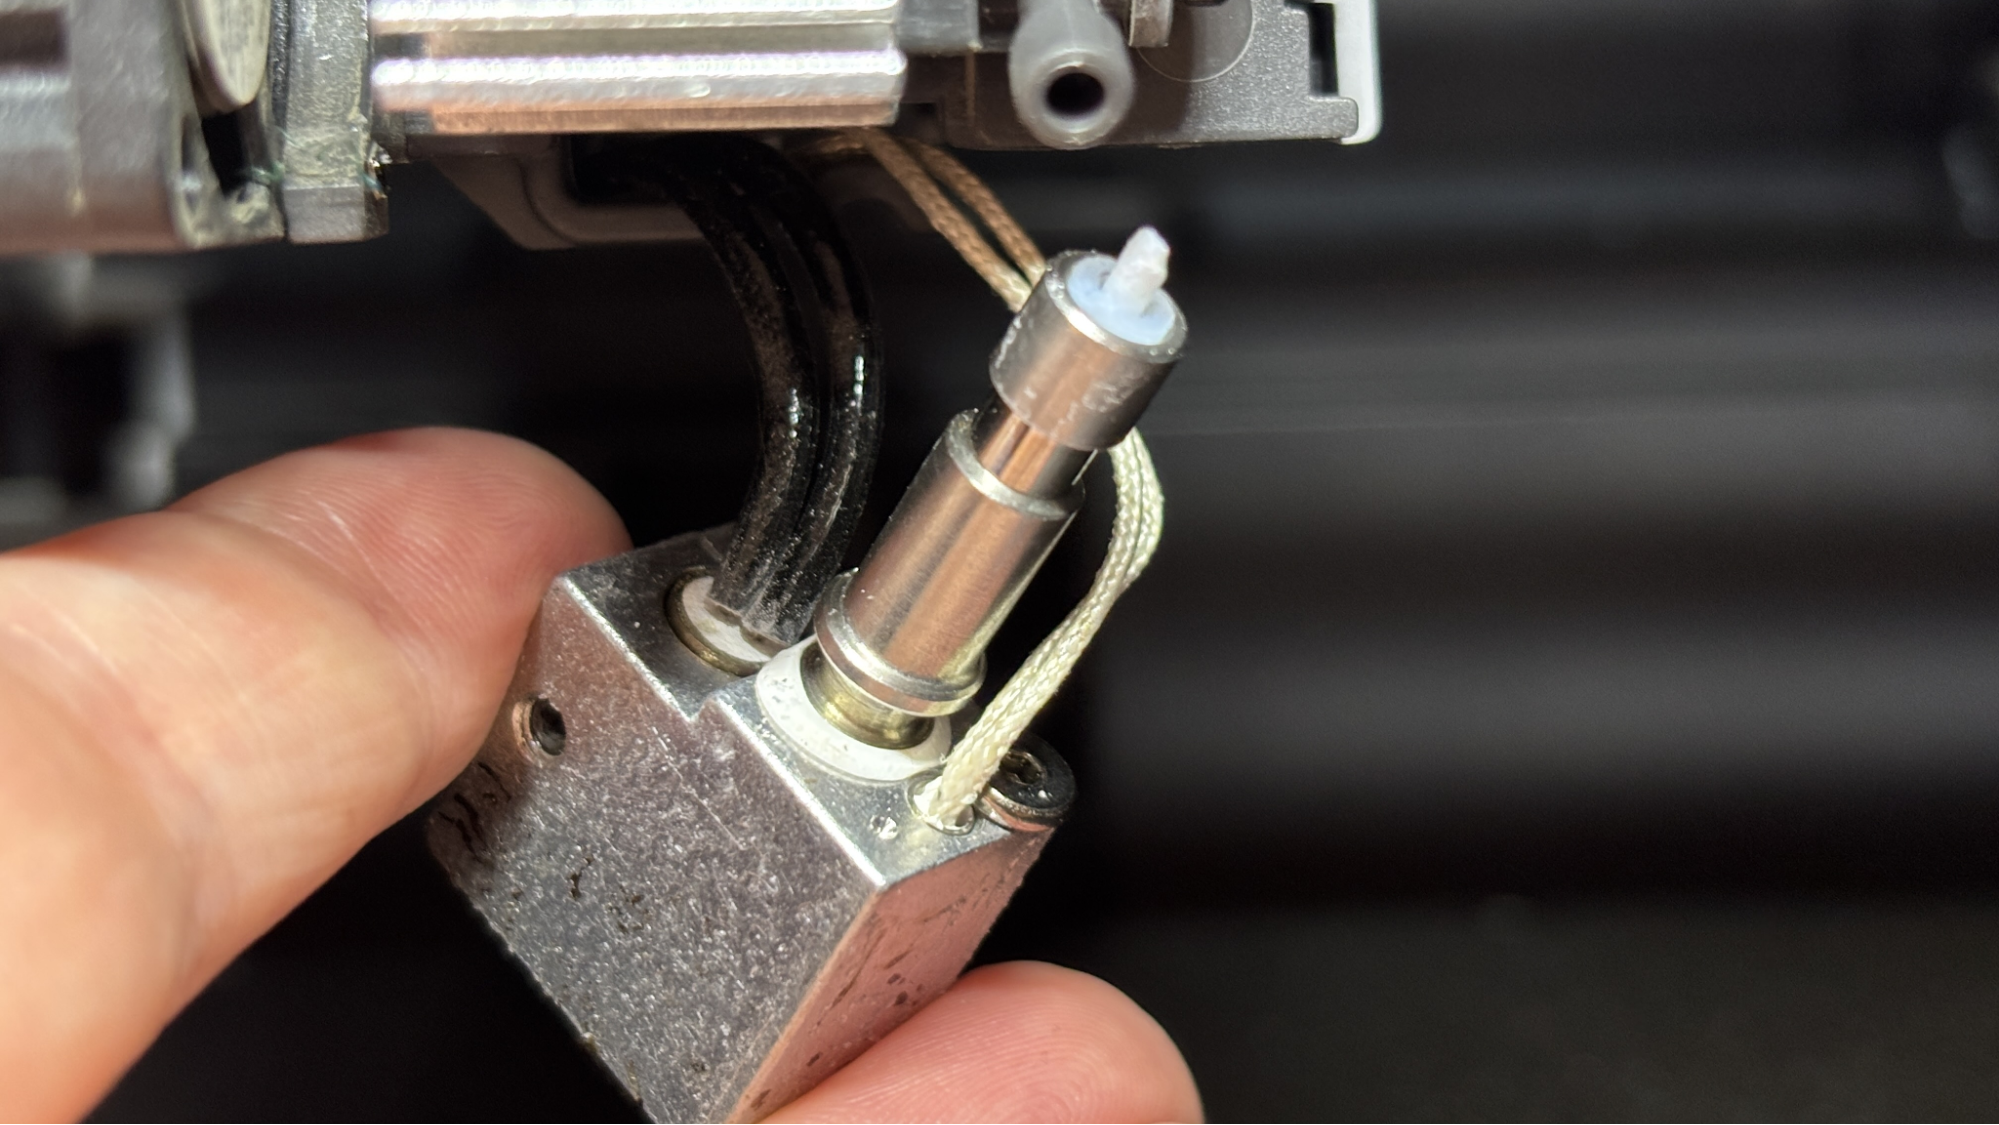
The hotend with the nozzle releases from the tool head with a simple lever, but the heater and thermistor are attached with screws and wiring going up to the toolhead. The brass nozzle appears glued into the heater block, which also houses the aerospace-grade ceramic composite throat tube. Based on the Anycubic website, it looks like the entire hotend can only be replaced as a unit, rather than just swapping out the nozzle tip.
The printer has a pretty good camera which enables monitoring from the workbench tab on the slicer software, and can be used for timelapse photos. In the workbench, the camera is given a tiny window, and there doesn’t appear to be a way to make it larger.
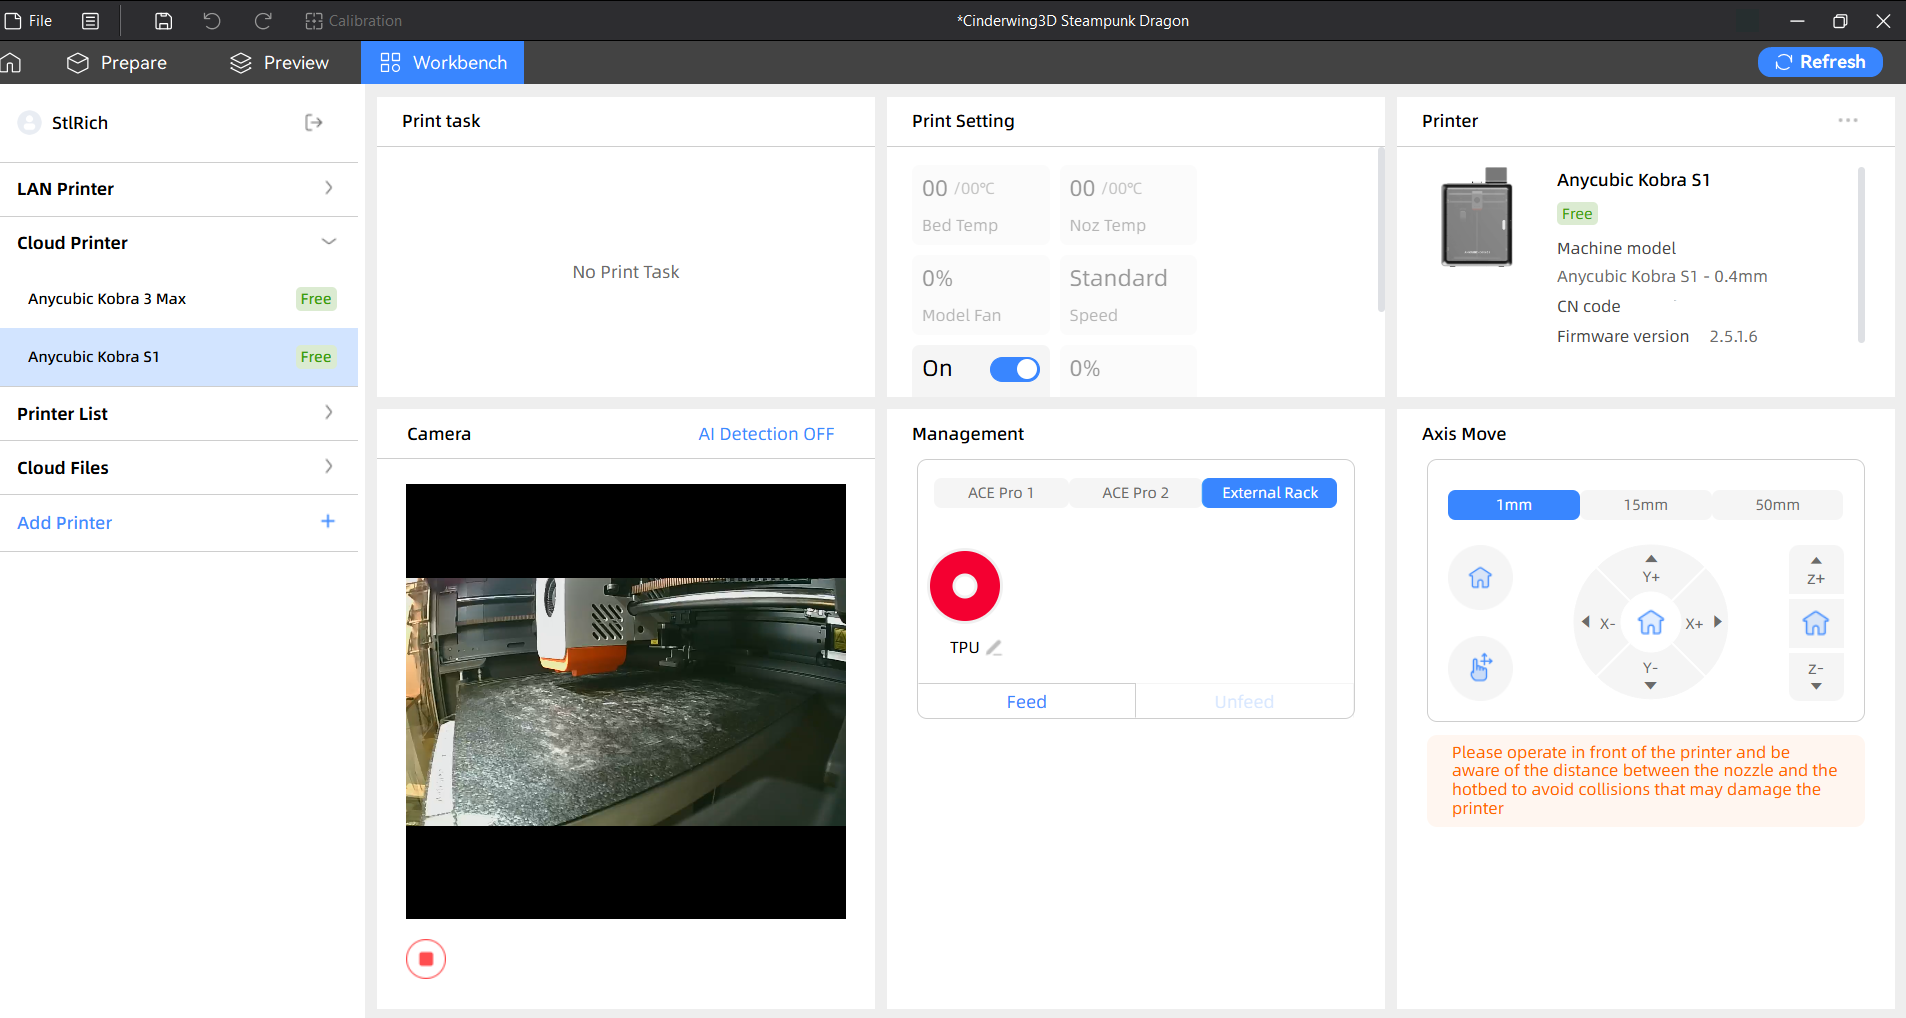
If you don’t mind using the cloud, Anycubic’s app lets you monitor your prints remotely and stop them if problems occur.
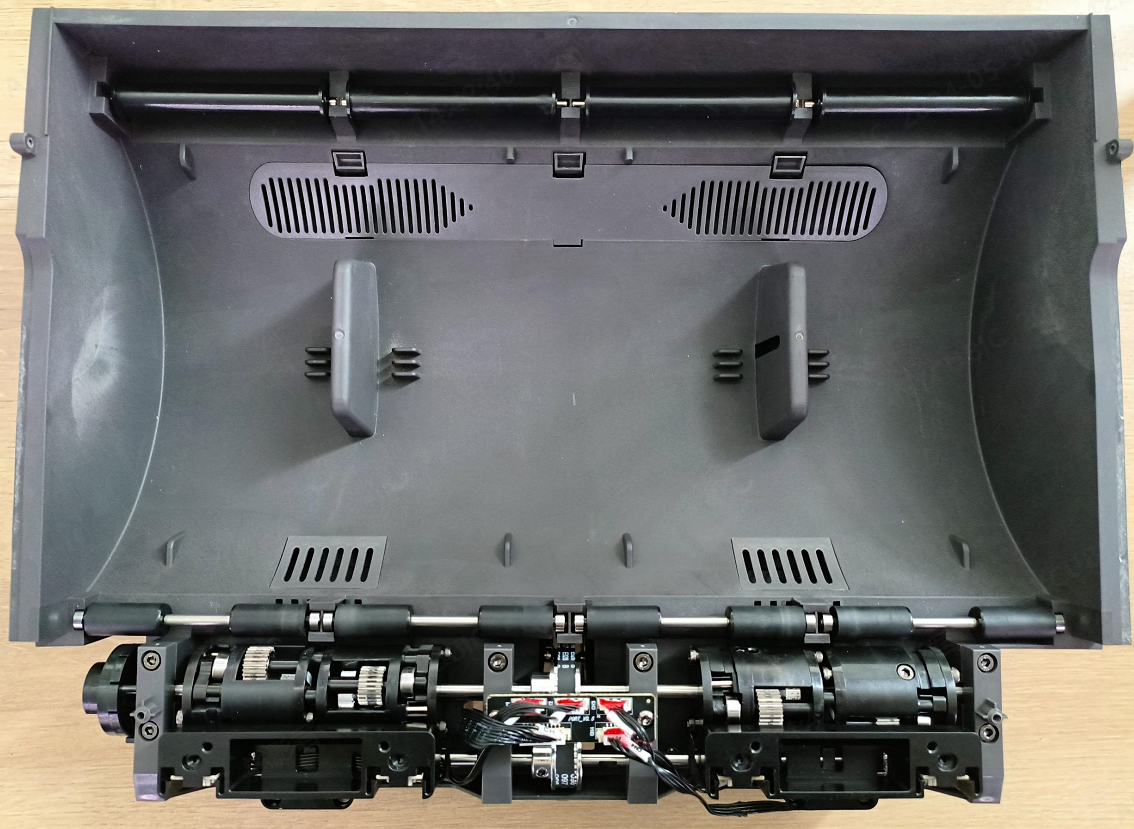
The ACE (Anycubic Color Engine) looks similar to a Bambu Lab AMS design, but lacks individual feeders motors for each slot. The single motor feed mechanism can only load one filament at a time and will occasionally have problems with filament not feeding or misfeeding when trying to load.
The machine also has sensors in the ACE Pro and the rear mounted buffer to detect nozzle clogs, spool tangles, and filament runout. Unfortunately, when the filament does run out or is set to auto refill from another spool in the ACE Pro, all of the filament between the rear buffer and the tool head must be pushed out of the system a wasted poop before continuing. When an error is detected, the printer will pause the print and alert you via the printer’s screen and the Anycubic app.
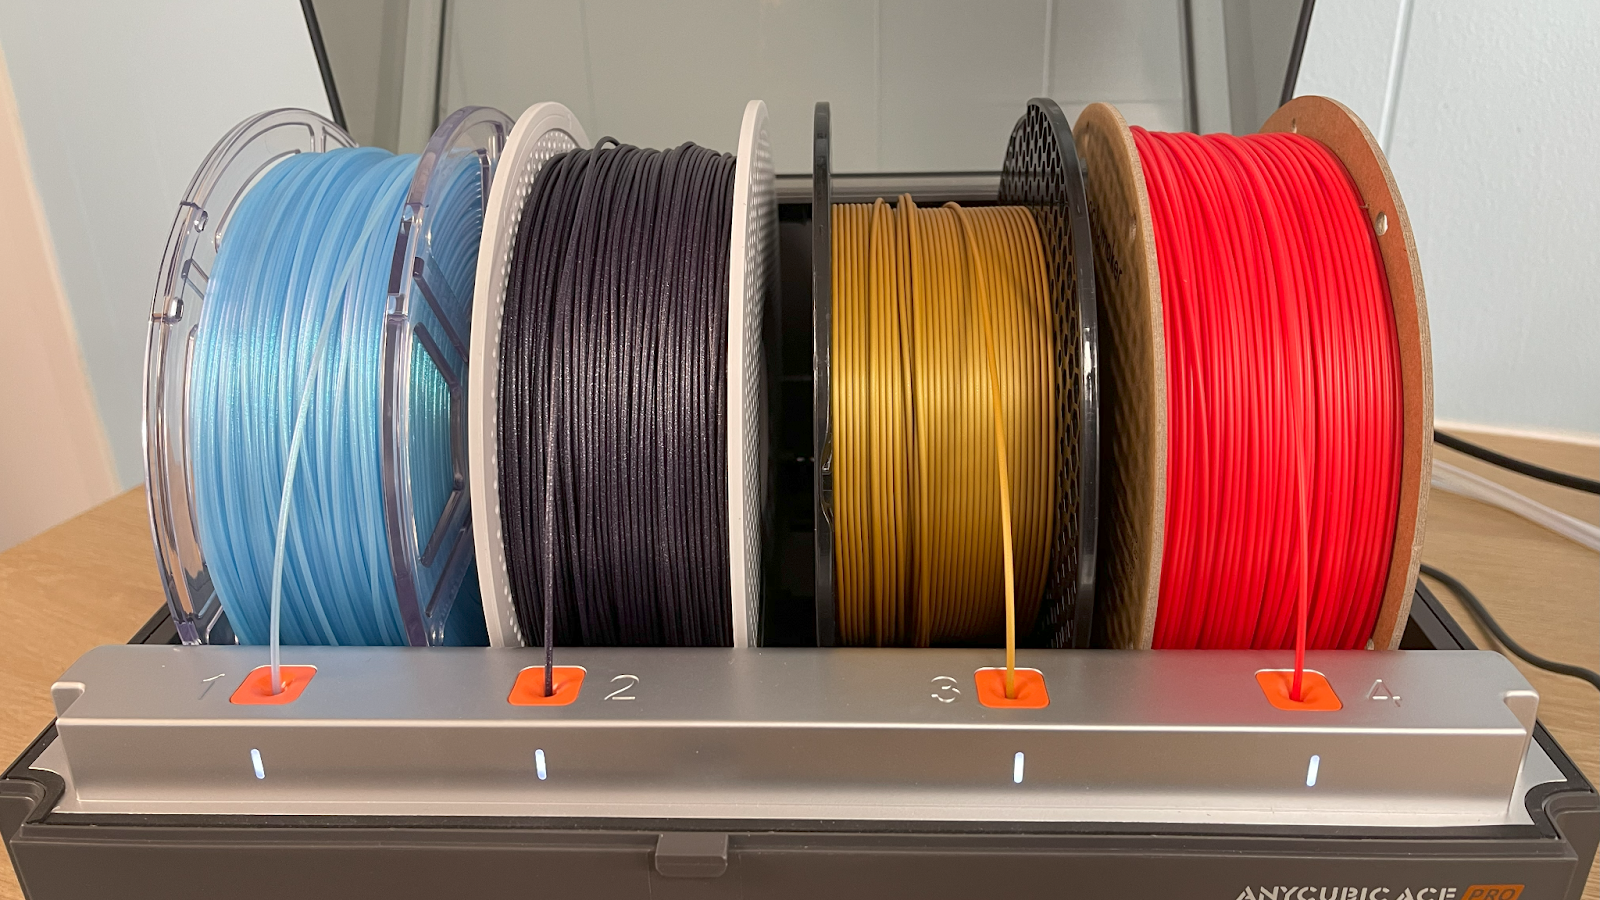
I successfully tried several different brands of filament in the ACE. Like the Bambu AMS, it can’t use small sample spools, some cardboard spools that are too light, and larger than standard spools like Prusament or Jessie PLA.
Preparing Files / Software
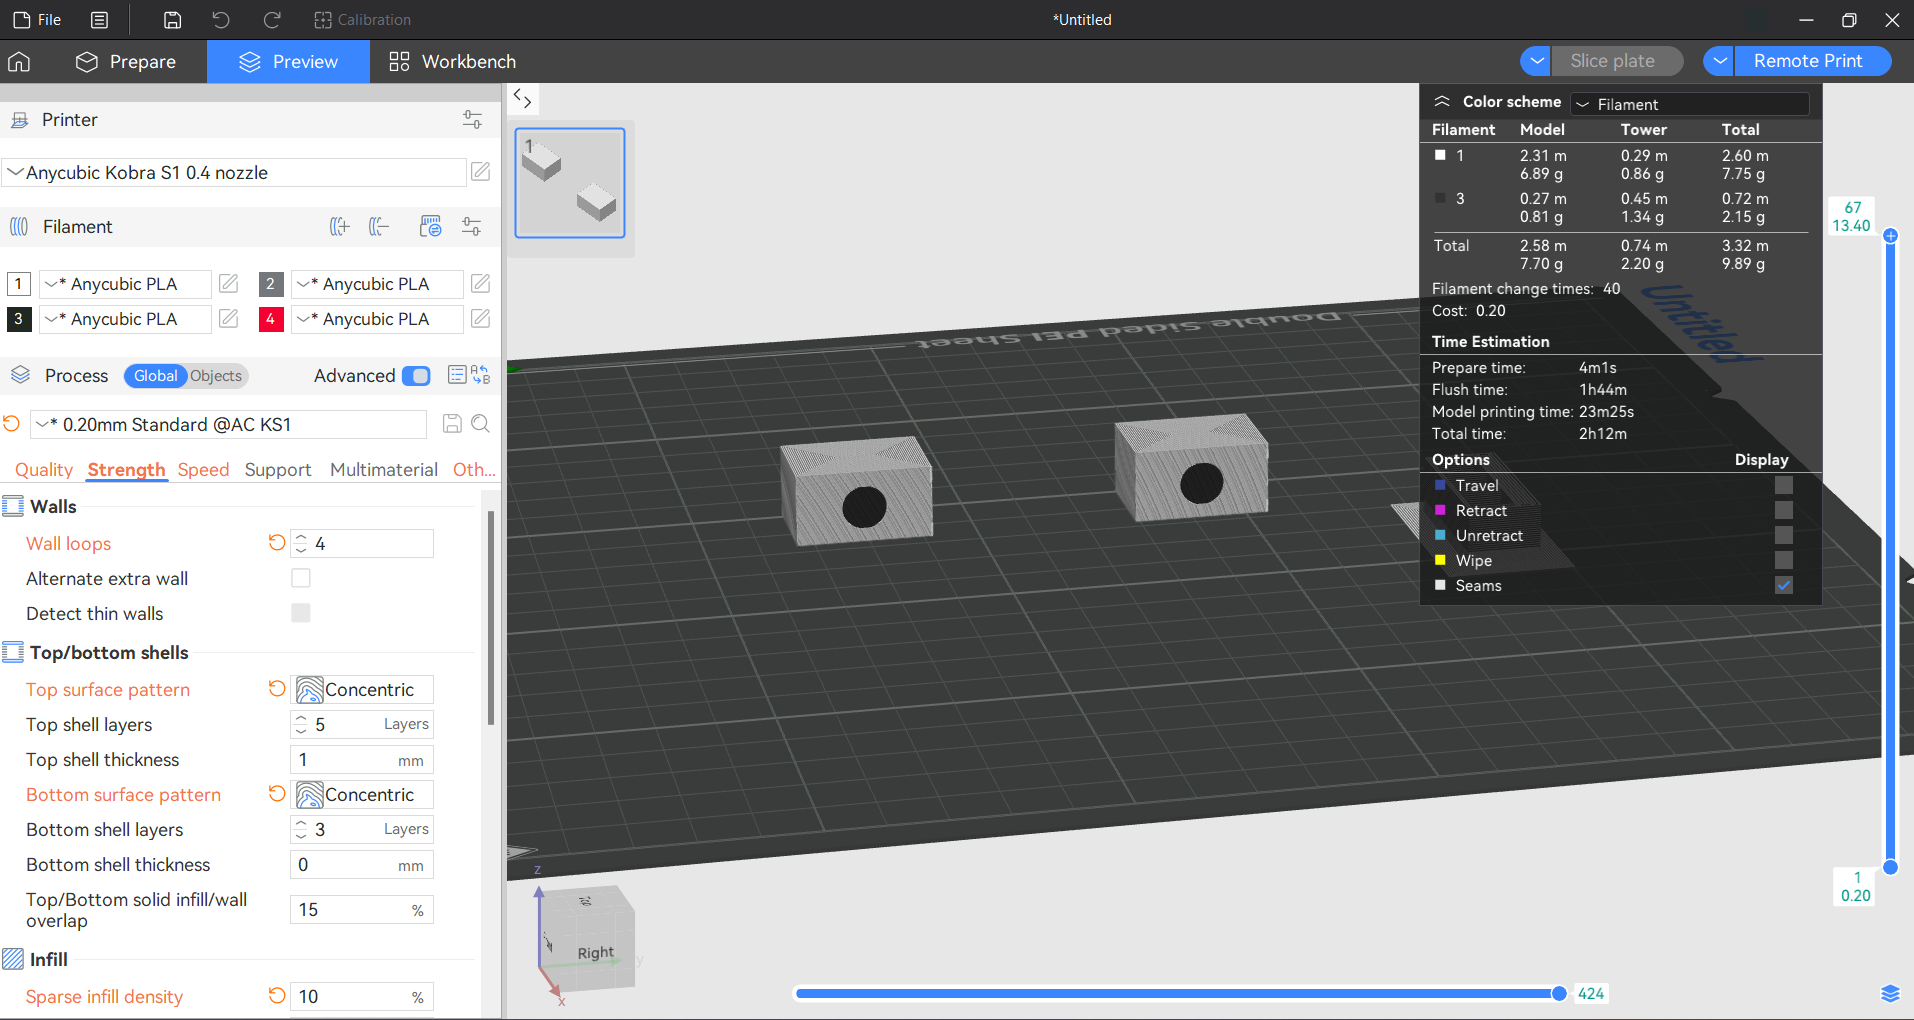
The Anycubic Kobra S1 came with a copy of Anycubic Slicer, which is based on Orca Slicer. If you are familiar with Orca or Bambu Studio, you should feel at home here. As with the earlier versions of Anycubic Slicer, the elephant in the room is the poop. When I reviewed the Kobra 3 bedslinger, I was told that missing features would be added with updates. The Kobra S1 did come with a new slicer, but the features are still missing.
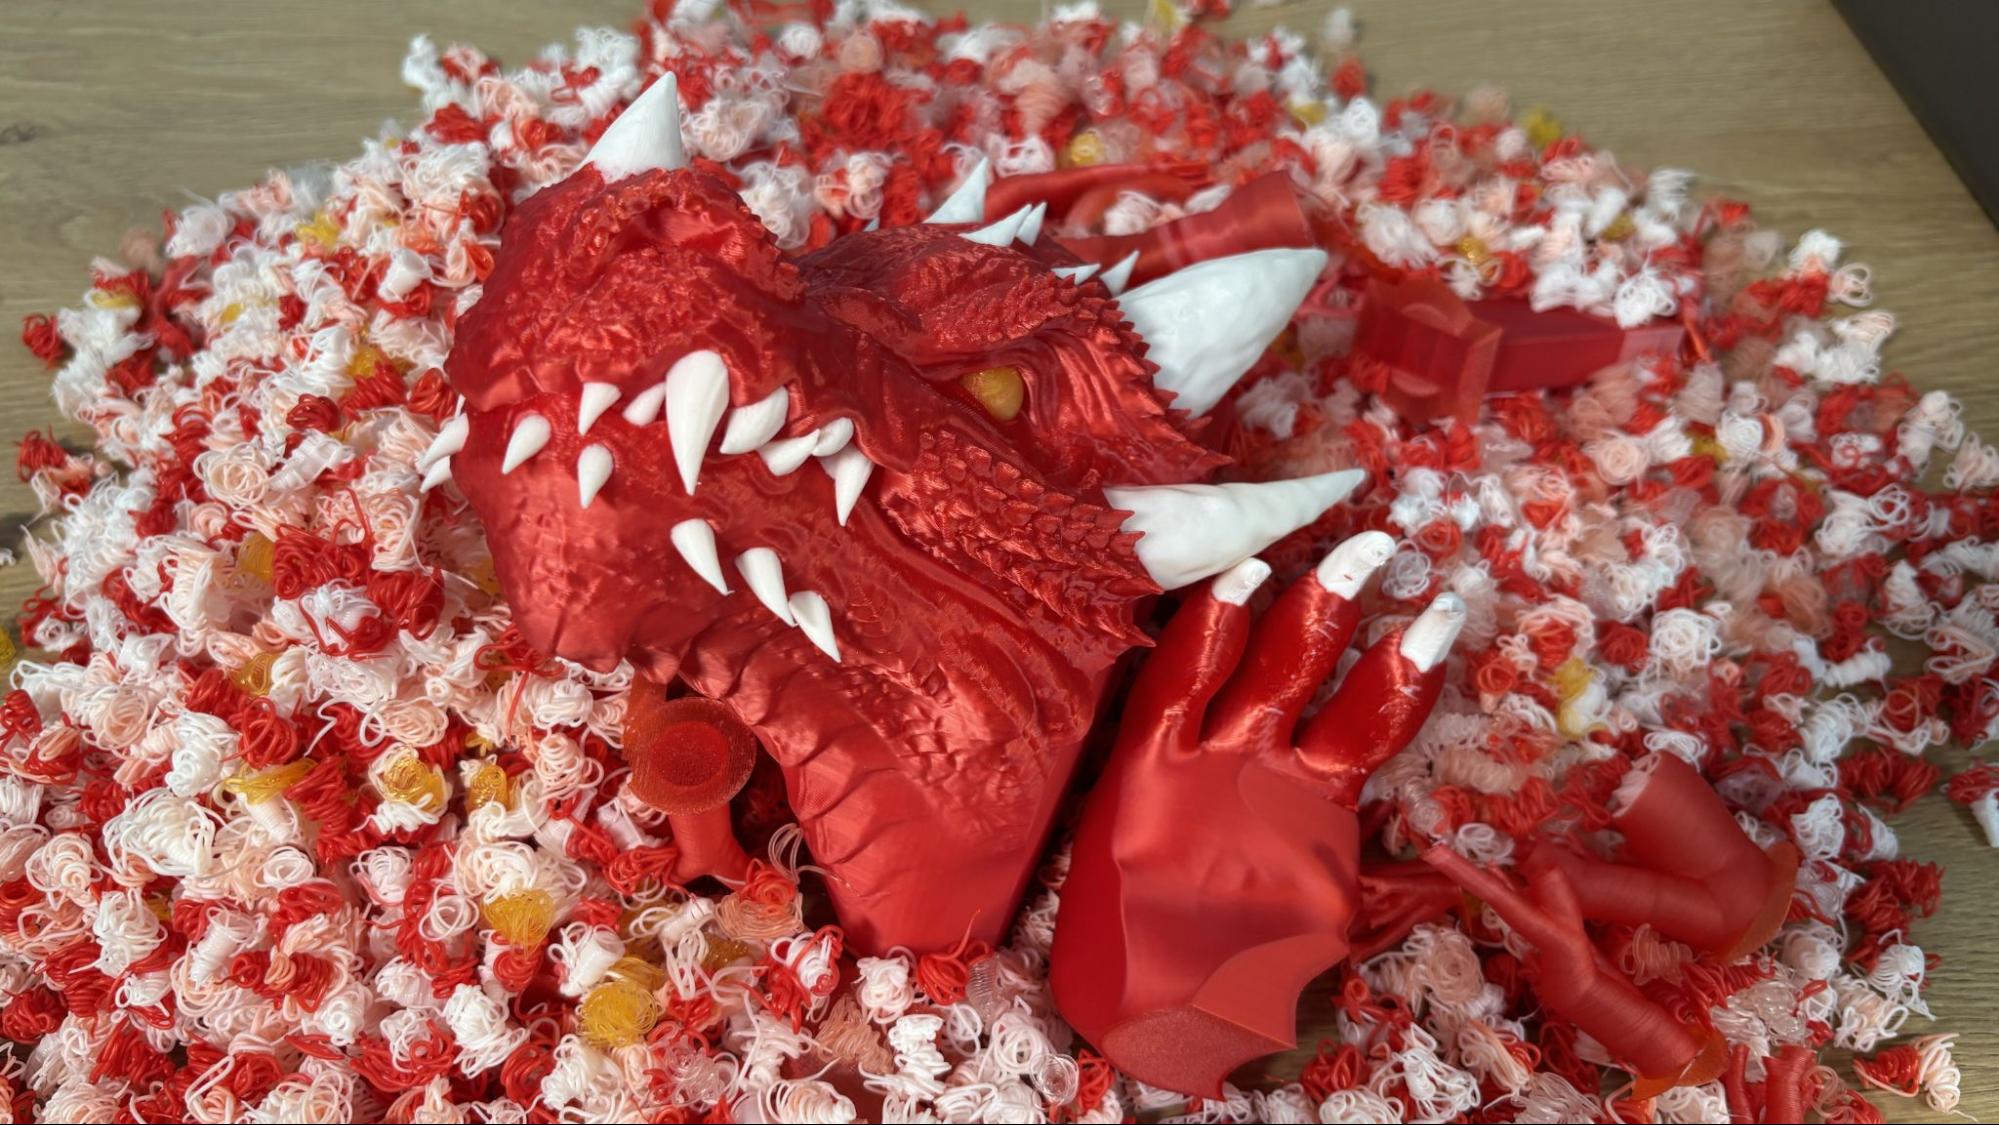
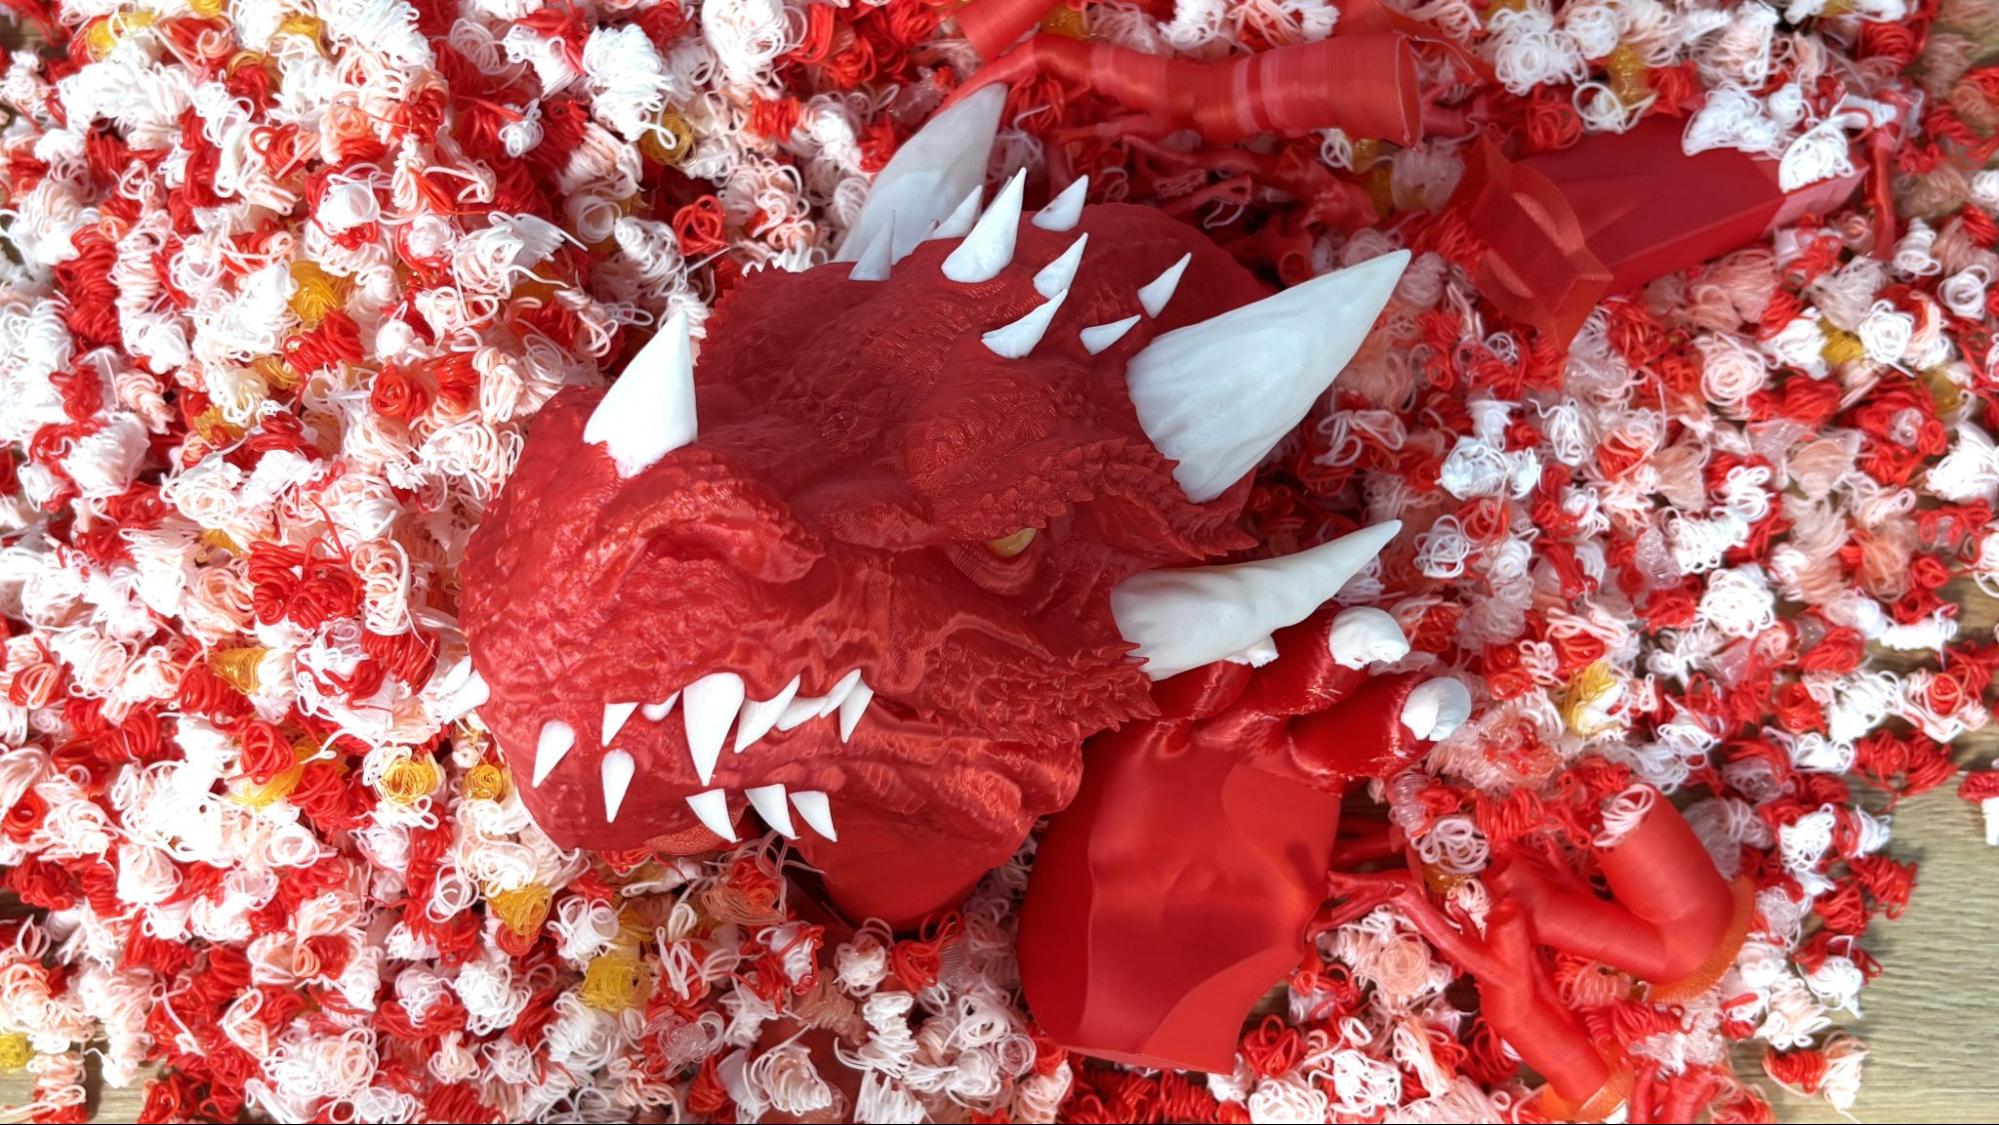
First, it does not display how much filament it needs to purge. This is less noticeable on smaller prints, but when you do something large – and with light colors – it becomes a serious issue. It is impossible to predict how much filament you will need for prints. It will tell you how much is in the purge tower and the supports, it will even tell you how much TIME it takes to flush. The dragon model here weighed 312 grams but wasted 730 grams of filament in supports, purge tower and poop. I only found this number by weighing the scraps after the print was done. If I had taken the slicer at face value, and given the printer a half spool of filament, I would have run out.
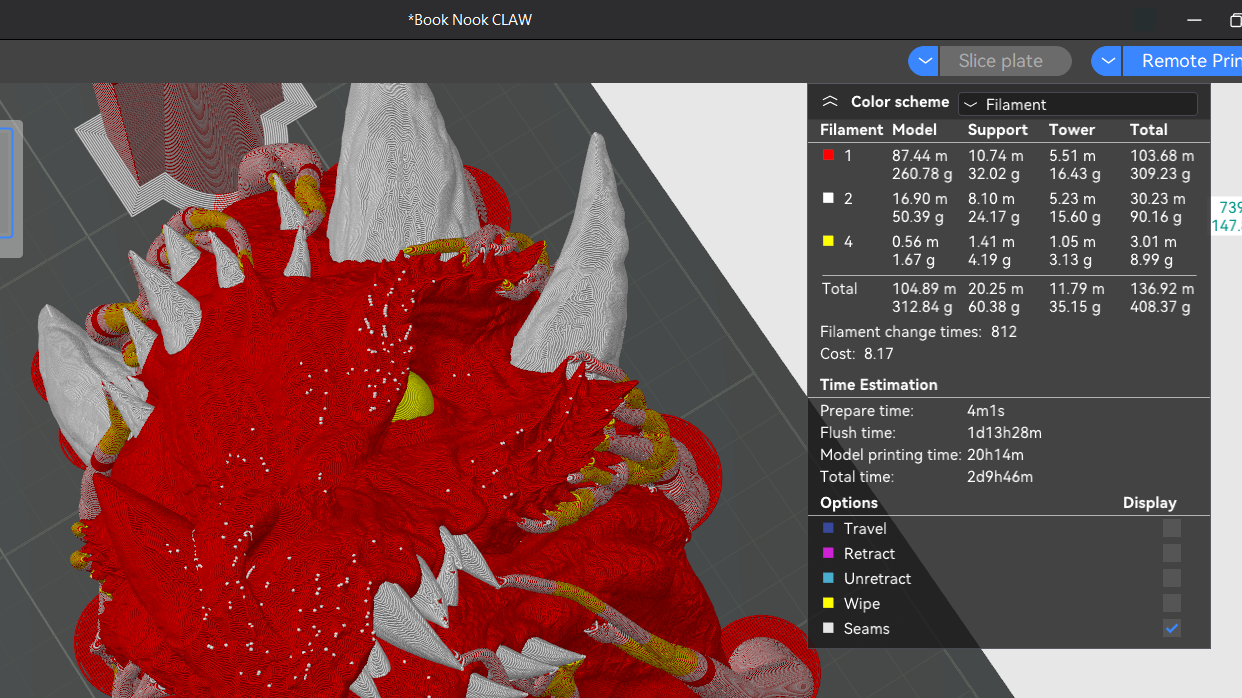
Second, the slicer has few tools to control the waste. It can flush into infill and flush into support, but there is no option to flush into a purge object.
More importantly, you can not adjust the purge amount from the slicer. You can only adjust this setting while standing in front of the printer while it is running, and only globally for all filaments. Since the printer doesn’t remember this setting from print to print, you will need to run a test to see if you like the purge setting, write that number down, then adjust each print after they get going. Tuning on the fly isn’t practical. If I had tried turning down the purge on the dragon shown below, I could have messed up a large print with streaks of pink. And last, without the slicer showing you the math, you have no idea if tweaking the flushing volume a point or two will save you one gram or a hundred.
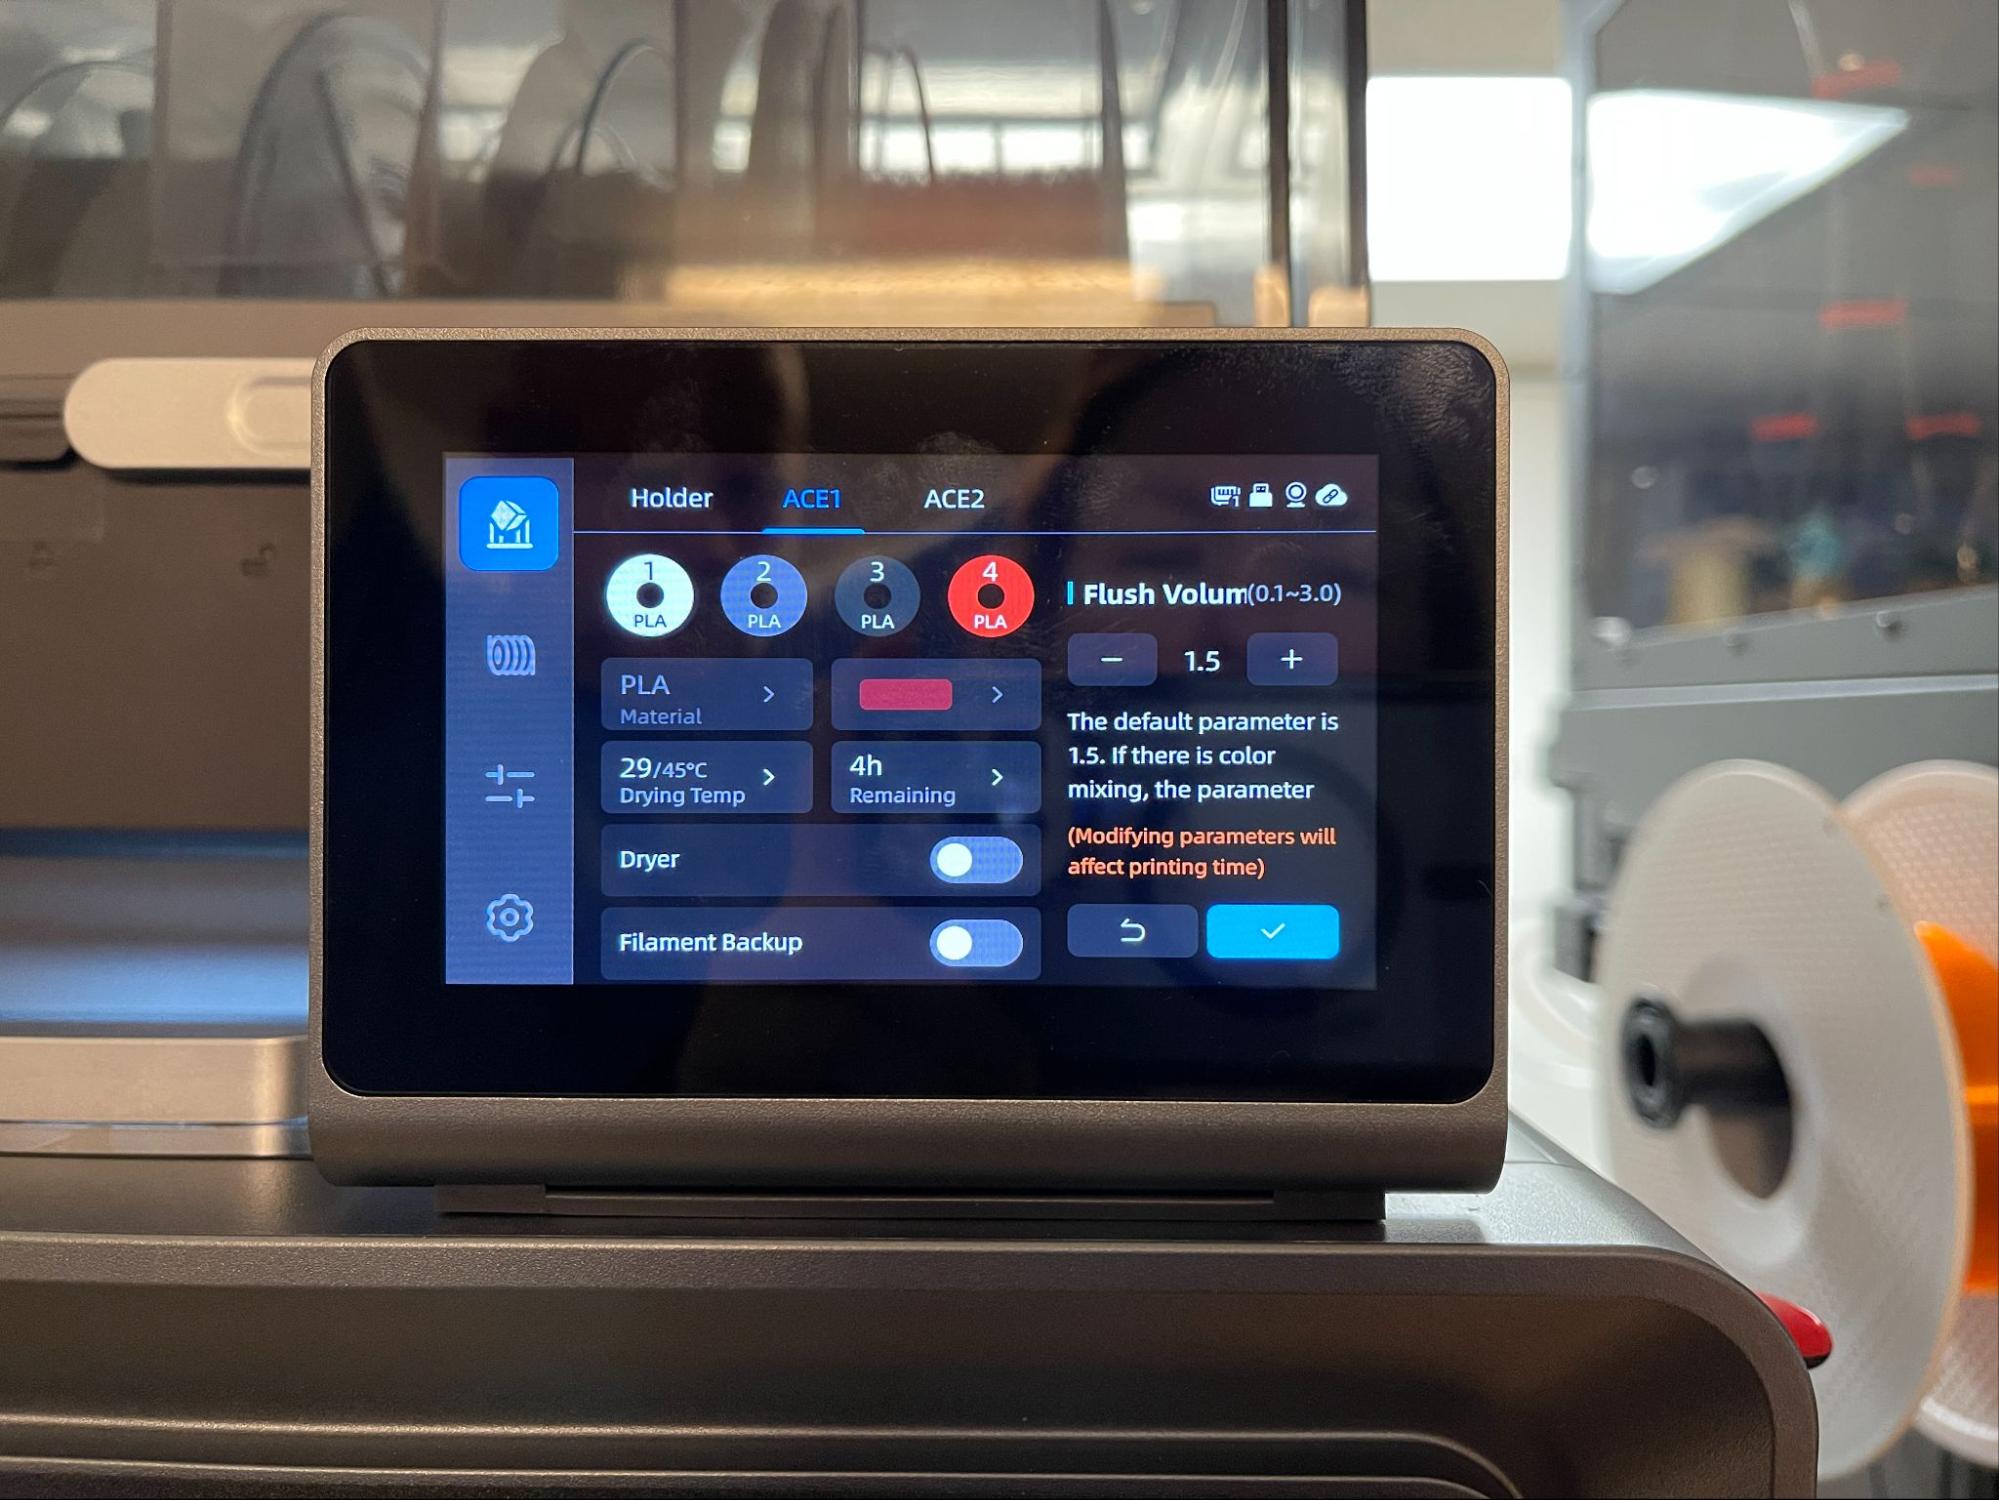
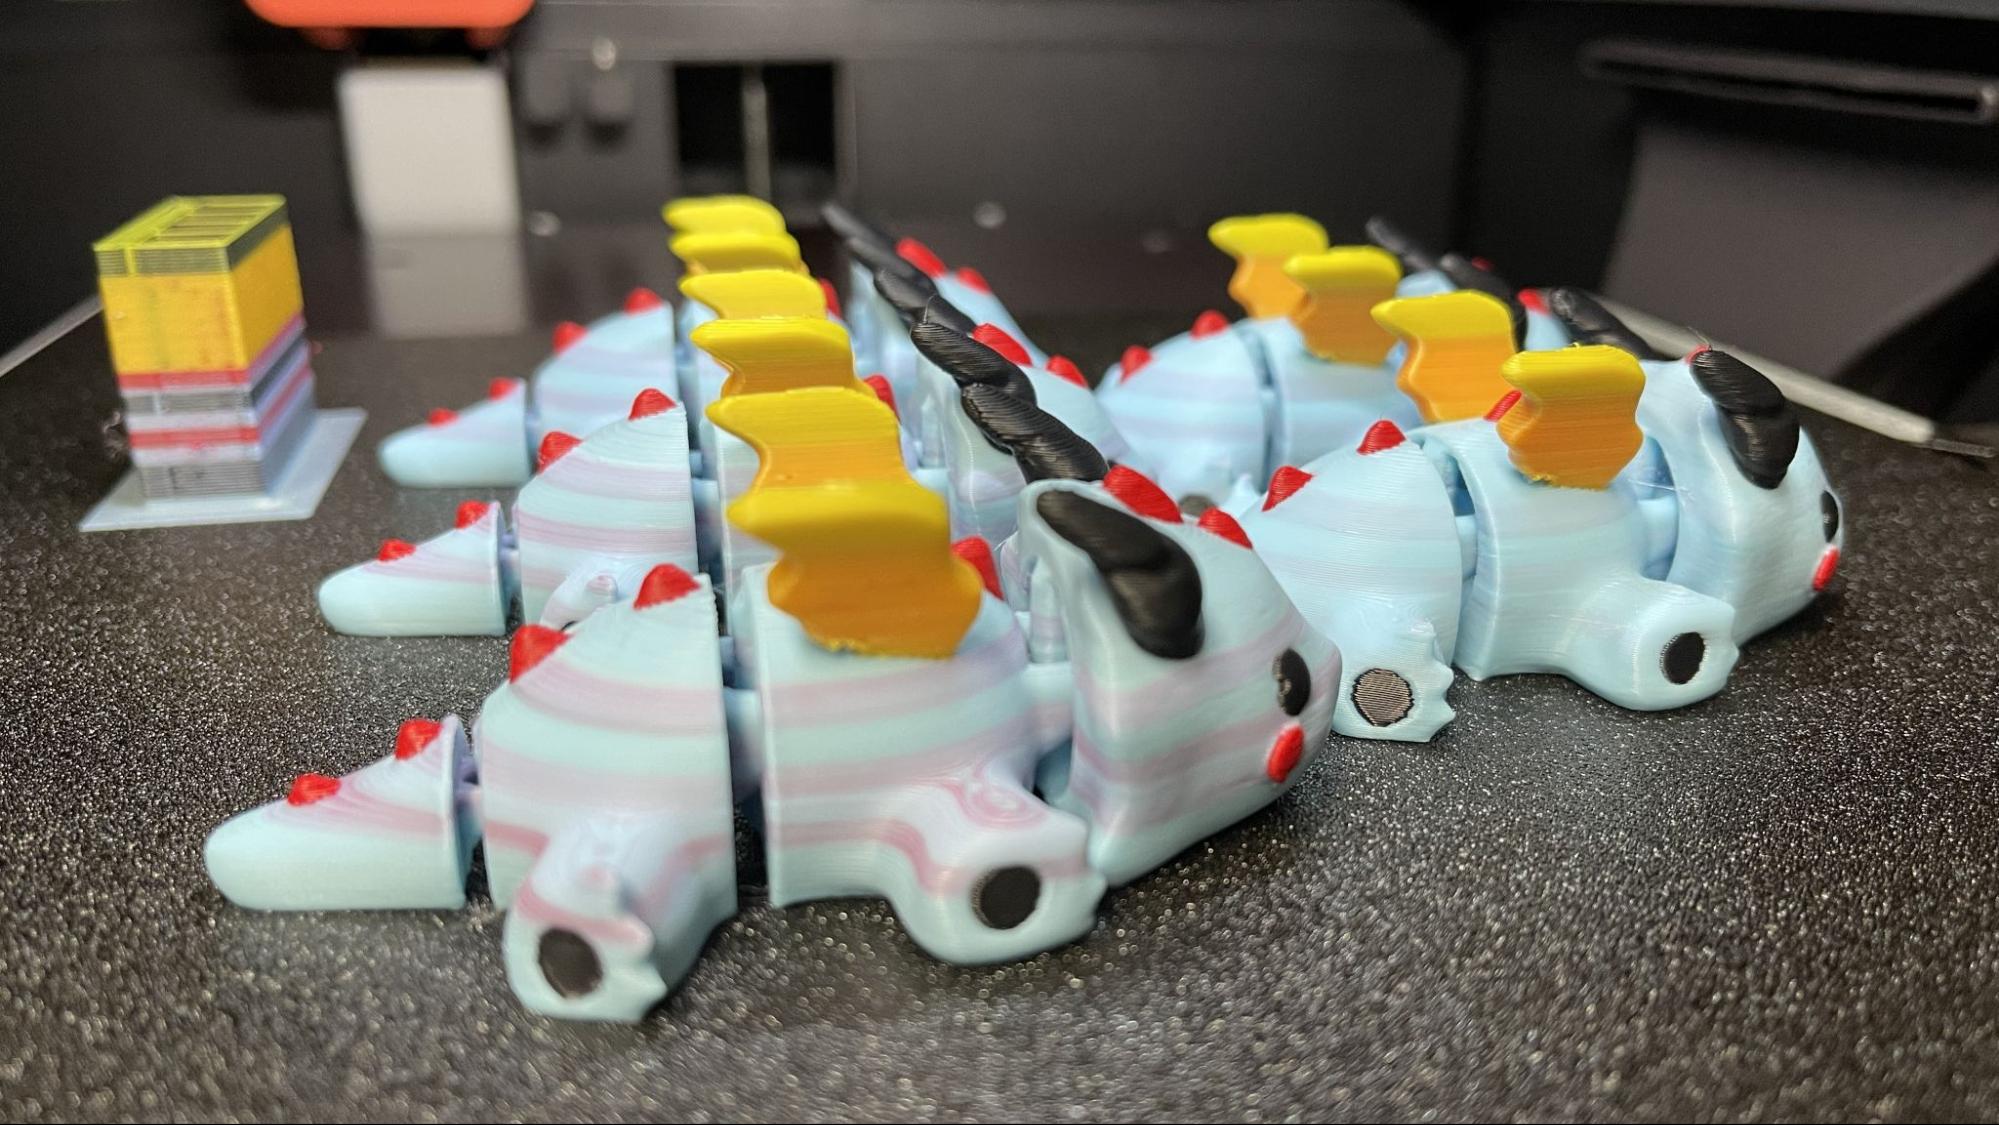
I did run some testing on a smaller model and found that the S1’s high flow hotend really needs to flush a lot of filament to print light colors cleanly.
Printing on the Anycubic Kobra S1
The review unit came with a tiny sample spool of filament, which was promptly dropped in the recycle bin. To fill up that ACE, you’ll want to check out our guide to the best filaments for 3D printing for suggestions.
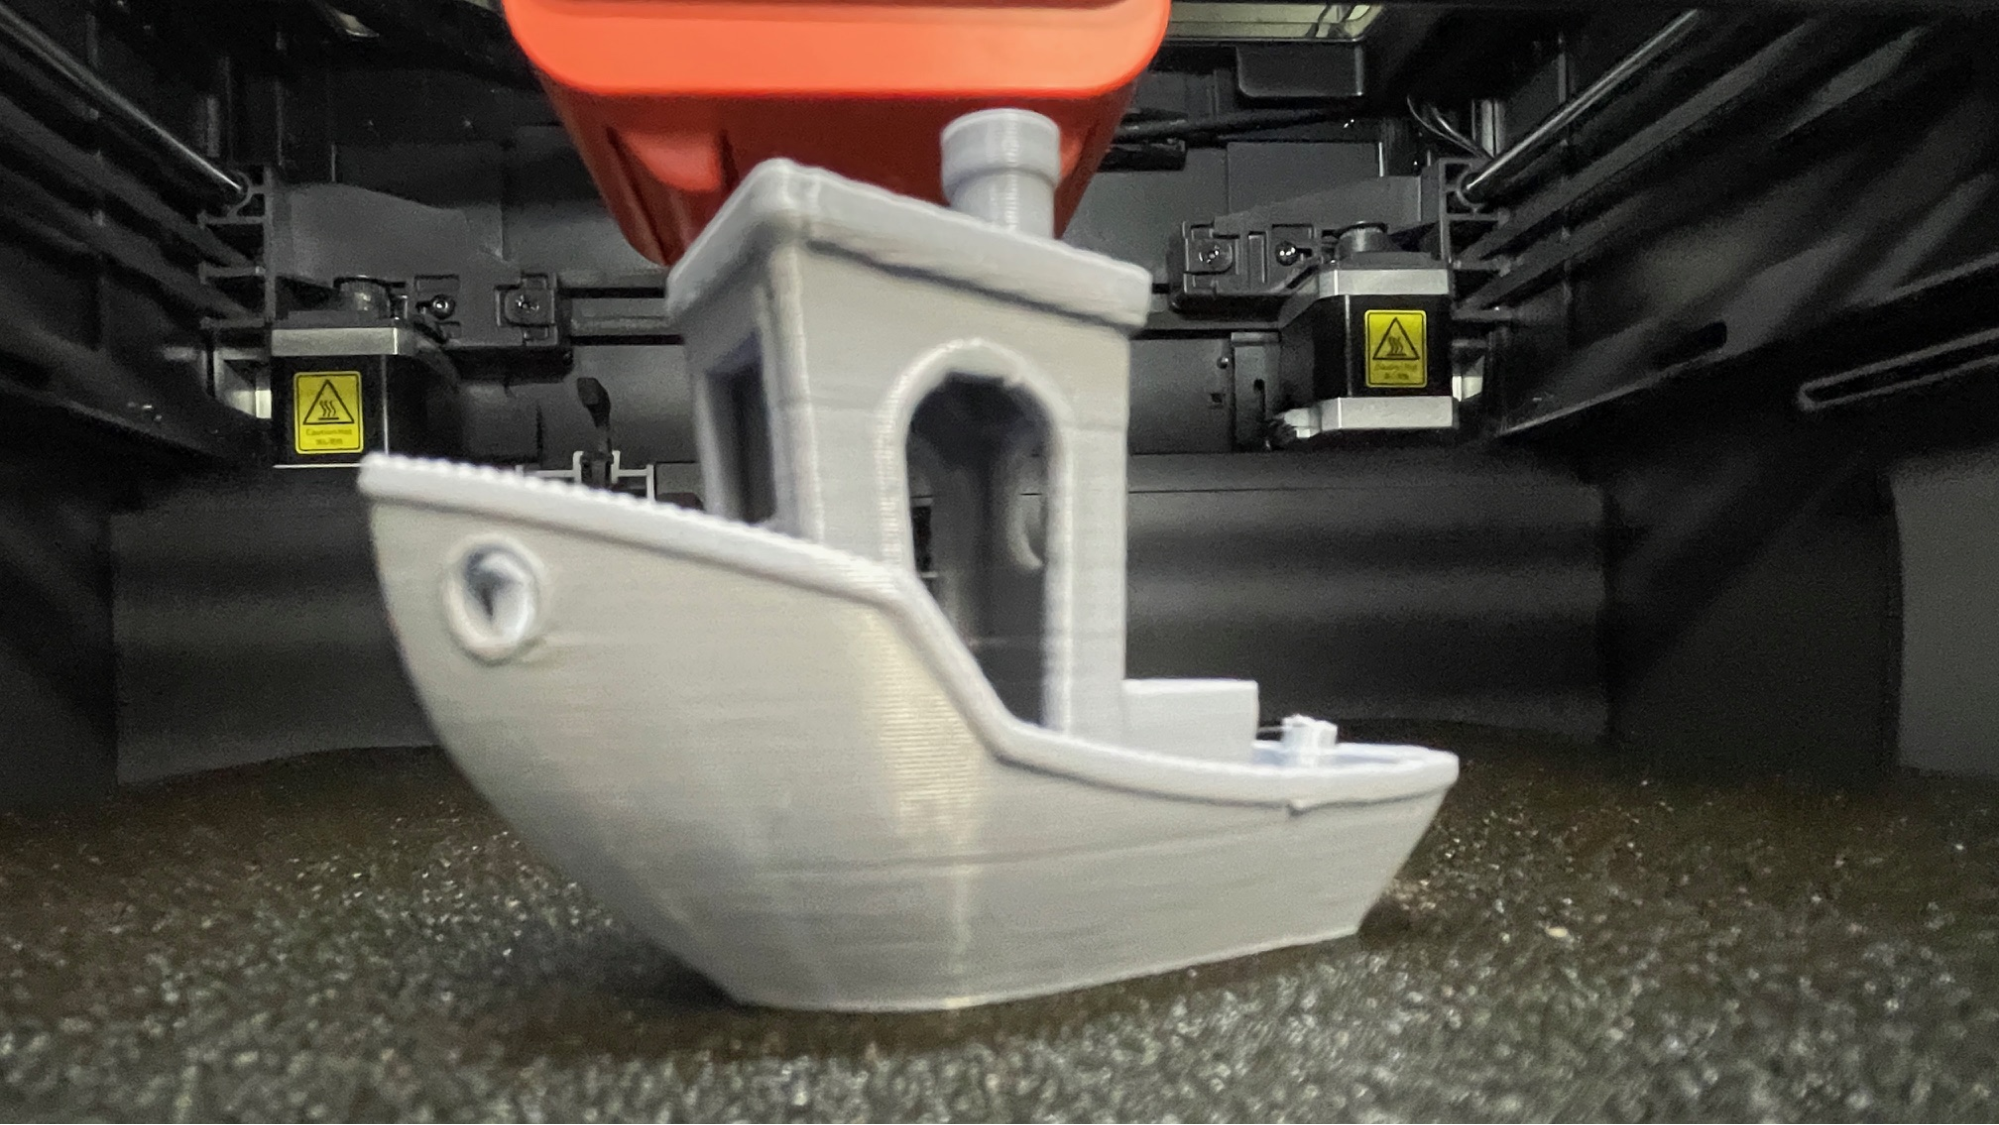
I started off with a Benchy, using the printer’s default speeds and standard Speed Benchy parameters: 2 walls, 3 top and bottom layers, 10 % grid infill, a .25 layer height and .5 layer width. I also turned off minimum layer times to give it a bit more pep. It took 24 minutes and 15 seconds.
This boat is a little rough, but its shape is well-defined, with no signs of ringing. This was printed in ordinary gray Inland PLA, so none of the defects are hidden.
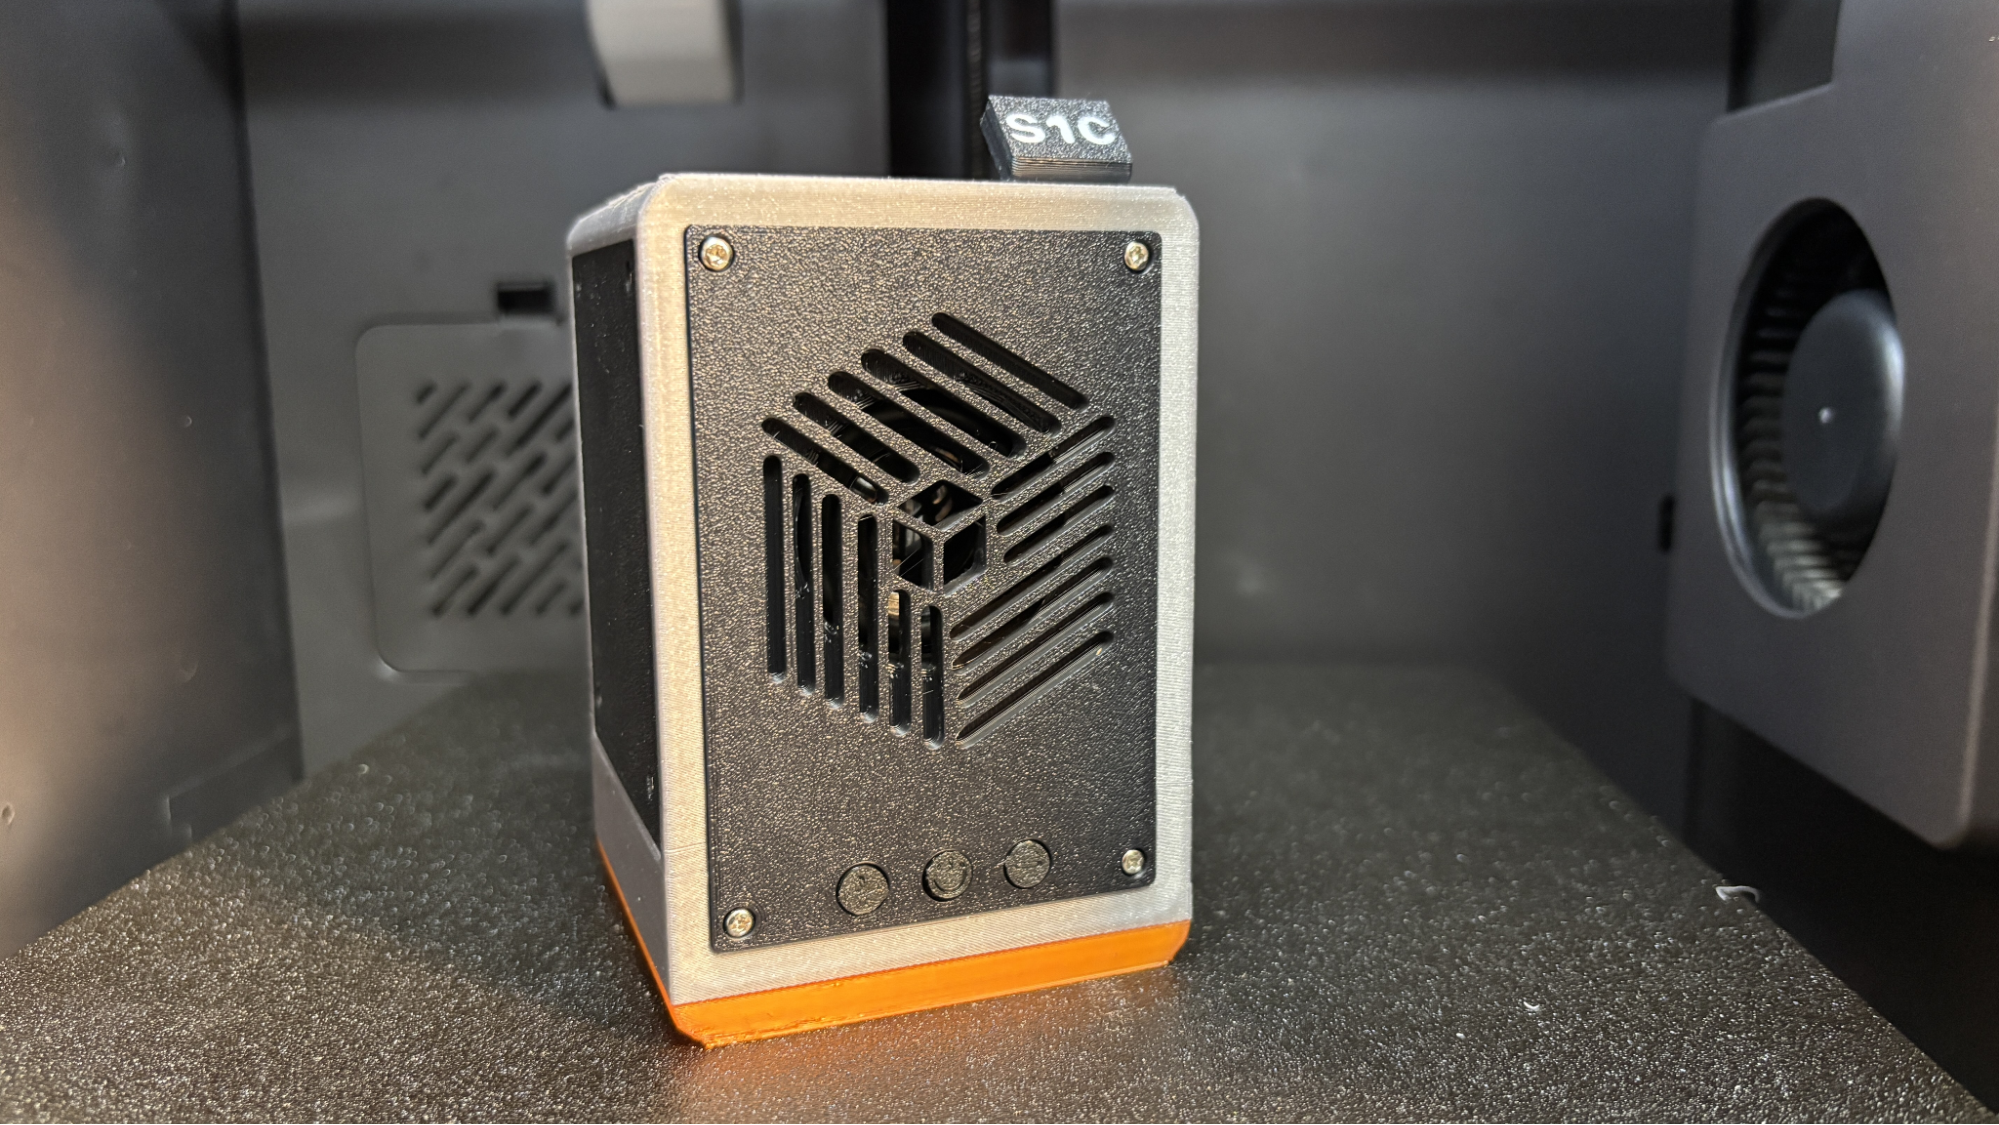
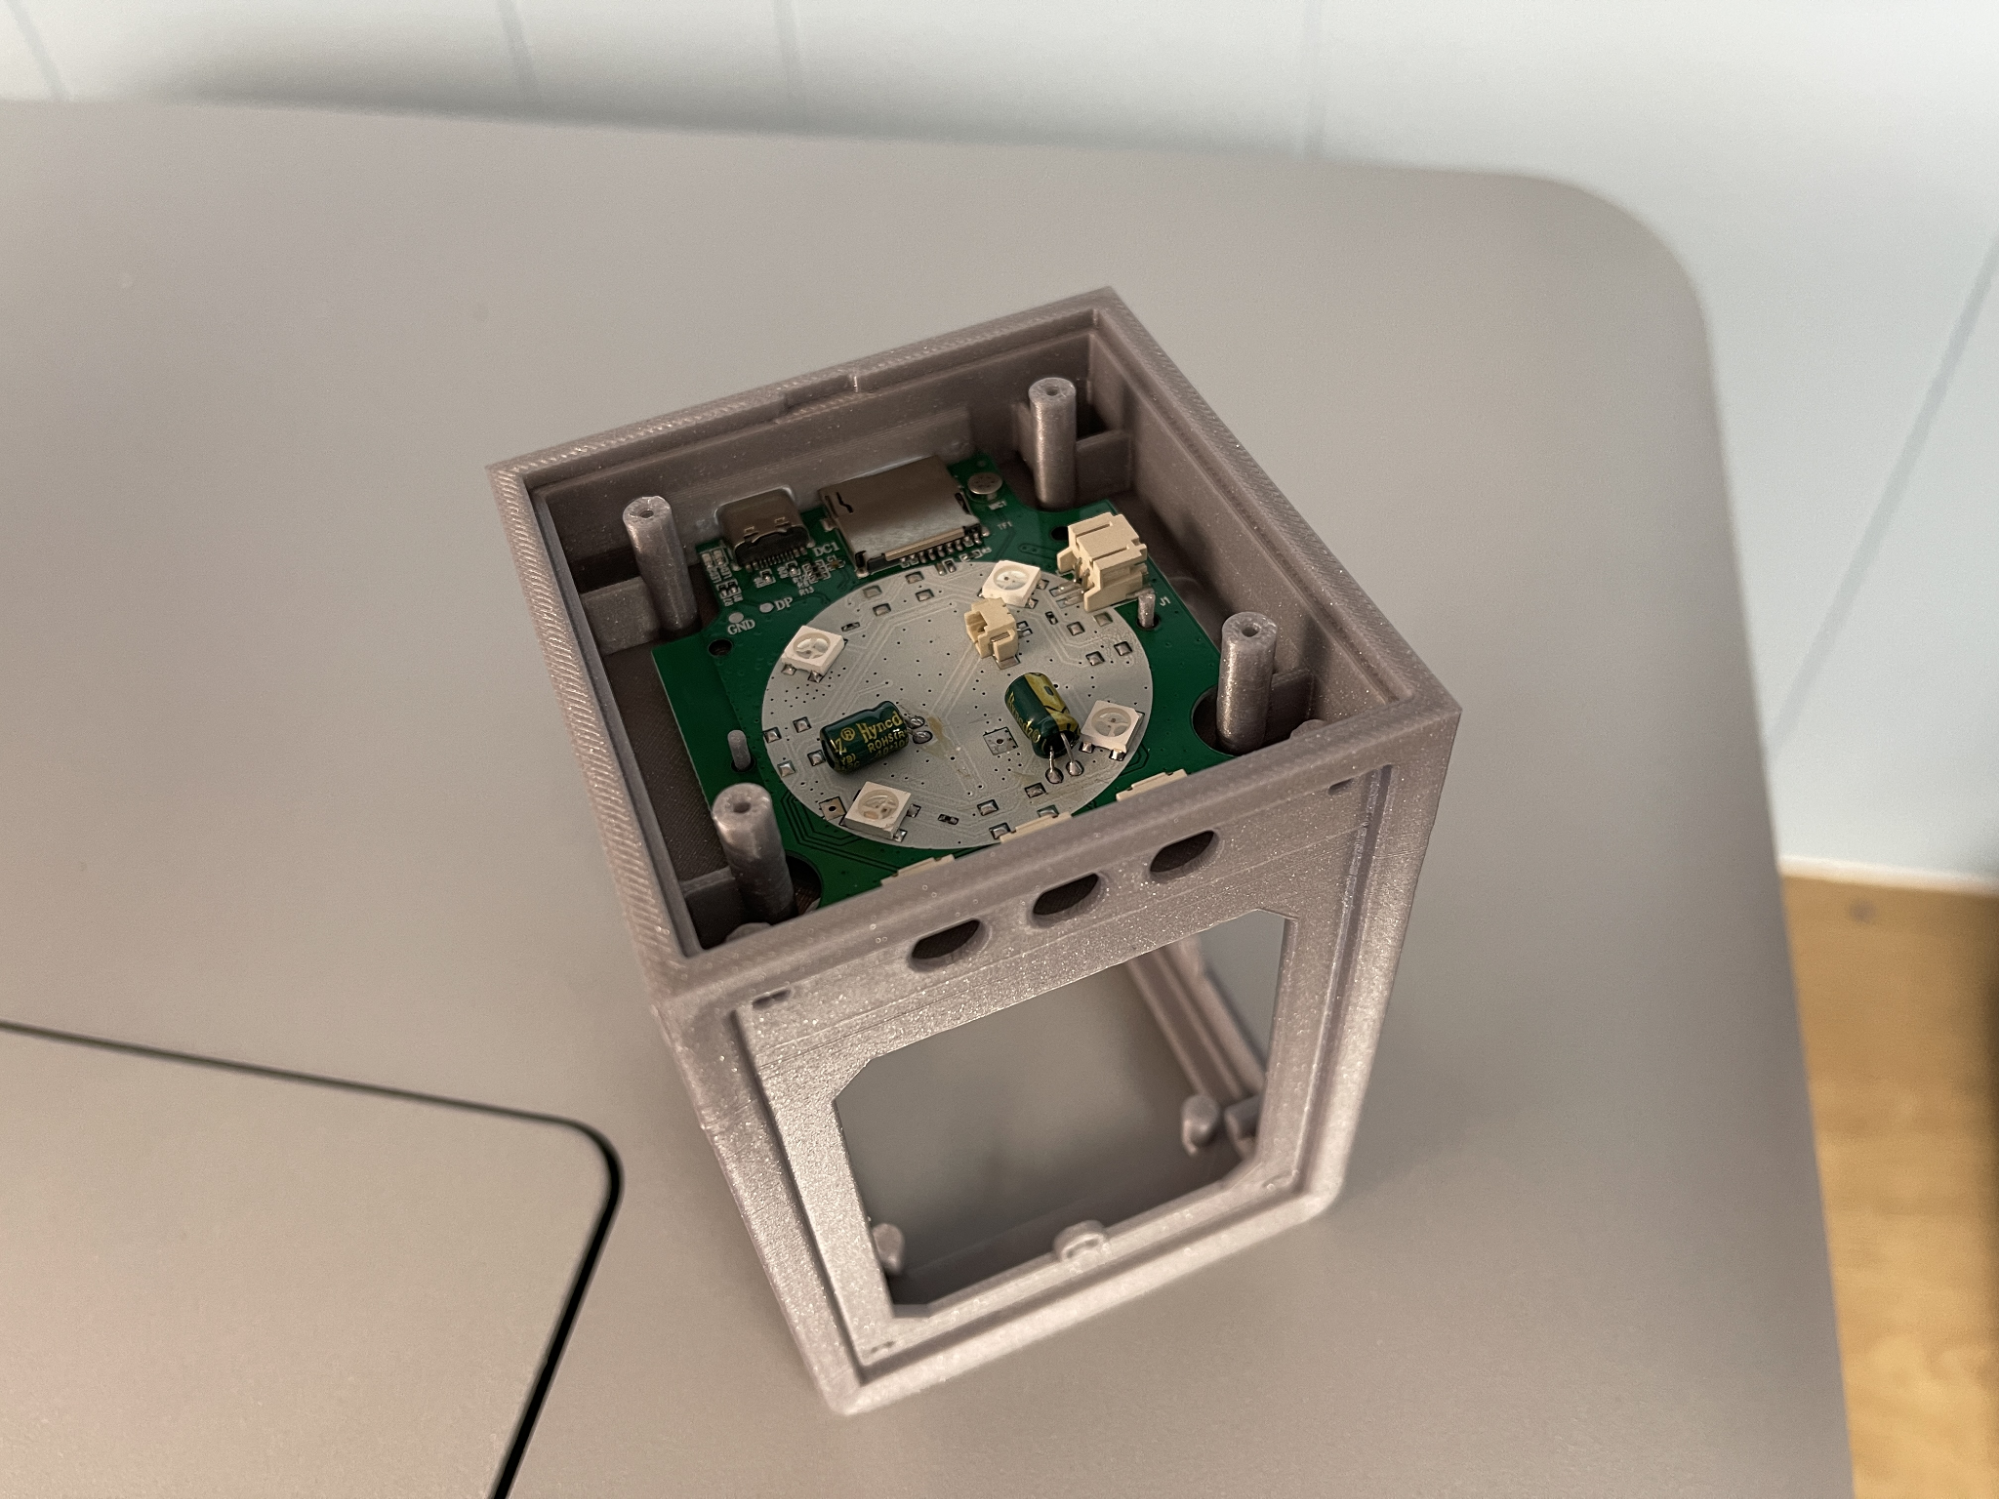
The Kobra S1 came with a kit to build a miniature S1 Bluetooth speaker, with files on Makeronline. This was printed with a .2 layer height at an average speed of 130 mm/s. All of the pieces together took less than an hour to print and it came out flawless. This is printed in Matterhackers Black Build Series PLA and Prusament Galaxy Silver, with an orange base in Matterhackers Build Series Translucent PETG.
For a showy multicolor print, it's hard to imagine anything better than CraftyKid3D’s dragon book nook. This printed in two parts: a solid color box in Bambu Lab PLA Sparkle Black and a three color dragon printed in Printed Solid Jessie Elixer Royal Ruby, Inland Glass Orange PLA for the eye and Creality Hyper White PLA. The box took 6 hours and 54 minutes using a .2 layer height and average print speed of 160mm/s.
The head and claw are printed separately, with the head taking a whopping 56 hours and the claw taking 8.5 hours to print at a .2 layer height and average print speed of 100 mm/s. The prints wasted an obscene amount of filament. While overall pretty clean, the print did have a few couple spots where specks of red dripped on the white horn. This could possibly be cleaned up with a bit of tuning.
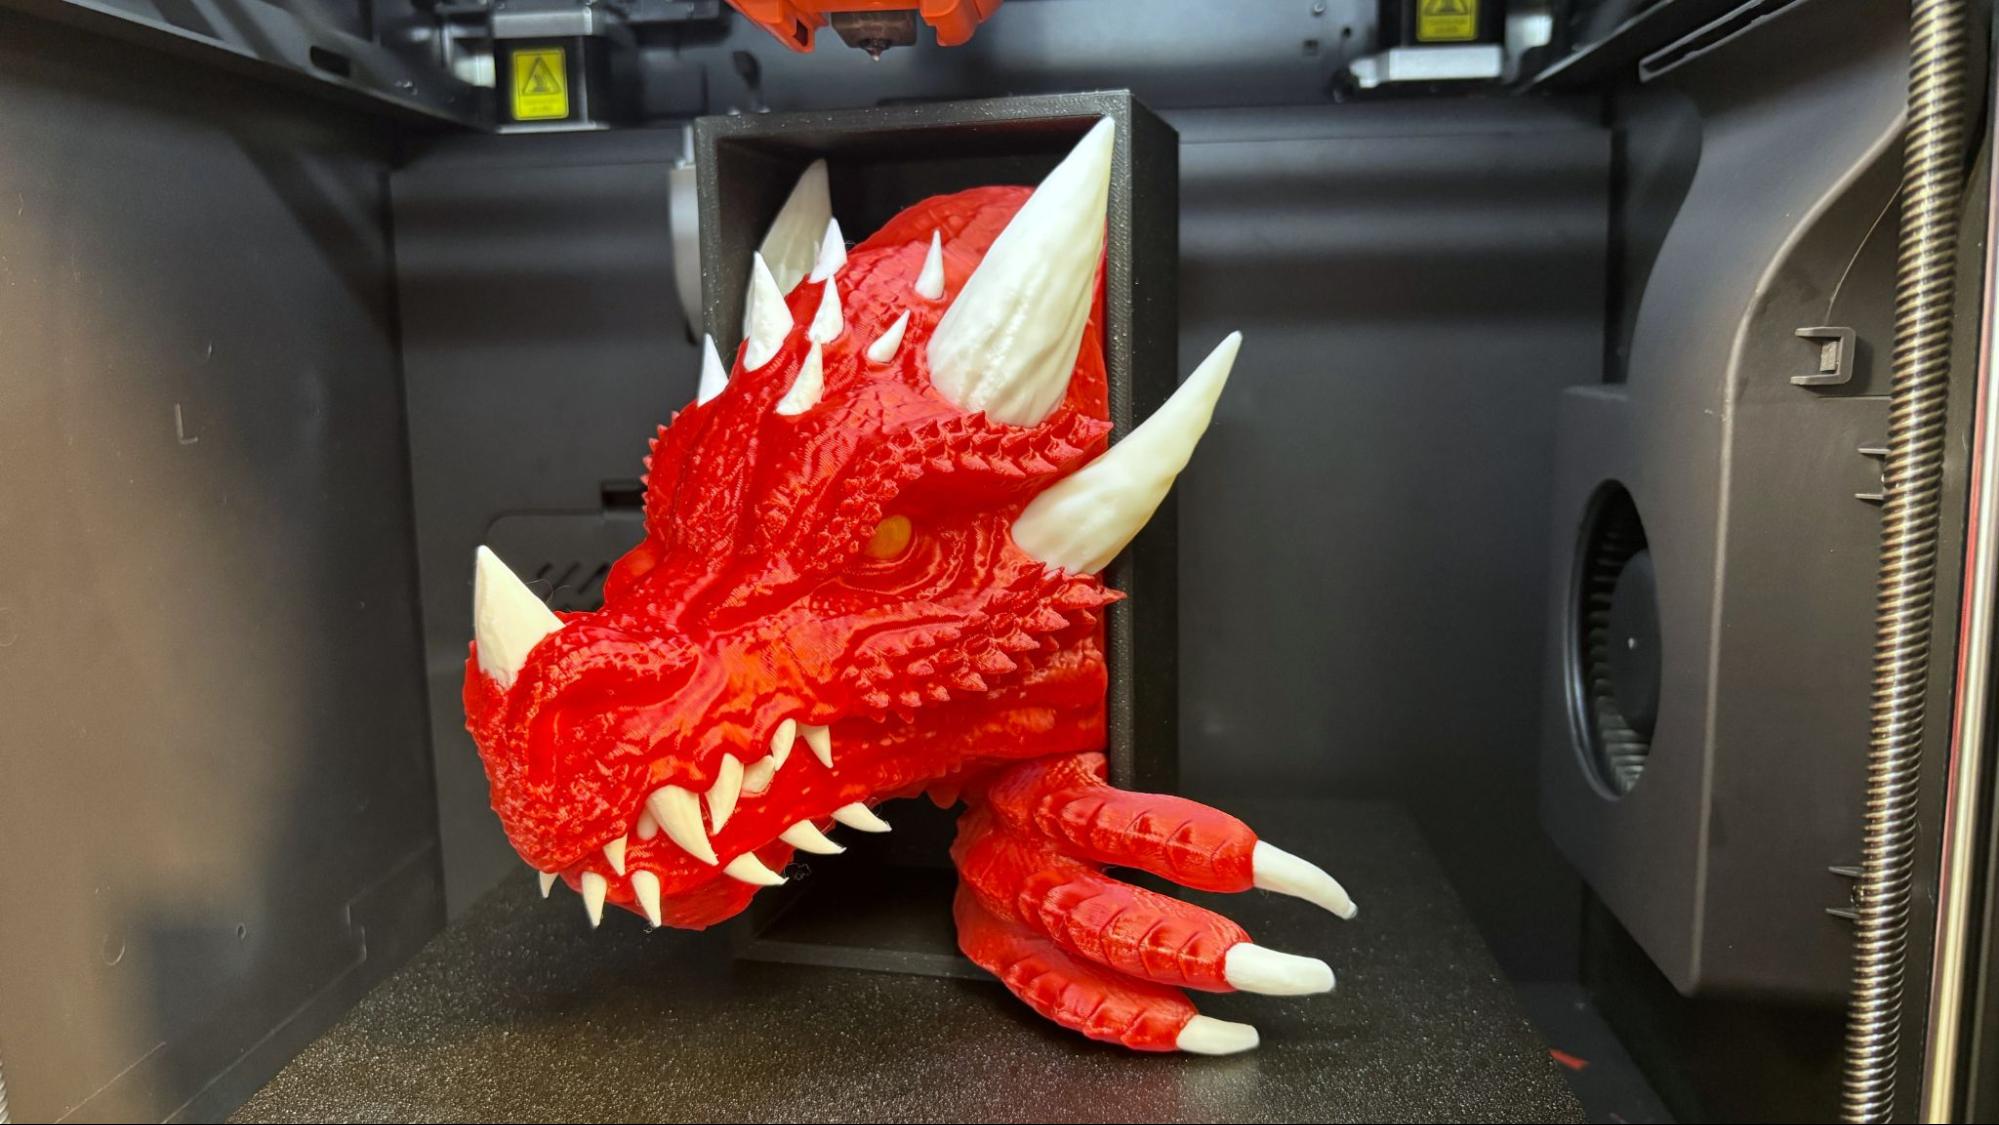
As I mentioned early, this print has 987gram of wasted filament between the two prints. I understand I could have saved about 140g of material if I had run the head and the claw together, but this was my first large multicolor print and I had not completely grasped the amount of filament it was going to burn through. (Don’t worry about the waste too much, I’m saving it for another project.)
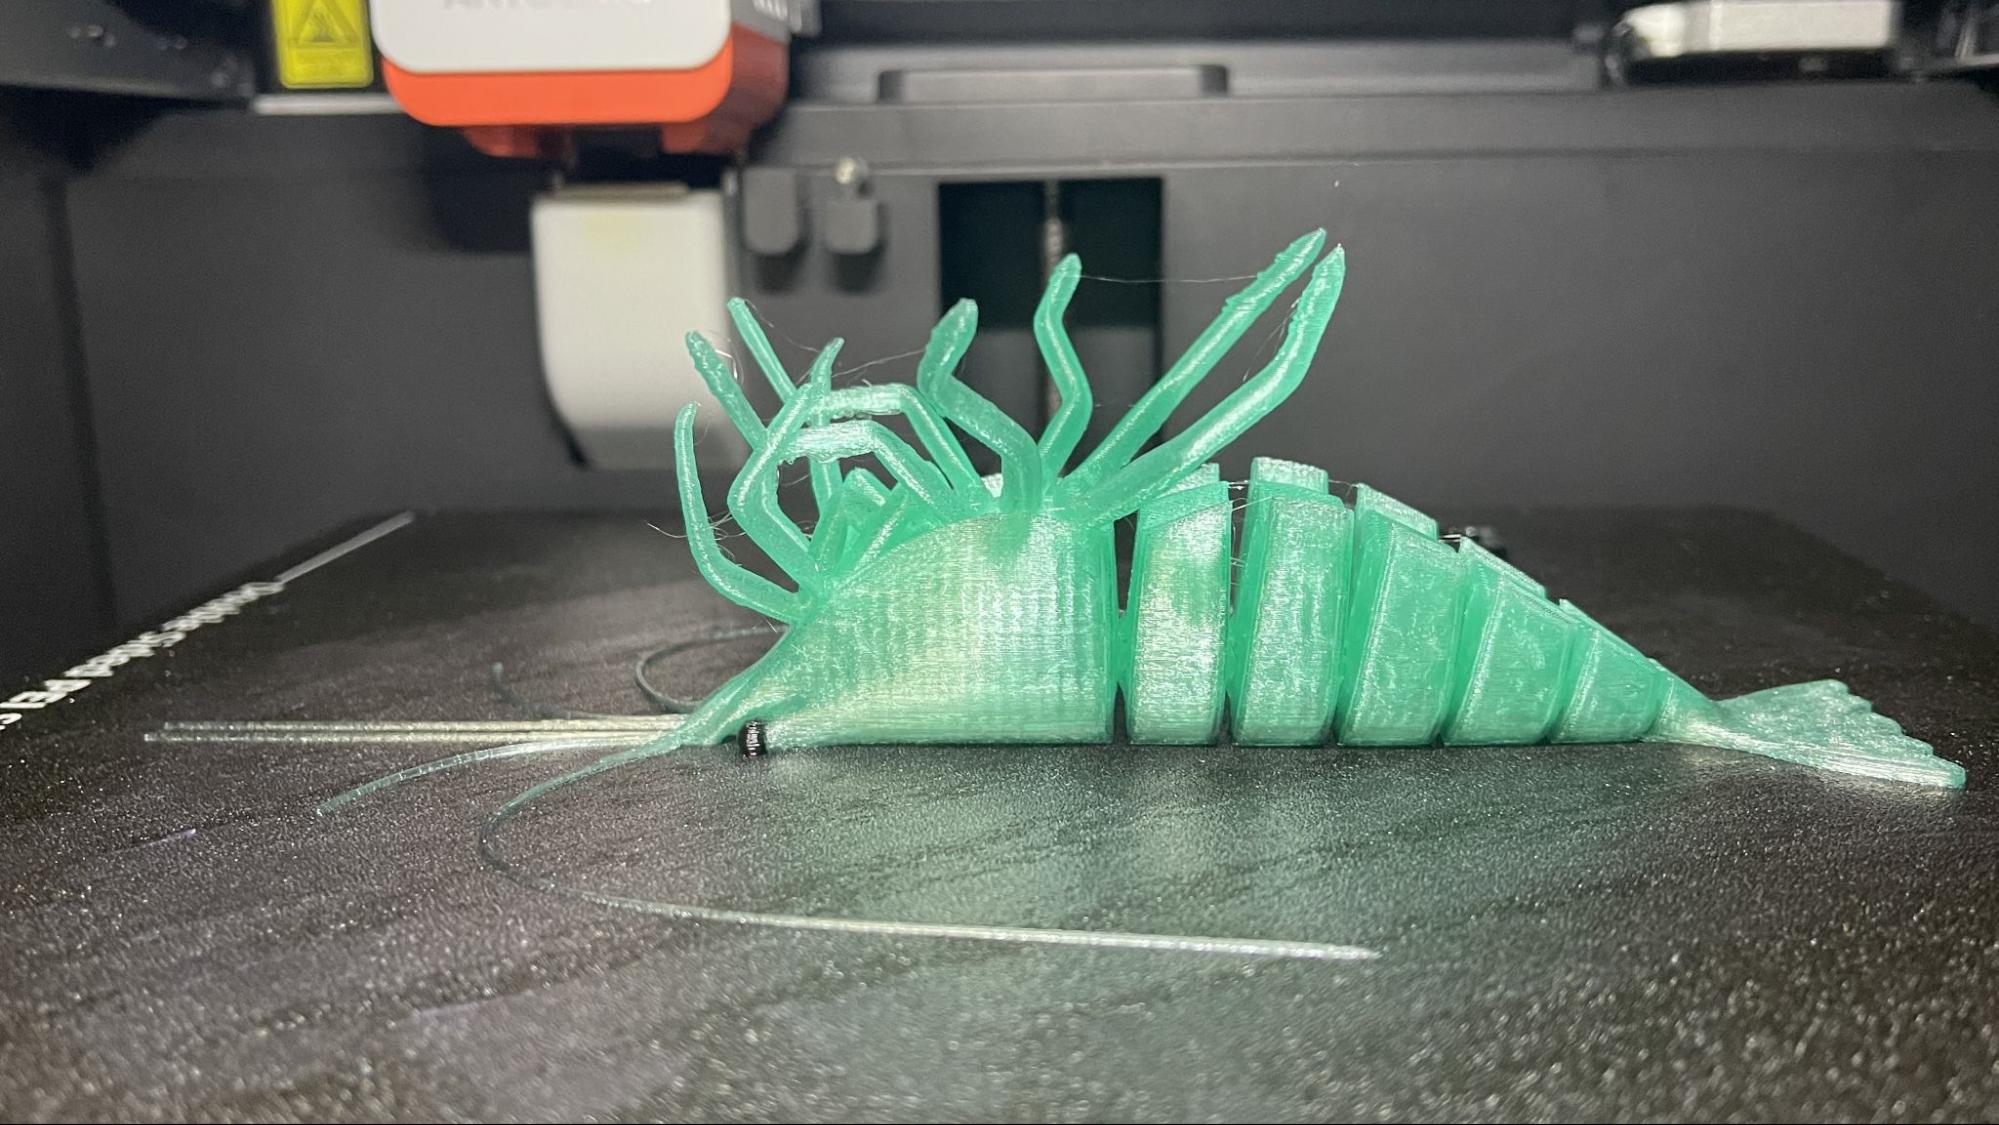
For PETG I printed this articulated shrimp which prints flat on it’s back. With a point 2 layer height and average speed of 90 mm/s it finished in 2 hours and 12 min. There were just a few wisps of stringing but otherwise it printed great. This is printed in Bambu Translucent Green with Prusa Research Jet Black PETG for the eye.
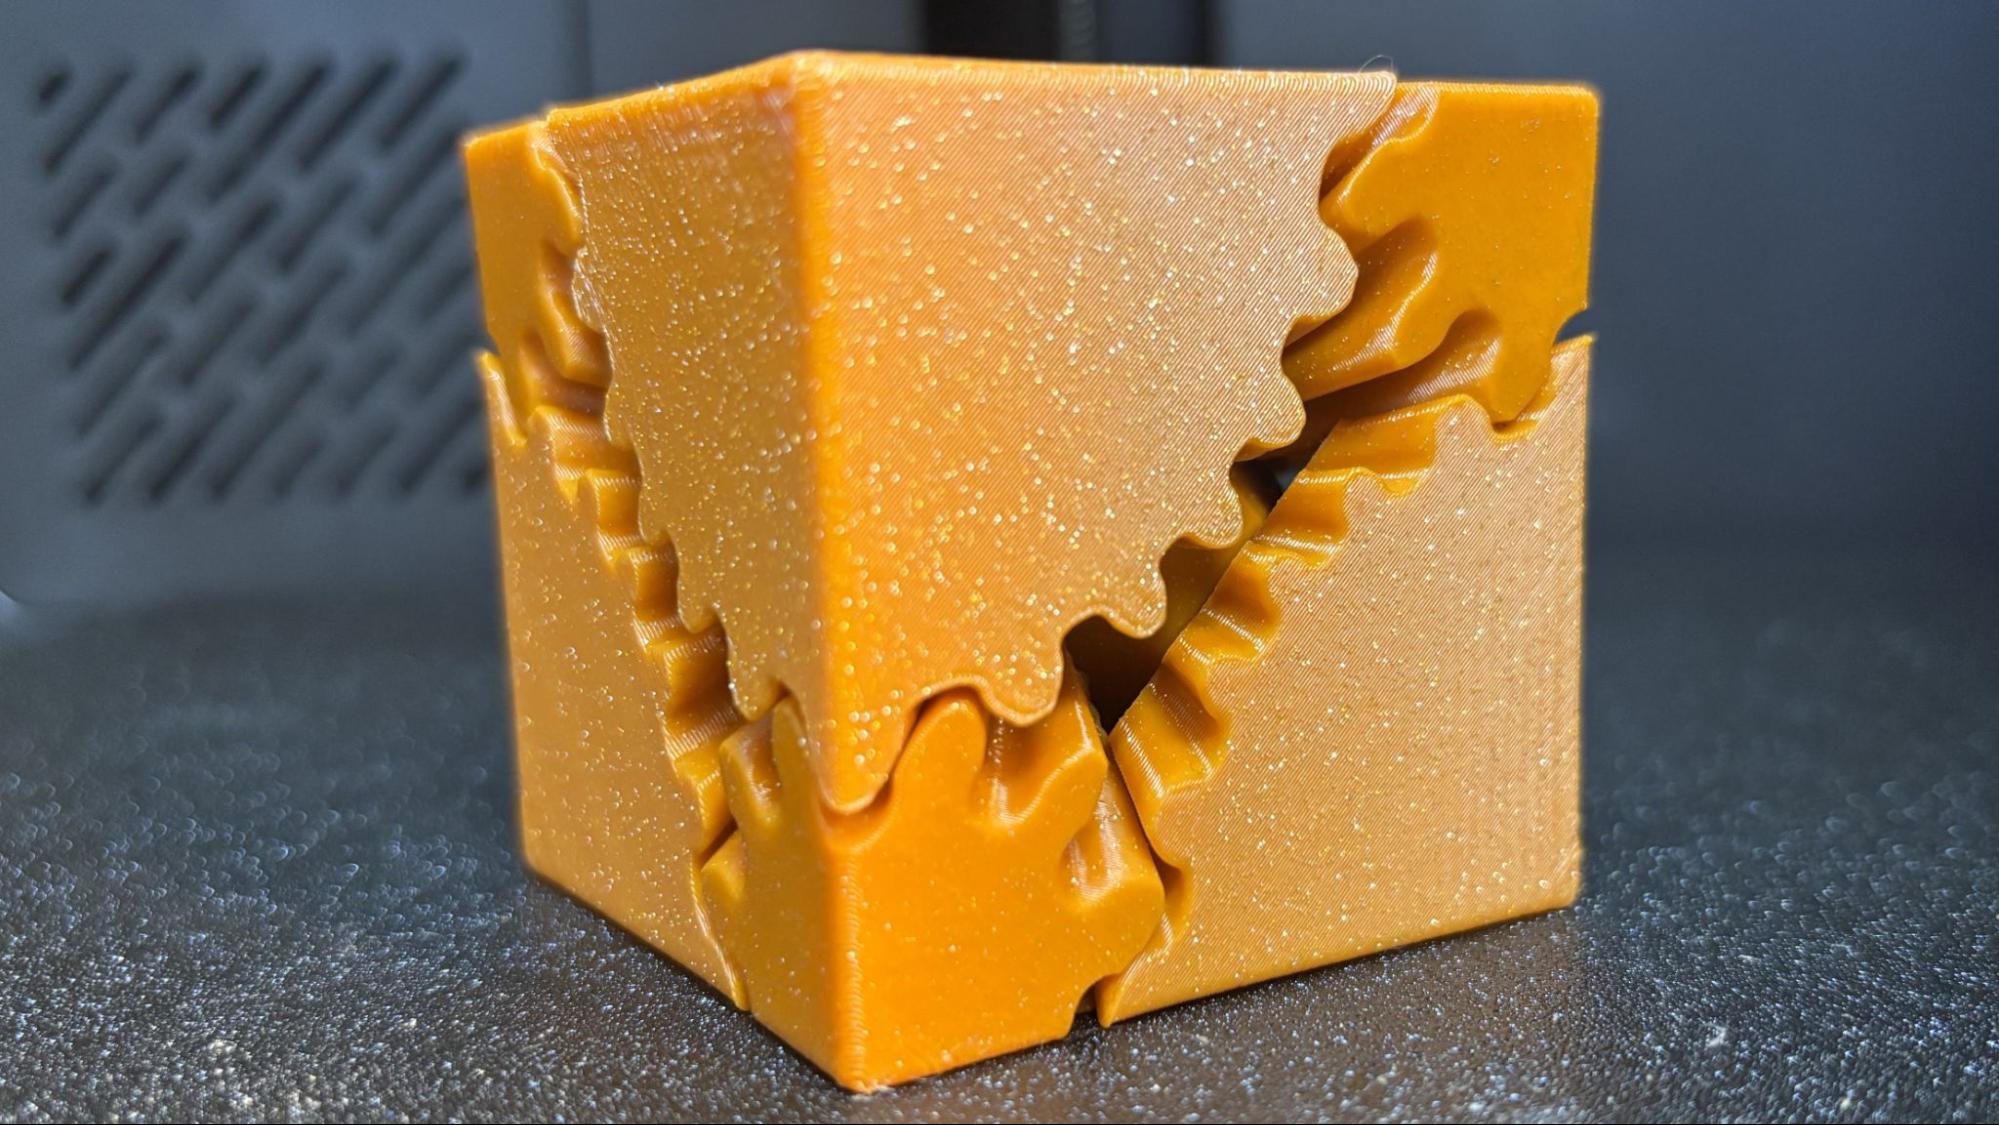
Since the Kobra S1 is enclosed, I had to try ABS. It does a remarkable job with high temperature filaments, and I had no issue with bed adhesion. This cube prints as several pieces and it then assembled, which proved that tolerances on this print were excellent. This is printed in Polymaker Galaxy Orange with a .2mm layer height and default settings and an average speed of 200mm/s, taking about four hours and 10 minutes to print.
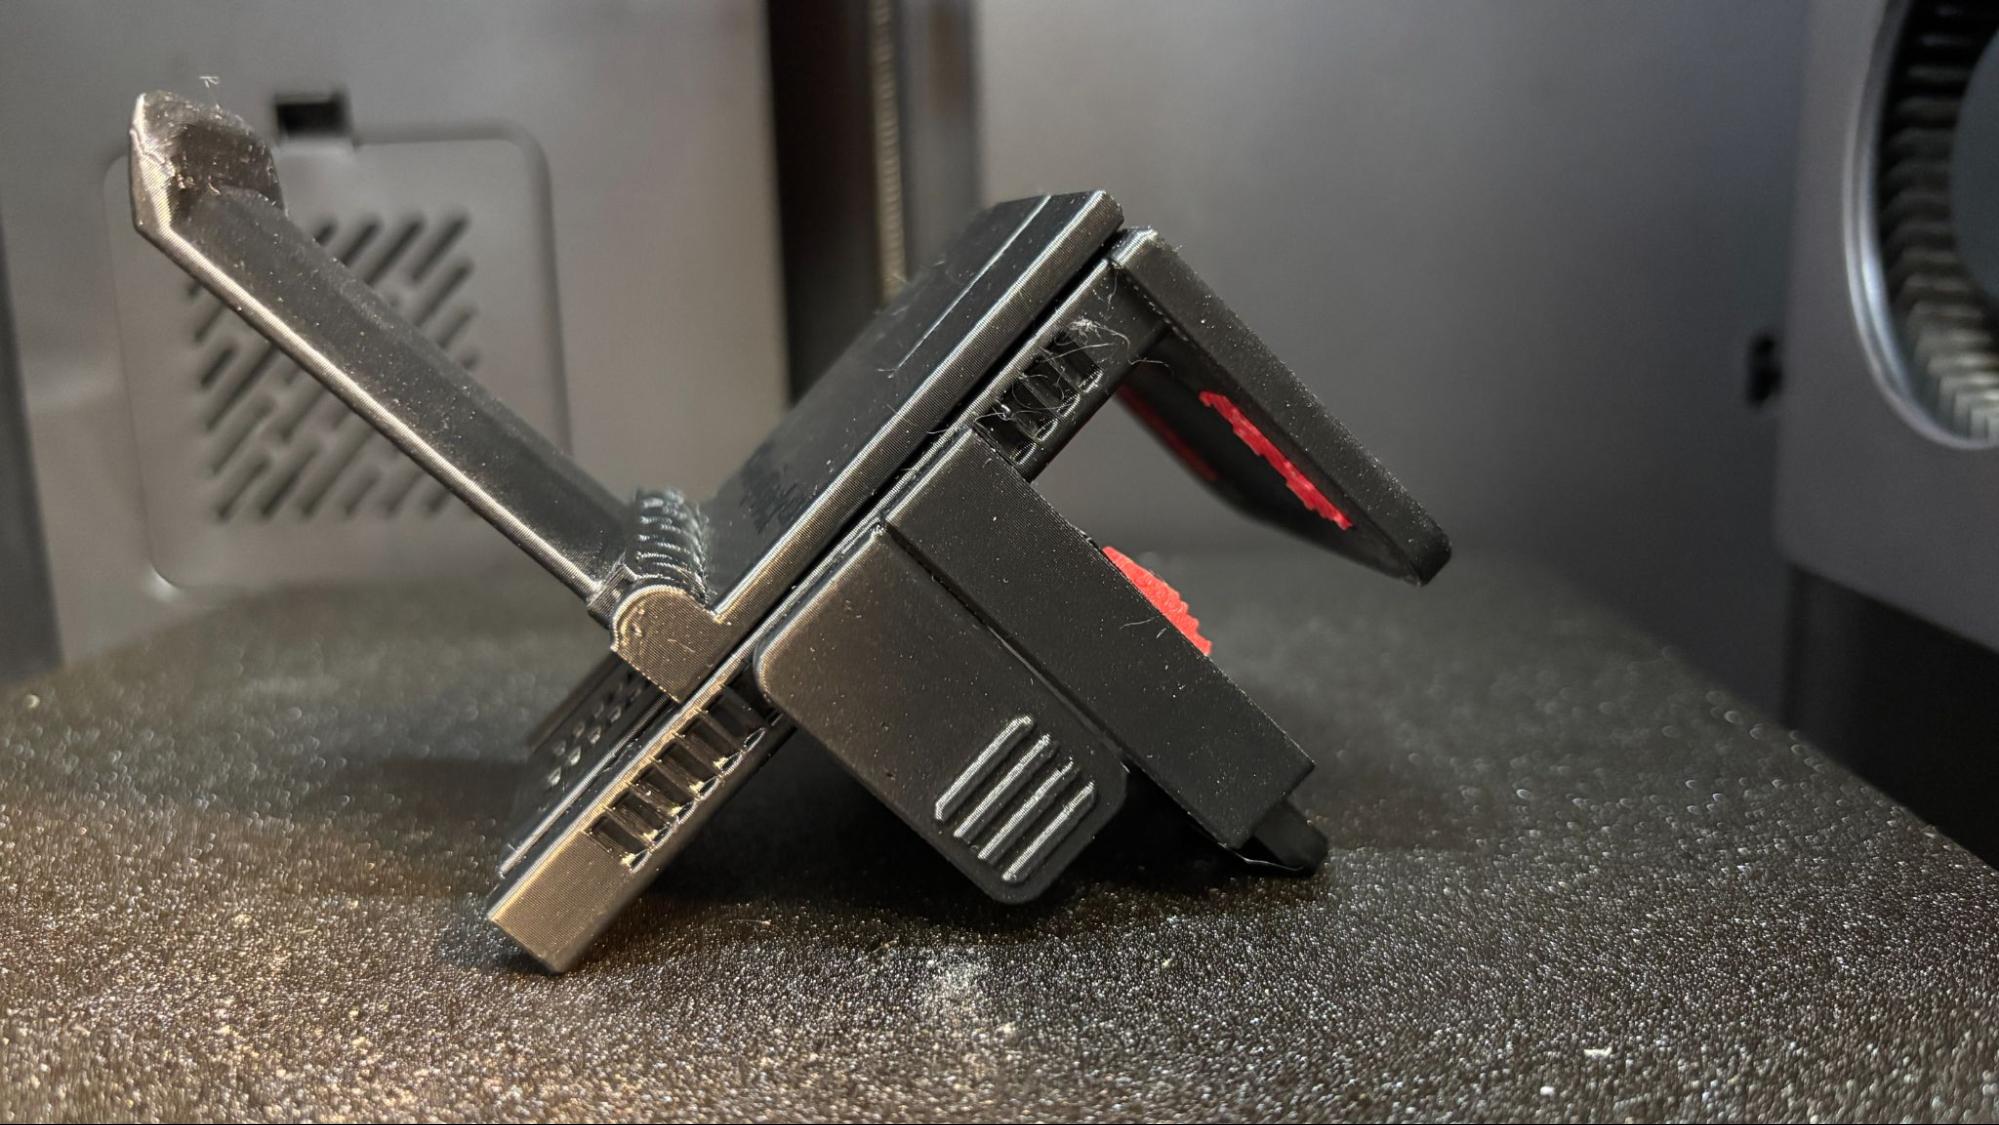
Perhaps the best print to show off the filament dryer in the ACE Pro and the capabilities of the Kobra S1 is the clamp dock headphone holder I printed out of Polymaker Polycarbonate and a small bit of random red TPU that was printed separately. Using a .2 layer height and 50 mm/s print speed, the clamp dock took 5 hours 18 minutes to print with the headphone holder attachment taking 2 hours and 18 minutes. Starting with dry filament and running the dryer on the ACE Pro at 55C lead to fantastic smooth prints with nearly invisible layer lines.
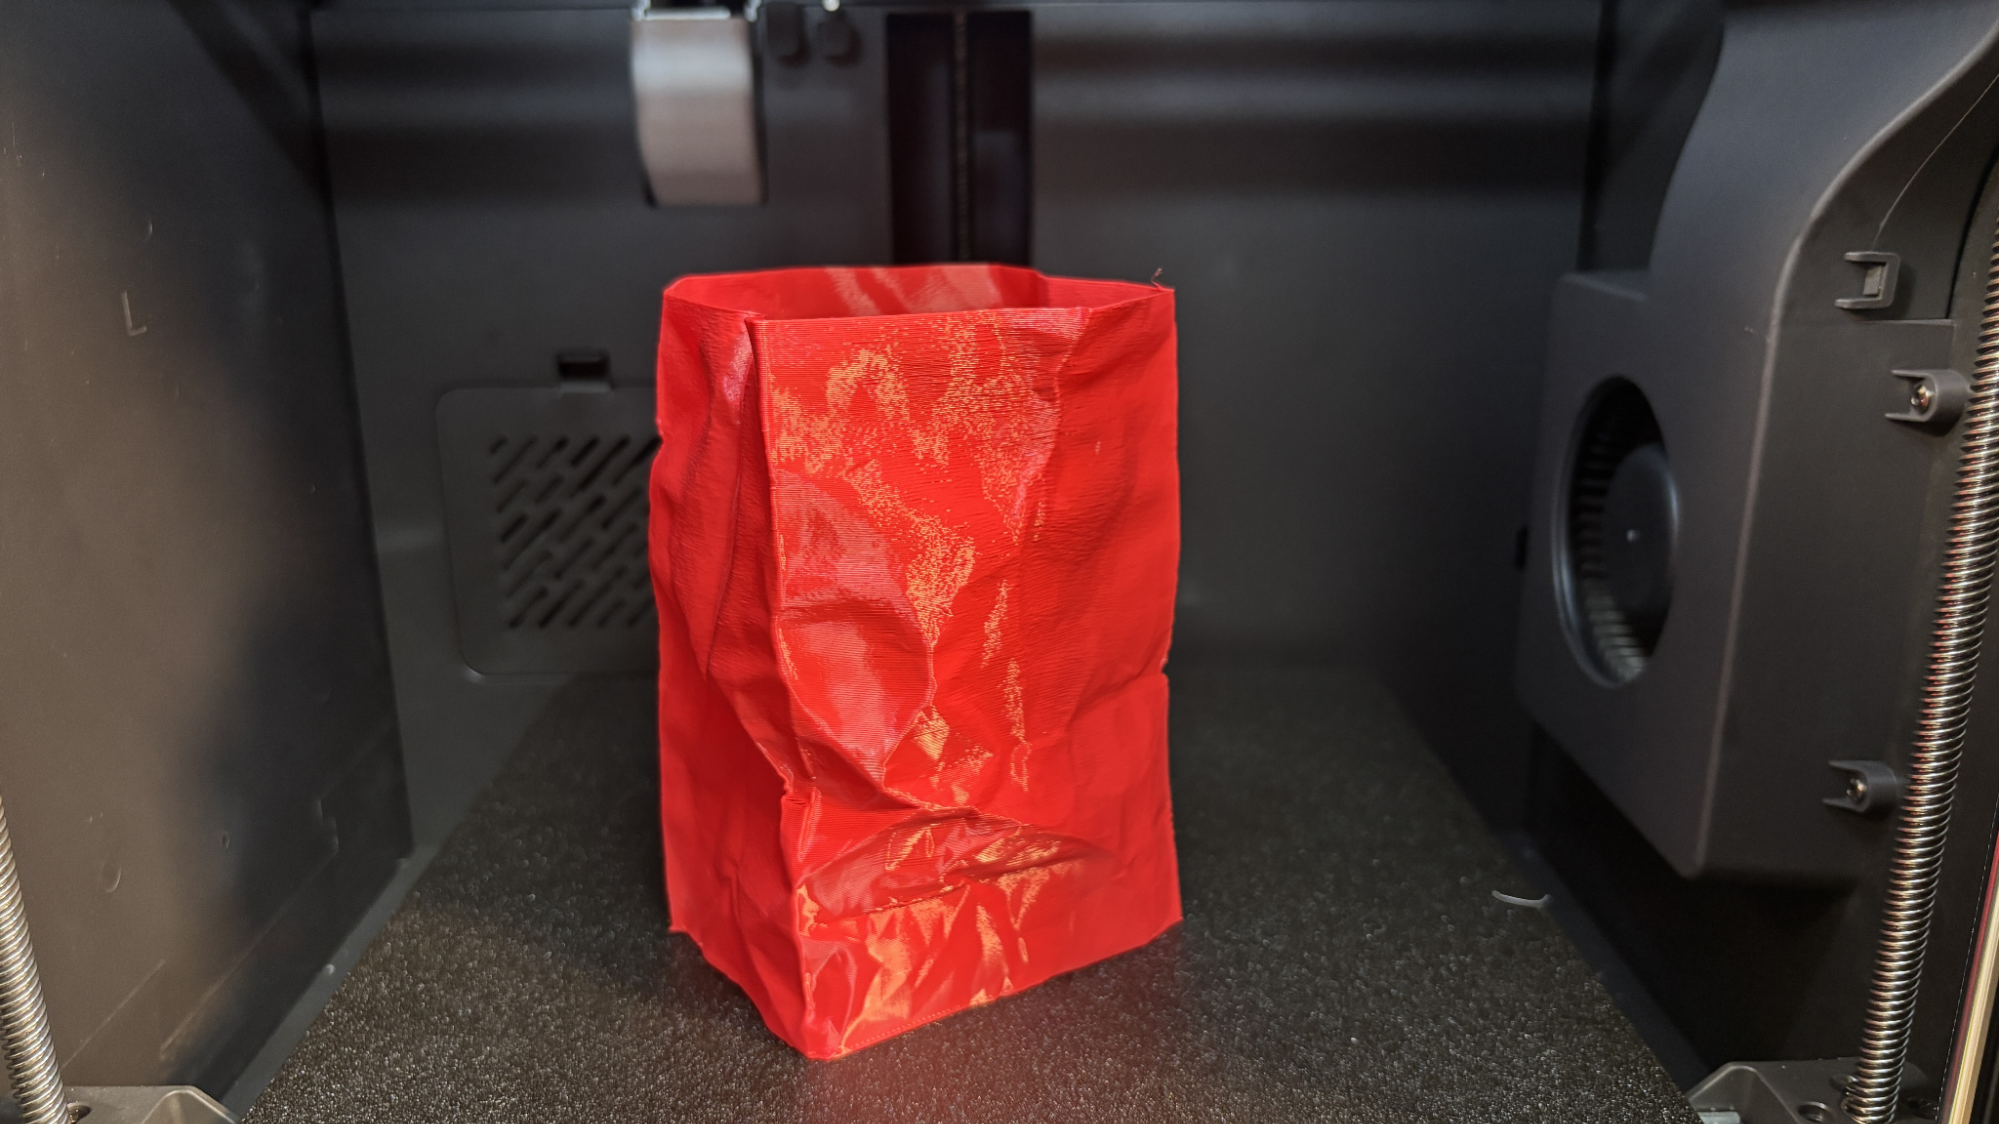
For TPU I ran my favorite Taco Bell bag in vase mode with a .28 layer height and .6 layer width. With an average print speed of 50 mm/s the print took 5 hours and 41 minutes. Print quality was pretty good with just couple areas of rough surface finish which should be fixable with a little tweaking. Printed in Fiberlogy Red FiberFlex TPU.
Bottom Line
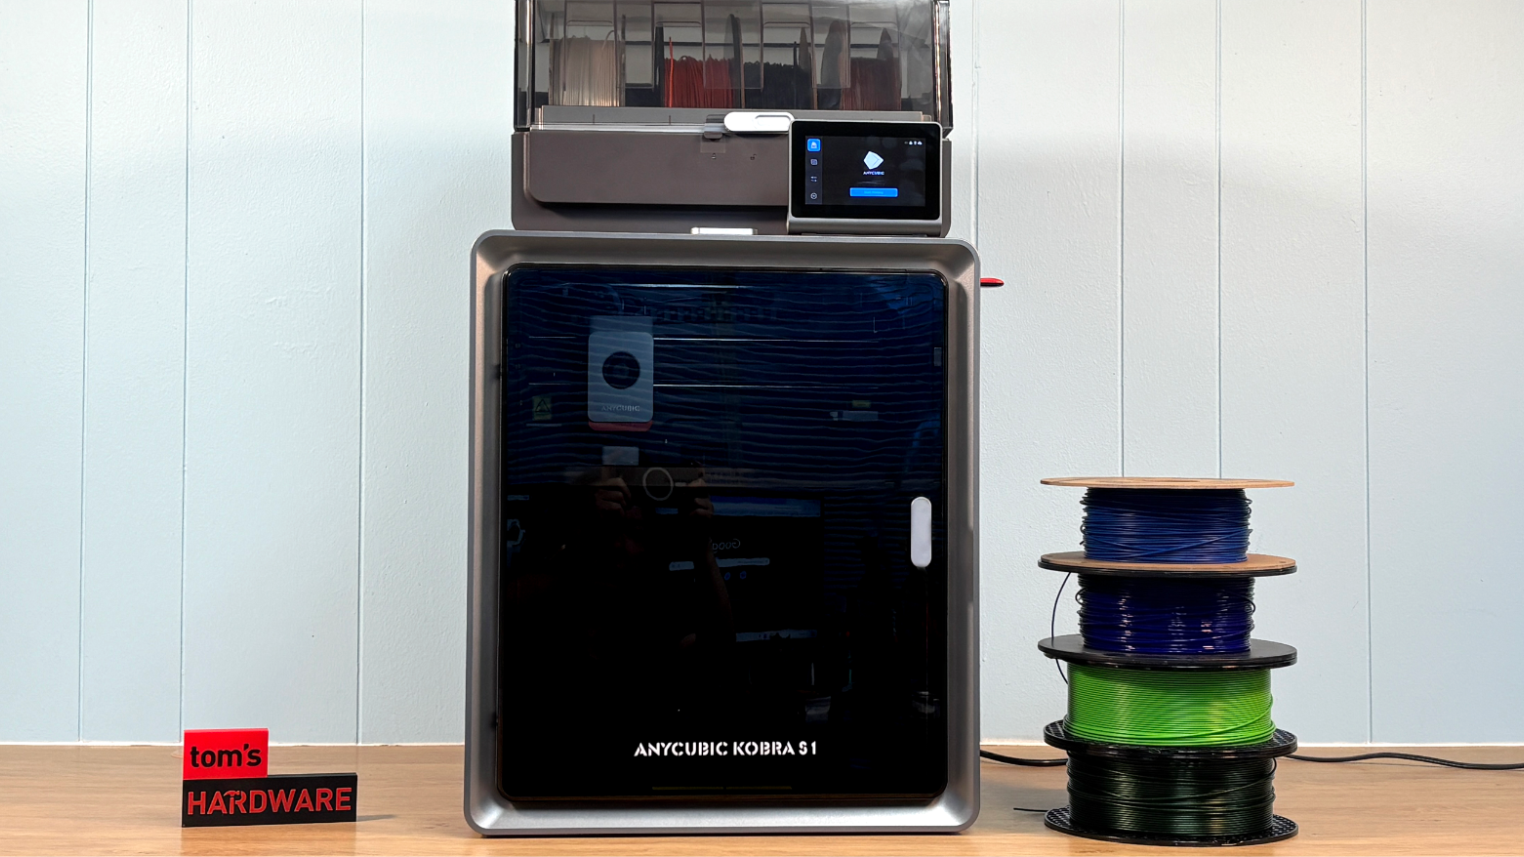
Anycubic’s first Core XY printer is, mechanically speaking, a wonderful addition to its printer lineup. Its reliability to this point compares favorably to the Bambu Lab P1P I use as my default multicolor printer. The ACE Pro is perfectly functional, but a tiny bit slow to swap filaments. These extra seconds really add up over larger prints, and I found it to be several hours slower than my Bambu Lab machine.
Having a built-in filament dryer on the ACE Pro is a nice touch that I’d love to see more often. I’m not sure if PLA needs to be dried, but running the dryer while printing and adding new filament has become my MO.
Since the ACE Pro was launched, purge waste has been a concern. Not being able to adjust it in the slicer is problematic. You probably heard this before, but this is an excellent printer, limited by the software.
The Kobra S1 Combo is currently on sale for $699, which is cheaper than the Bambu Lab P1S Combo, which is $1049 and has better purge control and faster color swaps. If you want a massive color Core XY, I’d suggest checking out the Creality K2 Plus Combo, which is currently priced at $1649. Of course, the best deal in color printing is still the Bambu Lab A1 Mini Combo, which is currently priced at $549.

Denise Bertacchi is a Contributing Writer for Tom’s Hardware US, covering 3D printing. Denise has been crafting with PCs since she discovered Print Shop had clip art on her Apple IIe. She loves reviewing 3D printers because she can mix all her passions: printing, photography, and writing.
