How To Change Your DNS Server in Windows
Get faster or more secure internet by using a third-party DNS server.
The Internet has been our window to the world for many decades now. But, as times change, we need to ensure that we stay safe online, and get the best performance possible from our equipment. So how does DNS (Domain Name Server) play a part in this? By moving away from our ISP-provided DNS server, we can gain extra features such as phishing protection, DDoS prevention and, in many cases, a welcome burst of speed.
In this how-to, we’ll guide you though changing your DNS server in Windows 10 or 11 and provide you with a list of alternative DNS providers to try out.
What is DNS?
A DNS (Domain Name System) server translates domain names into IP addresses. For example, when you navigate your browser to tomshardware.com, your request goes out to a DNS server which tells your computer to grab data from 199.232.194.114. There are many different DNS servers, and, by default, you’re likely using one that’s provided by your ISP. However, changing which DNS server you use is simple, provides additional services such as security and speed and many third-party DNS servers are free to use.
Alternative DNS Servers
The majority of users stick to the DNS server provided by their ISP. This may suit you just fine, but there are many alternative DNS services out there. The best approach is to try a few out, each having its pros and cons. Your need for greater online security may outweigh the need for blistering speed.
- Google’s Public DNS is perhaps the most famous. It claims to offer a faster browsing experience, improved security and provides search results with no redirection.
- Cisco’s OpenDNS is more focused on online safety. OpenDNS provides tools to offer content filtering and parental controls for the devices on your network.
- Cloudflare’s DNS features integrated DDoS protection and one-click DNSSEC to provide protection against DNS based attacks. Cloudflare claims that the service is the fastest in the world, with an average lookup speed of 11ms.
- Comodo Secure DNS provides a targeted service with an eye on your online security. It can block phishing attempts and various forms of malware.
| DNS Service Provider | Primary DNS | Alternative DNS | Best For |
|---|---|---|---|
| 8.8.8.8 | 8.8.4.4 | Overall performance | |
| Cisco OpenDNS | 208.67.222.222 | 208.67.220.220 | General online protection |
| Cloudflare | 1.1.1.1 | 1.0.0.1 | Speed / Performance |
| Comodo Secure DNS | 8.26.56.26 | 8.20.247.20 | Security |
How To Change Your DNS Server in Windows
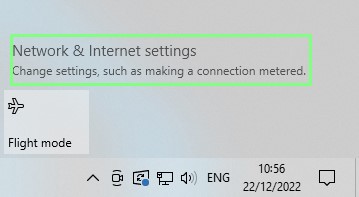
1. Left click on the Network icon (the icon that shows your Wi-Fi bars or Ethernet icon) and select Network and Internet Settings. The screen will look slightly different on Windows 11 than Windows 10.
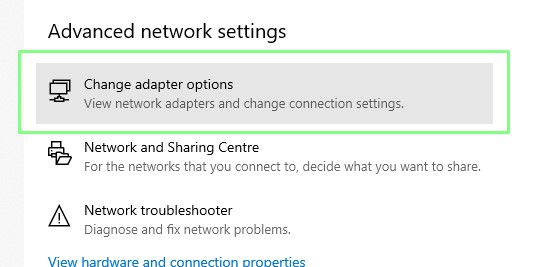
2. Click Change adapter options.
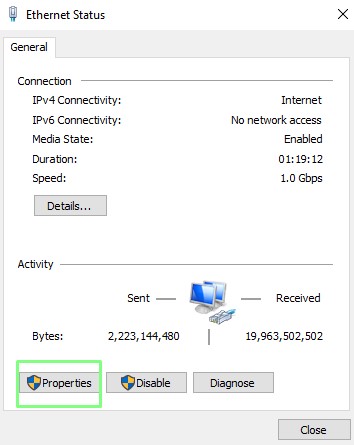
3. Double click on the Wi-Fi / Ethernet interface. In our example we just have an Ethernet connection, but yours may also have Wi-Fi.
Get Tom's Hardware's best news and in-depth reviews, straight to your inbox.
4. Select Properties.
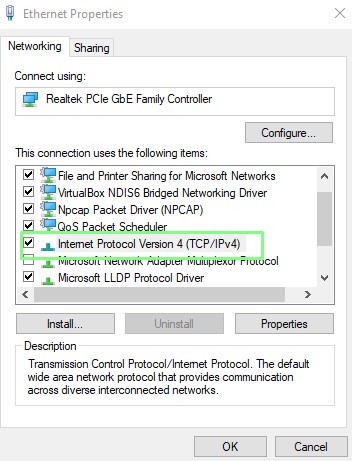
5. Double click on TCP/IPv4 line to edit its properties.
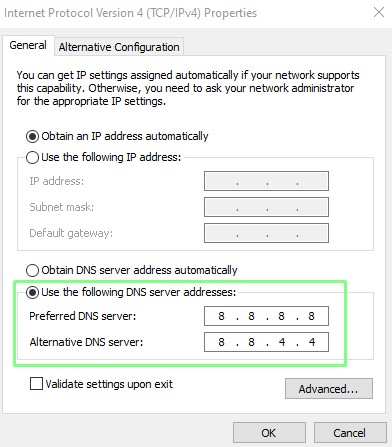
6. Set the preferred and alternative DNS server addresses and click OK to close the window. Try one of the services from the table above.
7. Click Ok and Close to close the previously opened windows. Your DNS server has been successfully changed
How To Change DNS via the Command Line
Sometimes it is necessary, or more convenient to change settings from the Command Prompt. DNS can be easily changed via the netsh (Network Shell) prompt which provides an interactive shell to make changes to wired and wireless interfaces. We’re going to use netsh to change the DNS of our Ethernet interface so that it uses Google’s Public DNS.
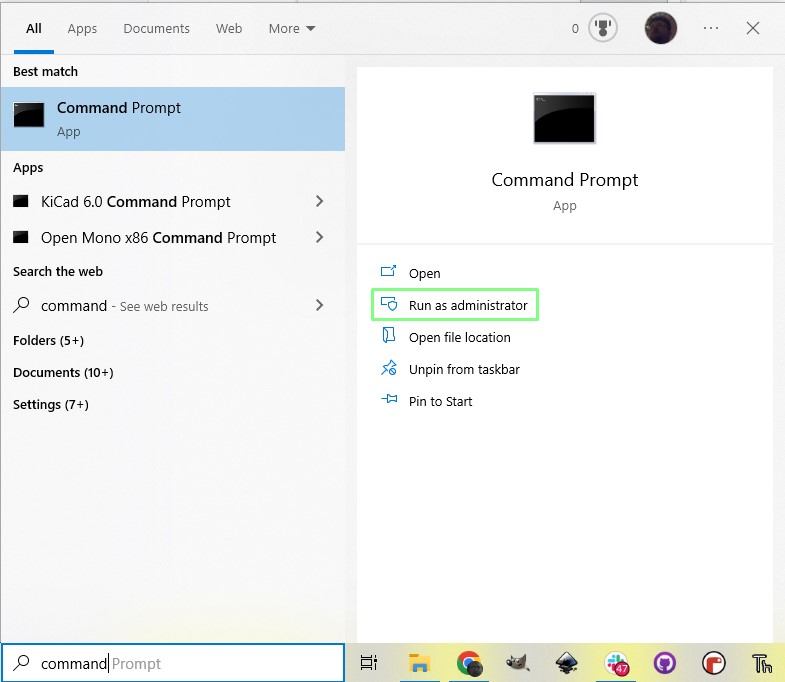
1. Open the command prompt as administrator. You can get there by searching for command prompt, right clicking and selecting “Run as administrator.”
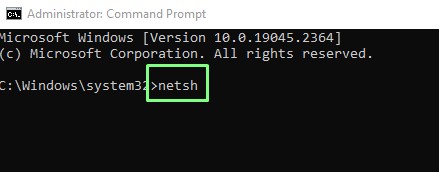
2. Use the Network Shell command, netsh to enter a prompt where the DNS can be changed.
3. List all the interfaces present by entering the following command.
interface show interface4. Use this command to set the primary DNS server for the interface. Press Enter to make the change. In our example we are setting the Ethernet interface to use the Google Public DNS.
interface ip set dns name="Ethernet" source="static" address="8.8.8.8"5. Type exit and press Enter to close the netsh session. The DNS server has now been successfully updated.

Les Pounder is an associate editor at Tom's Hardware. He is a creative technologist and for seven years has created projects to educate and inspire minds both young and old. He has worked with the Raspberry Pi Foundation to write and deliver their teacher training program "Picademy".
-
brandonjclark NameBench, DNSJumper.. tools like these can help you find the closest and fastest DNS server to use.Reply
However, I run my own DNS server on my ubuntu-based PiHole using Unbound.
Sure, it's slower on initial cache, but the security value is immense. -
digitalgriffin Good article.Reply
IPv6 also have their own DNS.
For cloudflare:
2606:4700:4700::1001
2606:4700:4700::1111 -
Protopia Fastest DNS server for many is Quad9, a Swiss public-benefit foundation which also gives some protection as it has bad sites filtered out: 9.9.9.9Reply
You can also apply a registry change to improve how DNS works when the primary server times out. The theory is that internet speeds are now much much faster on high speed broadband than on old dial up, so timeouts should be reduced to 1sec and fallback servers should be queried in parallel. I will see if I can find the precise registry tweak and post it here. -
Protopia Yes. With more and more users having internet connections which have ipv6, this article really does need to include the same details for ipv6 as for ipv4.Reply -
derekullo An even better way is to setup the dns on your router so that anyone connecting to it gets those setting as well.Reply
I've currently got the AdGuard dns setup for that at my house for my family.
They can always change that setting locally if they wanted to, but most don't know what a dns is and id rather they not click ads! -
TheOtherOne For Windows 10, easier, quicker and staying within Windows' new GUI style settingsReply
Type "Network Status" in Start/Search >> Click on "Properties" under the Ethernet (Or whatever else is there for Wireless if on wifi) >> Edit IP Settings ... And bingo!
