Cura Tree Supports: Everything You Need to Know
Generate supports that are easy to remove and use less material
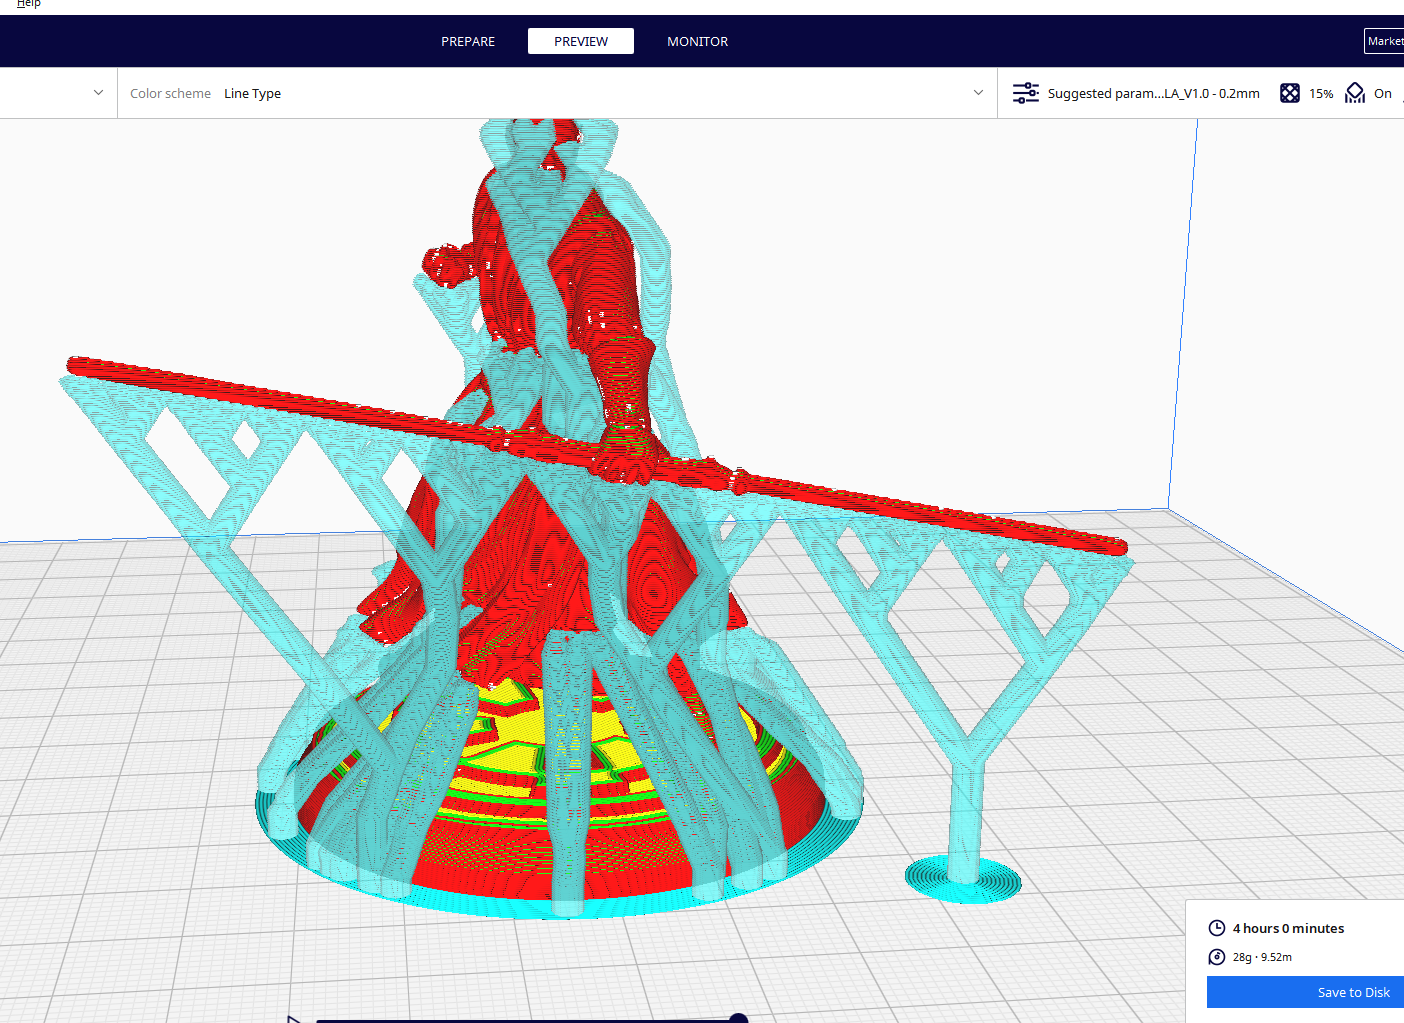
Tree supports are a type of support structure found in Cura slicer. They use less material than the normal supports and are easier to remove. Tree supports have a branching structure similar to a tree, with a main trunk and smaller branches that reach out to support the overhangs in the model. This structure makes breaking them away from the model easy, starting at the trunk and working your way out to the branches.
Also, they have fewer contact points with the model than other supports as they support the design from underneath rather than from the side, which means there is less material to remove. The main reason why they were created was to solve the issue of too many materials being used in 3D printing supports. Tree support structures have addressed this issue successfully, and the time it takes to print is drastically reduced, unlike when using the normal ones, and they also leave fewer marks on the surface of your design after you remove them.
Like in other supports, you don’t use them in all designs, only on those with overhangs and bridges that can collapse if they are not supported. The only challenge with these kinds of supports is that it takes more time to slice the model when compared to the others.
How to Activate Tree Supports
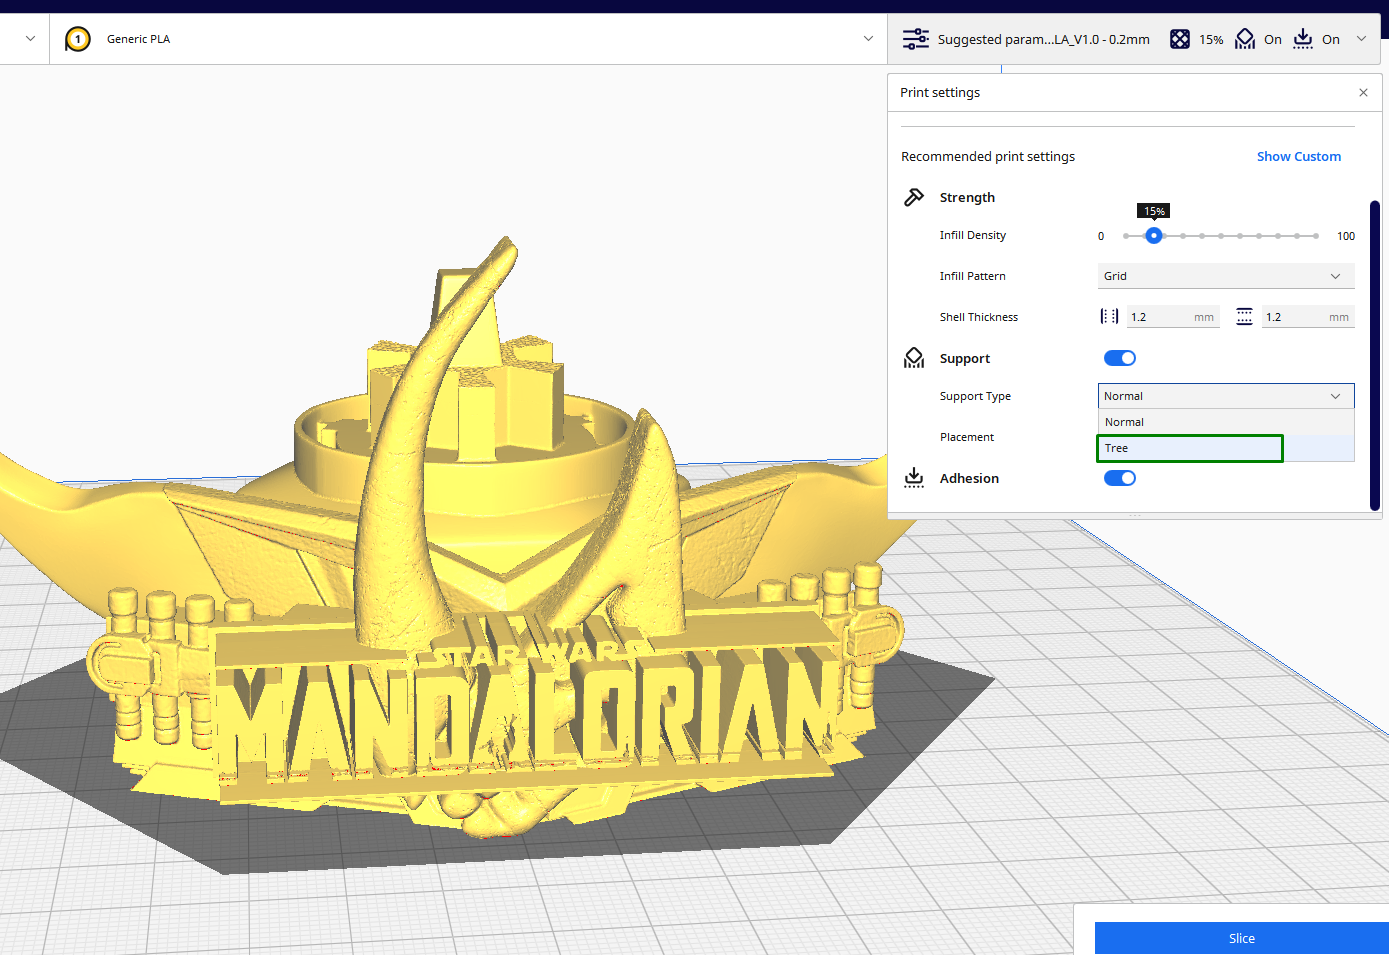
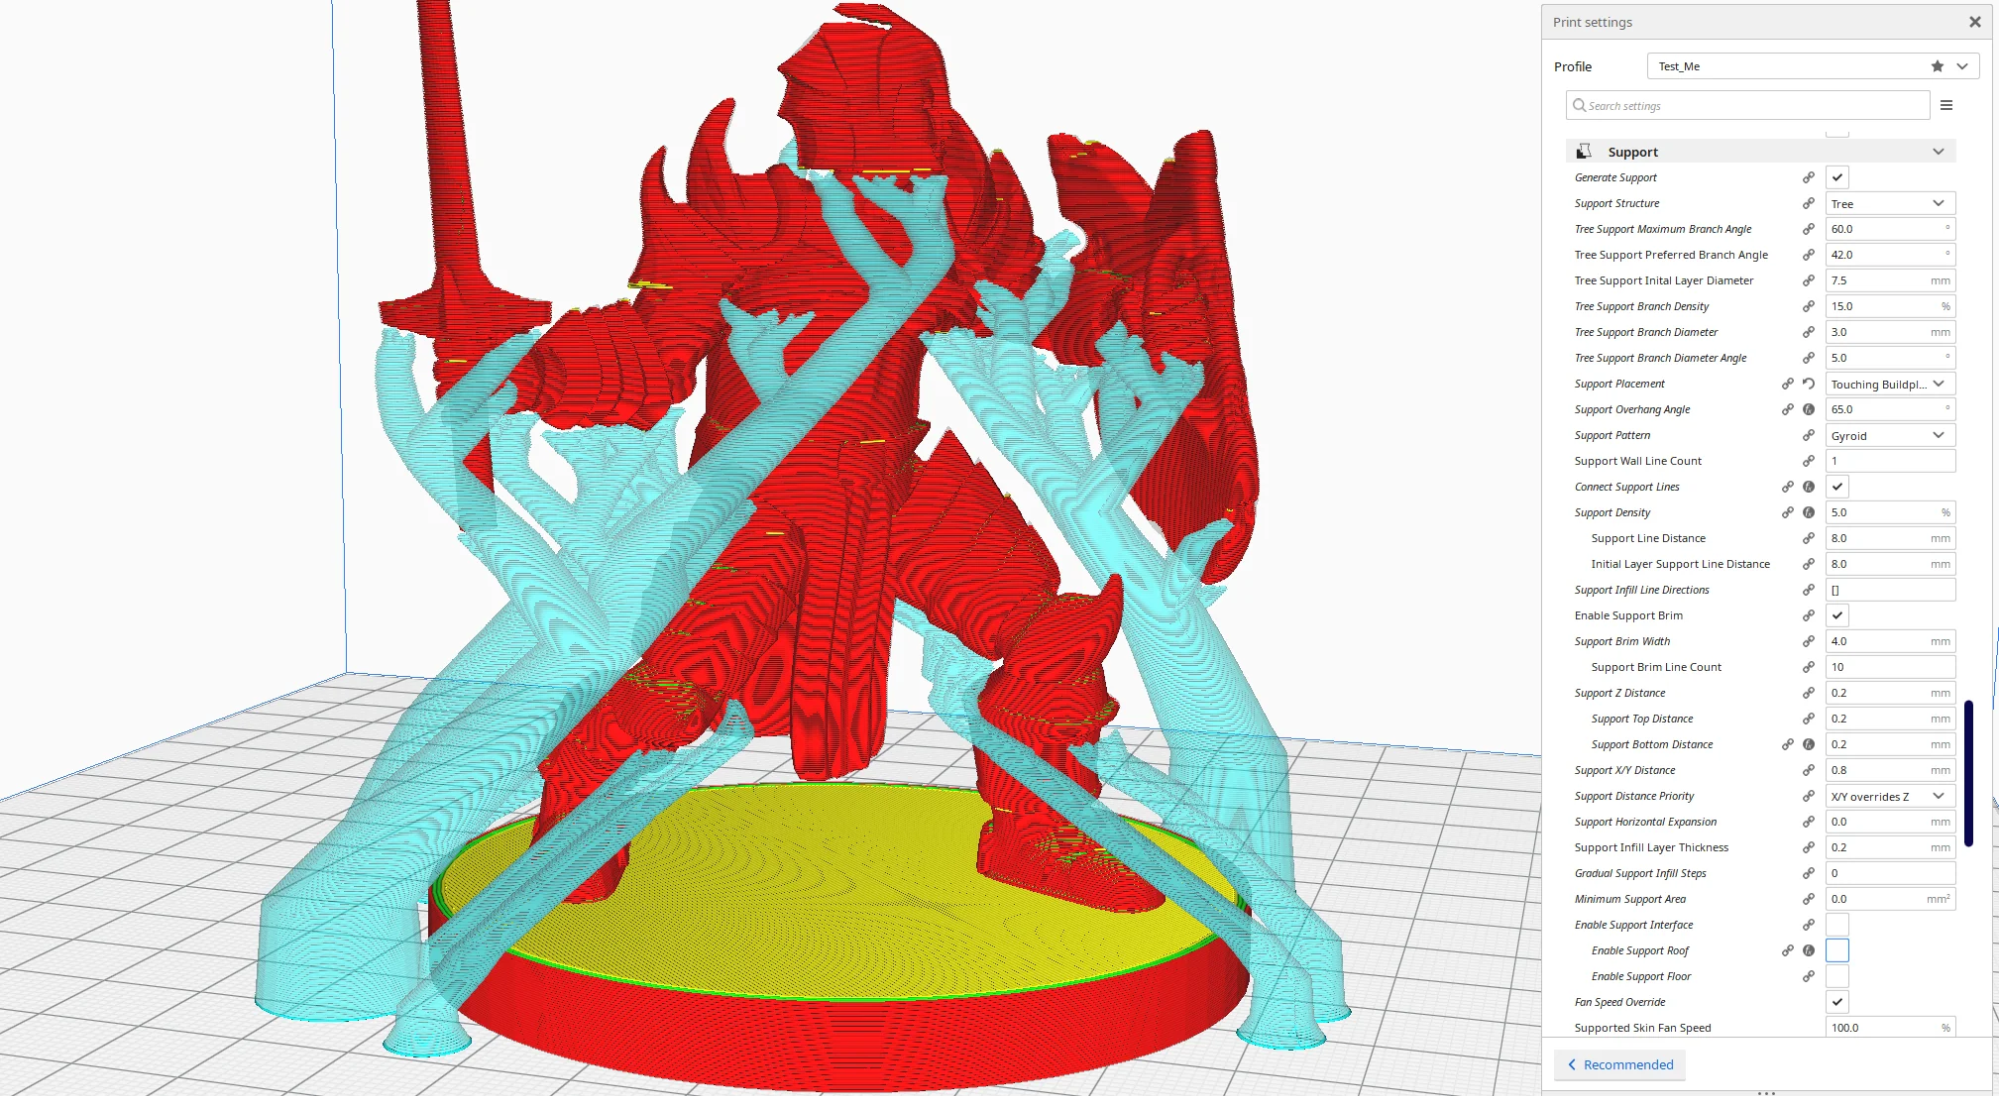
To activate tree supports, go to Support > Support Type and choose Tree from the drop-down menu.
After selecting that option, you can slice the design, then go to the preview section and see how the supports appear on the model. Just to be aware, the slicing process may take much more time than when you use other supports. This is a disadvantage in these supports, so you should not be surprised when you see the progress bar going slowly.
Cura Tree Support Settings
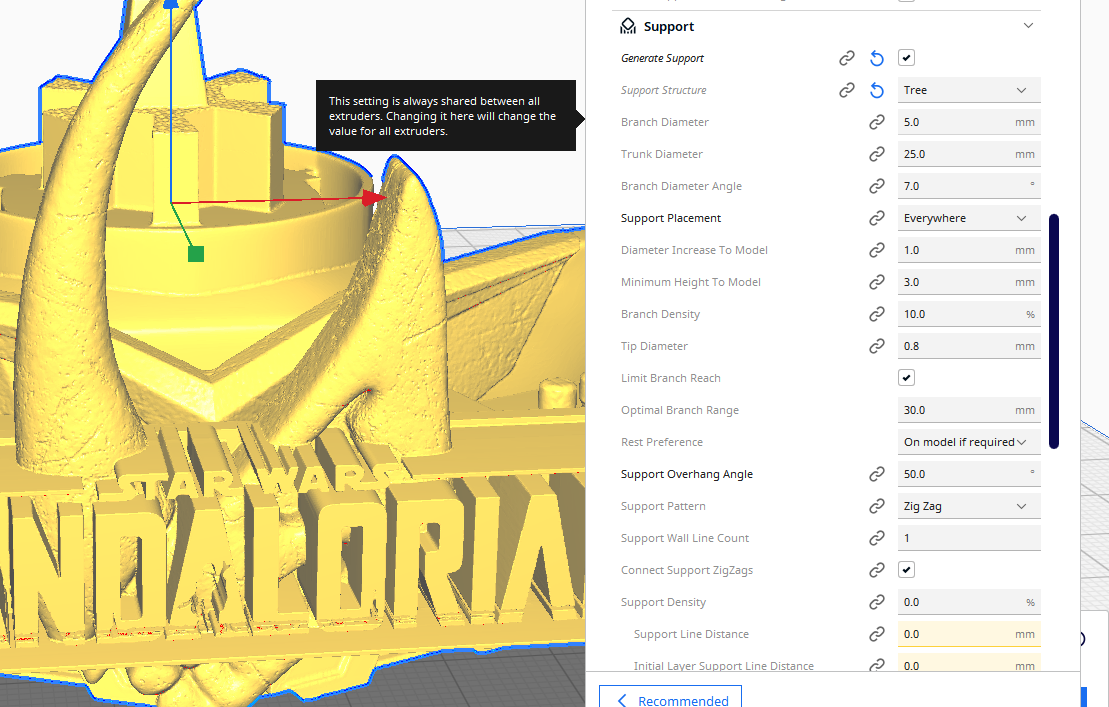
When you activate these supports, you can work with the default settings as they can give you the desired results. However, sometimes you need to tweak them to fit your specific design, and below are the key settings you can change.
- Support placement: There are two options here: Touching Build Plate and Everywhere. When you choose touching build plate, the supports will start from the build plate upwards and won’t touch anywhere else in the model, only on the sections it supports. Choosing everywhere means they will touch everywhere.
- Branch diameter: This controls the thickness of the tree branches. A thicker branch diameter will create stronger supports, though it uses more material. Cura's default branch diameter setting can be between 2-5mm, which is a good starting point for most models.
However, you may need to adjust it depending on the complexity of your model. You can use a smaller branch diameter setting for models with simple overhangs and bridges to further reduce the material used. But you should remember that thinner branches may be less stable. For designs with complex overhangs and bridges, you may need to use a larger branch diameter setting to create stronger supports to support the weight of the overhangs and bridges.
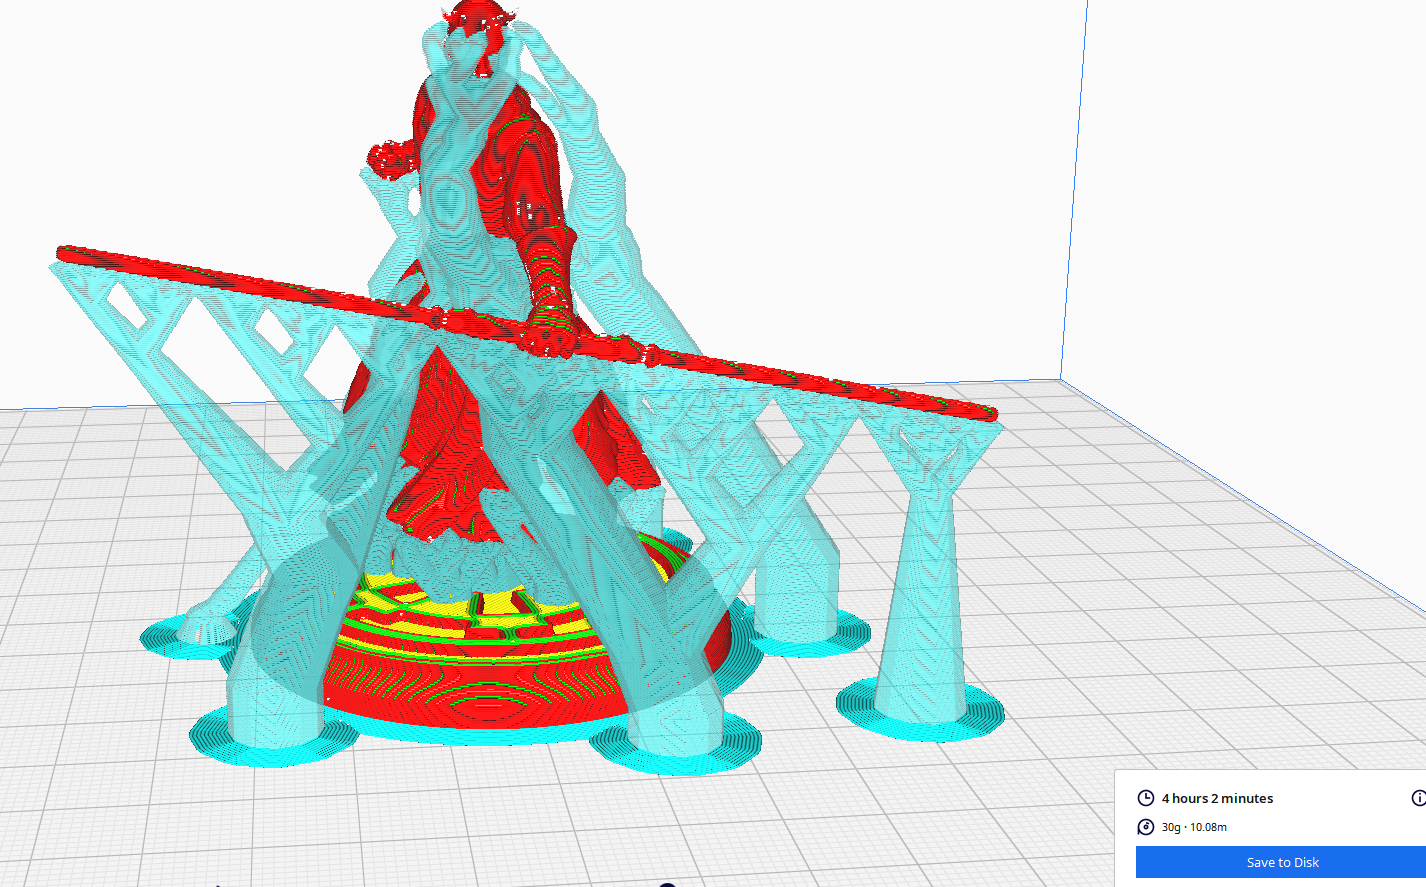
Even though this will increase the size of the material you use, but it will be worth it as it ensures that your design is supported well. To experiment which is suitable for your specific design, you can start with the default setting and then adjust it accordingly based on your 3D model. - Trunk diameter: This determines the diameter of the main support structure or the main central column that resembles the trunk of a tree, from which thinner branches extend to support overhanging parts of your 3D print. Just like in branch diameter, increasing the size of the trunk diameter will ensure that your design is sturdy but will increase the size of the material you use.
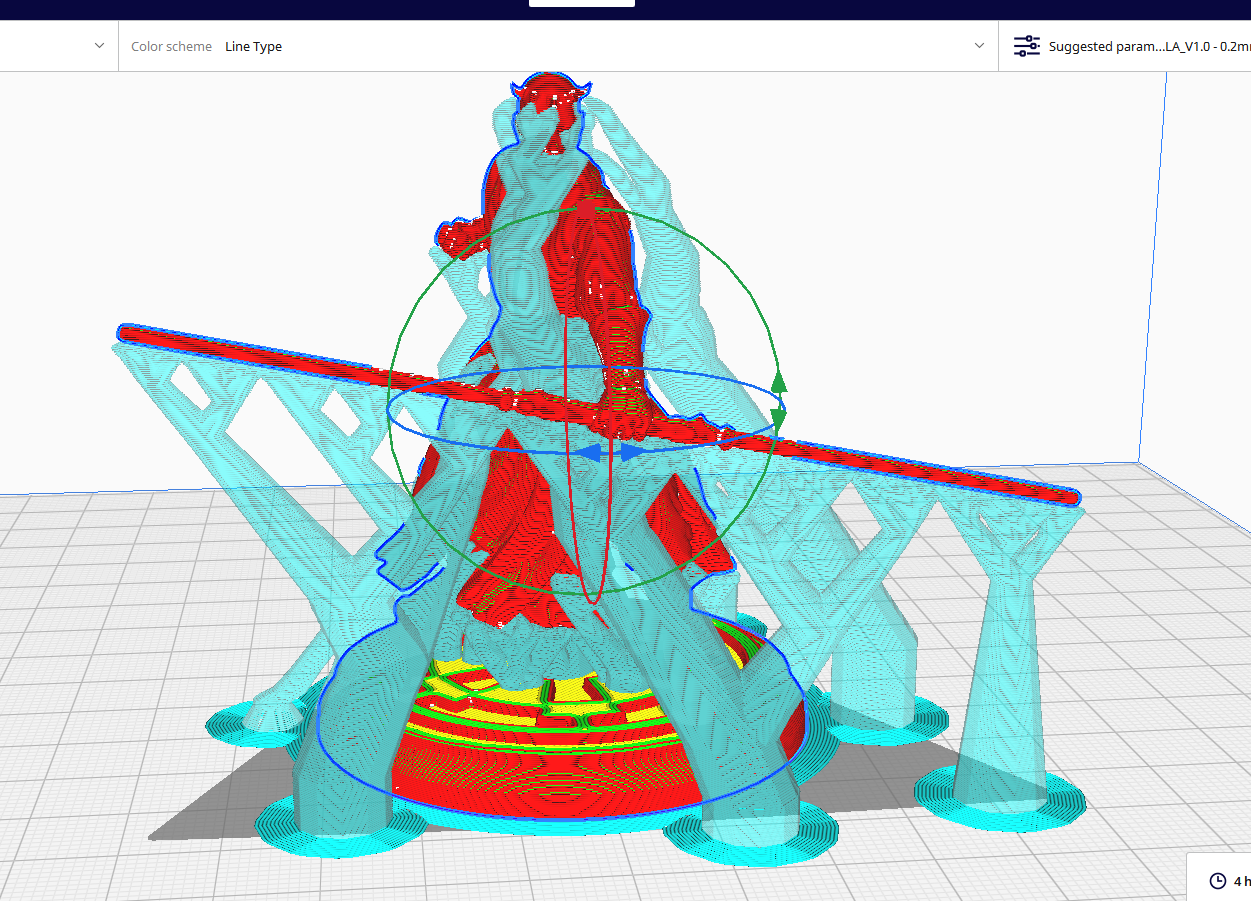
Before choosing to increase or reduce the size, you should know what’s more important to you, whether stability or material usage. In the figure below, I used a trunk diameter of 10. It looks stronger.
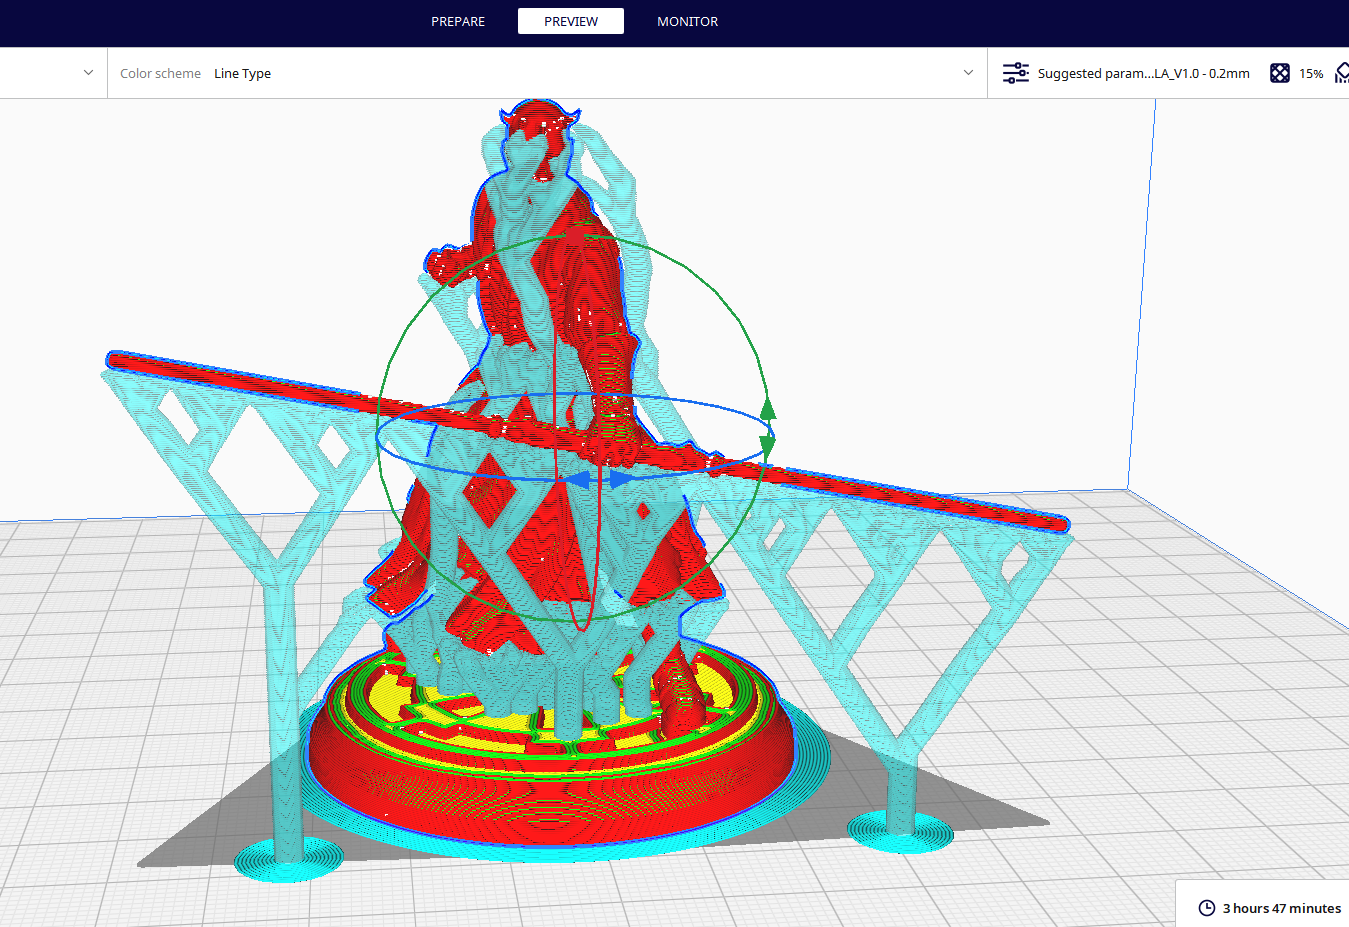
After reducing them to 3, this is how they appear.
Get Tom's Hardware's best news and in-depth reviews, straight to your inbox.
As you can see, there is a big difference and the time and material used reduces drastically too.
- Branch diameter angle: It determines the angle of the branches’ diameter as they become thicker towards the bottom. A branch diameter angle of 0 means that the branches will maintain a constant diameter, while a higher one will result in branches that have wider bases but are thin at the tips, providing more stability. You can adjust it depending on the structure of your design until you find the ideal one for your design. An angle of 3 to 5 is good for standard overhangs.
- Support branch angle: This unique tree support setting determines the maximum angle at which tree supports will be 3D printed. A lower angle will create steeper branches that are more stable, while a higher angle will create branches that can reach further but are less stable.
- Tip diameter: A smaller tip diameter will create thinner and more delicate supports, while a larger tip diameter will create thicker and more robust supports. You can use the default value or adjust it depending on your design.
When to Use Tree Supports
You can use tree supports in all your designs that have overhangs; however, they are much recommended when:
1. When 3D Printing Characters
3D printing miniatures and other characters with FDM is always challenging, and resin 3D printers are usually used as they handle these complex structures well. But in FDM, these supports are the best. Tree supports are suitable for these designs as they are easier to remove than traditional supports, which can be challenging to remove, especially inside the delicate structures of the character without breaking some parts.
This is because they have fewer contact points with the model, and they break away easily. In addition to that, tree supports don’t leave much visible marks on the designs after removal, and this ensures that your characters come out clean.
2. Material and Time Efficiency
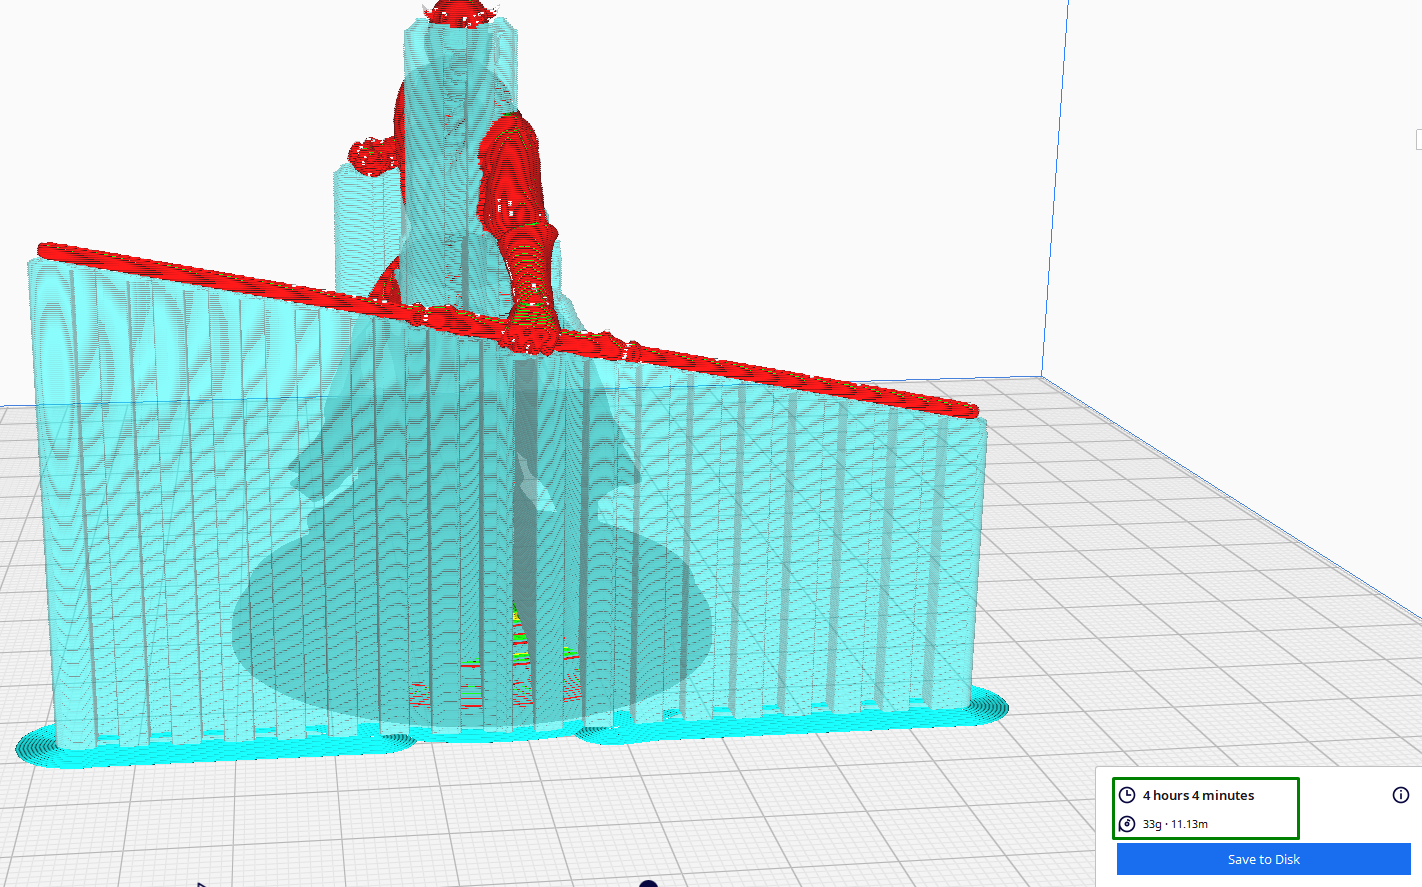
Tree supports use less material when compared to other supports because they only attach and support where needed, that is, under overhanging sections and complex features of the 3D model. This sparse placement reduces the overall volume and number of support materials you use. Also, because they have a tree-like structure, the branches are thin and have less volume, unlike other normal supports, in which the whole structure has the same volume. In addition, they take less time to 3D print as compared to the others, even though it takes more time to slice. For example, the design below using tree supports will use around 10m of material.
When using general supports and with the same settings, it uses around 11m.
3. Efficient Removal and Improved Surface Finish
No one likes the difficult task of removing supports, especially in areas that are hard to reach. With tree supports, the removal process is easier as you only hold the branch-like structures and snap them away. They are also less densely packed than normal supports. So, if you have 3D prints that have the tendency of supports appearing on areas that are difficult to remove, you can choose these supports.
Related Tutorials
MORE: How to Use Ultimaker Cura to Prepare Designs for 3D Printing
MORE: How to Use Cura Vase Mode
Sammy Ekaran is a freelancer writer for Tom's Hardware. He specializes in writing about 3D printing tutorials and guides. You can find more of his work on various publications, including Makeuseof, All3dp, and 3Dsourced.
