How to Use Ultimaker Cura to Prepare Designs for 3D Printing
The most popular slicer has lots of functionality.
Get Tom's Hardware's best news and in-depth reviews, straight to your inbox.
You are now subscribed
Your newsletter sign-up was successful
If you have been into 3D printing for a while, chances are high that you might have heard of or come across Cura, as it’s one of the most popular 3D slicing software available. Even if you have not tried it yet, we'll guide you through starting from downloading and installation, exploring its various tools and features, including 3D slicing and generating the G-code to send to your 3D printer, installing plugins, and finally, how you can update and backup your settings and profiles.
Downloading and Installing Cura
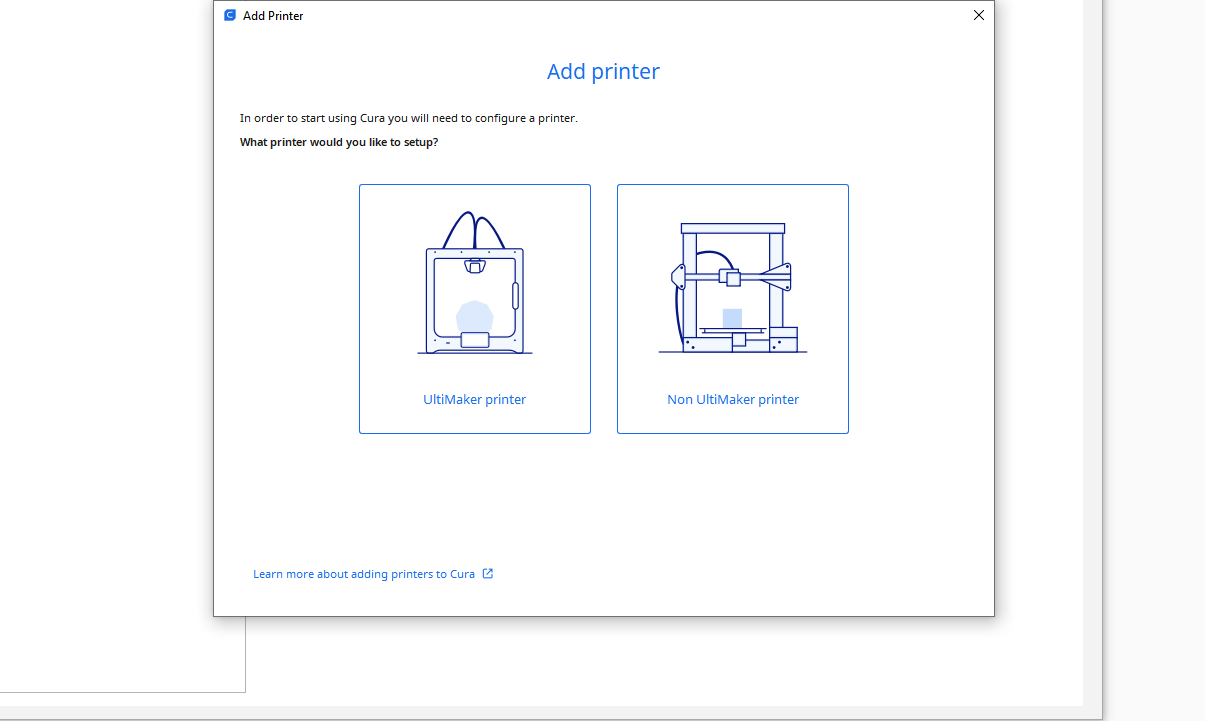
Go to the Ultimaker website and download either for Windows, Mac, or Linux. Once you download, launch it, and you will see an option to configure the software for your 3D printer. In the window that launches, you will choose whether you are using an Ultimaker 3D printer or not.
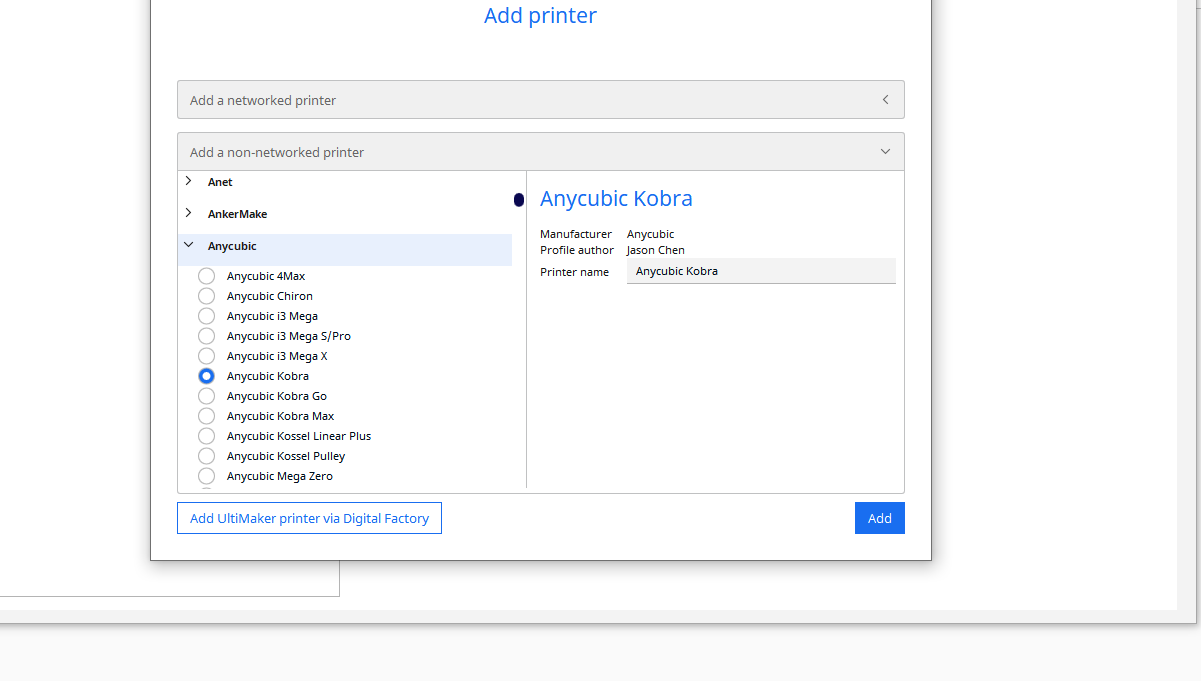
Because I am not using one, I chose Non Ultimaker printer, and there will be another window that will launch where you can choose to add a 3D printer on the network or one not in the network. In my case, I didn’t have a machine on the network, so I chose non-networked and a list of 3D printer launched, as shown below.
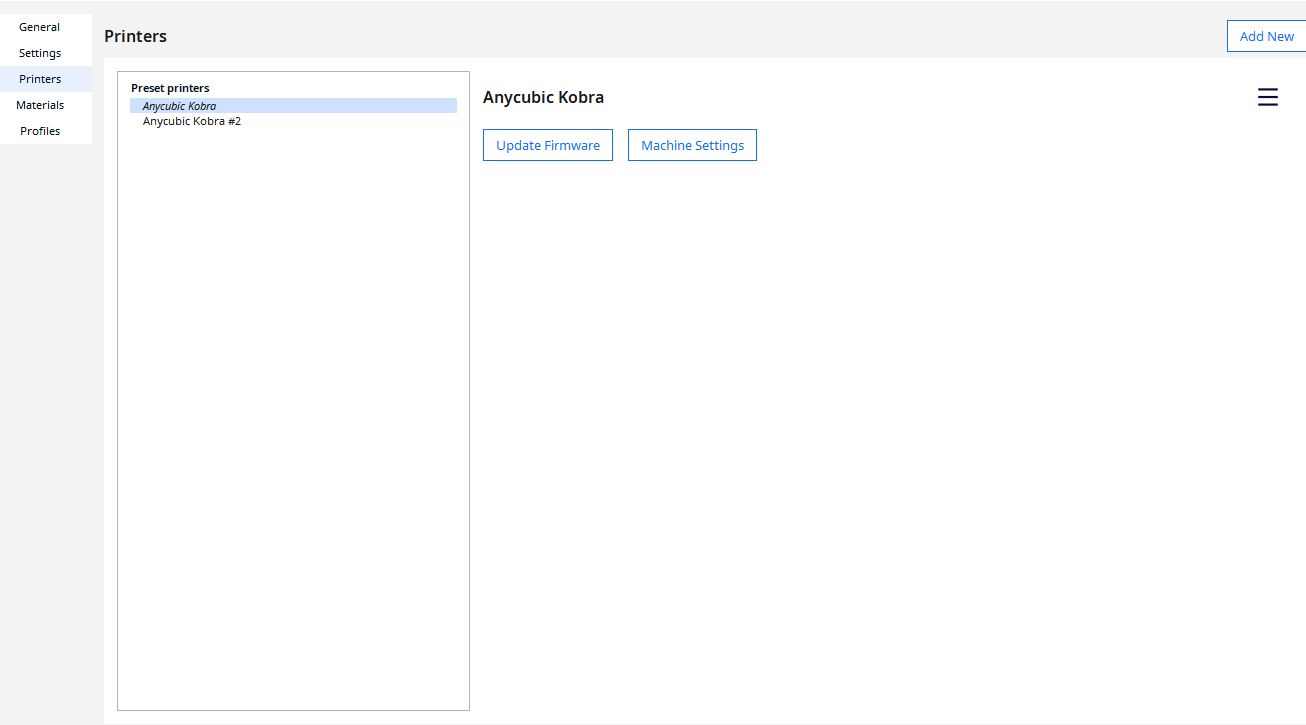
Once you select your machine, click Add, and you will see a window similar to the one below.
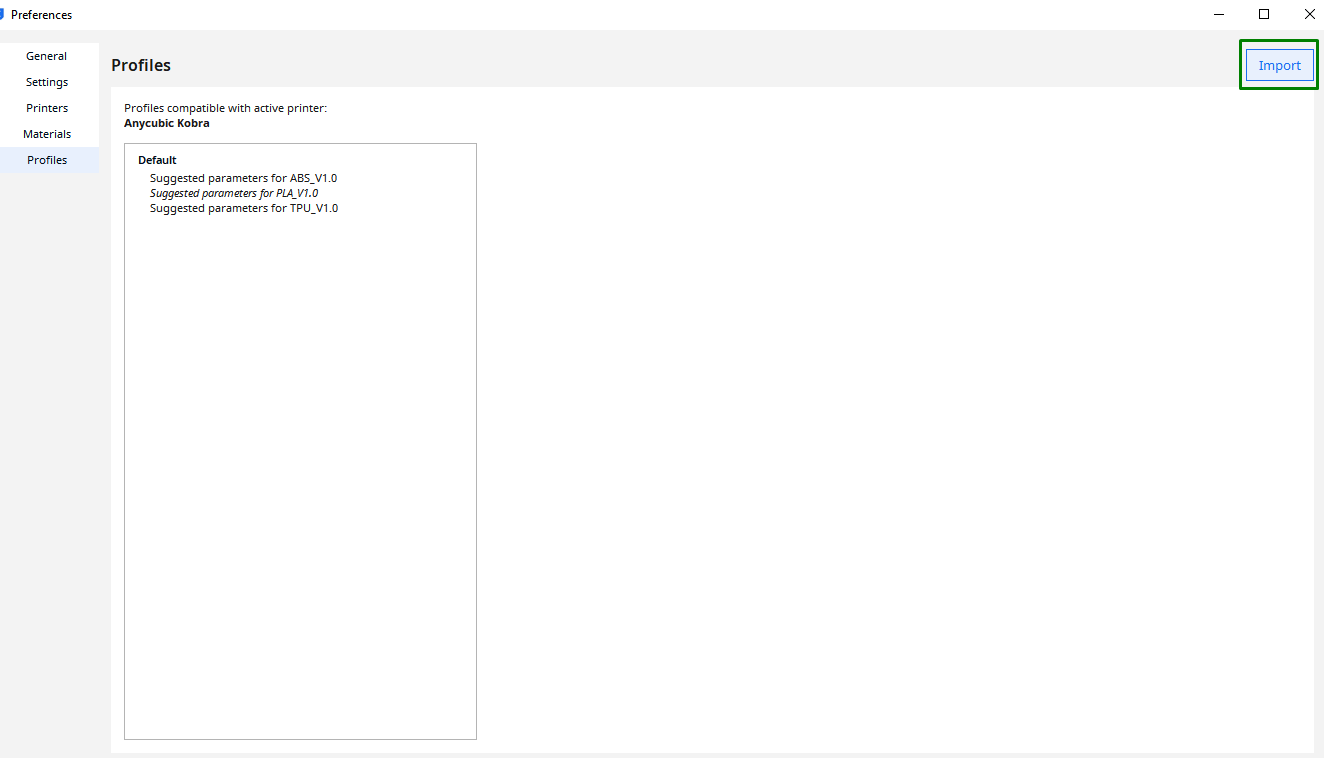
You can then add profiles and set the appropriate settings for your machine. If you don’t know the proper settings, select the Import option in the interface's top-right section.
You can then proceed to the interface of the software.
Get Tom's Hardware's best news and in-depth reviews, straight to your inbox.
Understanding the Interface and Tools of the Software
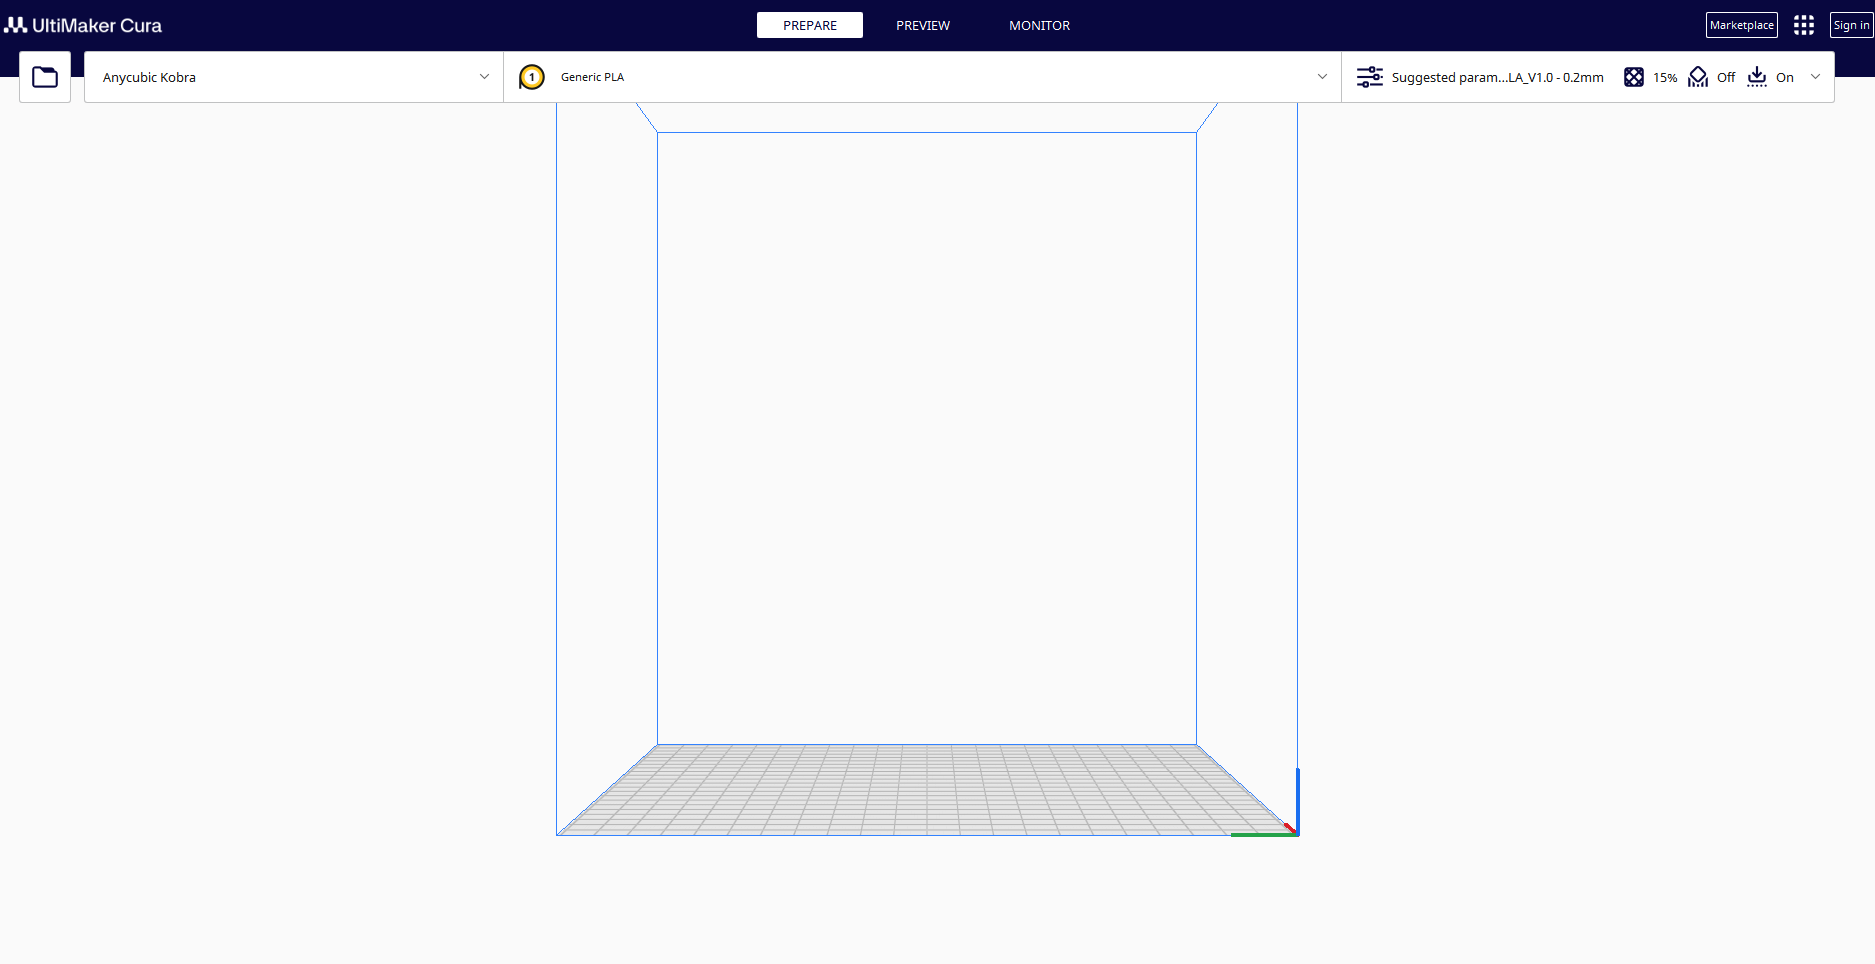
When you launch the software, you will be greeted with an intuitive interface, and on top, there is a menu bar where you can find an option to create a new project, open files, and recent projects, and even an option to export your files after you finish working on them. You can also find settings for your extruder and 3D printer and an option to configure the software.
Just below the menu bar, there is a folder icon that, when you click, gives you the option to import your files. The software supports the most common 3D file formats like STL, OBJ, 3MF, DAE, and G-code. In the middle section of the interface, you will see PREPARE, which is the default option. As the name suggests, it’s the option to select when preparing your file for 3D printing. The PREVIEW option, besides PREPARE, is the option for previewing your file and seeing how it will be 3D printed in real-time. The third option is MONITOR, which allows you to monitor your 3D printer remotely. For this option to work, you need to have connected your 3D printer to your computer and the software.
The right-hand sidebar consists of multiple tabs that allow you to customize various settings for your print, like material, infill, quality, shell, and supports.
Having looked at the overview, let’s now look at how to import and modify your files in the software.
Importing and Adjusting 3D Models in Cura
Go to File > Open File(s) and locate where your file is stored to import to the software.
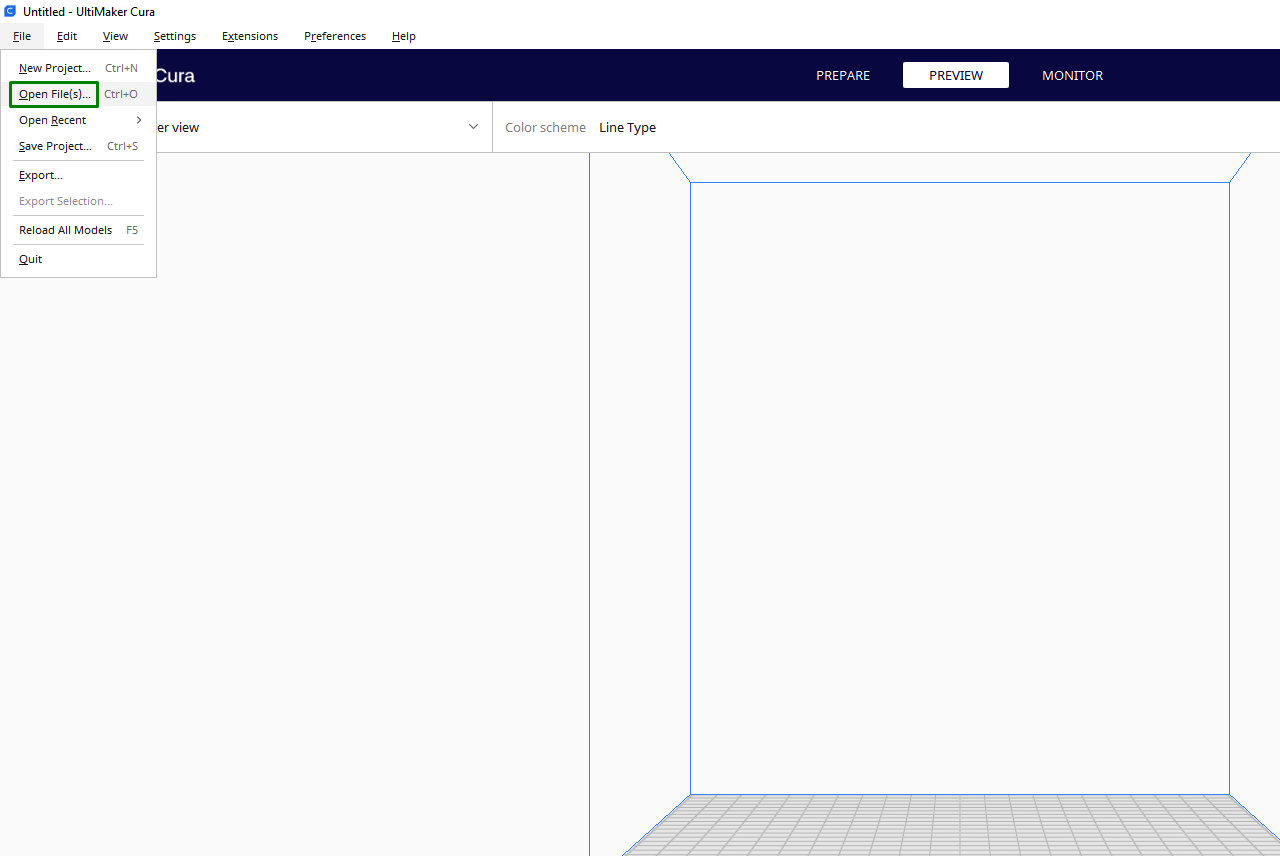
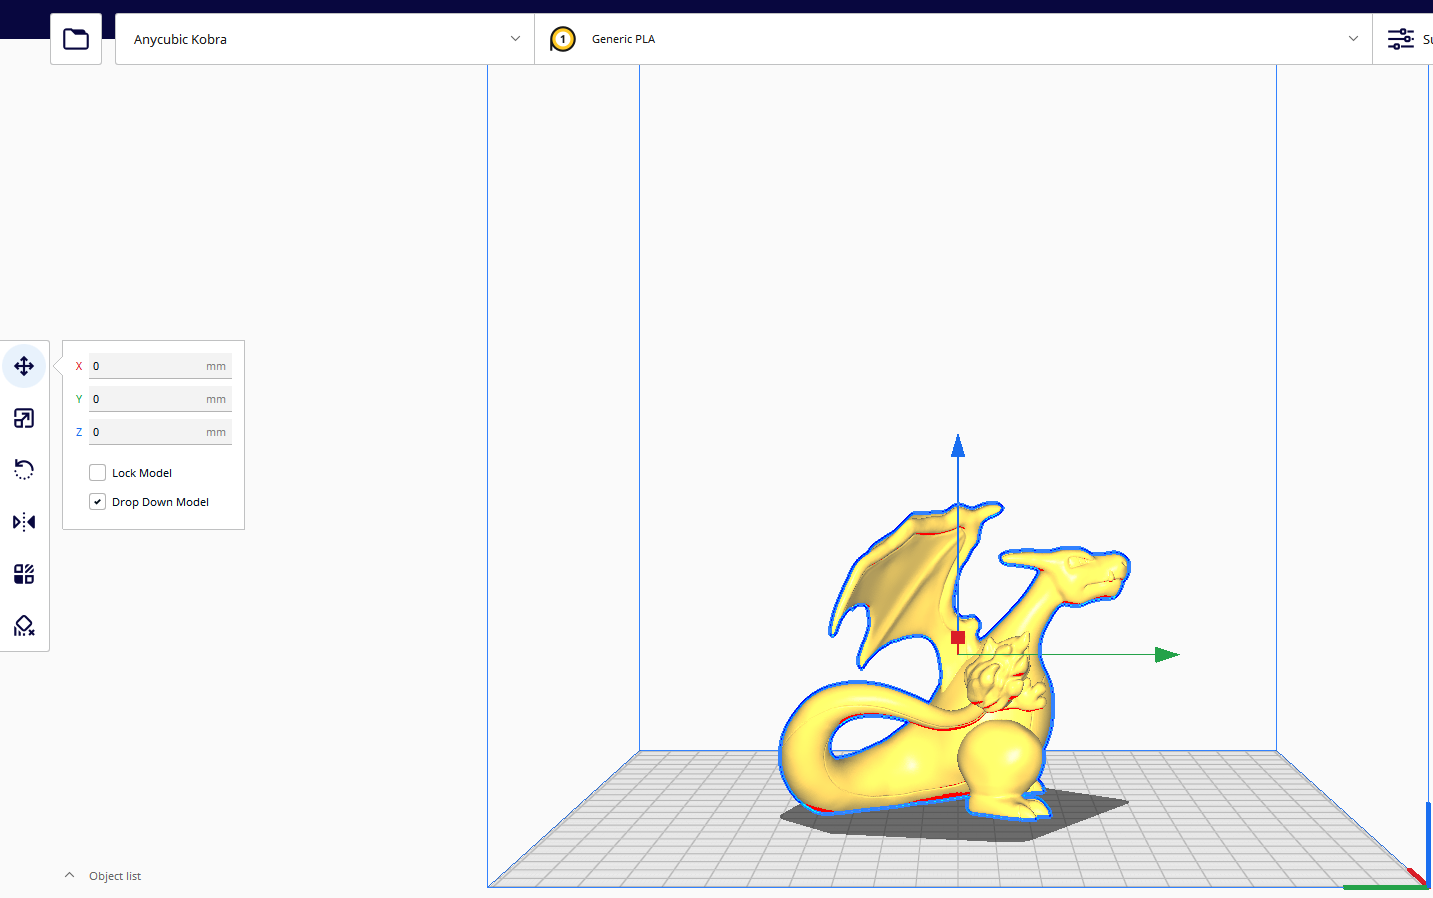
After importing the model, you will see tools appearing on the left-middle section of the interface.
On the top option is the move tool, which, when you select it, you will see arrows appearing on the model that you can use to move your design around the workspace. You can also move it by specifying the X, Y, and Z values.
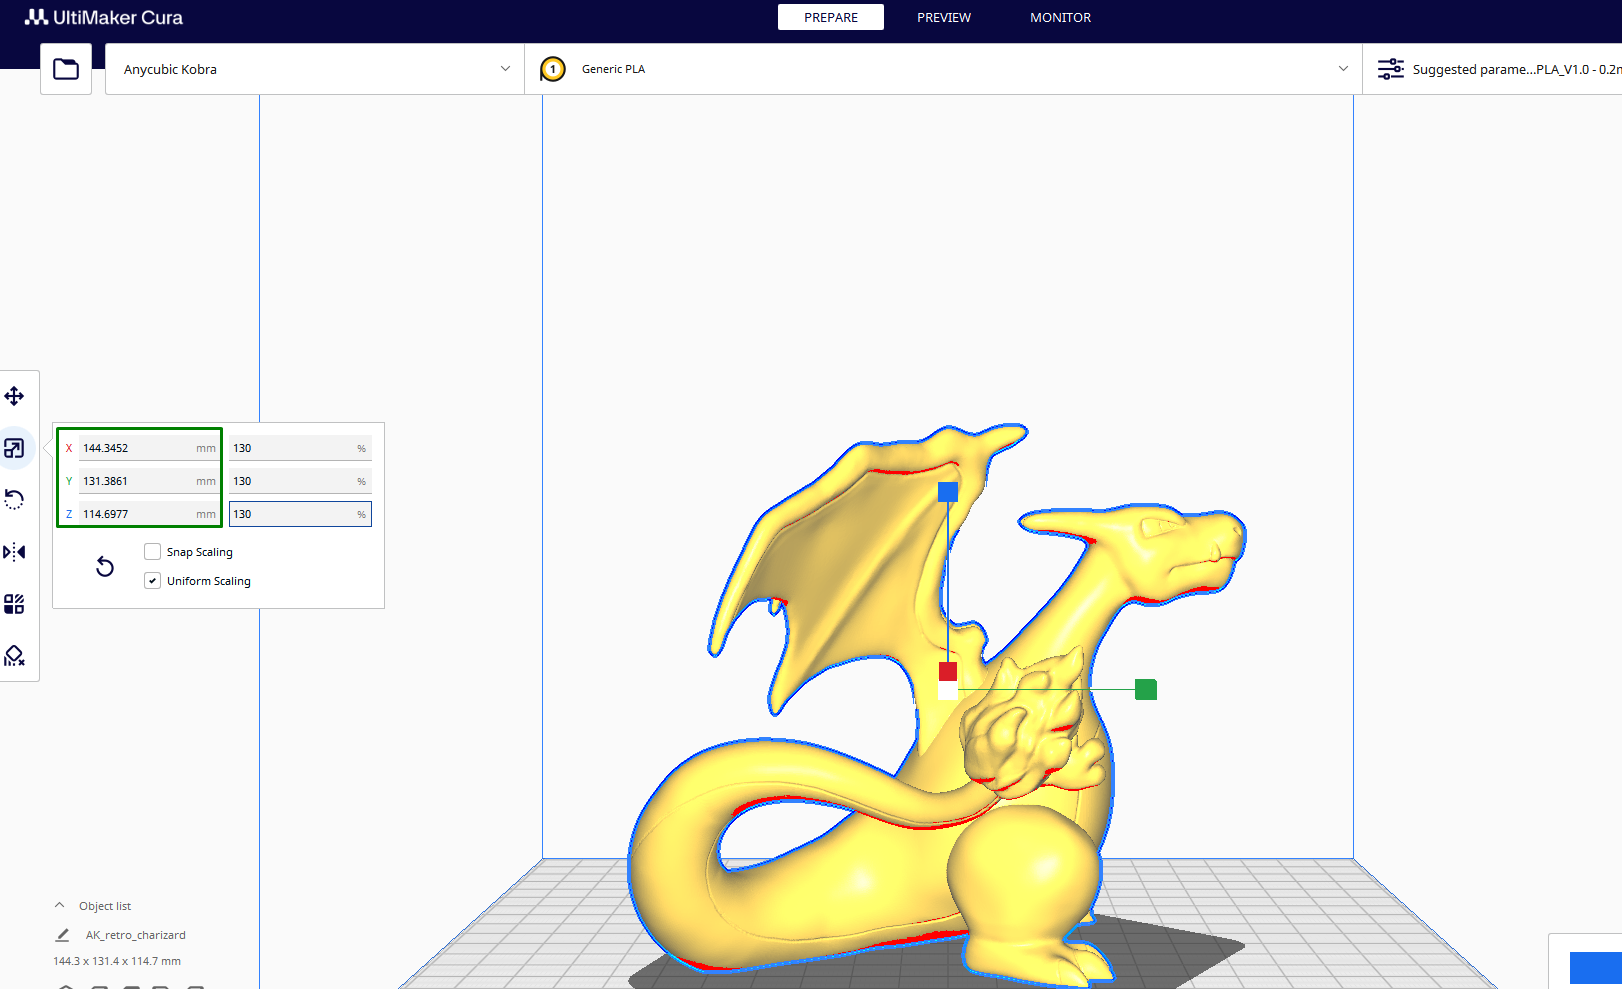
Below the move tool, you will see the scale option, which you can use to scale your design. Just like in the move tool, you can use the points appearing on the design to scale the design based on your needs. Another way to scale the model is by specifying X, Y, and Z settings. For example, I just scaled the model below by adjusting the values.
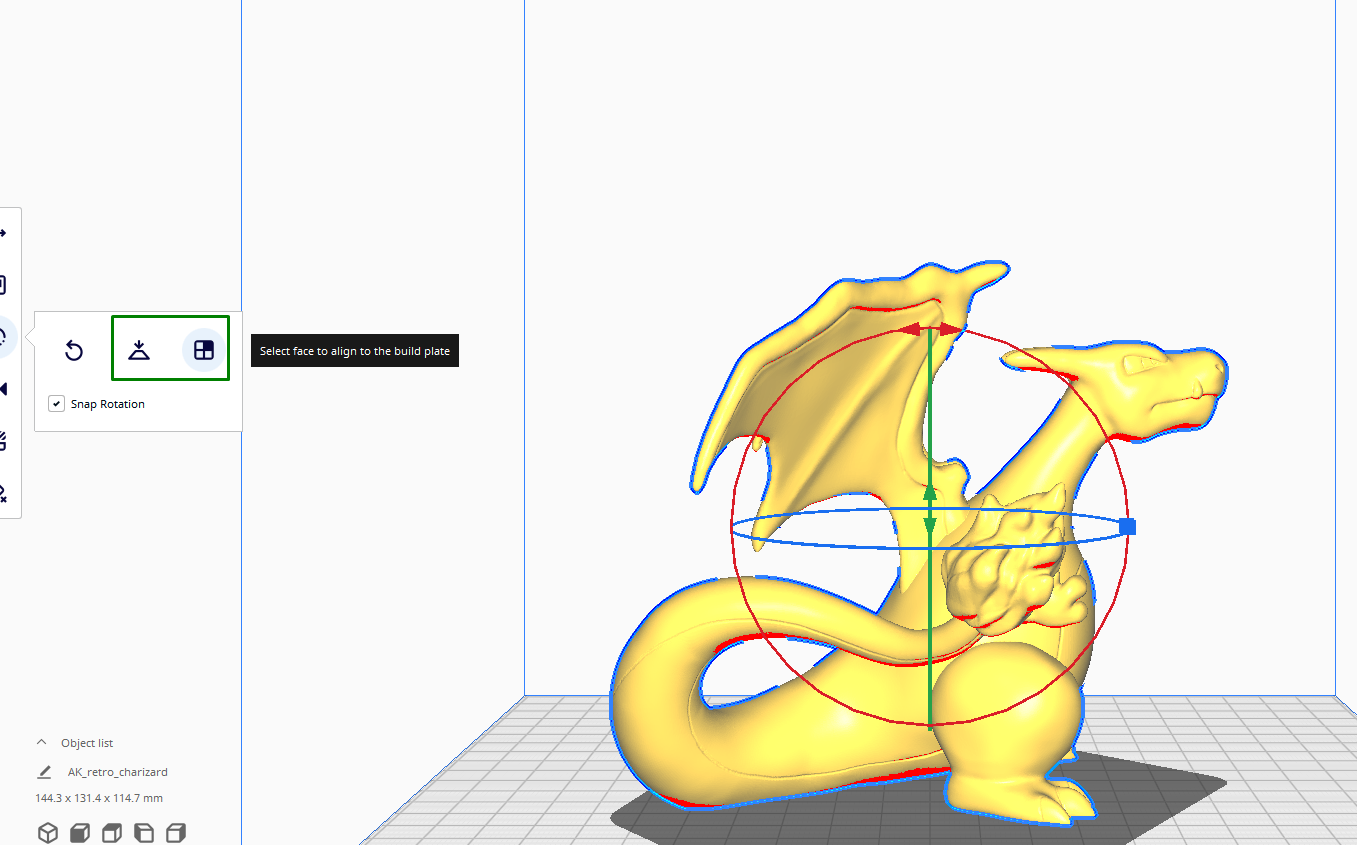
The next tool that follows is rotation, which allows you to rotate your design on the XYZ axis. You can move the circular arrows formed around the model to change the angles. There is also an option to make the model lay flat or align the face to the build plate by selecting the icons on the left, as shown below.
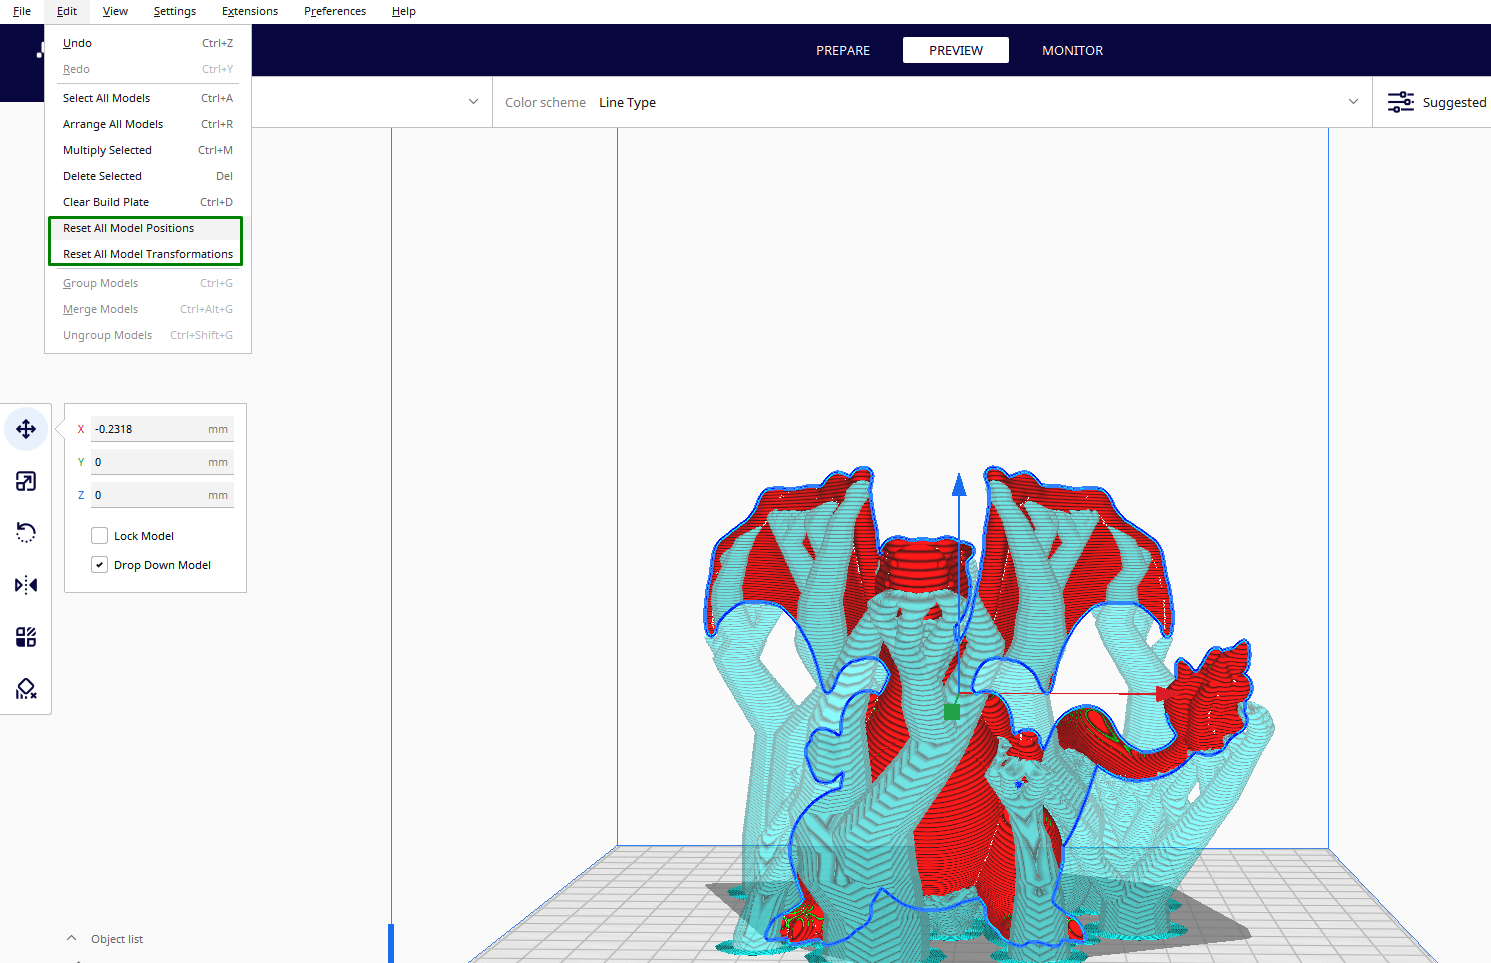
The mirror option below rotation allows you to mirror the object in X, Y, or Z axis, depending on the desired effect. This creates a new instance of the model that is a mirrored copy of the original. The mirrored version will have the same shape and dimensions as the original but will be flipped in the selected axis. You can also restore the transformation and orientation to their default state by selecting them in the Edit section.
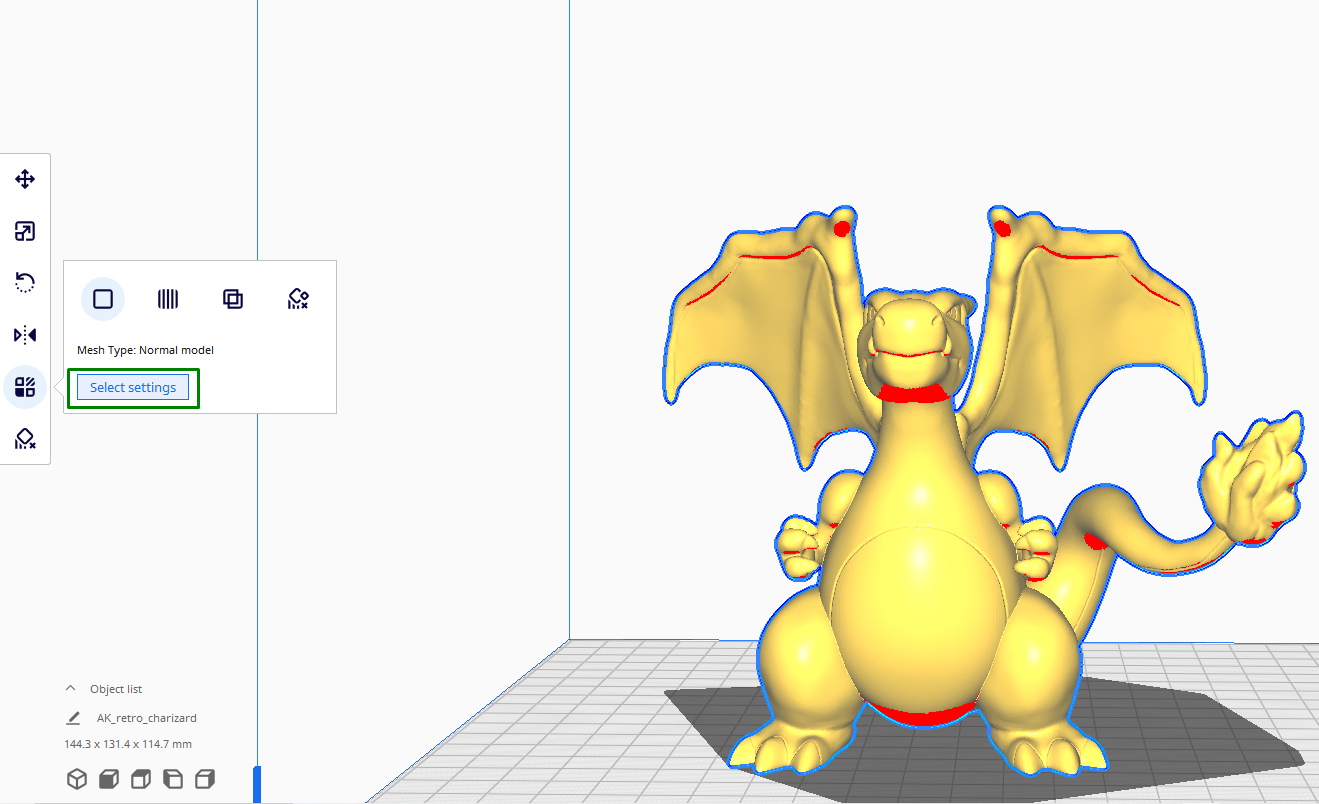
The next feature is the Per Model Settings which allow you to apply specific settings to individual models. In addition to the few settings displayed when you click it, you can launch more settings by clicking select settings.
You can customize various settings like layer height, print speed, temperature, infill density, support settings, and more on a per-model basis.
3D Slicing in Cura
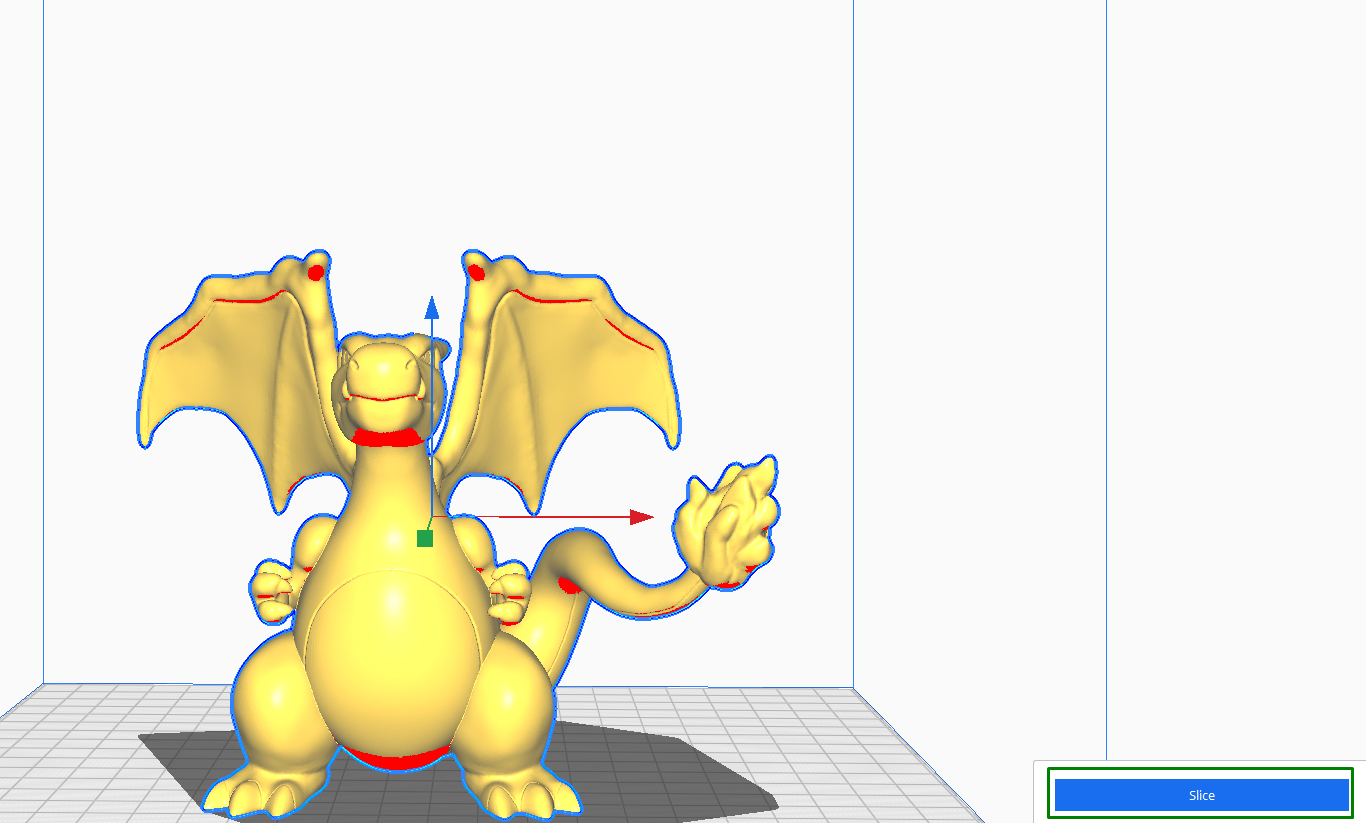
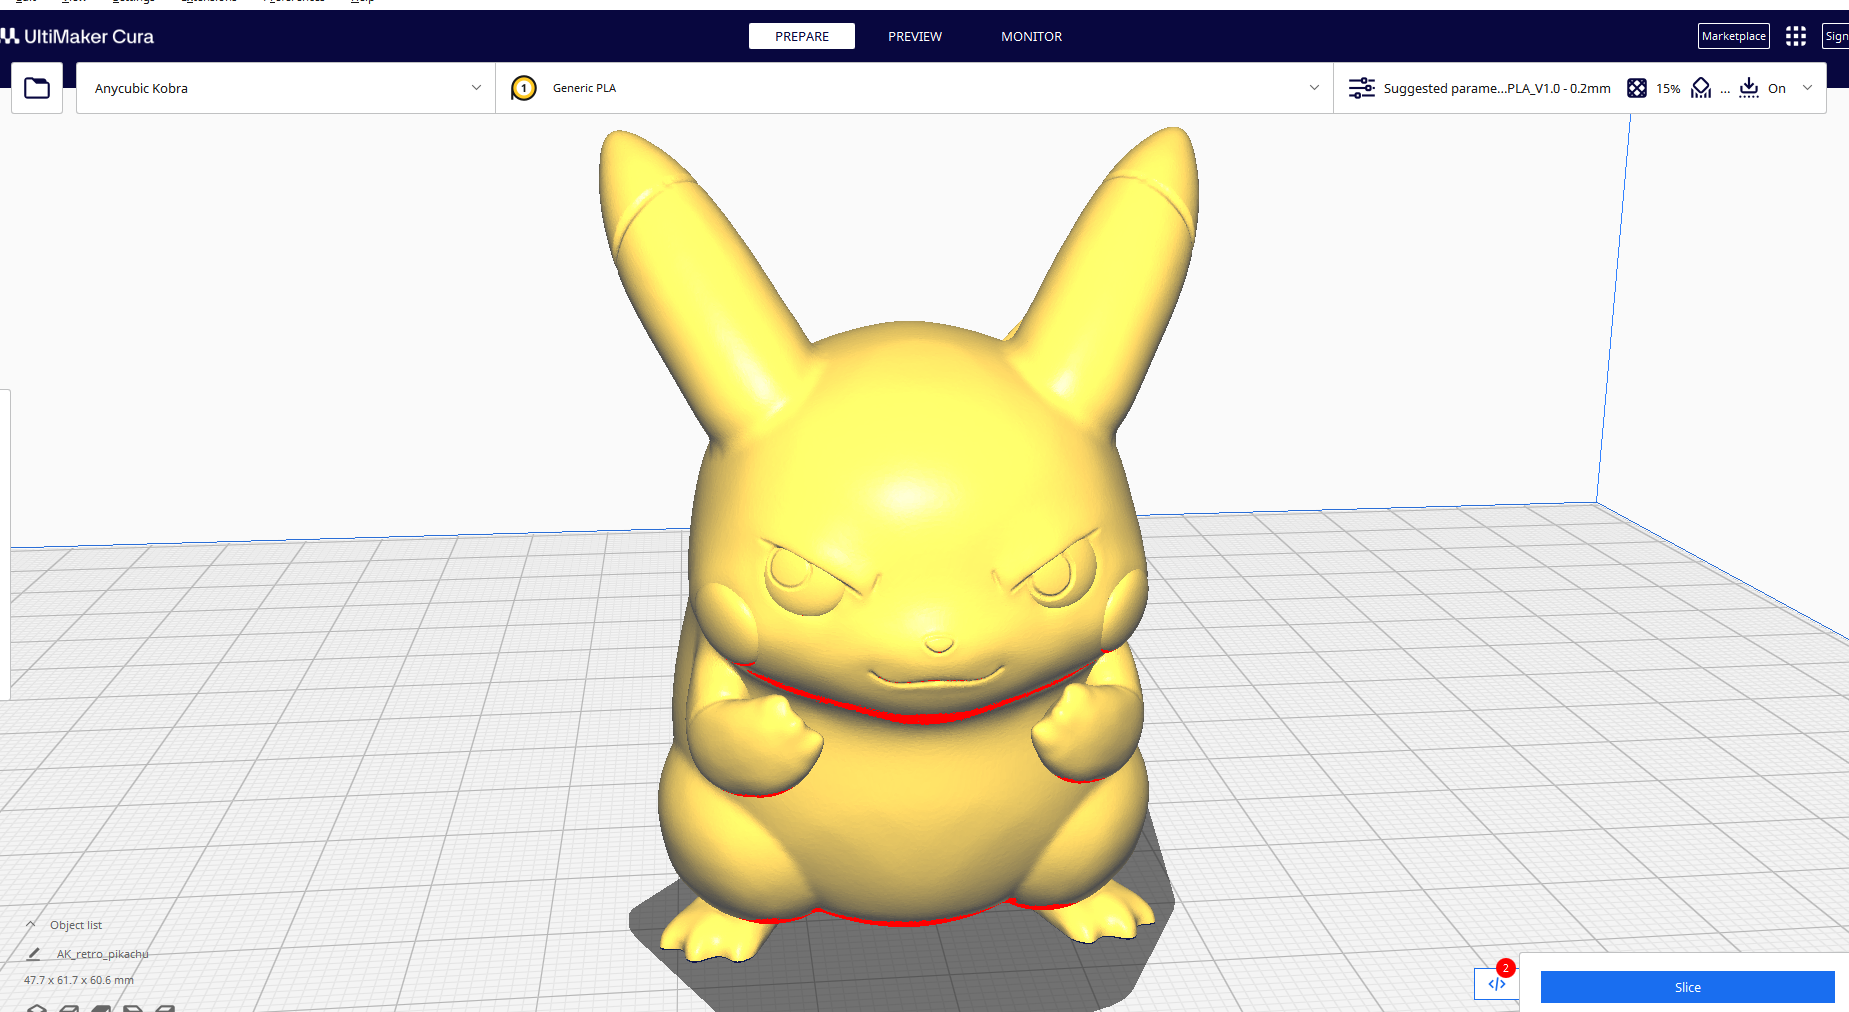
To slice your design, click the Slice option in the right-bottom section of the interface.
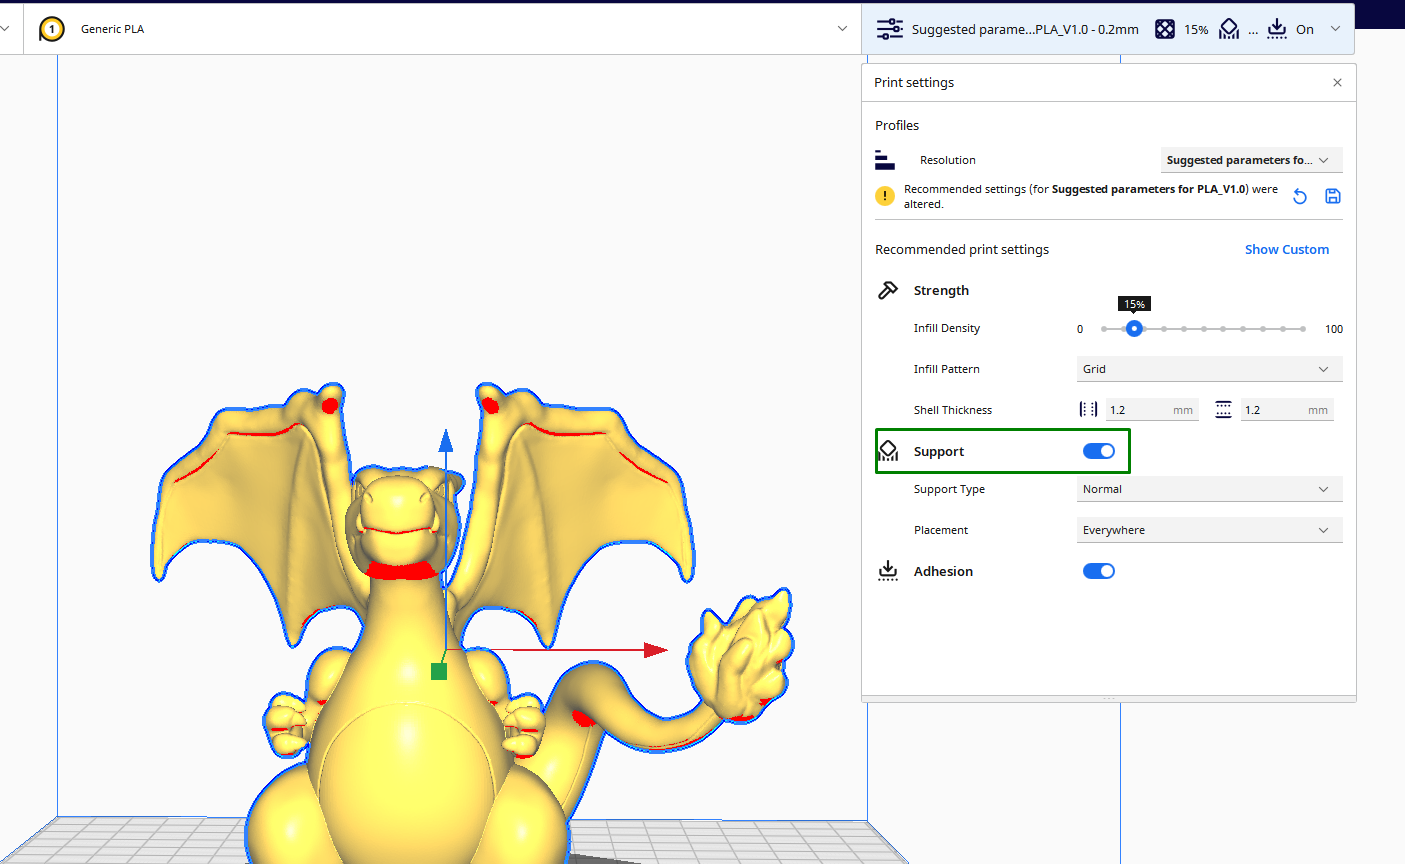
However, before you do that, you must apply all the settings appropriate for the design, material, and your 3D printer. You can find the settings in the top left section of the interface. For example, the above design needs supports as there are overhangs. I will simply activate Support in the settings.
There is also an option to choose the type of supports and where to place them. Other necessary settings that you need to adjust according to your 3D model, printer, and material you are using are:
- Infill density, pattern, and shell settings: Infill density determines the thickness of the internal structure. The infill pattern determines how the interior of the 3D print is filled, whether grid, triangles, lines, cubic and many others. On the other hand, Shell thickness settings determine the number of solid layers printed around the outer surface of your object.
- Layer height: As the name suggests, this setting determines the thickness of each layer being 3D printed.
- Wall settings: This setting determines the number of shells or walls around your design, affecting its strength and appearance.
- Materials: When you click it, you will see an option to adjust the printing and build plate temperatures. You can set this based on the material you are using.
- Speed: This setting controls the speed at which the printer's nozzle moves during printing.
- Travel settings: When selected, you will see an option to enable retraction, which tells the filament to retract from the nozzle as it moves from one non-printed part to the other.
- Cooling: This is useful in controlling the rate at which the extruder cools down the filament as it is being printed to ensure that all layers of the 3D print are adequately cooled.
- Build plate adhesion: You can choose between various adhesion methods like a skirt, brim, raft, or none.
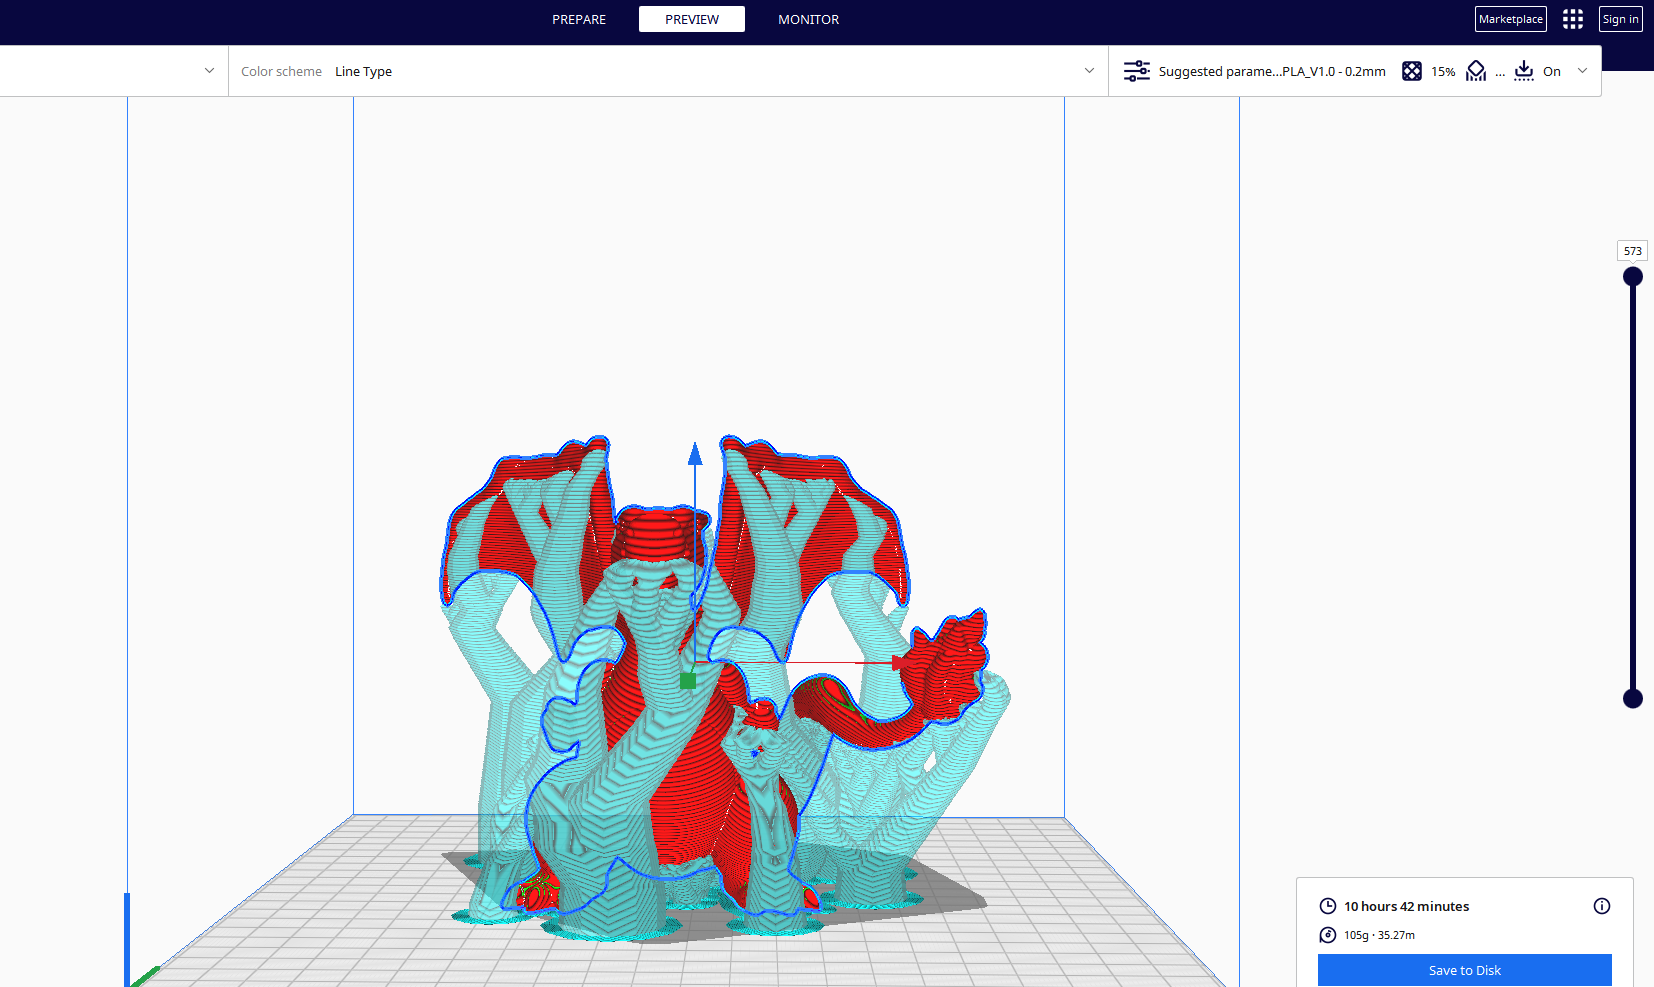
After applying the settings, click Slice and then go to the PREVIEW section to see what your design looks like.
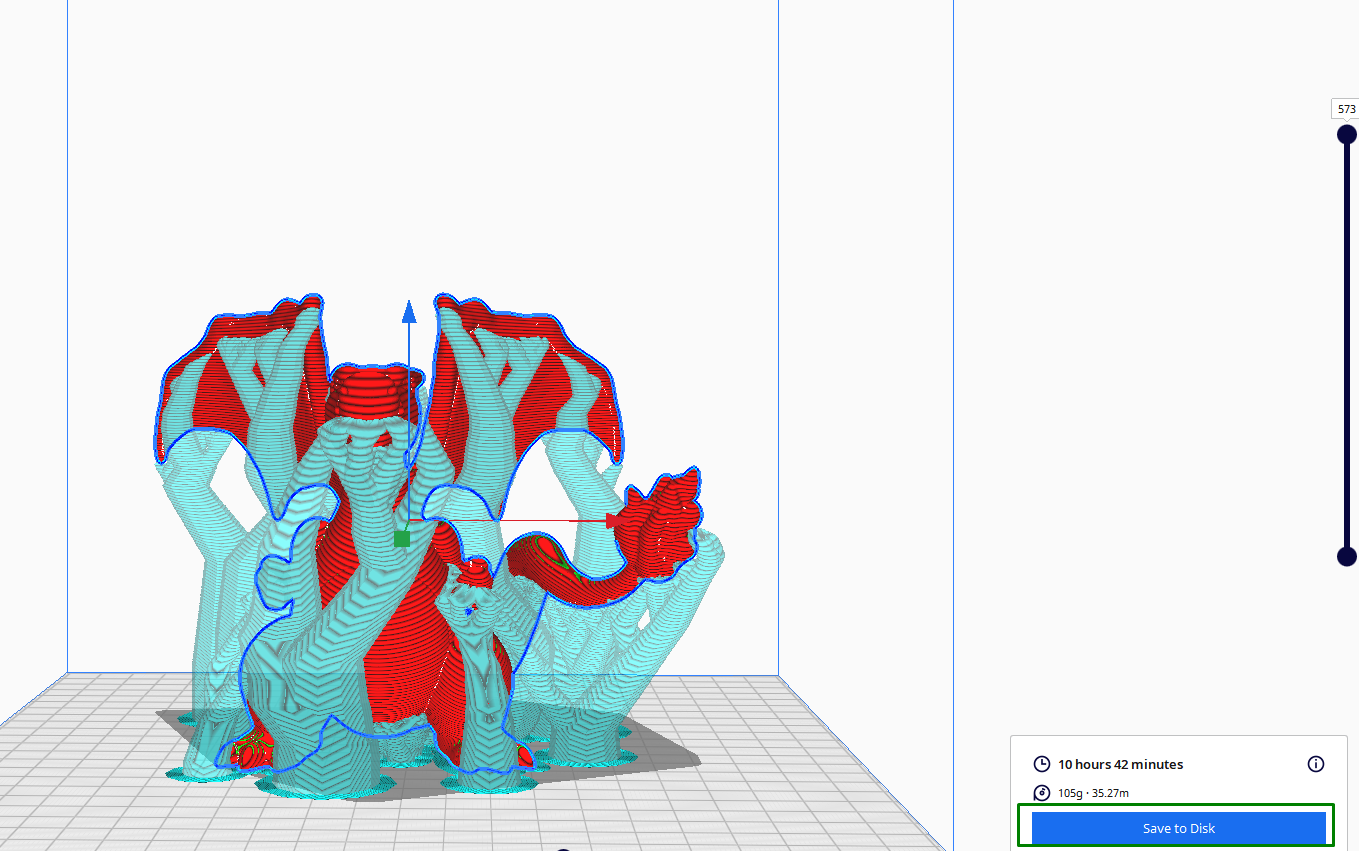
The Preview slider in the sidebar provides a layer-by-layer visualization of your sliced model. You can inspect potential issues and visualize how the print will progress, and when you are comfortable with the results, save the G-code by clicking the Save to Disk option on the bottom-right section of the workspace.
Understanding Cura Plugins
You can add plugins or extensions to Cura to enhance functionality and customize your 3D printing workflow. These plugins offer various features and options that go beyond the standard capabilities of the slicer, allowing you to perform specific actions, modify G-code, and add even new print settings. You can add or manage them by clicking the Extensions section on the menu bar.
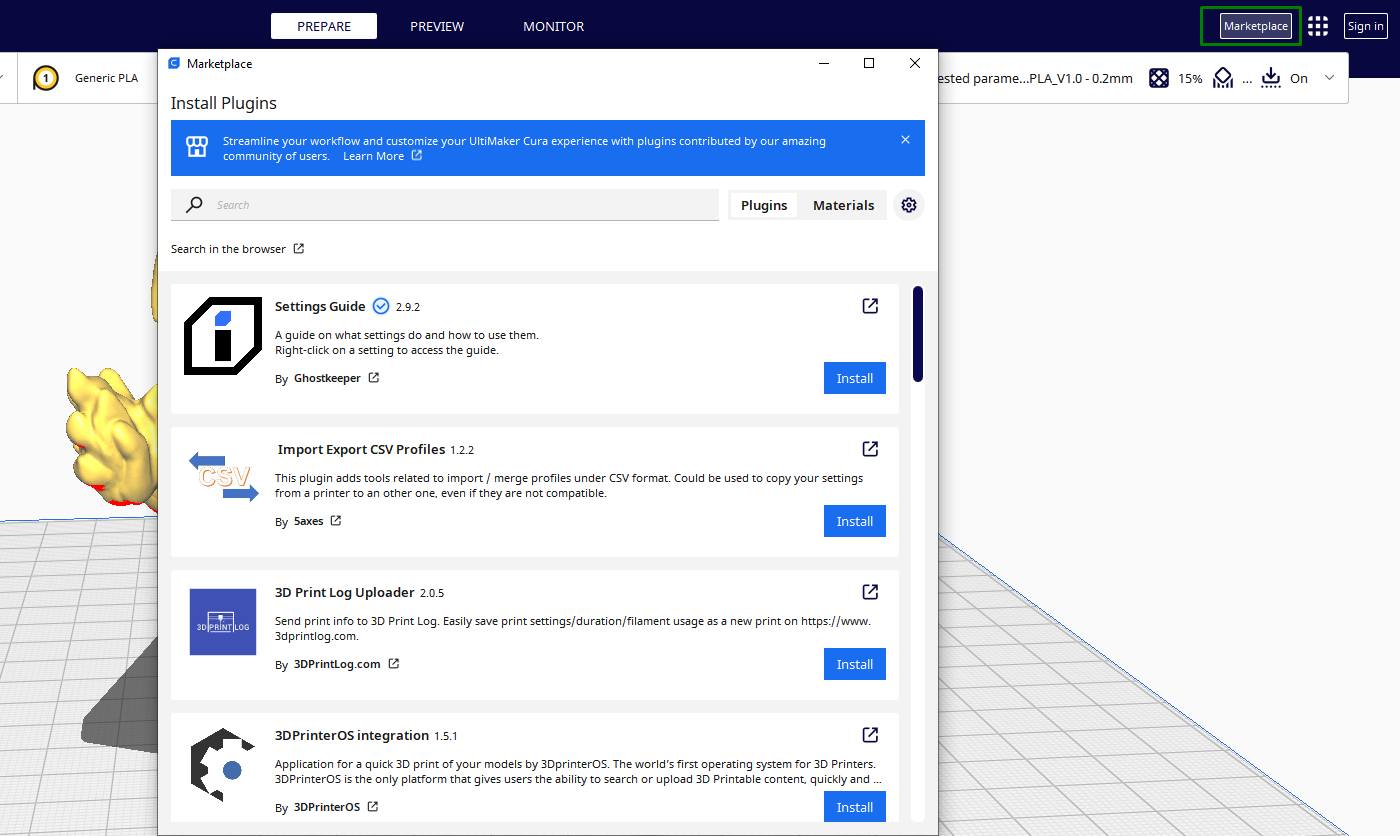
You can download plugins by clicking the Marketplace option found in the top-right section, and you will see a list of plugins displayed.
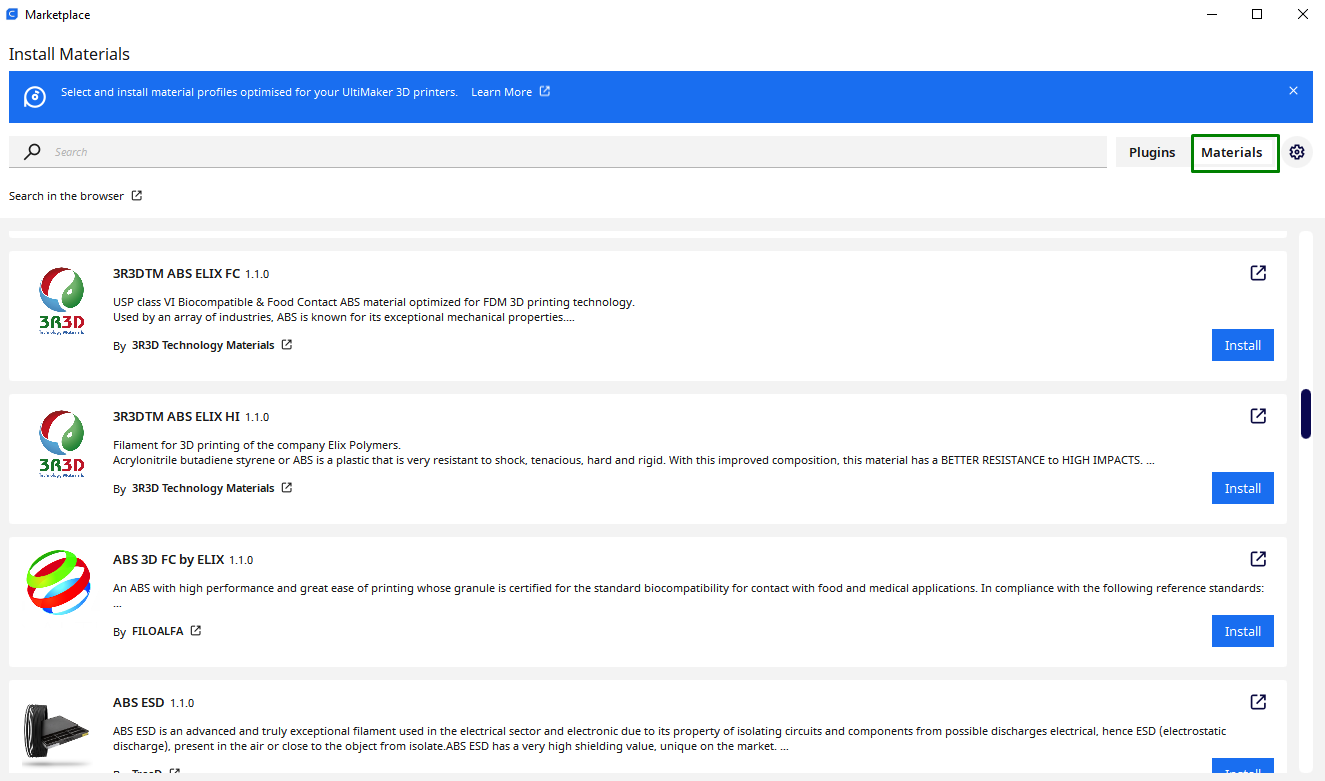
To install a plugin, click Install, and Cura will automatically download and add it to the slicer. If you don’t need to scroll to locate your preferred plugin, you can use the search bar to locate it. Besides the plugins, you can install material profiles optimized for your 3D printer by selecting the Materials section option.
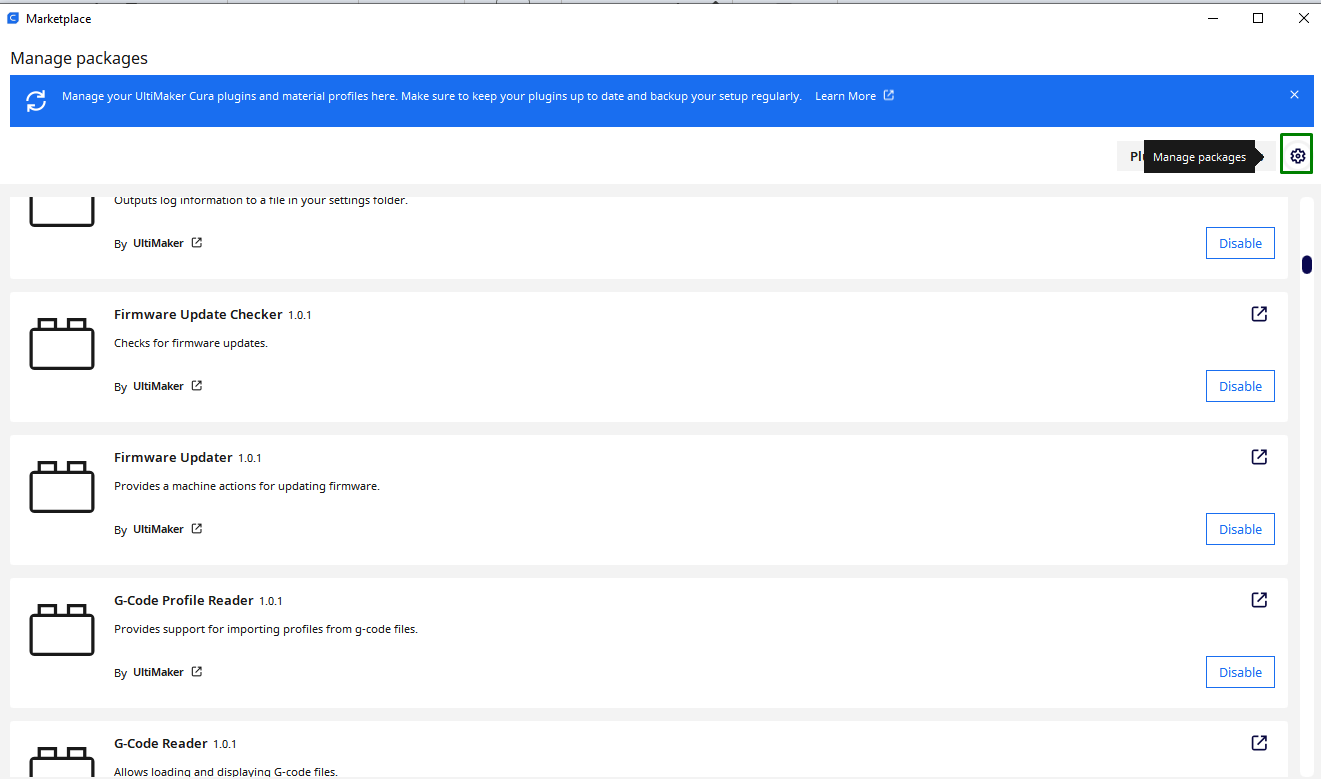
If you would like to see installed plugins or you would like to deactivate some, click the settings icon on the right-top section.
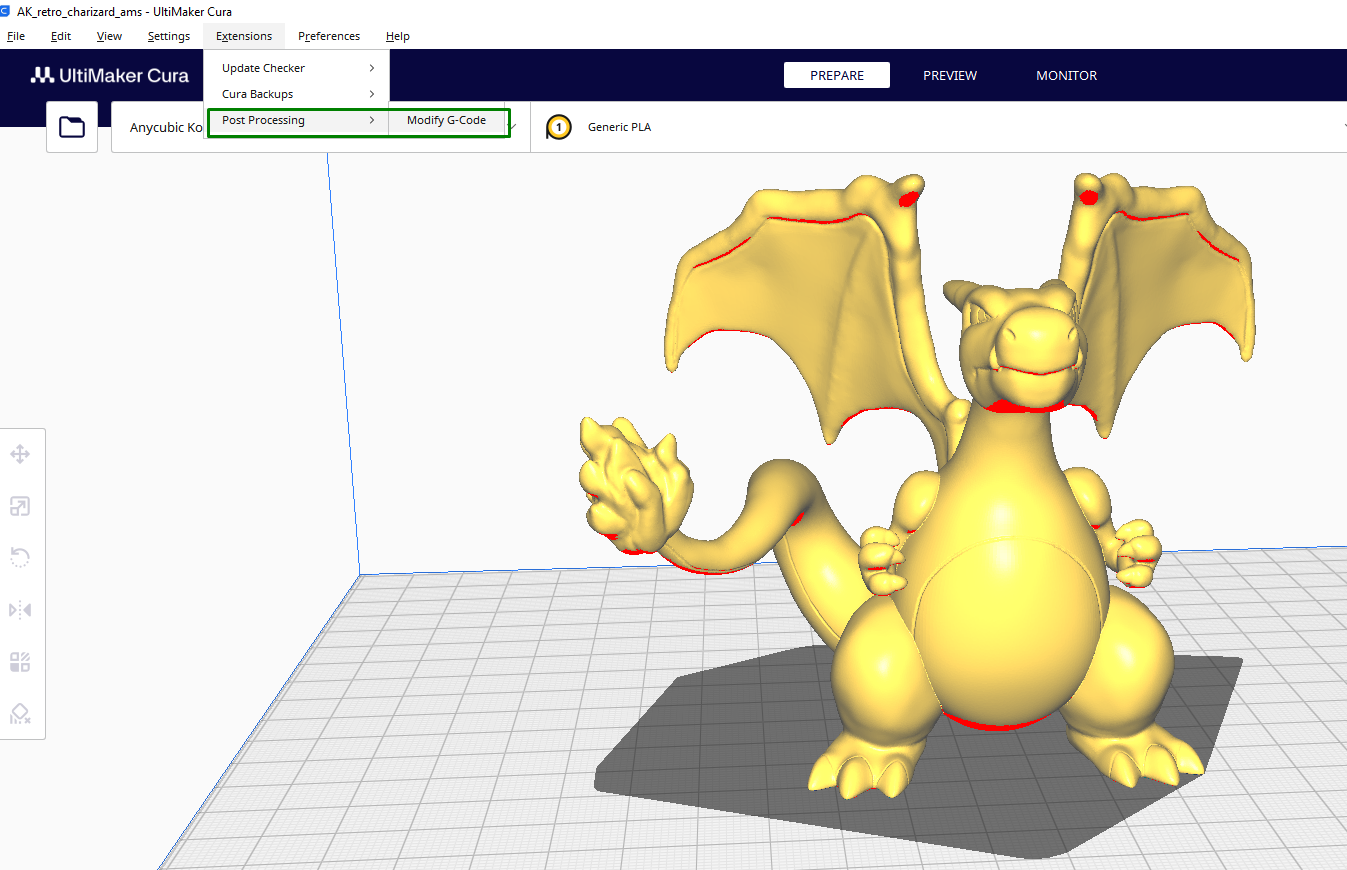
Other plugins like Post processing can be accessed in the Extensions > Post Processing > Modify G-Code section. These plugins allow you to modify the G-code after slicing. For example, you can pause the print at a specific layer height, add custom G-code scripts, or perform other actions during or after the print.
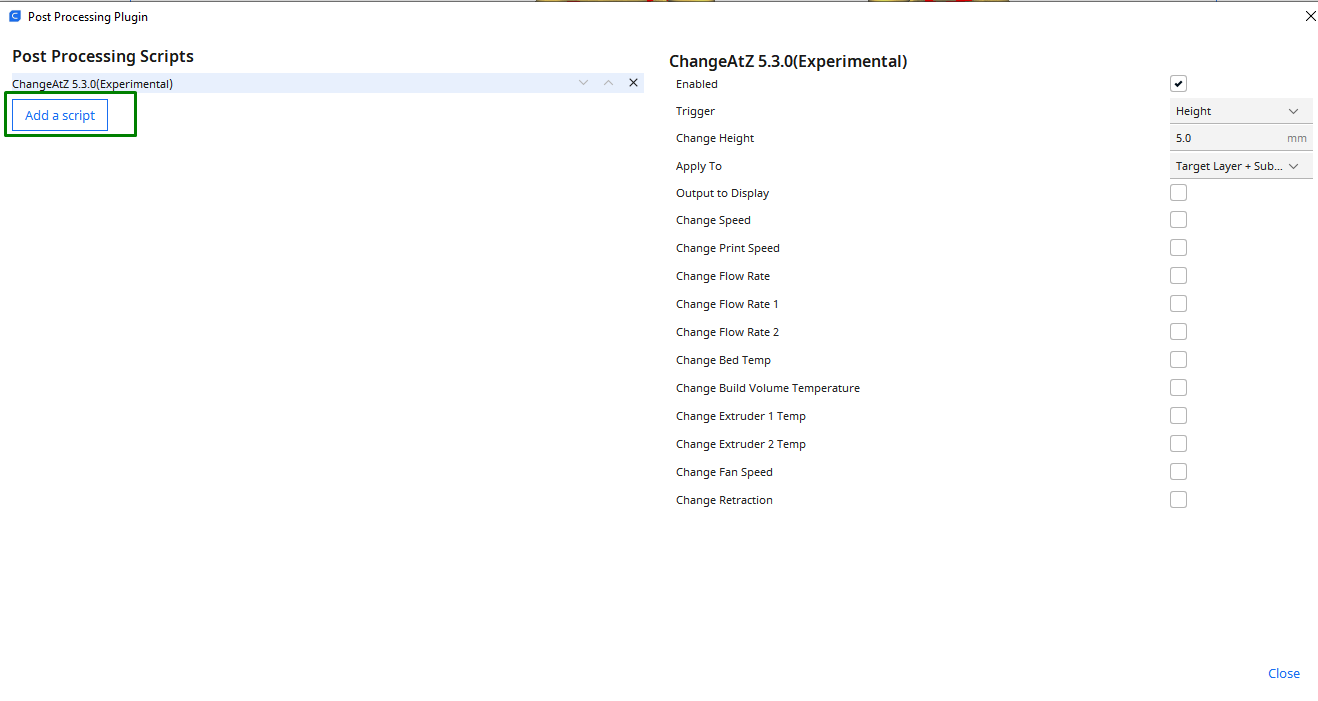
When you select it, you will see various scripts available, and there is an option to add specific ones by clicking Add a script.
Updating Cura and Backing Up Settings
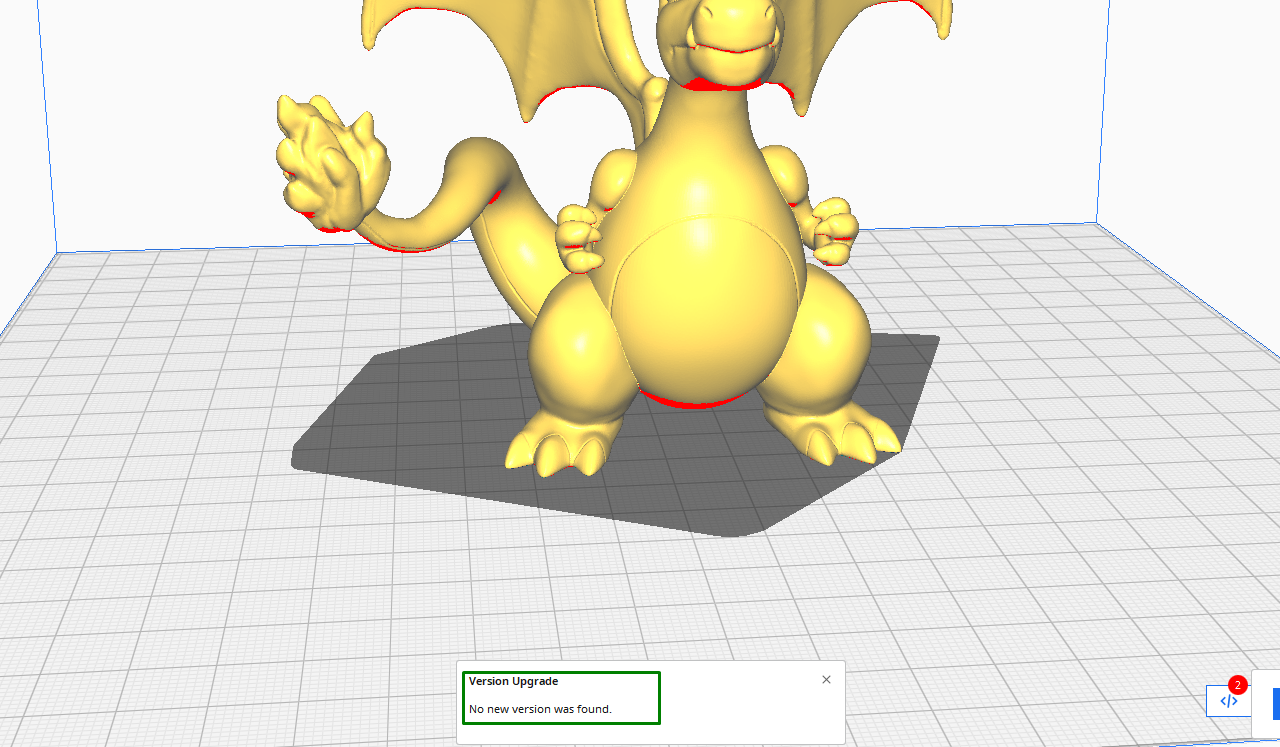
Updating and backing up Cura settings is essential to ensure you have the latest features, bug fixes, and compatibility with your 3D printer. To check if any new update is released, go to Extension > Update Checker > Check for updates. If there is any new update, you will see it; if not, you will see a notification on the button section of the workspace telling you that there is no new update.
In case there is an update, you will upgrade. Go to Extensions > Cura Backups > Manage backups to backup your settings.
When you click that option, a new window will launch, prompting you to sign into Cura, and this will redirect you to your default browser, where you can sign in or sign up if you have not yet registered to Ultimaker.
Up to that point, you should now be familiar with Cura workflow and tools and efficiently navigate and utilize the software to optimize your 3D printing process.
MORE: Best 3D Printers
MORE: Best Budget 3D Printers
MORE: Best Resin 3D Printers
Sammy Ekaran is a freelancer writer for Tom's Hardware. He specializes in writing about 3D printing tutorials and guides. You can find more of his work on various publications, including Makeuseof, All3dp, and 3Dsourced.
