Your system's CPU or processor may be powerful enough to keep your games running smoothly and chew through productivity tasks with ease, but it (and the CPU socket that it drops into on the motherboard) are surprisingly easy to damage if you aren't careful and don't know what you're doing.
So whether you're building your first PC, upgrading an existing system, or you're a DIY veteran confused by recent socket changes, it's essential that you handle your processor with care and install your CPU correctly in the motherboard socket. If it's clamped into the socket wrong, you can damage the CPU, your motherboard, and even other components if you power the system up with the CPU installed incorrectly.
The good news is, aside from general patience and care, there are only a couple of key steps to keep in mind. Follow our instructions below for a simple, successful CPU install.
Be careful with the pins!

Older AMD AM4 processors use a Pin Grid Array (PGA) with hundreds of tiny pins on the bottom of the chip. Newer AM5 CPUs and all of Intel's consumer CPUs are the Land Grid Array (LGA) type, with pads on the bottom of the CPU and the pins in the socket. Whichever you're using, you need to take care not to bend the pins by dropping or banging the CPU or socket.
Bent pins can be extremely difficult to recover from – especially if it's more than just one or two near the edge. These pins and pads are where the CPU and motherboard meet to exchange data and power, so even one broken or bent pin can keep your system from booting or disable some important feature like USB. Keep your CPU in its plastic or cardboard tray until the minute you're ready to install your CPU. And don't drop it!
Prep your motherboard

You can wait until your motherboard is screwed into your case to install your CPU, but it's generally easier and safer to do so with the motherboard still outside your case. This isn't the easiest option, though, if you're upgrading a CPU in an existing desktop.
If you're building a new PC, first place the board on top of the anti-static bag that it came in and/or on top of the motherboard box to give the bottom of the board and your table or desk some protection from each other.
Open the socket

Next, you'll need to open the socket. For the most recent Intel and AMD platforms, that's done by pushing down on the metal lever on the right side and moving it slightly away from the socket. You'll need to move the lever out from under the piece of metal holding it down, and slowly lift the bar all the way up and away from the socket. On older AMD AM4 motherboards, the bar is smaller, held down by a plastic clip, and has less resistance. But the bar-lifting process is similar.
On Intel and current AMD boards, you'll then need to lift the silver metal CPU retention plate up and away from the socket, the same way you lifted the metal bar but on the opposite end of the socket. Note that, if your motherboard is brand-new, there should be a plastic piece in the center of the retention plate, designed to protect the socket. You can pop this out now or leave it in until you actually install the CPU, when it will be forced out by the CPU. Hang onto this protective cover if you think there's a chance you might want to store, sell, or give away the motherboard at some later date because it's important to protect those socket pins.

AMD's AM5 socket fully open
The retention plate and the bar should now be past vertical, allowing the socket to remain open for the next step of placing the CPU in its new home.
Line up the triangle arrows

Don't mess this bit up unless you want to destroy your components! Before grabbing your CPU, look on the socket or the retention plate for a small triangle / arrow in one of the corners. Usually, it's in the upper left (image below, AMD) or lower left (Intel). Once you've located the arrow indicator for the socket, check your CPU for a matching arrow in one of its corners.
You need to make sure the triangular arrow on your CPU (see image of the AMD CPU, above) lines up in the same corner as the same arrow on your CPU socket or retention plate. If you clamp your CPU down with these arrows misaligned, you will damage your motherboard, likely your CPU, and possibly other components if you power the system up with the CPU installed this way.
Gently place your CPU in its socket

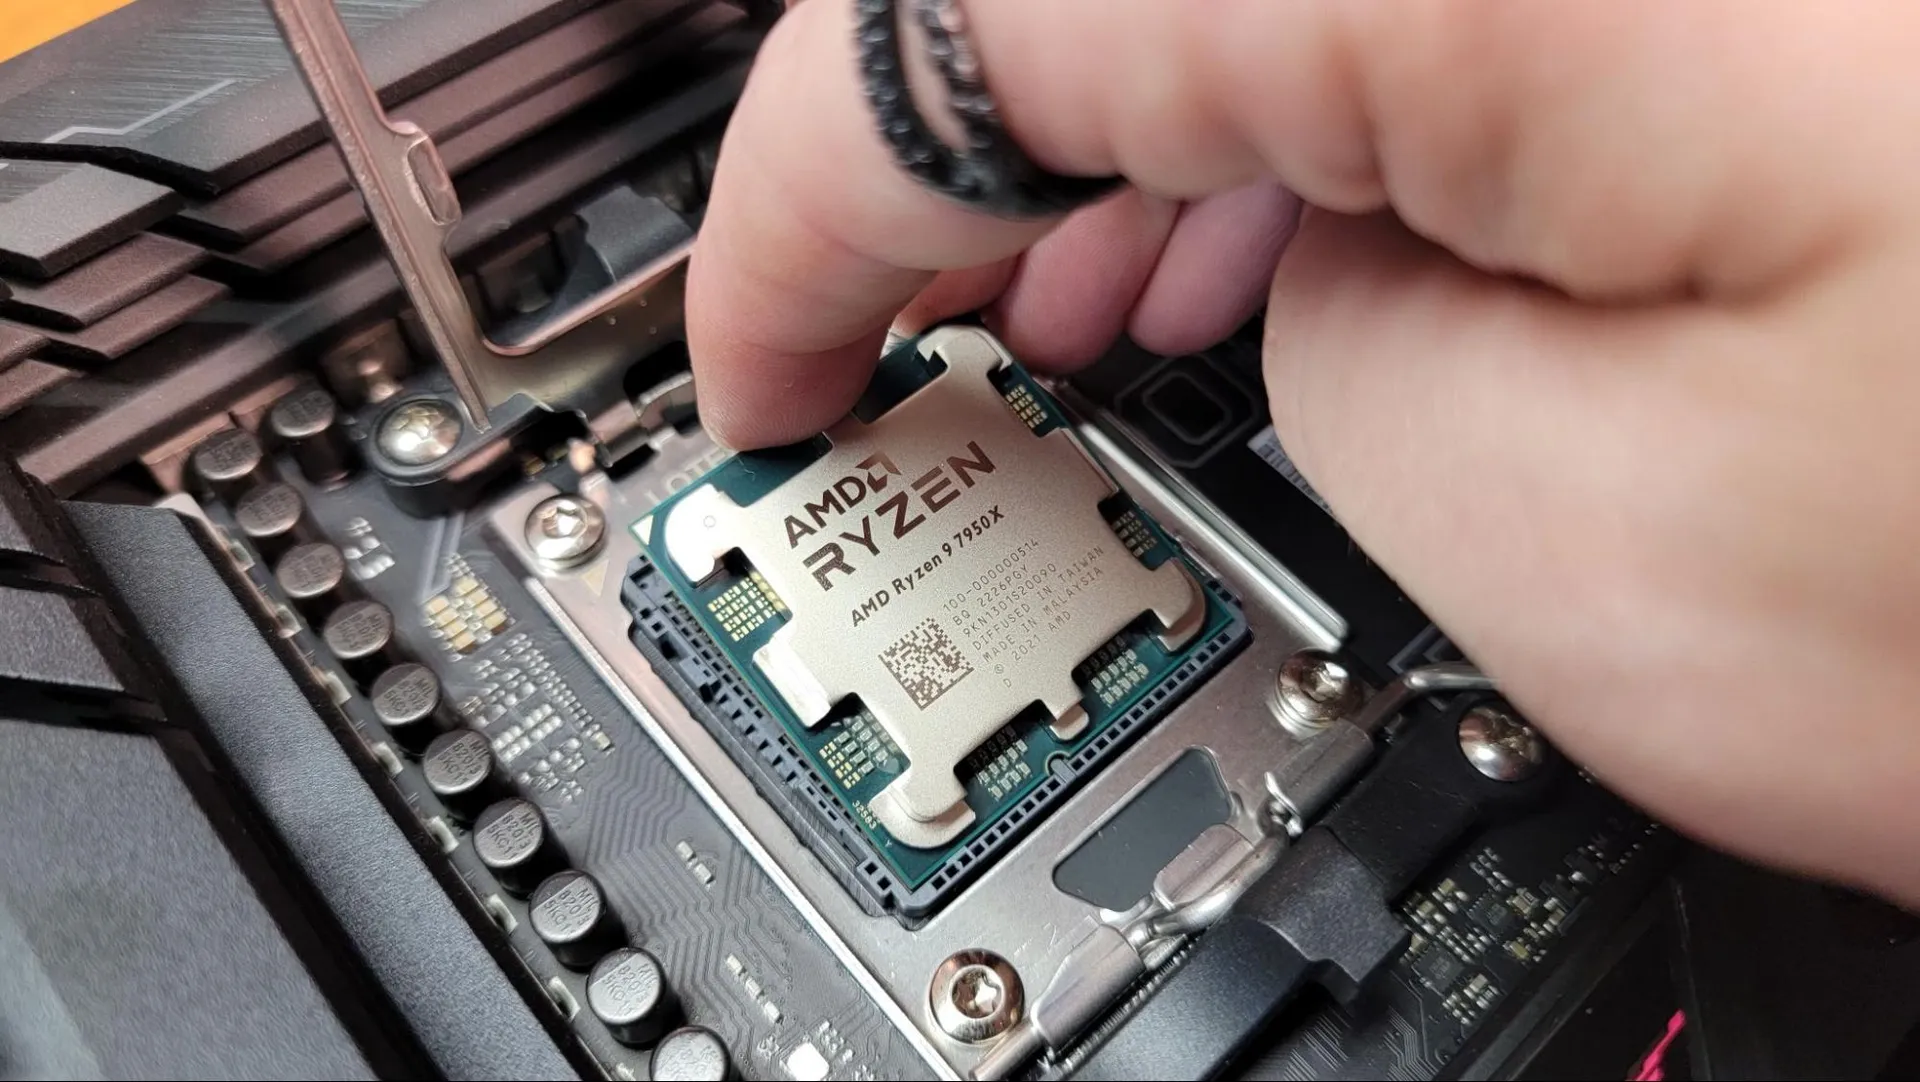
AMD's Ryzen 9 7950X gets lowered into the AM5 socket
Now that you know where your arrows are, it's time to put the CPU in the socket. Gently place the chip in the center of the socket, lining up the bottom edge of the CPU with the bottom edge of the socket. Check one last time that, like in the image above, the arrow on your CPU aligns with the arrow on your socket or retention bracket. Then, gently lower the top edge of the CPU into the socket.

With the CPU correctly sitting on top of the socket, nothing should look askew
With modern CPUs, the chip doesn't click or snap into place. You just need to look and make sure that it's properly seated, fully sitting inside the plastic frame that runs around the edge of the socket itself. If anything looks crooked or one edge or corner sticks out in a way that the others don't, then the CPU isn't seated properly. If that's the case, gently lift up the CPU and re-seat it in the socket until everything looks straight and the CPU is perfectly centered in the middle of the socket.
Locking the CPU in the socket
With your chip in its proper place, it's time to reverse a couple of the previous steps above. But first, check one last time that your CPU and socket arrows are aligned. Because if they aren't, you're about to destroy some expensive hardware.
With that last check done, now lower the metal retention bracket back down, on top of the CPU.

Lower the retention bracket back down first, before lowering the the arm that locks it into place.
Next, it's time to lower the metal lever / retention bar again. Do this slowly, making sure that the metal lip sticking out of the retention bracket is under the raised section at the beginning of the bar, at the bottom or top of the socket (depending on if it's an Intel or AMD board).

You'll have to press firmly to get the bar back under the metal clip that holds it in place.
As you slowly press the bar back down, you'll notice increasing resistance, especially with an Intel motherboard / CPU. This is normal, as pressure is needed to press and hold all those pads against all those pins. So long as you followed the above steps closely, aligning the arrows and making sure the CPU was seated in the center of the socket, there's nothing to worry about.
Press the retention lever/bar down firmly until it's parallel to the motherboard, and slip it under the metal piece on the socket that holds it down (shown to the left of the finger in the image above).

With the arrows aligned, the CPU in its socket and the retention plage and bar back in place holding things in place, the processor install process is complete.
Congratulations! Your CPU is now installed in its socket and it's time to add thermal paste and your cooler of choice, both of which we'll cover in other how-tos soon. Or you can see our full guide on how to build a PC.