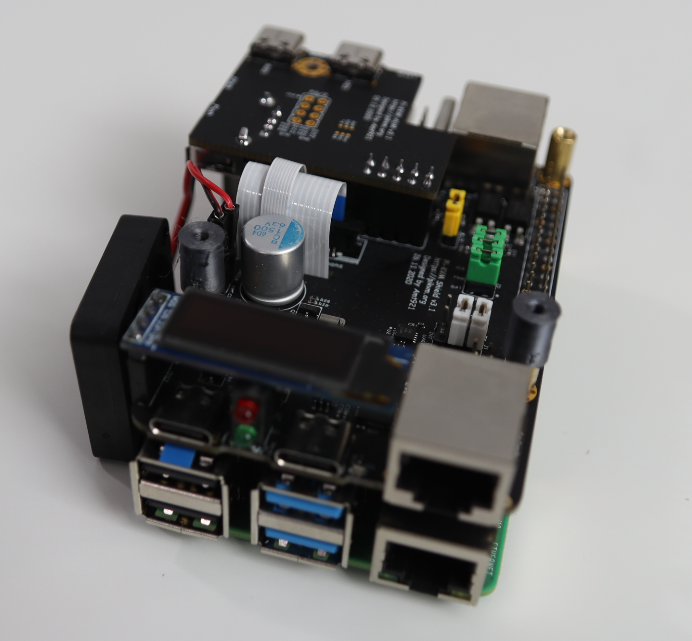
How to Build a KVM Over IP with Raspberry Pi
If you’ve ever needed remote access to a PC, you’ve probably tried VPN or other apps such as TeamViewer. However, this kind of software only works within the remote computer’s OS, which means that it can’t access the BIOS, reboot, install an operating system or power on the computer. There are several solutions that allow you to remote control a PC independently of its operating system, but using a KVM over IP is one of the most convenient and affordable.
While a store-bought KVM over IP device can cost hundreds of dollars, it’s easy to use a Raspberry Pi to create your own. A developer named Maxim Devaev designed his own system called Pi-KVM, which he is planning to sell as a $130 kit. However, if you have the right parts, you can use the software he’s developed and your Pi, to put it together for far less.
Below, we’ll show you how to build your own Raspberry Pi-powered KVM over IP that can output full HD video, control GPIO ports and USB relays, configure server power using ATX functions and more. You’ll be able to control the whole setup via a web browser from another device over the internet via TailScale VPN or on your local network.
What You Need to Build a KVM Over IP with Raspberry Pi
- Raspberry Pi 4 or Raspberry Pi Zero
- 16 GB or larger microSD Card. (See best microSD cards for Raspberry Pi)
- HDMI-to-CSI bridge like this one or or USB HDMI capture dongle. (https://amzn.to/2ZO9tjo
- USB female to dual male Type-A splitter like this one.
- USB C to Type-A cable
- 5V, 3 amp power supply with USB Type-A output. You’ll be plugging a type-A cable into it so the official Raspberry Pi power supply won’t do.
Setting Up the SD Card for Raspberry Pi KVM Over IP
The software you need for the Raspberry Pi is all contained on a custom disk image that you must download and burn to a microSD card. Here’s how to do that with Raspberry Pi Imager, but you can also use other burning software such as balenaEtcher.
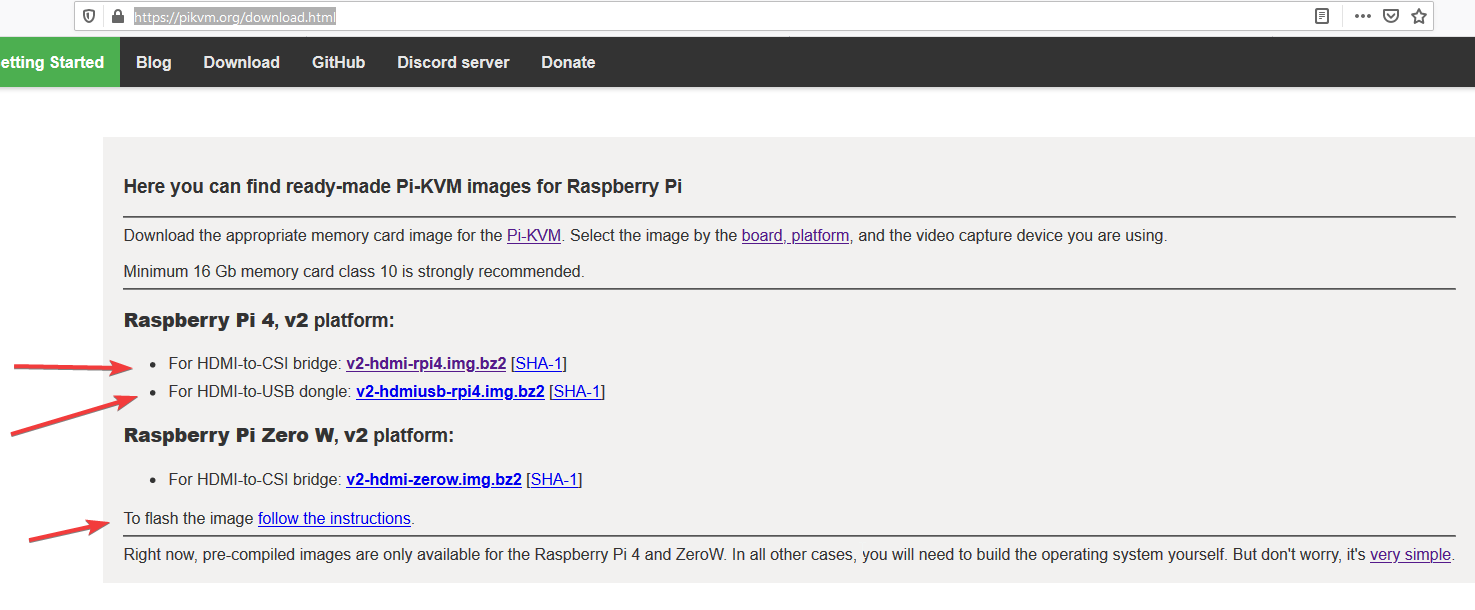
1. Download the Pi-KVM disk image. The first thing we will need is to download the ready made image from pikvm.org. Note that there are different versions, depending on which Pi you use and whether you use the HDMI-to-CSI bridge or an HDMI-to-USB capture dongle. The image file is in BZ2 format so you’ll need to uncompress it.
2. Extract the IMG file from the BZ2 file you downloaded. If you have Windows, BZ2 support isn’t built-in, but you can use 7Zip to do it.
3. Launch Raspberry Pi Imager. If you don’t have it installed already, you can download it from the Raspberry Pi Foundation’s website.
Get Tom's Hardware's best news and in-depth reviews, straight to your inbox.
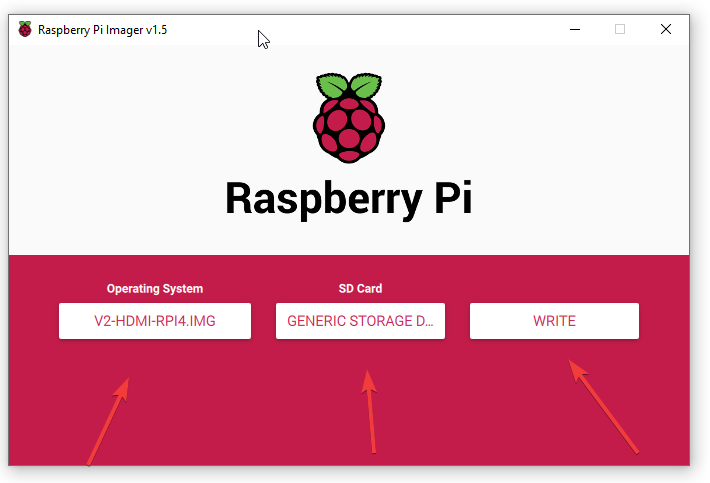
4. Select “Choose OS” -> “Use Custom” and locate the Pi-KVM image.Pick your microSD card by clicking Choose SD Card. We will now “Choose SD Card”, make sure it’s the correct one you are choosing.
5. Click Write.
Setting Up the Raspberry Pi for KVM Over IP
Now that we have finished burning the microSD Card, we can move on to installing the HDMI-to-CSI-2 bridge or USB-to-HDMI dongle and prepping the OTG USB-c cable
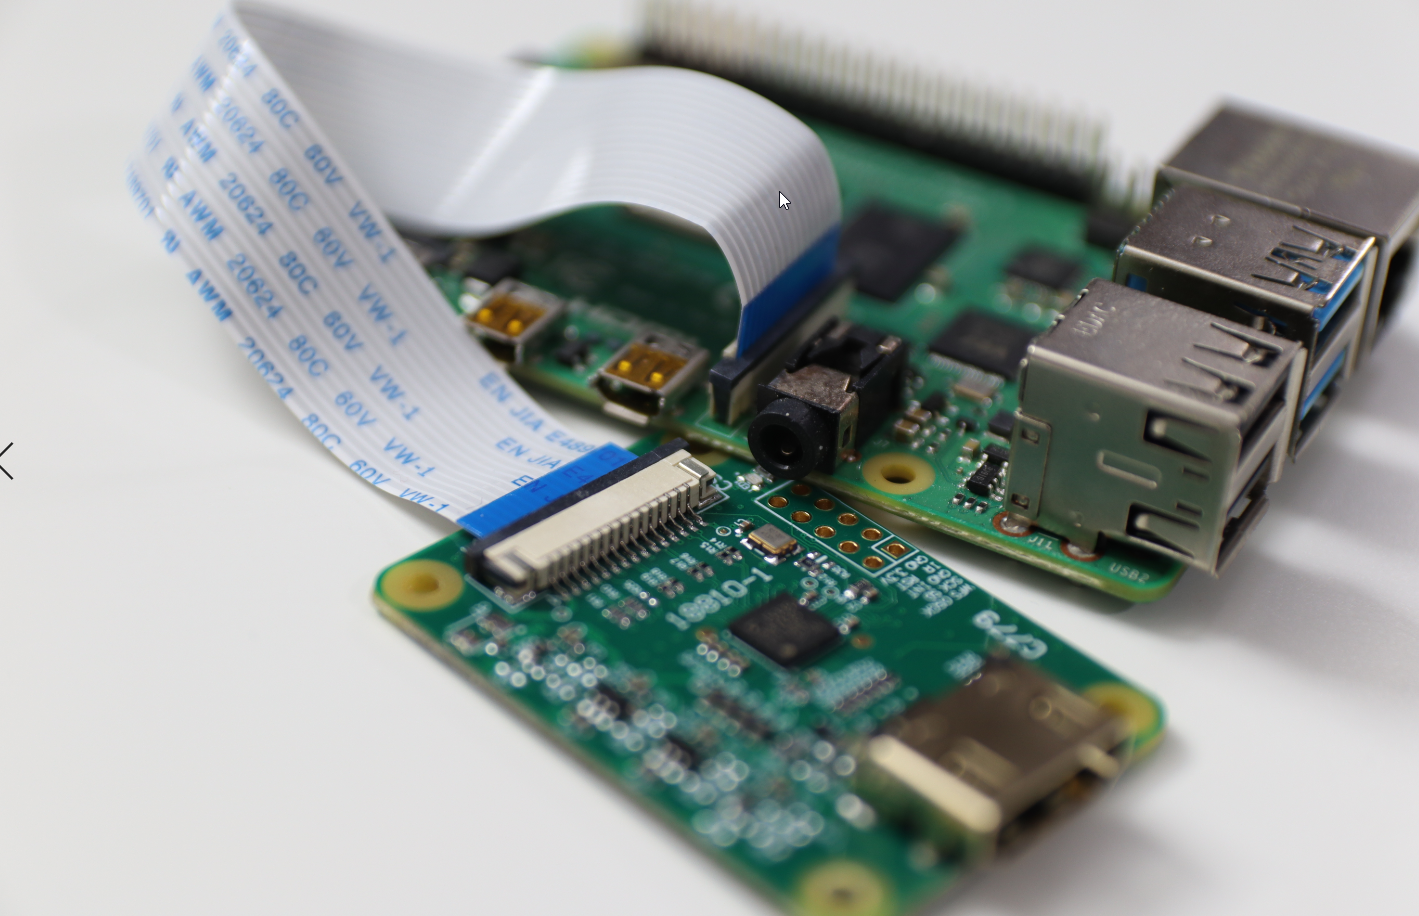
1. Connect the CSI ribbon cable from the HDMI-to-CSI-2 bridge to the Raspberry Pi’s CSI camera port. Make sure that the blue marking faces the black clamp. If you are using an HDMI-to-USB dongle instead, connect it to a USB port on your Pi. If you are using a Pi Zero, you will need microUSB to USB Type-A hub.
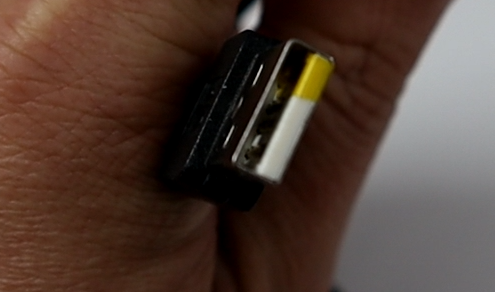
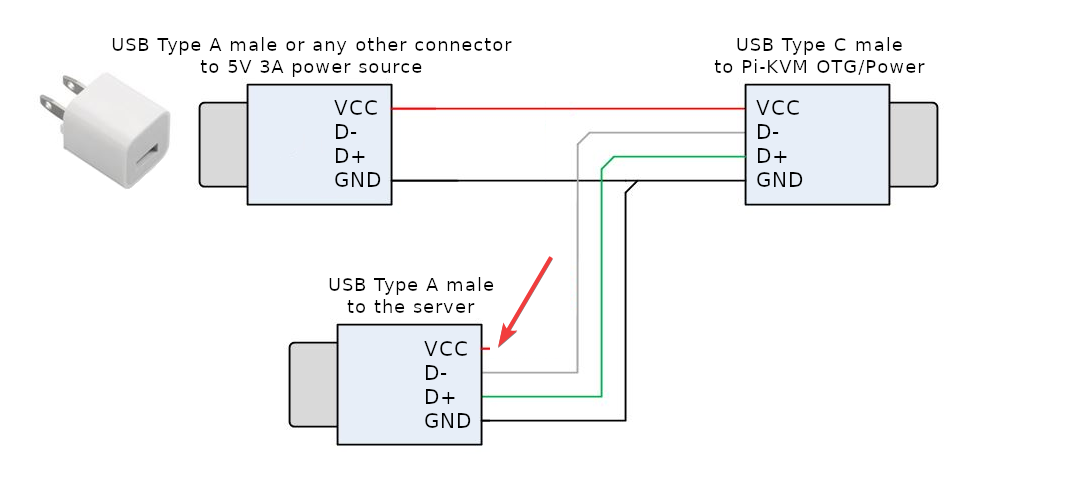
2. Disable the 5V pin on one of the USB Type-A male connectors from your splitter. The easiest way to do this is to place a small piece of Kapton tape over the right-most pin on the connector. You could also try cutting that leads to that pin, but that’s more complicated.
This will be the connector that attaches to a USB port on the PC you wish to control. If you don’t disable that 5V pin, it will back feed the power from your wall power to the PC, possibly causing damage to its USB port.
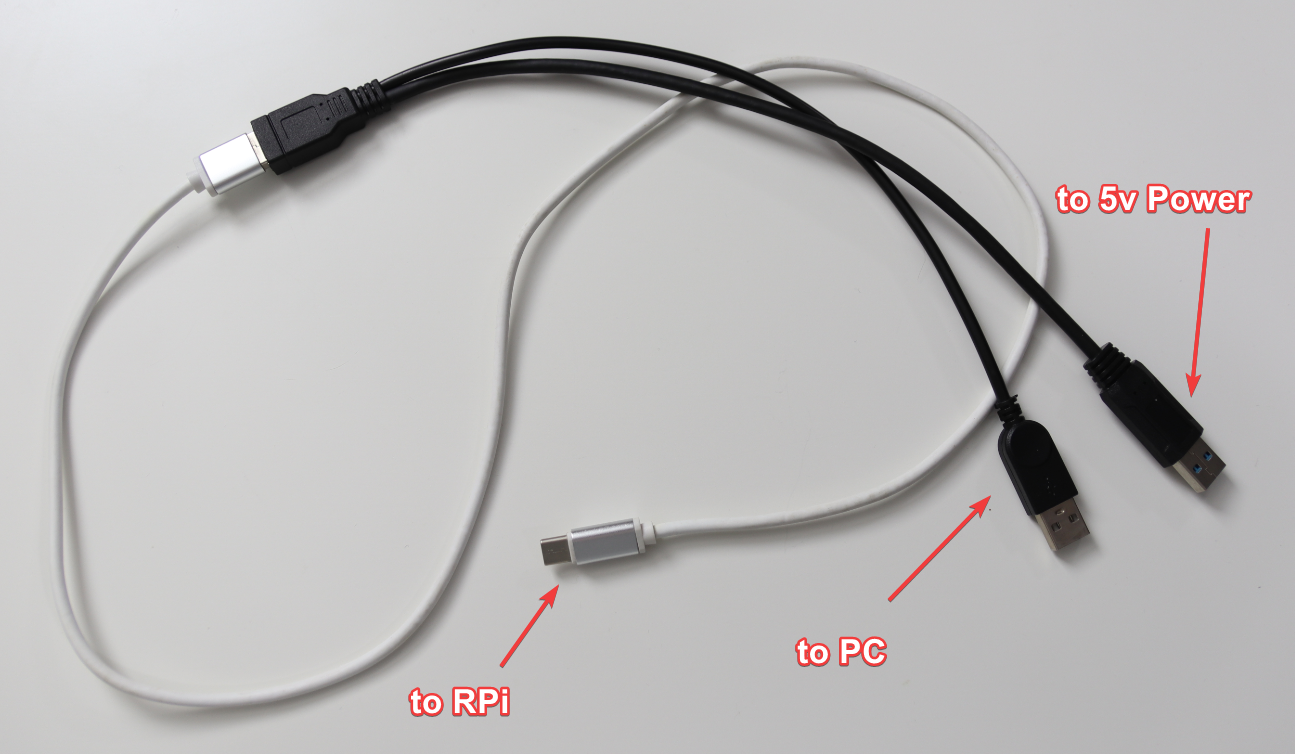
3. Connect the USB C-to-A cable to the Type-A female connector on the splitter. This will provide power to the Pi. Your cables should look like the picture below.
4. Connect the USB-C cable to the Raspberry Pi 4’s USB-C port.
5. Connect the unmodified Type-A male to your power supply.
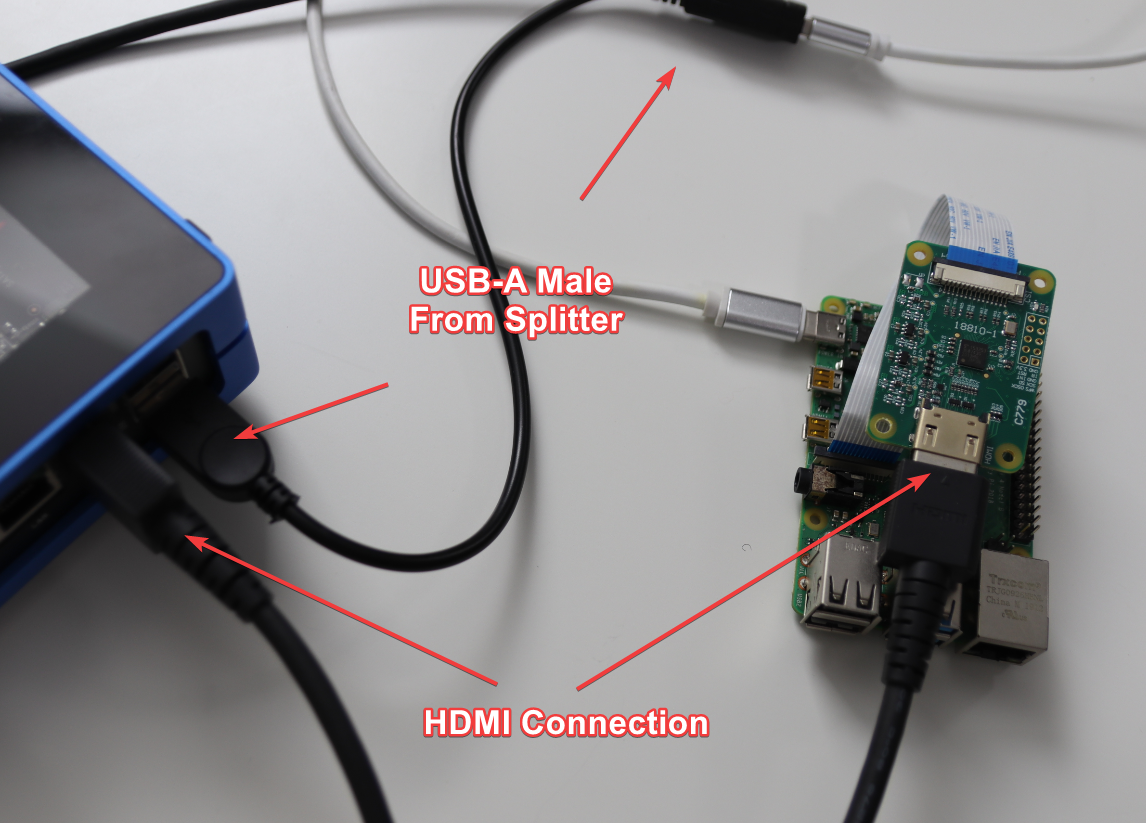
6. Attach the USB Type-A connector and HDMI to the PC you wish to remote control.
7. Insert the microSD card we created and power on the Raspberry Pi.
Setting Up the Pi-KVM Software
At this point we are ready to start using the Pi-KVM. On first boot it will take longer then expected due to the initial process for enlarging the microSD card so be patient and it will boot.
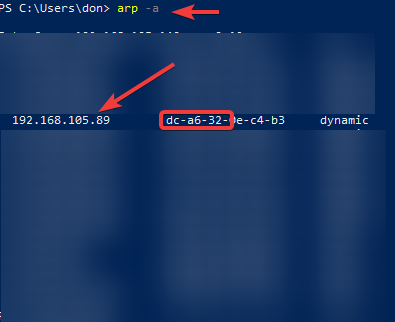
1. Locate your Raspberry Pi’s IP address. You can do this looking through your router’s control panel to see what devices are logged on, or by using a little method I like to do called ARP.
To find the Pi’s IP using this method, launch Windows PowerShell, run the command “arp -a” and you’ll see a list of devices on your local network. Anything that begins with b8:27:eb: or dc:a6:32: is a Raspberry Pi.
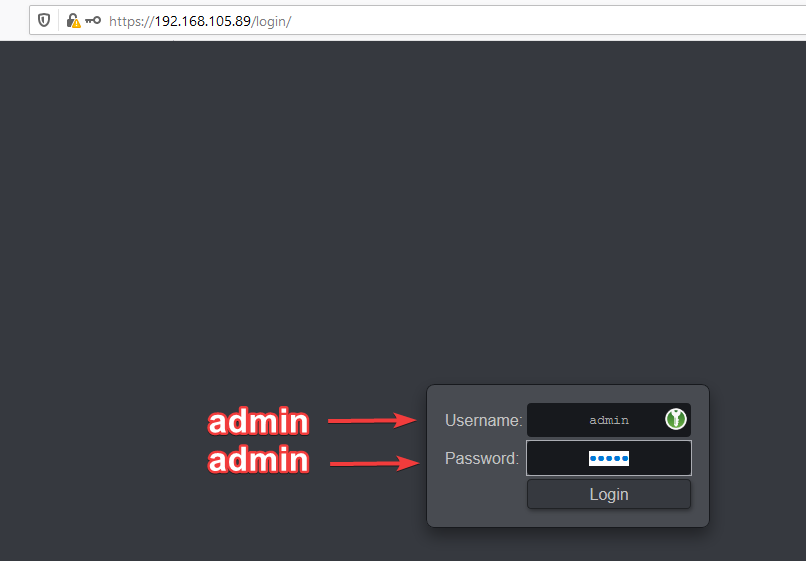
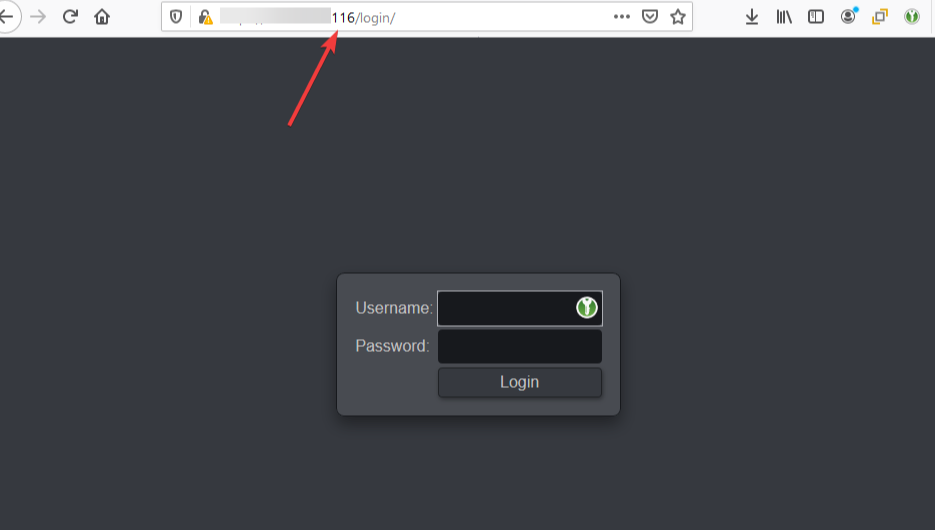
2. Navigate to the Pi’s IP address in a browser on your client computer (the one you are using to control the other PC). You will be redirected you to your login page.
3. Log in. The default username is admin and the password is admin also.
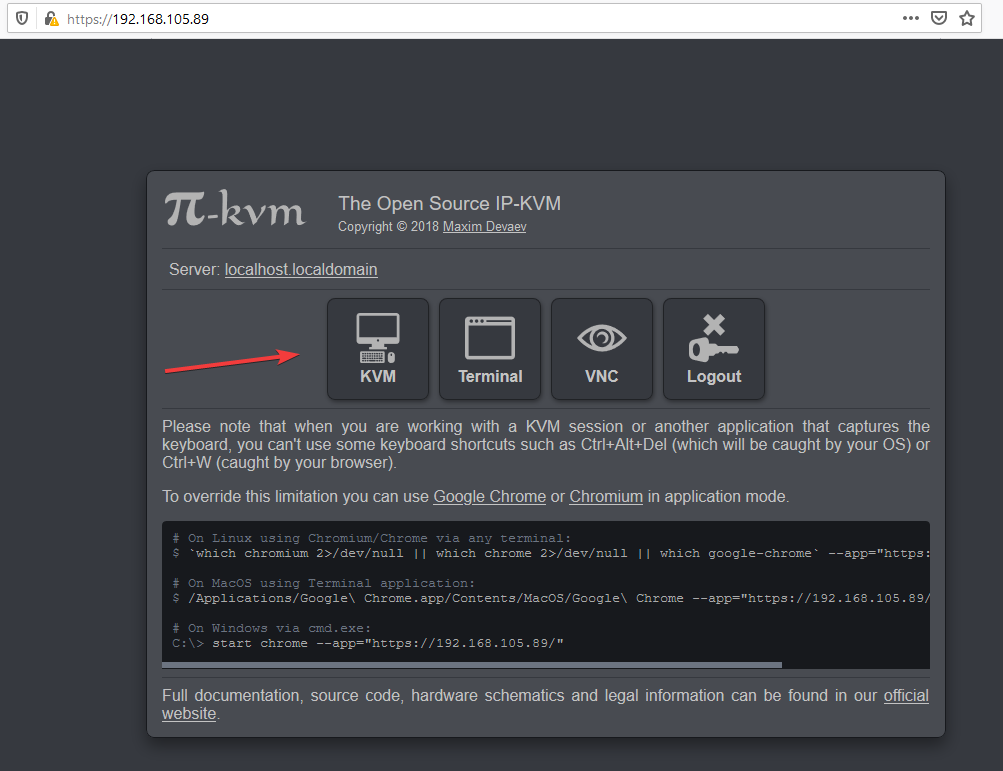
4. Click the KVM icon.
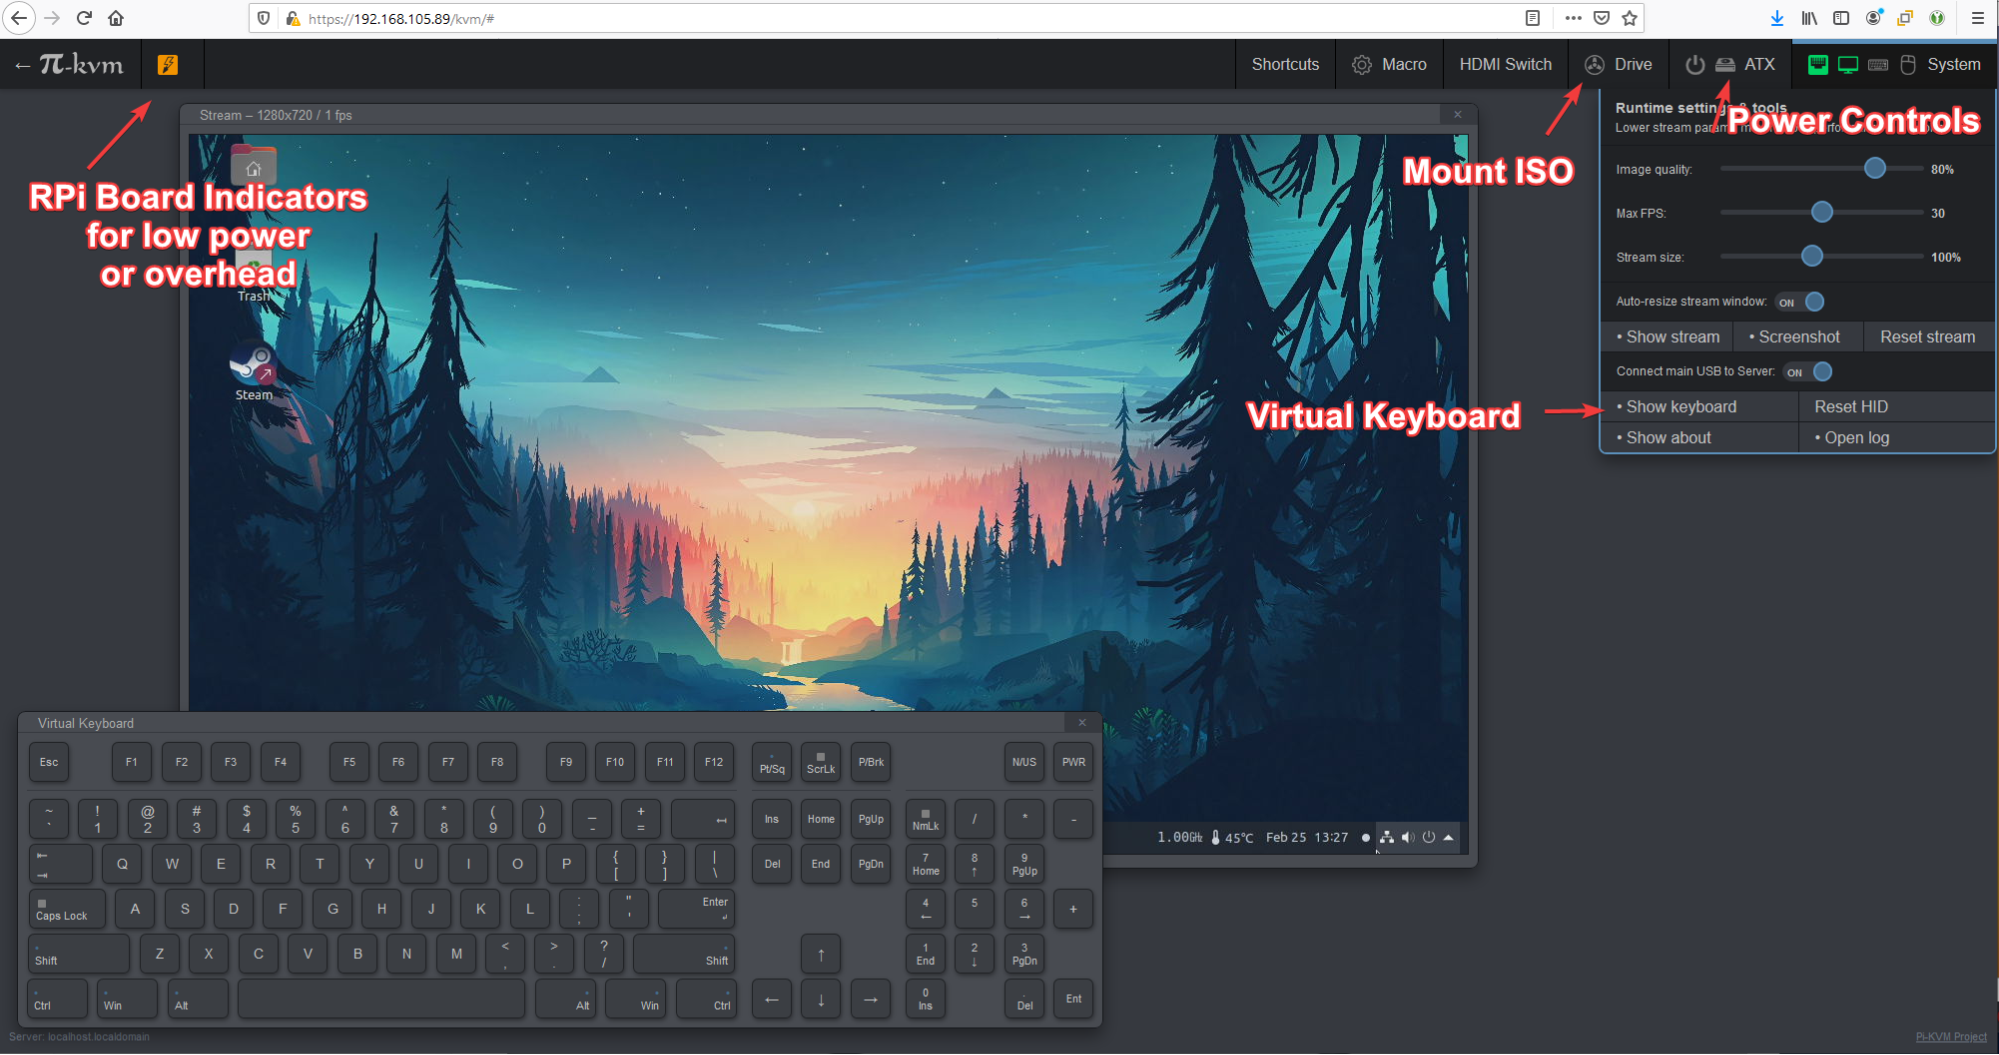
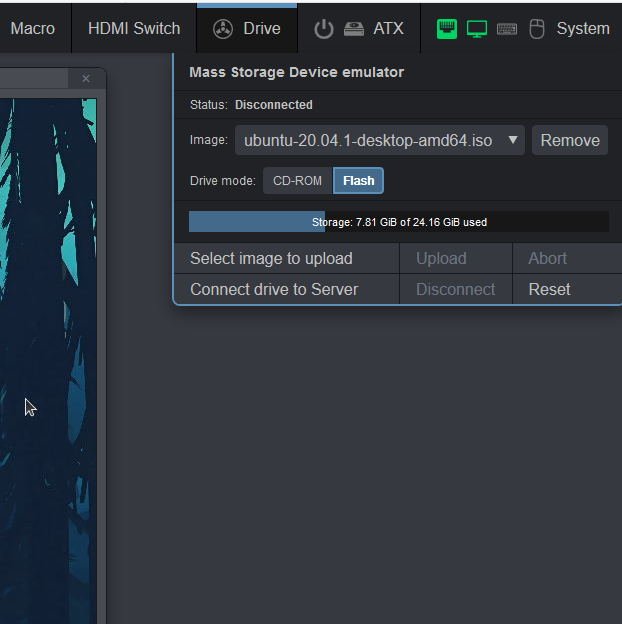
You should now be presented with a screen like the one shown below, providing you with access to the remote PC and a number of other menus. . I have more options then others and you can unlock them by going to the pikvm github for more instructions.
Keep in mind that the more storage you have on your sd card the more ISO images you can store and use for future PC setups.
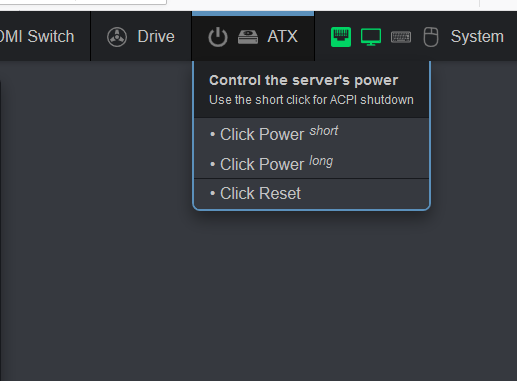
With the proper GPIO hook ups you can also enable the use of ATX controls
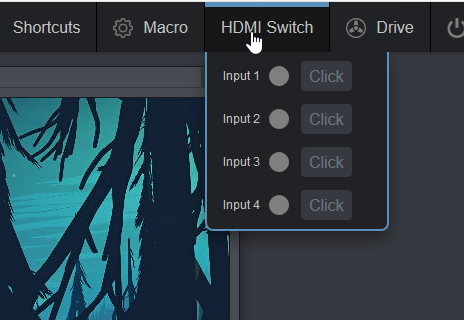
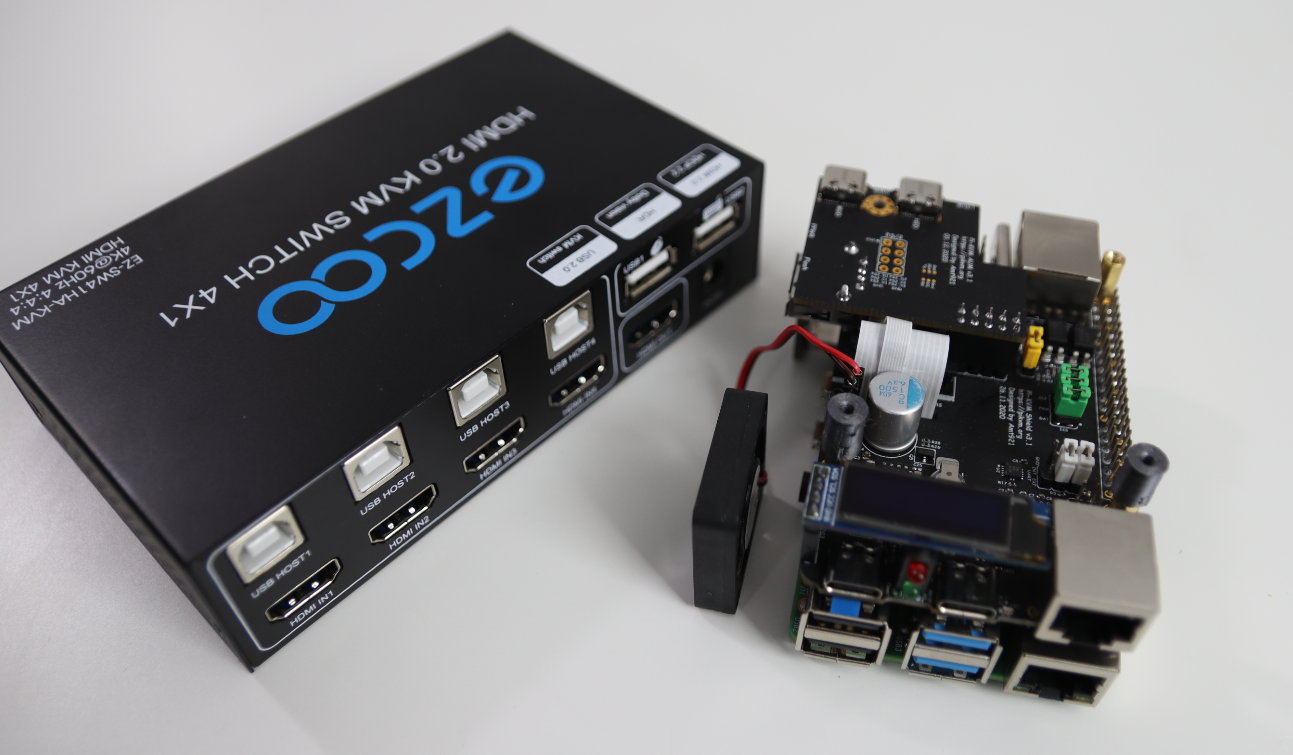
To expand the functionally of the PI-KVM to allow for more display inputs, you can connect it to an HDMI 4 port switch with USB control.
Updating Pi-KVM to the Latest Version
Pi-KVM is always getting new features so it’s important to keep the software up to date. Fortunately, you don’t need to reflash the microSD card. To update:
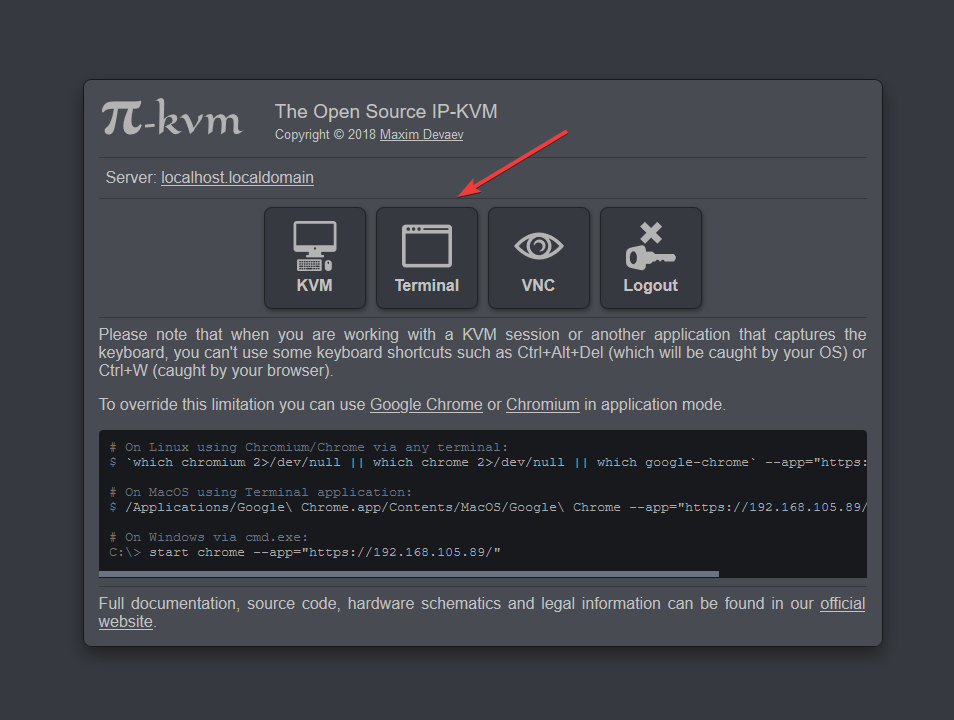
1. Click the Terminal icon on Pi-KVM’s main menu. A CLI shell will appear.
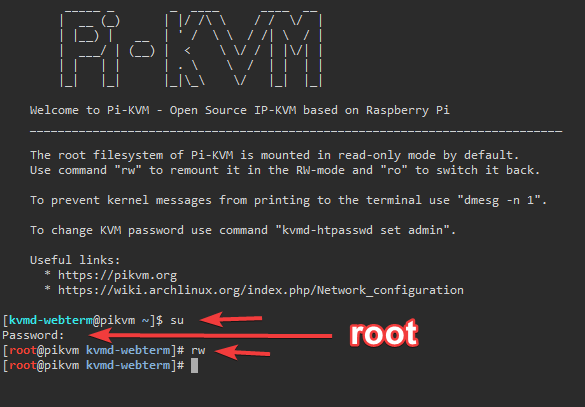
2. Become a super user by typing “su” and then entering “root” as the password.
3. Type “rw” to make the file system read/write.
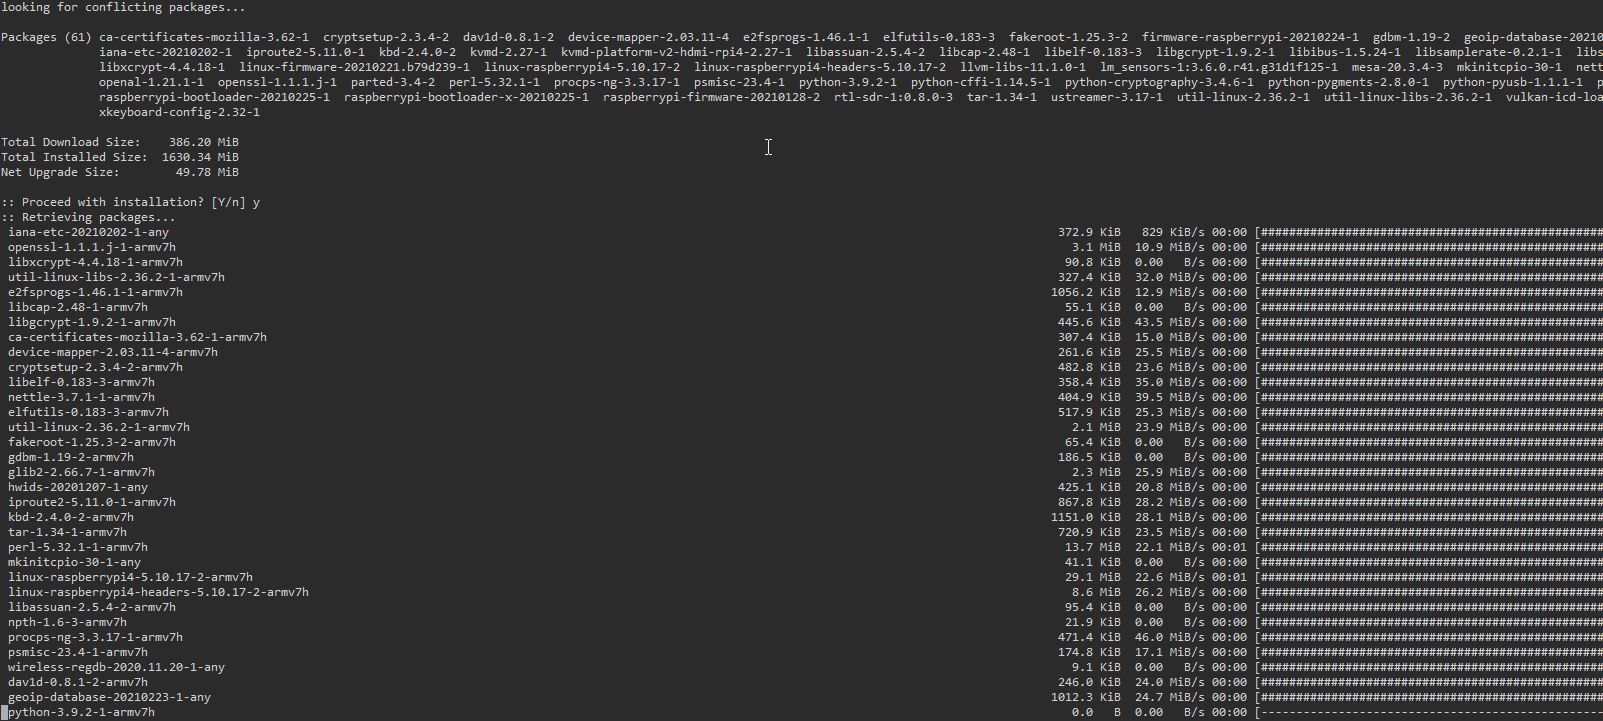
4. Enter “pacman -Syu” and “Y” to get updates.
Reminder: set the file system back to ReadOnly with “ro” in the command line when done.
Access Pi-KVM Over the Internet
You can use Tailscale to access Pi-KVM over the internet. This is a convenient and free (for private use) tool for organizing a small VPN network.
1. Create a Tailscale account choosing the Solo Plan will be free for personal use only
2. Click the Terminal icon on Pi-KVM’s main menu.
3. Become a super user by typing “su” and then entering “root” as the password.
4. Type “rw” to make the file system read/write.
5. Type “pacman -S tailscale-pikvm” to install tailscale VPN service on PI-KVM.
6. Type “reboot” to perform a soft reboot on the Pi-KVM
7. After the reboot has been performed we will need to gain access to the terminal again so follow steps 1-4
8. Type “systemctl enable --now tailscaled” to enable to service
9. Type “tailscale up” to start the initiation process
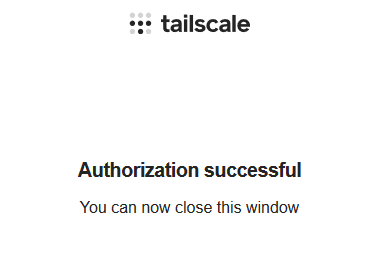
10. Follow the Link to authorize this installation
11. Once connected successfully you will see “Success” appear on the terminal.
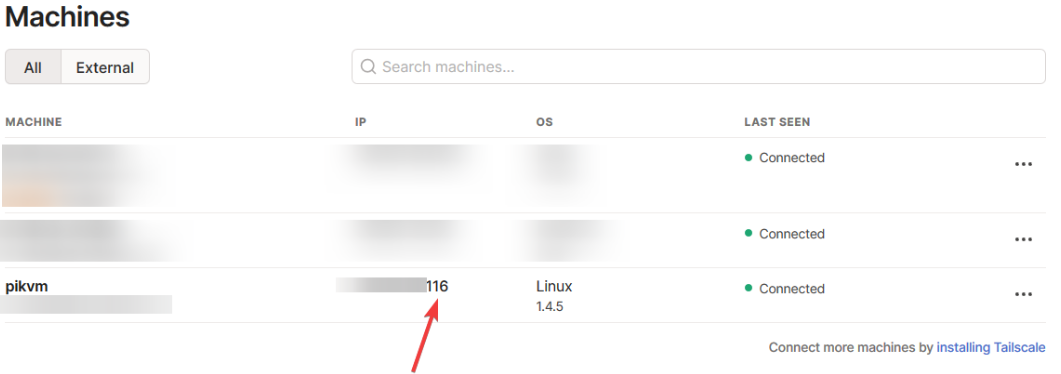
12. Navigate to this URL https://login.tailscale.com/admin/machines to view the IP address assigned by tailscale VPN.
On the Client Side
This will show you how to install tailscale on the workstation side. Tailscale supports most operating systems including windows, mac, and linux.
1. Download tailscale for your OS from https://tailscale.com/download
2. Navigate to this URL https://login.tailscale.com/admin/machines to view the IP address assigned by tailscale VPN.
3. Navigating to the IP address given by tailscale on your browser. It will connect you to your PI-KVM <https://tailscale_IP>
This is a very affordable way to build a very modern, very fast KVM over IP without the high cost. This software is also provided to you for free. There are more features that I have not covered in this tutorial such as VPN, Sharing network from your PI to PC, VNC and many more and if you wish to learn about it, visit the Pi-KVM github page or join the Discord.
-
jasonnet Do you have any additional tips on how disable the power on that cable? Or a clearer photo? Or perhaps a complete tutorial?Reply -
fcotugno Well I have the error (seems that I am not the only one)- keyboard and mouse are yellow and cannot be enabled. I must admit that my power supply is only 5V 2,1A , however I cannot believe that low power is the reason? any idea?Reply -
fcotugno Also I would like to ask why my vga to hdmi converter does not give any video signal, just hdmi does work....Reply -
CityKidz Will this work to remote control a laptop? I'm going to be working remotely for the foreseeable future, and I want to leave one of these at the office so I can log into any laptop (Mac or PC) and remote control it, including rebooting, entering BIOS, and wiping and reloading the OS from the local network. Please advise.Reply -
Paul Venice Reply
It probably won't work. The KVM display will only work on a laptop after the laptop has booted up. The KVM gets it's video from the computer's HDMI output. The laptop's display doesn't appear on the HDMI output until after the laptop has booted.CityKidz said:Will this work to remote control a laptop? I'm going to be working remotely for the foreseeable future, and I want to leave one of these at the office so I can log into any laptop (Mac or PC) and remote control it, including rebooting, entering BIOS, and wiping and reloading the OS from the local network. Please advise. -
Paul Venice Reply
The short answer is that the VGA to HDMI converter you're using isn't compatible with the HDMI to CSI converter. HDMI is a somewhat complicated protocol with different versions and not all devices play nice together. You could try a different VGA converter.fcotugno said:Also I would like to ask why my vga to hdmi converter does not give any video signal, just hdmi does work.... -
Sbbh My keyboard and mouse aren't working. And if I think about it, how is it supposed to work?Reply
In the instructions, the USB splitter has the white USB used for the PC while the blue one goes into the power plug. The white one is typically only used to for power and not data. Or am I missing something obvious? -
USAFRet Reply
Please start a NEW thread for your particular situation.Sbbh said:My keyboard and mouse aren't working. And if I think about it, how is it supposed to work?
In the instructions, the USB splitter has the white USB used for the PC while the blue one goes into the power plug. The white one is typically only used to for power and not data. Or am I missing something obvious?
Thanks.
