How To Use A Raspberry Pi Pico W To Control RGB Lights Across The World
Shine your light across the world
NeoPixels are “candy” for makers. These bright, easily =-controllable RGB LEDs power signs, light shows and holiday decorations across the world. We’ve used NeoPixels with Python to make a Simon game, Node-RED and even BASIC.
We can control NeoPixels using Raspberry Pi, Arduino and Raspberry Pi Pico W (plus many more boards) and in this how to we will use CircuitPython on the Raspberry Pi Pico W. CircuitPython has a ready to go CircuitPython module that we can use to get up and running with very little code.
Our goal for this project is to create a holiday themed decoration which uses NeoPixels. How we control it is via the Cheerlights API. Cheerlights is a global network of synchronized lights. Sending a tweet to @cheerlights containing one of the supported colors will trigger our project to change color, but better than that, it changes the color of every Cheerlight across the globe.
Cheerlights supports the following colors. In the code we have converted these hex values into RGB for ease of use with CircuitPython’s NeoPixel module.
- red (#FF0000)
- green (#008000)
- blue (#0000FF)
- cyan (#00FFFF)
- white (#FFFFFF)
- oldlace (#FDF5E6)
- purple (#800080)
- magenta (#FF00FF)
- yellow (#FFFF00)
- orange (#FFA500)
- pink (#FFC0CB)
Building the Circuit
For This Project You Will Need
- A Raspberry Pi Pico W
- A half size breadboard
- Circular NeoPixels (7 Pixels)
- 3 x Male to male jumper wires
- 3D Printed plinth
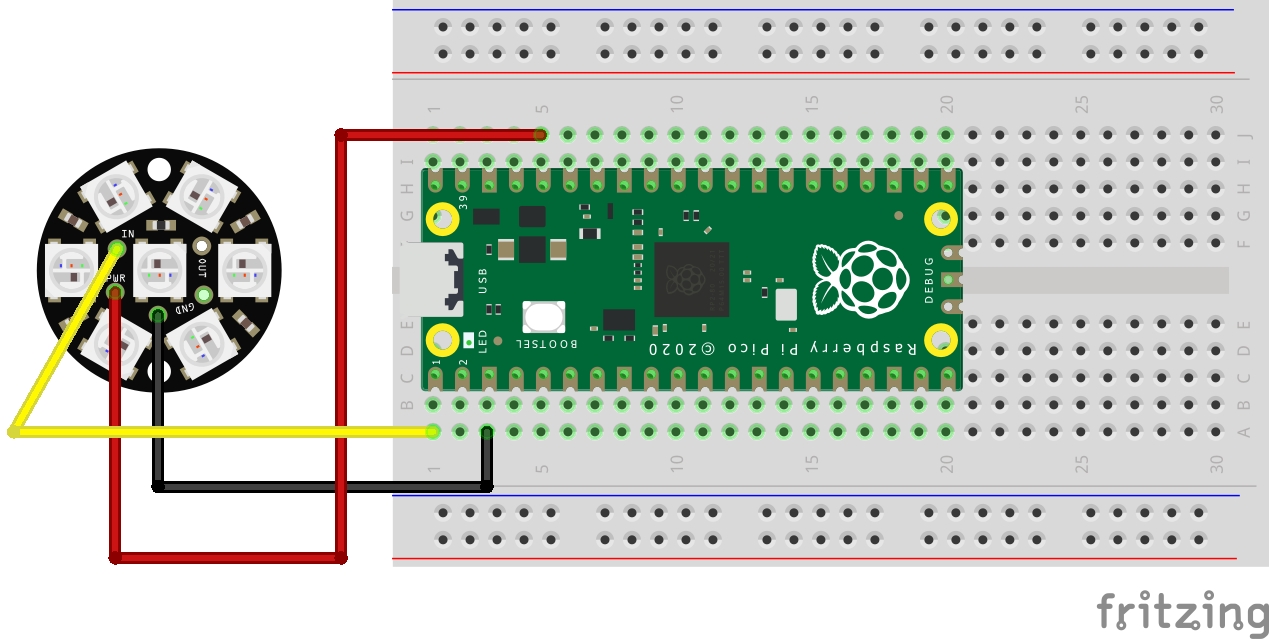
The circuit is essentially just a NeoPixel ring connected to the Raspberry Pi Pico W’s GPIO. We take power from the 3.3V pin, connect GND and use GP0 as a data pin to control the NeoPixels.
| Wire Color | Raspberry Pi Pico W | NeoPixel |
|---|---|---|
| Yellow | GP0 | IN |
| Red | 3V3 Out | PWR |
| Black | GND | GND |
Building the Decoration
We wanted to make this project a little special, so we designed a quick 3D print to celebrate a holiday season.
Using the same principle (but massively simplified) as we used for the Tufty 2040 badge holder, we created a basic layout using Inkscape and SVG files.
Get Tom's Hardware's best news and in-depth reviews, straight to your inbox.
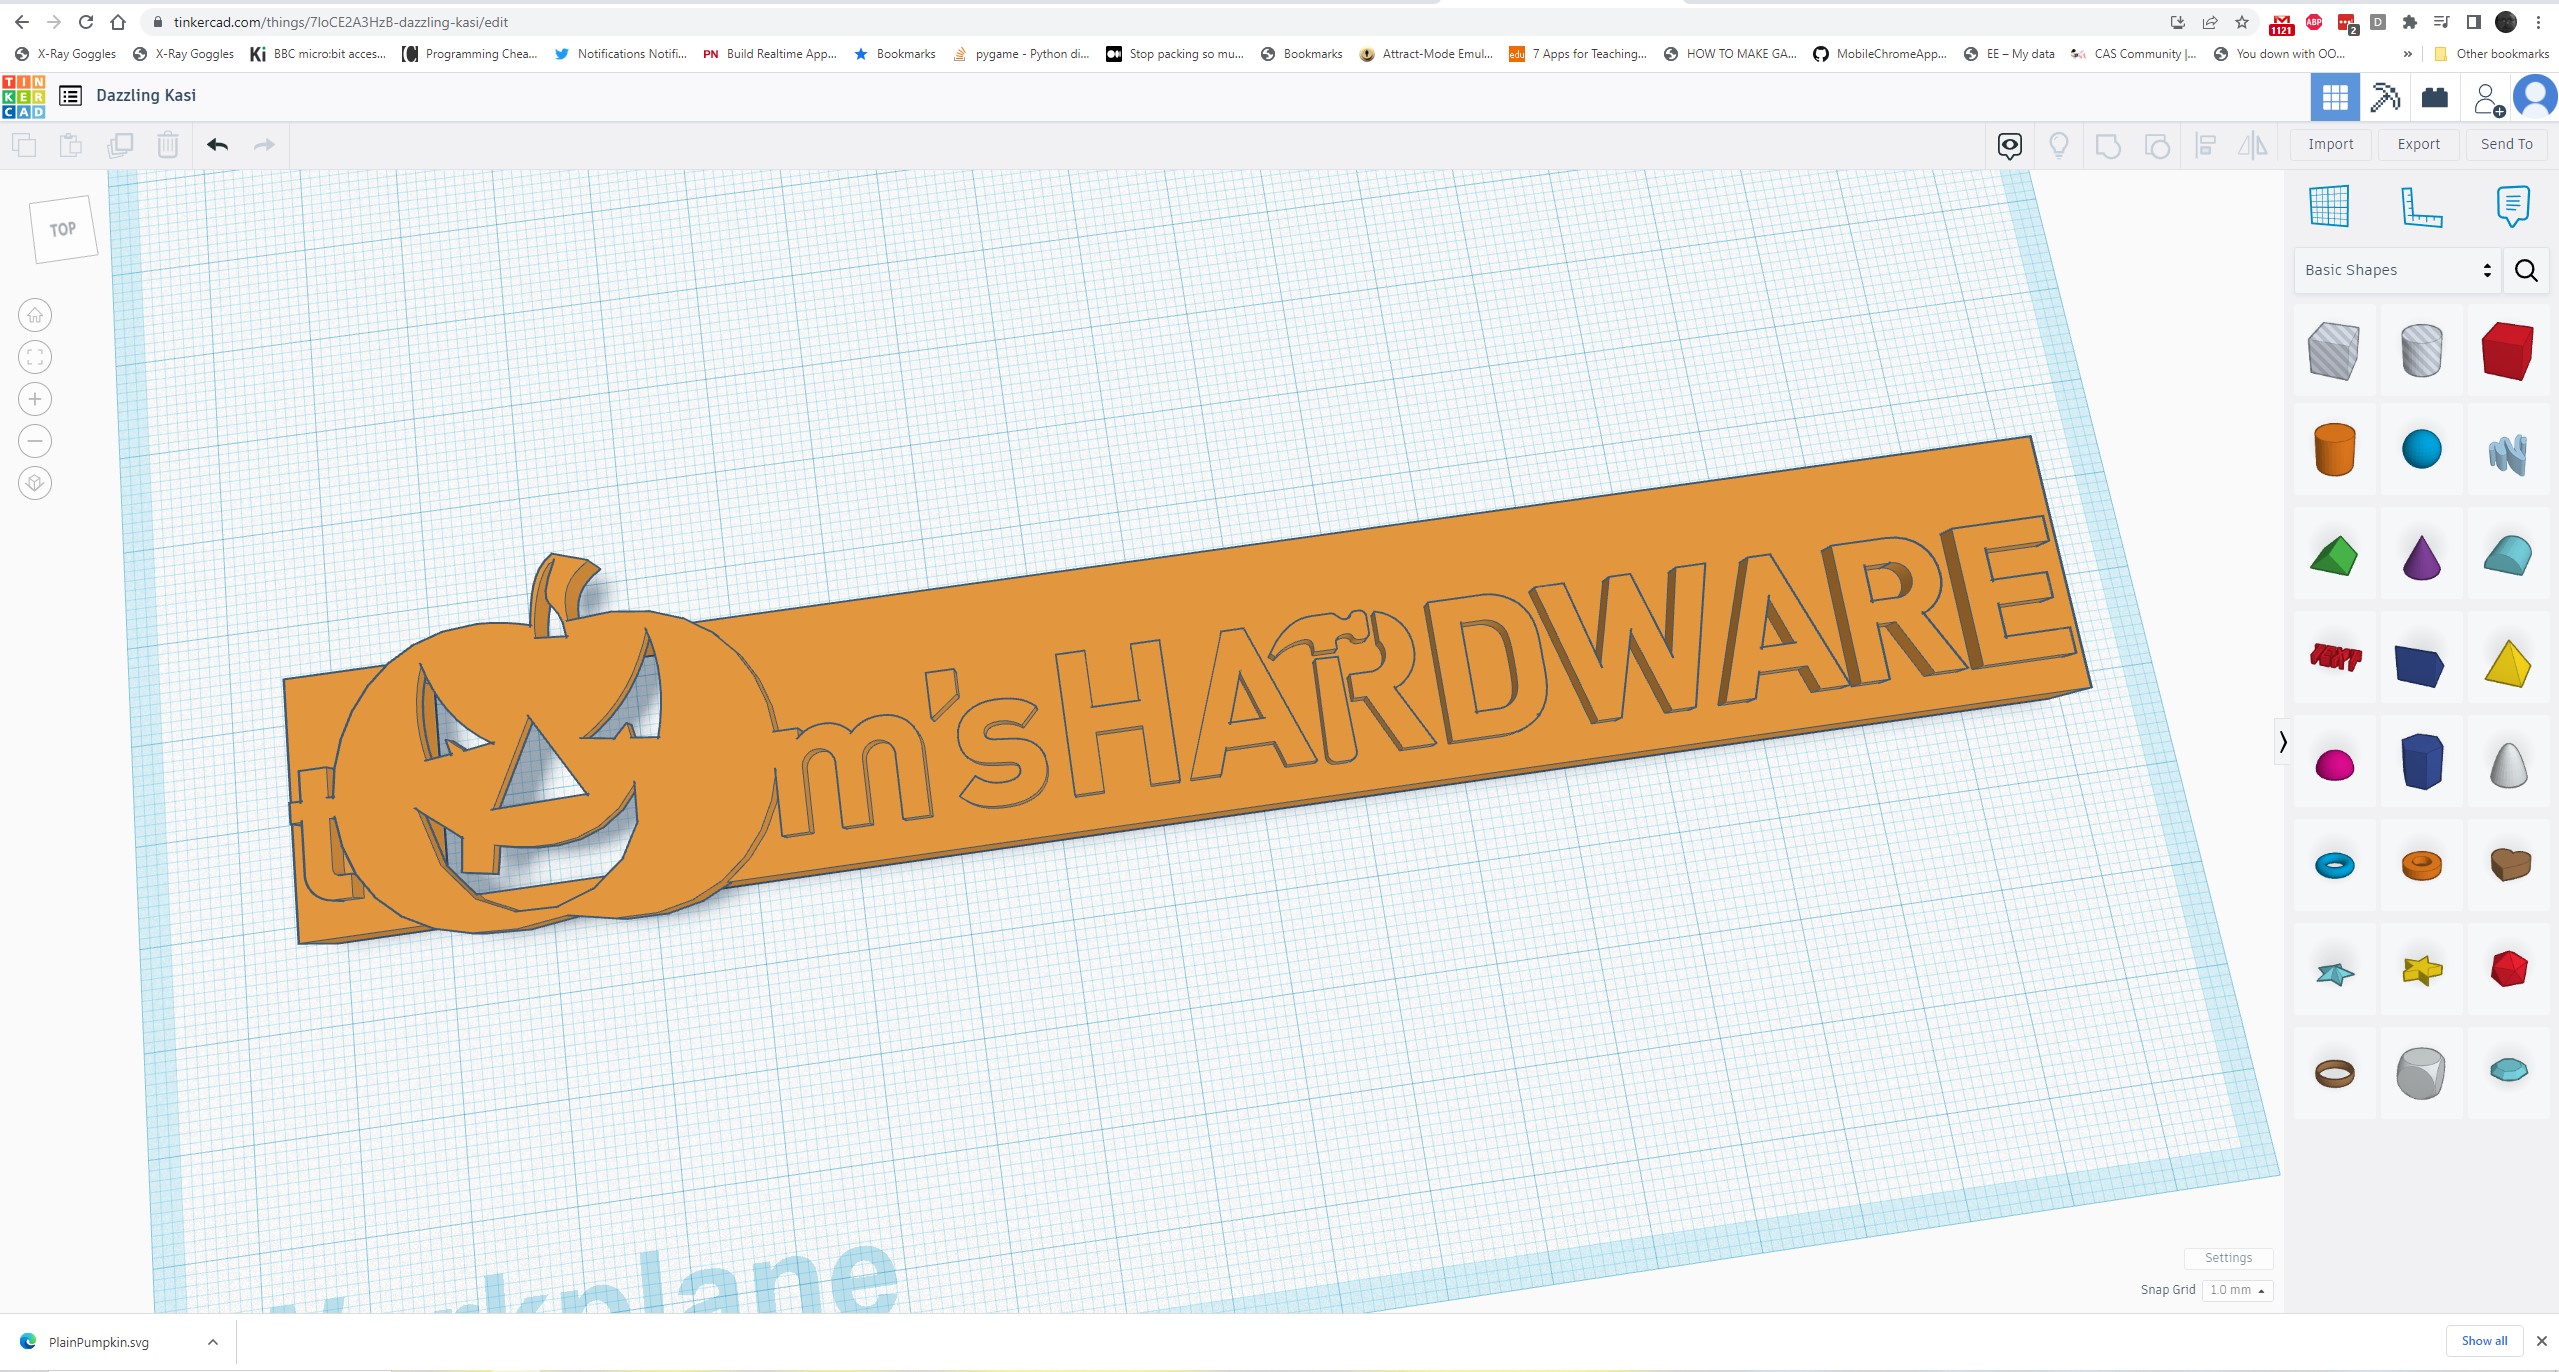
We then imported the project into Tinkercad and extruded the SVG to create a solid 3D object, then added a plinth to contain the graphics.
Lastly we cut sections from the rear to house our LEDs and wires. We got this wrong but the end result is not impaired.
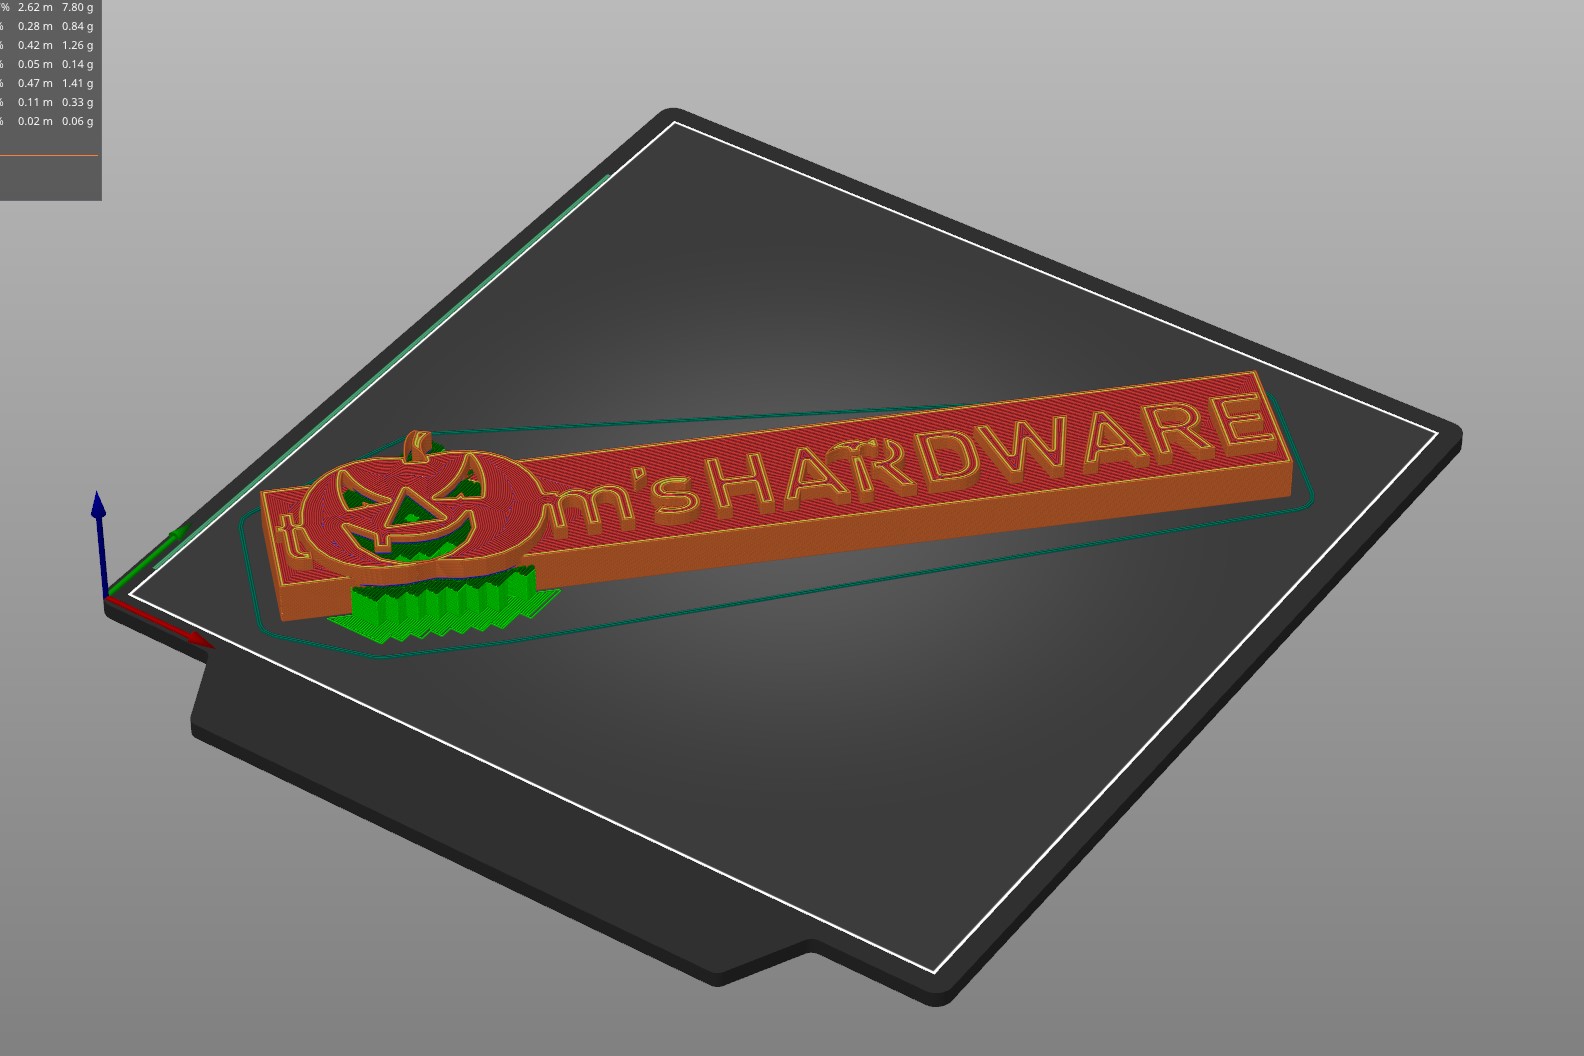
We exported the design as an STL, then sliced it using Prusa Slicer for use with our Creality Ender 2 Pro, a low-cost printer which appears on our best 3D printers page.
Configuring CircuitPython
1. Go to the official CircuitPython page for the Raspberry Pi Pico W and download the latest release UF2 firmware image. At the time of writing this was CircuitPython 8 Beta 2.
2. Whilst holding the BOOTSEL button, connect the Raspberry Pi Pico W to your computer. A new drive, RPI-RP2 will appear.
3. Copy the downloaded CircuitPython UF2 file to RPI-RP2. This will write CircuitPython to the internal flash storage of the Pico W. A new drive, CIRCUITPY will appear.
We need a number of CircuitPython libraries before we can continue. These libraries of prewritten code add extra features to a project.
1. Download the bundle of libraries for the same version of CircuitPython as installed on the Pico W. We installed CircuitPython 8 so downloaded the bundle for version 8.x.
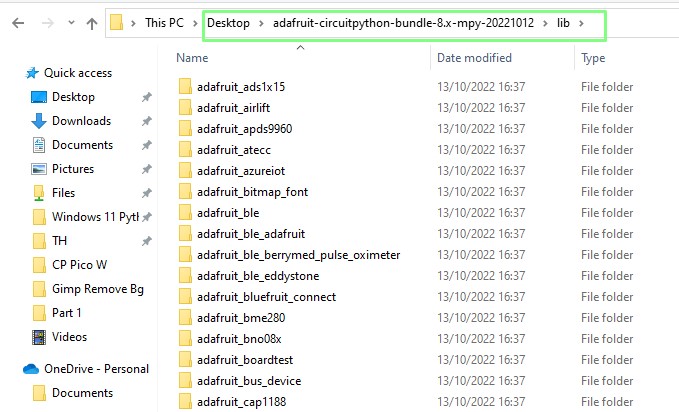
2. Extract the bundle to your desktop and then open the lib folder contained within.
3. Copy the following files / folders from this lib folder to the lib folder on the CIRCUITPY drive.
adafruit_pixelbuf.mpy
neopixel.mpy
adafruit_requests.mpy
Working with CircuitPython
1. Download and install Thonny if you don’t have it already. Thonny is a Python editor which covers Python 3, MicroPython and CircuitPython.
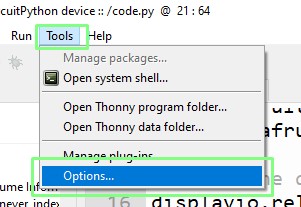
2. Open Thonny and go to Tools >> Options.
3. Select Interpreter, then set the interpreter as CircuitPython, port to automatic, and click OK. Thonny will now connect to the Pico W running CircuitPython.
Our project code is made up of two files, secrets.py and code.py. The secrets.py file is essentially a Python module with two variables that will contain the SSID of our Wi-Fi access point, and the password. It is best practice to save your Wi-Fi details to a separate file called secrets.py, this reduces the risk of accidentally sharing your credentials. This process works for CircuitPython and MicroPython.
1. Create a new file and in there create two objects, ssid and password.
2. For the ssid object, assign it the name of your Wi-Fi access point / router.
ssid = “YOUR WI-FI AP NAME HERE”3. For the password, assign the Wi-Fi password.
password = “YOUR SECRET PASSWORD”
4. Save the file to the CIRCUITPY drive as secrets.py.
Secrets.py Code Listing
ssid = "YOUR WI-FI AP NAME HERE"
password = "YOUR SECRET PASSWORD"
The code for this project is contained in a file called code.py. This file will autorun when the Pico W is powered up, this is a feature of CircuitPython. In MicroPython we would name the file main.py to achieve the same result. We now start the process of writing the code that will make up our project.
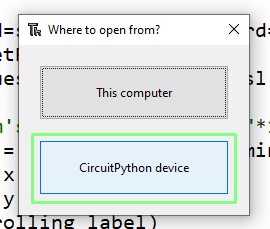
1. Click on File >> Open and select the CircuitPython device. Open code.py on the CIRCUITPY drive. Delete any code in the file.
2. Import modules of pre-written code to handle pause (time) our code, set an IP address, use the Pico W’s Wi-Fi chip and to create web sockets.
import time
import ipaddress
import wifi
import socketpool
3. Import five more modules for secure connections, to make web requests, a module with our Wi-Fi login details,a module to interact with the GPIO and finally the NeoPixel module.
import ssl
import adafruit_requests
import secrets
import board
import neopixel
4. Create an object, pixel_pin to instruct the code as to where our NeoPixels are connected, then create another object to set the number of pixels.
pixel_pin = board.GP0
num_pixels = 7
5. Use another object, pixels, to configure the NeoPixels connected to the GPIO. This object passes the GPIO pin and number of pixels, saved in the previous objects and we can set the brightness of the pixels. Consider 0.3 as a safe maximum brightness.
pixels = neopixel.NeoPixel(pixel_pin, num_pixels, brightness=0.1, auto_write=False)6. Create an object, off to store a tuple that contains three integers, 0,0,0. These integers represent the mix of red, green and blue light that we use to make colors with NeoPixels. Three zeros represent no light, essentially turning them off.
off = (0,0,0)7. Use the pixels object, and the value stored in off to turn off the NeoPixels, then use show to set the pixels to that “color” and pause for 0.1 seconds.
pixels.fill(off)
pixels.show()
time.sleep(0.1)
8. Create a function called “scare” and set it to accept an argument which will be the NeoPixel color.
def scare(color):9. Create a dictionary inside the function called “colors” and in there store the name and RGB values for the Cheerlights colors. A Dictionary is a Python data storage object which uses keys to retrieve values. In this case the keys are the color names, and when they are called, they retrieve the RGB values that our NeoPixels use.
   colors = {"red":(255,0,0),
             "green":(0,255,0),
             "blue":(0,0,255),
             "cyan":(0,255,255),
             "white":(255,255,255),
             "oldlace":(253,245,230),
             "purple":(128,0,128),
             "magenta":(255,0,255),
             "yellow":(255,255,0),
             "orange":(255, 165, 0),
             "pink":(255, 192, 203)
             }
10. Still inside the function create a conditional test that checks for the color, passed as an argument in the function, is present in the colors dictionary.
if color in colors:11. If the color is present we print the name of the color, and then set the NeoPixels to that color.
       print(colors[color])
       pixels.fill(colors[color])
       pixels.show()
12. If the code is not present, an error message is printed to the Python shell. This section ends the function code.
   else:
       print("Sorry that color is not in the list")
13. Connect to the Wi-Fi using the ssid and password stored in the secrets module.
wifi.radio.connect(ssid=secrets.ssid,password=secrets.password)14. Create a pool of sockets that we can use for connections and then create a new HTTP session to be used when making web requests.
pool = socketpool.SocketPool(wifi.radio)
request = adafruit_requests.Session(pool, ssl.create_default_context())
15. Create a while True loop to run the main project code. This loop will continue for as long as the Pico W is powered on.
while True:16. Create an object, feed, to store the JSON feed URL for the last color tweeted to Cheerlights.
feed = request.get("http://api.thingspeak.com/channels/1417/field/1/last.json")17. Print the last color to the Python shell. This is stored in the JSON object under “filed1”.
print(feed.json()['field1'])18. Call the scare function and pass the last color, from the JSON feed.
scare(feed.json()['field1'])19. Add a ten second pause to hold the NeoPixel color before the loop repeats.
time.sleep(10)20. Save the project to the Raspberry Pi Pico W as code.py. Click Run to start the code and watch the NeoPixels change color.
21. Use your Twitter account to send a tweet to @cheerlights, using one of the supported colors.
Complete Code Listing
import time
import ipaddress
import wifi
import socketpool
import ssl
import adafruit_requests
import secrets
import board
import neopixel
pixel_pin = board.GP0
num_pixels = 7
pixels = neopixel.NeoPixel(pixel_pin, num_pixels, brightness=0.1, auto_write=False)
off = (0,0,0)
pixels.fill(off)
pixels.show()
time.sleep(0.1)
def scare(color):
   colors = {"red":(255,0,0),
             "green":(0,255,0),
             "blue":(0,0,255),
             "cyan":(0,255,255),
             "white":(255,255,255),
             "oldlace":(253,245,230),
             "purple":(128,0,128),
             "magenta":(255,0,255),
             "yellow":(255,255,0),
             "orange":(255, 165, 0),
             "pink":(255, 192, 203)
             }
   if color in colors:
       print(colors[color])
       pixels.fill(colors[color])
       pixels.show()
   else:
       print("Sorry that color is not in the list")
wifi.radio.connect(ssid=secrets.ssid,password=secrets.password)
pool = socketpool.SocketPool(wifi.radio)
request = adafruit_requests.Session(pool, ssl.create_default_context())
while True:
   feed = request.get("http://api.thingspeak.com/channels/1417/field/1/last.json")
   print(feed.json()['field1'])
   scare(feed.json()['field1'])
time.sleep(10)
Les Pounder is an associate editor at Tom's Hardware. He is a creative technologist and for seven years has created projects to educate and inspire minds both young and old. He has worked with the Raspberry Pi Foundation to write and deliver their teacher training program "Picademy".
-
MiketheYeti I just did the tutorial, and it works great! I am having no luck with the pico running on USB power only. It will only work when connected to my computer. Are there any suggestions to get me in the correct direction?Reply -
MiketheYeti Aha! The brick I was using was not up to the task of powering the Pico and my lights. The tutorial is the way.Reply
