How to Program Raspberry Pi Remotely, Using a Browser with VS Code
Use the browser-based, code-server editor on your PC to write programs on your Raspberry Pi 4
Get Tom's Hardware's best news and in-depth reviews, straight to your inbox.
You are now subscribed
Your newsletter sign-up was successful
Remotely editing code on a Raspberry Pi is possible, but it relies on taking a few steps to setup the working environment. Typically we would enable SSH and then connect using a terminal, access the files on the Pi via a sftp connection or run a VNC connection after doing a headless Raspberry Pi setup. However all of these methods have their drawbacks, whether it’s limiting yourself to text-based editors in the terminal or slowing yourself down by having to constantly reupload files or wait for a sluggish remote desktop.
But what if we could write code, on our Raspberry Pi using a web-based interface that’s accessible from another device on your network such as a laptop or tablet? Well now we can and in this tutorial we will introduce code-server, a tool that enables us to program in in Microsoft’s Visual Studio Code application from the comfort of your device’s browser. Of course, since this is a Raspberry Pi, you’ll be using Pi-friendly languages such as Python or web-friendly languages like JavaScript, not Microsoft languages such as Visual Basic or C#.
To install code-server, power up your Raspberry Pi 4 and follow these instructions.
1. Download and install code-server by entering this command in the terminal.
curl -fsSL https://code-server.dev/install.sh | sh2. Autostart code-server on boot by running the server as a service in the background.
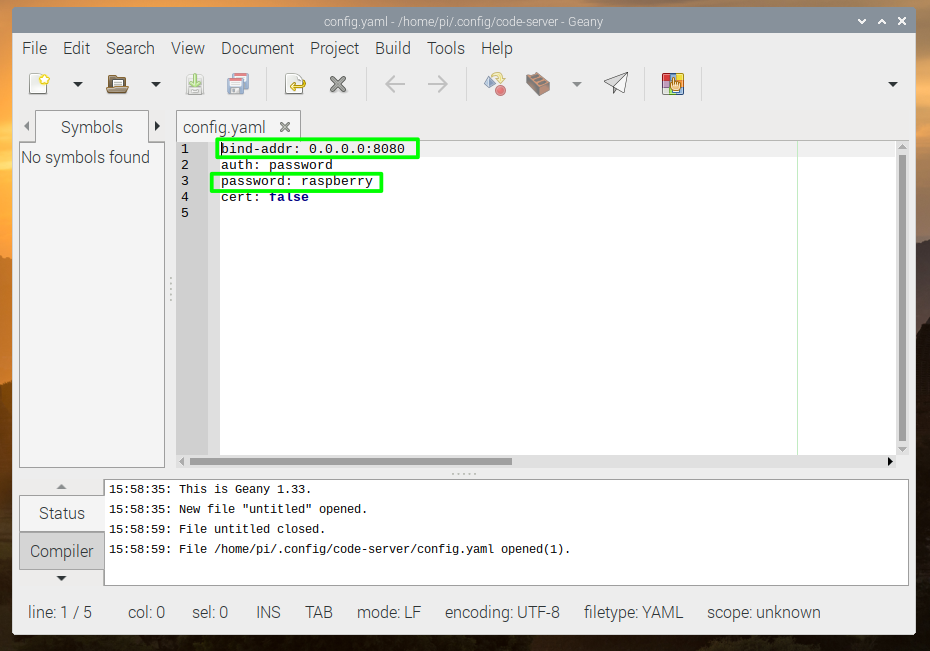
systemctl --user enable --now code-server3. Open the config file for editing in Geany.
geany /home/pi/.config/code-server/config.yaml4. Change the bind address to enable any device on the network to connect.
Get Tom's Hardware's best news and in-depth reviews, straight to your inbox.
0.0.0.0:80805. Change the password to raspberry. Press CTRL + X, Y and then Enter to save and exit.
6. Get your IP address by hovering the mouse cursor over the Networking icon in the top right corner.
7. Reboot the Raspberry Pi and
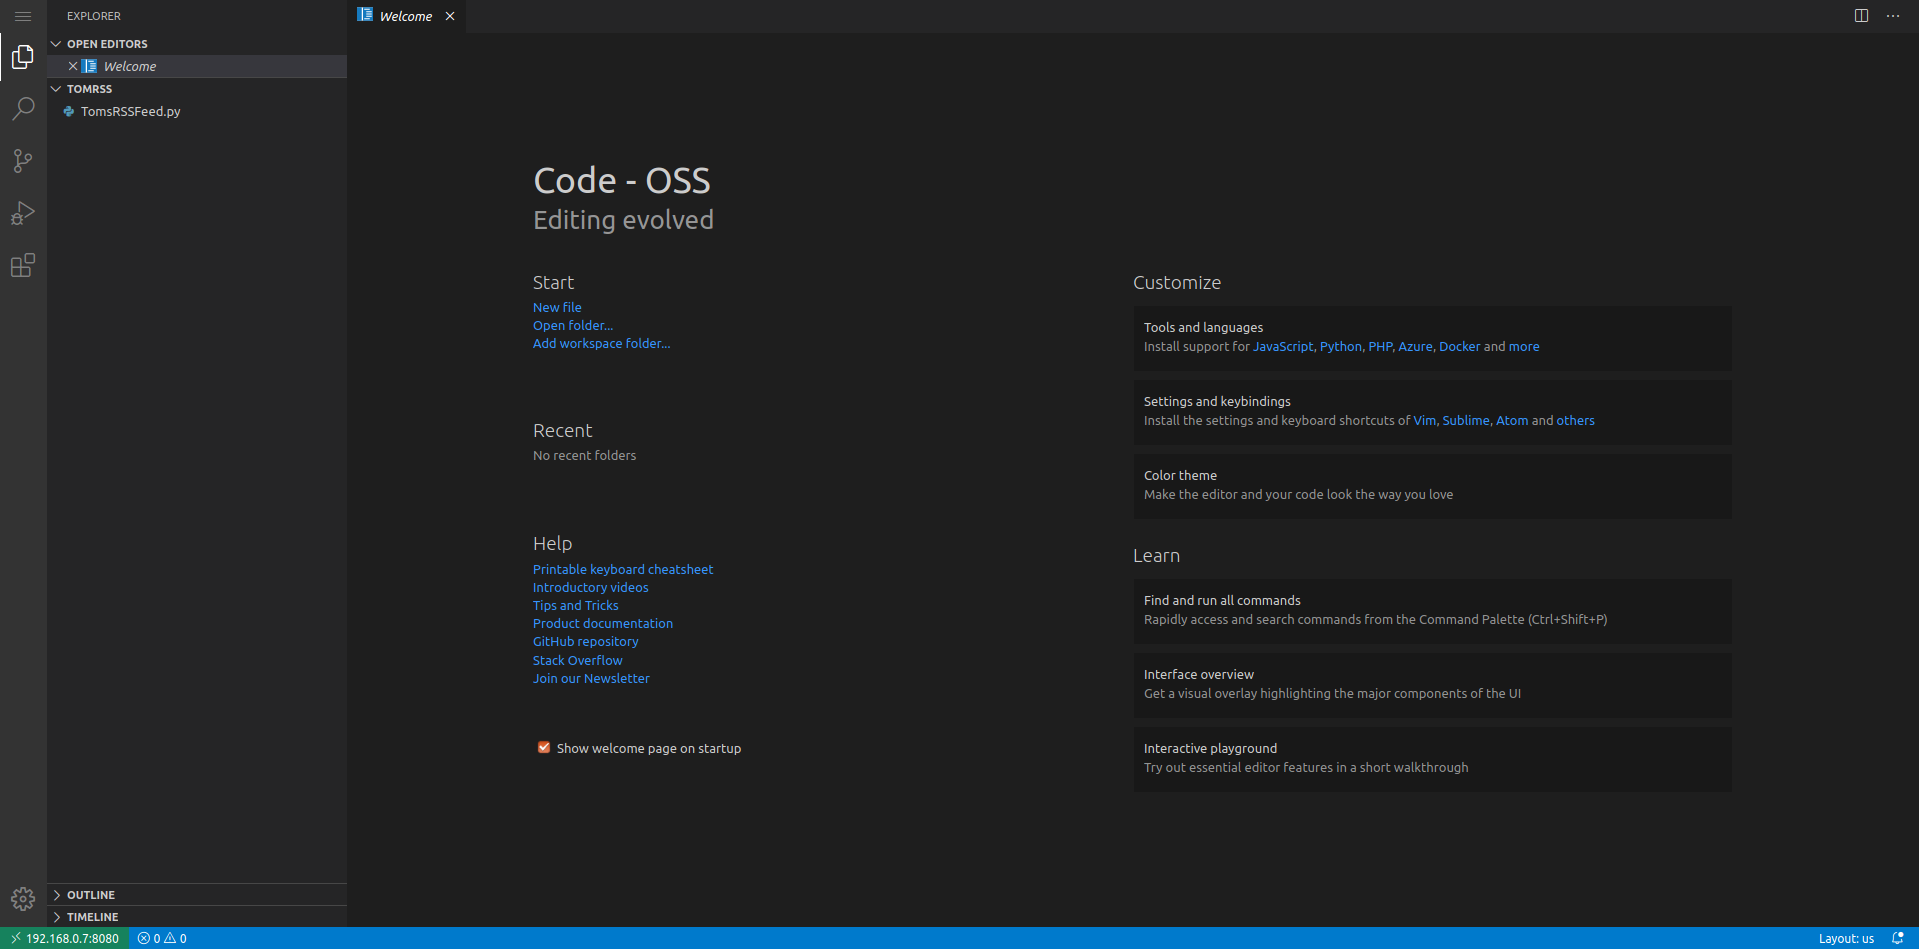
8. On a PC on the same network, open a browser and go to the IP address of the Raspberry Pi, followed by :8080. For example
192.168.0.6:80809. Log in using the password “raspberry.”
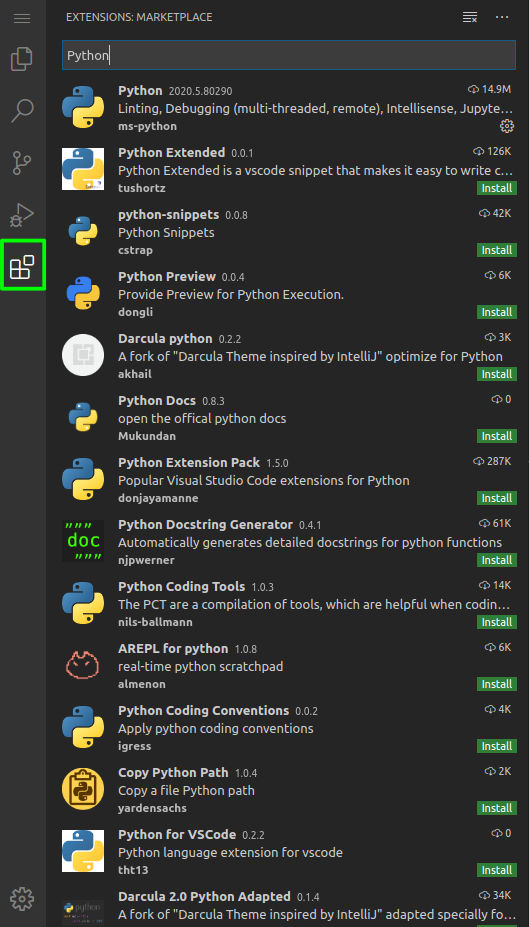
10. Click on Python, found under Tools and languages to install support for Python 3.
What makes code-server and VS Code different to other more beginner focussed editors is in how they can be extended to match the way we work.
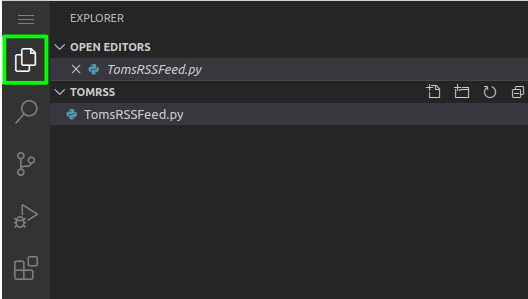
Project files can be grouped into folders, tidying away the many files that are generated in a large project.
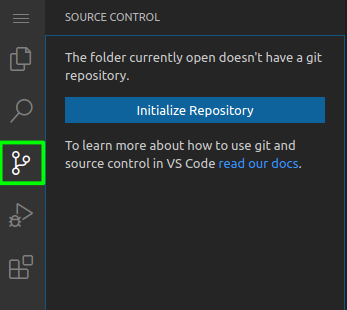
There are tools to work with source control, where code is stored in a version control system such as Git. We can publicly publish our project while still inside the editor.
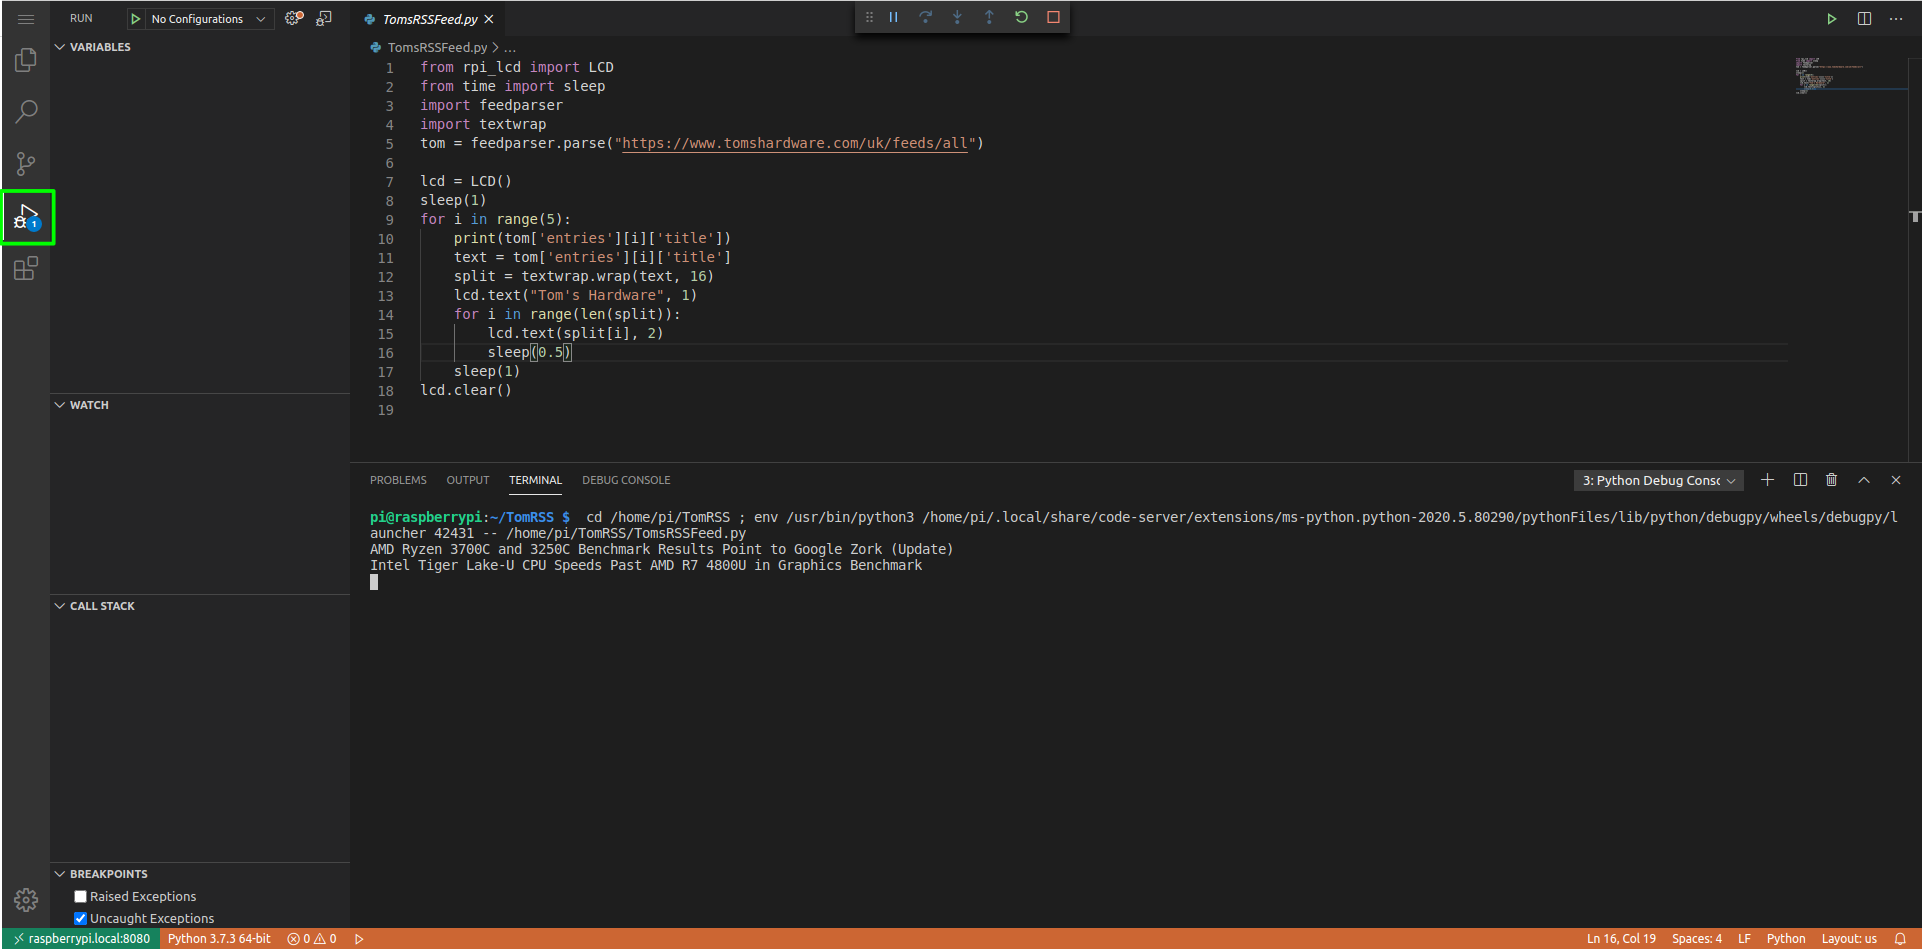
We can step through the code, looking for bugs and issues in the code as they happen. Pause, rewind, restart or stop as the code performs each task.

Les Pounder is an associate editor at Tom's Hardware. He is a creative technologist and for seven years has created projects to educate and inspire minds both young and old. He has worked with the Raspberry Pi Foundation to write and deliver their teacher training program "Picademy".
-
SonoraTechnical This is more or less what you do with Node-RED development on Raspberry PI OS. You open up a browser on your local PC to the code on the Raspberry Pi and design/code away.Reply -
coolestcarl Hi, I probably write a comment once every 5 years or so. Therefore if I write anything, it usually shows how much it matters to me to write something.Reply
I really appreciate your dedicated Raspberry Pi section. I like the breadth that it covers and does not assume that everyone is some sort of IT demigod, or DevOps expert.
I write code, but I do not have a great depth of knowledge of the underlying hardware or OS. So its nice to have articles like this. Plus the stuff in the Raspberry Pi section is also more generally adaptable to use in the Linux world too.
Thanks and keep up the good work to all the contributors of the Raspberry Pi section.
I chose to comment in this particular article because I was having trouble with aspects of this very subject (i.e. the networking configuration part) and it cleared my brain fog.
God bless. -
nervalo88 Perfect tutorial !Reply
but...This don't work with old raspbian releases (Raspbian GNU/Linux 10 (buster) as it requires a 64bits OS.
And do not expect to get relieved by installing yarn/node directly from repo as it is limited to node v10...
Ensure you use a recent raspberry pi OS and avoid custom images (like the octopi I just tested)
About security concerns, it is a good advice to check a script content before running it directly after download (which | sh command does indeed).
In that case, it is simply a way to have a multi-platform installer with a single entry point.
Thanks for this guide !
