How to Make a Raspberry Pi Work-From-Home Status Indicator
Update your work available/busy/meeting status on a Raspberry Pi LCD screen from your desktop.
Get Tom's Hardware's best news and in-depth reviews, straight to your inbox.
You are now subscribed
Your newsletter sign-up was successful
If you’re working from home and have kids or a partner around, you’ve probably had them barge into your home office when you were in the middle of an important meeting. Do you wish your family would visit you at more convenient times during the work day? In this tutorial, we’ll set up a method to show your work status (busy or available or “in a meeting”) on a Raspberry Pi LCD screen you can hang outside your door.
How does it work?
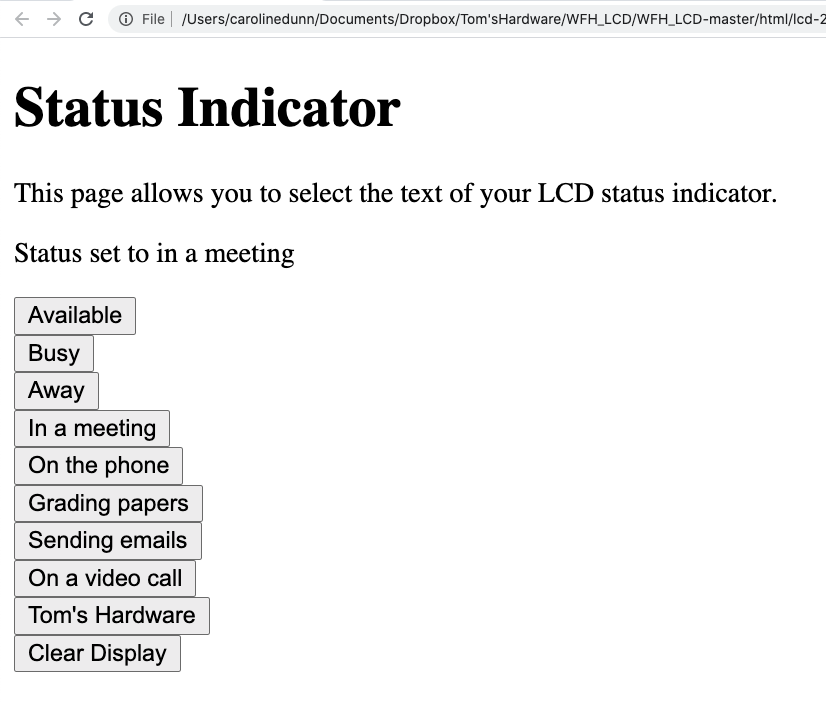
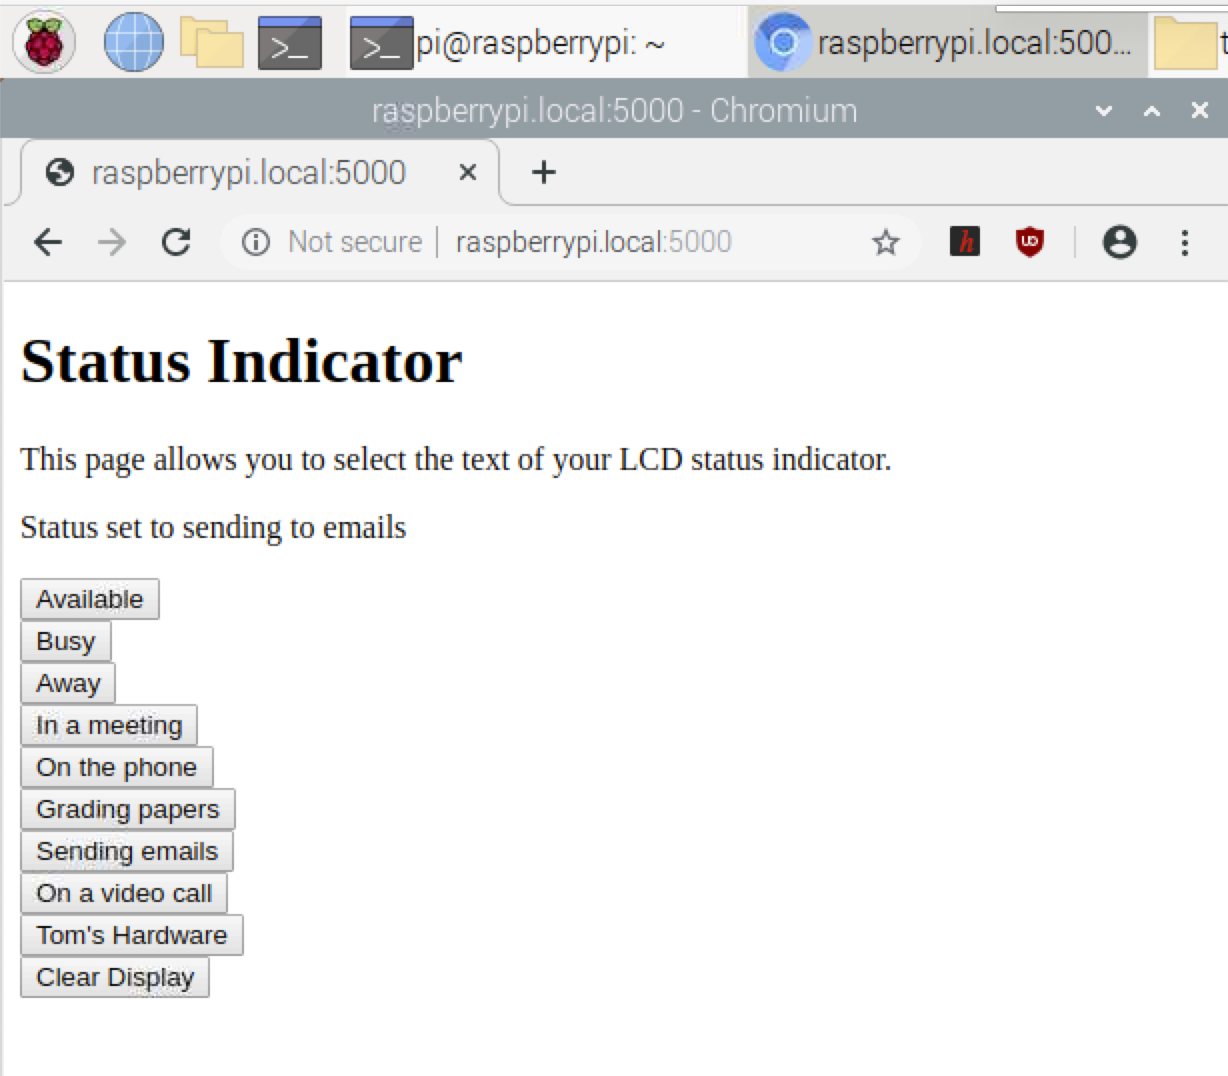
When you’re done, you’ll be able to update your status screen from a browser window on your PC. You’ll navigate to your local lcd.html page and then click a button to change the status.
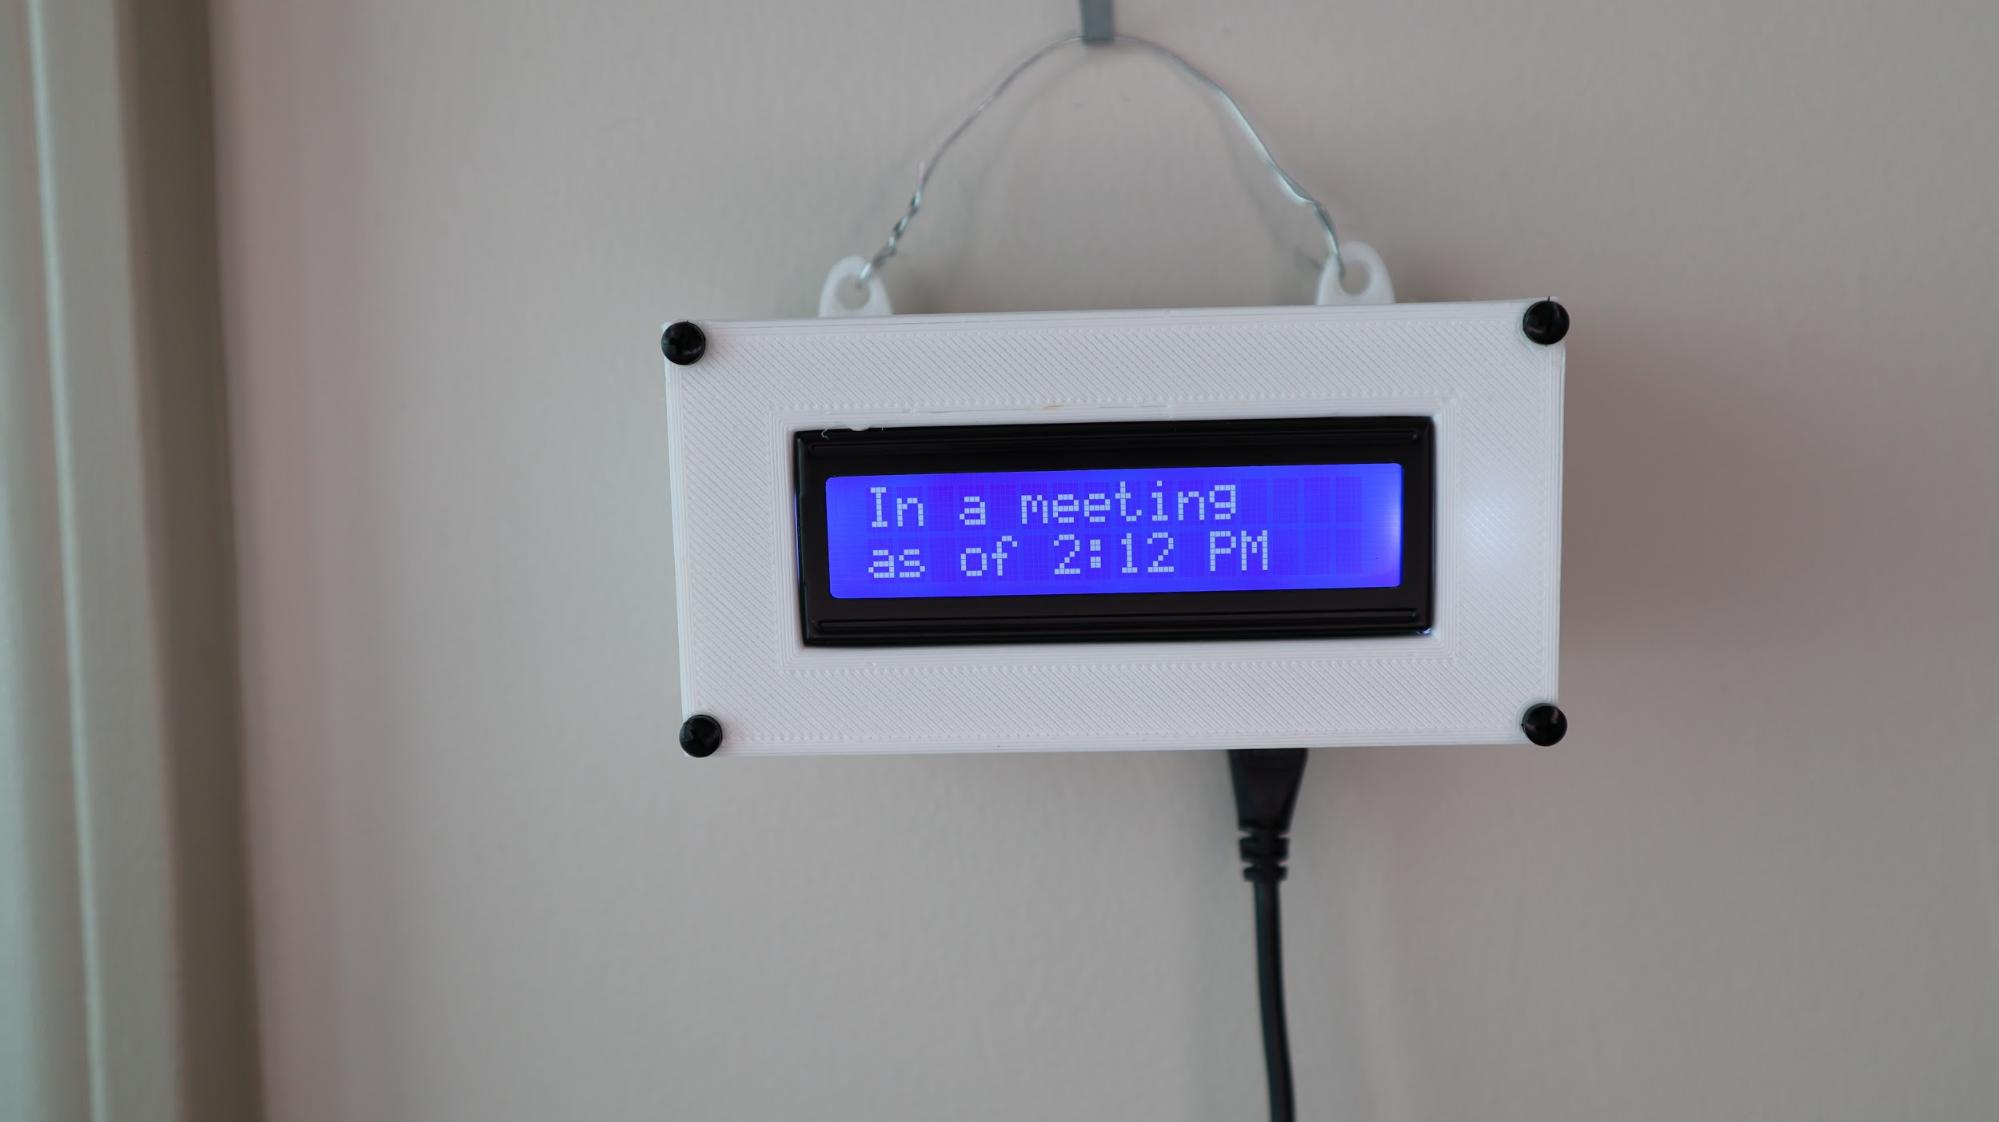
For example, if you click “In a meeting”
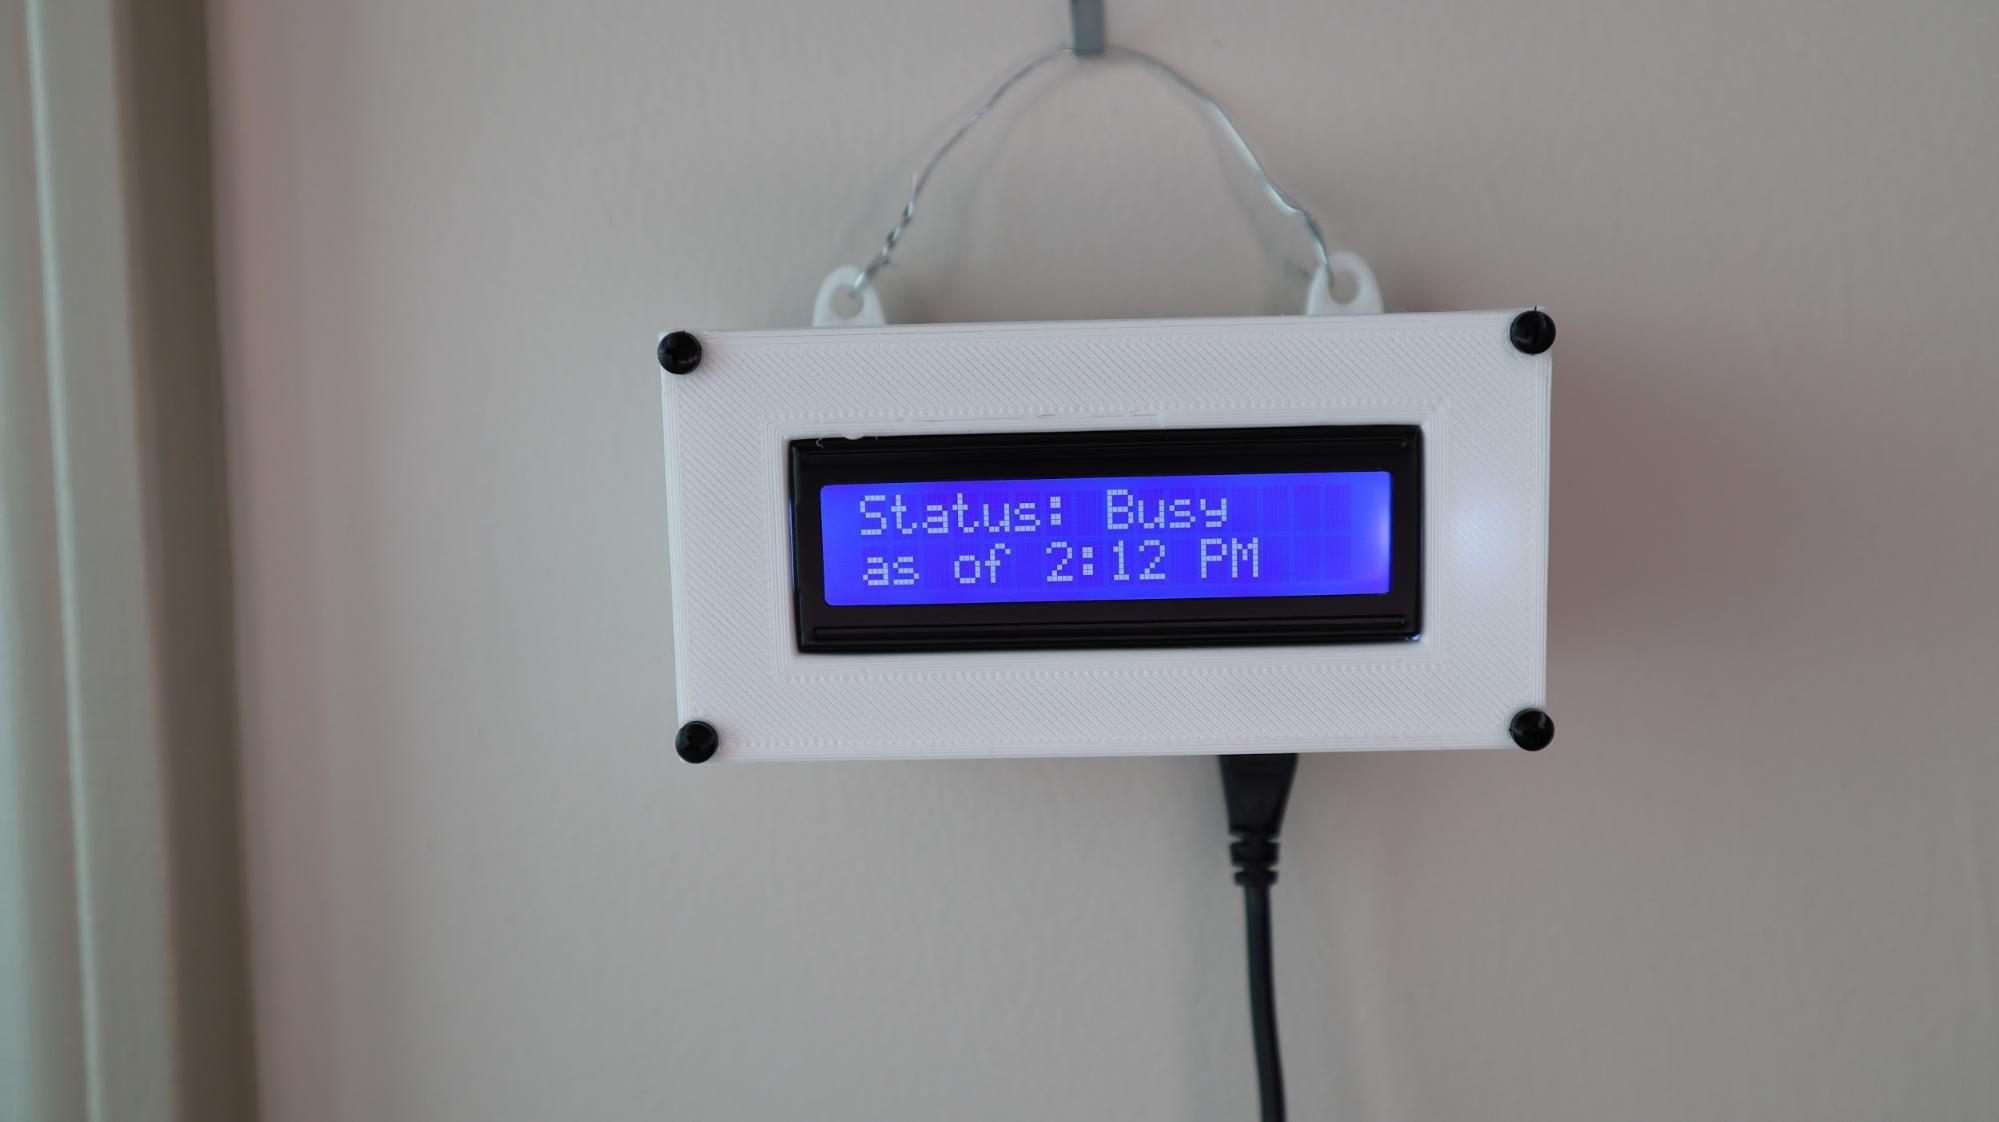
Your LCD screen will read: “In a meeting as of 2:12 pm” (2:12 pm represents a timestamp when you clicked the button)
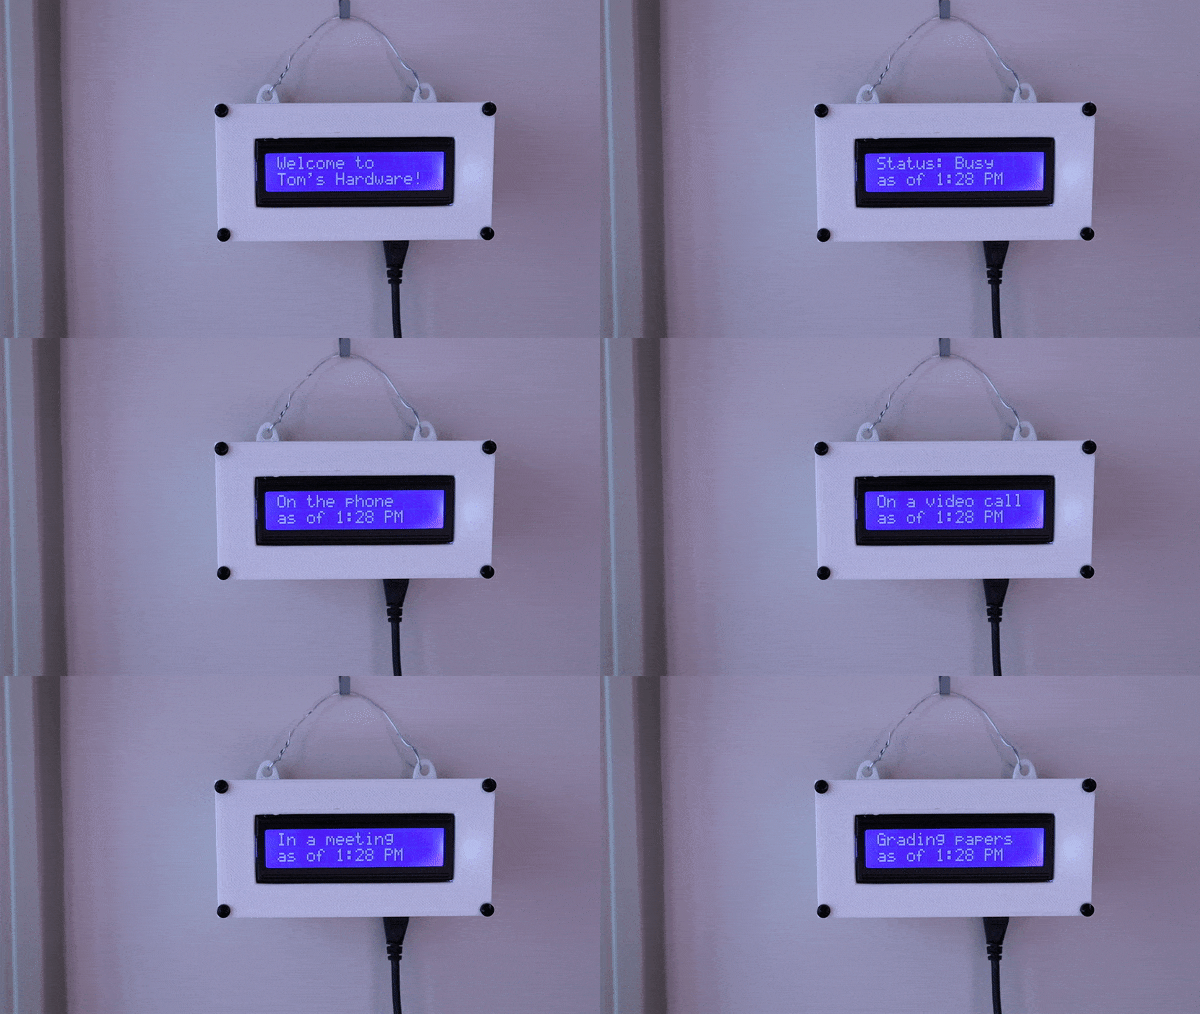
Below are messages included in the sample code, but you can change the messages to suit your needs.
- Status: Available
- Status: Busy
- Status: Away
- On the phone
- In a meeting
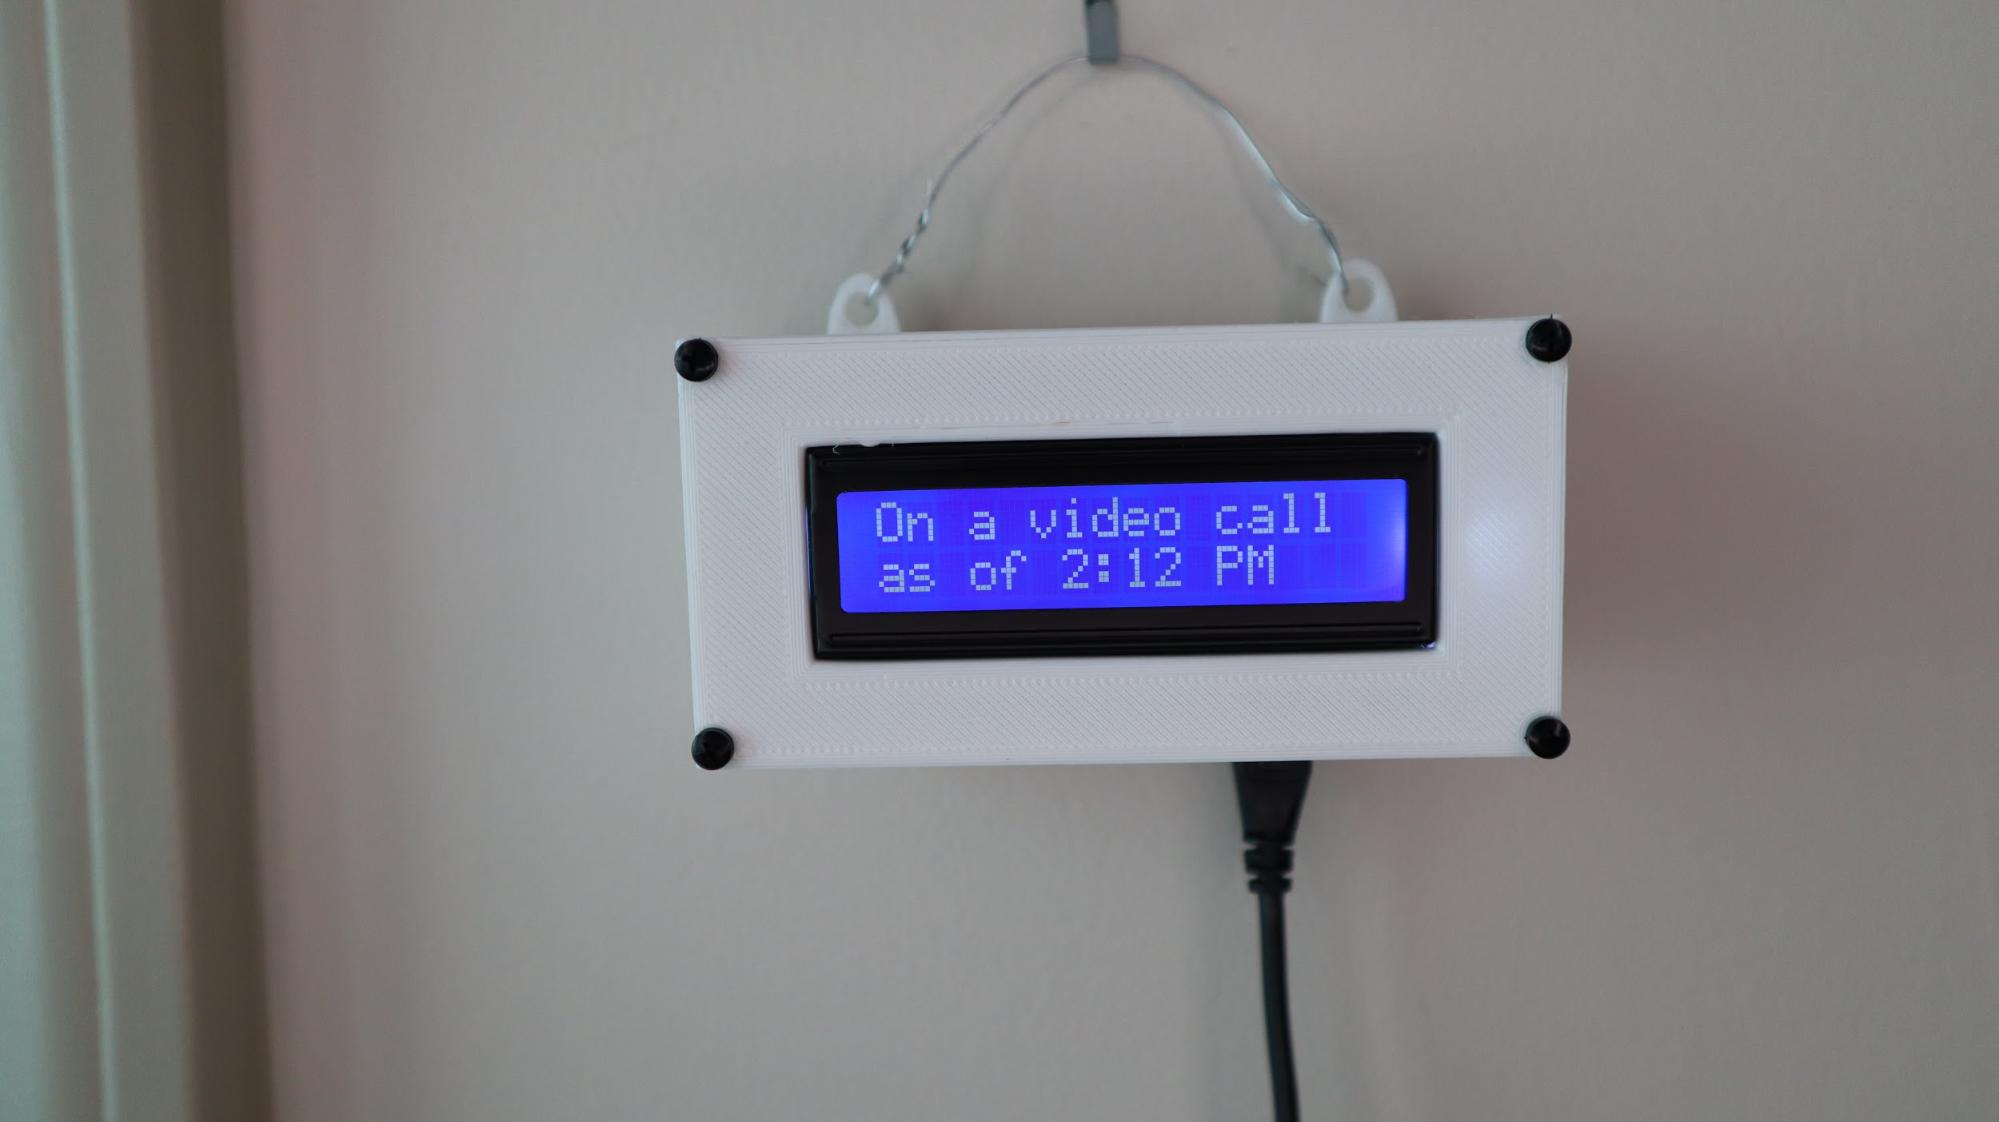
- On a video call
- Grading papers
What you’ll need:
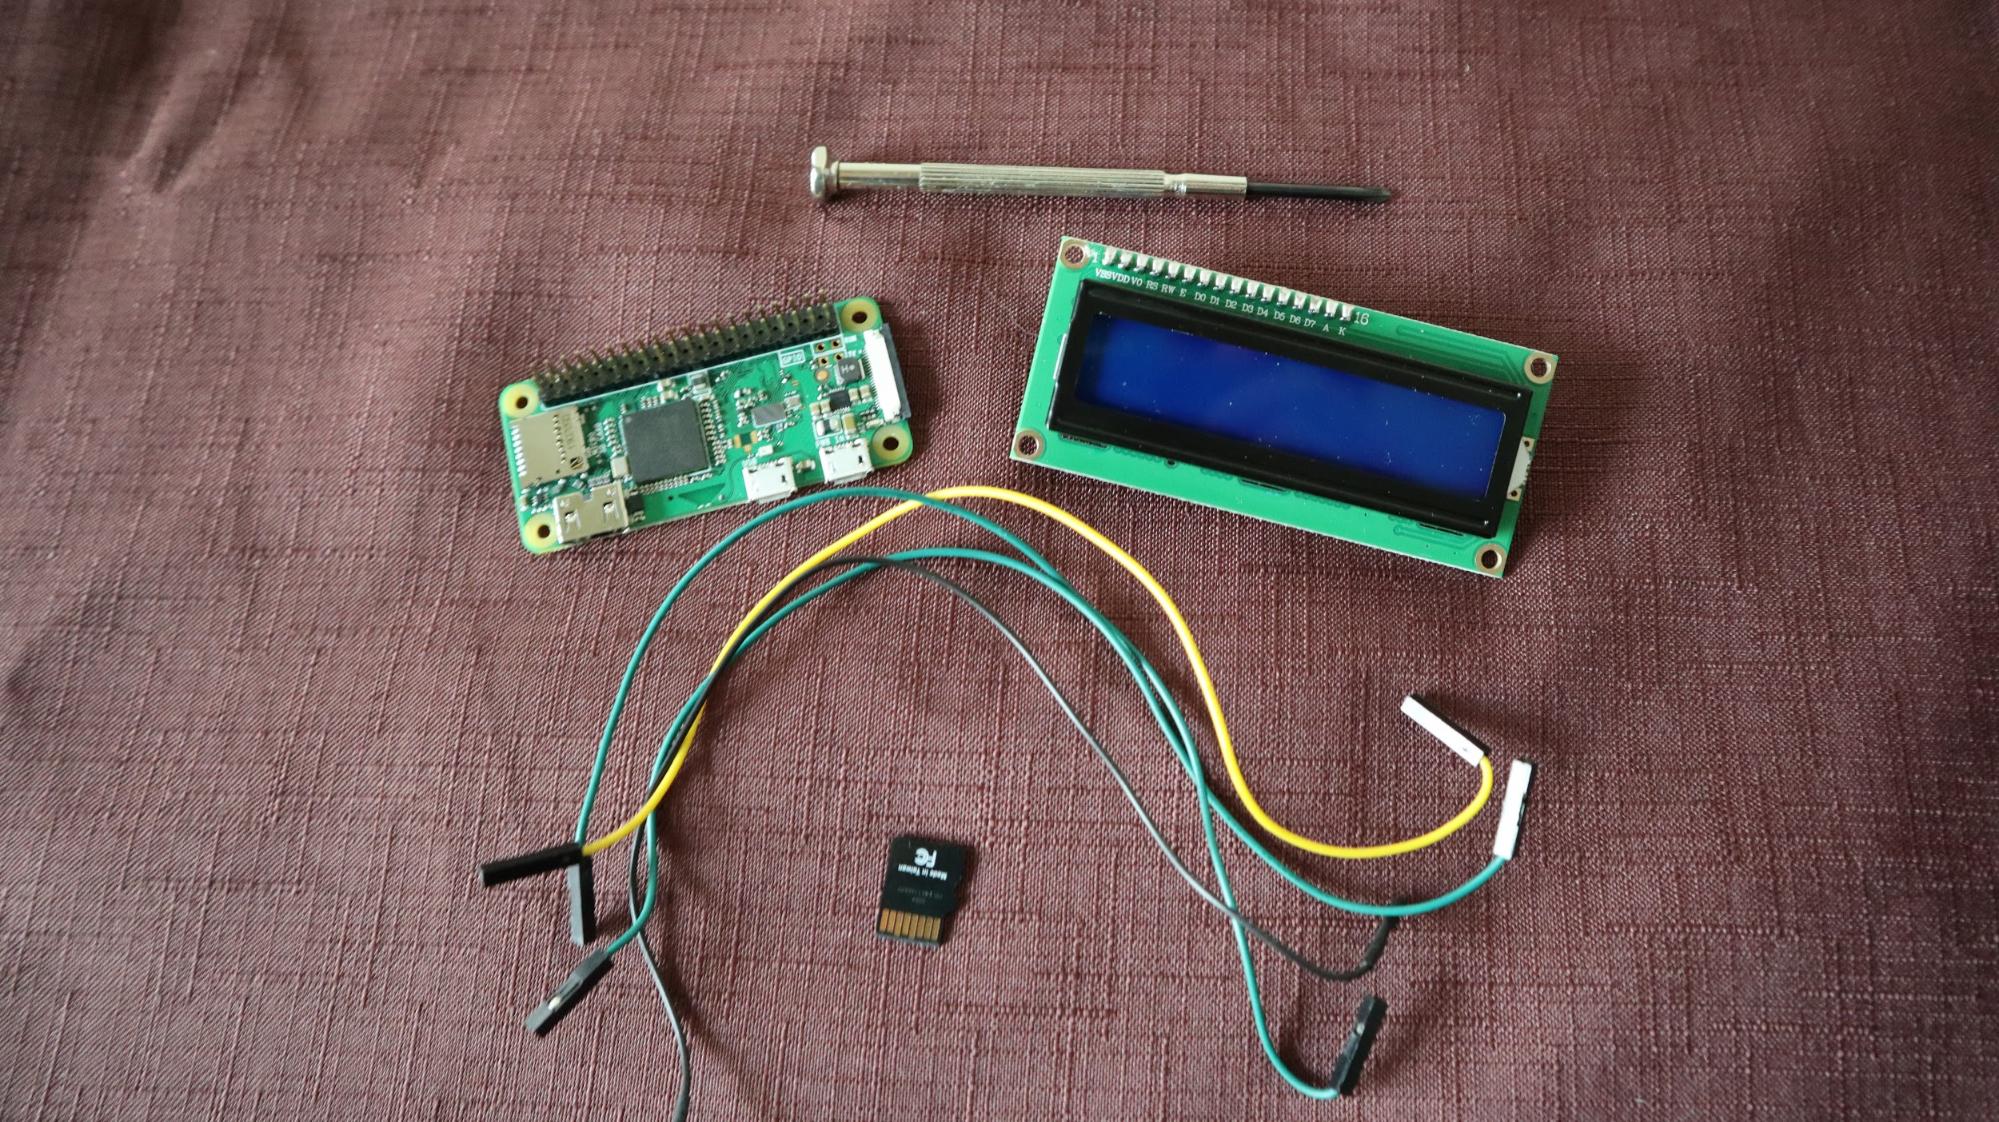
- Raspberry Pi Zero W with pre-soldered GPIO headers or you can solder them yourself. We could have used any model but the Raspberry Pi Zero W is small and low-power.
- Power supply/microSD card/Keyboard/Mouse/Monitor/HDMI Cable (for your Raspberry Pi)
- 16x2 LCD screen with I2C backpack
- Small screwdriver to adjust contrast of the LCD screen
- 4 Female-to-Female jumper wires
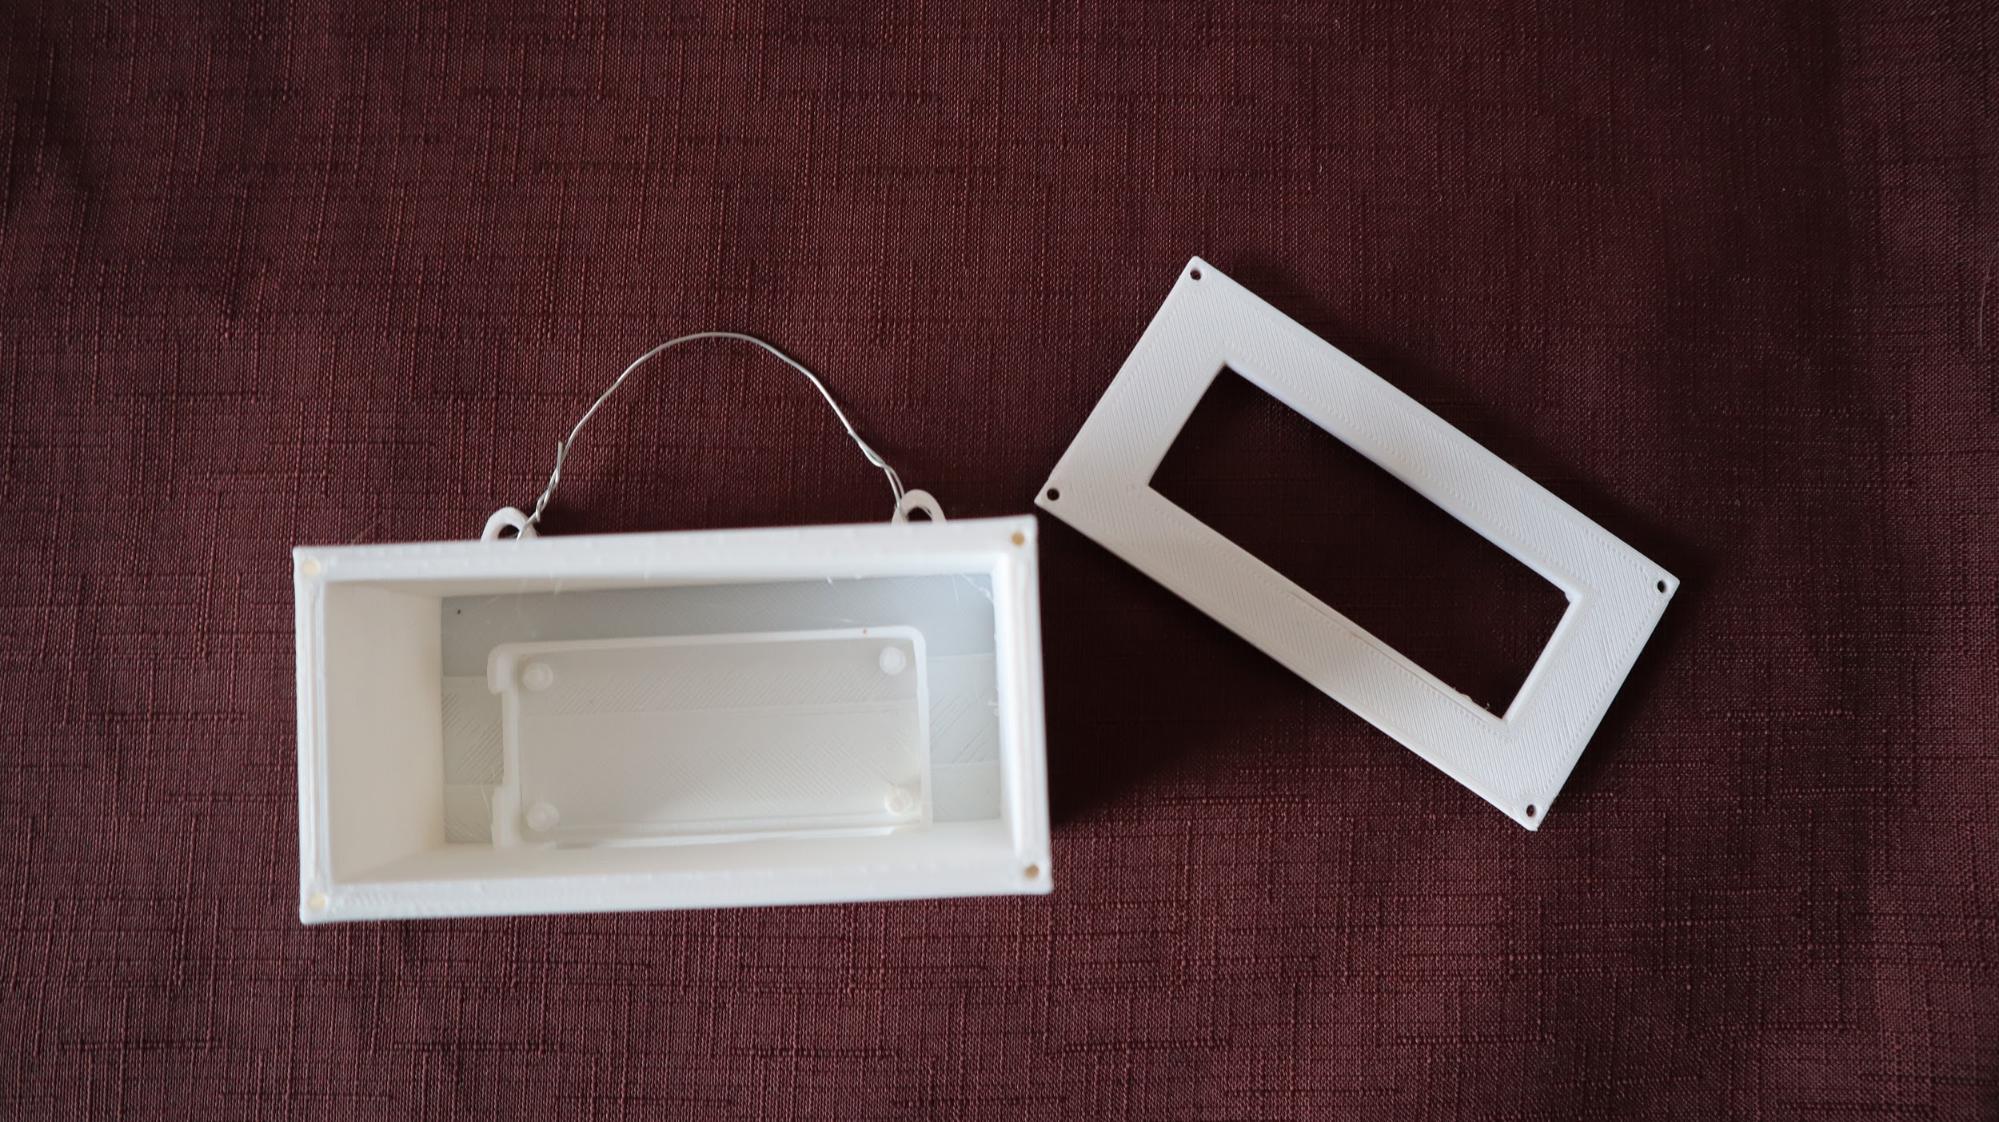
Optional: You can 3D print a case for your Raspberry Pi and LCD screen here.
This enclosure requires 8 M2.5 screws and picture hanging hardware.
Get Tom's Hardware's best news and in-depth reviews, straight to your inbox.
Part 1: Hardware Assembly
In this section, we will connect the Raspberry Pi to the LCD screen and turn on our Raspberry Pi.
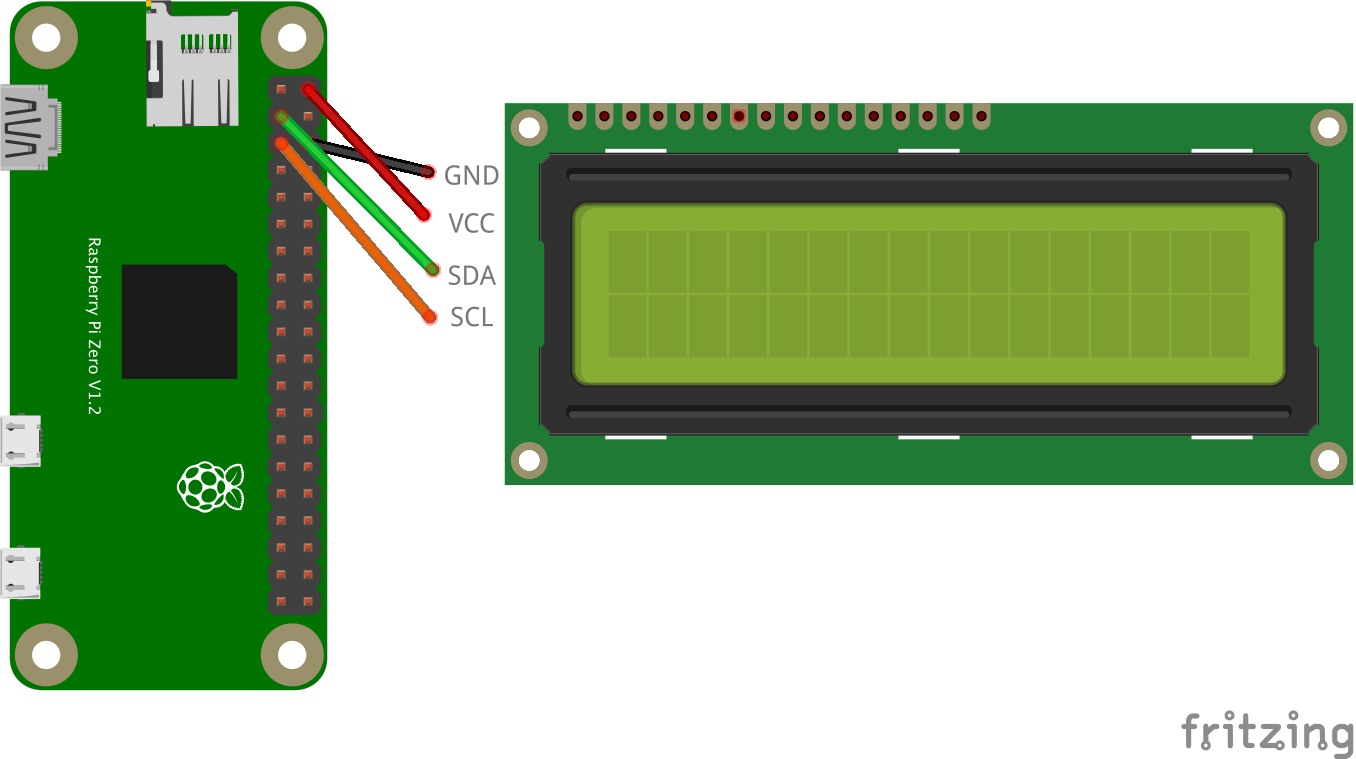
From the I2C backpack on the LCD screen (using 4 female-to-female jumper wires)
- Connect GND to a ground pin on the Raspberry Pi.
- Connect VCC to 5V (pin 2) on the Raspberry Pi.
- Connect the SDA to pin 3 on the Raspberry Pi.
- Connect the SCL to pin 5 on the Raspberry Pi.
Standard Raspberry Pi Setup
- Insert microSD card formatted with the Raspberry Pi OS.
- Connect keyboard, mouse, and monitor to your Raspberry Pi.
- Connect your power supply to your Raspberry Pi.
Optional Case
There is an optional case that can be 3D printed for this project. The STL files for printing are located here. The case is fitted for a Raspberry Pi Zero W with headers.
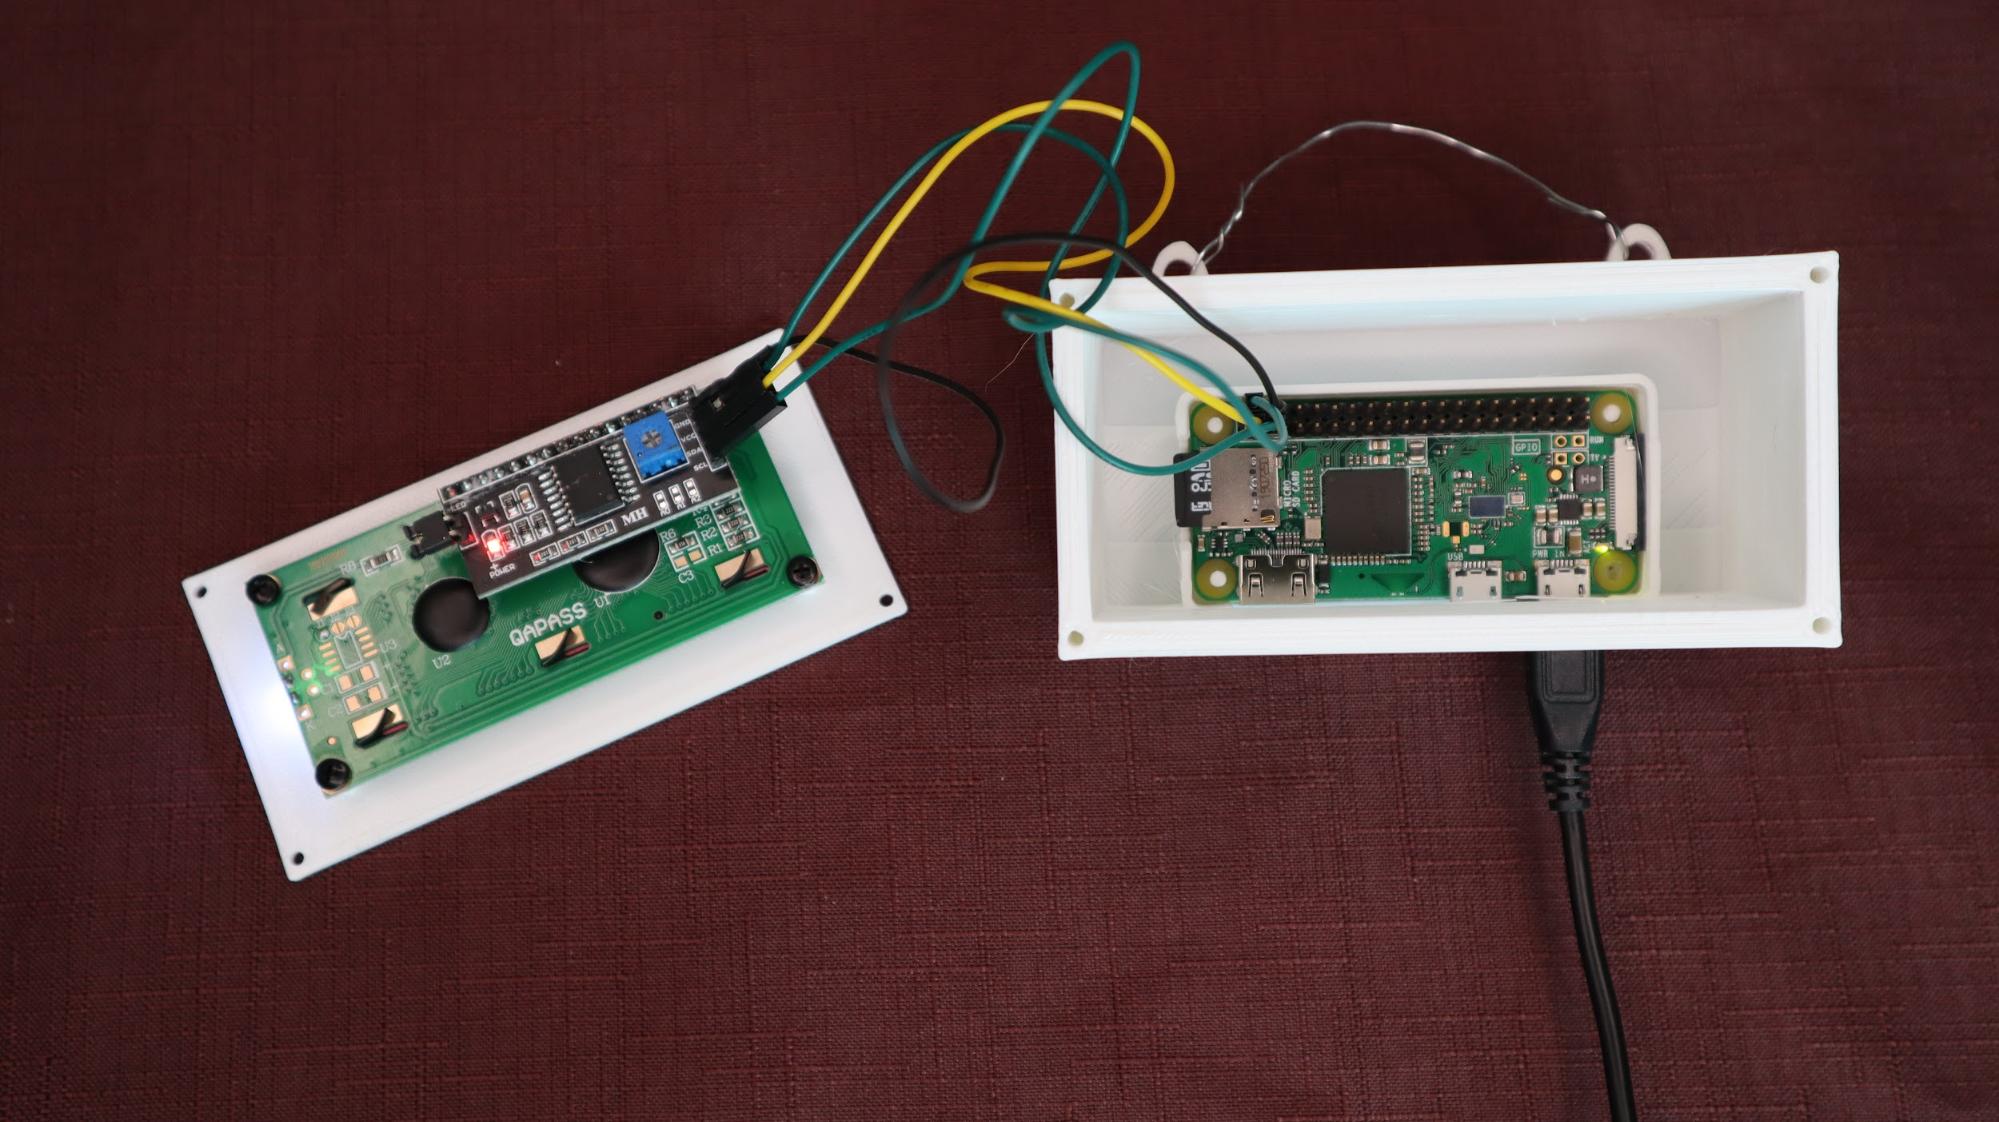
1. Push the Raspberry Pi Zero W into the bottom of the case fitted into the 4 pins.
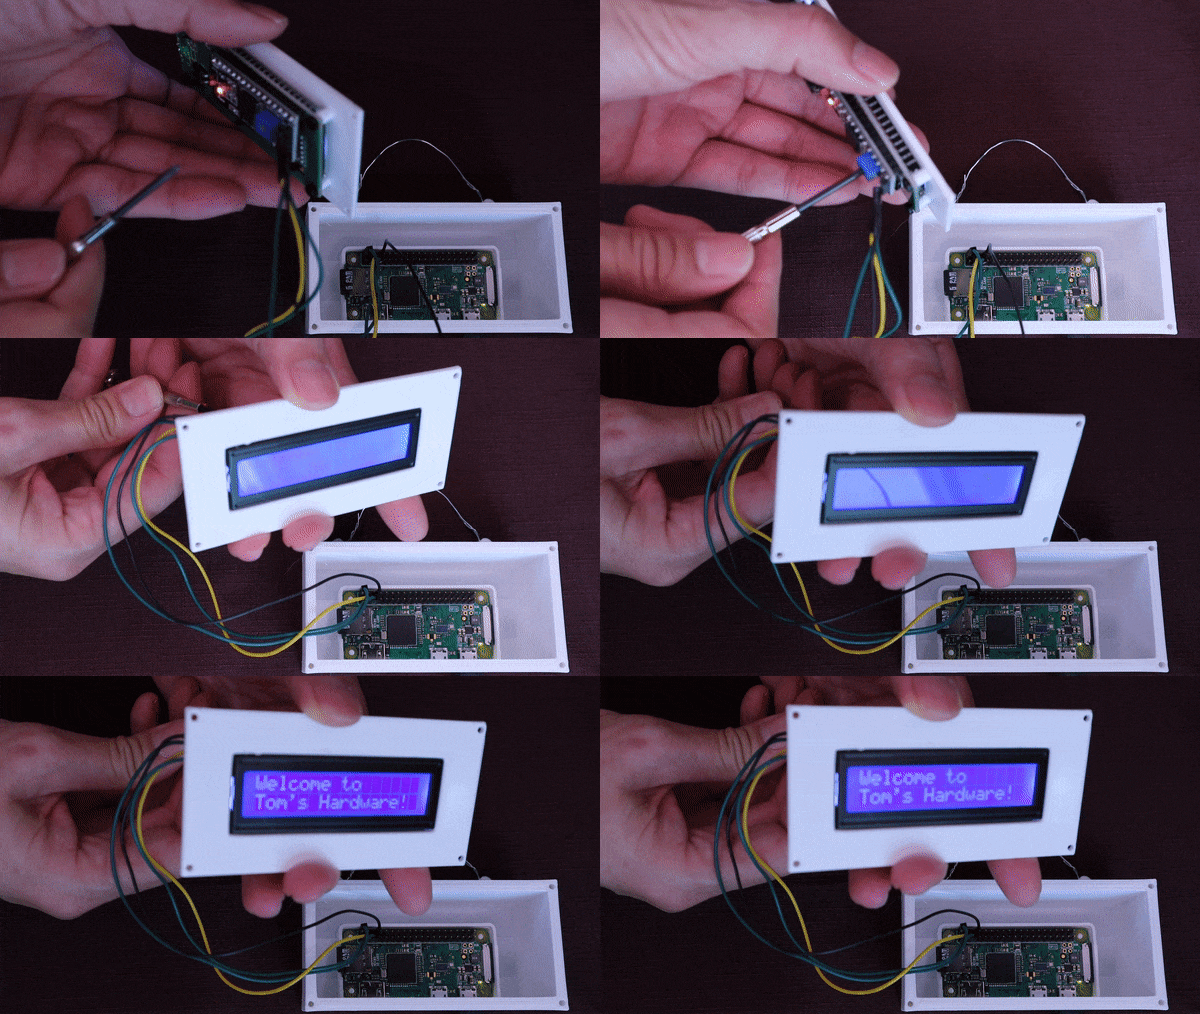
2. Using 4 M2.5 screws, attach the LCD screen to the lid / front of the case,
In order to fit the wires and the LCD screen with the I2C backpack into the case, I slightly bent the pins of the I2C backpack outwards and then inserted the 4 female-to-female wires.
3. Delay securing the lid to the case until after the LCD screen contrast is adjusted later in this tutorial.
Part 2: Setup the LCD Display
In this section we will set up our HQ camera to take photos.
1. Boot your Raspberry Pi. If you don’t already have a microSD card see our article on how to set up a Raspberry Pi for the first time or how to do a headless Raspberry Pi install.
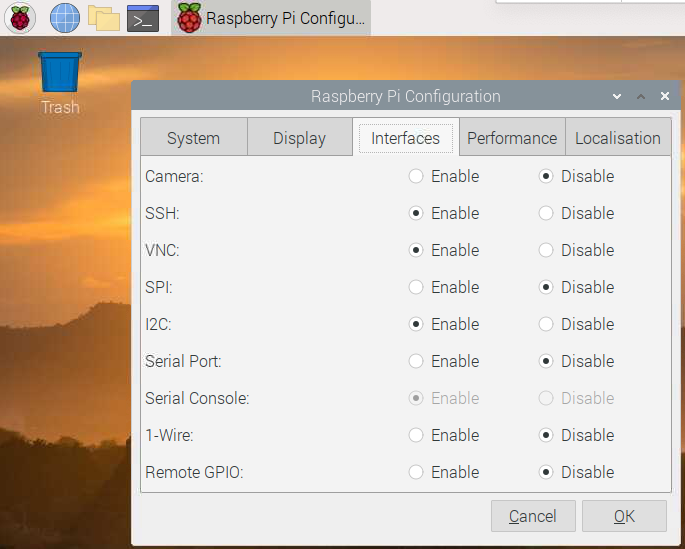
2. Open the Raspberry Pi Configuration tool from the Preferences menu in the Raspberry Pi OS GUI.
3. Enable ‘I2C’ on the Interfaces tab.
4. Click OK to close the window.
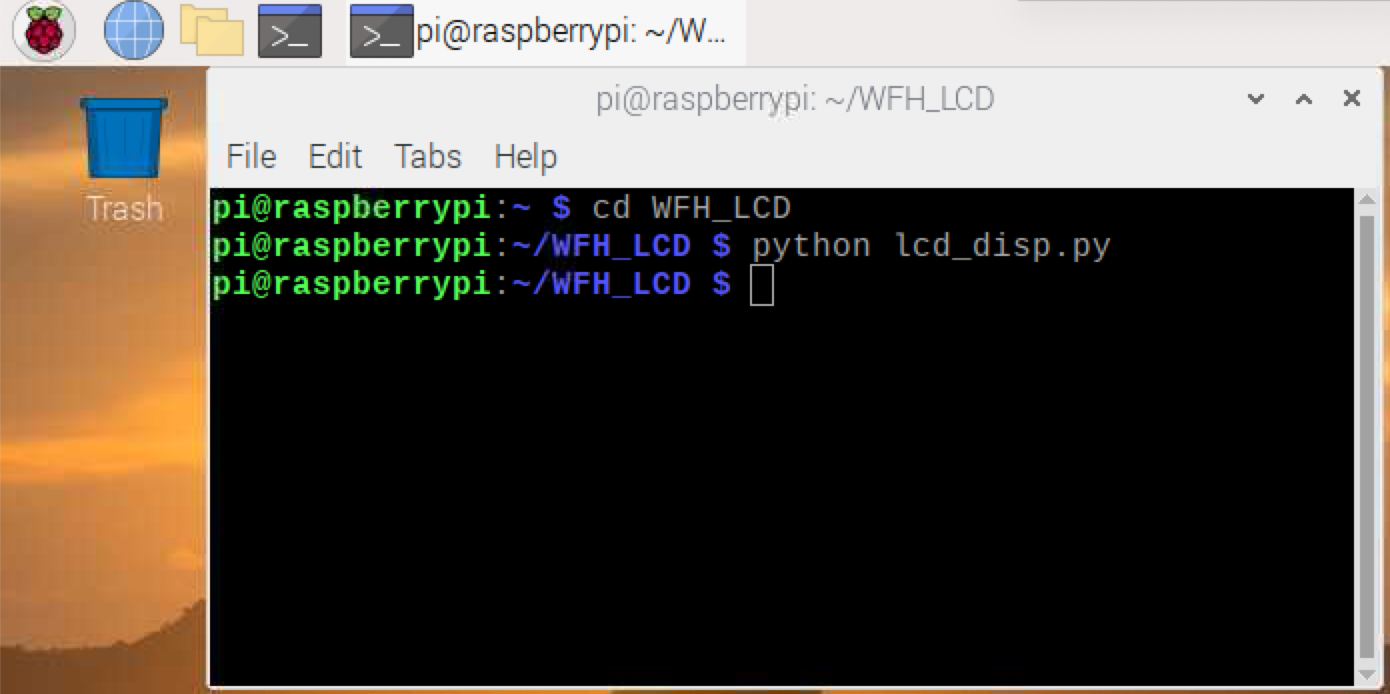
5. Open a Terminal. You can do that by hitting CTRL + T.
6. Clone this repository:
git clone https://github.com/carolinedunn/WFH_LCD7. Navigate to the directory you just created
cd WFH_LCD8. Test your setup by entering in the Terminal
python lcd_disp.py9. Adjust the contrast dial on the back of the screen using a screwdriver, until you’re comfortable with the output.
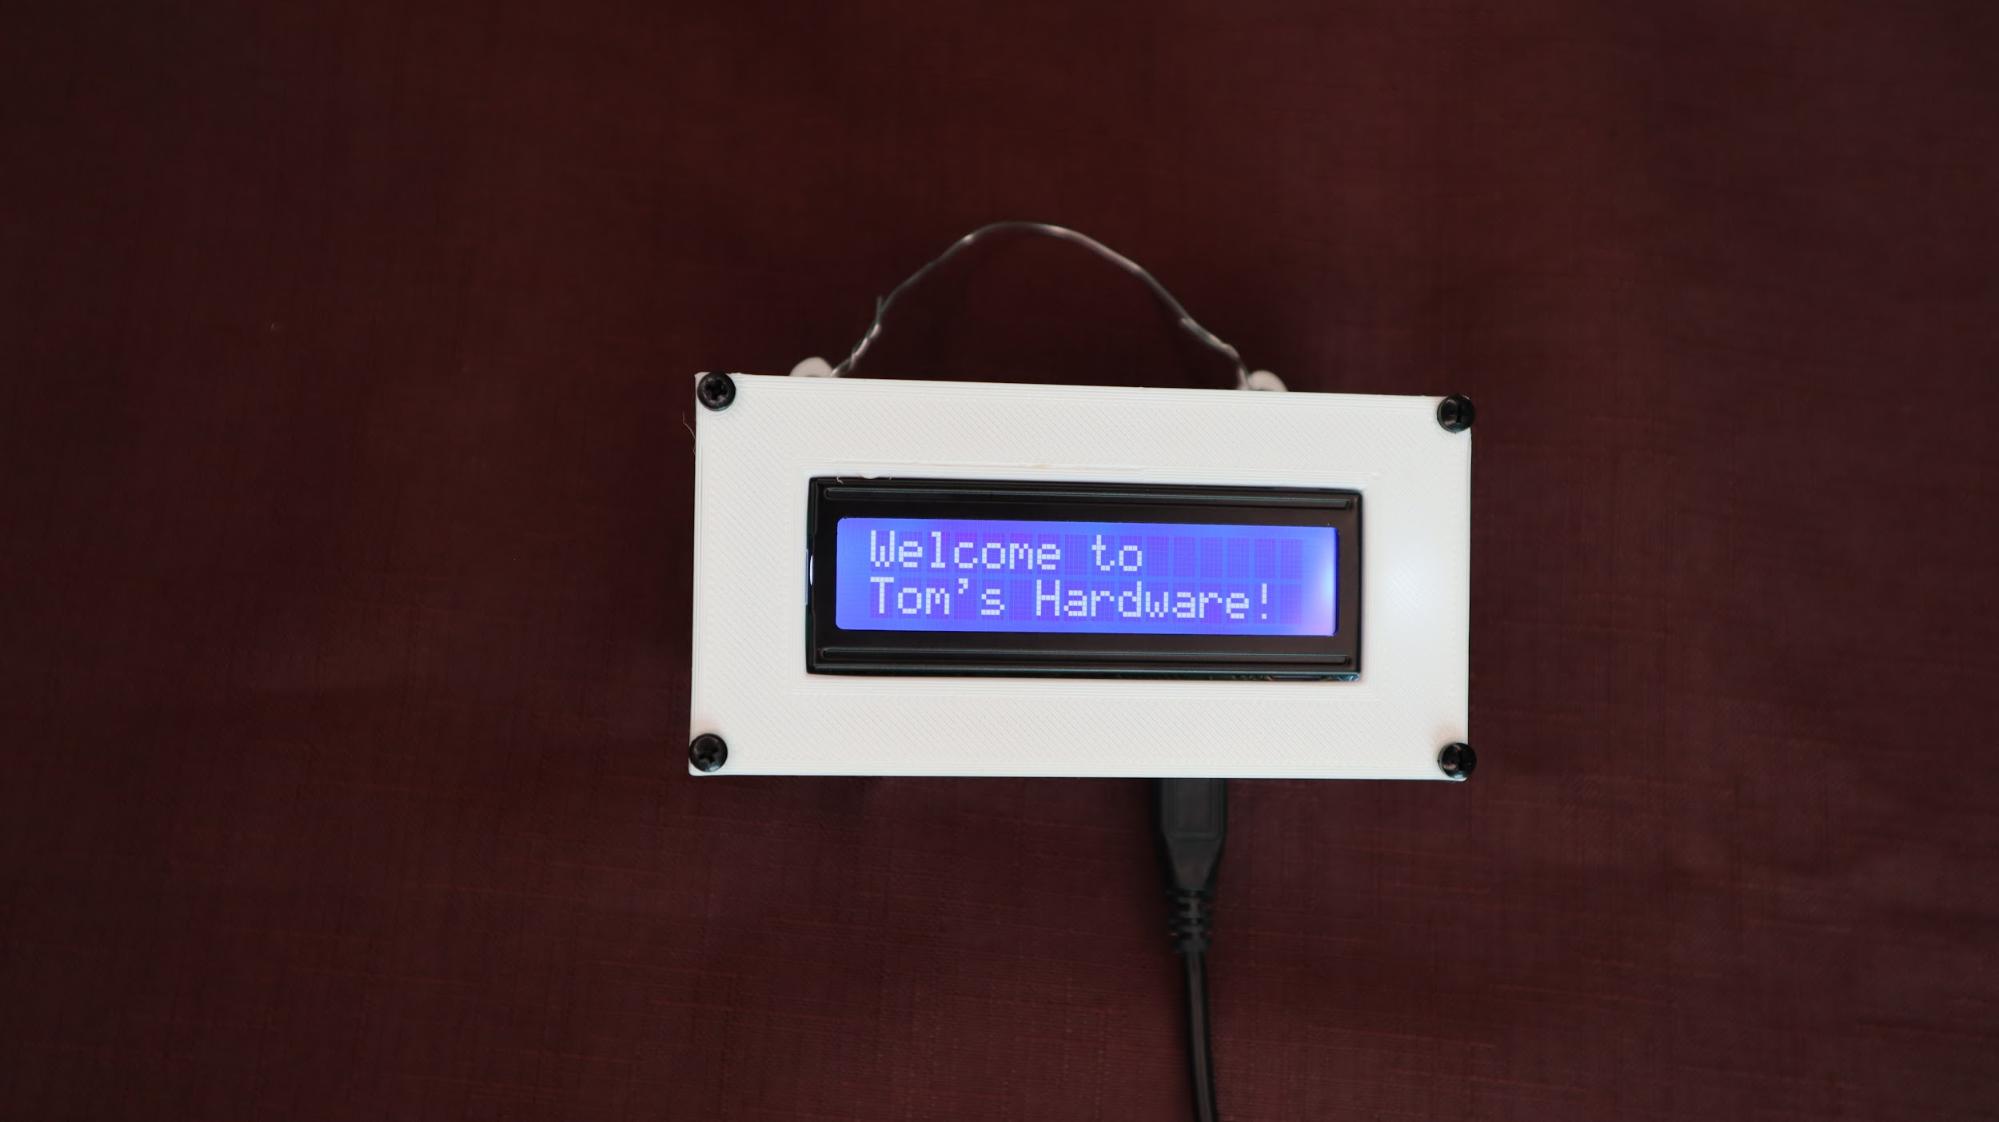
You should now see text across the LCD screen that reads “Welcome to Tom’s Hardware!”
Optional: As a side project, I’ve included the code for a digital clock display. After running the lcd_disp.py code, in the terminal now enter <bash>python clock.py</bash> and view the current time on your LCD display.
If the time displayed on your LCD screen is incorrect, go to your Raspberry Pi Configuration (as in Step 2), Localisation tab and click “Set Timezone” to your time zone.
Part 3: Messaging & API Setup
In this section, we will test and set up the work status indicators.
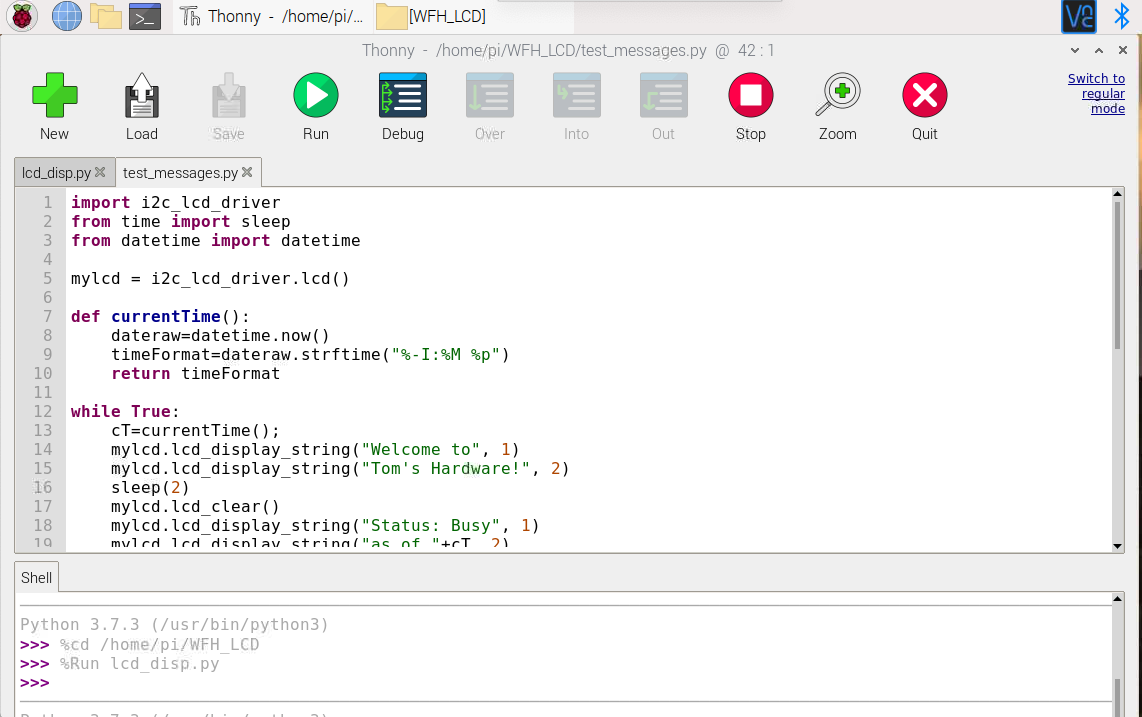
1. Navigate to the WFH_LCD folder in your file manager. Open test_messages.py in Geany or Thonny.
2. Run test_messages.py code by clicking the paper airplane icon in Geany or the Run button in Thonny.
You should now see various status messages display on your LCD screen for 2 seconds each.
3. Press CTRL+C when you want to stop the messages.
Code notes about test_messages.py
- The command mylcd.lcd_display_screen refers to the file i2c_lcd_driver.py that was included in the github package https://github.com/carolinedunn/WFH_LCD
- On your LCD screen, there are 2 lines containing 16 characters per line.
- mylcd.lcd_display_string(“Welcome to”, 1) instructs the Pi to display “Welcome to” on the first line of the LCD display. The first parameter is the text and the second parameter is the line number for the LCD screen. If your string (1st parameter) is longer than 16 characters only the first 16 characters will display on your LCD screen.
- Function currentTime() takes the current time and formats it to Hour:Minute AM/PM string, i.e. ‘9:34 AM’
- If the time that displays is incorrect, please go to Raspberry Pi Configuration -> Localisation tab and “Set Timezone” to your time zone.
- sleep(2) tells your Pi to display each message for 2 seconds before moving forward.
- mylcd.lcd_clear() tells your Pi to clear the LCD.
Back to the tutorial:
4. Optional: Now you can change the text to messages of your choice.
5. Run your updated code to see your text across the LCD screen.
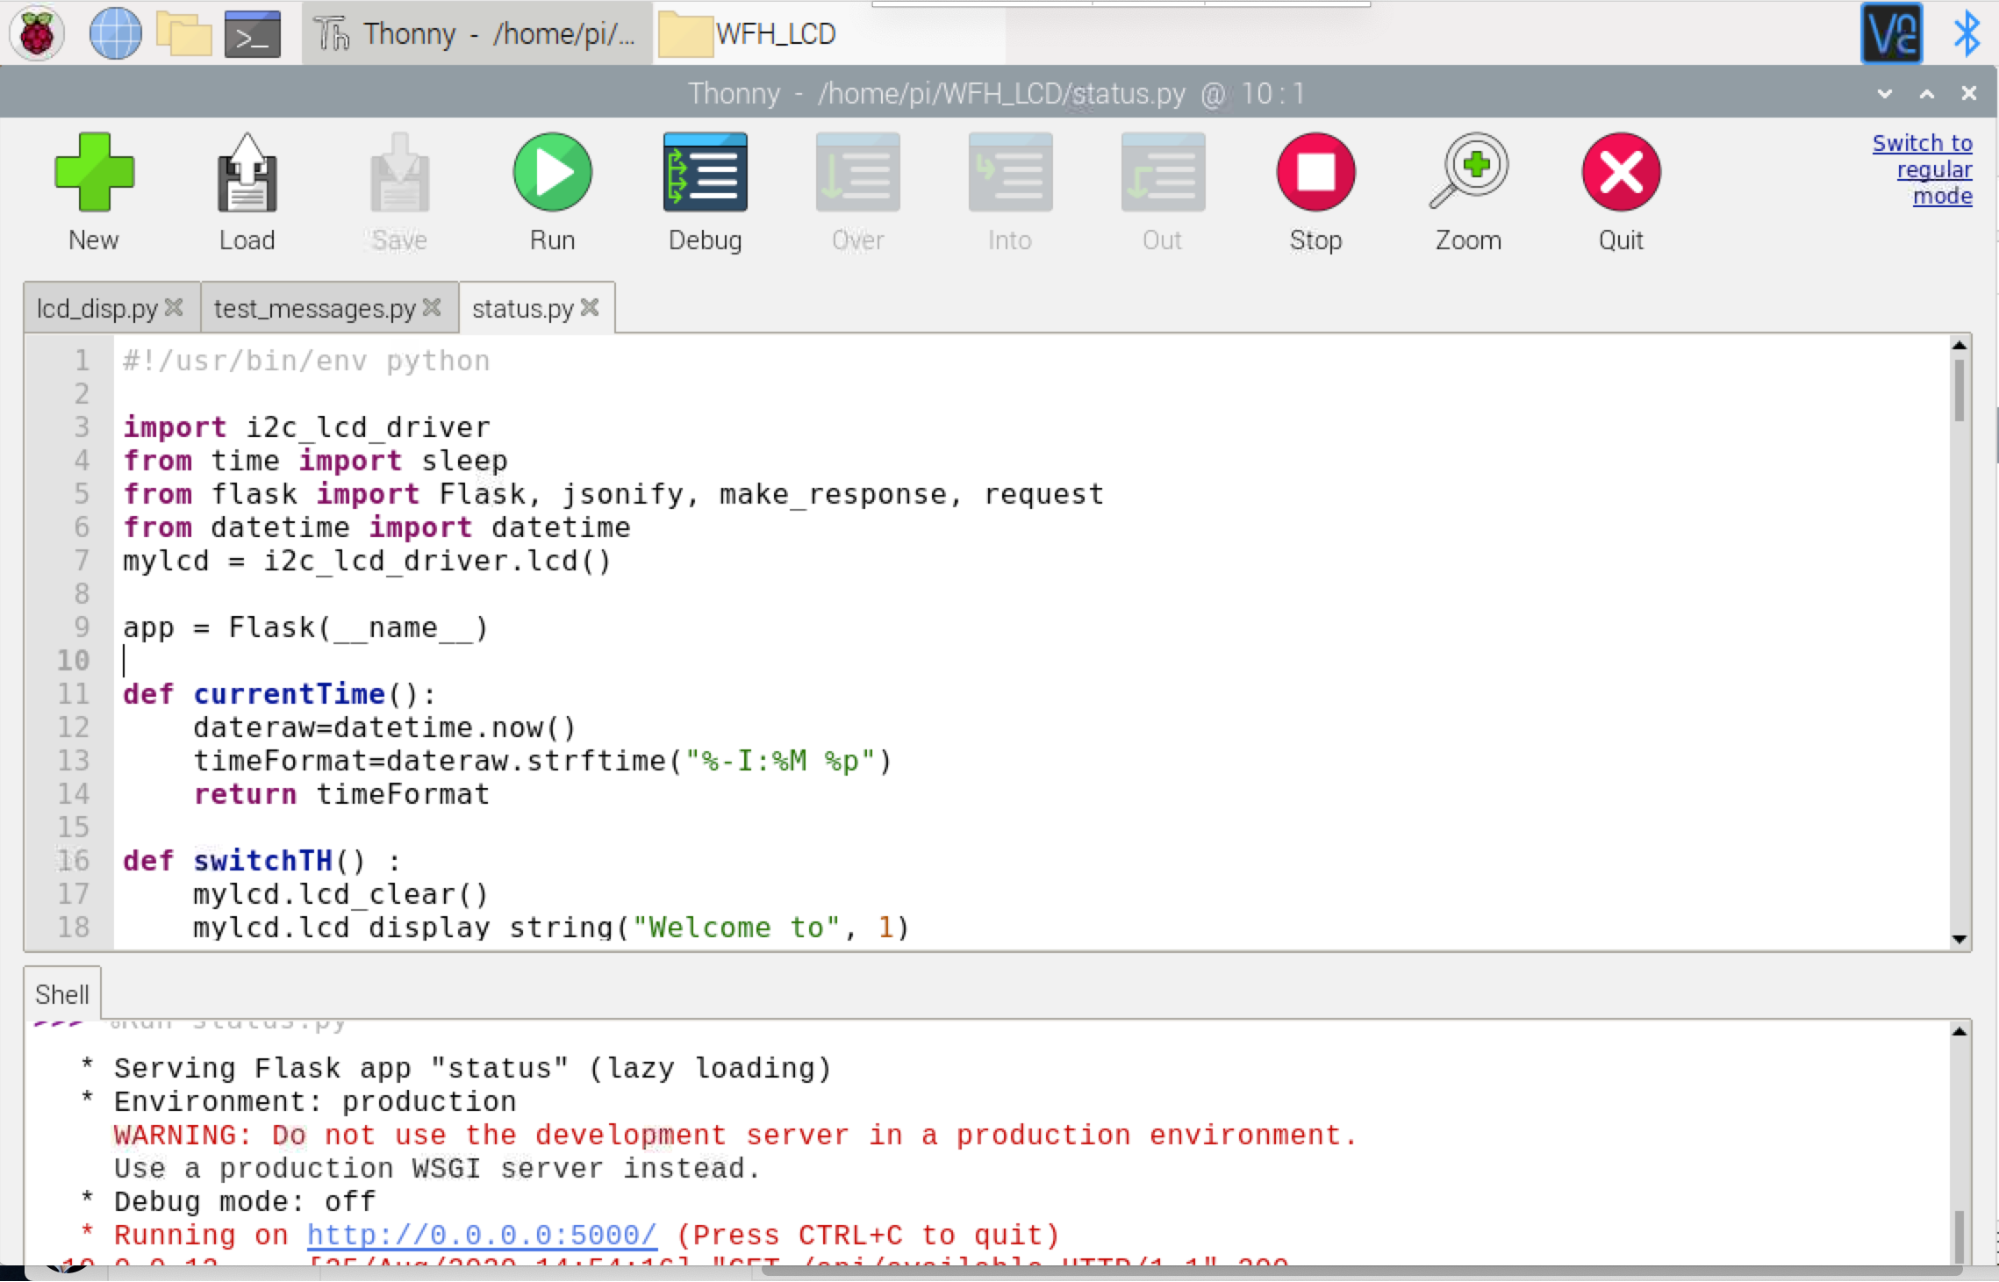
6. Open status.py for editing in Geany or Thonny. You’ll find it in the WFH_LCD folder in your file manager.
7. Run status.py code by clicking the paper airplane icon in Geany or the Run button in Thonny. The LCD screen should not change at this point.
8. Launch your Chromium browser.
9. Navigate to “http://raspberrypi:5000/api/busy” (assuming “raspberrypi” is your hostman) Your LCD screen should update to “Status: Busy” with the Pi’s current time.
Code notes about status.py
- This Python code creates APIs that you can call from another device on your network. To test this, go to your desktop computer, type in the hostname of your Pi followed by “:5000/api/busy” (ex: http://raspberrypi:5000/api/busy) to see the LCD screen text change to “Status: Busy”
- For example, if your Pi’s hostname is raspberrypi (the default hostname), enter the following URL in the browser of your desktop computer “http://raspberrypi:5000/api/away” and the LCD screen text will now read “Status: Away”
- The code “@app.route('/api/available', methods=['GET'])” tells the Pi to map ‘/api/available’ to run the function switchAvailable() using a REST API GET request
- The function switchAvailable() sets the text on the LCD screen similar to what you saw in test_messages.py
At this point, you can customize the LCD text functions to statuses that are appropriate for your purposes, making note of the API names that you may change, add, or delete.
For example, If you add a function for ‘Writing a book,’ then you would need to create an API call, perhaps ‘api/book’ to status.py.
Don’t forget to test all of your API calls in Chromium before moving onto the next step.
URLs to test in Chromium
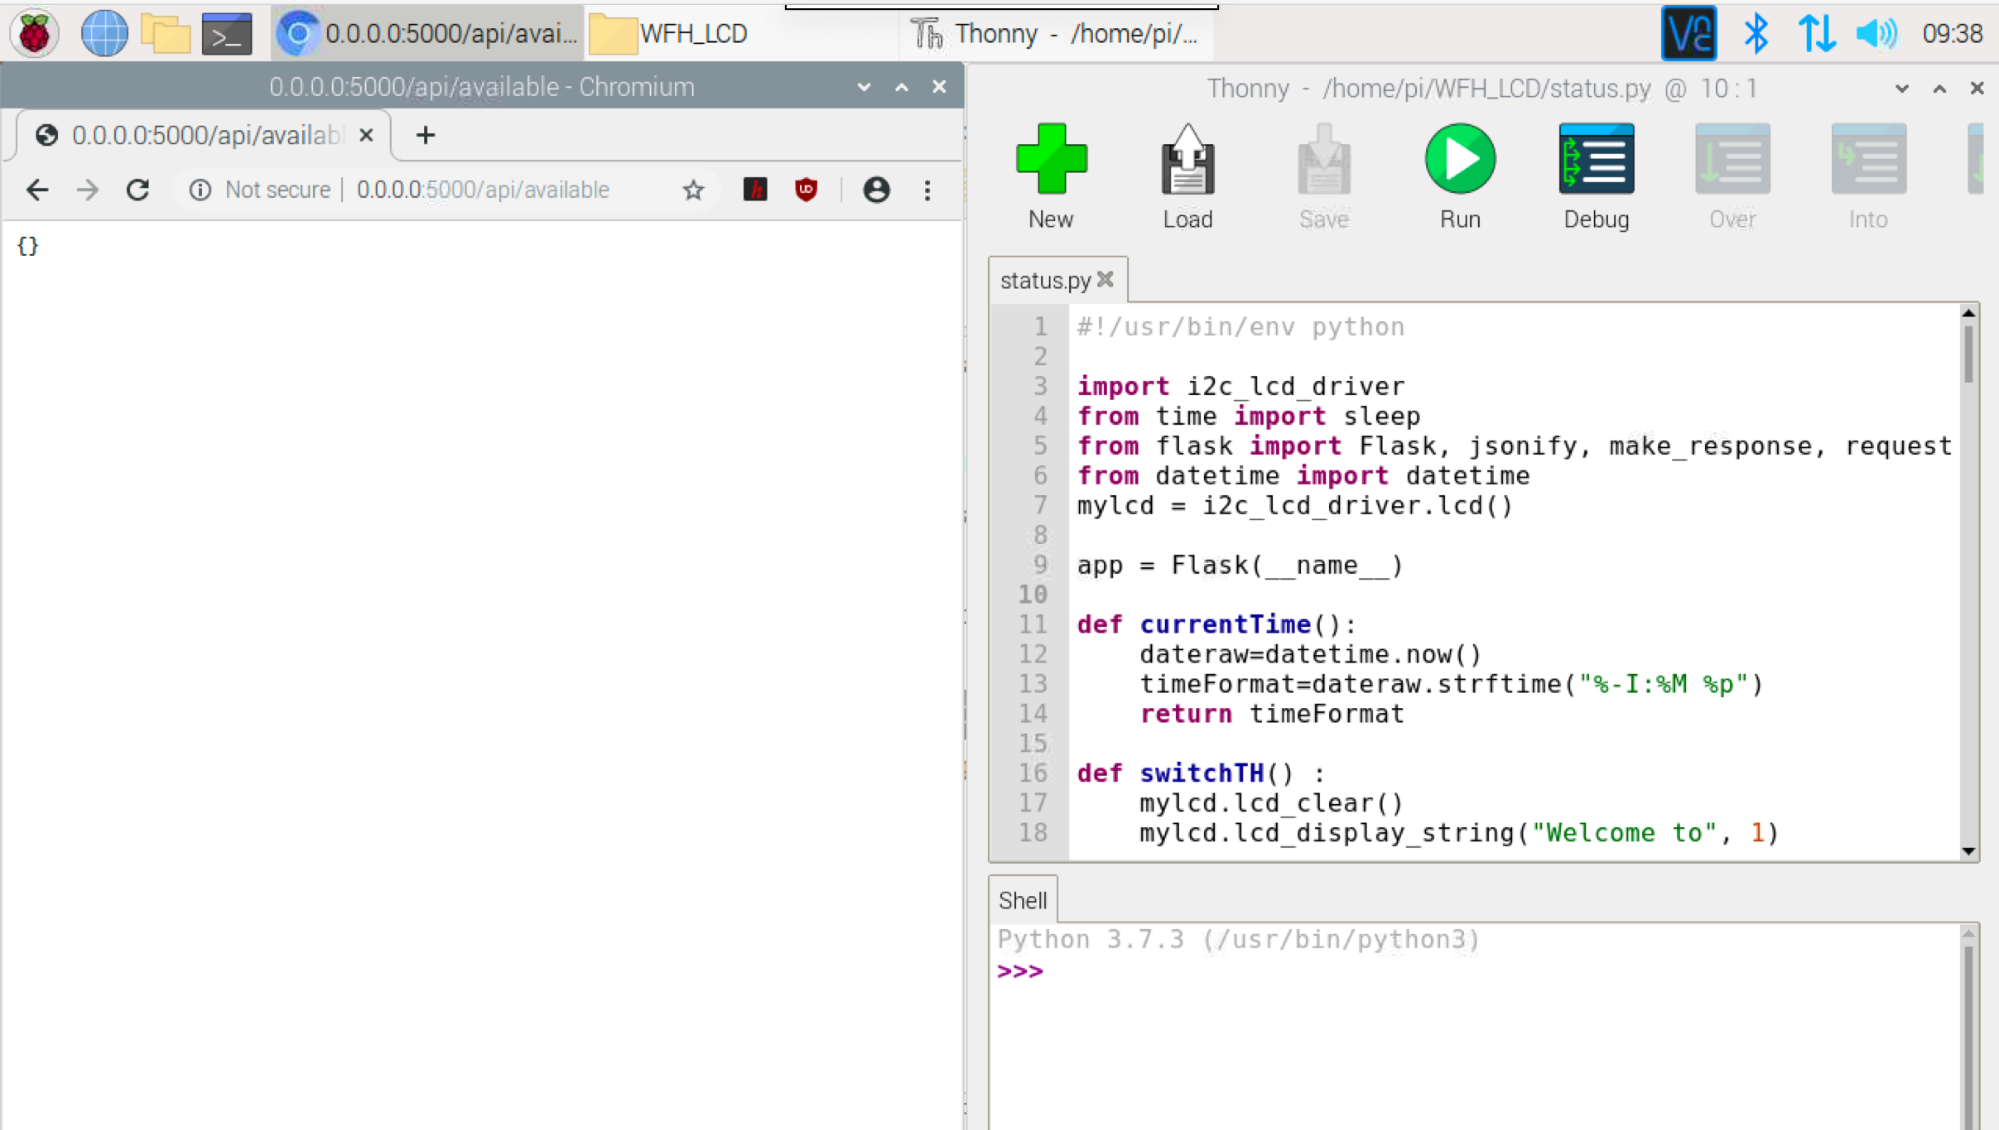
- http://raspberrypi:5000/api/available
- http://raspberrypi:5000/api/busy
- http://raspberrypi:5000/api/away
- http://raspberrypi:5000/api/meeting
- http://raspberrypi:5000/api/phone
- http://raspberrypi:5000/api/grading
- http://raspberrypi:5000/api/email
- http://raspberrypi:5000/api/video
- http://raspberrypi:5000/api/th
- http://raspberrypi:5000/api/clear
Testing your API calls individually can be tedious. What if we created a website with a button to click for each API instead? We’ll do that in the next step.
Part 4: Updating your Pi from your Desktop & Setting the Python script to run on boot
Important Note: Your desktop computer and your Raspberry Pi must both be connected to the same WiFi network in this step.
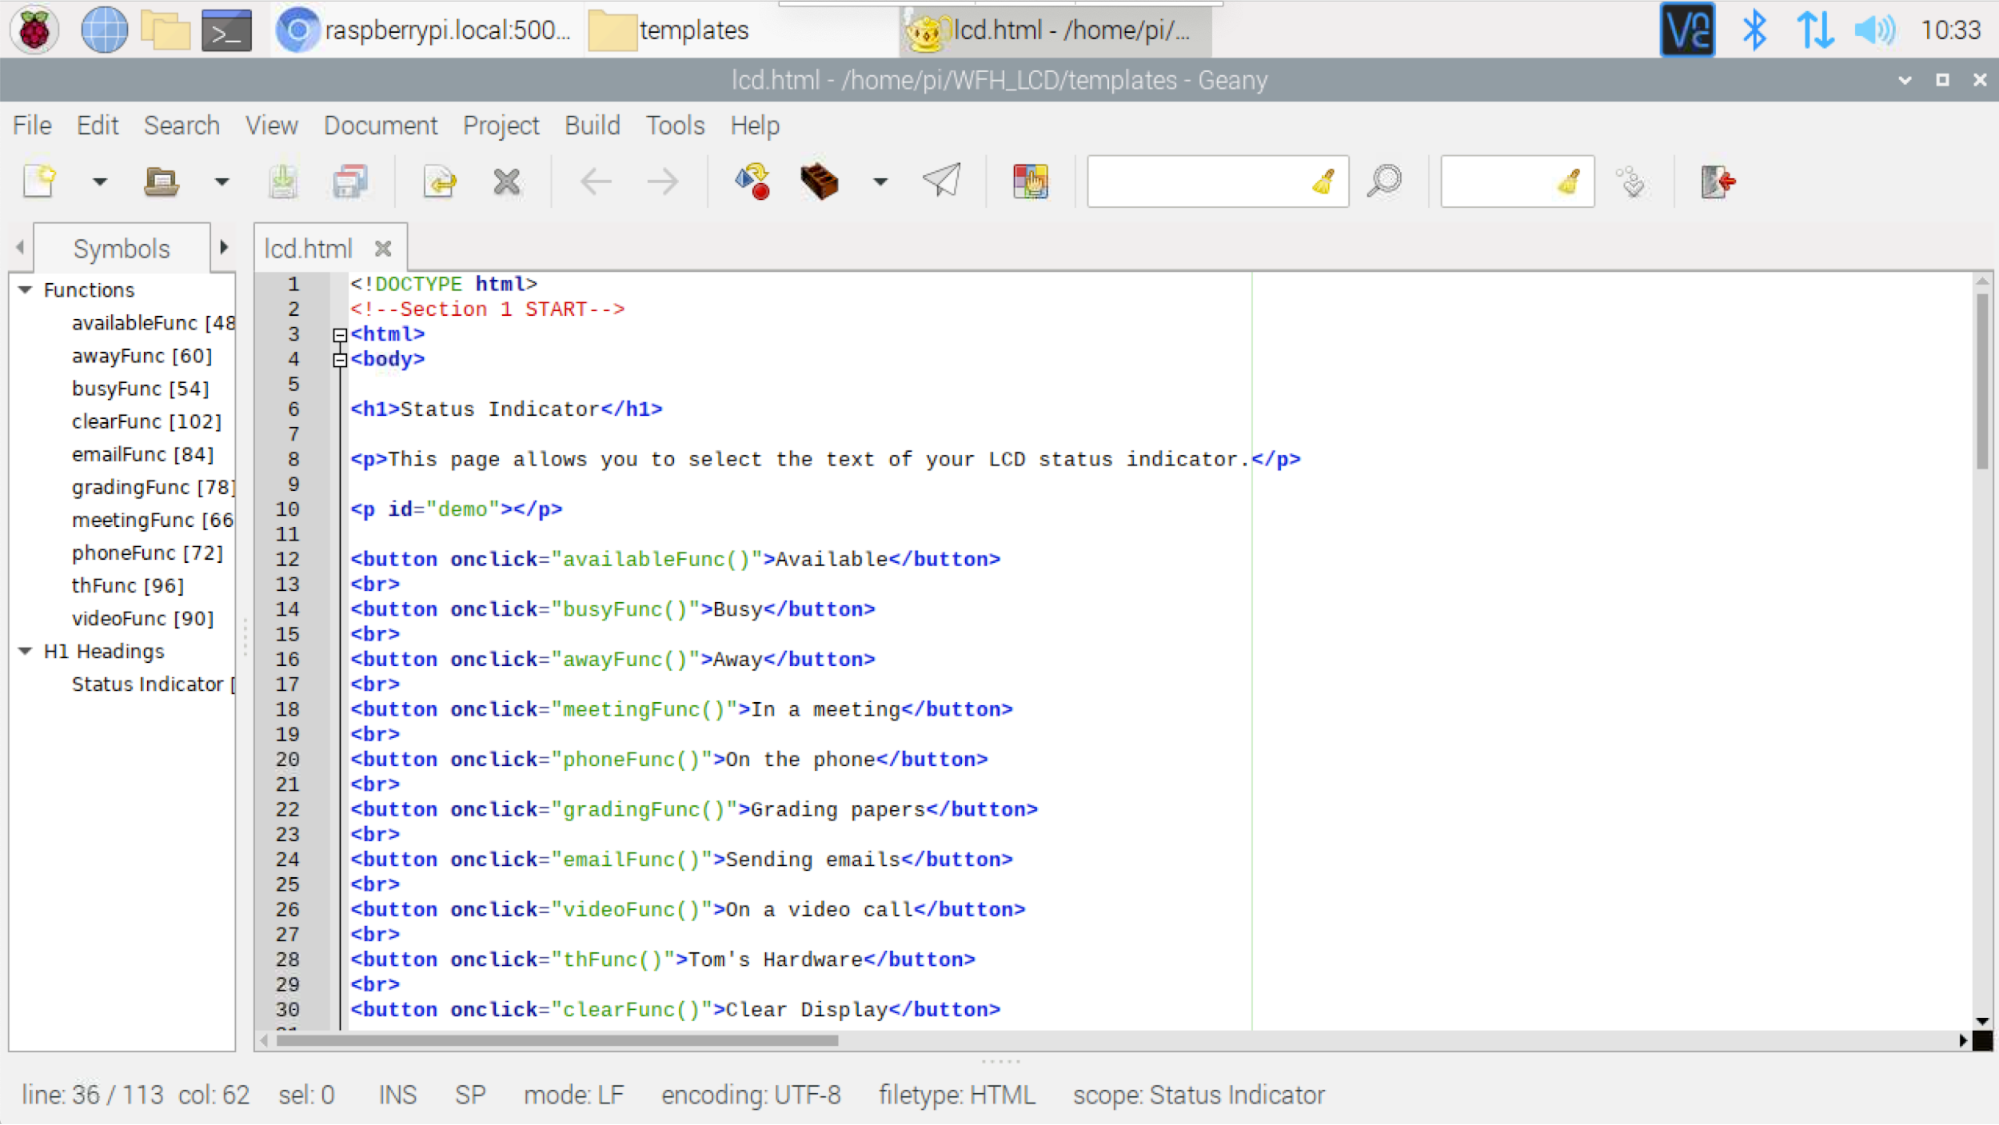
1. If you made changes to status.py in the previous step by adding or removing buttons, you’ll need to make corresponding changes to your html file. To do this, from your file manager, go to /home/pi/WFH_LCD/templates and right click on lcd.html. Select ‘Geany’ as your editing tool. If you added an API call in status.py, then you will need to add a corresponding button, api call, and function in lcd.html.
Code Notes on lcd.html
- There are 3 main sections in this HTML document.
- Section 1 creates graphical buttons for each of the status entries.
- Section 2 maps the API calls to variables.
- Section 3 is a list of functions that execute when a button is pressed to make the API call and note the last clicked status on the webpage.
Back to the tutorial:
2. You may need to stop and restart status.py from Geany or Thonny. Please ensure status.py is running before moving onto the next step.
3. Navigate to http://raspberrypi.local:5000 in Chromium (if you changed your Raspberry Pi hostname use that instead of “http://raspberrypi.”)
4. Click on each button to test your API calls again.
5. Now head over to your desktop internet browser and navigate to: http://raspberrypi.local:5000/
6. Click on any of the status buttons and watch your Pi’s LCD text change.
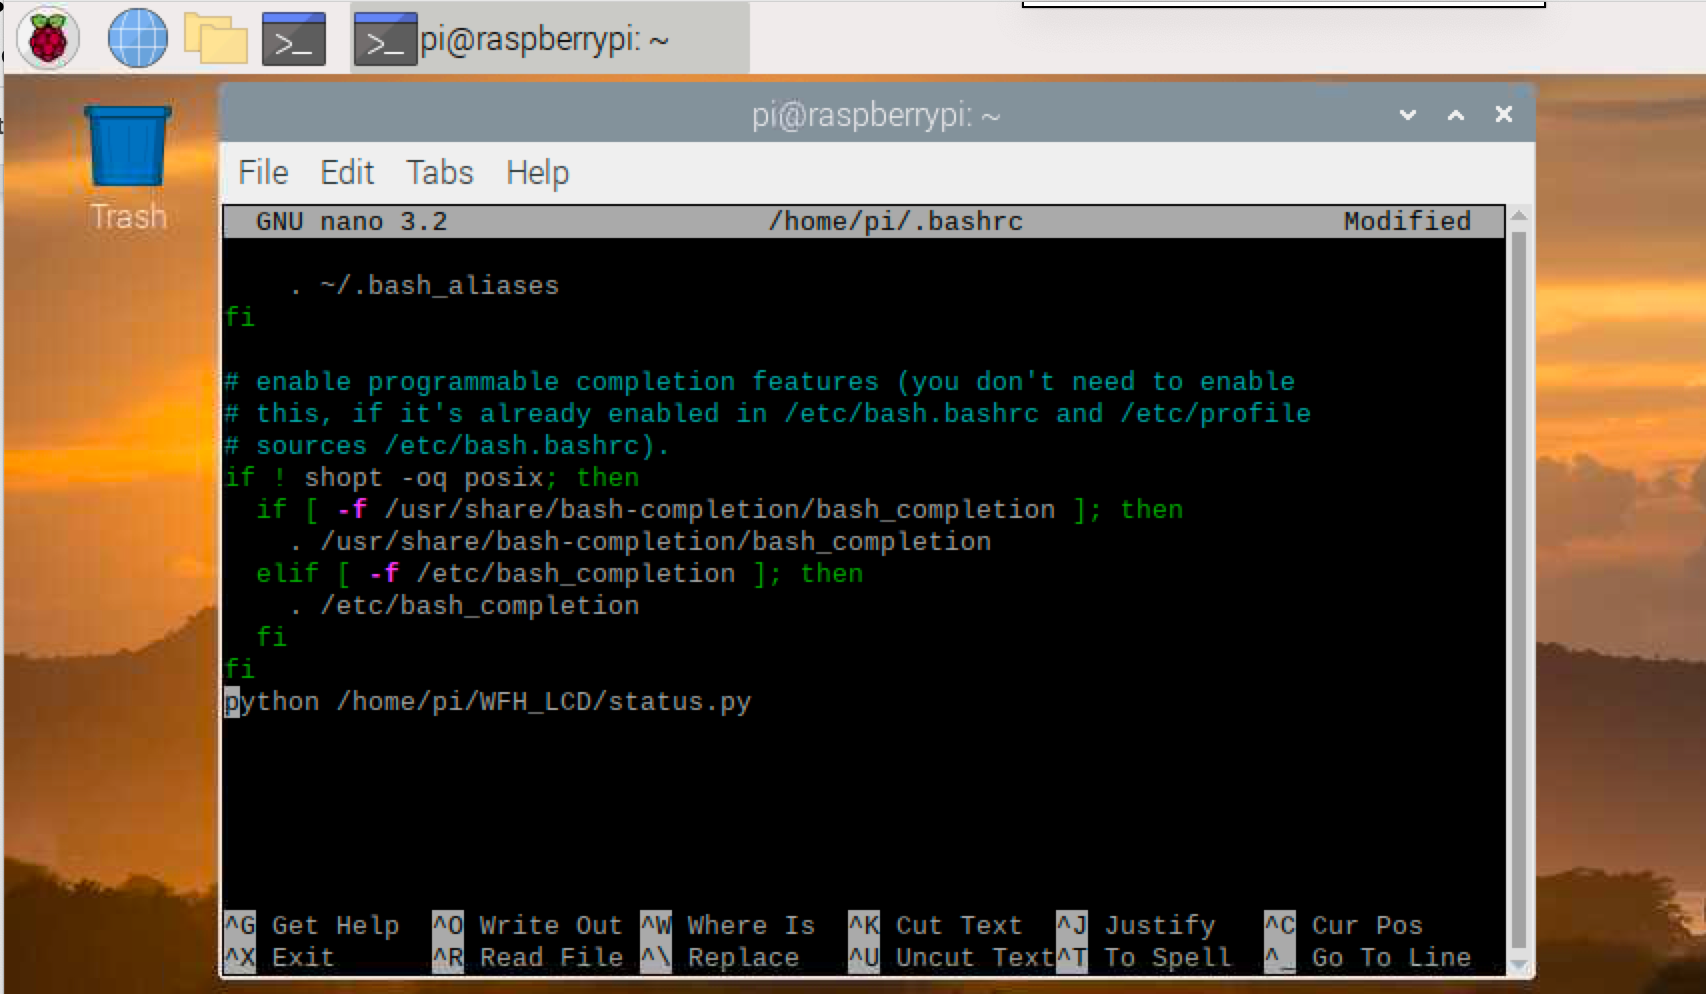
Now let’s go back to our Raspberry Pi and set status.py code to run on boot.
1. Open a Terminal
2. Enter code
sudo nano /home/pi/.bashrc3. Enter the following text at the bottom of .bashrc
python /home/pi/WFH_LCD/status.py4. Hit Ctrl-X to exit and Y to save.
5. Reboot your Pi.
Once your Pi reboots, it should automatically run status.py python script every time.
Caroline Dunn is a freelance writer for Tom's Hardware. Her expertise lies in covering Raspberry Pi projects, creating video tutorials, writing guides, and exploring other entertaining tech DIY initiatives.
-
jstraiton Erp!Reply
"Optional: You can 3D print a case for your Raspberry Pi and LCD screen here. "
I guess you meant "here" to be a link, but it's not. At least not on my Chrome on PC.
They are on the link the exists later in the document thankfully.
=)
John -
seattle.plague.rat clicked thru thinking it would be an indicator showing the webcam ur busy w/family. its to keep family away from u at home?Reply
this is gross, your priorities are backwards -
jstraiton I can offer 2 potential answers.Reply
Point the webcam at the sign.. Problem corrected.
Raspberry Pi projects can be seen much like Lego sets. You buy them because of what they are but you then create whole new things with it especially if you happen to own maybe a couple other sets to include.
In terms of learning to program, this could be a website which you pick apart the HTML, CSS, & Javascript to construct it but then use pieces of this with pieces of that to make something new which is more your own... part of a common method of learning.
In the same vein, this is a somewhat simple project in which isn't difficult to see how your work on "A" results in product "B" but aspects of it could be pieced together with other ideas you may have to create something not so entirely different but not necessarily the same. For example, I could see where the same system with a different software implementation could be used to issue the secret words to whomever's turn it is at Charades, or Taboo, or Pictionary, etc without having to bring cards along. Then you expand on that to have it able to roll virtual dice and a few projects later, it's your pocket sized Game Night RPi you have ready to take around as soon as COVID limitations let up...
Someone has tried adding to the world instead of tearing it down for reasons and outcomes that I can't imagine affect you any more negatively than not catching a green light while driving. May I suggest in the future that you could just choose to ignore it? -
Rot_farm So i'm trying to make this project a reality, but I'm running into this Remote IO errorReply
Everything is plugged into it's proper pin, not sure what the problem is. -
Rot_farm Replyseattle.plague.rat said:clicked thru thinking it would be an indicator showing the webcam ur busy w/family. its to keep family away from u at home?
this is gross, your priorities are backwards
I kind of see this as a self reminder to keep focused and accountable to a task and schedule. ADHD sucks <3 -
jstraiton ReplyRot_farm said:So i'm trying to make this project a reality, but I'm running into this Remote IO error
Everything is plugged into it's proper pin, not sure what the problem is.
I know you said everything is connected to the right pin, however this error is almost universally caused by bad wiring. It could even be defective in the display though highly unlikely. If you really think it's all perfect then before giving up I'd say remove all the jumpers, set them aside, then wire the display again using new cables. It could be that your connection between the cable end and the pin was unsatisfactory or something. Also, I have found that once a single wire is 1 pin off, it's easy to mistakenly wire more. Doing this would be a good way of also confirming you haven't done anything like that.
Good luck! -
logicl77 question - on this step - Important Note: Your desktop computer and your Raspberry Pi must both be connected to the same WiFi network in this step.Reply
Any easy way to be able to reach the 192.168.x.x:5000 site from another subnet? It works fine if I use my laptop on the same subnet(same wifi network), but if I try from another machine that is on another subnet(diff wifi network with access to first wifi network), I can reach the site, but if I press any of the buttons, it does not change the status. -
marshal.miller Could this work on an e-ink display via SPI? If so, what changes would need to be made to the code?Reply -
Mr Brainz I loved this project. Found it after the missus walked in on a video call. I don't have access to a 3D printer, so this was my crude solution...Reply
