Tom's Hardware Verdict
The VCS delivers on its promise of nostalgia-inducing retro gaming with old-school Atari titles. But the rest of the experience is like peeling an onion when you were expecting an orange. The deeper you go, the more layers of bitter frustration you uncover.
Pros
- +
Attractive, nostalgia-inducing design
- +
Bundled and Antstream games run well
- +
Upgradable RAM and storage
Cons
- -
Included content is limited for the high price
- -
Streaming apps basically require a keyboard and mouse
- -
PC mode is convoluted to set up and clunky at best
- -
Noisy fan
Why you can trust Tom's Hardware
Depending on your perspective, the Atari VCS console/computer/set-top box is either a couple of years, or several decades overdue. Modeling itself after the venerable Atari 2600 (originally called the Atari Video Computer System, hence VCS) which launched in September of 1977, the modern VCS made its debut via a YouTube teaser in 2017. The company followed that up with a successful crowdfunding campaign the following year, promising to deliver devices in mid-2019. Here we are a couple of years later, and the VCS finally made its way to retail, via Best Buy and Micro Center last month.
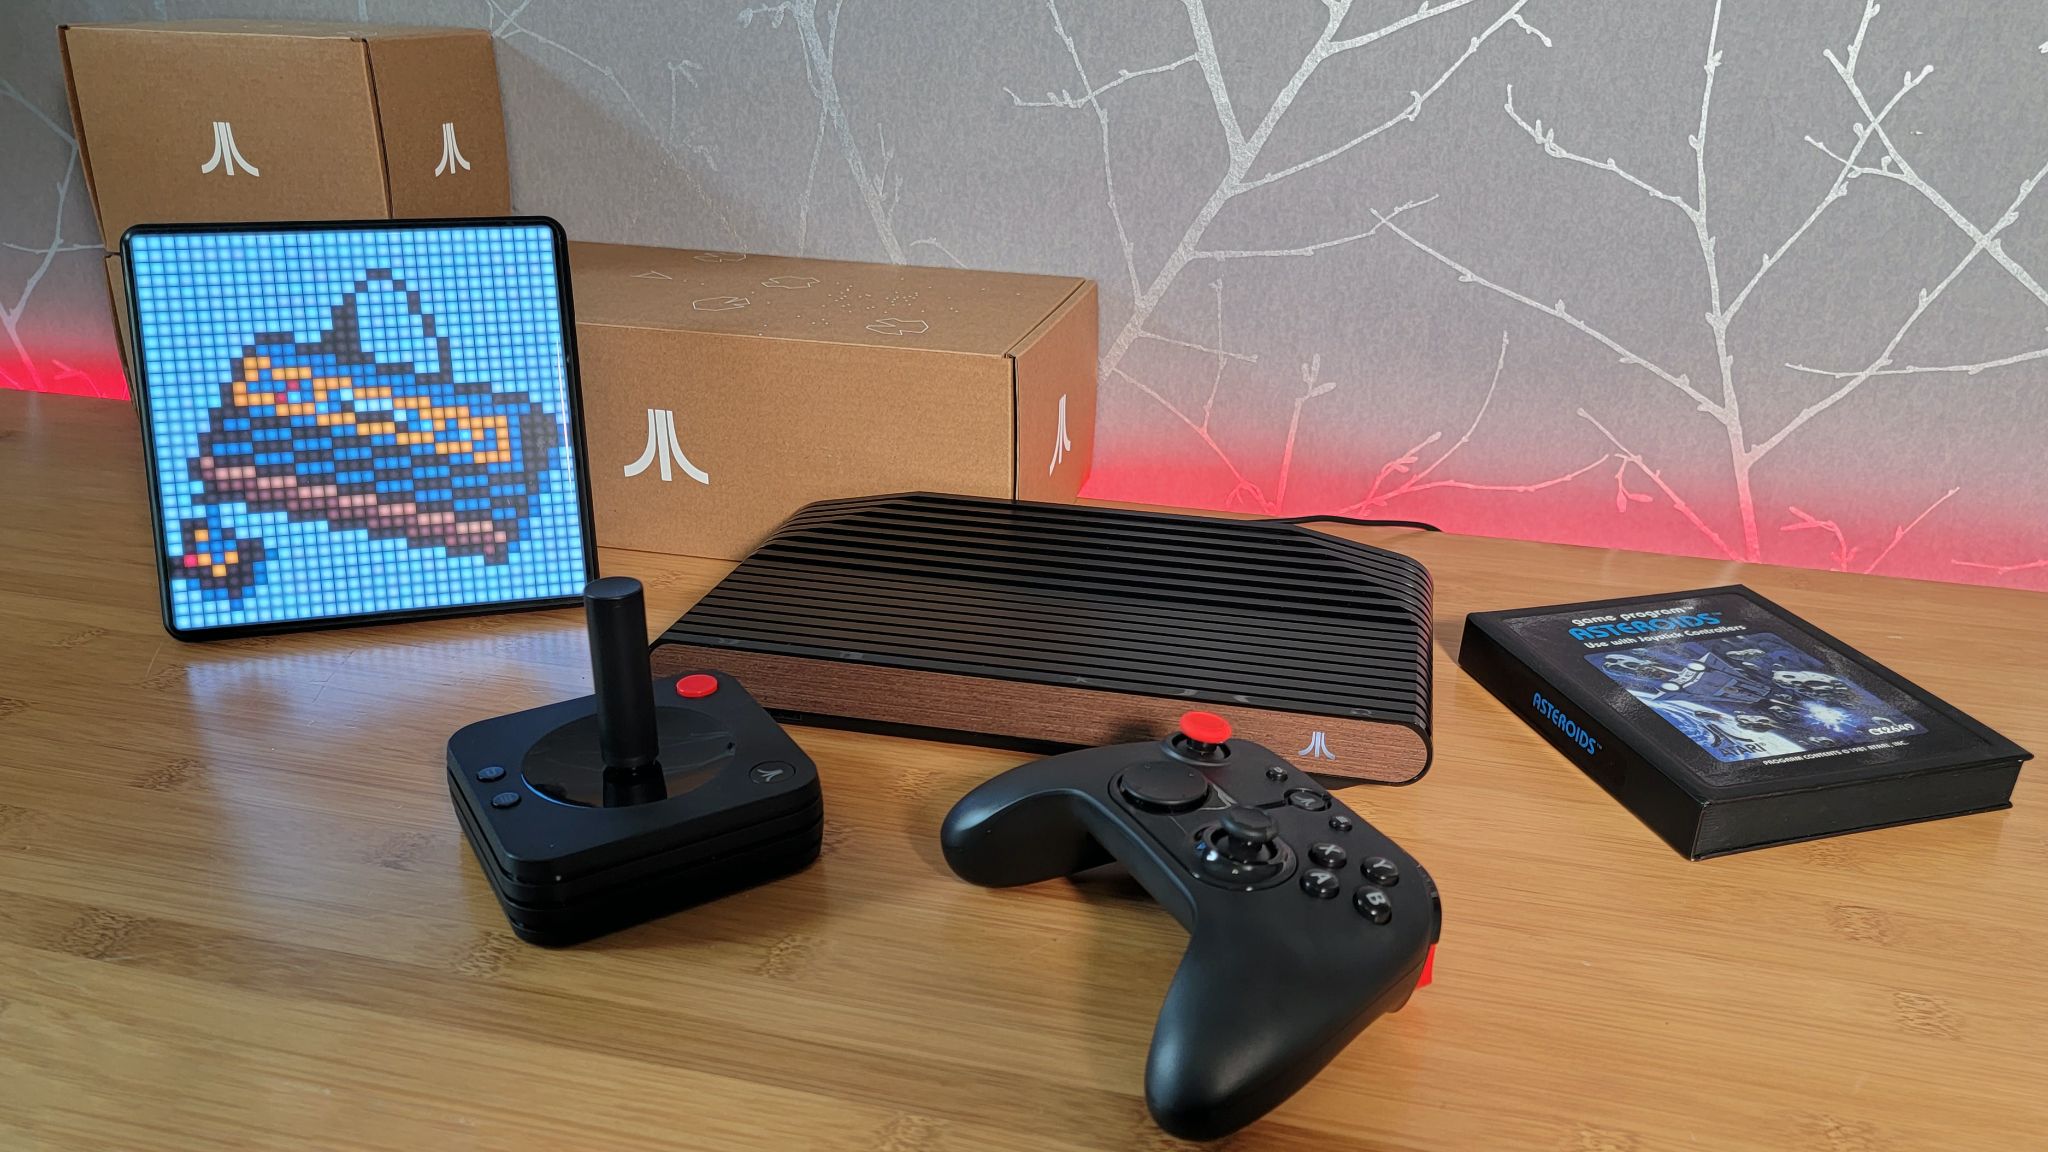
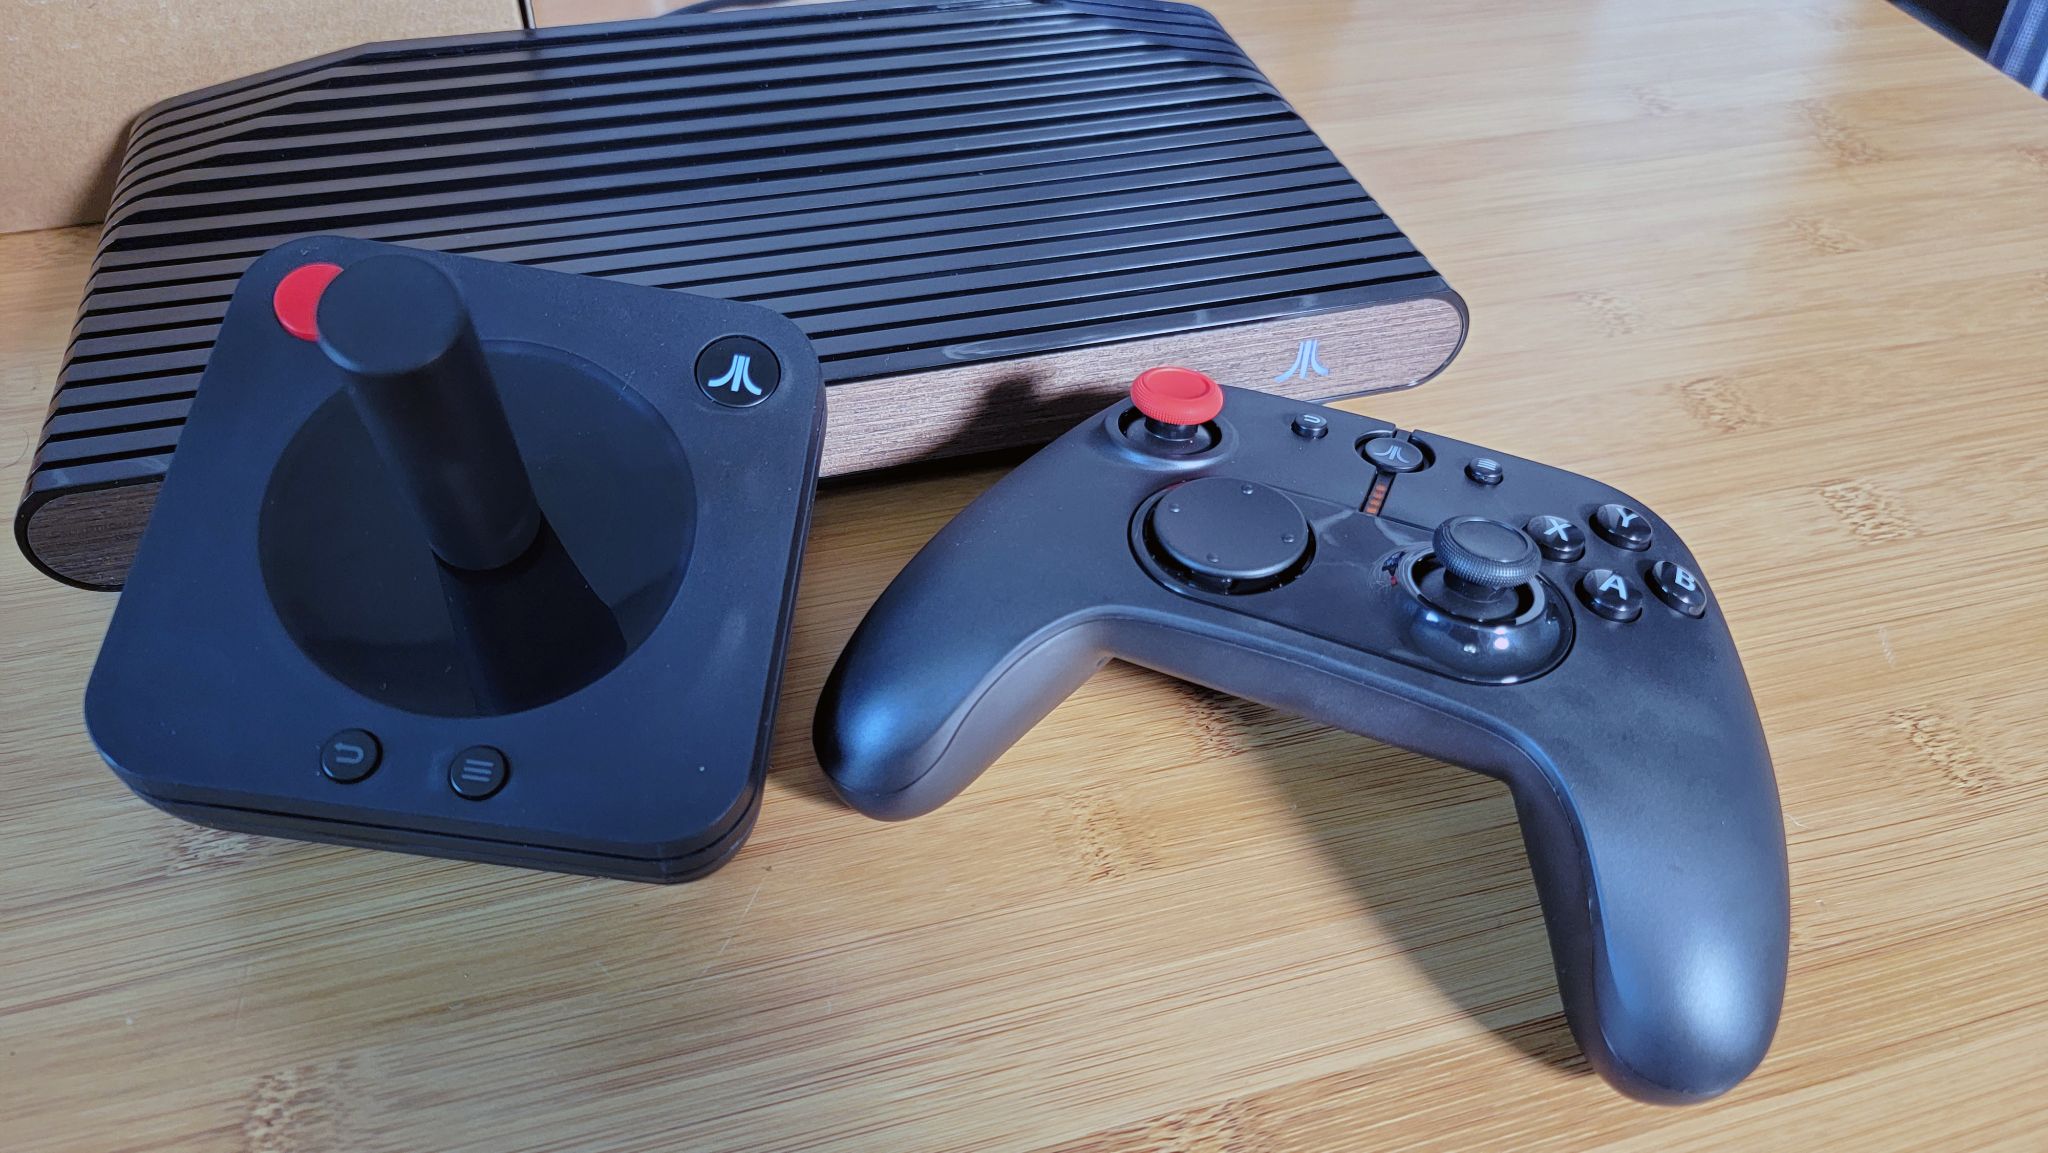
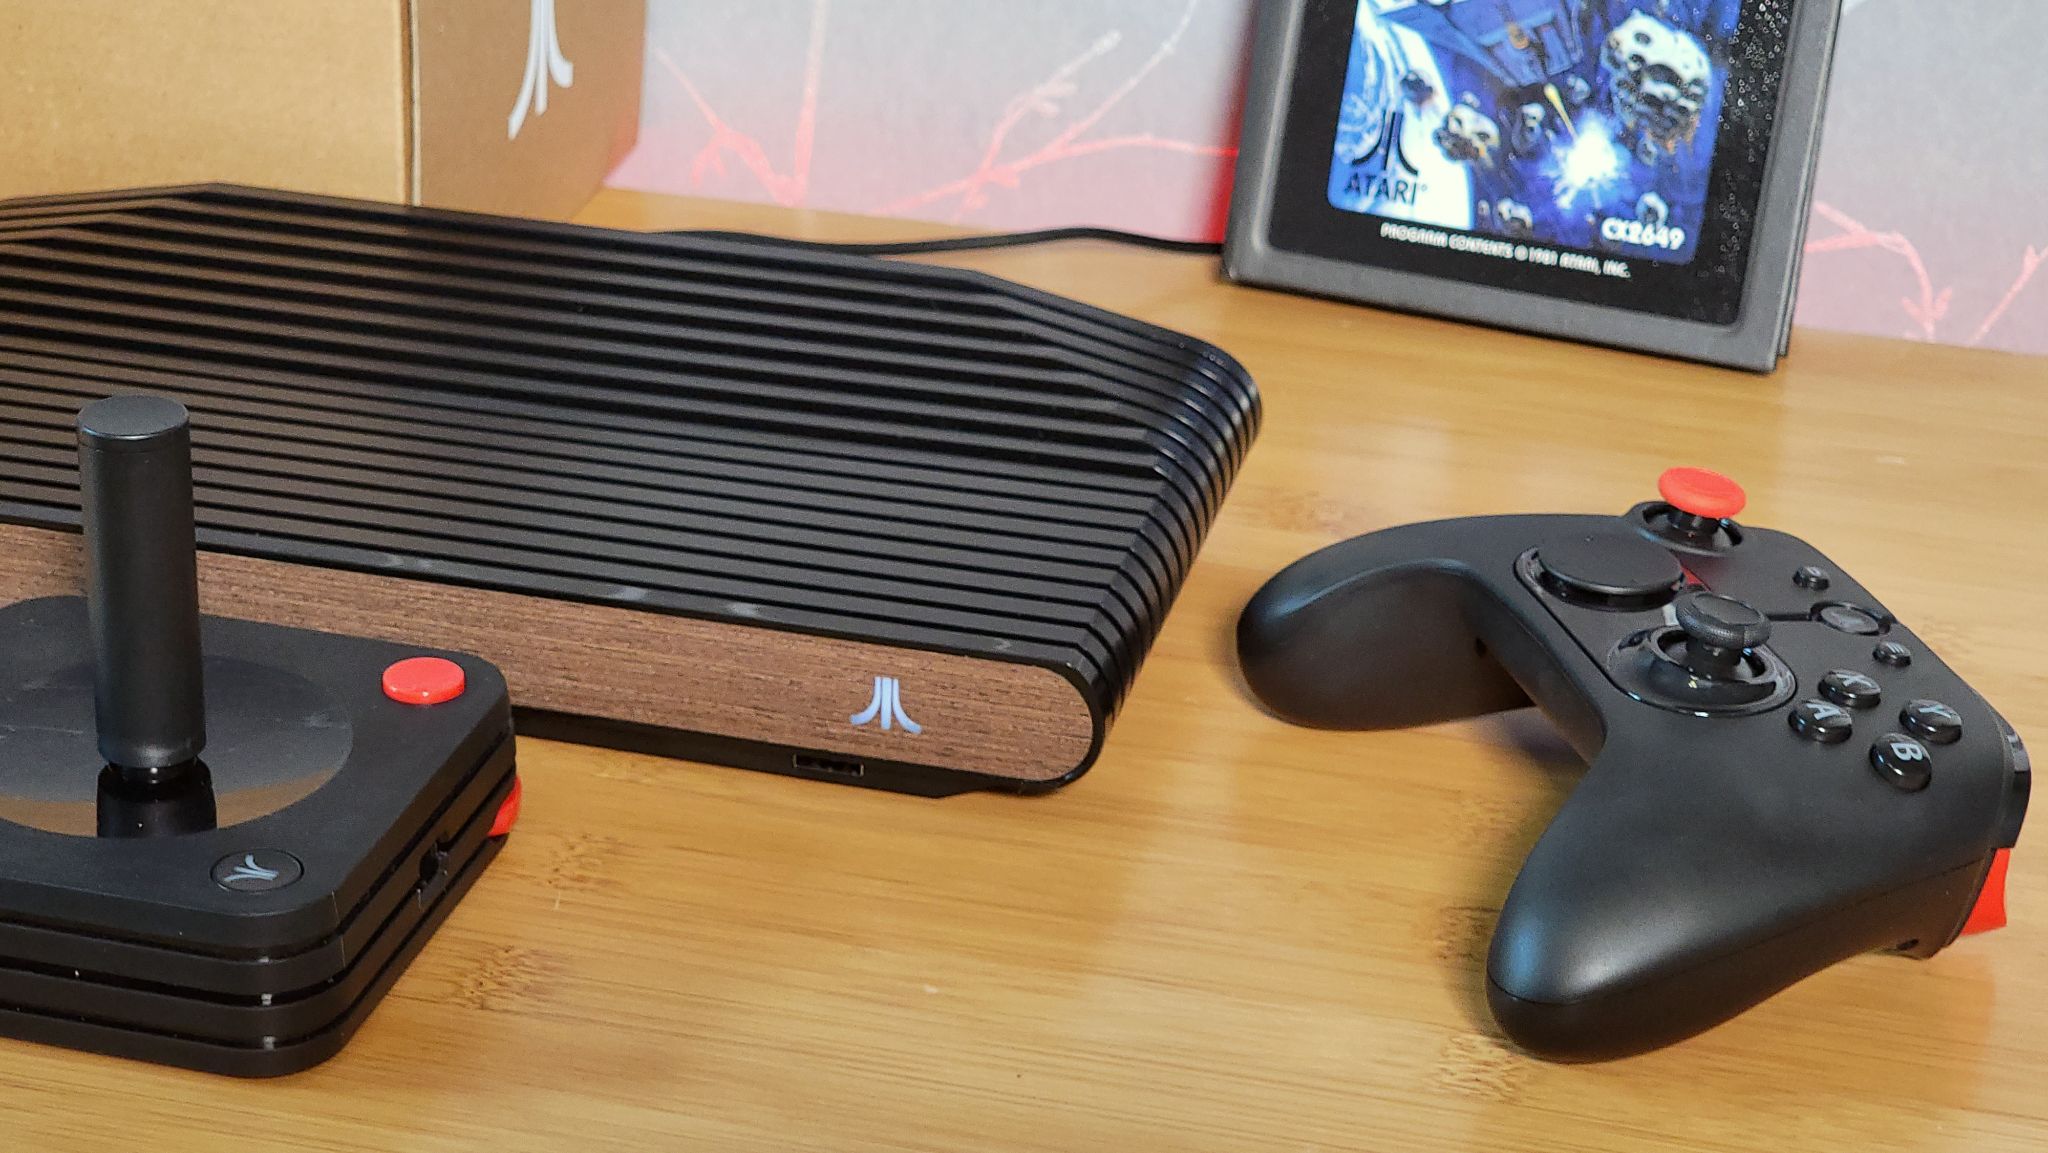
Available in either basic black (Onyx) or the more 2600-like Black Walnut, the device (let’s call it a console, though it also has a PC Mode, if you can get it to work) sells for $399. You get an AMD embedded APU, 8GB of RAM and 32GB of storage, as well as both a nostalgia-inducing joystick and a more modern Xbox-like controller.
$399 is a lot to ask for the hardware here, although you do get a promised “100 classic arcade and console games” included, as well as the ability to install popular streaming apps, like Disney+ and HBO Max — in case you didn’t already have a set-top box. That said, beyond some streaming apps and a handful of indie retro-inspired games, the store selection is minimal at best.
And in a move that at the very least makes the VCS more versatile and interesting, you can crack the console open to add additional storage via SATA M.2 as well as upgrade the RAM. A PC Mode selection in the menu lets you install and run other operating systems, like Linux and Windows — at least in theory. But the process for installing Windows on an internal drive is surprisingly convoluted. And if you were hoping to run demanding AAA games from your Steam or Epic gaming libraries, the dual-core (four-thread) Ryzen embedded R1606G SoC with integrated Vega 3 graphics is here to throw a wrench in your plans. In terms of retro gaming, this is a powerhouse compared to the popular Raspberry Pi. But as might be expected given the Atari name and woodgrain front panel, modern games are best left to the best gaming PCs, or a current console from the likes of Sony or Microsoft (if you can find one in stock).
Atari VCS Specifications
| Software | Atari Custom Linux OS (Debian based) |
| CPU/GPU | AMD Ryzen Embedded R1606, 2.6-3/5GHz dual-core (four threads) |
| GPU | AMD Radeon Vega 3, 3 Compute Units, 1.2 GHz |
| Internal Storage | 32GB eMMC fixed internal |
| Row 4 - Cell 0 | Internal SATA M.2 SSD slot |
| RAM | 8GB DDR4 RAM (upgradable) |
| Compatible Operating Systems | Linux, Windows, Chrome OS |
| Wireless | Wi-Fi 802.11 b/g/n 2.4/5GHz, Bluetooth 4.0 |
| Ports | HDMI 2.0, Gigabit Ethernet, 4x USB 3.1 (2x front, 2x rear) |
| Included Controllers | Classic Joystick, Modern Controller (mice and keyboards also supportive via USB or Bluetooth) |
| Dimensions | 11.6 x 5.9 x 1.9 inches |
| Weight | 11.6 x 5.9 x 1.9 inches |
Out of the Box Atari VCS Experience
It’s clear that the company is leaning hard into the nostalgia trip with the VCS, as the interior boxes are all pleasingly adorned with the company’s old-school logo and Asteroid graphics. Given that I was born a month before the 2600 launched, and some of my earliest gaming memories involve small black cartridges and the iconic single-button joystick (which gets a few extra here), I’m happy enough to go along on this trip.
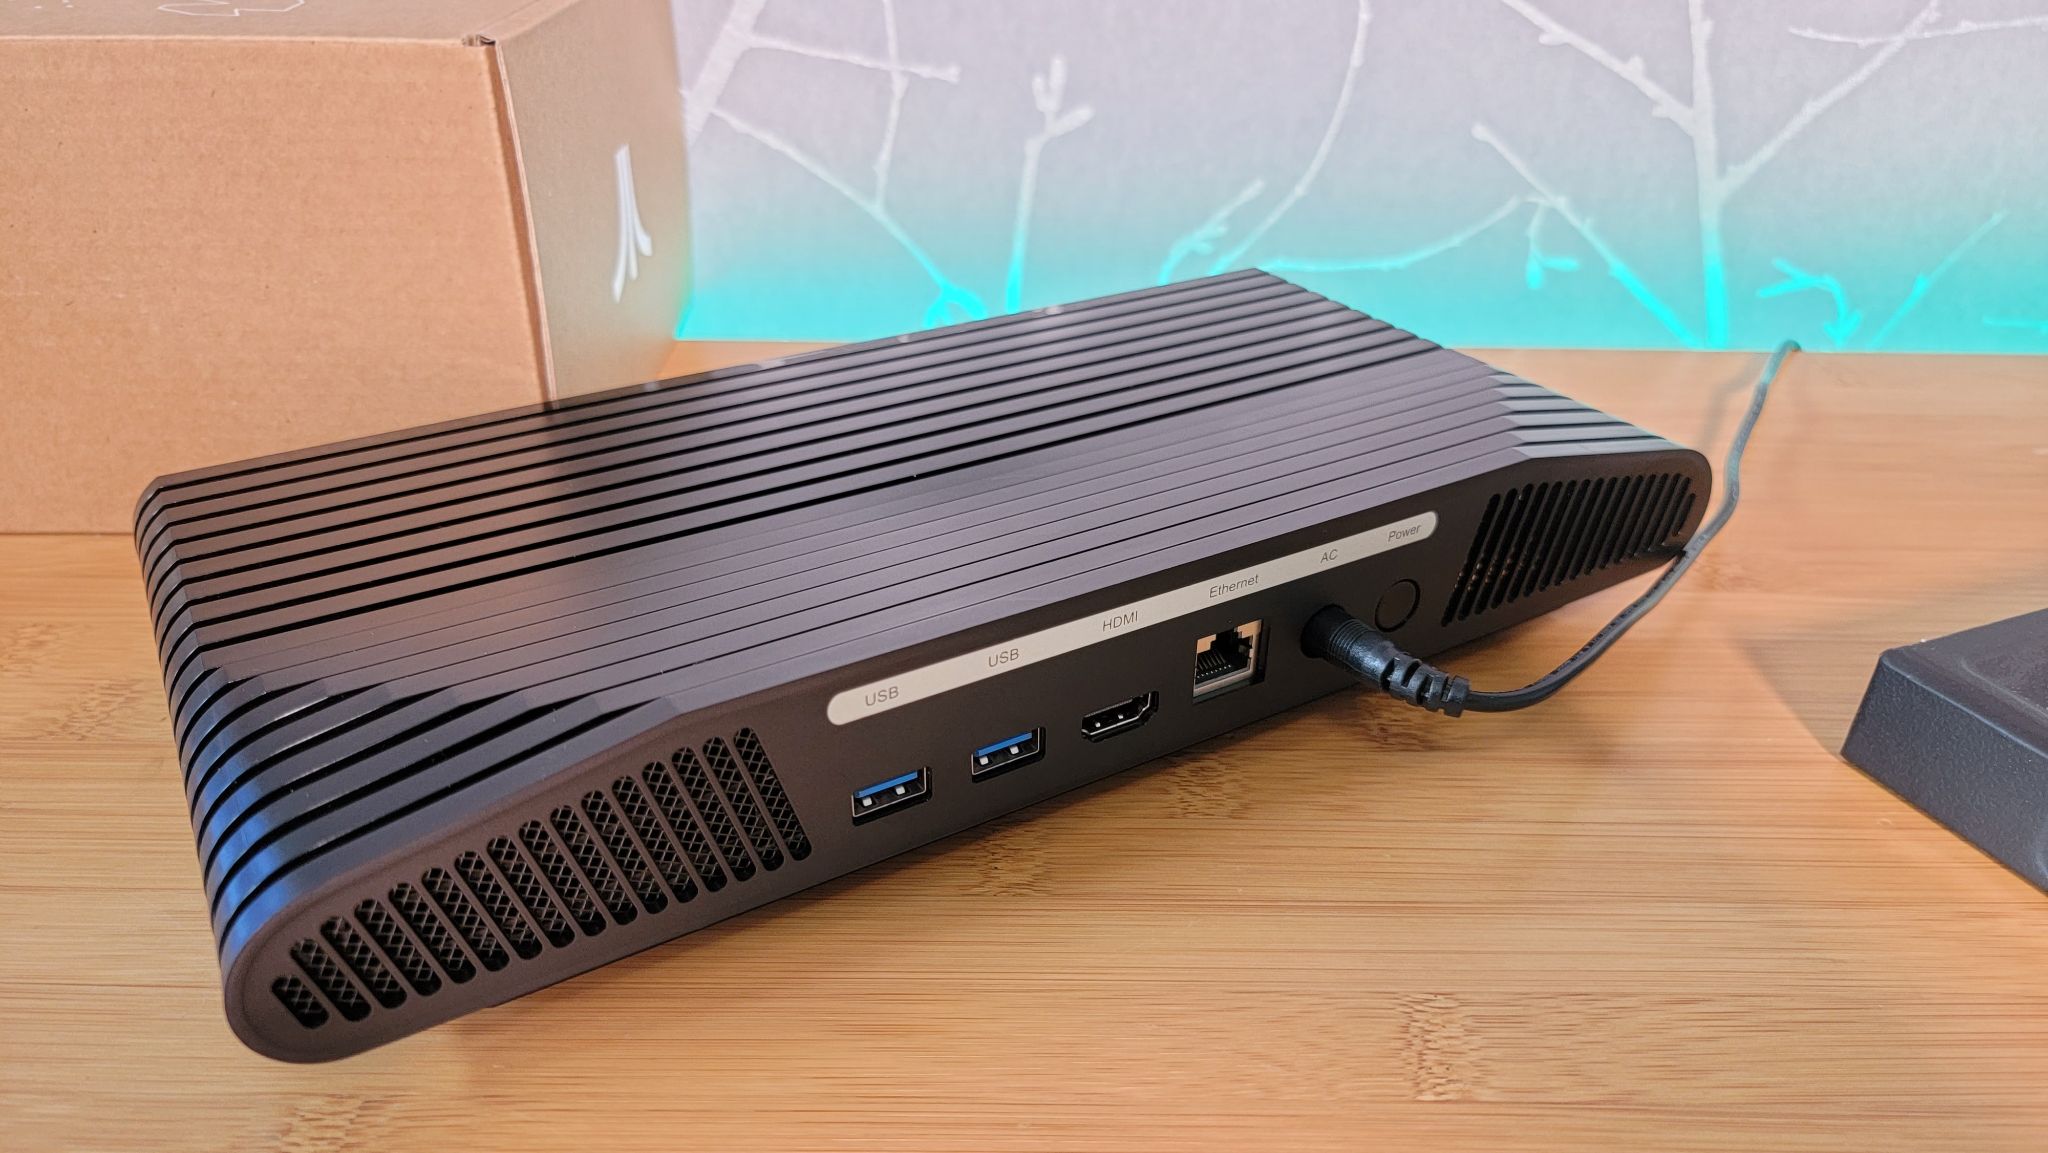
Thanks to USB-A ports (two in the front and two in the back) and HDMI, connecting up the VCS is a whole lot easier than the old-school Switch Box that always had me running to the kitchen for a butter knife to use as a screwdriver to connect the console to the two screws on the back of the TV. Powering up the system pulls on the nostalgia strings, as the Atari logo takes center stage, followed by some black-and-white Asteroids animation.
But once you get into the VCS’ main screens (you’ll first have to create an account and a PIN), it very quickly becomes clear that what’s available is much more broad than it is deep.
Get Tom's Hardware's best news and in-depth reviews, straight to your inbox.
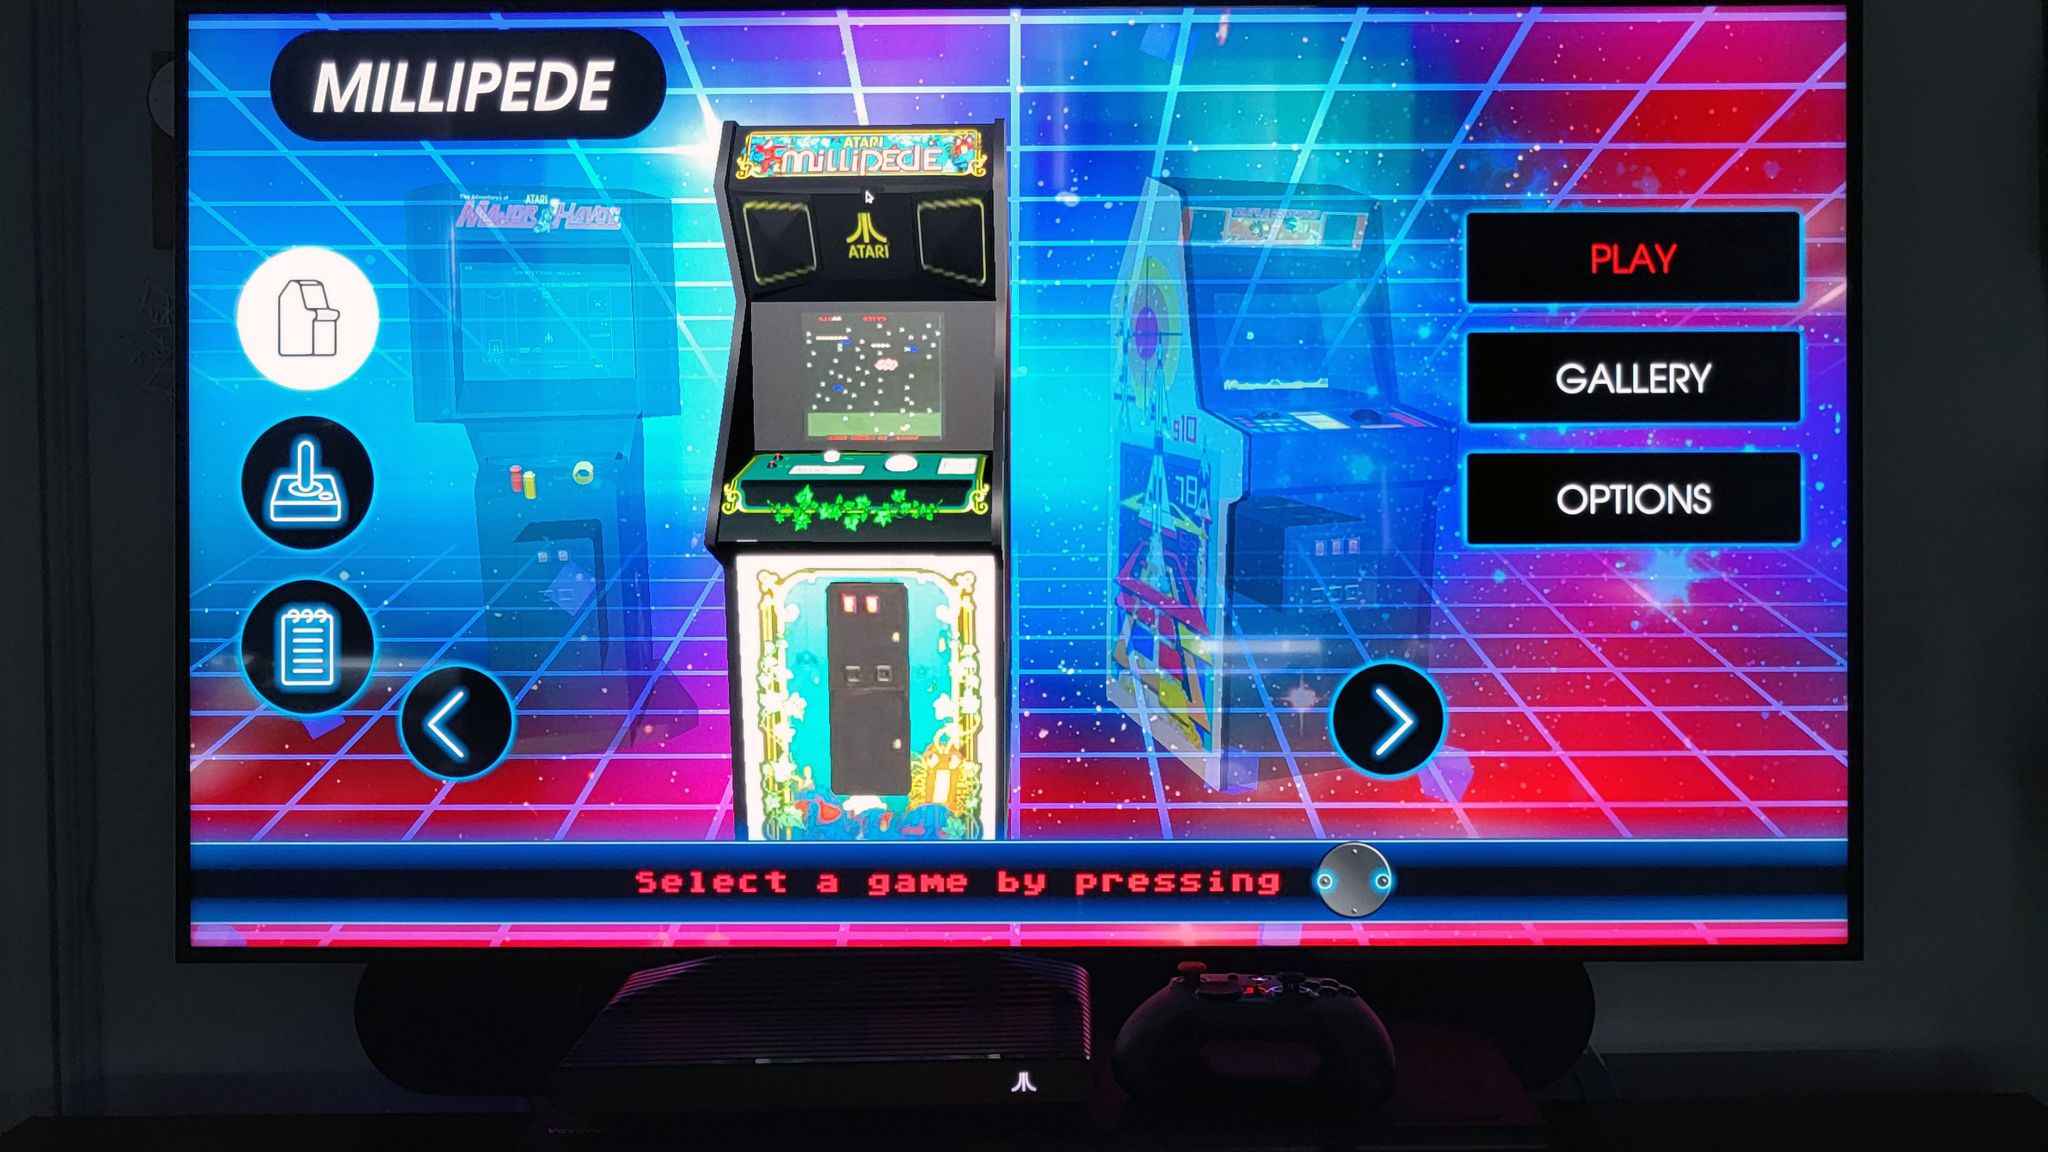
First, the good news: As advertised, there are about 100 included Atari arcade and 2600 games. And while I can’t say I played each and every one, the titles I played worked well and looked good. They certainly looked better than when I played them in the 1980s on a 13-inch TV with no remote and a busted channel knob that required using a pair of pliers when it was time for my mom to watch M*A*S*H.
I was, though, disappointed that Yar’s Revenge did not include rumble support (although some games do). And some notable titles that no-doubt would require expensive licensing (like ET, Superman and Pitfall Harry) were absent. If you want more Atari titles, a VCS Vault Volume 2 with 50 more games is available in the store for $5, though it leans more on arcade and homebrew titles. Really though, given the price, it’s irksome that the company keeps so many Atari titles behind an additional paywall. And regardless, don’t expect anything close to a complete list of even 2600 titles. I counted 81 in the standard bundle, and while the VCS Vault Volume 2 adds a few more, there were over 400 games released for the console, or more if you count the many duplicate titles. Something you remember fondly will probably be absent here.
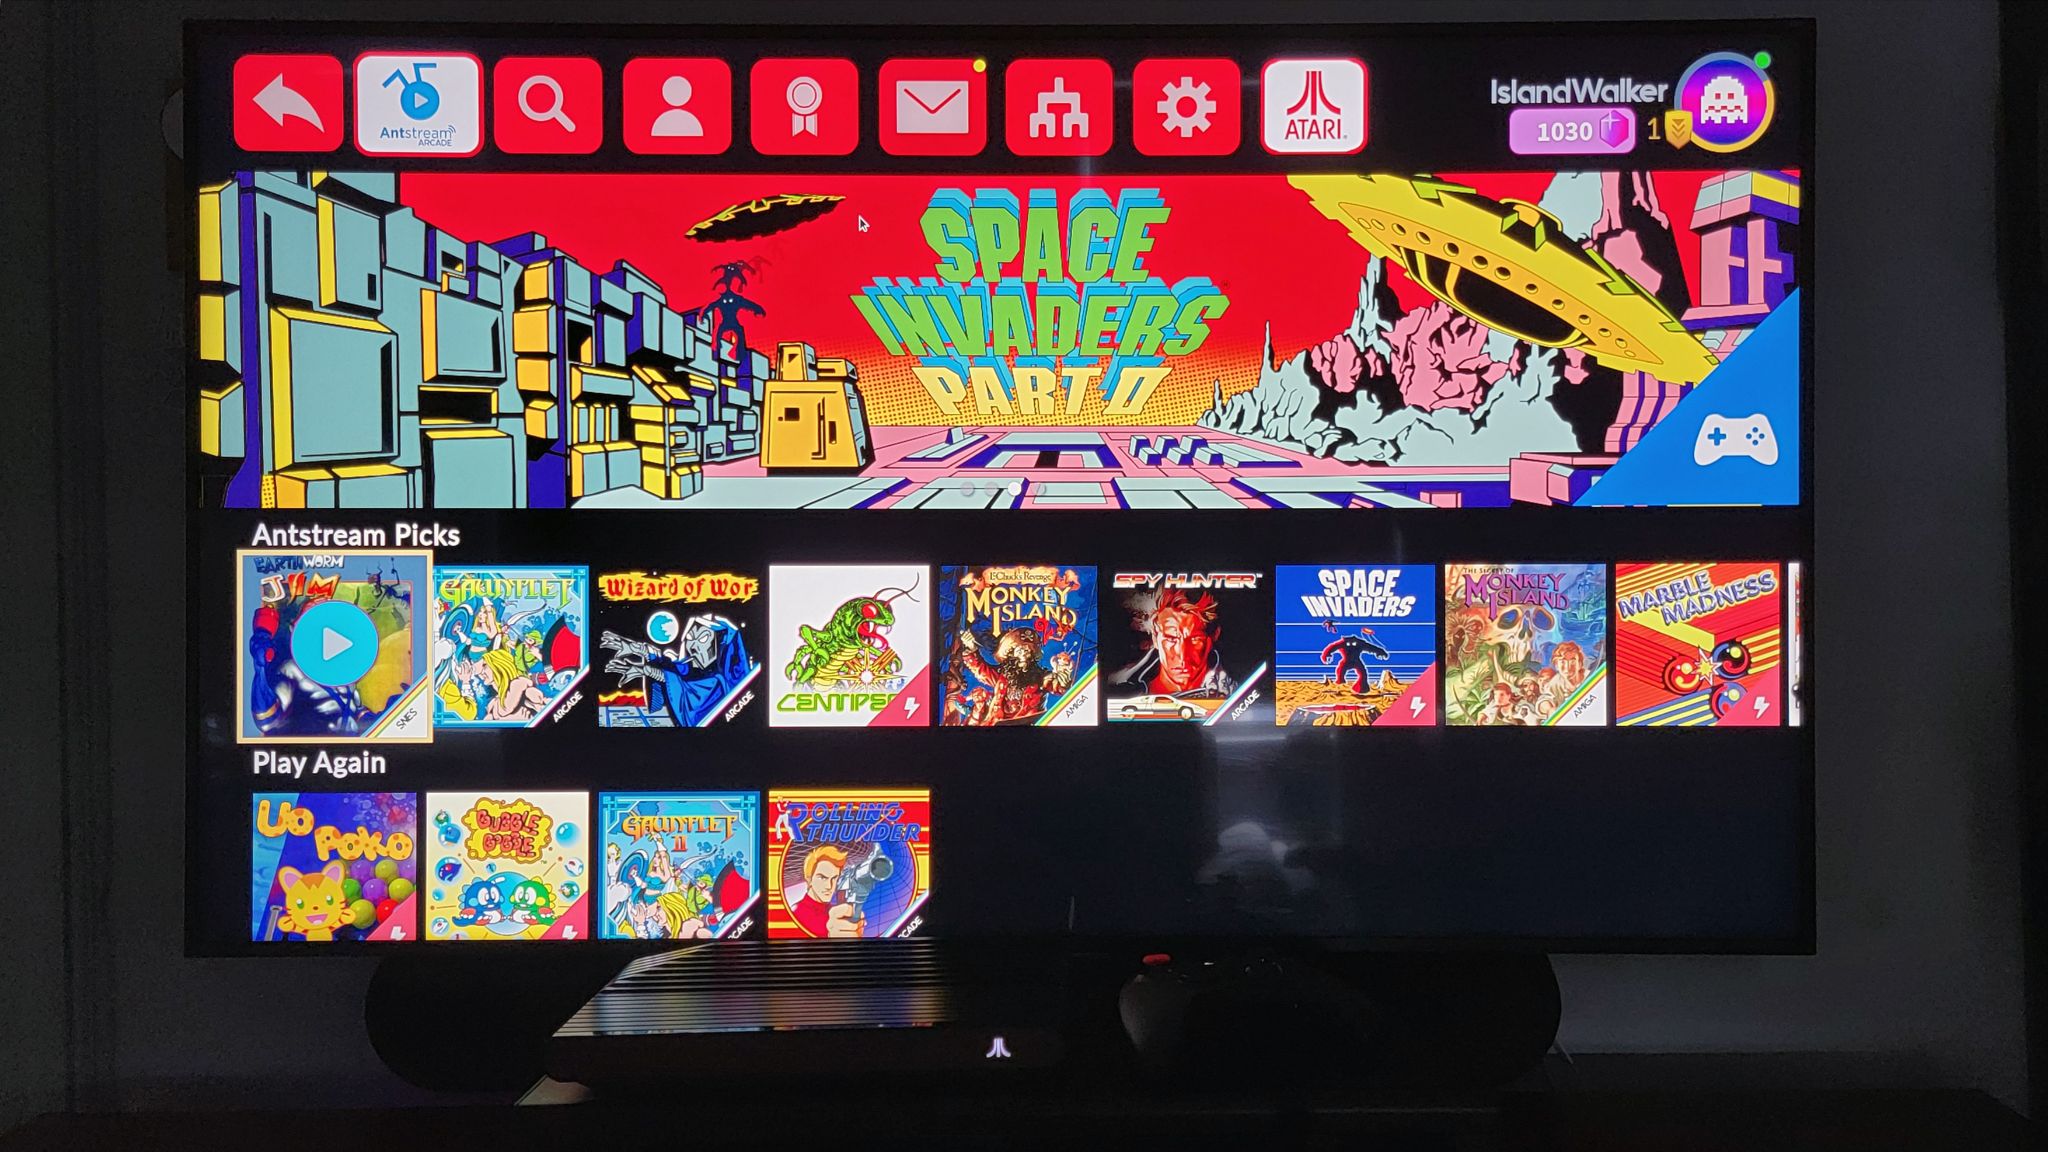
When you get tired of retro Atari titles, the Antstream Arcade app also comes pre-installed, and there’s real depth here. It’s a retro-gaming service with “thousands” of streaming retro titles from any number of platforms and decades, as well as online leaderboards, tournaments, and challenges. It’s also free as an ad-supported service, or $10 a month without ads. As much as I like the service, the pricing is a bit steep. But Atari does include a card in the box with a URL that gives you a year’s premium subscription for $39.99, which seems more reasonable. The only real downside I saw with the service, and this will be a big one with some people, is that you can’t remap buttons — at least for now, which can make playing some games feel awkward.
Regardless, I may pay up for Antstream, in part because the service works on almost everything: PC, Mac, Android — even the Amazon Fire TV stick is supported. That’s great, but it also means one of the VCS’ best features isn’t tied to this $400 device. You probably already own three or four devices that can play the games on this service already.
Games and App Store (Have your Keyboard and Mouse Handy)
Aside from the Atari titles and Antstream, the VCS also has a selection of additional apps and games in its store. At first, I was pleasantly surprised when I saw services like Disney Plus, HBO Max, Hulu, Netflix and YouTube. ESPN Plus, Twitch, Showtime and Peacock are also here, but what I just mentioned is about half of the current app list. I counted 19 in total, and that’s including a VCS Companion smartphone app to control the console, plus an app to test the controller that seems to be aimed at developers.
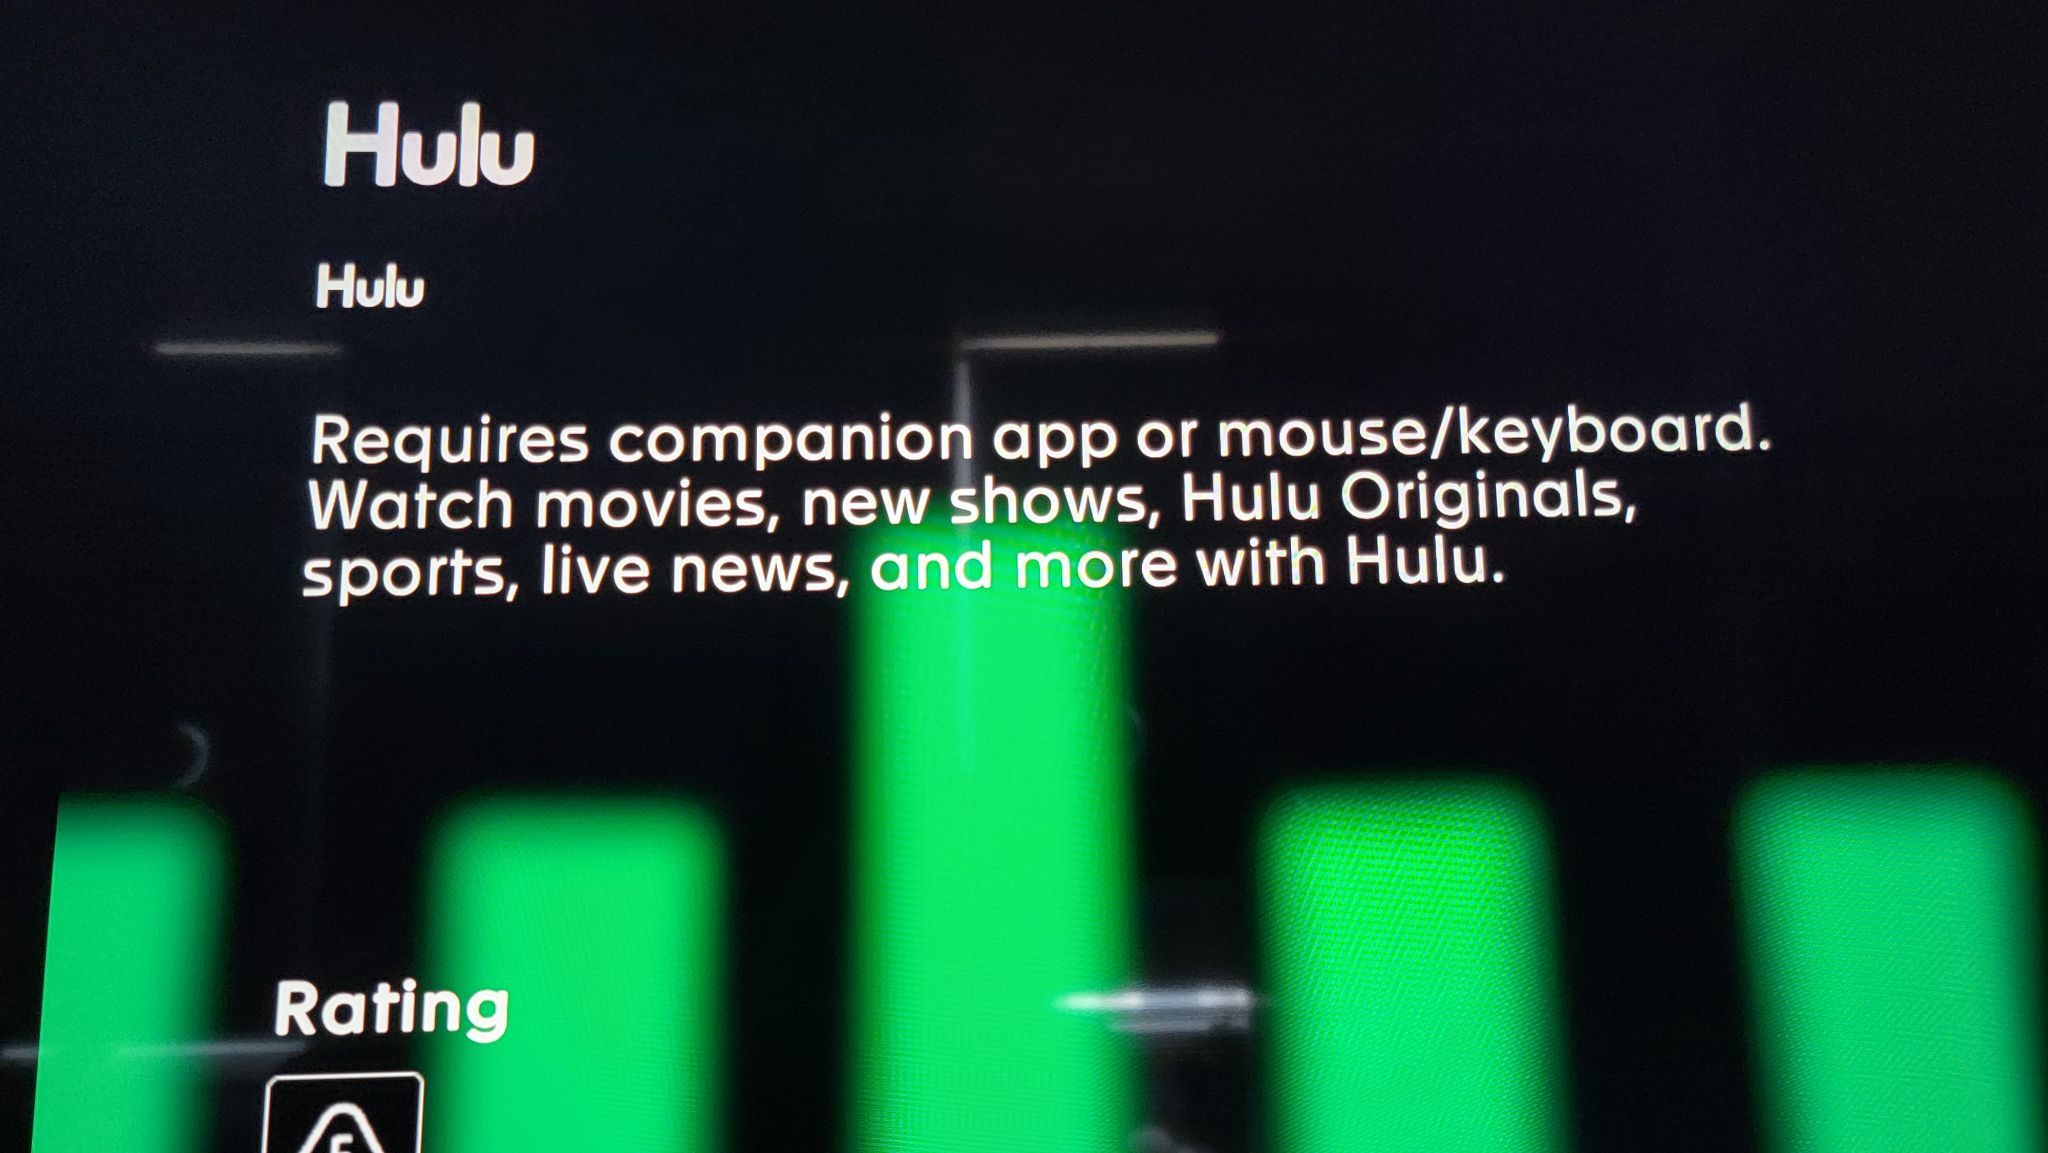
Things actually get worse when you actually try to use the streaming apps. I tried both the Disney+ and Hulu apps, only to find out (eventually) that you can’t actually control them with either of the included VCS controllers. You either need to have a regular keyboard and mouse connected (via USB or Bluetooth), or you need to use the aforementioned VCS Companion app, on a smartphone or tablet that’s connected to the same network as your VCS.
It seems like this app basically emulates a keyboard and mouse, similar to an app Intel shipped with its Compute Stick PCs years ago. But I could never actually get the app to work on my Samsung S21 Ultra. No matter how many times I entered my login PIN, the Launch button was always grayed out.
Your mileage may vary with app-based control. But as much as having to navigate streaming apps with a gaming controller isn’t ideal, having to use a mouse and keyboard with a set-top box or use a buggy app to awkwardly move around menus is a flatly awful experience.
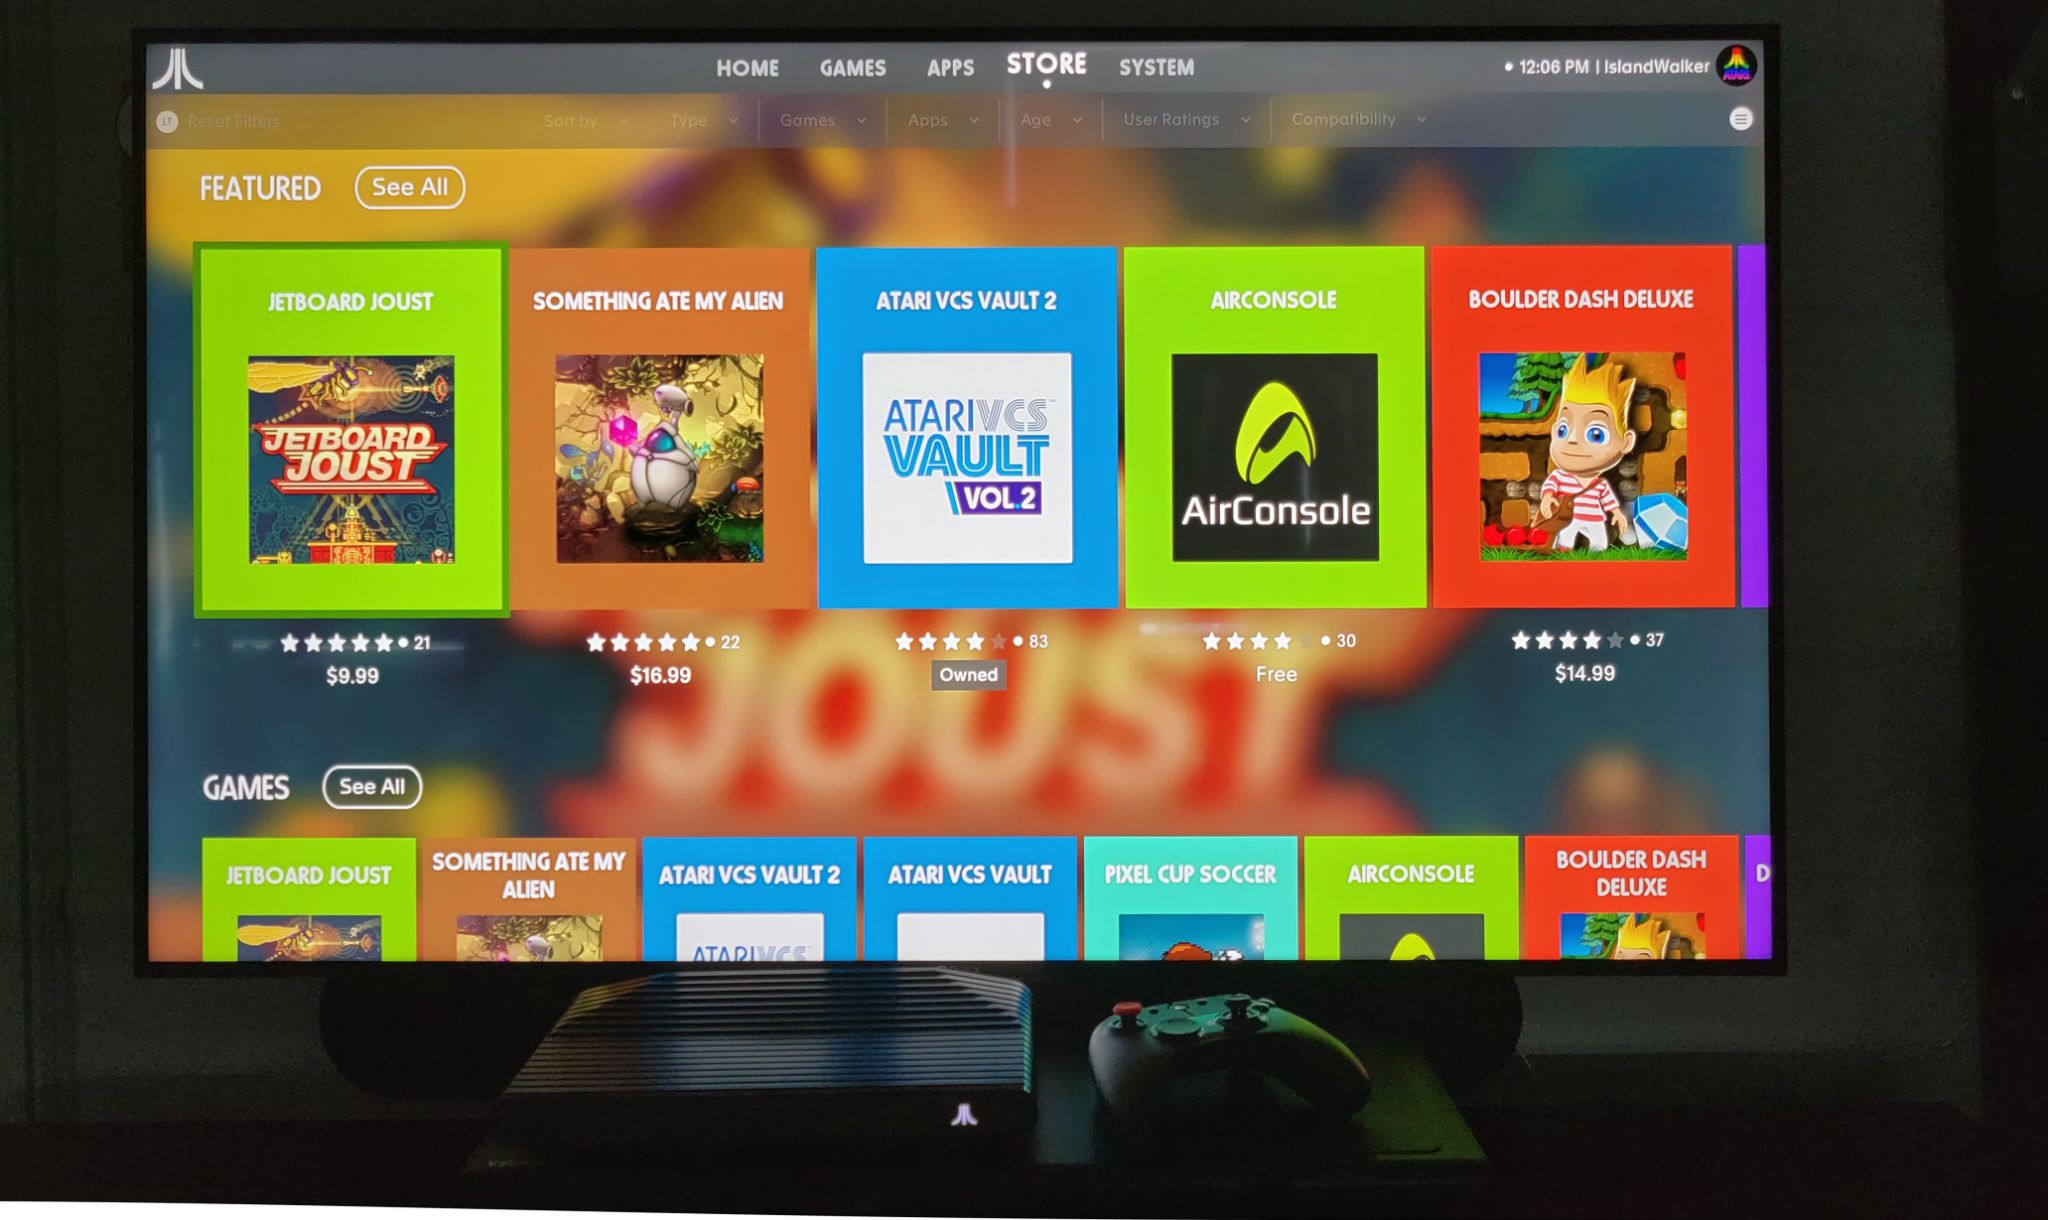
The game store is also sparse. At the time of testing, I counted just 26 titles available to buy (including that second Atari pack). Most were appropriately retro themed, and they all seem to be indie titles. Nothing stood out as something I’d seen before.
So while the VCS has support for most of the major video streaming apps, and there are some games that you can buy to add some depth, you’re likely going to be spending most of your time with Atari titles and Antstream.
Oh, and in case you were planning on using the VCS as a set-top box, make sure it’s going to sit far from earshot, because the console’s fan is quite audible. It’s not loud by gaming PC standards, but it’s quite noisy and noticeable for a set-top streaming device.
Controllers
The controllers that ship with the VCS feel OK, even leaning toward good. And while there are no paddle controllers included, the joystick spins left and right, giving an at least somewhat analogous experience for those games that used paddles on earlier consoles. However, twisting a slim control stick doesn’t give you the same level of fine-tuned control as you get with the larger paddle knobs on the original controllers.
Now, the controllers can be used either plugged in via USB or connected wirelessly with Bluetooth. Extra long micro USB cables are included in the box for a wired experience, and you may want to stick to using them, because I had issues with Bluetooth. Pairing the controllers is fairly simple. When the VCS boots up, it will flash a Bluetooth icon in the corner of the screen. Simply hold down the Atari logo button on each controller for several seconds, and they should pair within a few seconds.
But every time the system restarts, the controllers need to either re-pair, or wake up from their sleep state and reconnect to the VCS. And power up is done by pressing the same Atari button that’s used for pairing; a short press powers a controller up while a long press initiates pairing mode. This at times had me disconnecting the controller when I was just trying to turn it on. And at best, powering up the controllers takes a few seconds for each controller every single time you start up, leaving you sitting at the lock screen fiddling with controllers while waiting to be able to enter your PIN. I also experienced occasional issues with the Keychron K3 Bluetooth keyboard I used with the system, where it sometimes wasn’t recognized after a VCS reboot, forcing me to re-pair it from the Devices menu. I tried pairing an HP mouse via Bluetooth as well, but the system refused to see it at all. My advice is to stick to USB connectivity, as it just works. But of course, that makes for a much less-tidy setup.
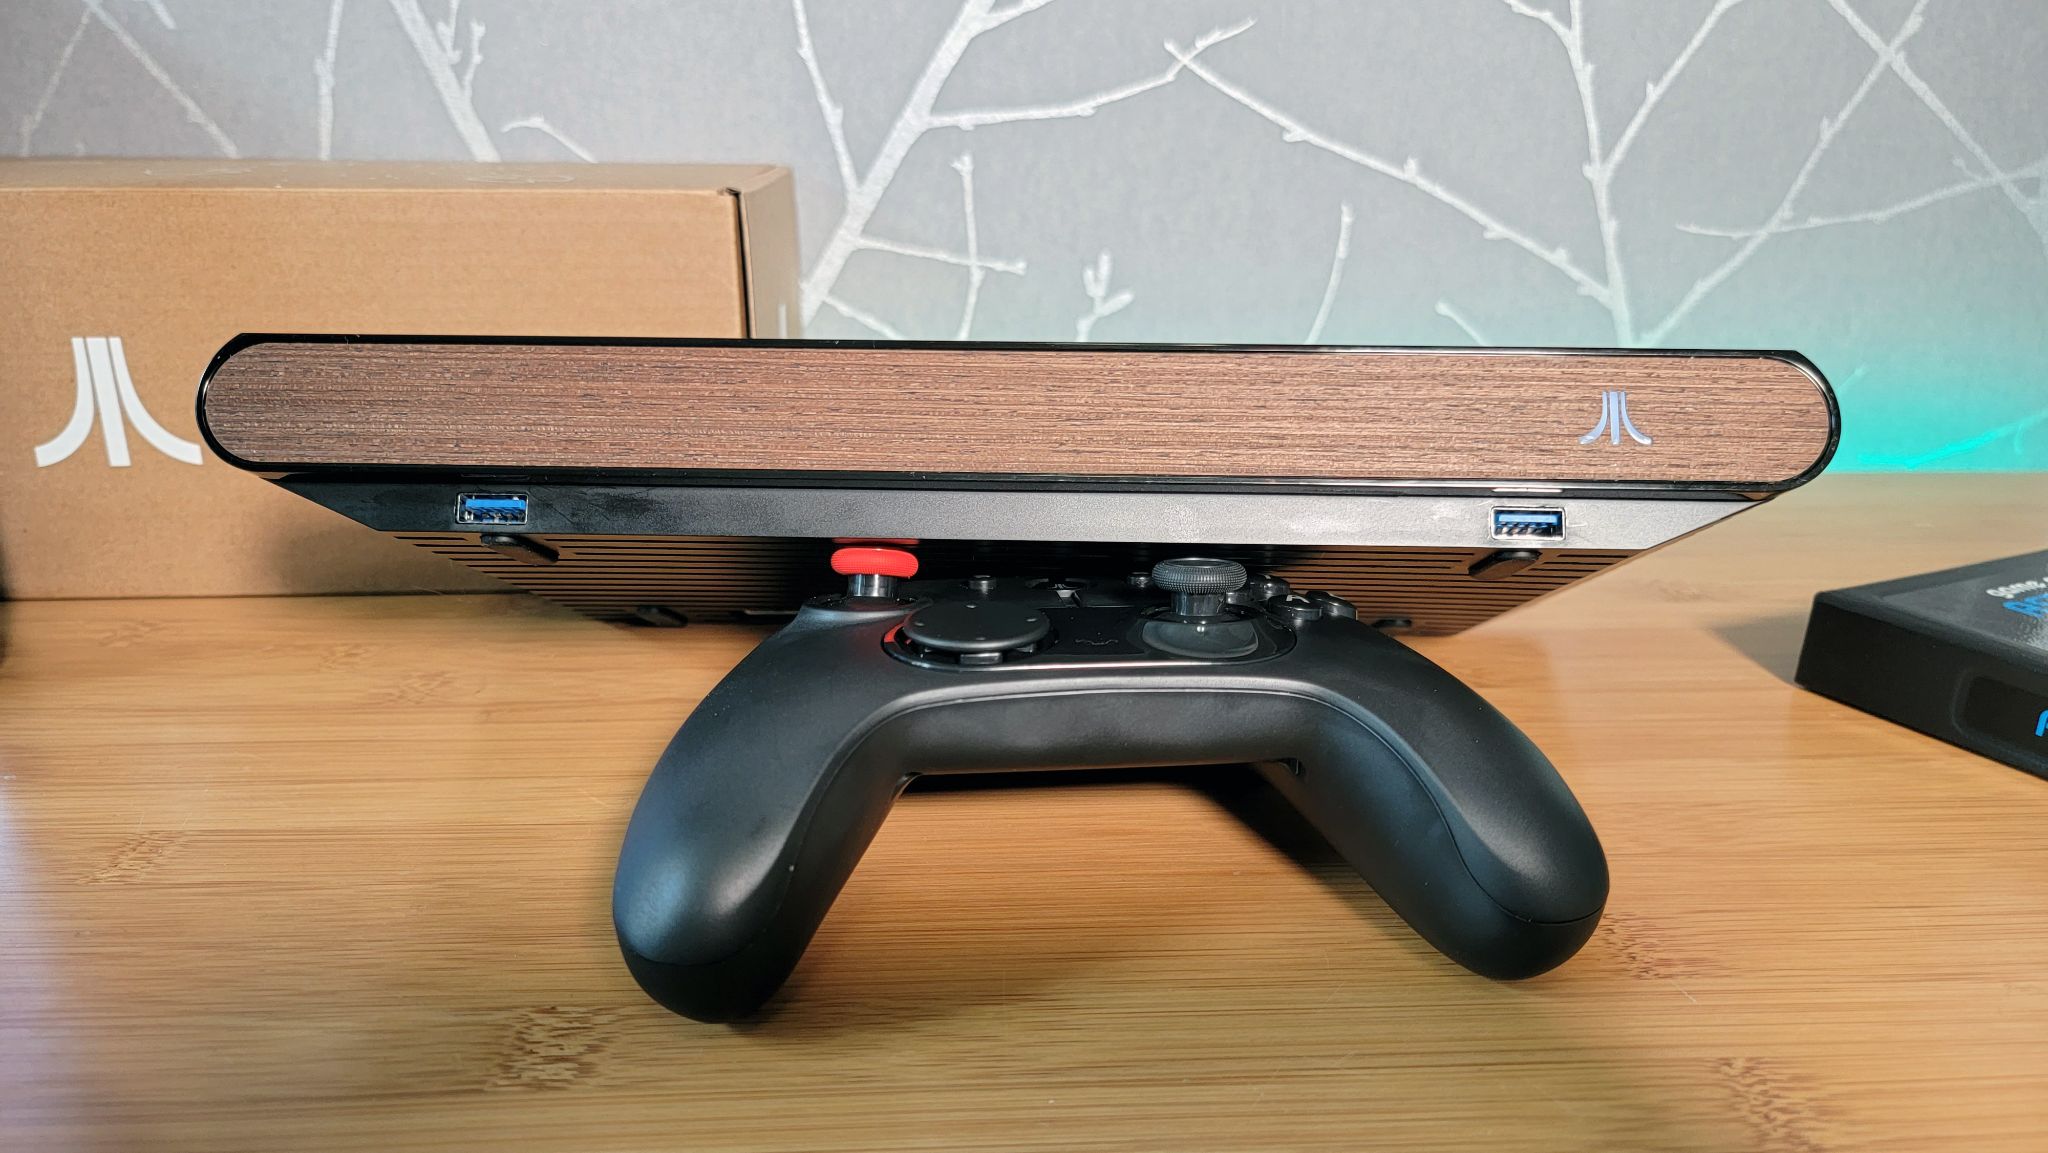
At least with USB, the controllers just work. And there are four USB ports for this purpose, with two conveniently up front and two in the back.
Upgradability and OS Install Frustrations
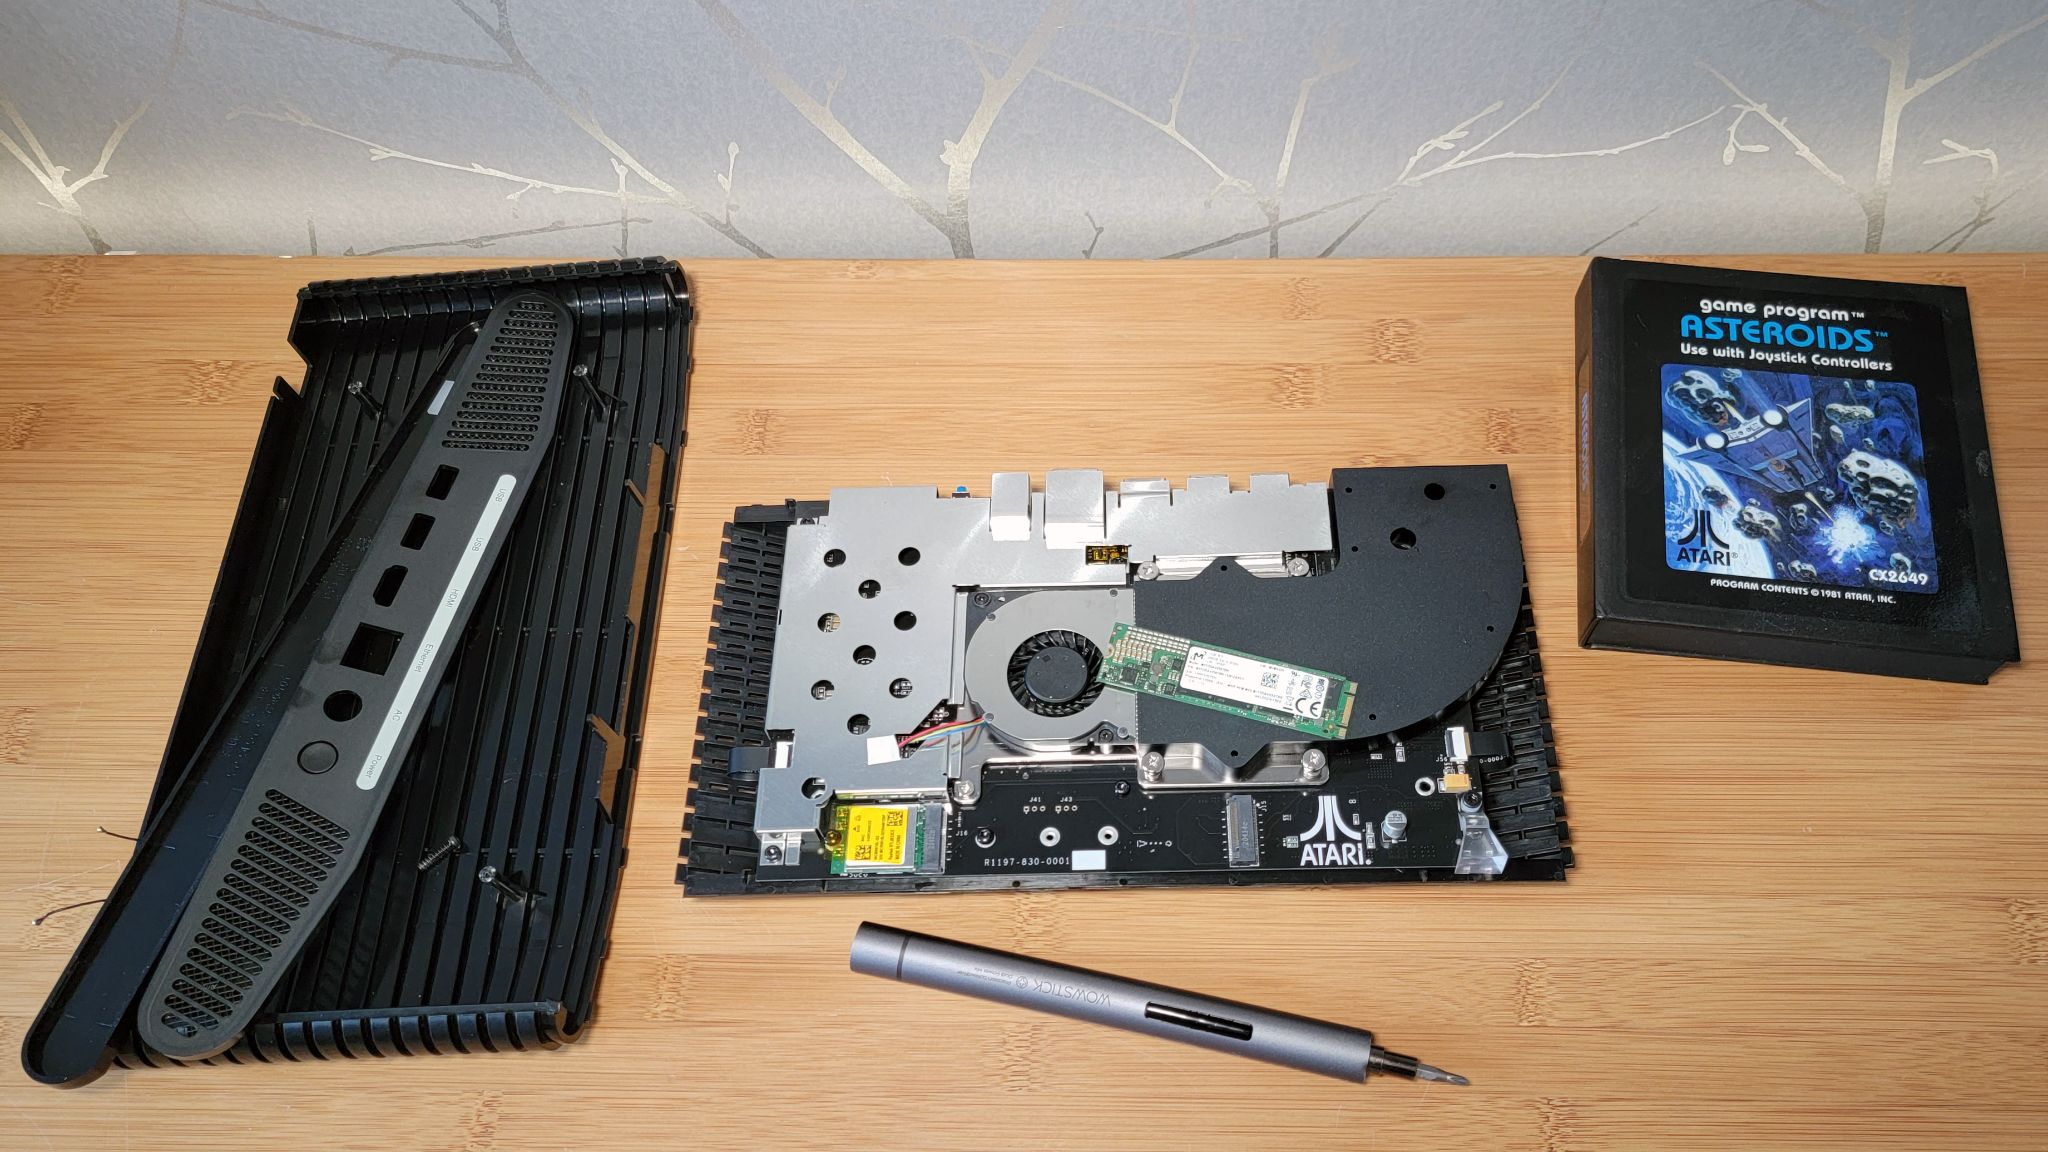
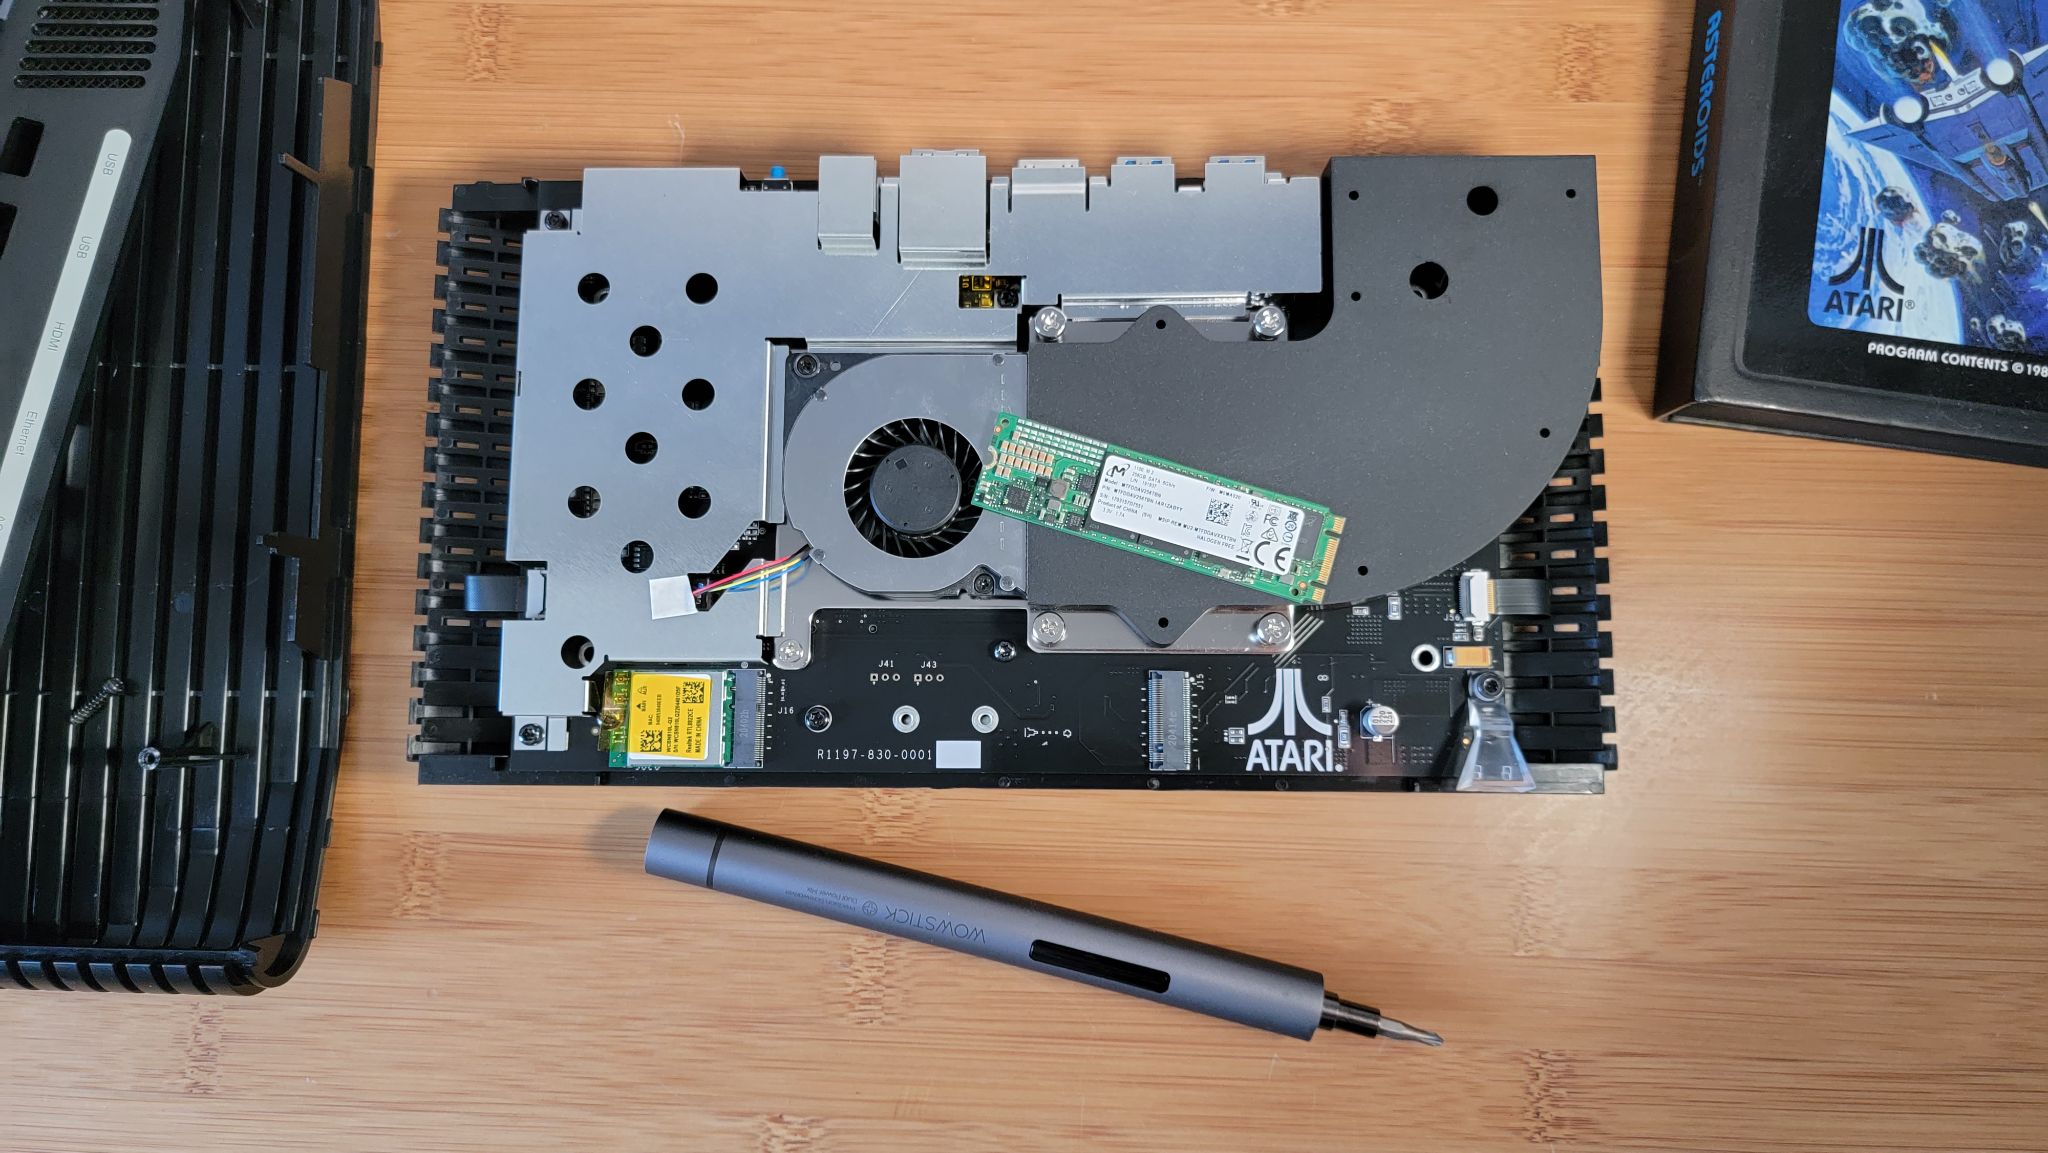
Everyone appreciates versatility and upgradability — or at least I hope most of our readers do. As noted up top, the VCS’ menu has a PC Mode button that reboots the console, designed to let you launch into another operating system. An M.2 slot on the motherboard lets you add storage (which you’ll need for this purpose, given the system’s meager 32GB of eMMC). Only SATA M.2 drives are supported here, which is what we installed. I used a 256GB Crucial OEM model that I at some point pulled from a laptop that I upgraded.
You can also upgrade the RAM, but getting to that involves some more serious disassembly, because the SO-DIMM slots are on the underside of the motherboard. Games and productivity apps that you’re likely to run on a system like this should be fine with the 8GB that the VCS ships with, so for the sake of saving some time, we didn’t upgrade the RAM here.
Getting into the VCS is reasonably easy. The front and back panels pop off with a moderate amount of pulling and prying. That said, we suggest taking the back off first, then removing the four bottom screws, at which point the front panel should essentially fall off when you start to open the chassis. I mostly used Google searches and various posts and videos from users as guides for this process. Perhaps Atari has documentation regarding disassembly and upgrading, but I didn’t find any. Most of the documentation is provided digitally via a QR code on one of the interior boxes. But the camera app on my Samsung S21 Ultra refused to take the URL from the QR code, forcing me to type https://atarivcs.com/support in manually. This is fairly minor, but just adds to the frustration pile.
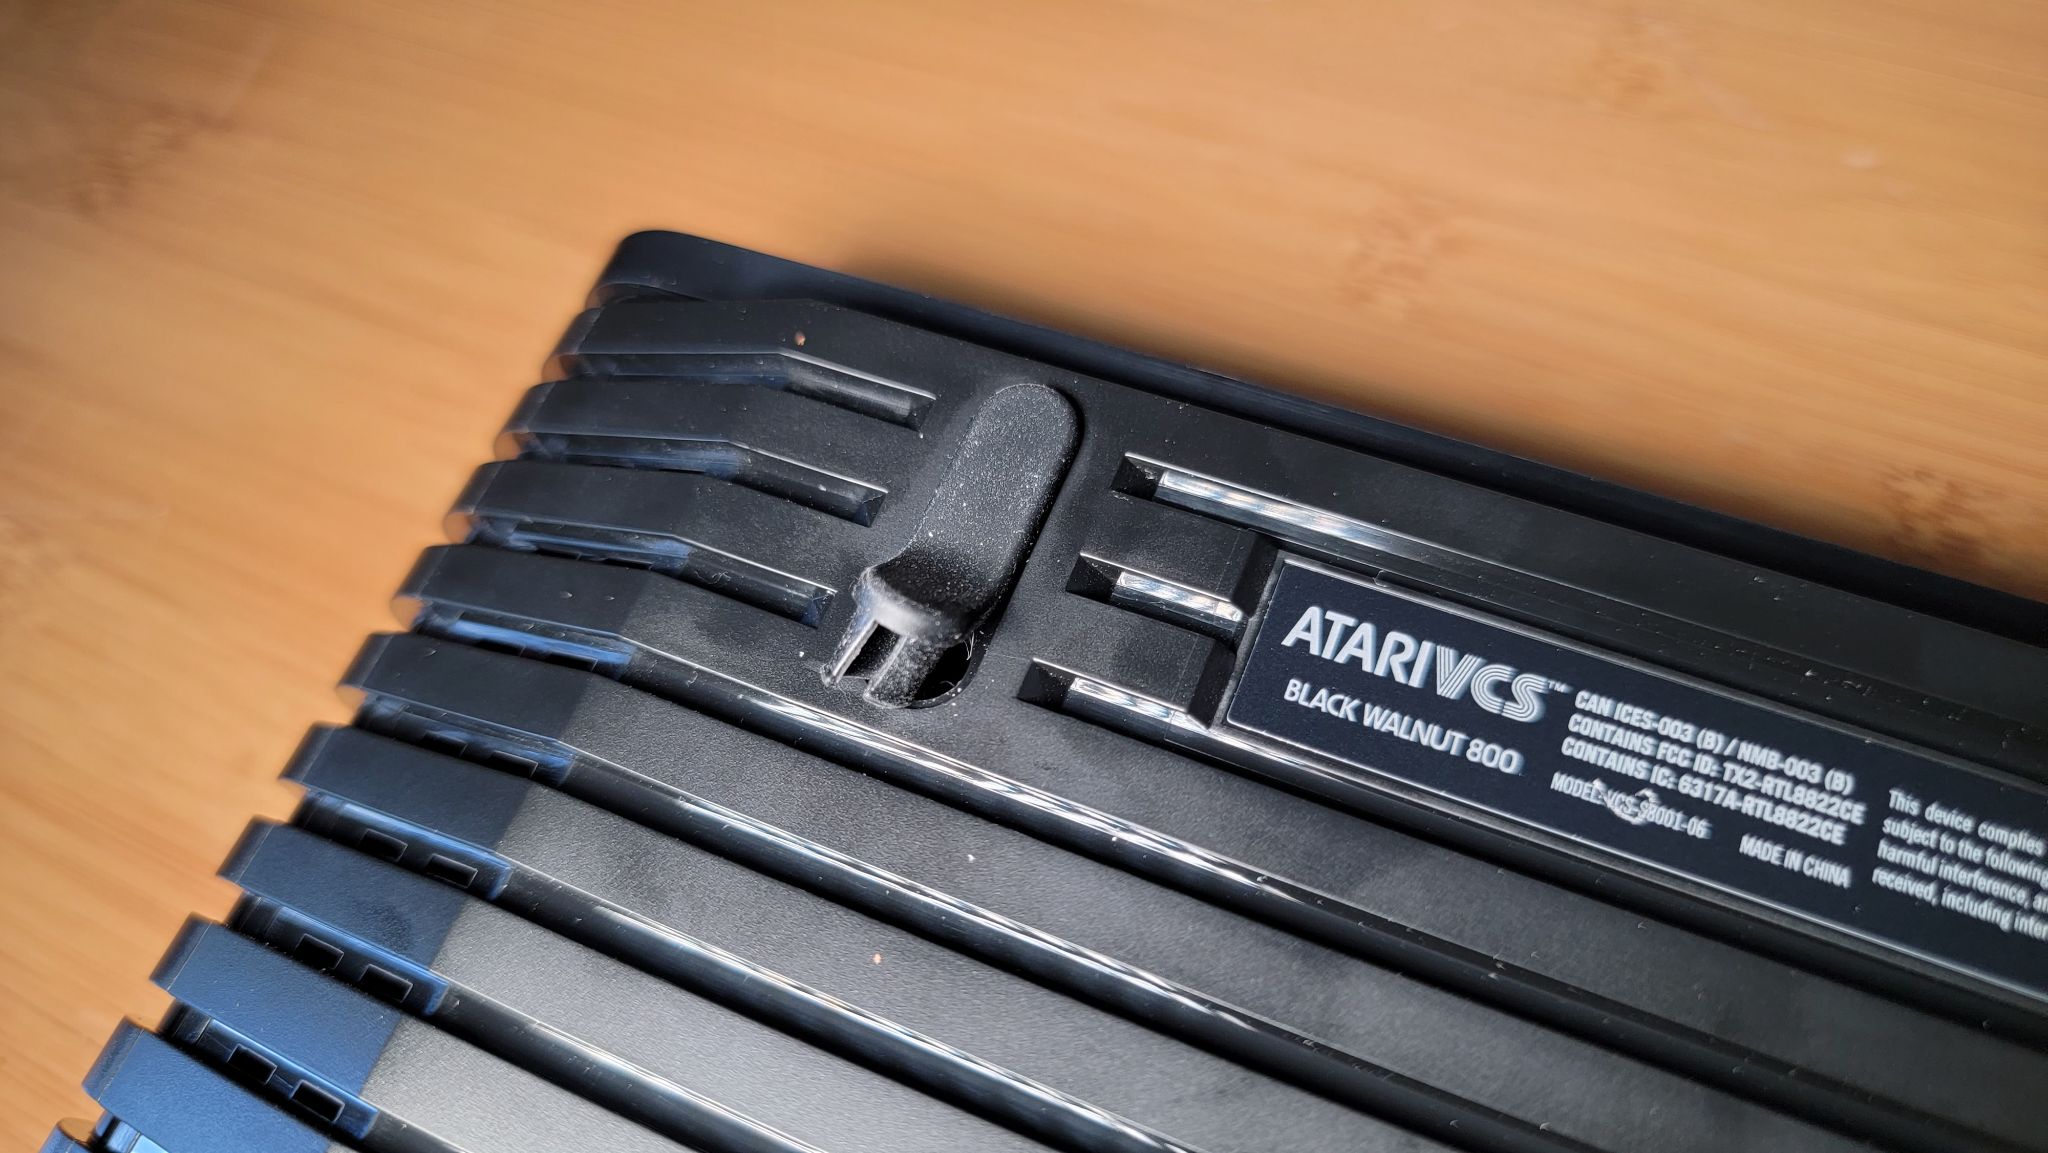
One nice thing to note: The four screws that hold the VCS together are hidden under rubber feet, but the parts over the screw holes just pop out to let you get to the screws, and then pop right back in. Every laptop maker should take notes here. A less-nice thing: The VCS uses Torx screws, and some require a lot of force to loosen, particularly for me the mounting screw for the M.2 drive.
Be careful when you open the VCS, as the Wi-Fi/Bluetooth module antennas are taped to the plastic top of the shell, while the module and the rest of the system is attached to the motherboard. You can pull off the tape, or unplug the tiny antenna connections. Just be sure not to snap the wires.
Installing the M.2 in the slot to the right of the Wi-Fi module was a pretty standard process, aside from initially getting that screw loosened (I eventually resorted to using pliers to loosen it). Installing the SSD went so fast and easy that, in my eagerness to get Windows installed, I didn’t even take a picture before putting the VCS back together. Little did I know that I would be opening the VCS up a few more times before getting Windows 10 installed.
Installing Windows 10 on the Atari VCS
It’s worth noting that the VCS technically supports both booting into another operating system via an external drive or an internal drive. And many VCS owners online have opted for the former, understandably due to a lack of PC hardware knowledge and an aversion to cracking open a $300-$400 device that you just bought. But with nearly 25 years of PC building experience under my belt, a couple of SATA M.2 drives available, and the fact that I didn’t spend $400 of my own money on this VCS (our company purchased the VCS), I was happy to delve headlong into installing Windows 10 on an internal drive on the VCS. After installing the drive itself and putting the VCS back together, I expected the process to go smoothly. Boy, was I wrong.
While I was often distracted by other tasks, I spent more than two full work days attempting to install Windows 10 on the 256GB SATA drive I installed in the VCS. First, I attempted to use a LaCie flash drive I’d used to install Windows 10 with several times over the last couple years, only for the process to error out at various stages, with various messages of complaint.
So I wiped the flash drive and created a more up-to-date install drive using Microsoft’s Media Creation tool. After that attempt, I got a different error, indicating some files were missing. I’d run into a similar error with flash drive installation media before that was fixed by using an optical install disc. So I pulled my old USB Blu-ray drive out of a drawer and burned a Windows 10 install DVD. Again, upon attempting to install, I got varying errors, often relating to the system being unable to initiate a reboot to get to the next stage of the installation.
In the midst of all this, at some point I began Googling possible solutions, first landing on Atari’s own Windows 10 Install guide (warning, PDF link), which actually involves creating a bootable flash drive to run Windows 10 from, rather than getting Windows 10 running on an internal M.2. Still, I tried this process anyway and, one night after work, left the system to boot from my converted TeamGroup flash drive. After about 8 hours, Windows 10 hadn’t actually booted from the flash drive, but it had progressed from the spinning Windows loading circle to a spinning circle that asked me to please wait a moment while Windows loads. After several more moments, I gave up and powered down.
Eventually, I pulled the M.2 drive out and performed some low-level formatting on it from the command line, reinstalled it in the VCS, and didn’t get any further with my install attempts. Then I found another flash drive to use as installation media, and didn’t get any further. I even dragged out a different M.2 SATA drive and installed it in the VCS, without any luck.
At the end of the second day, I stumbled on a possible solution via Reddit, which I had considered at some point the day before, but figured there must be a simpler (and more sensible) solution. Maybe there is, but after about 48 hours of frustration, I tried the Reddit route. It involved pulling the M.2 drive from the VCS, installing it in an external enclosure (thankfully I had a Silverstone model at hand) and using the Hasleo WinToUSB tool recommended by Atari’s support materials to create a bootable version of Windows on an external drive. The free version wouldn’t let me create a partition that used all of the 245GB or so of space available on my Crucial SSD, but I gave it a shot anyway, creating an “external” Windows 10 boot SSD with over 100GB of space--plenty of room to install the OS and a few older or indie games and programs.
After the drive finished writing, I then unplugged and removed the M.2 drive from the Silverstone enclosure, and installed it back into the VCS once again. From there, I had to plug in a keyboard and mash the escape key when booting to get into the BIOS and tell the system to boot from my Windows MBR partition first--something you’ll have to do every time you want to boot into Windows on the VCS, unless or until Atari unlocks the BIOS features it apparently locked down with an update before the launch of the retail VCS.
But, with the Windows Boot Manager selected, I rebooted, and within a few minutes I finally had Windows 10 running on the VCS. I was slightly elated. It only took two days of failed attempts and frustration. And again, I’d have to enter the BIOS each time I wanted to boot into Windows 10 to choose my preferred boot device (the Atari’s Linux-based OS is still the default), but at least it worked! Of course, given the embedded AMD APU, I wasn’t expecting modern AAA titles to run. (Or at least run well.) It turns out, though, what I was actually in for was yet another round of “well, this isn’t what I expected.”
As I nudged Windows 10 to install any available updates and drivers, I also manually downloaded and installed AMD’s Radeon software, to be sure I had the latest video drivers. All seemed to go well at first, and I even began installing Steam and the Epic launcher, thinking I would soon be firing up some games to see what ran, what ran well, and what didn’t run at all.
But after a few reboots and, at least seemingly, all necessary updates and drivers installed and ready to rumble, the system was still persistently experiencing app crashes, video display issues, and other flavors of wonkiness. Slack ran OK for short periods of time, but both Chrome and Edge would often crash after sometimes just several seconds of use.
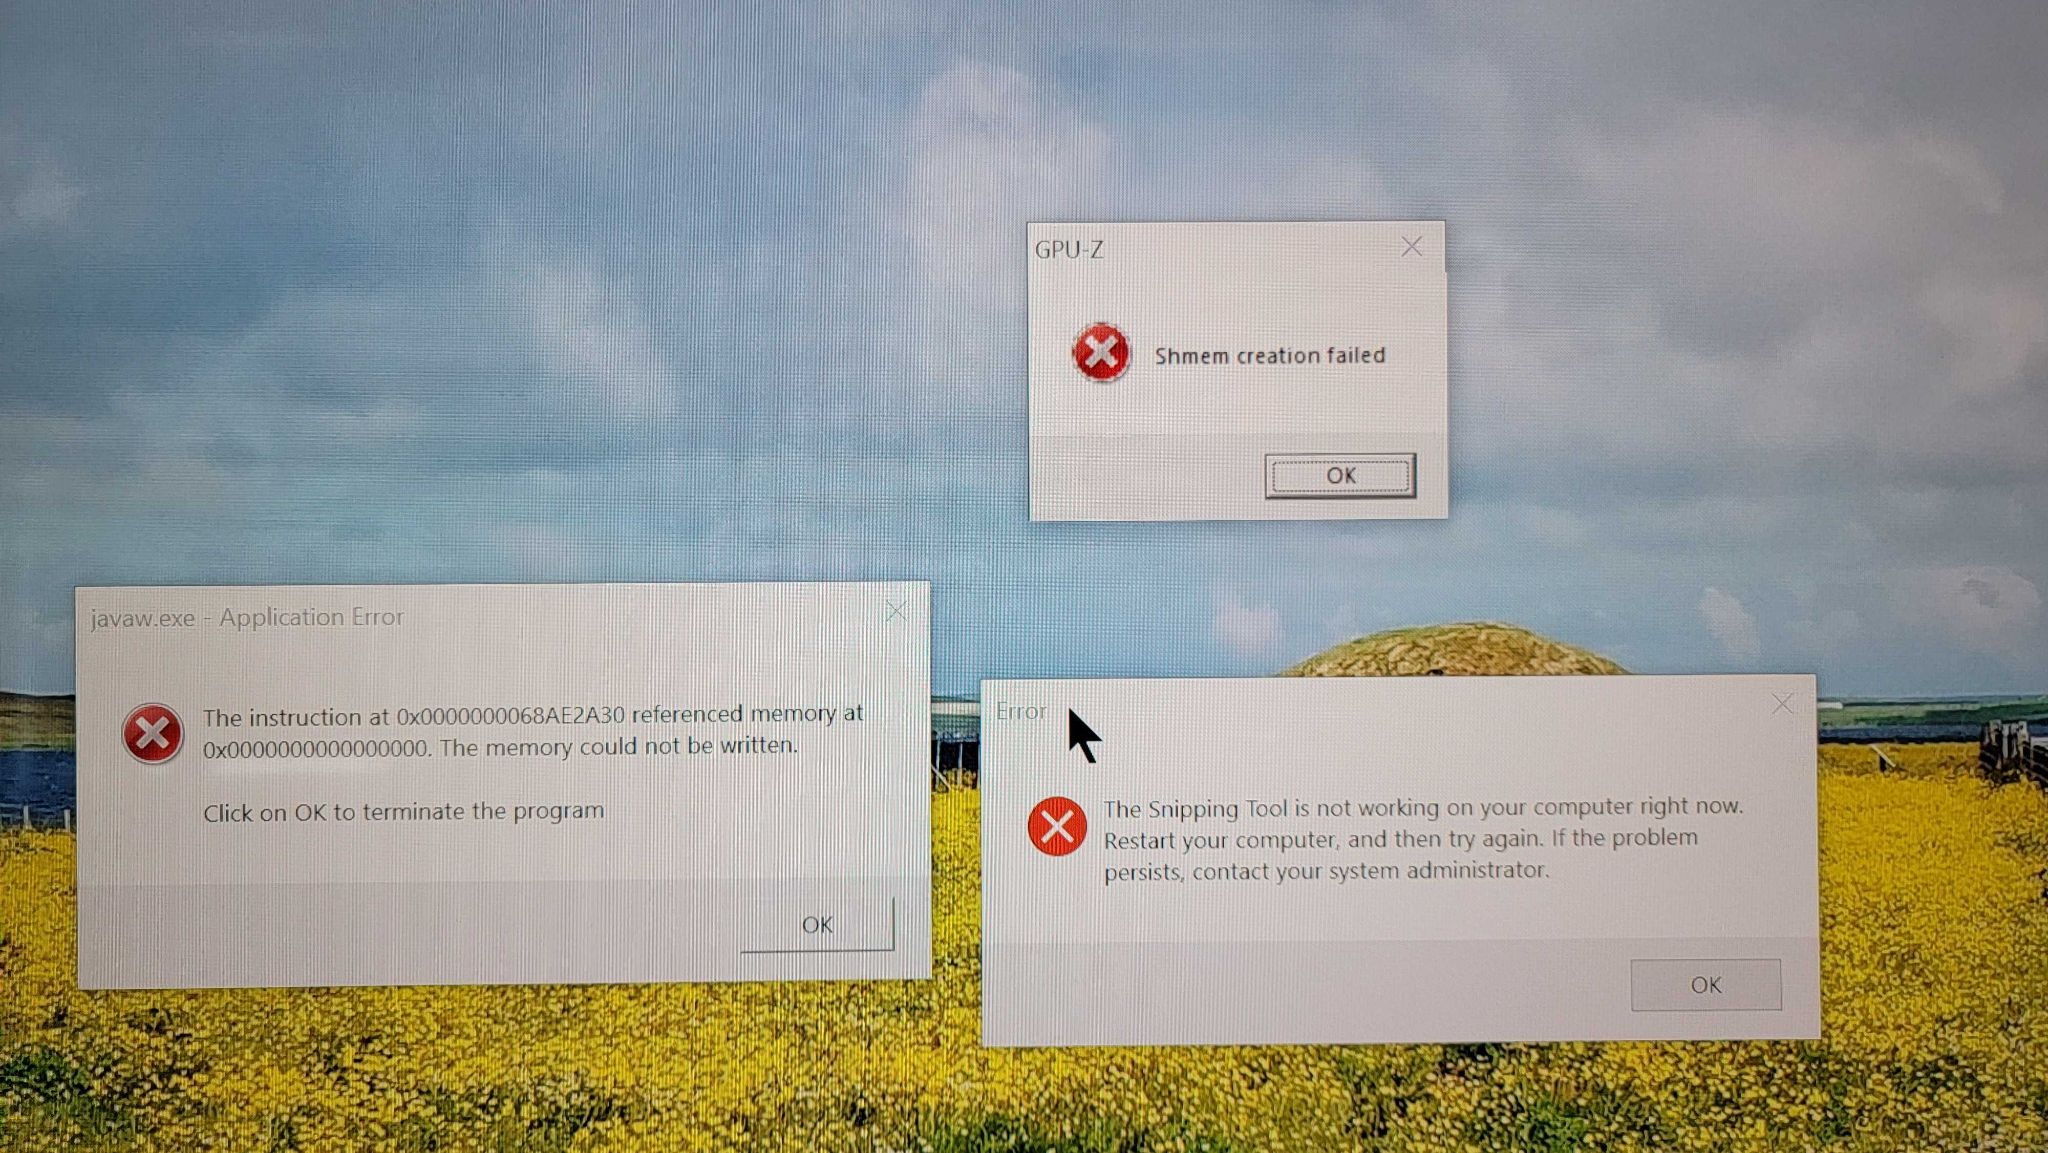
At first, given the display issues, I thought the problems might be primarily down to the generic Radeon software I installed. The system does, after all, make use of a rather non-mainstream Ryzen Embedded R1606G silicon. So I rooted around on AMD’s support site until I found, downloaded and installed Radeon software specifically for the company’s R-Series R1000 hardware. I was hopeful this would improve things, but after installation and a reboot, within a couple of minutes, my desktop looked like this.
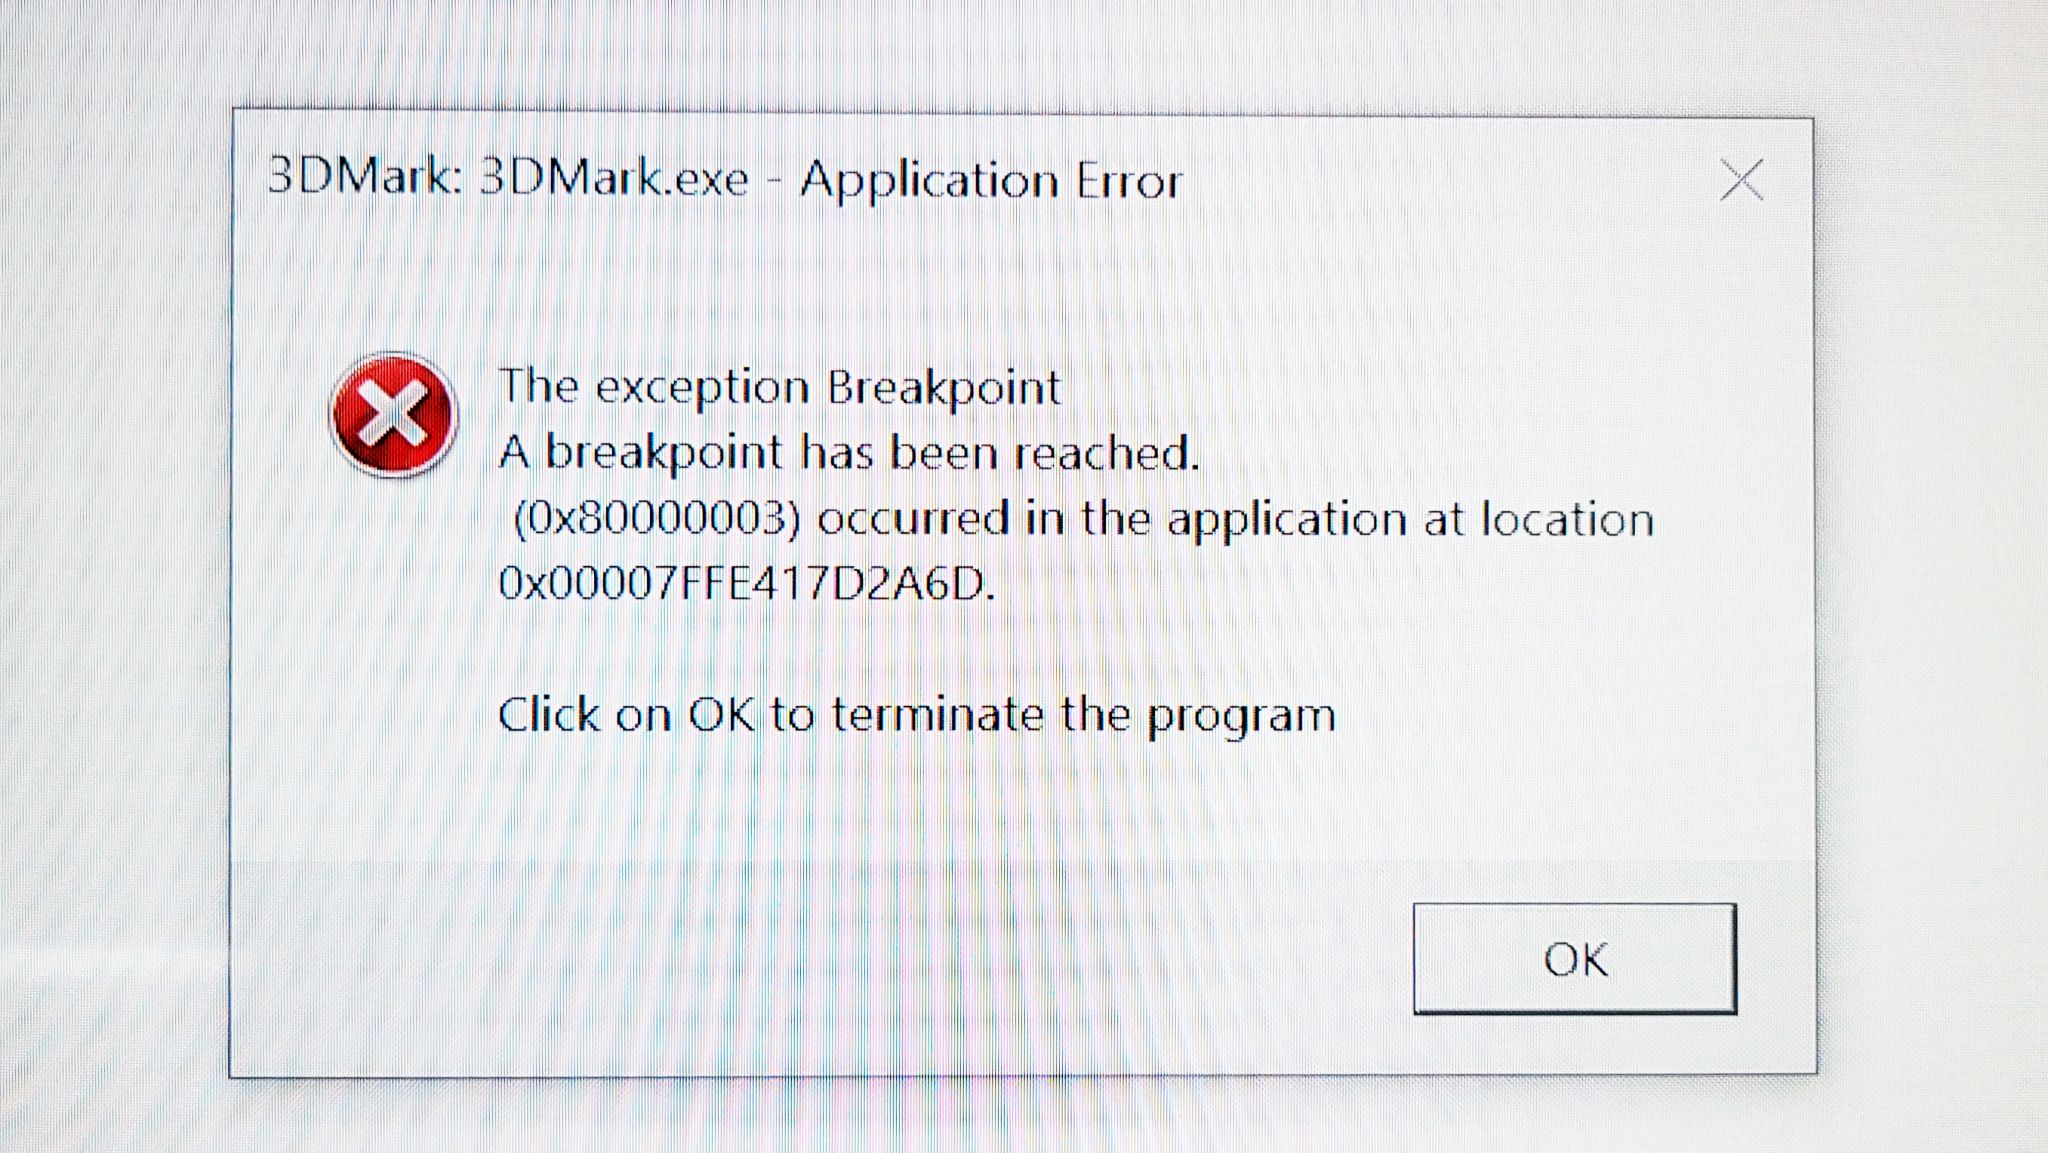
Apologies for the smartphone photo, but as you may notice from the error on the right, even the snipping tool at one point refused to run. I clicked through a couple of these error windows, and eventually ran across this bouncing bundle of annoyance.
At this point, it felt like the Windows gods were trying to tell me something. I could spend several more hours Googling all of these errors and trying to get Windows 10 to run better on the VCS, but why? At best I was going to see performance akin to a $300 budget box. And if my primary purpose was to run Windows for low-end gaming, there are all sorts of options out there that should perform better, with fewer hassles — and, oh yeah, they will all run Antstream Arcade, which features plenty of Atari games, too. I love to tinker with hardware more than most people, but a Breakpoint error is, it turns out, my breaking point for the VCS.
Conclusion
I could give the Atari VCS every pass possible. Maybe you won’t have the issues I did with the Companion App or the Bluetooth pairing issues with the controllers. Maybe you don’t care about PC Mode, or you won’t have the installation and basic functionality issues I did. Good for you! And maybe the company will add significantly to its current lineup of apps and games. But then you’re still left with a $400 set-top box that does a pretty good job at playing 100 or so games from 35 or more years ago, with a noisy fan and a clunky interface for video streaming.
Aside from being perhaps the most frustrating piece of hardware I’ve tested and reviewed in years, the VCS is also hugely overpriced for what you get. And beyond its core functionality, it feels very much unpolished and unfinished, despite years of delays.
And here’s another frustration: While the system is technically capable of being switched over to 4K mode for higher-quality video, it ships at 1080p by default, because the whole OS is sluggish at the higher resolution. This would feel like a more dire issue if there weren’t so much else going on. But the retro games themselves don’t visually benefit from the OS running at a higher resolution. And the fact that the streaming apps require the use of either a keyboard and mouse or a smartphone app (which I couldn’t get to work at all) makes the VCS such a poor streaming media device that its 4K sluggishness feels fairly minor.
The basic 4K ability and responsiveness is the kind of basic functionality that $40-50 devices like the Roku Streaming Stick+ and the Amazon Fire Stick handle with far less issue (and with much better controls. And the Fire Stick can run Antstream Arcade, which is arguably the best thing about the Atari VCS. Or at least Antstream has far more depth than the rest of the games on the VCS, and it runs on Android and Windows and elsewhere, which means you probably have a few devices that will run the retro gaming service already without spending $400 on a device with some pretty retro-wood grain and a nostalgia-inspiring controller.
And heck, if it’s that old-school joystick feel that you're after for your retro-gaming enjoyment, Hyperkin makes one of those with a USB connection that will give you that retro-gaming experience for just $20, or $380 less than the Atari VCS. While it won’t come with that iconic Atari logo, the vast majority of gamers looking to recreate that old-school feel would be much better off buying a retro controller and a budget mini PC or even a Raspberry Pi for retro gaming than spending hundreds on the Atari VCS.
After a rough start with the Mattel Aquarius as a child, Matt built his first PC in the late 1990s and ventured into mild PC modding in the early 2000s. He’s spent the last 15 years covering emerging technology for Smithsonian, Popular Science, and Consumer Reports, while testing components and PCs for Computer Shopper, PCMag and Digital Trends.
-
salgado18 I knew since the announcement of the dual-core Ryzen in it that it would be a bad system for the price, but at least I hoped it could be well made. Guess it can always be worse, right?Reply -
evdjj3j I also grew up in a household that required a pair of pliers to change the channel on the TV.Reply -
VuULF First, I've had my system since the beginning of May, having preordered a long time ago, and I've done a lot of playing around with it. It definitely has it's quirks.Reply
The errors you encountered are almost certainly due to the usb drive you are using. I tried several brands of terabyte, and a few 512 and 256 gig thumb drives to get things working correctly. What I noticed was that if the process of writing to the drive when creating Windows To Go on Windows or booting was exceedingly slow on the Atari (more than an hour), there would be failures. I ultimately used a Window To Go certified device to get it going. Using a wtg certified device had the Atari up and running in about an hour and a half give or take.
Win2USB is a terrible product imo, it does what it says, but it costs an exorbitant amount for what it does do. Use Rufus instead; this is 100% free and works absolutely fine, and supports writing a VHD without paying cash (you can find many articles on Goog using Rufus to create a WTG).
While I have successfully installed and bench tested both RAM and M2, after testing I removed both to return the AtariVCS to stock. I will be performing the upgrade again because performance is a whole lot better, even in 4K res, however I currently need the Atari to stay stock while I do a few projects with it. Currently I have WTG running on an inexpensive ADATA 2TB external HDD (yes, a spindle). I have installed MAME, ColEm, Stella, Daphne (get the Daphne GTG release from the library Archive.org for perfection!), ad infinitum with ROMs and have had no issues with running anything emulated up to and including PSOne/PSP and GameCube ( I have not attempted PS/2 or WII yet, but will soon). The only problem, and it's a big one, is the data speed. While my drive is USB 3.1, being a spindle, coupled with USB external, it is slow loading. I just boot, go make a coffee and grab a smoke. By the time I'm done, it's snappy enough to not make me angry.
For controller support in Windows there's an obscure, but published easy fix - turn it into an xbox controller by holding the buttons beside the Atari logo down simultaneously (curved back arrow/hamburger). The Atari logo will flash and, once connected to Bluetooth, will turn off leaving only the four status lights below turned on. It's now an Xbox compatible controller and works much better with windows. I have not tried with the classic sticks yet because that's probably pointless with only 6 buttons, the stick, and the paddle - also of note, pushing the joystick down is one of the buttons 😉 On the AtariOS side I haven't bothered with Netflix etc because it's redundant, but I hope they fix the control issue. I believe, however, that you can click the left stick down to get a virtual keyboard, but I would have to check.
As far as PC titles on Steam, I can play GTA 5 well enough without resorting to uberporato mode so that was a definite plus, and even managed No Man's Sky, which is playable, but the settings are very low, and you WILL get a warning about memory running the stock Atari, but Hello Games was smart enough to allow it to play anyway. Also I've been collecting Epic freebies for just this purpose. Everything Epic I've tested runs pretty well from the Epic freebie pool. Even Control works decent on low settings.
Will I ever use this for serious gaming? No. I'll play Epic freebies on the PC side of the Atari (yes that was a swipe at Epic), and I'll definitely be enjoying Pinball FX3 using Steam on my 65" TV. I may use it to link Steam to play Far Cry 5 or import AC Valhalla to Steam to play on 65", but I usually prefer sitting in front of my rig for that. What I will do is play a whole whack of games I haven't seen since I was 7, and have a whole lot of fun with it figuring out what I can and can't do with it. Truly, I think that's the point that Infogrames (the current owner of the Atari brand) was going for. Much like the original Atari Video Computer System/2600, this unit can both surprise and disappoint. I find the AtariVCS to be more akin to the Atari 8-bit computers, not the greatest piranha in the pool, but it's fun as hell! -
TerryLaze Reply
Why use windows for emulation in the first place?! Sure for steam or windows games in general but for emulation go with a self contained linux distro like batocera, recalbox or lakka.VuULF said:I currently need the Atari to stay stock while I do a few projects with it. Currently I have WTG running on an inexpensive ADATA 2TB external HDD (yes, a spindle). I have installed MAME, ColEm, Stella, Daphne (get the Daphne GTG release from the library Archive.org for perfection!), ad infinitum with ROMs and have had no issues with running anything emulated up to and including PSOne/PSP and GameCube ( I have not attempted PS/2 or WII yet, but will soon). The only problem, and it's a big one, is the data speed. While my drive is USB 3.1, being a spindle, coupled with USB external, it is slow loading. I just boot, go make a coffee and grab a smoke. By the time I'm done, it's snappy enough to not make me angry.
No special usb drive needed and they are so small that loading will be much better. -
Joseph_138 I don't know why this was even made. It's too expensive for what it is. There are plenty of retro consoles on the market already, and if you need the functionality of a PC, this doesn't even make a good PC. You're better off to run the games under emulation on your PC. A Raspberry Pi configured to play retro games is even a better value than this is. It's never going to be competitive with consoles from MS, Sony, or Nintendo, and doesn't do anything that you can't do cheaper or for free on other platforms. Totally useless. A year from now, they'll be on the scrap pile of history along with the Ouya, and other failed consoles of the past. Their timing of the release is also bad. Christmas is when you want to release something like this, not mid-summer. It's easier to sucker people into buying something when their kids are screaming for it. By the time Christmas rolls around, everyone is going to know what a POS this console is, and won't touch it with a 40 foot pole. They'll buy an OLED Switch for their kids, instead.Reply
You can even go on ebay and buy a SFF PC from HP or Dell with a 3rd or 4th generation Intel CPU that you can configure into a retro games console for a lot less money than this. You don't need a lot of CPU/GPU power to run retro games. -
TerryLaze Reply
Yeah, all the kids are going to be screaming for atari...Joseph_138 said:Their timing of the release is also bad. Christmas is when you want to release something like this, not mid-summer. It's easier to sucker people into buying something when their kids are screaming for it.
This already made all of its sales in pre order and the number of units that will reach retail is going to be extremely low anyway.
I do agree on everything else though. -
Derpeee The indie games on the VCS store were worth the price of admission for me. Check out Mockduck’s and I Love’s Youtube channels for game reviews. Yes most are also available on Steam and some are available on other platforms / stores. Prices are comparable to Steam. As for the fan noise i only hear mine on boot. But I don’t have a Steam Box and the Steam Link app doesn’t work for me i tried it and I’m not big on PC gaming. There’s more titles on the way like The Spirit of the Samurai. I think people are missing the point when viewing this as a retro machine only, although i had fun using the joystick controller paddle functionality to play some original VCS paddle games like Night Driver. I view it as a channel into some curated content that I particularly like, on hardware I particularly like. I spent lots of lawn mowing money on the original VCS/2600 back in the day. Not sure if i might try to turn it into a steam box or use it as a Stadia streamer, but maybe down the road will try that.Reply -
AtariArtist Had mine since late Dec. Like the other VCS user in the comments - I too am using an external USB 3 3TB HDD - but configured to Ubutntu Linux. Took less than an hour to get up and running. All of my 60 steam titles are running fine, although I'm more into indie games that don't top out my specs (plus older titles that were choppy to unplayable on the Mac are now running fine). Proton-wine (from Valve/Steam) on Ubuntu is both easy and automatic. Amusingly enough - thanks to distro and updates sometimes not being up to snuff on the 'native linux' titles - windows titles are preferred running in Proton. In fact, at least a few titles run faster than Windows (for various reasons from win10bloat to who knows what). Protondb is also good for checking steam titles in advance and checking out if there's any proton versions that work 'better' or putting in exception handlers on launch.Reply
I'm using the 300 dollar VCS as a miniPC upgrade from a Mac Mini which was choking on Minecraft (down to 18fps). So far the VCS running fine stock and is now my daily driver (I'm even admining a Minecraft MP server - and other users are hosting servers with their VCS too). As far as upgrading my PC activities it's doing what's expected for a third the price of a new Mac Mini and it's the platform of choice as I shift from Windows/MacOS to Ubuntu (and perhaps elementaryOS - whenever ver 6 arrives). Firefox, Minecraft, and (earlier) AAA titles using both Unreal 3 and 4 engines are fine (3 is smooth as silk - all the Bioshock games are great). Source engine titles are running over 100fps. I'm displaying on an ultrwide 1080p *2560.
Obviously I'm biased, but I did not go through 2 days of configure hell - but then - I didn't do Windows either (because this is the first PC I'm dedicating to going Linux whole-hog, and I'm loving it. Like a LOT!). I didn't do the internal drive option either - mostly because that (I agree) does need some help down the road with dedicated installers and the like. Another reason for not wanting to spend more on PCs is because I'm a music gearhead (and that's a black hole of hobby-money right there).
I won't say the reviewer is bla bla bla negative nitpicky bla - but I'd be curious what would happen if he'd gone the thumbdrive installer to USB3 HDD route and configured Ubuntu . He might be having as much fun as I am - and it wouldn't take forever to try. I'll also admit I'm not 100-percent which has me fanboy-ing more. The Dual-core Ryzen and graphics vs the horrible Mac Mini previously used - OR - just being REALLY surprised at how fast and snappy Ubuntu is. I can see why Linux folks are so tennacious about their OS flavor(s).
(disclaimer - I'm typing on the VCS right now) -
VuULF ReplyTerryLaze said:Why use windows for emulation in the first place?! Sure for steam or windows games in general but for emulation go with a self contained linux distro like batocera, recalbox or lakka.
No special usb drive needed and they are so small that loading will be much better.
Lakka works really well with the little bit that I've tested it in the Atari, but that was little more than MAME. For general users it is a pain because they will need to find the BIOS password and disbale secure boot. (Yes the current BIOS password is out there, and you can also do this with a shim, but that's beyond the scope here.) I stuck with Windows because I pretty much want a single boot unit (well dual with AtariOS) for the time being, because that's pretty much what most people will be doing. Additionally I am chosing to stick with RetroArch in Windows as it will be coming to Steam eventually with achieves, etc, and I'm a serious Steam whore. What I intend on doing when I replace the upgrades is running Lakka, and AROS/Icaros from the external, and Win 10 internal.
Also, just to note, if the drive fails with WTG creation or reading Windows 10 as mentioned in my other post, you will also see disk errors with Linux based distros. This happened to me with both Lakka and Debian. The boot time isn't affected like with Windows, but once you reboot you will see disk corruption and it will run fsck. It's about 60/40 if you'll be able to boot into the OS again.
