Tom's Hardware Verdict
The Kingroon KP3S is an affordable printer with a cluttered design that’s still useful for beginners on a budget or makers wanting a small second machine with quality prints.
Pros
- +
Affordable
- +
Easy assembly
- +
Direct drive
- +
Linear rails
- +
Quiet operation
Cons
- -
Manual bed leveling
- -
Detached power supply
- -
Spool holder works poorly with cardboard spools
Why you can trust Tom's Hardware
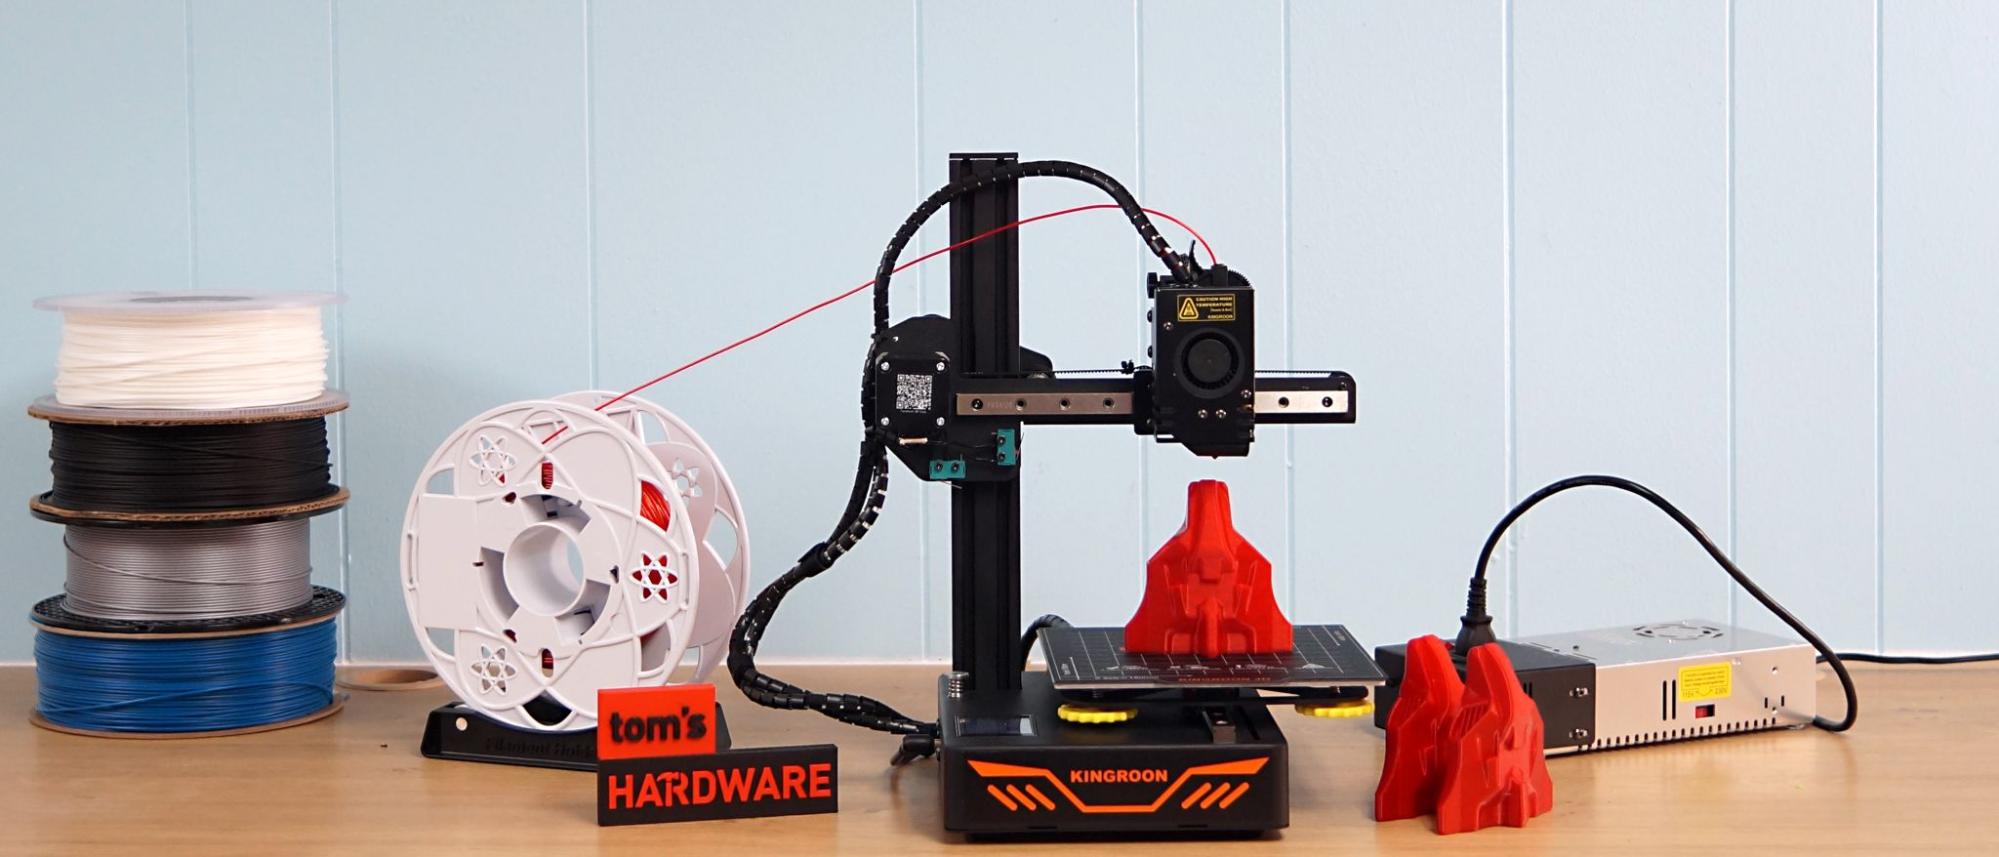
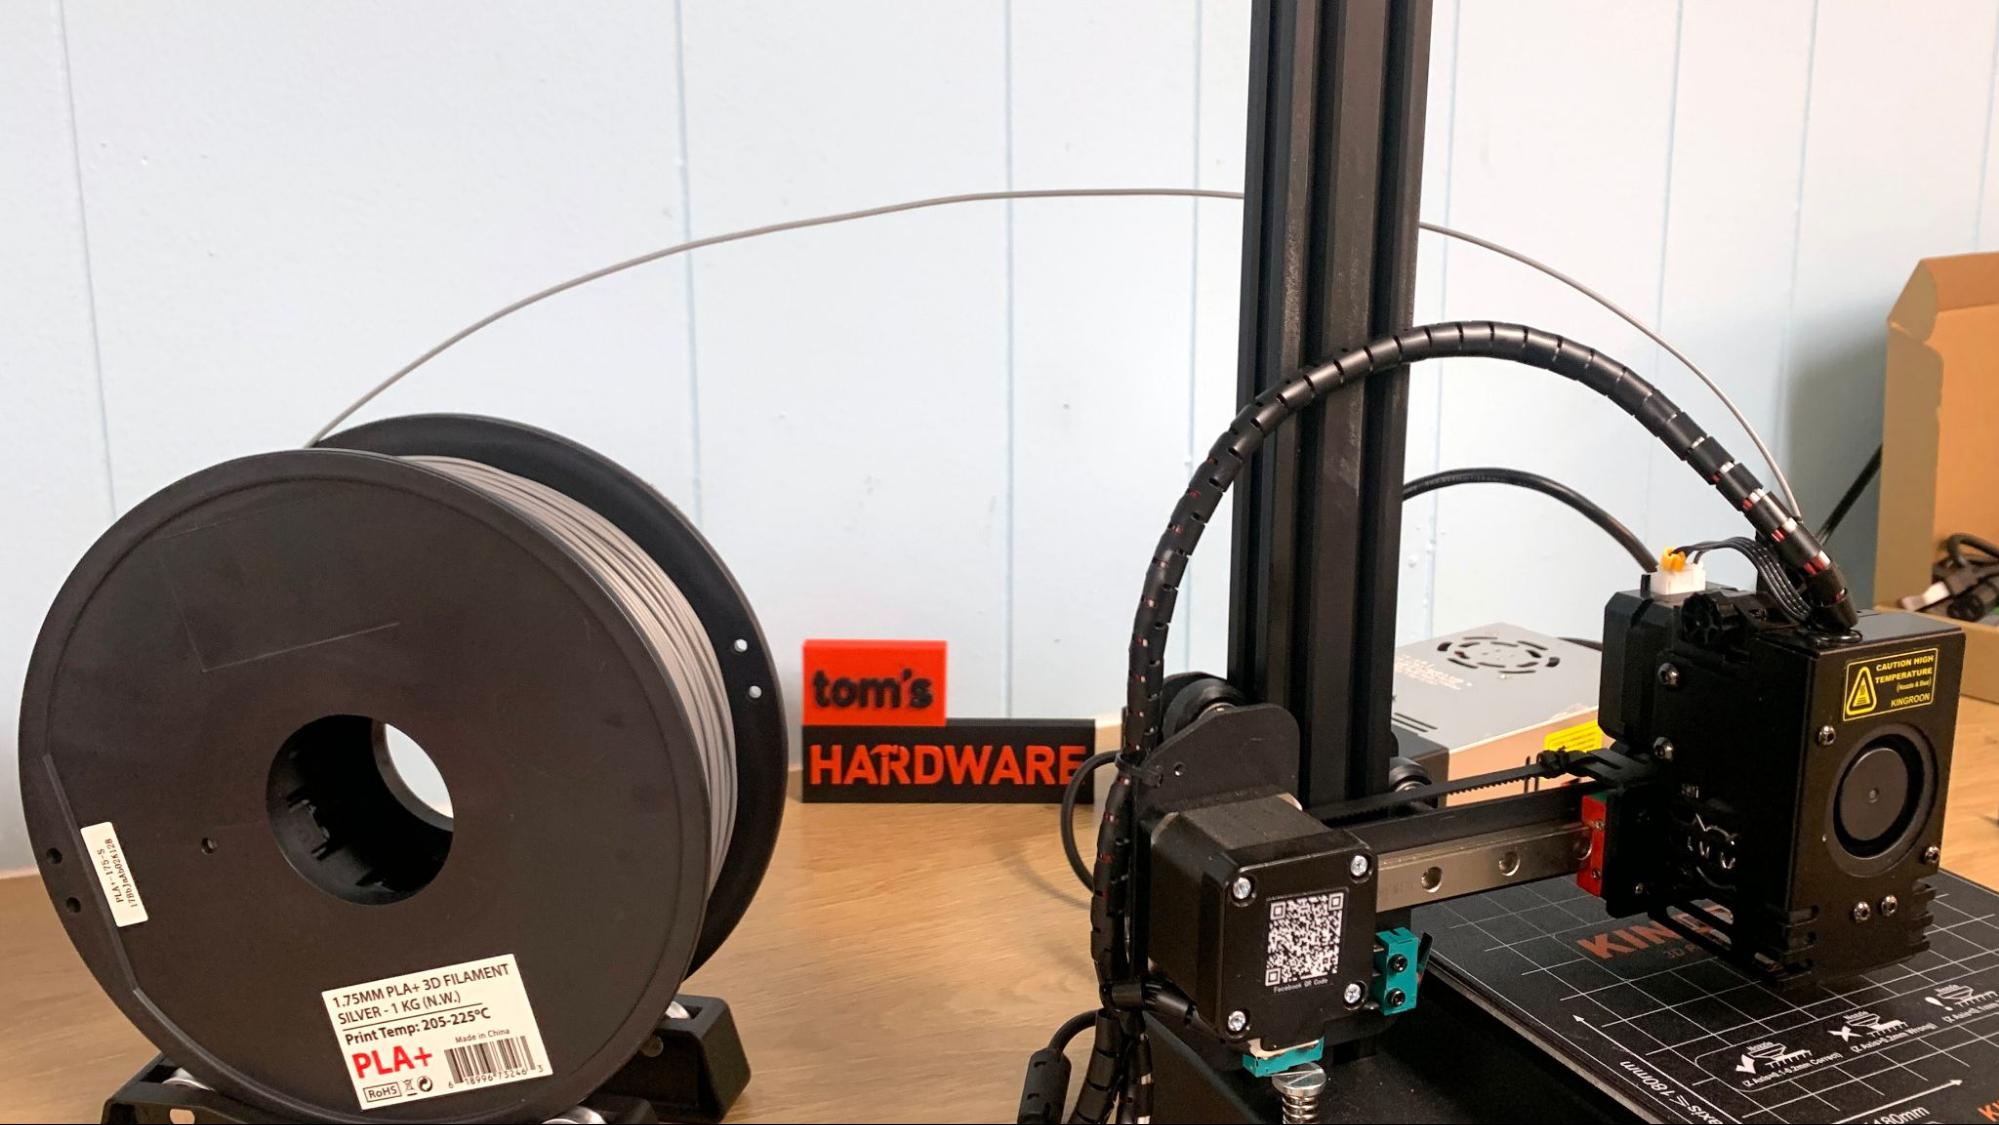
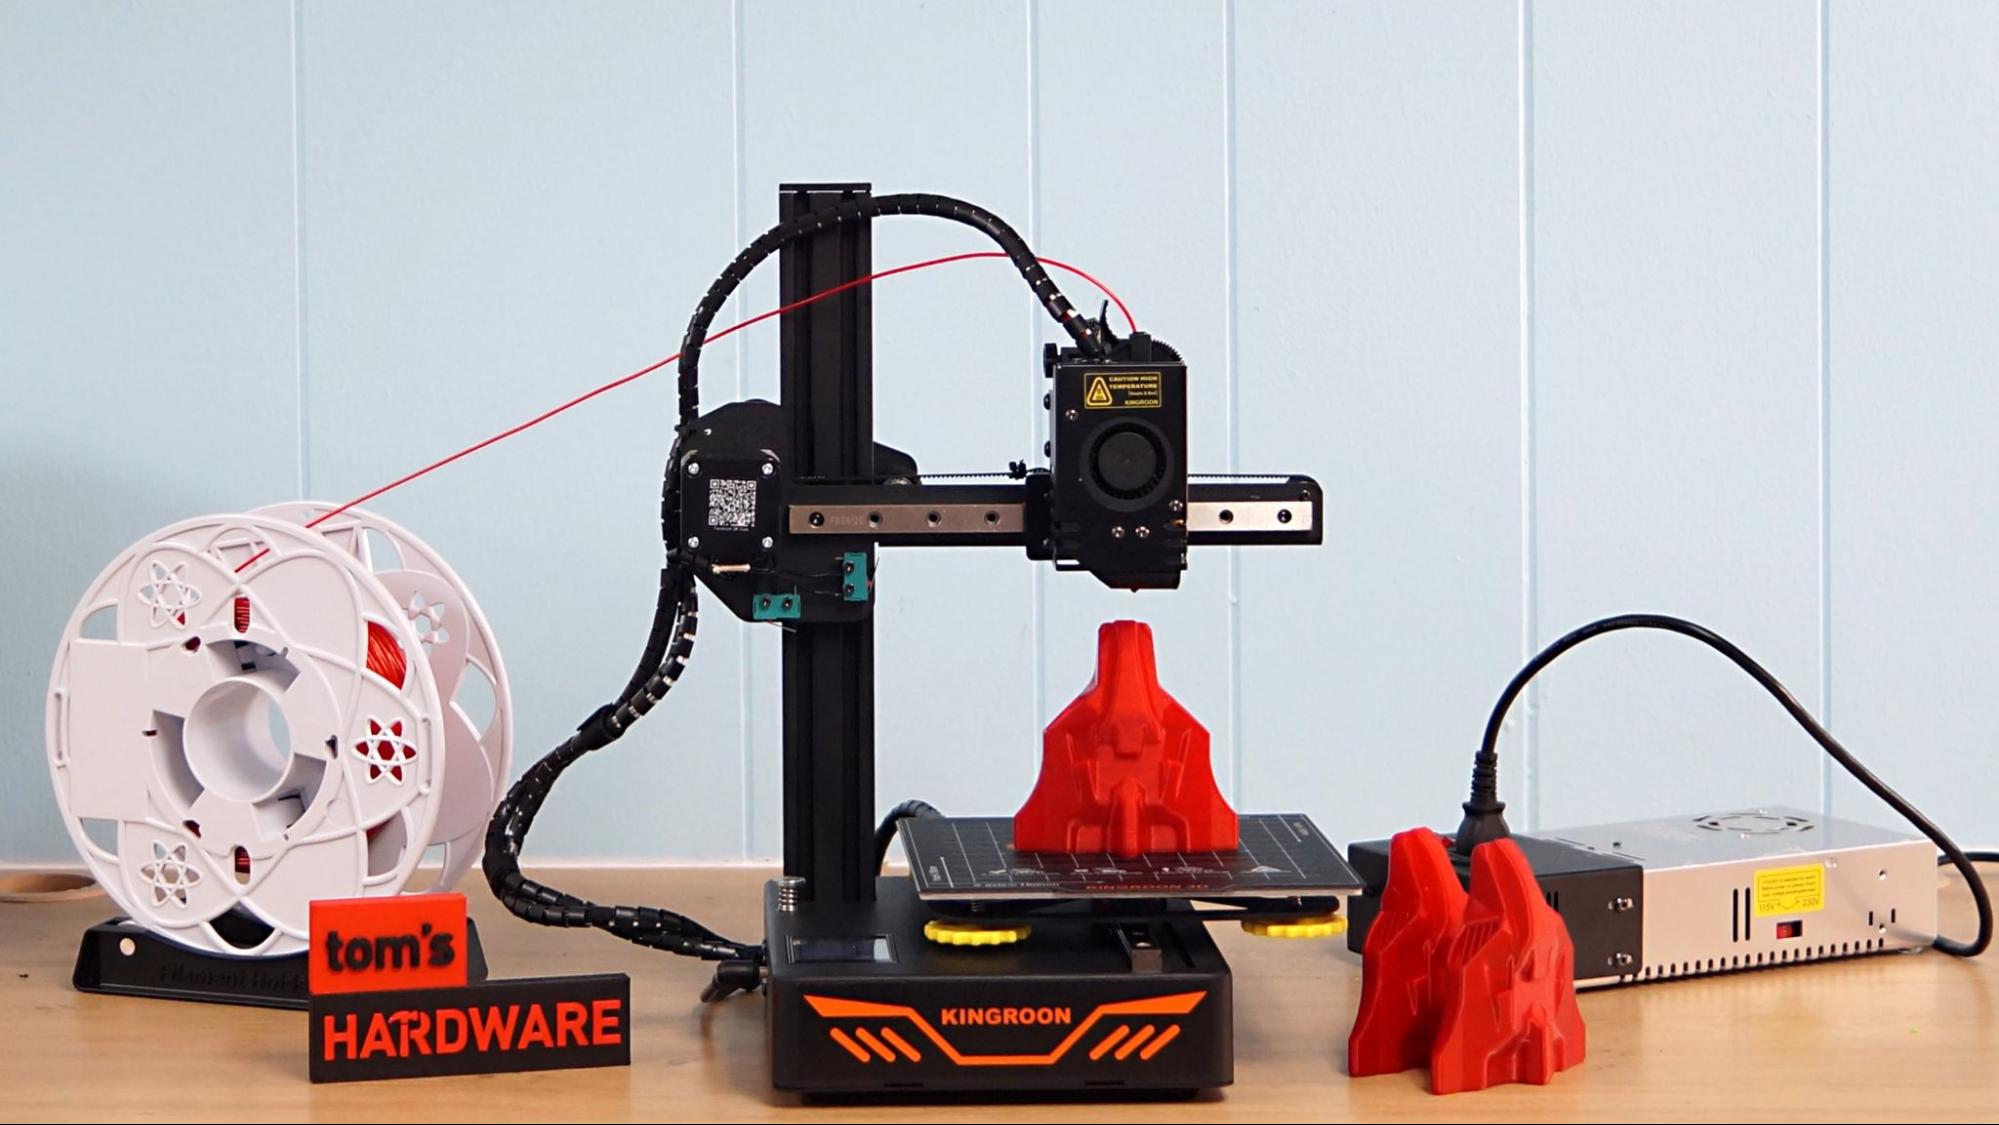
The Kingroon KP3S is a confusing little 3D printer. It’s small, inexpensive and relatively easy to set up – making it an ideal choice for beginners. But it’s also scattered into three units – printer, power supply and tabletop spool holder – which causes an untidy jumble. You’ll find many photos of the KP3S omitting the power supply or the spool holder, or sometimes both, in an attempt to make it look like a portable machine. Which it is not – unless you put it in a box.
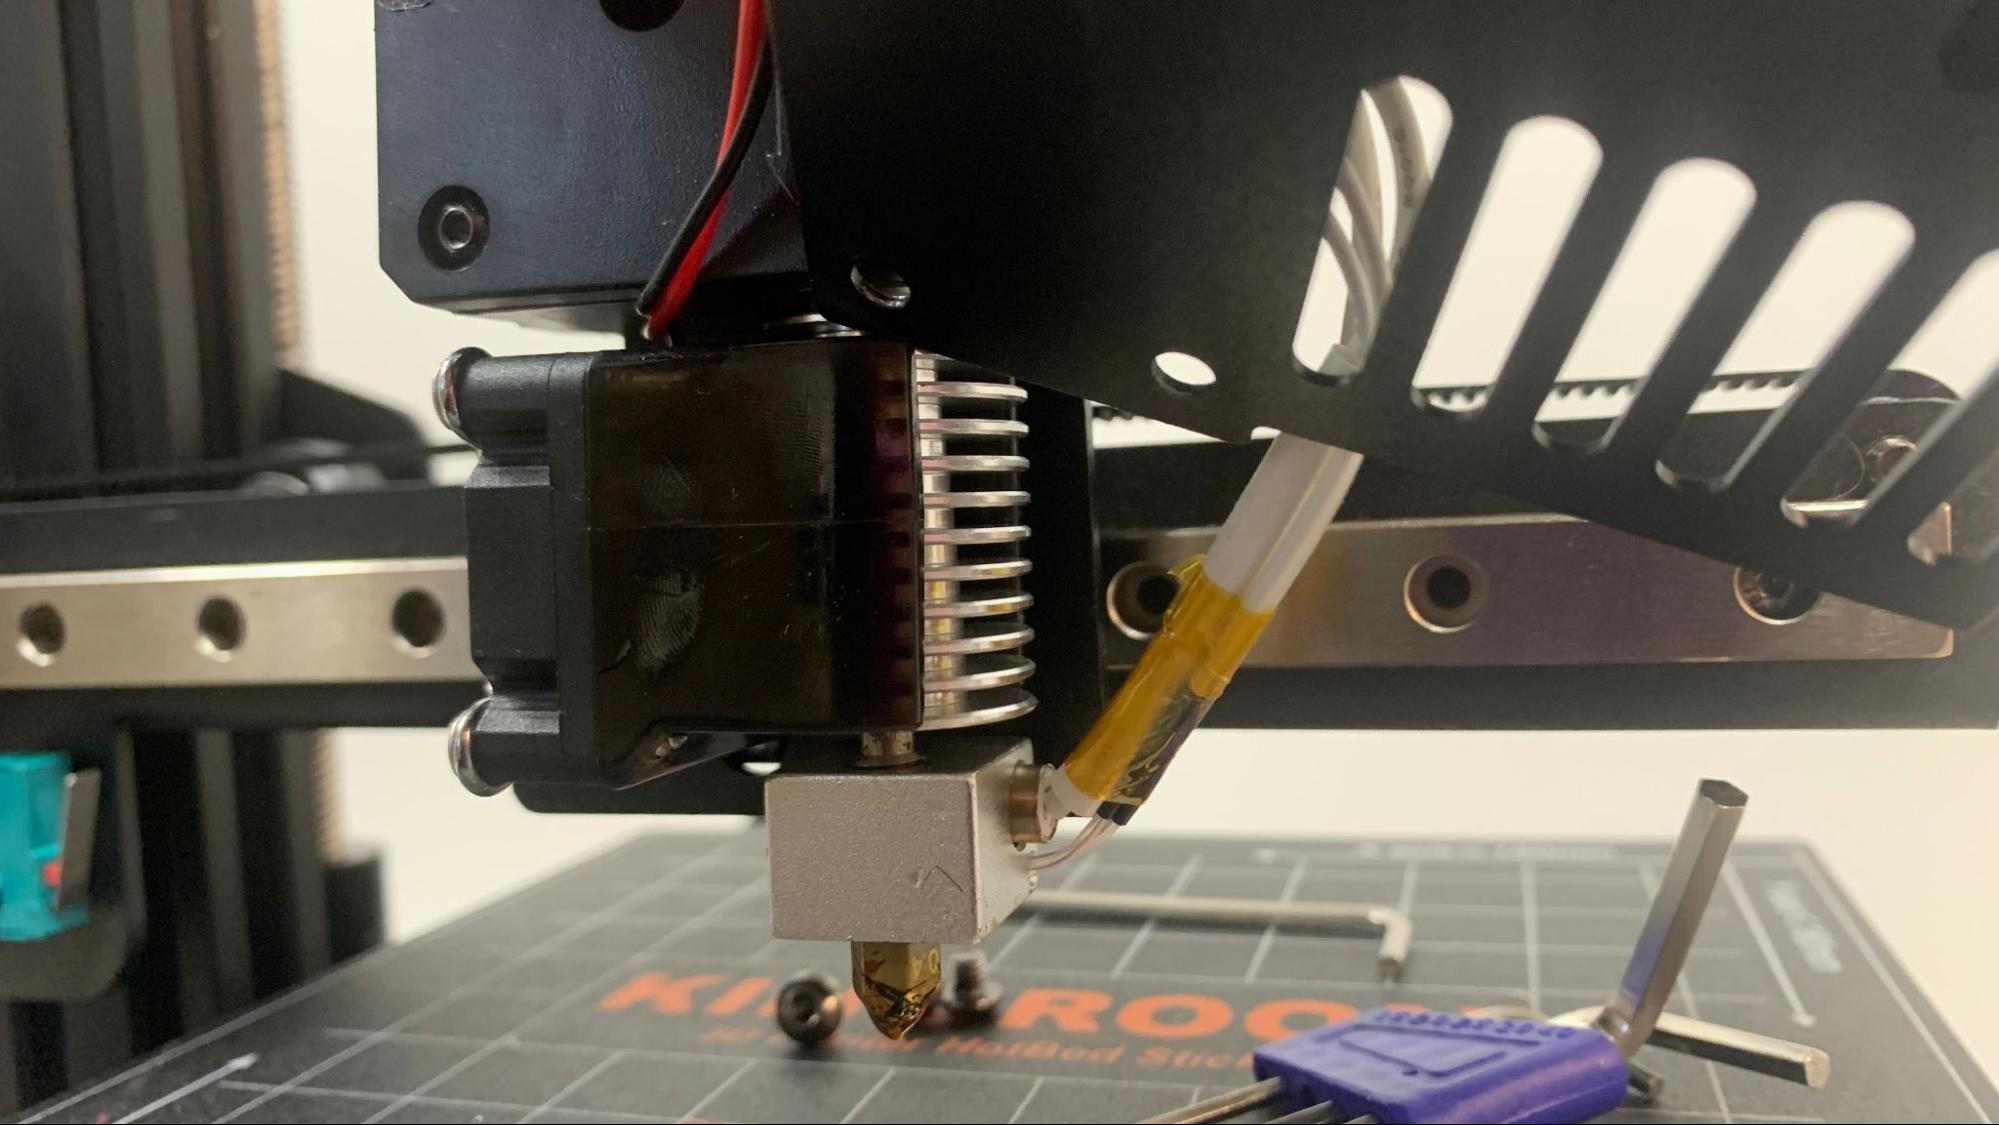
The machine prints very well thanks to a Titan clone extruder with a large 3-to-1 gear ratio. Using common parts means this machine will be easy to upgrade should you want to add an all metal heat break or just buy nozzles off of Amazon.
The tiny KP3S isn’t for everyone, but with a retail price of $169, it’s a good choice if you want to try out 3D printing for the first time or need a reliable second printer on the cheap.
Specifications: Kingroon KP3S
| Build Volume | 180 x 180 x 180 mm (7 x 7 x 7 inches) |
| Material | PLA/PETG/TPU/ABS (up to 260 degrees) |
| Extruder Type | Direct Drive |
| Nozzle | .4mm MK8 |
| Build Platform | PC coated flex sheet, heated |
| Bed Leveling | Manual |
| Filament Runout Sensor | No |
| Connectivity | microSD card, USB Type A |
| Interface | Color 2.5 inch LCD touch screen |
| Machine Footprint | 400 x 390 x 370 mm (15.7 x 15.3 x14.5 in) |
| Machine Weight | 6 KG (13.2 lbs) |
Included in the box: Kingroon KP3S
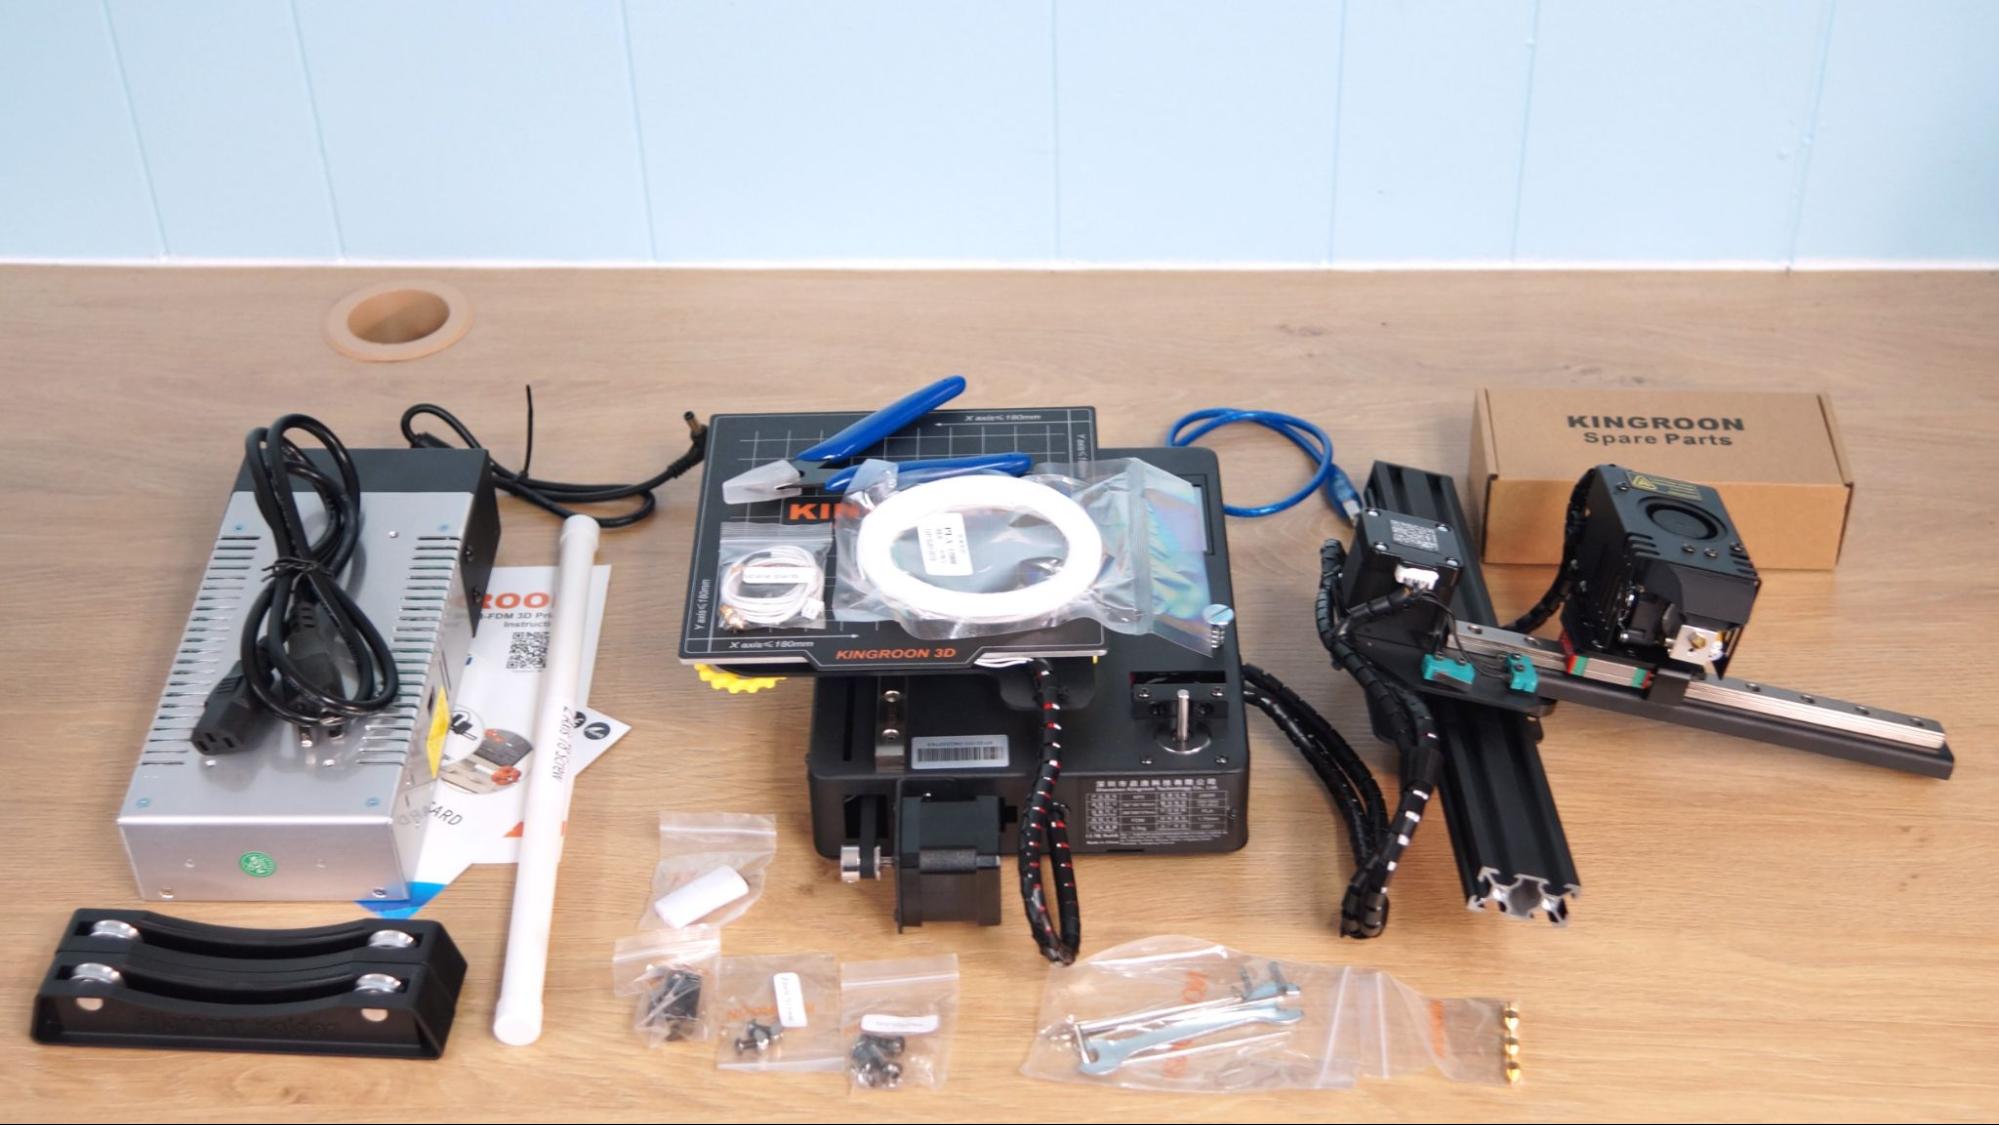
The Kingroon KP3S comes with everything you need to get started: tools to build and maintain the printer and side cutters. You also get one spare nozzle, an extra thermistor and a small sample of PLA.
There’s a paper booklet with a quick start guide to help you build the printer. Several sample prints are provided on the microSD card, as well as a copy of Ultimaker Cure 4.9.1 and Kingroon’s custom slicer.
We also received 3 extra nozzles in various sizes for testing purposes. These do not appear to be part of the standard kit.
Assembling the Kingroon KP3S
The Kingroon KP3S arrives mostly pre-assembled. The upper gantry is attached to the base with two bolts. The Z axis rod comes separate, and needs to be inserted into the coupler and then screwed into the base.
Get Tom's Hardware's best news and in-depth reviews, straight to your inbox.
There are no electronics to deal with as everything is prewired. The power supply is a separate unit and attaches with an ordinary appliance cable. The spool holder is likewise kept separate and needs no assembly.
Leveling the Kingroon KP3S
The Kingroon KP3S needs to be leveled manually. The knobs are a bit hard to manage to due to the machine’s small size – especially on the left side where your knuckles might bump the touchpad. This may be concerning to people with large hands – I have smaller hands for an adult and kept hitting buttons unawares.
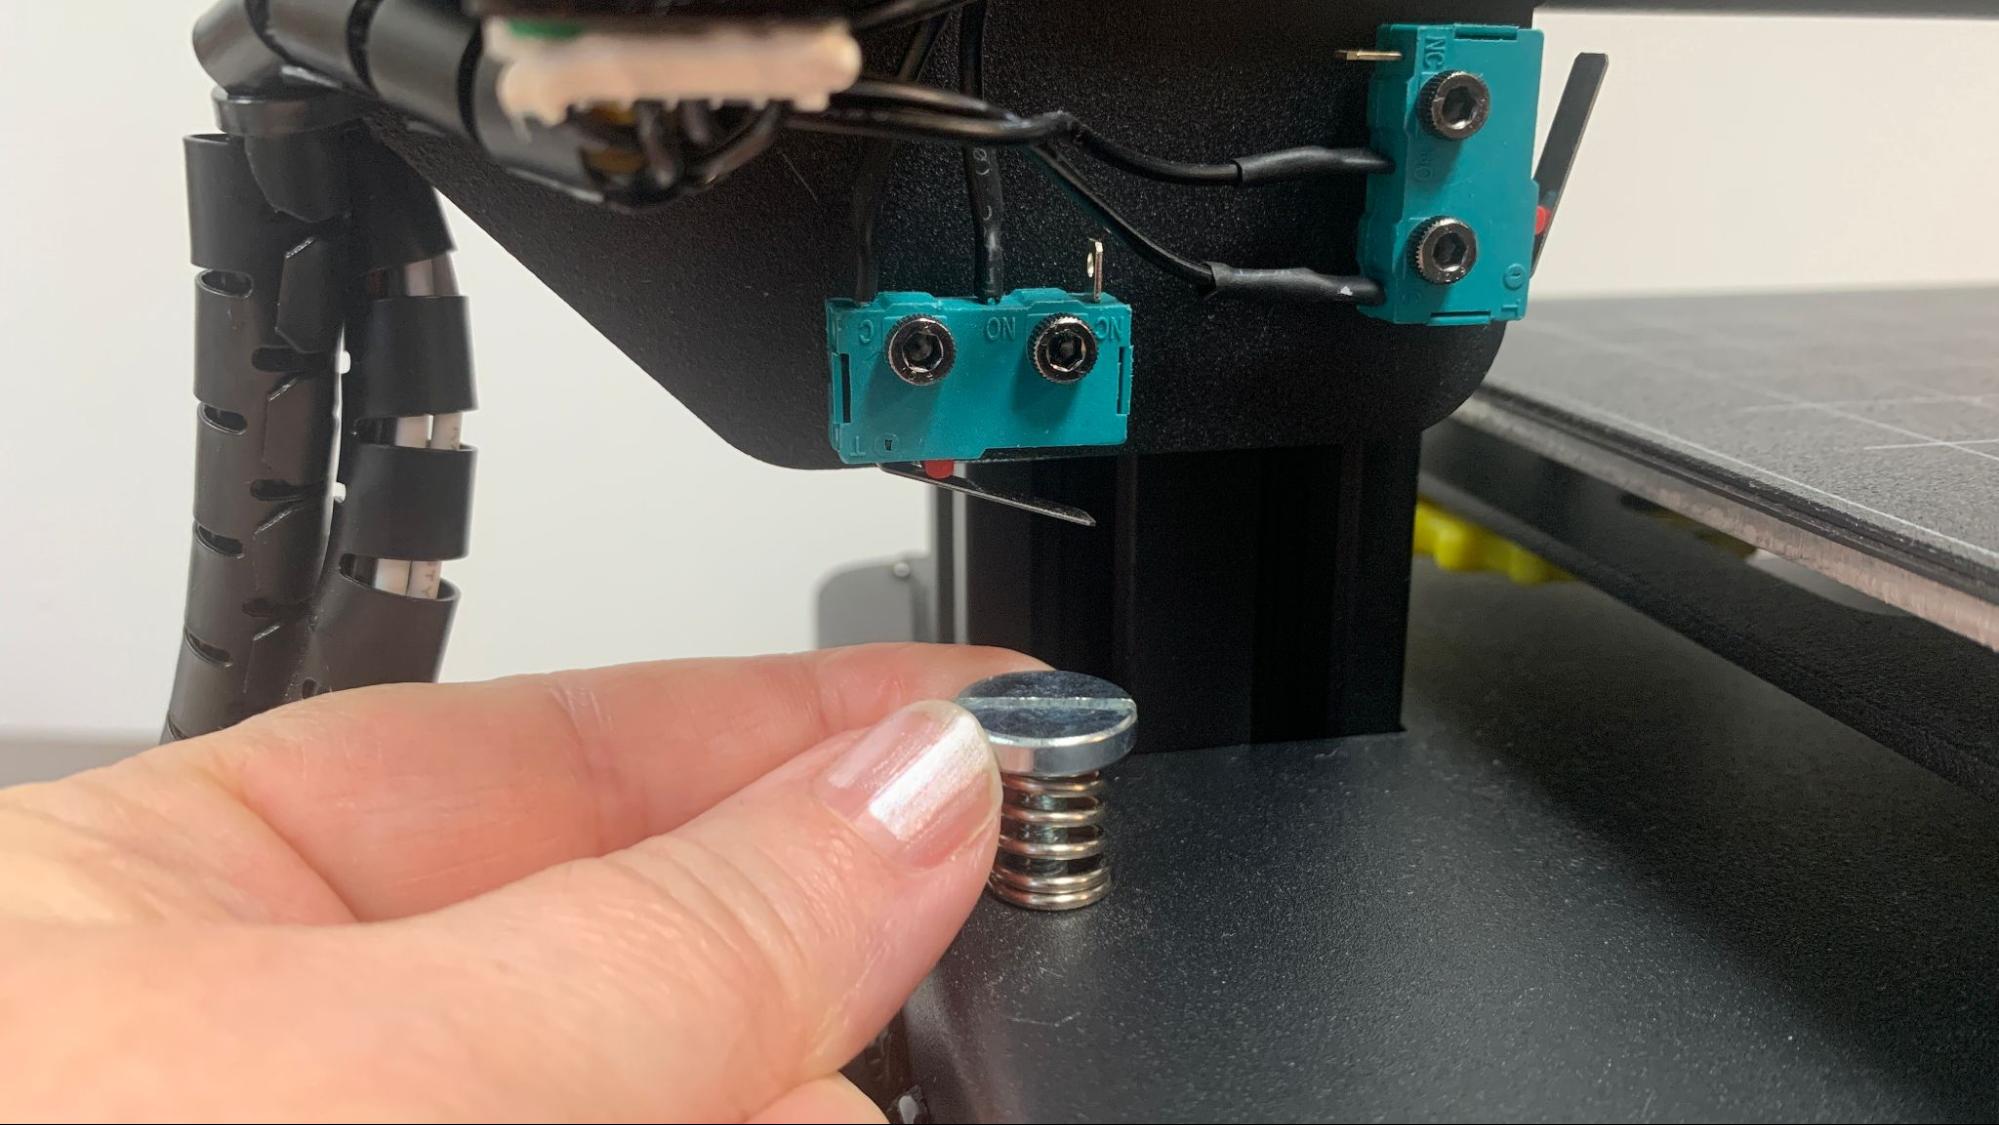
There is no control for changing the nozzle’s distance from the bed other than moving the rather difficult Z stop screw. This makes bed leveling critical, as the only way to change the Z height while a print is running is to adjust the bed leveling knobs.
For this reason, we recommend leveling while the printer is warmed up. We tested leveling the KP3S both hot and cold, and found the machine definitely expands while hot. Cold leveling left the nozzle much too far from the bed for filament to stick.
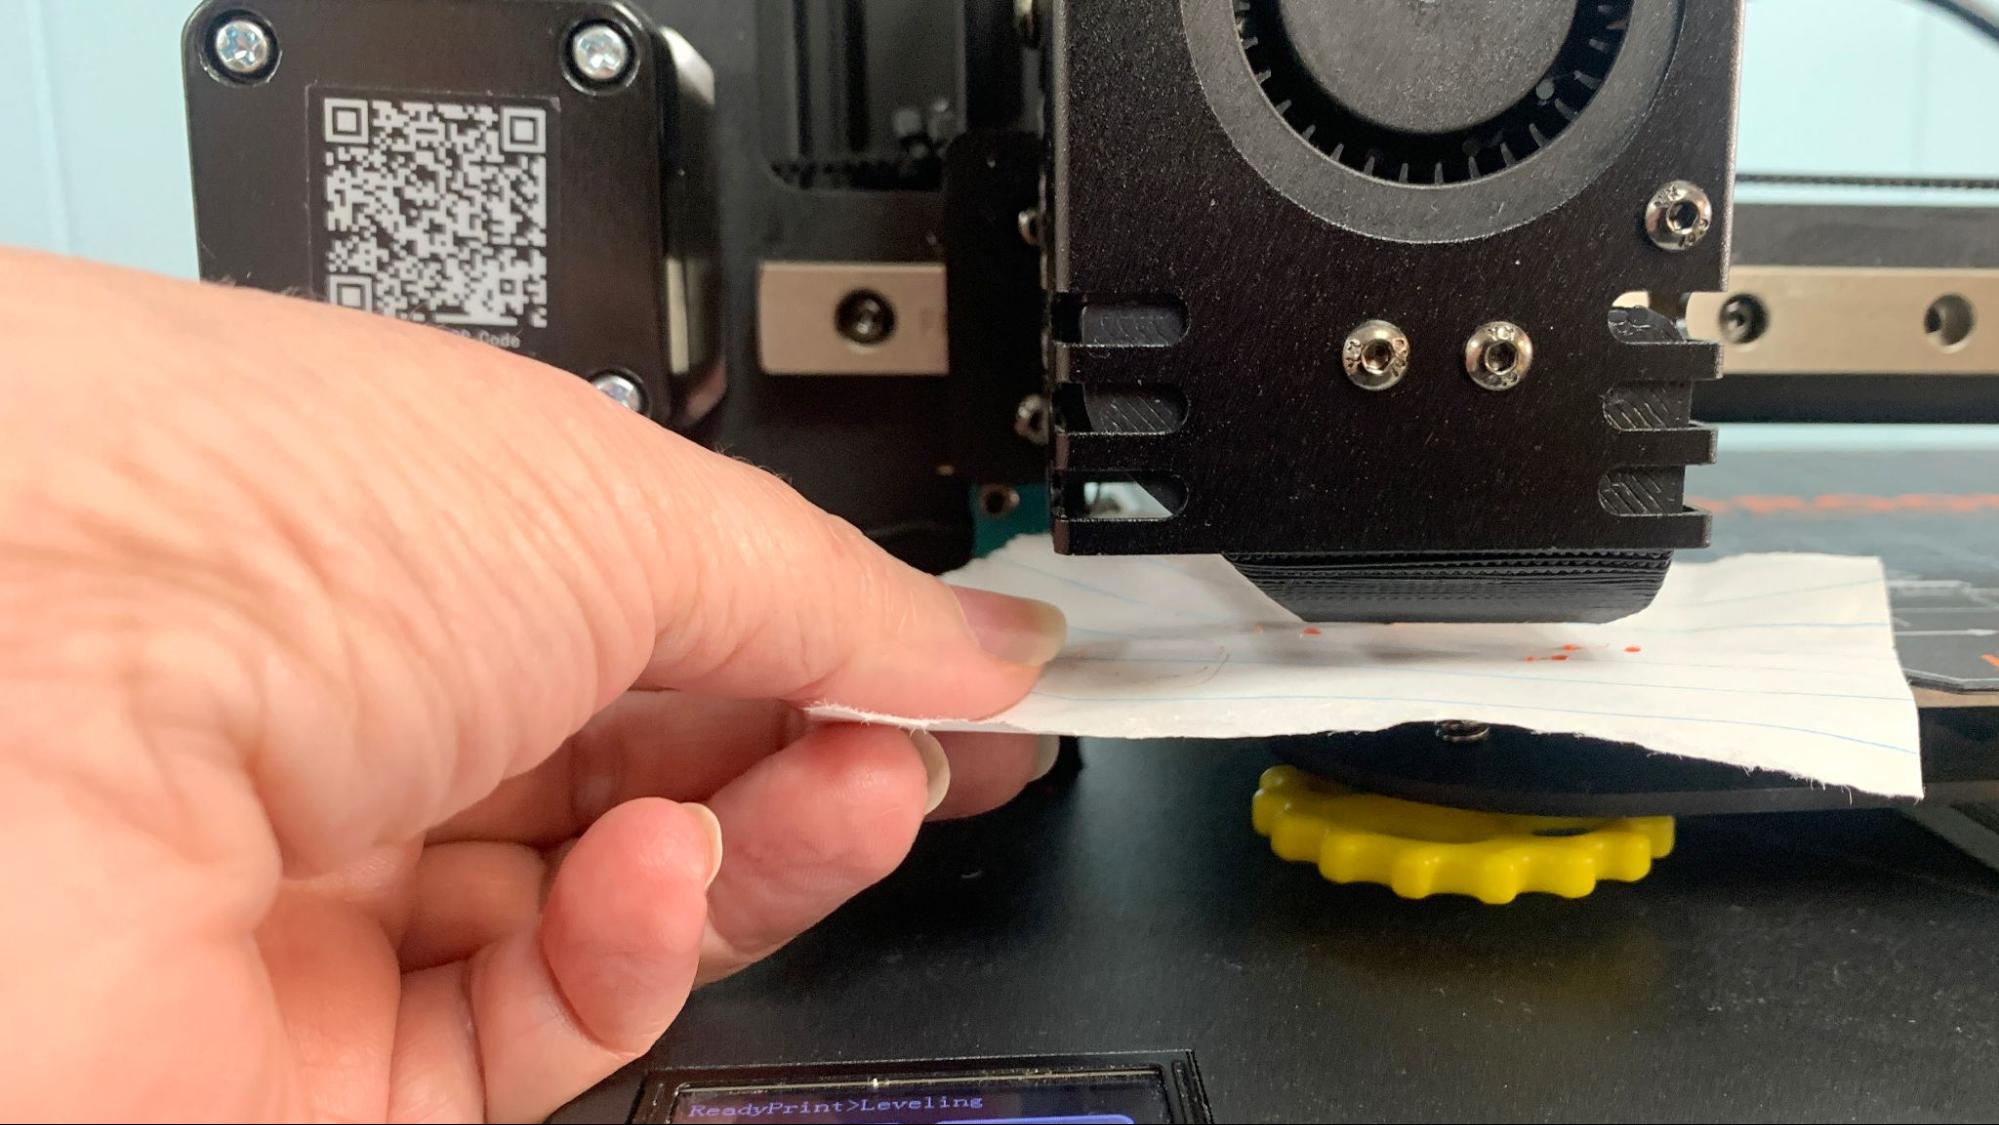
To level the machine, click “Leveling” on the control screen. You’ll be given a choice of five points on the screen. Click a corner on the screen and the print head will move to that spot on the bed at Z height 0. Place a piece of paper under the nozzle and twist the appropriate yellow knob to raise or lower the bed. You want the nozzle to just scrape the paper.
Do this for all four corners. Ideally, once the corners are level the center point will be at an acceptable height as well. For more advice on manual bed leveling, see our article on how to manually level a 3D printer bed.
Loading Filament in the Kingroon KP3S
The Kingroon KP3S has an extremely easy filament path and allows you to load materials without effort. There is no program for loading or removing filament, so you must handle each step yourself.
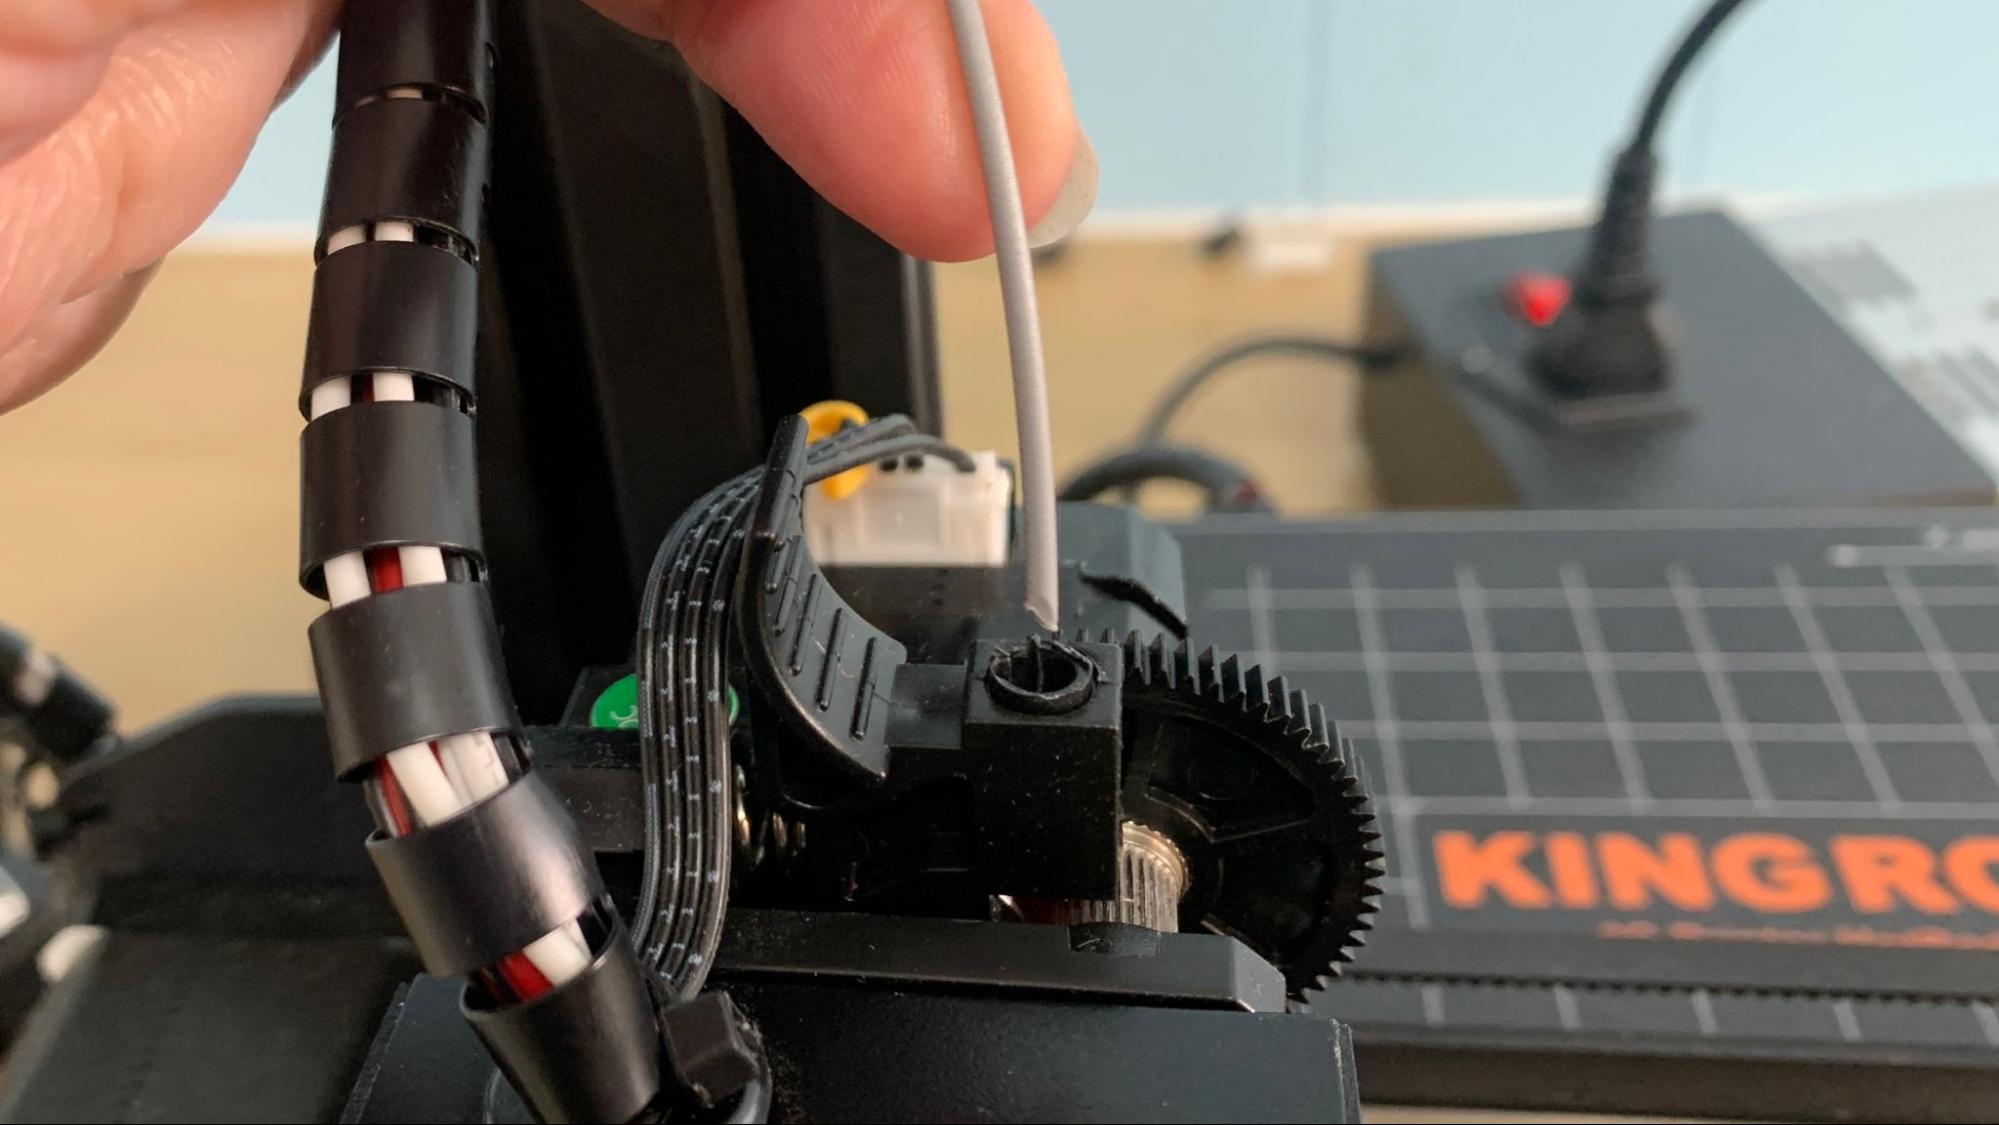
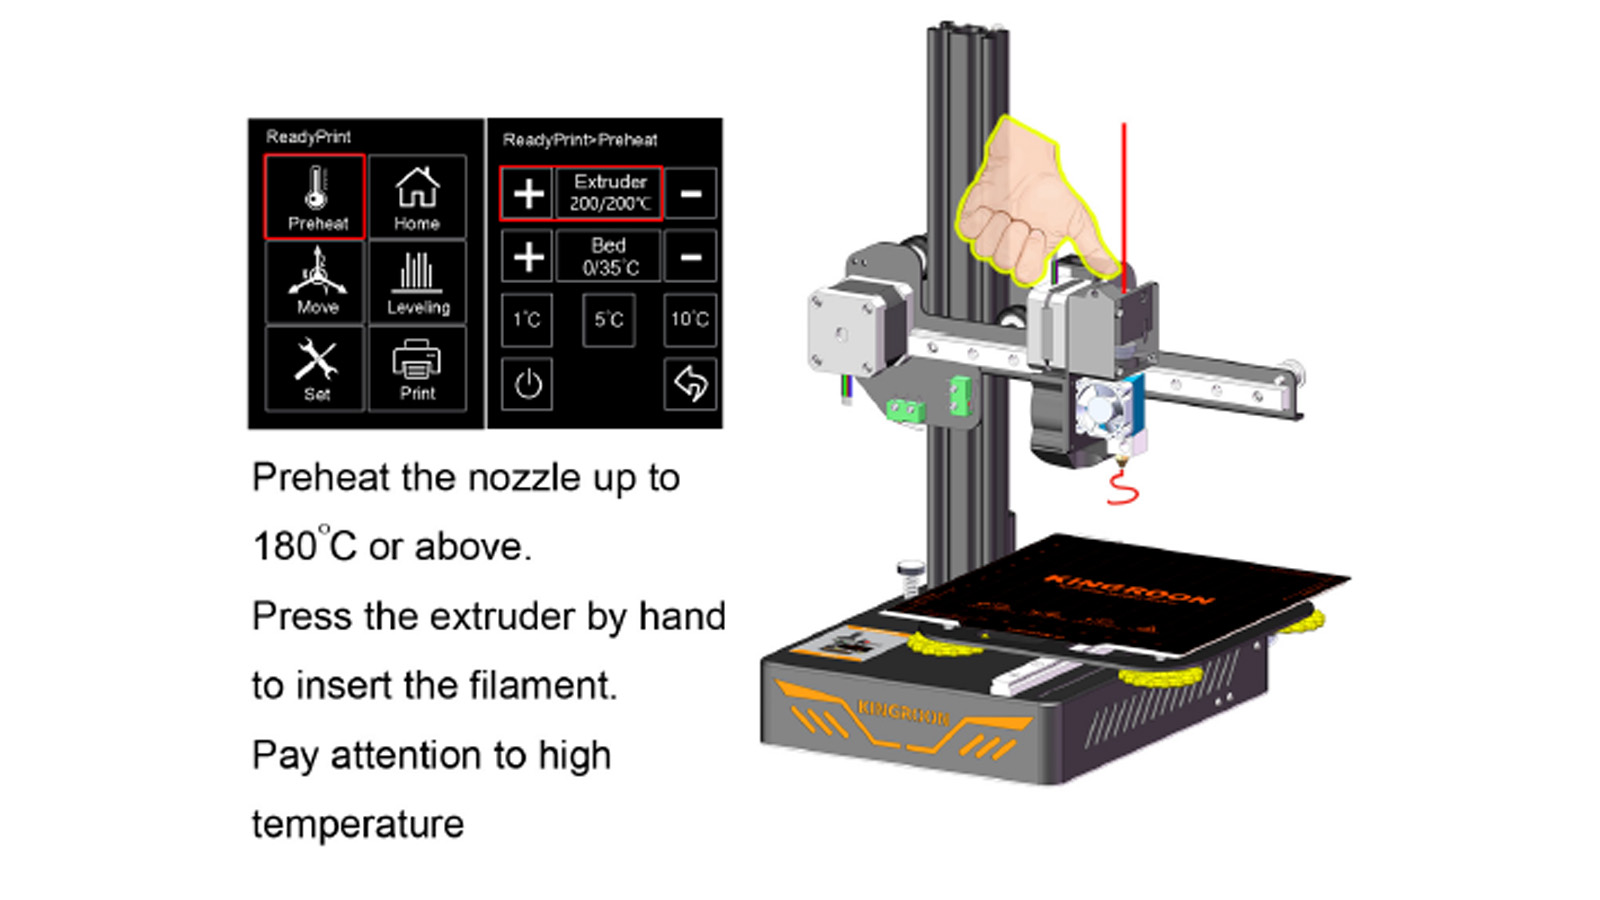
First, cut your filament at an angle, then insert it in the opening at the top of the extruder. Press the lever and push the filament in a few centimeters until it stops.
Now select “Preheat” from the main menu.
Next, tap the plus sign by “Extruder” until the temperature is above 180 C. Once it is hot, tap the back arrow, then tap “Move.” Click the Extruder symbol and then choose “In” to advance the filament. Keep tapping until filament comes out of the nozzle.
To change or remove filament, reverse the process.
Design of the Kingroon KP3S
The Kingroon KP3S is a cantilever style 3D printer, meaning everything is well-balanced on one Z axis tower. It’s a remarkably quiet machine with silent stepper drivers and whisper-soft fans. The direct drive sports a large 3:1 gear ratio and a clone Titan style extruder that handles materials exceptionally well. It also runs on linear rails which tend to be smoother and more precise than wheels.
The power supply is a separate unit, something we haven’t seen in newer machines. The cord connecting the power supply to the printer body is rather short, so your options for stashing the clunky brick are limited. You wouldn’t want to hide it too well; the on/off switch is located on this segment of the printer.
It should be noted that the KP3S is on its third release and about to take a back seat to the KP3S Pro. The new machine will have its power supply in the base and is currently available for pre-order for $209.
The KP3S has a tiny 2.5 inch color touch screen set into the top of the base. The screen is pressure sensitive, so you could use a stylus to tap the buttons if they are too small for you.
The spool holder is two separate rails with roller bearings, allowing it to adjust to any size spool. Cardboard spools are troublesome when they are more than half spent – the spool needs some weight to stay in place and can be easily knocked off by retraction moves.
Filament is also bent at a severe angle while printing taller objects as the extruder rises higher.
These two issues – a separate power supply and tabletop spool holder – can be addressed with printable mods shared by fellow makers on Thingiverse. You’ll find prints for new spool holders and filament guides that can be attached to the tower, as well as clever ways to raise the machine to make room for the power supply to fit underneath.
The print bed features a removable PC coated surface which, while not my favorite, does a good job of holding onto prints. The soft surface is easily damaged, so care should be taken to gently remove prints by peeling the bed from the print rather than using a scraper to pry things.
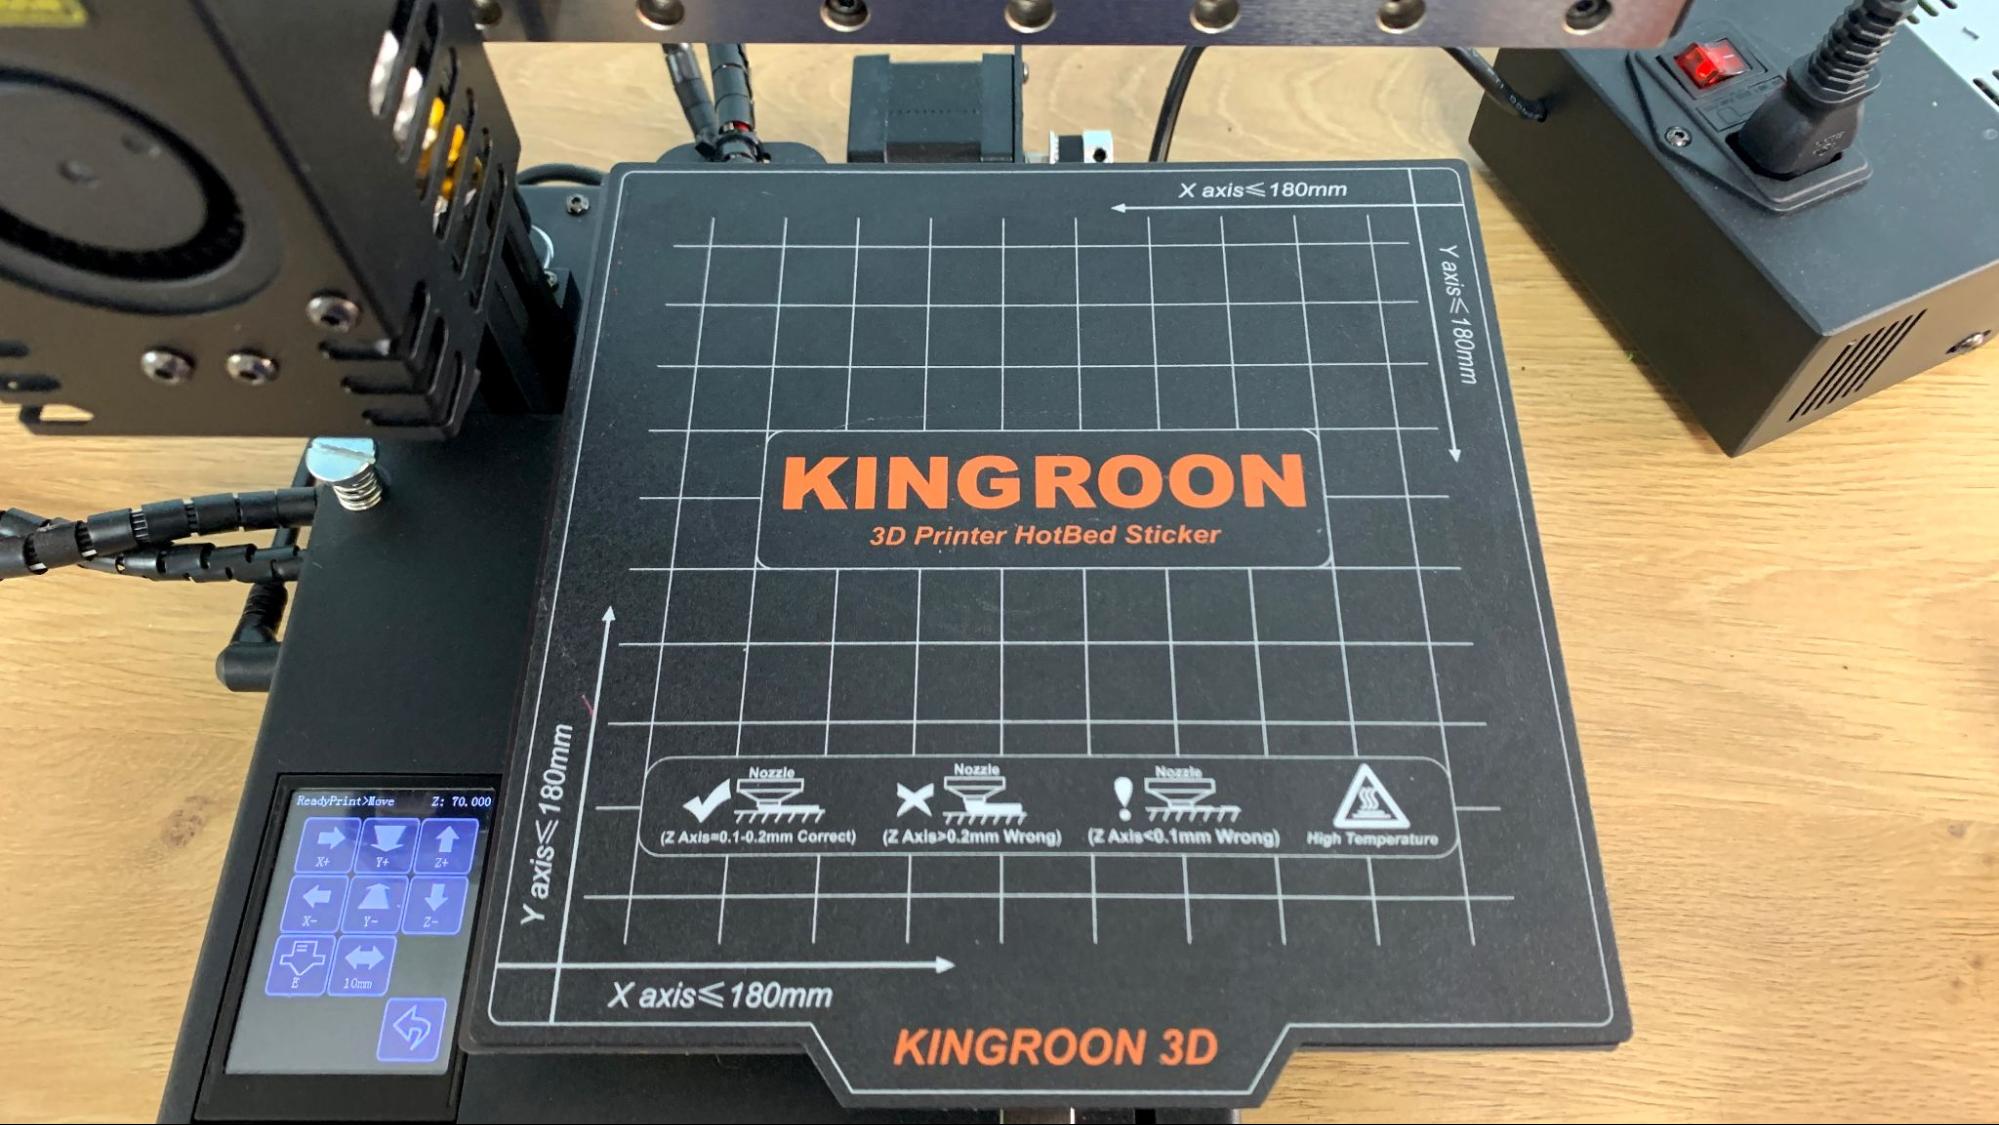
The print bed has a clever cheat sheet printed on it to remind users of the X and Y directions as well as examples of perfect Z height.
Preparing Files / Software for the Kingroon KP3S
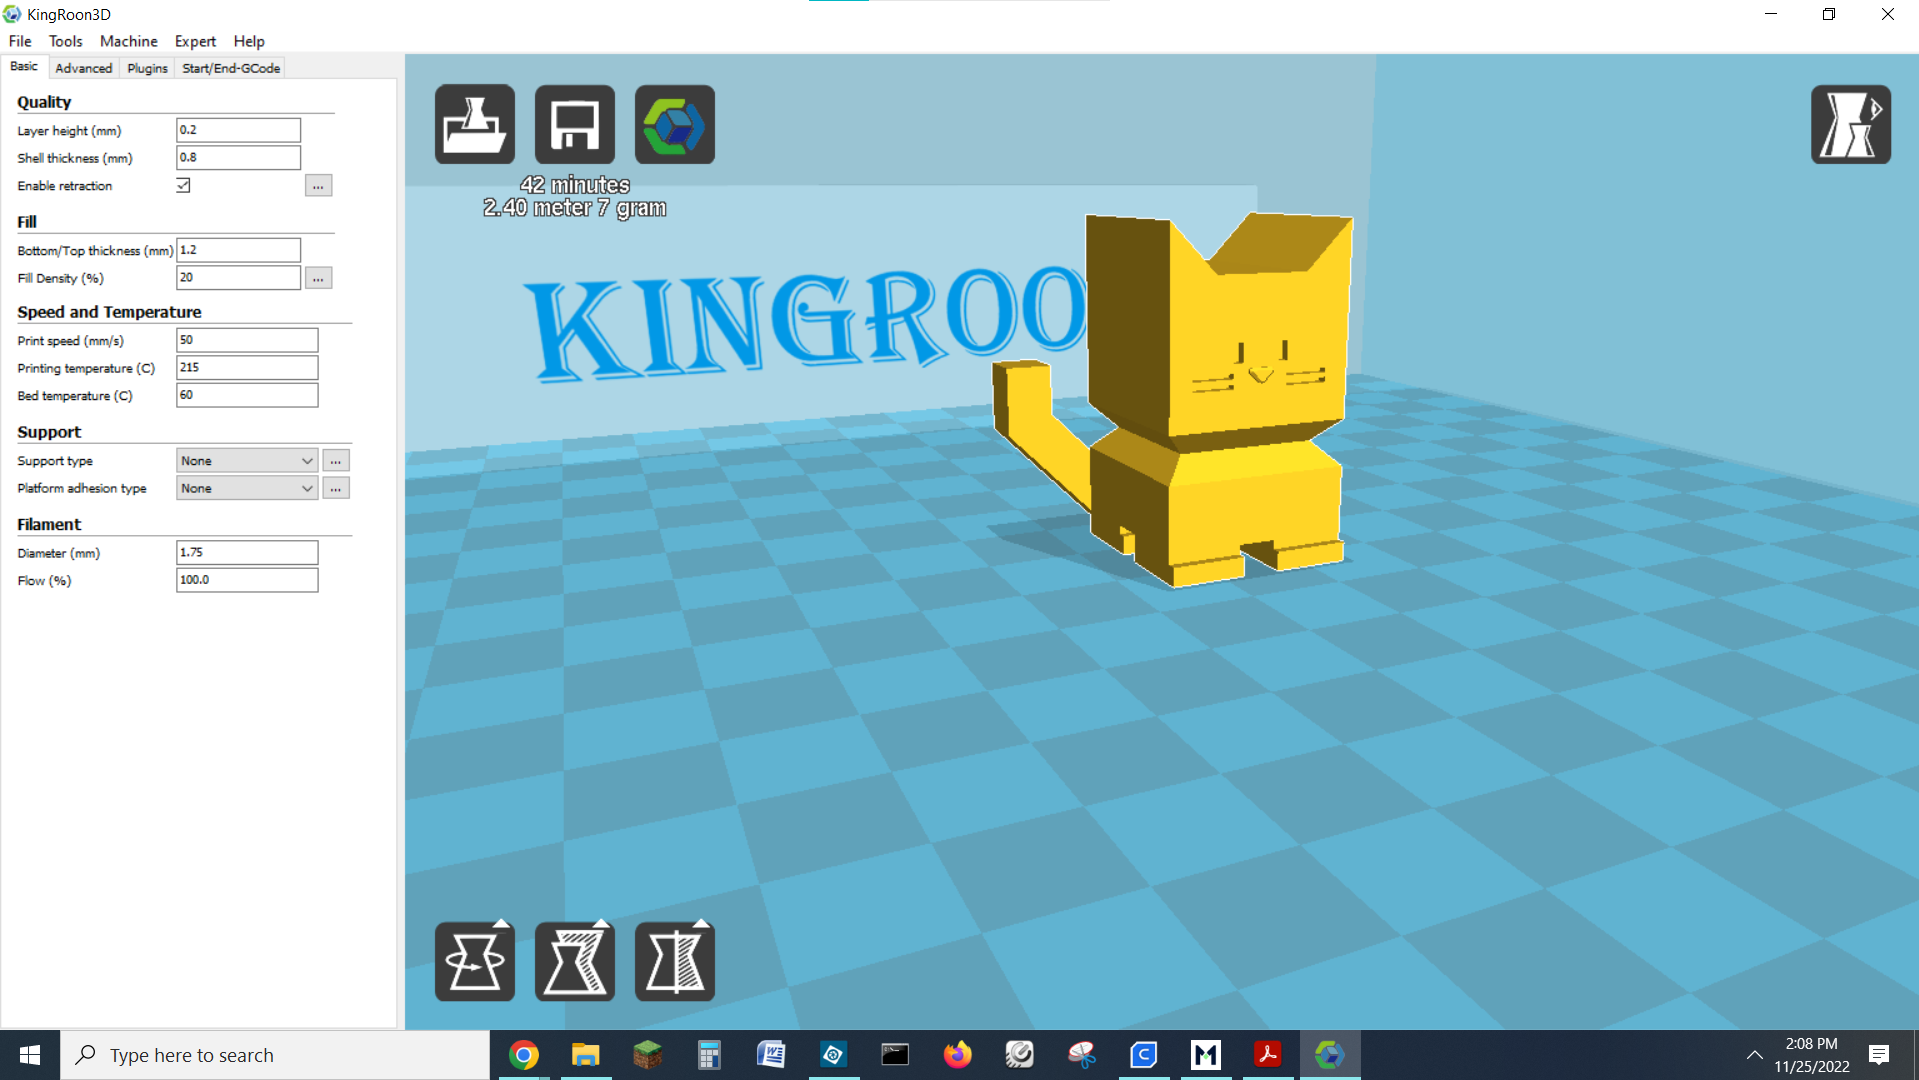
The Kingroon KP3S has its own custom slicer simply called KingRoon3D. This is a very simple to use program with quick, basic and expert modes, all tuned for the KP3S.
There’s also a profile included in Cura if you would prefer to download a more popular slicer. No profile is available for PrusaSlicer, but you could set up the Kingroon as a Prusa Mini, which has the same build volume. You would only need to reduce the retraction values as the Prusa Mini is a Bowden style extruder.
Printing on the Kingroon KP3S
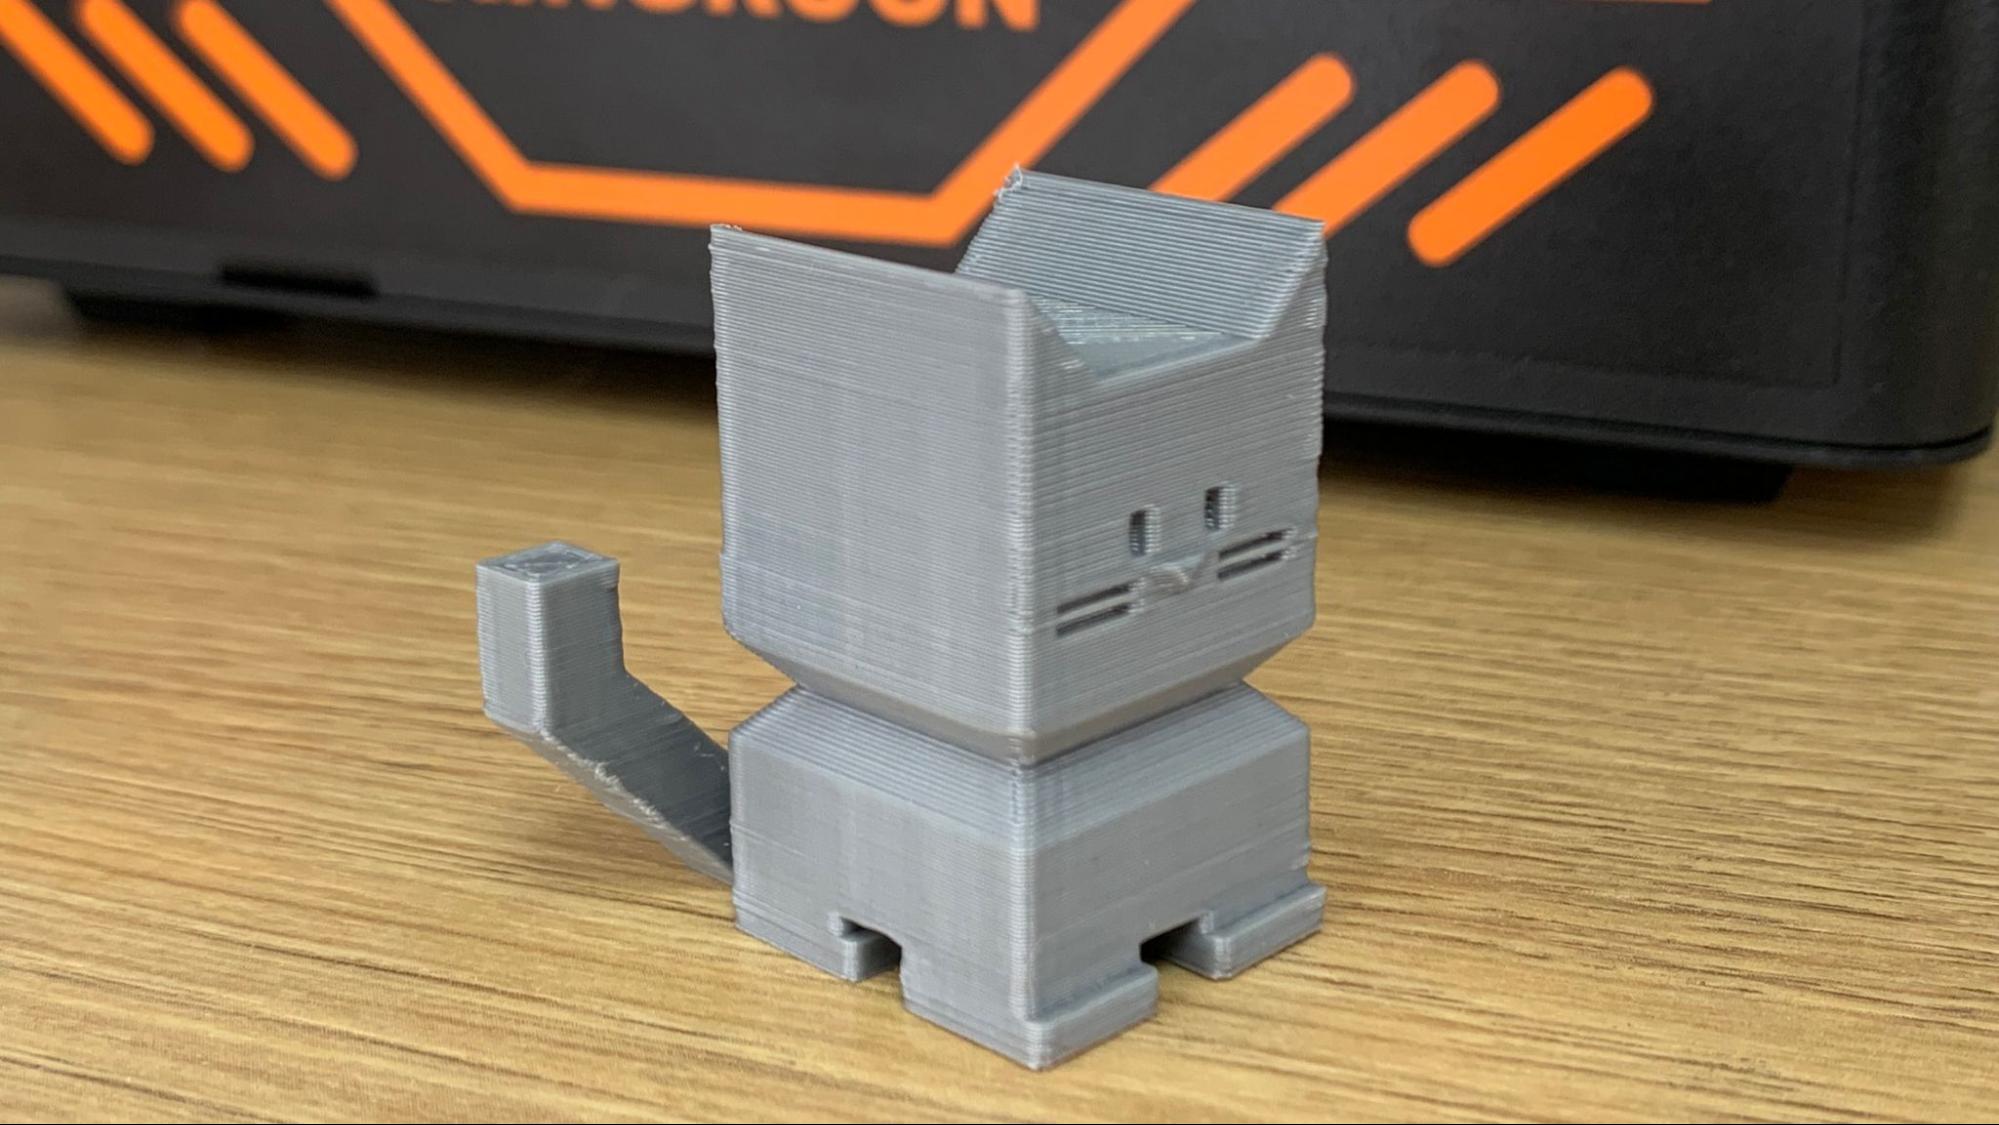
The KP3S is rated for print speeds up to 100mm/s, so I printed a fast Cali Cat to see how it runs at speed. The results were a little lumpy on the corners, but overall not bad. I used KingRoon3D to slice it with a .2mm layer height at 100mm/s, using Jessie Premium Gun Metal Grey PLA. The print took 47 minutes to print, about 5 minutes faster than it would take at 60mm/s. Sadly, small prints do not give a printer enough time to reach full speed, but you can still see how it handles cornering while running quickly.
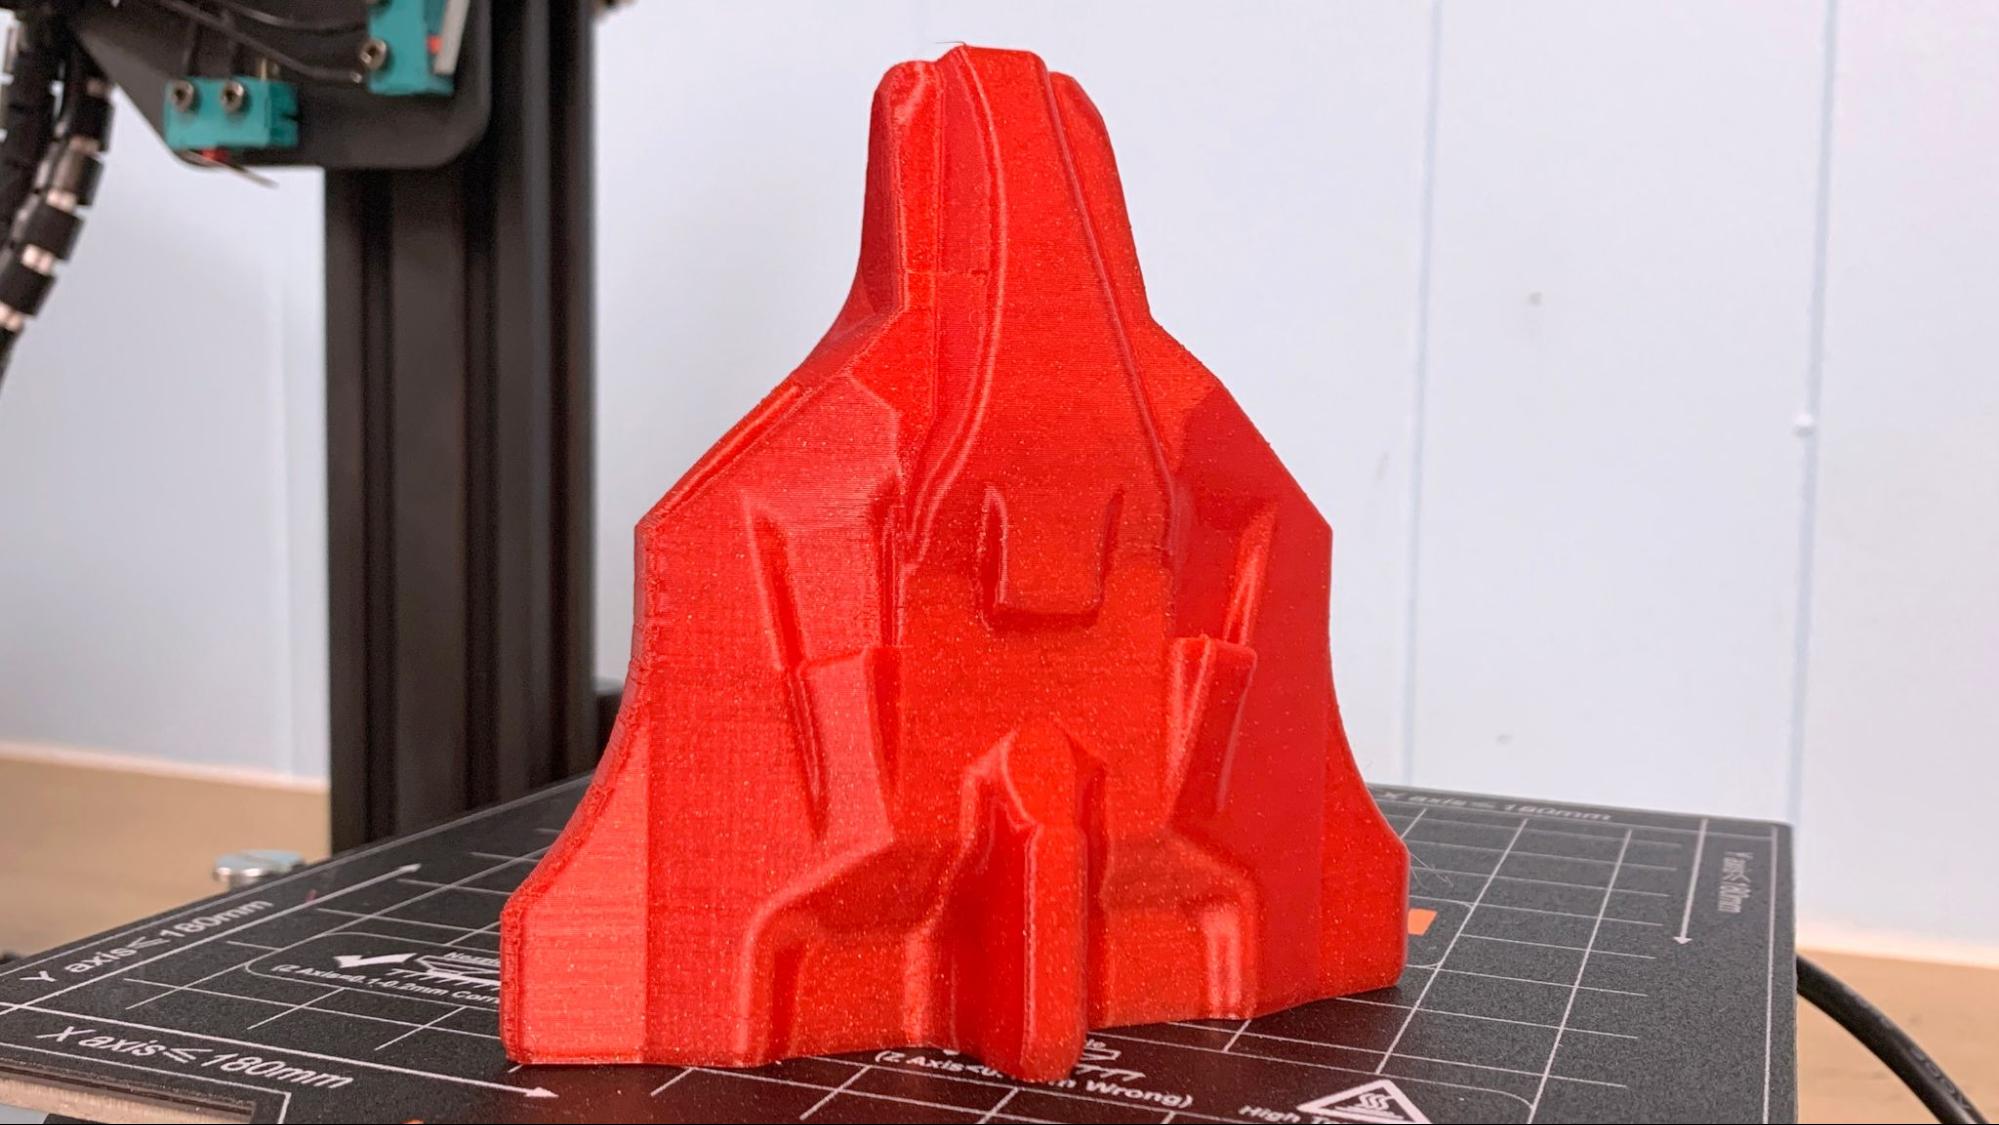
The KP3S isn’t a very large printer, but you’ll be surprised at how much it can actually print. I was able to place three of these spaceship toys on it at once. These are printed in Atomic Golden Blood Diamond Translucent PLA at .2 mm layer height, 60 mm/s. Three ships at once took 11 hours and 56 minutes.
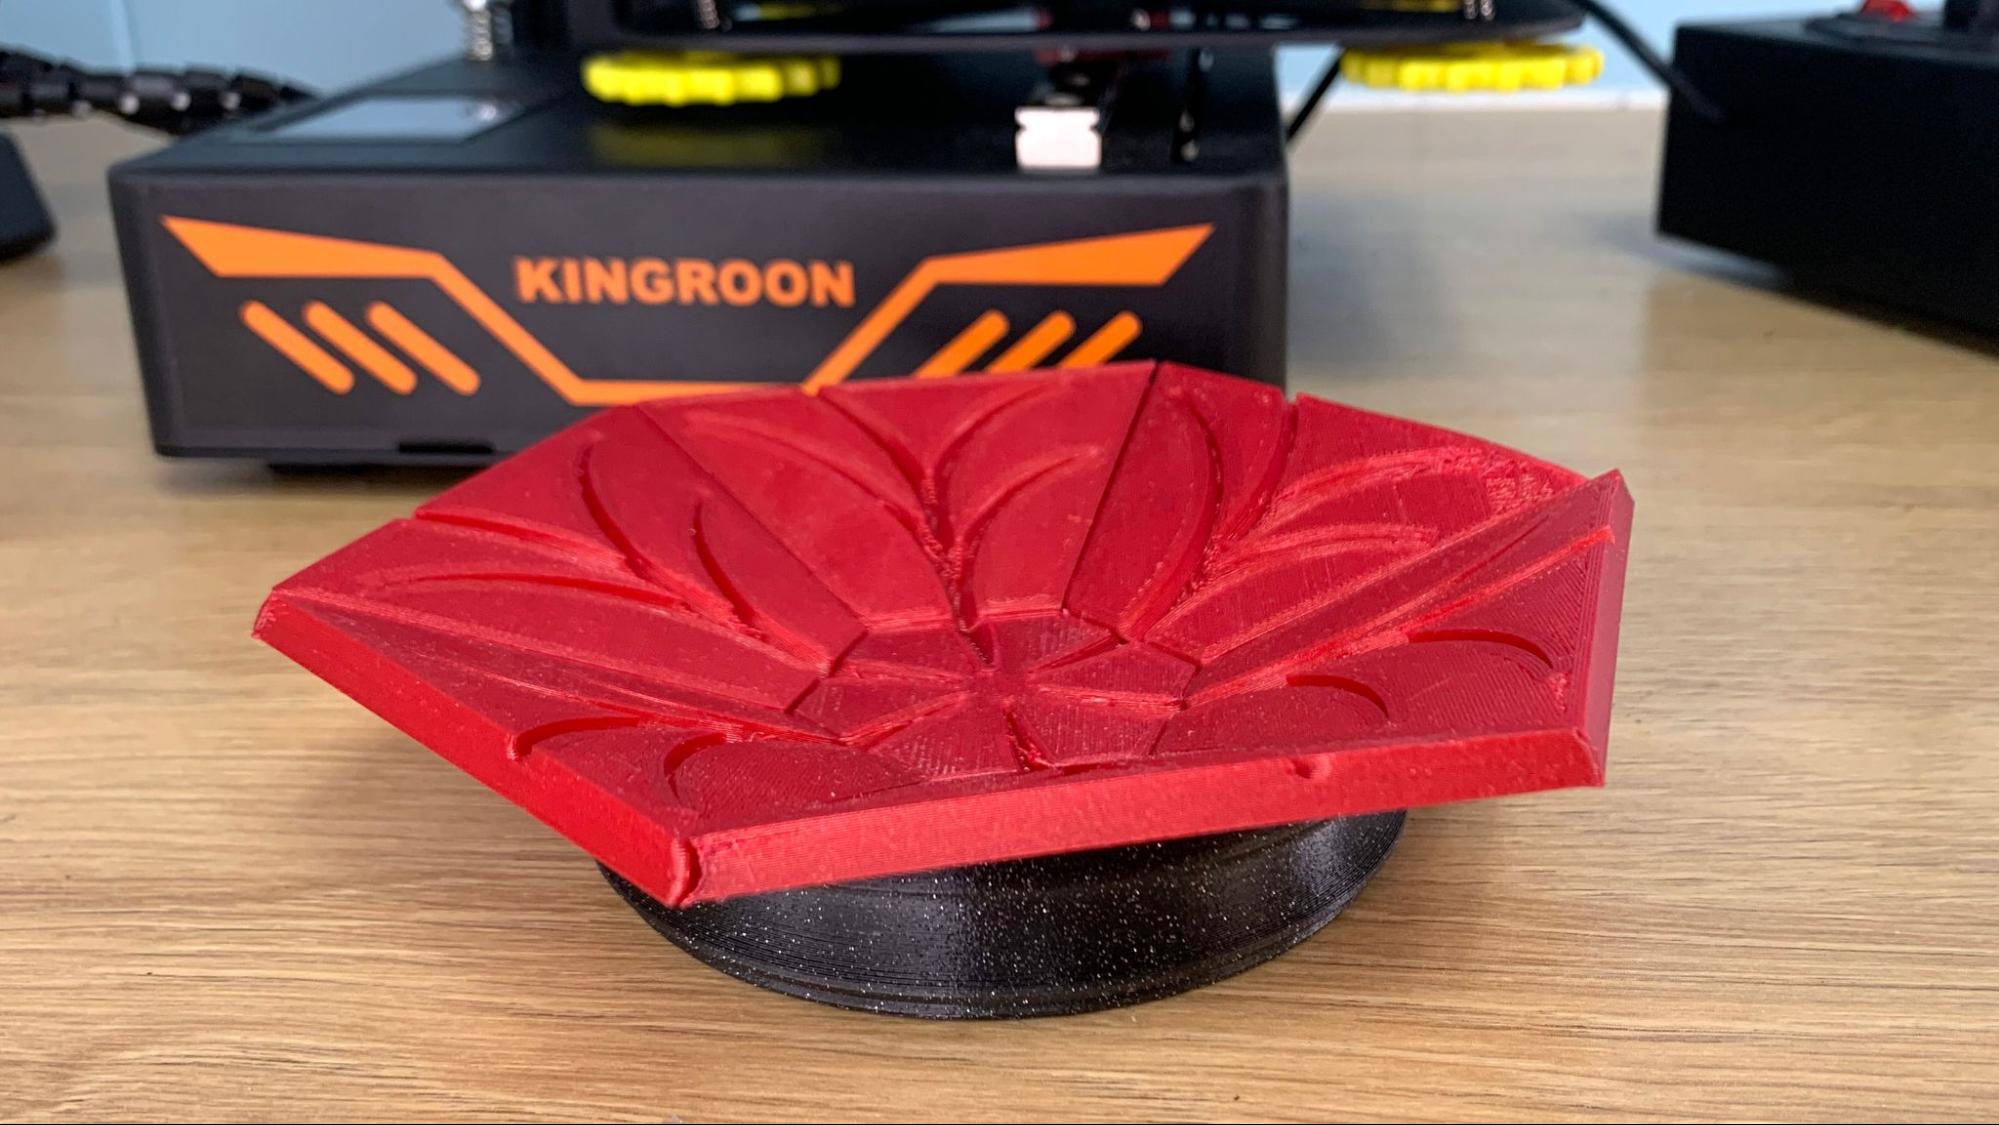
PETG printed smoothly as well, although there was a rough spot where the test print didn’t stick as well to the bed. This is Clockspring’s Planar Dish which prints flat then folds up a bit to form a shallow bowl.
The base is printed separately and screws on, holding the bowl shape in place. The two parts fit together perfectly. I printed in Protopasta Candy Apple Red Metallic and Empire Strikes Black PETG. Each piece was run at a .2 mm layer height at 60 mm/s, taking 8 hours and 40 minutes in total to print.
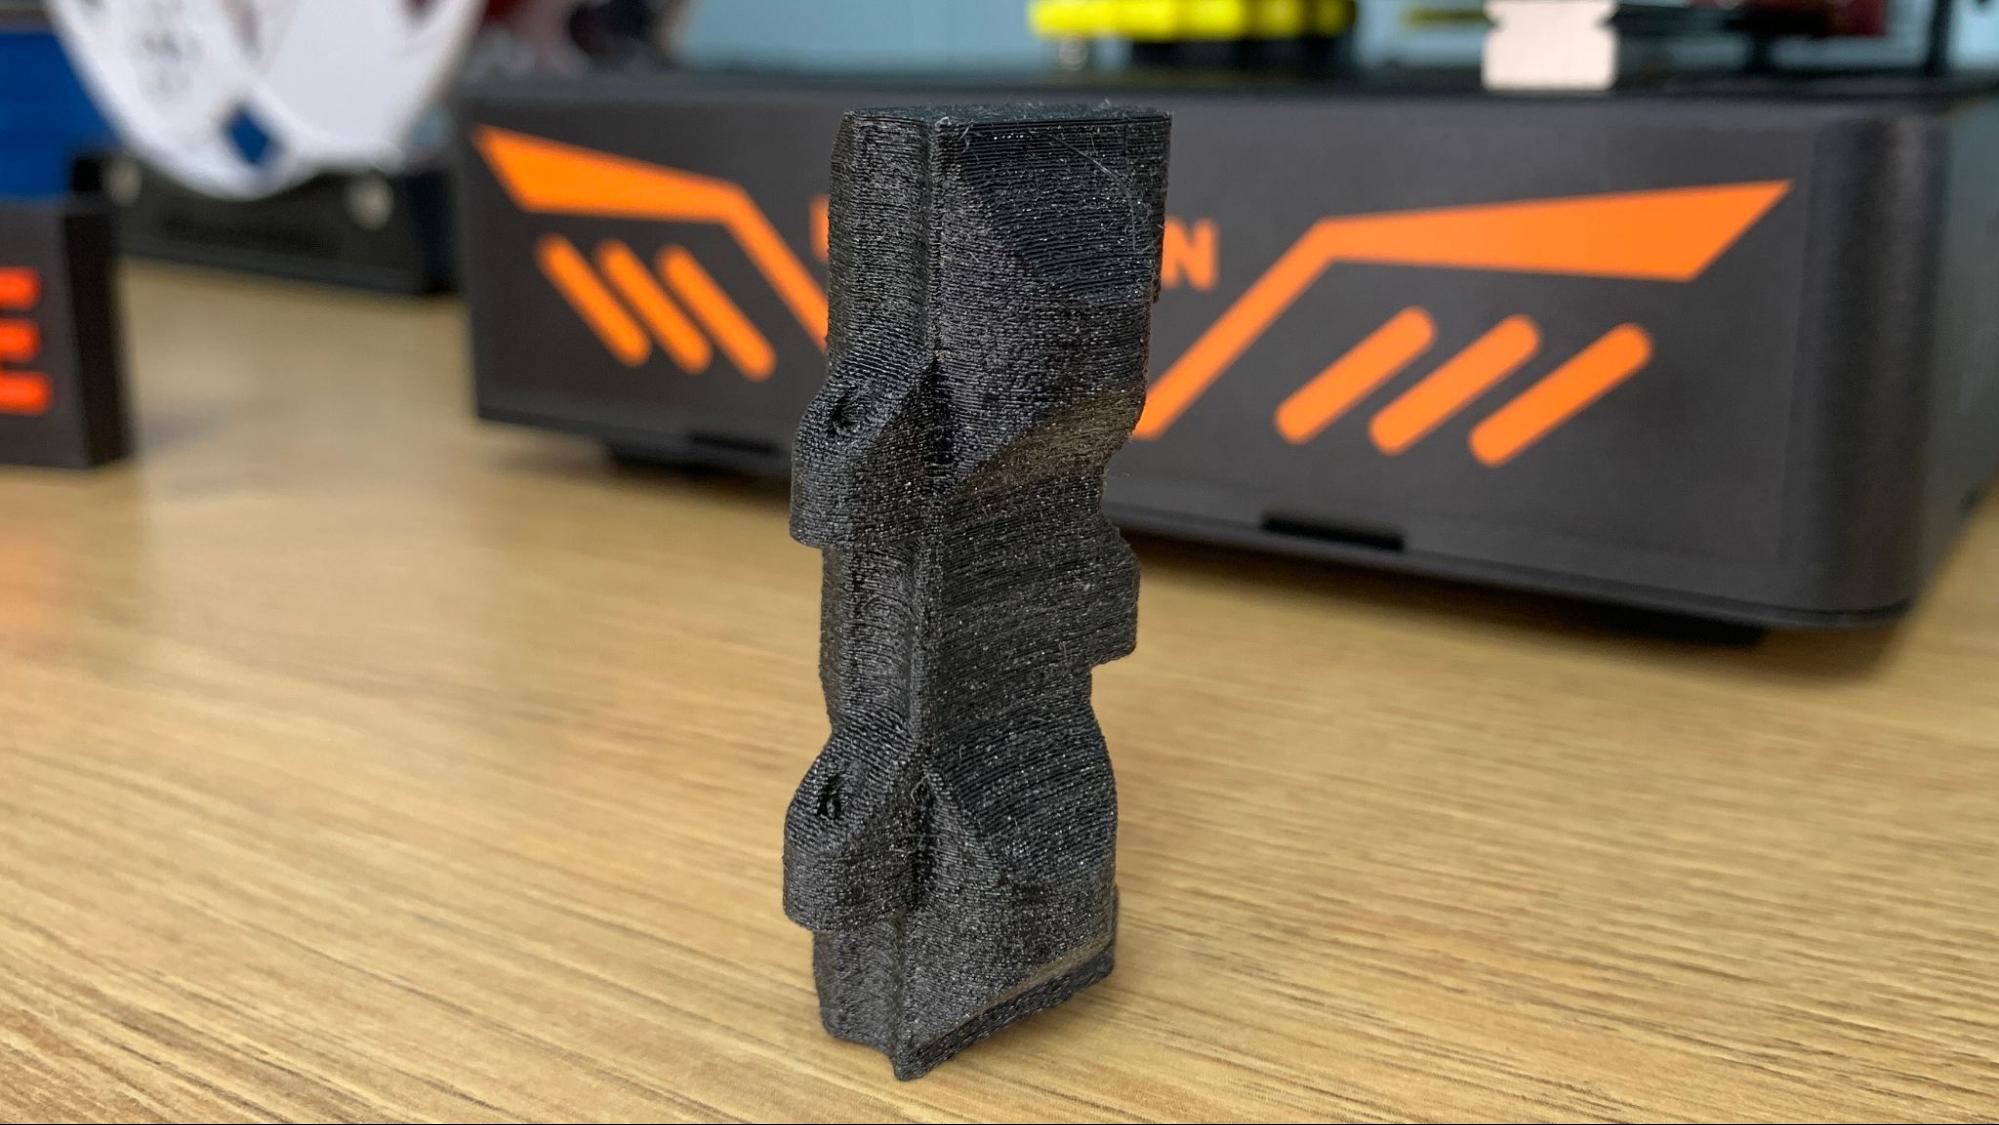
TPU printed well, though a bit stringy when I tried running several copies at once. This is a tread for an RC Death Racer, printed without supports at a .2mm layer height and 20mm/s speed and took 58 minutes to print. The material is Inland Black TPU.
Bottom Line
The Kingroon KP3S is a conundrum for me. On the one hand, it’s very affordable, easy-to-use and provides good quality prints. On the other, it has an antiquated design that wastes space and makes it unhandy to move.
It has many excellent features: direct drive, linear rails and a removable build plate with excellent stick. However, its awkward tabletop spool holder can be hard to wrangle into position and caused a few failed prints when cardboard spools became too light and literally flew away.
The Kingroon KP3S is not quite at the level of the best 3D printers right now.The more compact Pro version could be more competitive when it releases in December. With a retail price of $169 it’s tempting to buy the KP3S knowing that a few mods to consolidate the printer could fix its design flaws. However, for $159 you can get the truly portable Creality Ender 2 Pro, our pick for best compact 3D printer.
MORE: Best 3D Printers
MORE: Best Resin 3D Printers
MORE: Best Filaments for 3D Printing

Denise Bertacchi is a Contributing Writer for Tom’s Hardware US, covering 3D printing. Denise has been crafting with PCs since she discovered Print Shop had clip art on her Apple IIe. She loves reviewing 3D printers because she can mix all her passions: printing, photography, and writing.
-
outlyer Any idea whether they have changed the fans? Because mine are the opposite of quiet, and last time I checked I found a lot of people with the same experience.Reply
