How to Manually Level a 3D Printer Bed
Make sure your prints are even and stick to the bed every time.
Get Tom's Hardware's best news and in-depth reviews, straight to your inbox.
You are now subscribed
Your newsletter sign-up was successful
Whether you’re using a brand new 3D printer for the first time or noticing that your prints come out uneven or, even worse, fail to stick, you need to level the print bed. Entry-level 3D printers, even those which sit among the best 3D Printers, often do away with luxuries like color screens, direct drives and probes for automatic bed leveling. Don’t worry, learning how to level a 3D printer bed is not hard; it just takes a little practice.
“Leveling the bed” is a bit of a misnomer. We’re actually “tramming” the print surface: making sure the nozzle is at the same height across the bed at every point on the X and Y axis.
Level is a simple, if not precise, word everyone can understand.
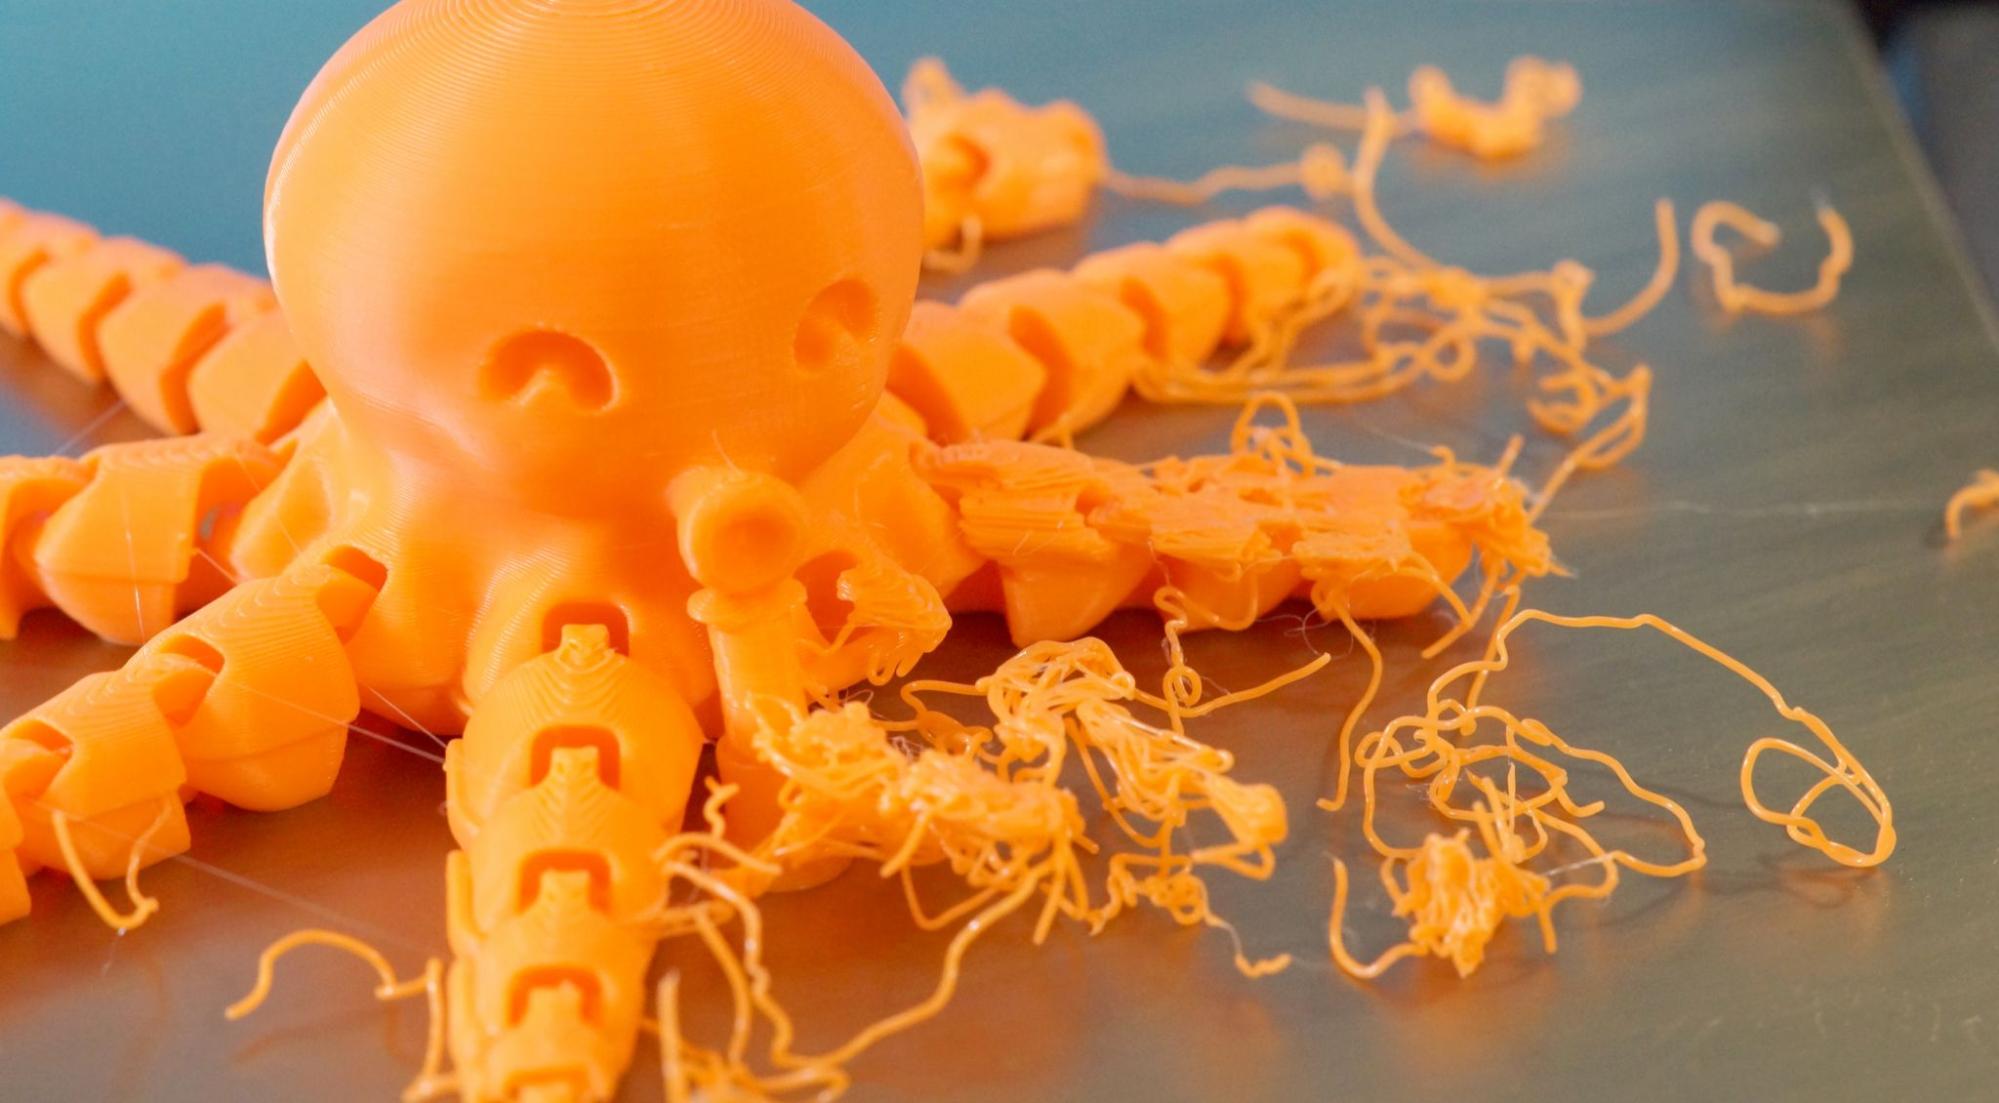
The biggest problem when manually leveling a 3D printer bed is finding the correct distance between the nozzle and the print surface. Too far and your prints won’t stick. Too close and you’ll damage the print surface.
Luckily for those of us stuck with manual 3D printer bed leveling, we don’t need to be laser accurate. We’re dealing with fractions of a millimeter, so pretty darn close will get us the quality we seek.
When Do You Need To Level a 3D Printer Bed?
- After assembly and before your first print.
- After changing the nozzle to make sure the nozzle remains the correct distance from the bed.
- Once a week. Even the best printer can fall out of calibration with use, so check your level occasionally.
- After a failed print. Prints not sticking? You might be out of level.
What You’ll Need to Level Your 3D Printer Bed
- A Piece of Paper: This is used to gauge the distance between your nozzle and the print bed. Computer paper is a good choice, but a piece of junk mail or a Post-It Note will work too.
- Filament: Load your printer with PLA for running a test print. PLA is a commonly used filament and sticks well without fuss. We’re using Inland PLA + Orange for this article.
- Isopropyl Alcohol: Clean the print surface before leveling. Filament never sticks well to a dirty bed.
- Paper Towel: For cleaning the bed.
- Slicer App: You’ll need to slice your test print – any slicer will do. We like to use Ultimaker Cura.
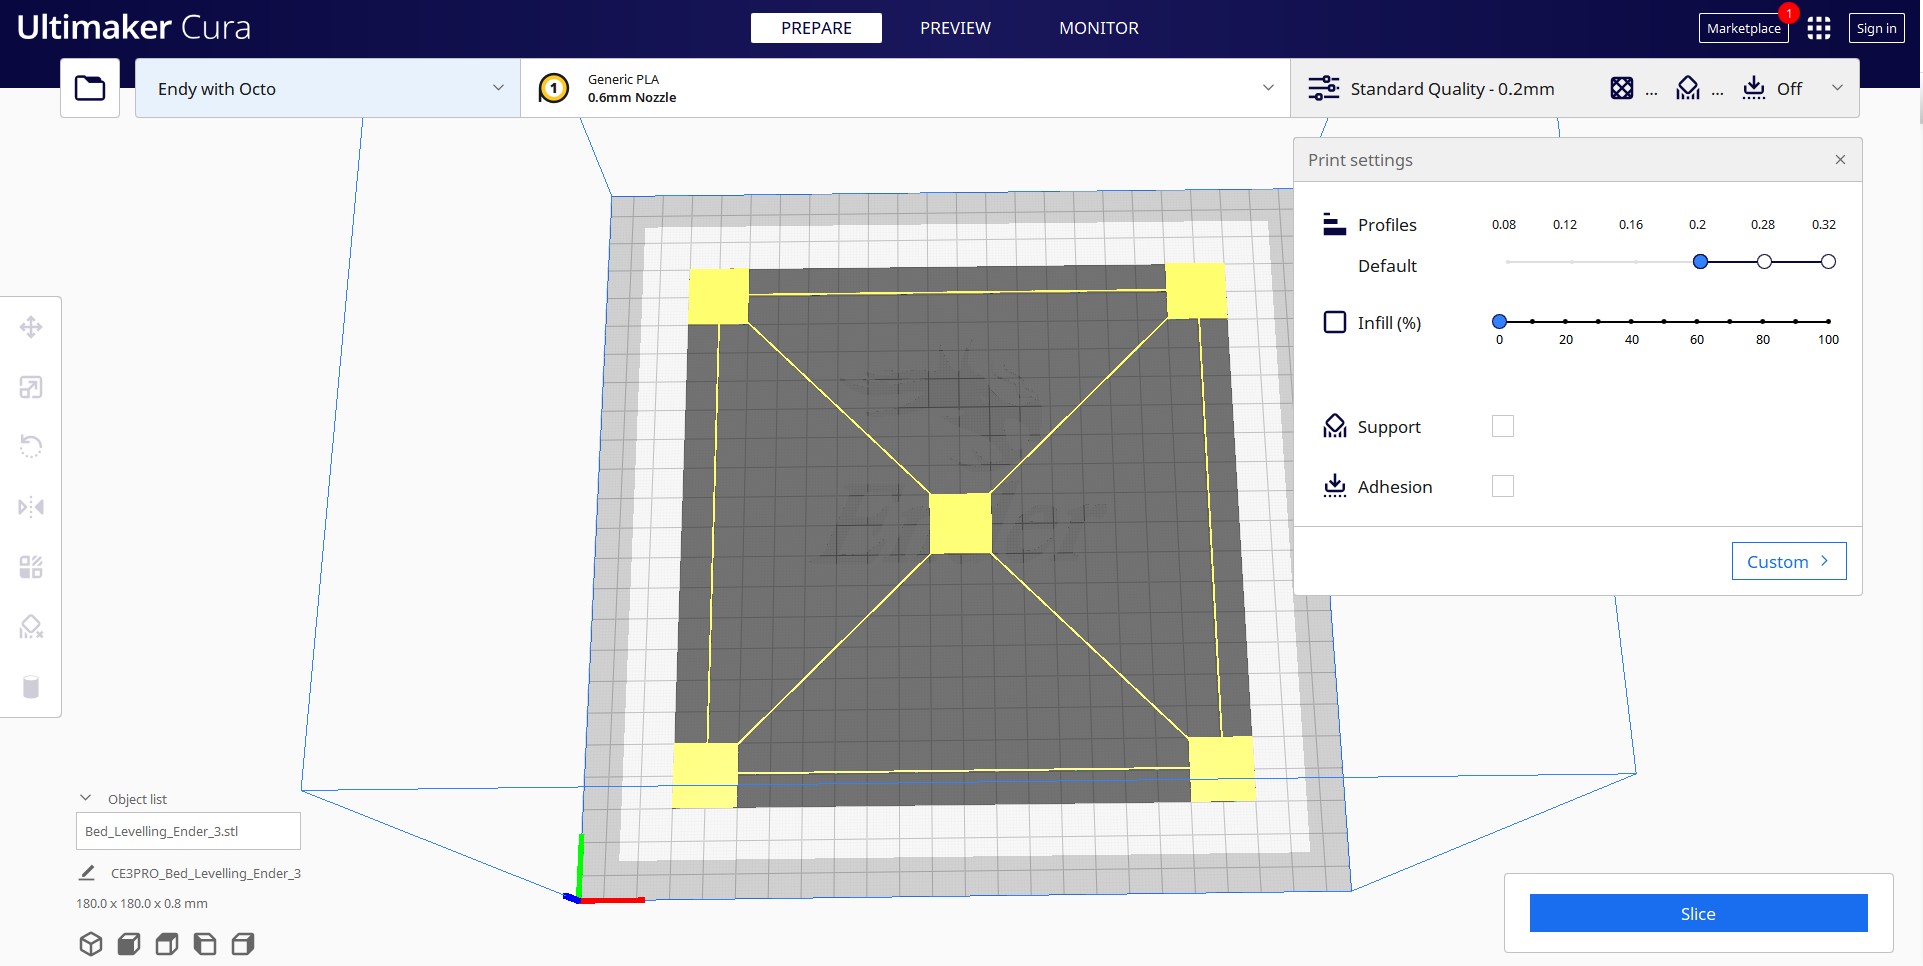
- Bed Level Test Print: There are several files online, we’ll use this one from Thingiverse. It’s sized for an Ender 3. You can size this one to fit your printer’s bed or search for a test that’s made for your specific machine.
- Your 3D Printer: In this article, we’re using a Creality Ender 3 Pro FDM 3D printer. The four-point print bed is similar to many popular 3D printers on the market today, including the Elegoo Neptune 2.
Prepare your Printer
1. Clean the bed. Lightly scrub the print surface with Isopropyl Alcohol and a paper towel to remove fingerprints and any bits of leftover filament.
2. Preheat your printer and bed to its normal operating temperature. For PLA, we warm up the printer to 200° on the nozzle and 60° on the bed. Wait at least 5 to 10 minutes to let the printer absorb the heat.
Some experts believe it's unnecessary to preheat the bed, as the possibility of heat expansion is very small. We prefer to level the bed under the same conditions we use while printing.
Get Tom's Hardware's best news and in-depth reviews, straight to your inbox.
3. Home the printer. This will take it to the 0,0,0 position.
4. Check your printer controls for an option called Bed Leveling, Level Corners or Bed Tramming. This option will move the printer around the four corners of the bed while you adjust the springs underneath.
A few Ender 3 models come with leveling aids installed. You’ll need to select “Disable Steppers,” which turns off the stepper motors and allows you to push the print head by hand.
Note: Our Ender 3 Pro has been upgraded to Marlin 2 firmware, which added a Bed Tramming routine.
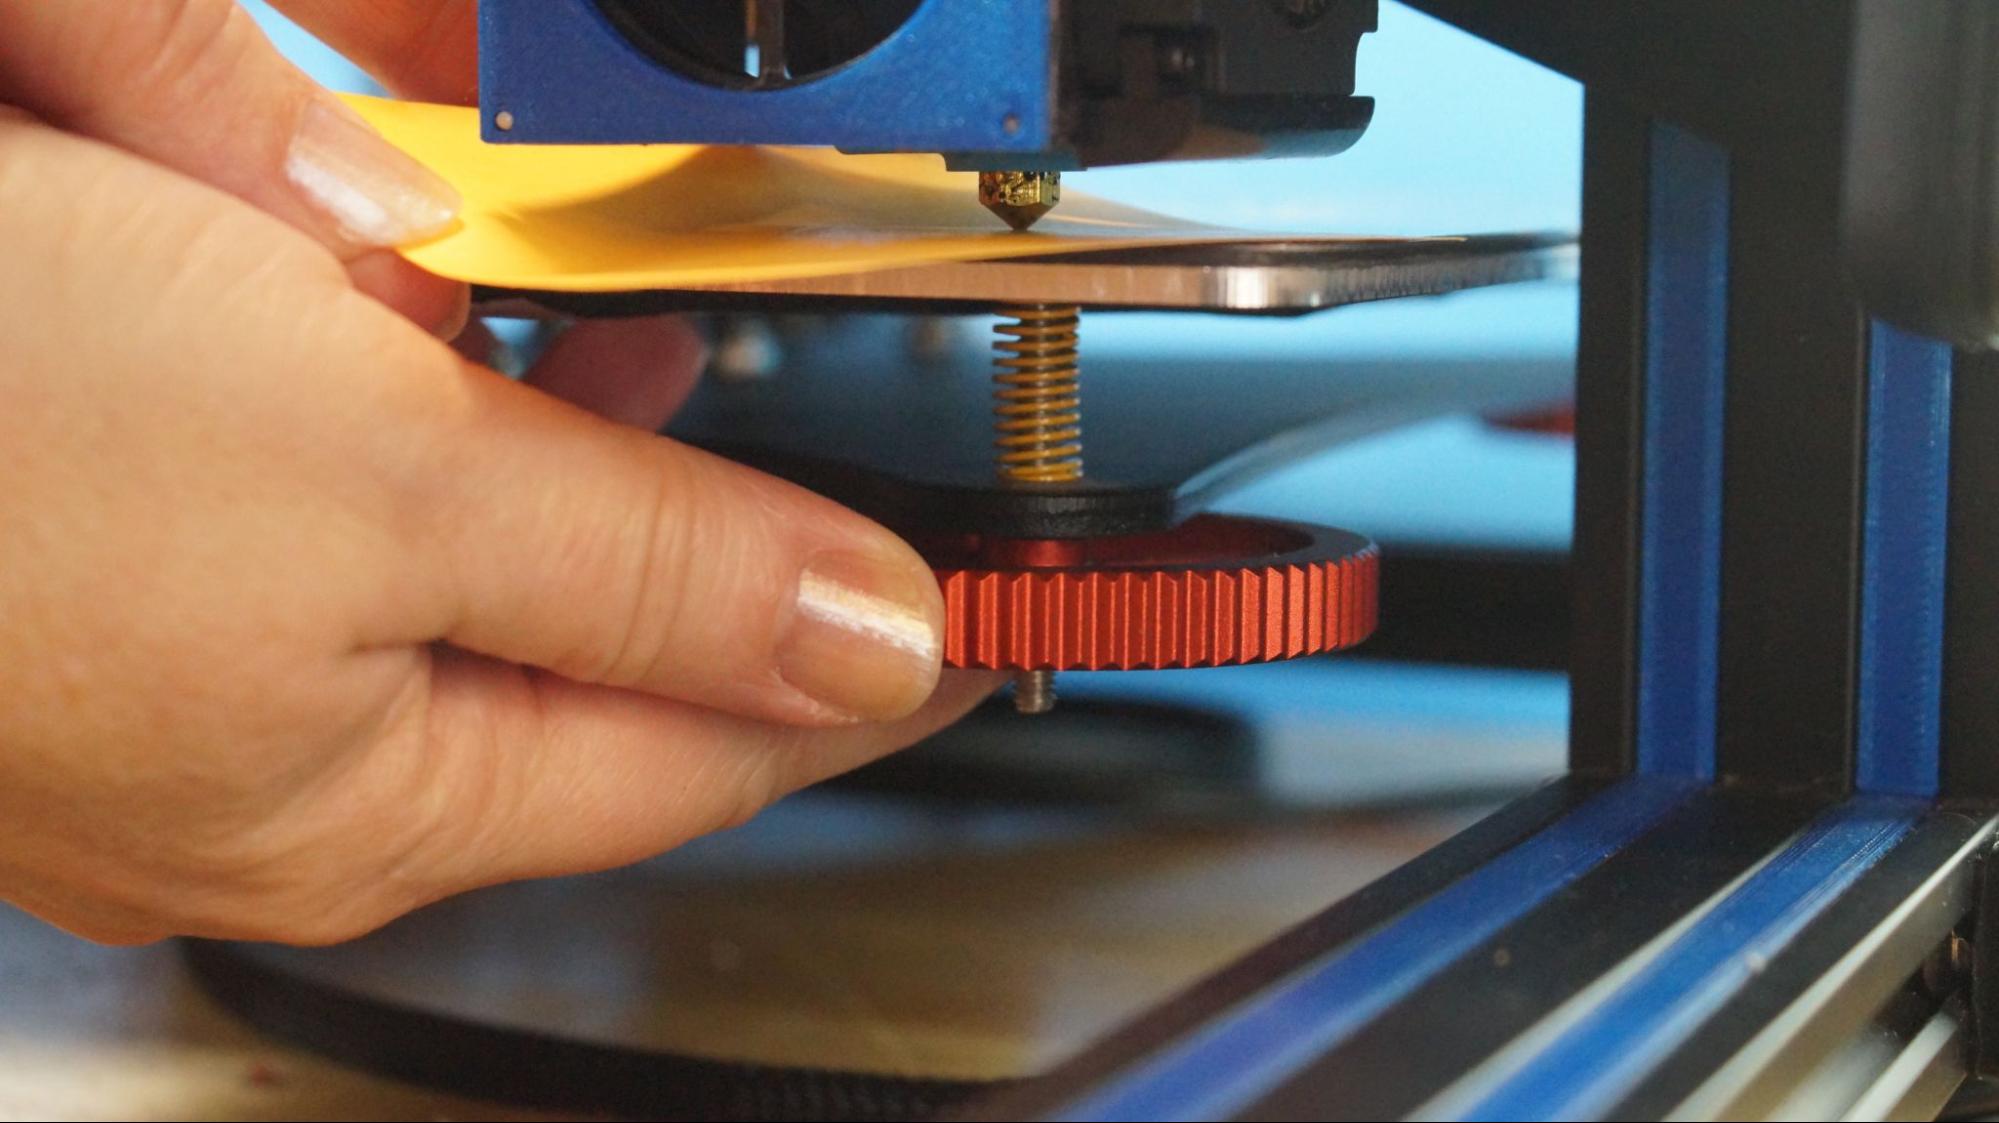
5. Slide the print head (or let the printer do it) to the first corner, centered more or less over the adjustment knob under the bed. Slip a piece of paper under the nozzle.
6. Use the adjustment knob underneath the bed to raise or lower the nozzle until it barely touches the paper.
Do this for all four corners and the center. Then do it again. Leveling the bed is a balancing act where adjusting one corner can throw off the opposite corner.
Run a Test Print
1. Load a bed level test print into your slicer of choice. Since we’re using a Creality Ender 3 Pro, we’ll use one found on Thingiverse called “Ender 3 Bed Level”. If your printer has a larger or smaller print surface, adjust the x and y coordinates accordingly.
2. Reduce the Z height to 0.4 for a single layer test print.
3. Clean the bed with Isopropyl Alcohol and a paper towel.
4. Run the print.
Diagnose the Results
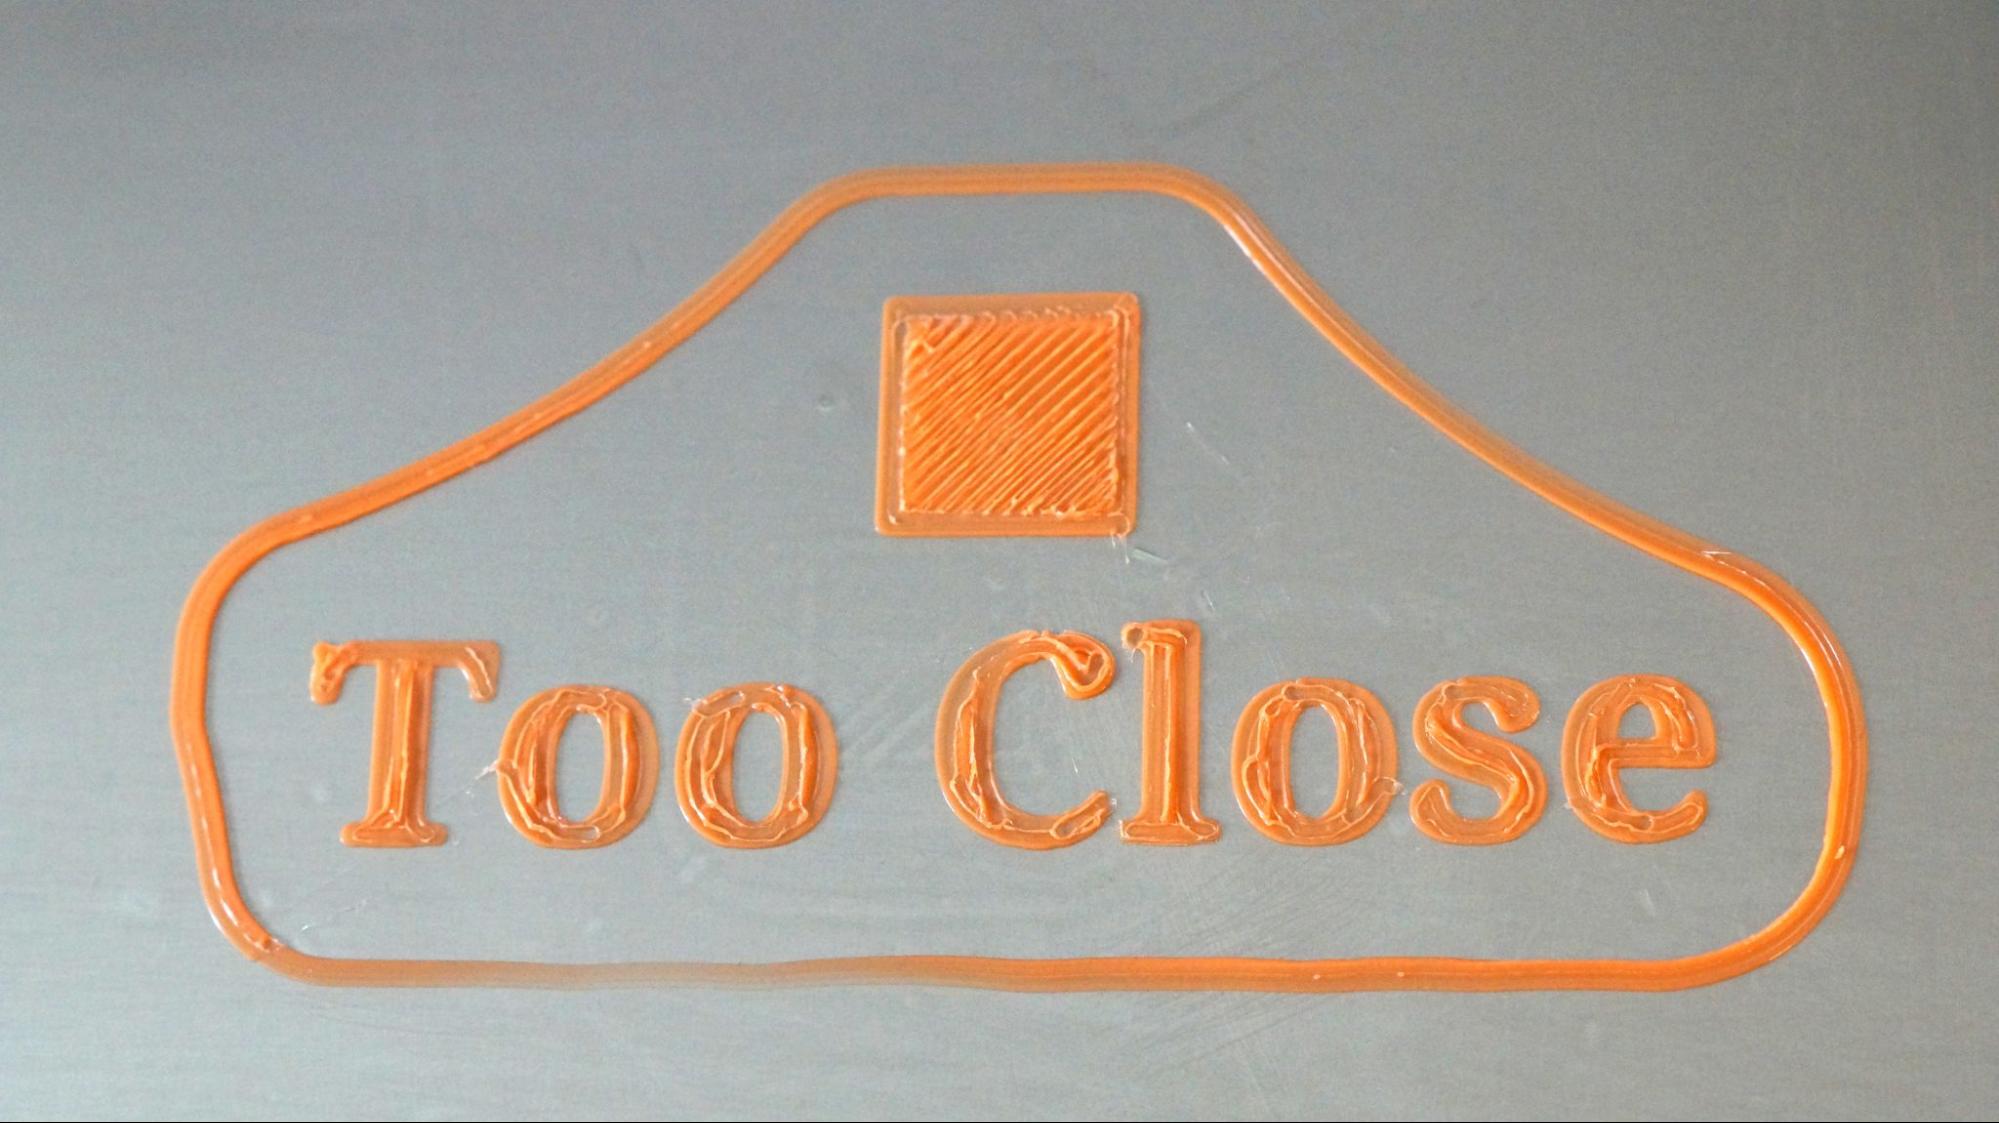
- Nozzle is too close. If your nozzle is too close to the bed, it will plow through the filament, causing a rough, uneven surface. You could have thin patches where the plastic is being pushed into the bed surface. It may be difficult to remove.
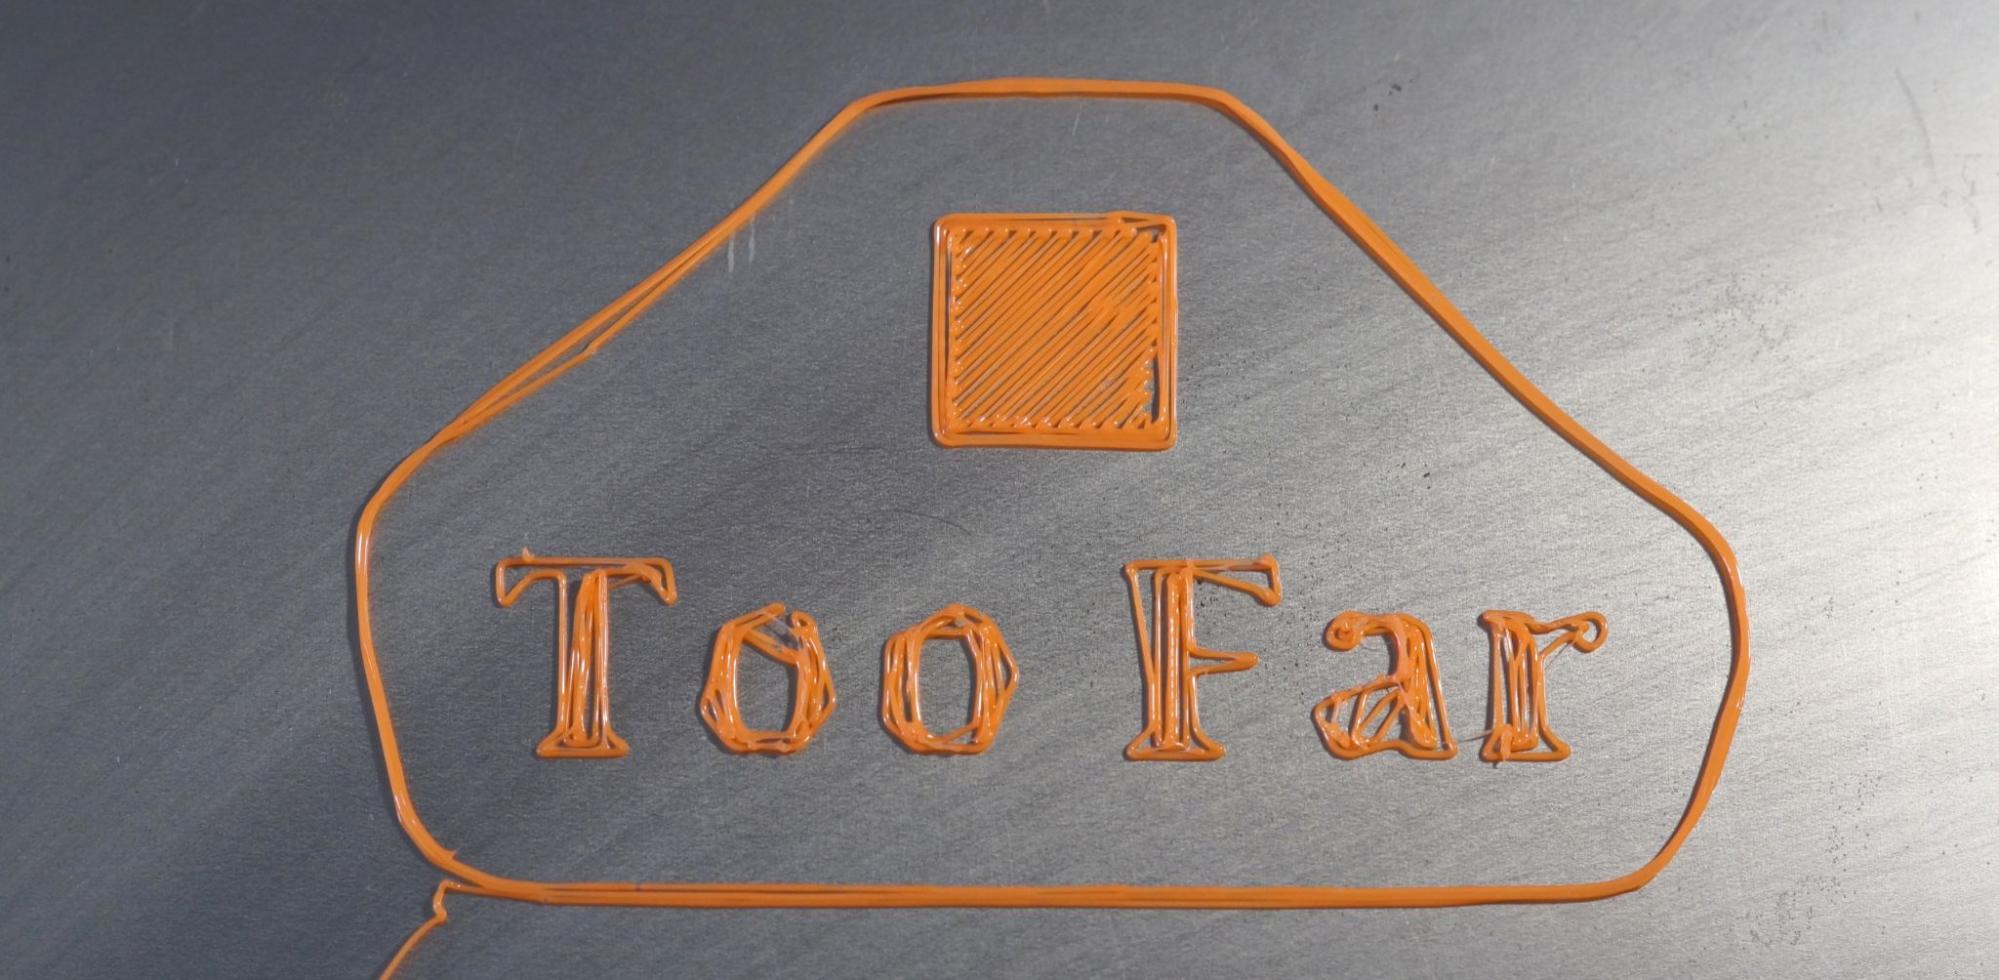
- Nozzle is too far. If your nozzle is too far from the bed, there will be gaps between the lines of filament. The lines of plastic appear rounded and may not stick to the bed at all.
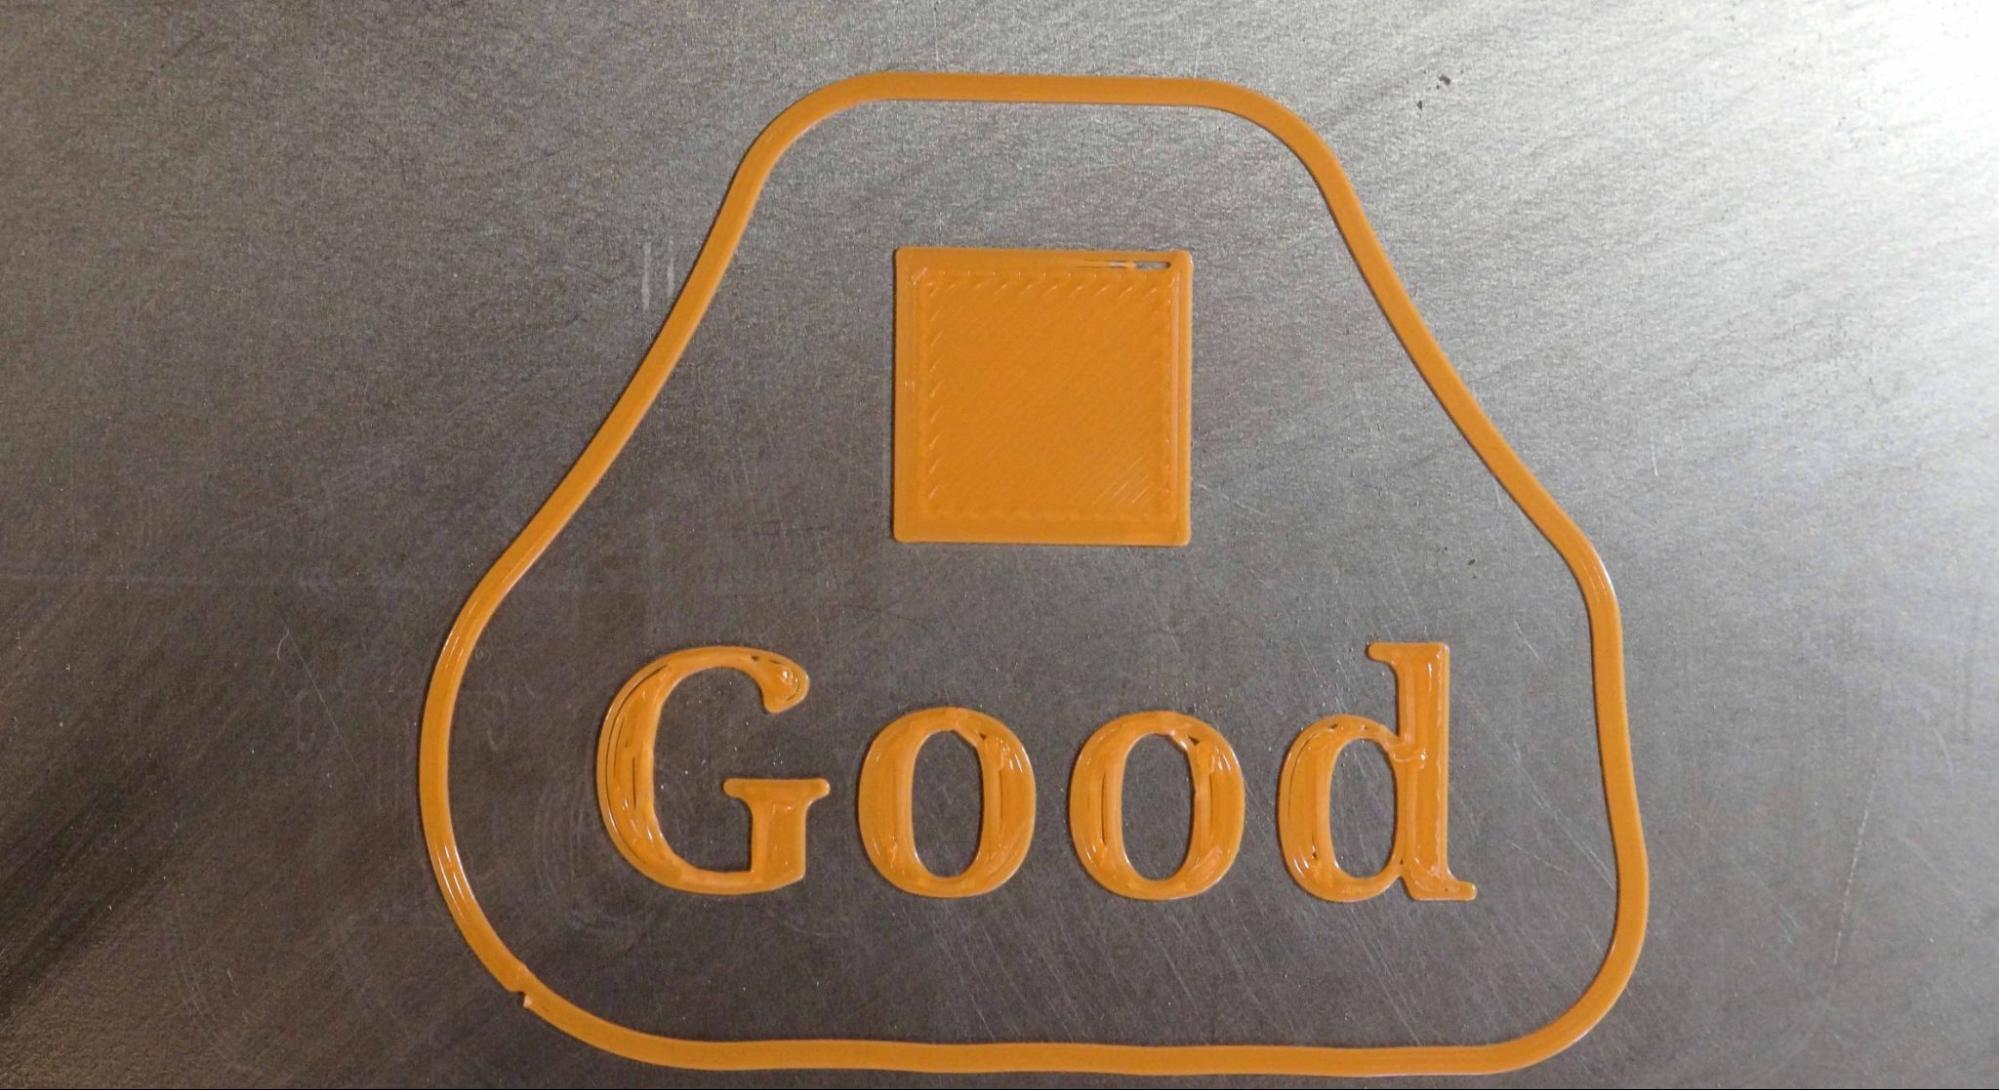
- Nozzle is just right. When the nozzle is a perfect distance from the bed, it will appear slightly squished or lightly flattened. Lines will blend into each other with a uniform appearance. There will be very little roughness.
If the squares of the test print appear too far or close to the nozzle, make adjustments as needed and re-run the test print.
3D Printer Bed Leveling Aids
It can be difficult to achieve a perfect first layer with manual 3D printer bed leveling. Here’s a few things to try before you give up and buy a BL Touch Auto Sensor, which can be used to do auto leveling on an Ender 3-style 3D printer.
- Clean the Bed. A squeaky clean bed is extremely important for bed adhesion. Even a few fingers prints can add enough grease to make a print not stick.
- Use a Raft. Your slicer can place a chunky first layer down that helps tall or delicate prints stick. The downside is that you’ll have a rough surface on the bottom of your print. You will find rafts under Build Plate Adhesion in Cura and under Support Material in PrusaSlicer. Other slicers have their raft options in other menus.
- Use Glue Stick. A washable disappearing glue stick – the purple kind – from the children’s craft aisle is a perfect adhesion helper. It lays down a tacky layer that helps filament grip the surface. Lightly smear the glue across the whole bed, then wash off after 3 or 4 prints and reapply. The brand doesn’t matter, so feel free to stock up during the next Back to School sale.
- Shim the Bed. Warped beds are sadly common in inexpensive printers. If your bed seems lower or higher in the middle – and you have a removable print surface – you can shim the bed with aluminum foil, masking tape or even a Post-It Note.
To Shim the Bed
1. Remove the print surface.
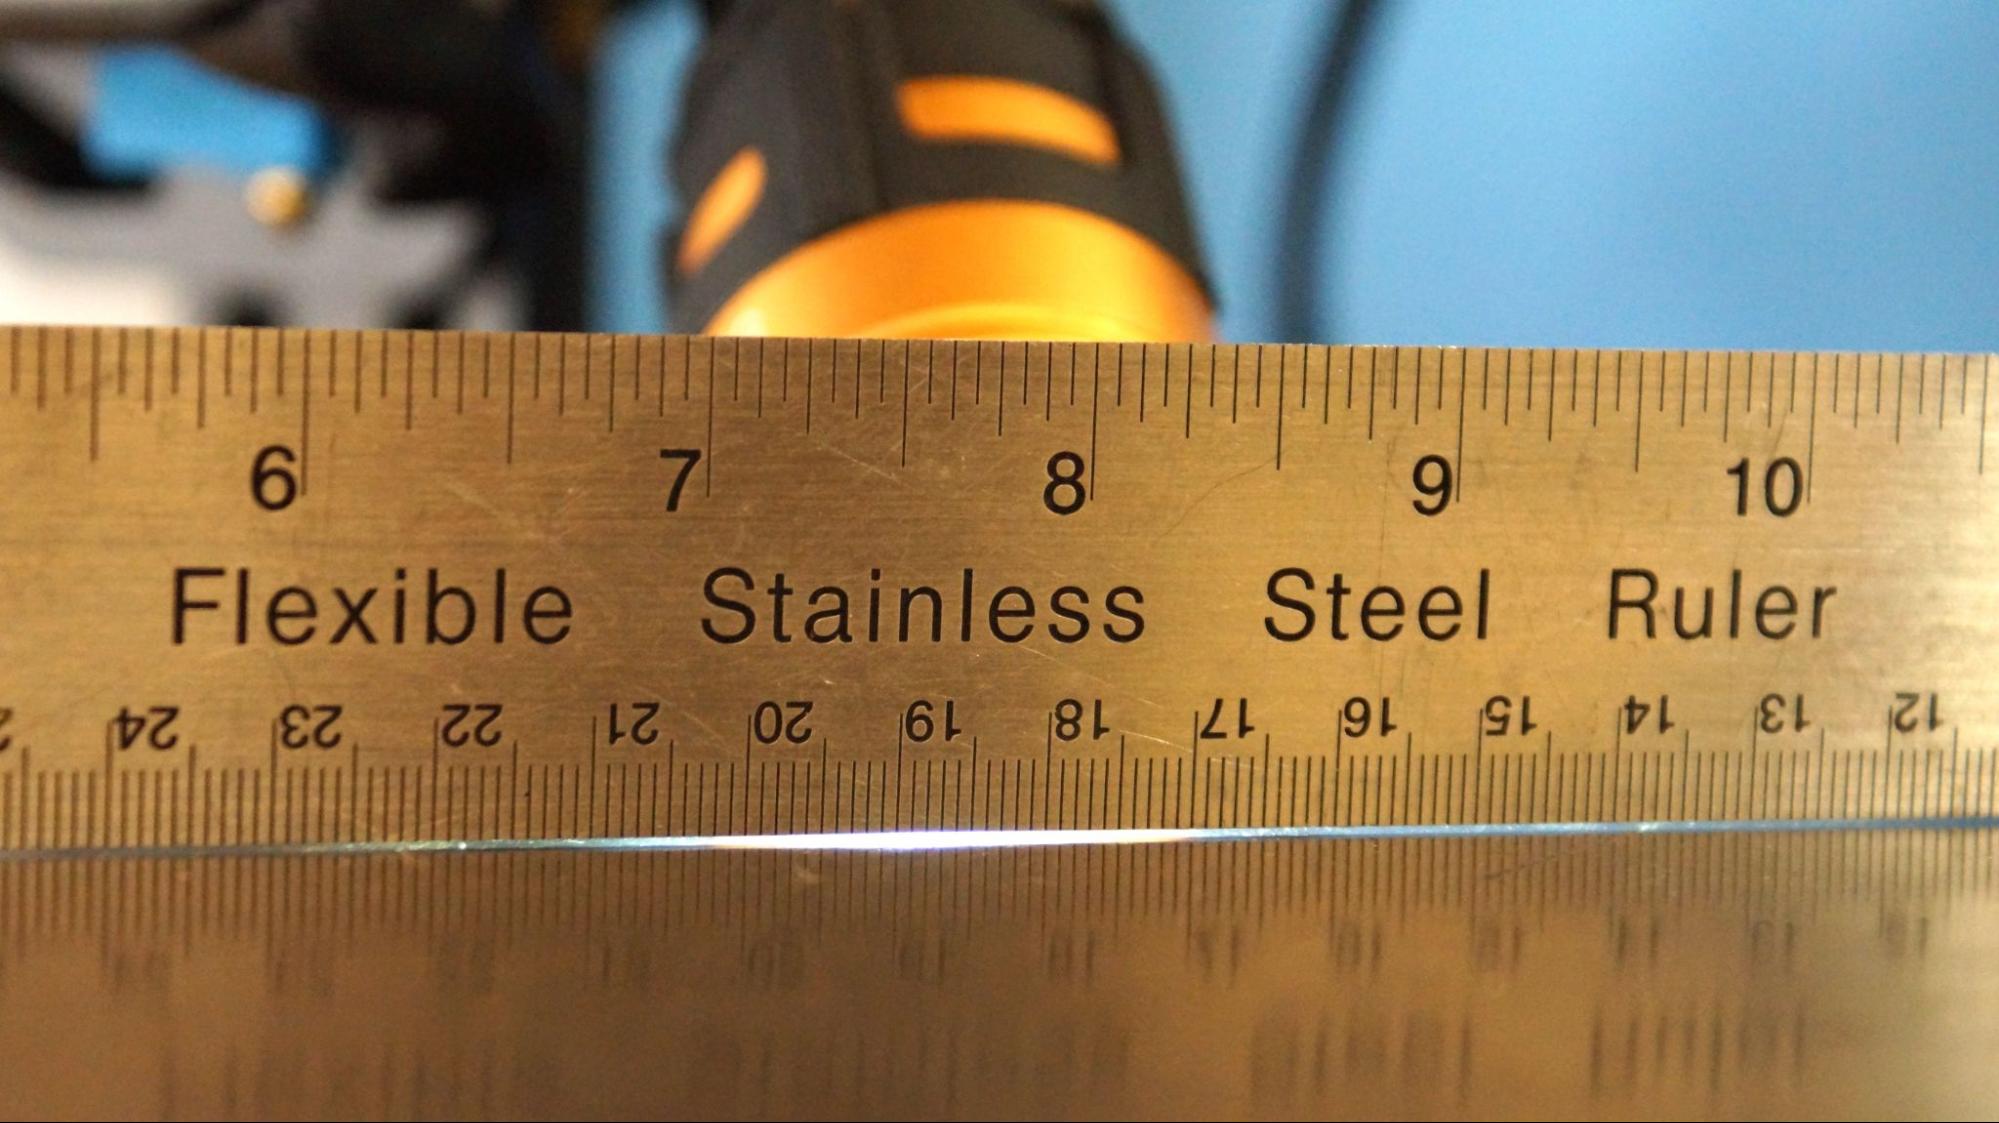
2. Place a steel ruler or similar straight edge on the bed and shine a flashlight behind it.
3. Note how big the gap is and cut a piece of foil or tape approximately that size.
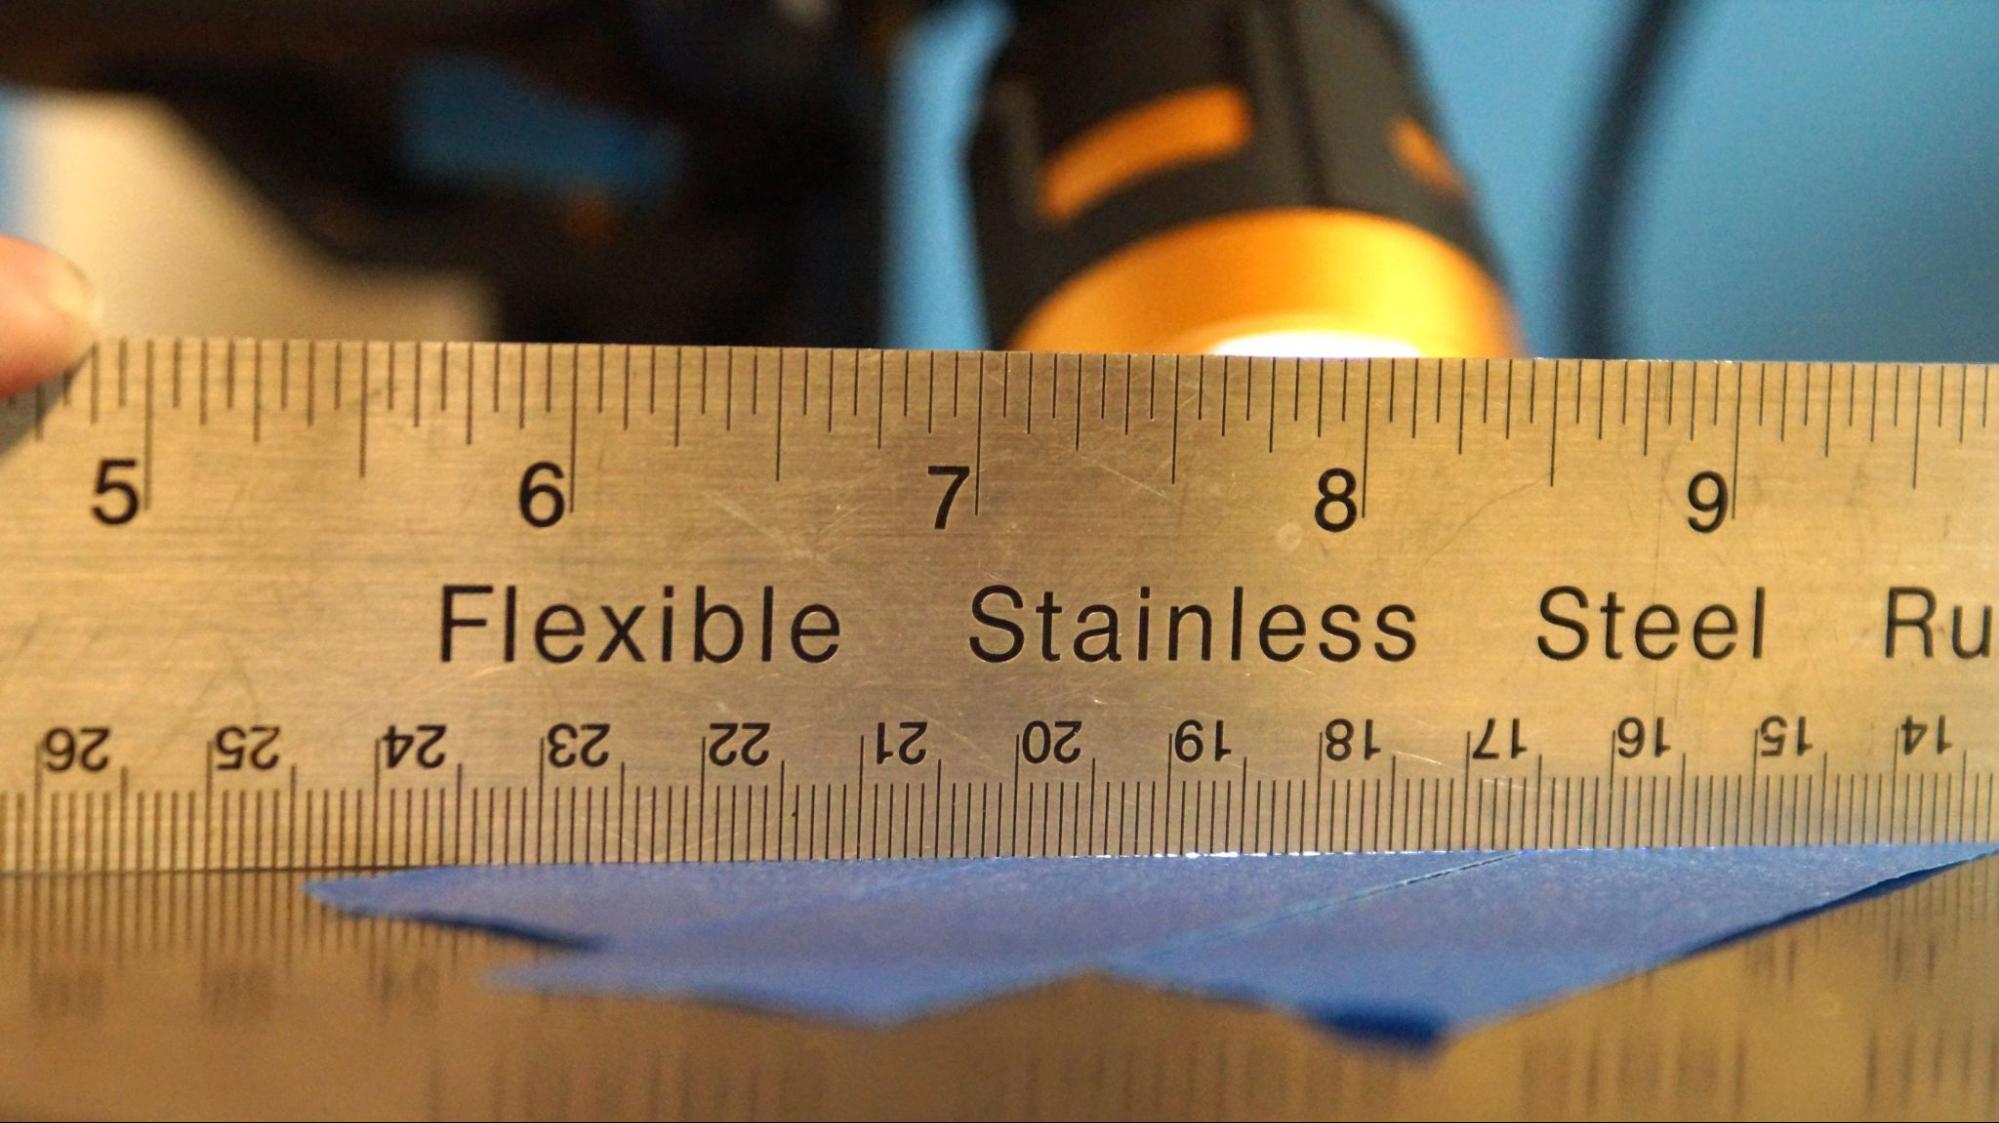
4. Place it on the printer bed and look for gaps with the ruler.
5. Layer additional pieces of foil or tape until the bed is mostly flat.
6. Replace the bed surface and level the bed.

Denise Bertacchi is a Contributing Writer for Tom’s Hardware US, covering 3D printing. Denise has been crafting with PCs since she discovered Print Shop had clip art on her Apple IIe. She loves reviewing 3D printers because she can mix all her passions: printing, photography, and writing.
