Philips BDM4065UC 40-inch Ultra HD Monitor Review
Why would you put the Philips BDM4065UC on your desk? Because it's 40 inches with Ultra HD resolution and a 5000:1 contrast ratio. Today we check it out in our lab.
Why you can trust Tom's Hardware
OSD Setup And Calibration
Philips is the latest addition to our list of monitors with OSD controls we love. The BDM4065UC’s joystick is a pleasure to use and once you get a feel for it, you’ll be zipping through the menus at warp speed. It’s so much easier to use than traditional buttons.
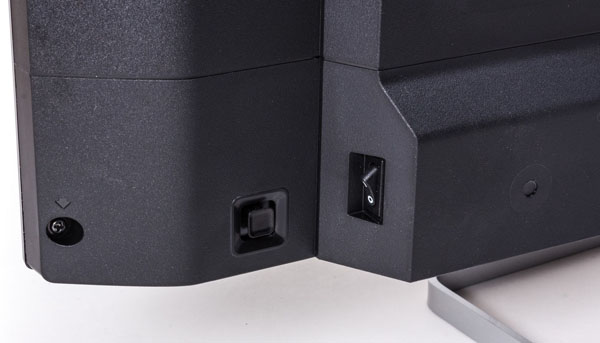
Pressing the stick for three seconds or more toggles the power. A right-click brings up the OSD. Down accesses a user-preference menu which can be Audio Source, Volume or Input. Clicking up opens the PIP menu and left takes you to the SmartImage modes. We’ll expand on all functions during our tour.
OSD Tour
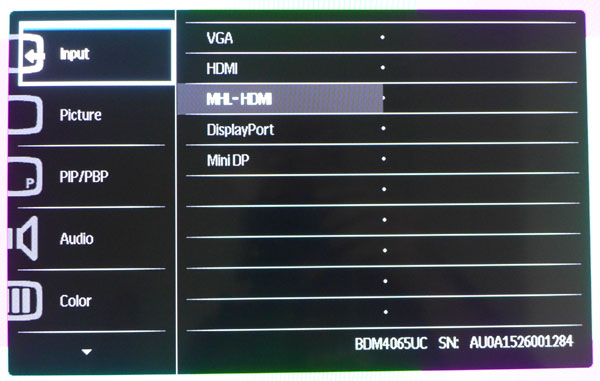
The first menu is an input selector. You can also get quick access to this screen by programming the User Key in the OSD Settings menu (below). Inputs do not auto-select so you’ll have to cycle them manually if you have more than one source.
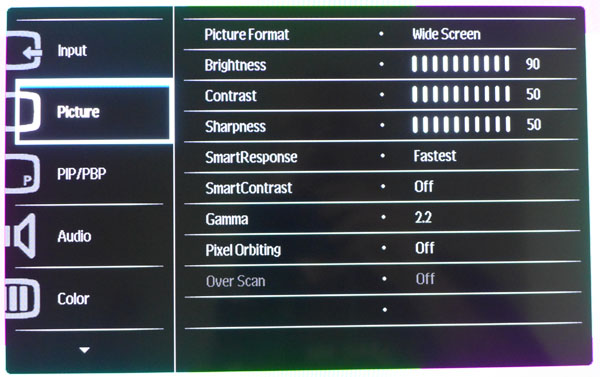
The Picture menu contains most of the image adjustments. Brightness controls the backlight over a range of 24 to 248cd/m2. SmartResponse is the overdrive setting and can be Off, Fast, Faster or Fastest. While Fastest provides the quickest panel response, it does introduce visible artifacts. The best balance between blur reduction and ghosting is the Fast option.
SmartContrast is a dynamic contrast option and can be either on or off. The monitor has plenty of dynamic range without help so we suggest leaving it off.
Gamma presets range from 1.8 to 2.6 in .2 increments. 2.2 is the default and best setting.
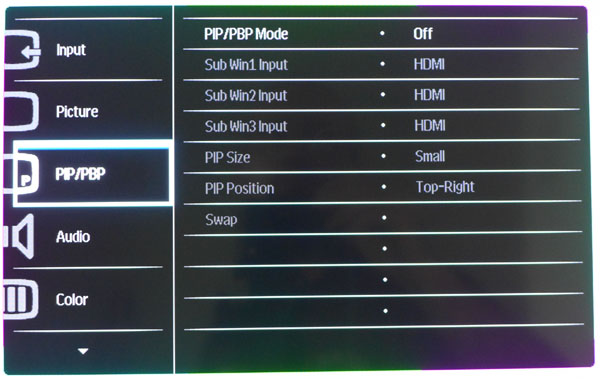
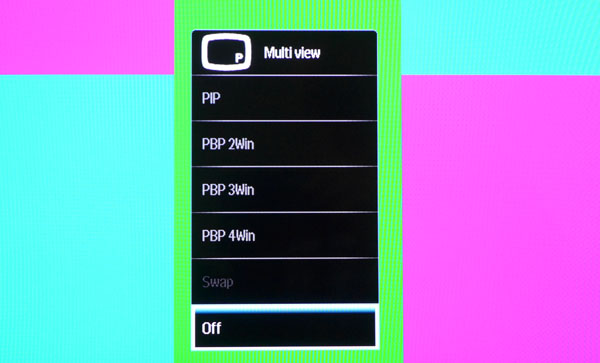
The PIP/PBP menu has extensive options for viewing up to four sources simultaneously. With so much screen area and resolution, the BDM4065UC makes a perfect monitor for multiple cameras or anything else you care to connect. Once configured, you can call up a quick menu to change the mode.
Get Tom's Hardware's best news and in-depth reviews, straight to your inbox.
Here is the PIP/PBP quick menu which appears when you click the joystick up. It saves you a trip to the OSD when you want to change the arrangement of the source windows.
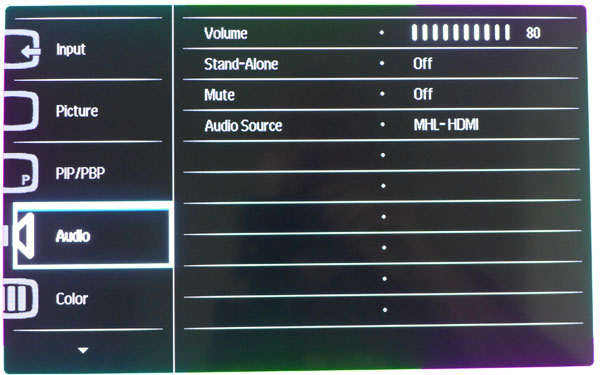
The Audio menu lets you control volume and mute. You can also select from HDMI, DisplayPort or analog sources.
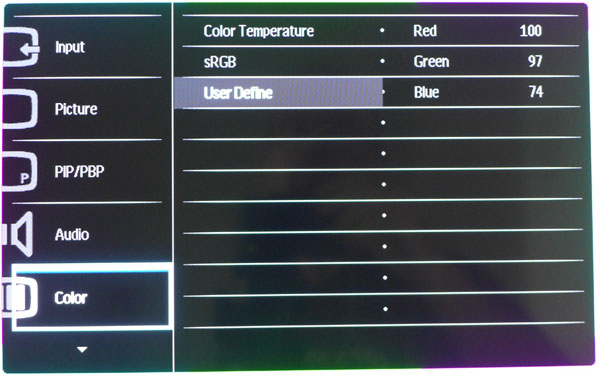
The Color menu has the rest of the calibration controls. Color Temperature, sRGB and User Define are basically picture modes. Color Temperature lets you adjust the white point in degrees Kelvin. sRGB locks out all adjustments including Brightness. User Define opens up the RGB sliders for a traditional grayscale adjustment.
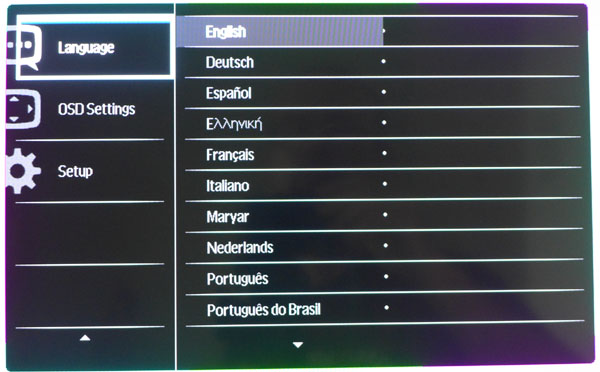
The OSD can be viewed in 22 languages.
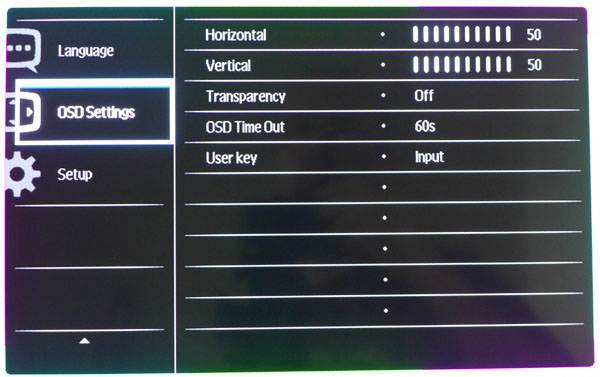
The OSD appears at the center of the screen by default. To make calibration easier, you can move it to any corner you wish. You can also adjust the transparency and the timeout can be up to 60 seconds. User Key refers to a down-click of the joystick. You can set that function to Input, Audio Source or Volume.
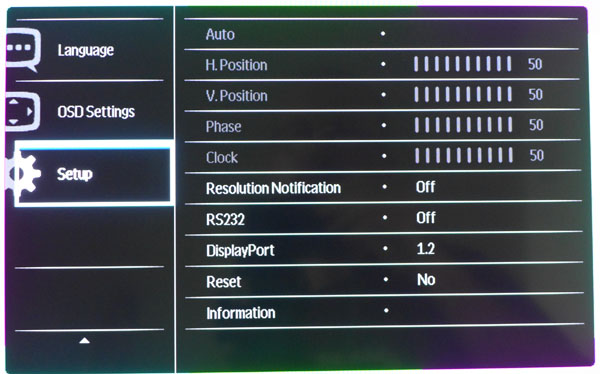
The grayed-out sliders in the Setup menu are for analog image adjustments. You can toggle off the resolution notification and RS-232 control port here as well.
DisplayPort comes factory-set to version 1.1. Change it to 1.2 if you want Ultra HD at 60Hz.
Reset returns all OSD settings to their as-shipped defaults and Information displays the input signal resolution and refresh rate.
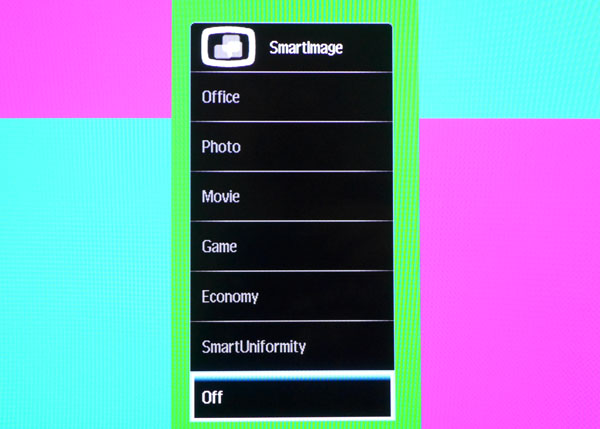
Earlier we mentioned SmartImage. It’s a series of presets for different viewing scenarios. We discovered an anomaly in the one marked SmartUniformity. The user manual says it improves screen uniformity. Like other displays with this feature, turning it on reduces contrast. Our sample didn’t need help there. But we also saw something strange.
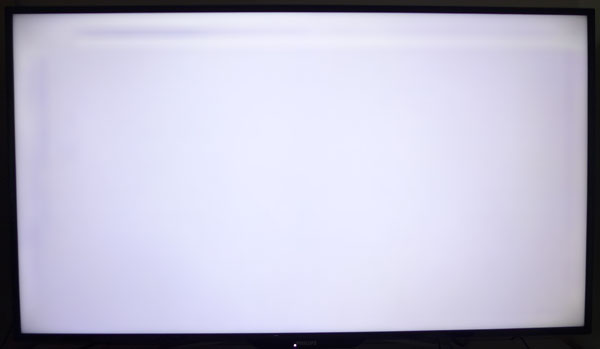
The BDM4065UC has an LED backlight but the pattern at the top and sides almost make you think there’s a CCFL tube behind the screen. We don’t know what this artifact is but it only appears when you turn SmartUniformity on. Fortunately there’s no need to use this feature.
Calibration
We encountered a bit of a conundrum when calibrating the BDM4065UC. In the Color Temperature and User modes, grayscale tracking is OK (excellent after adjustment) but the color gamut shows oversaturation in blue and magenta; and an under-saturated red primary. Things look much better in the sRGB mode but then you can’t adjust the grayscale which has visible blue errors. We finally decided to live with the pumped-up blue of User mode in favor of better grayscale tracking. Gamma in every case is very accurate. We wish the monitor had separate presets for color temp and gamut. Please try our settings below to optimize your BD4065UC.
| Philips BDM4065UC Calibration Settings | |
|---|---|
| Brightness 200cd/m2 | 90 |
| Brightness 120cd/m2 | 52 |
| Brightness 100cd/m2 | 41 |
| Brightness 80cd/m2 | 29 |
| Brightness 50cd/m2 | 13 |
| Contrast | 50 |
| Sharpness | 50 |
| SmartResponse | Fastest |
| SmartContrast | Off |
| Gamma | 2.2 |
| Color User Define | Red 100, Green 97, Blue 74 |
.
Current page: OSD Setup And Calibration
Prev Page Packaging, Physical Layout And Accessories Next Page Brightness And Contrast
Christian Eberle is a Contributing Editor for Tom's Hardware US. He's a veteran reviewer of A/V equipment, specializing in monitors. Christian began his obsession with tech when he built his first PC in 1991, a 286 running DOS 3.0 at a blazing 12MHz. In 2006, he undertook training from the Imaging Science Foundation in video calibration and testing and thus started a passion for precise imaging that persists to this day. He is also a professional musician with a degree from the New England Conservatory as a classical bassoonist which he used to good effect as a performer with the West Point Army Band from 1987 to 2013. He enjoys watching movies and listening to high-end audio in his custom-built home theater and can be seen riding trails near his home on a race-ready ICE VTX recumbent trike. Christian enjoys the endless summer in Florida where he lives with his wife and Chihuahua and plays with orchestras around the state.
-
Oleander Bought one back in january. Best decision ever!Reply
A lot of bad stuff were said about it in forums (for all the wrong reasons) so it's nice to see that for what I use it (non first-person gaming and all-round) this review vindicates it.
Only remaining issue is the flicker of the backlight if brightness is not at 100%, but since the brightness is so low, it's not a problem to me. -
cats_Paw For professional use, absolutely.Reply
For gaming, probably not (Black levels are amazing for LED panel, and also contrast is amazing, but color delta and input lag... no way).
Plasmas are still king for gaming in my books, too abd they are almost all gone by now. -
Maryland_USA A completely unique product? I don't think so. Several other 40-inch monitors are available that will drive a VA panel at 3840x2160@60Hz through both DisplayPort 1.4 and HDMI 2.0. They're sold by AMH, Crossover, Iiyama, MIcroboard, and Seiki. Step up to 43 inches, and you must add Wasabi Mango. All but the Seiki and Iiyama cost less than the Philips.Reply -
Larry Litmanen I currently game on a 32 inch TV, honestly you can not go back to a monitor with a better resolution that is 24 or 27 inches. Once you go big it is just amazing.Reply
It's not just the width, you also need that vertical screen real estate.
-
hotdogee "Nearly every LCD panel on the planet is made by either Samsung, LG or AU Optronics. A few are also made by Innolux (formerly Chi Mei). But the Philips BDM4065UC is made by TP Vision, which is the actual owner of the Philips brand."Reply
The panel is made by Innolux for TP Vision. -
Eggz Great to see this. Is tom's planning on reviewing the new LG 4K OLED displays? They would seem to score very well in just about every category that matters for professional use. I'd love to see it, and the reviewers would also probably enjoy playing with one. Consider it, please.Reply -
Xorak I used a 32" 1080p TV for a long time, so I completely get the appeal of a big screen with great contrast and vibrant color, even if it's not the fastest or most accurate. Now I'm used to my MG279Q and would not go back to a fixed refresh screen. I hoped that 4096x2160 would start catching on too, but it looks like it won't. In the next 2 years a single GPU should be able to make use of a true 4k panel with variable refresh up to 75 or 90hz and it would be a thing of beauty at 30+ inches.Reply -
enewmen Can someone explain why not to use Ultra HD LEDs TV for computer work? (another dumb post) For small font text (using 1080p TVs) , the TVs did'n't look as sharp as PC monitors. But I don't see that as a problem for 2160p TVs. Yes, the TV must have HDMI 2.0 and the graphics card must also support that. But is that the only reason? Anyway, the Philips looks like an UHD TV made for PC work at a price similar to TVs.Reply
I also personally don't like Display Port cables because only the BEST cables won't give problems with recovering from sleep mode. Gave up on Display Port and currently using DVI Dual Link at 1440p. -
mavikt ReplyGreat to see this. Is tom's planning on reviewing the new LG 4K OLED displays? They would seem to score very well in just about every category that matters for professional use. I'd love to see it, and the reviewers would also probably enjoy playing with one. Consider it, please.
I too would like to see a proper technical review of said (TV) tech.
In a home theater magazine I subscribe to they said that the latency was around 50ms (55EG960V), didn't say how it was measured though. Otherwise they said it was The Perfect TV.
So it remains to be seen if LCD will "remain the dominant tech for the foreseeable future"
