How to Index Files in Windows 10 to Speed Up Searches
Learn how to index specific Windows 10 files and folders, change the default indexing database location or even disable indexing in Windows 10.
Just like previous versions of Windows, Windows 10 has a search indexing service that creates an index of all files on your Windows 10 computer similar to a database index that greatly improves lookup speed. If the files you're looking for are indexed, rather than having to sort through the hundreds of thousands of files manually, that entry can be quickly looked up in the index.
By default, not all files on your computer are indexed. This is done for performance reasons as indexing files does impact performance. However, if you have a few folders that you routinely access and search for files in, you can greatly reduce the time it takes to find these files in Windows Search by indexing them.
MORE: Windows 10 Tutorials
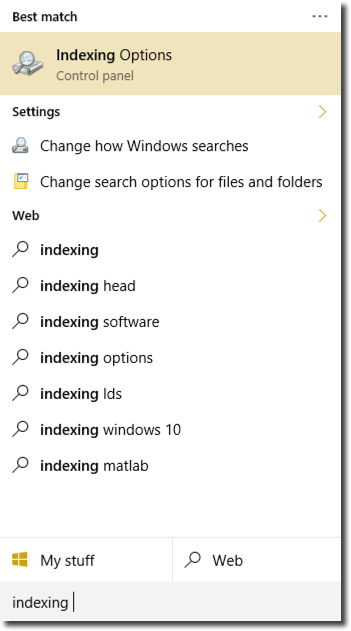
To index specific files, type "indexing" in the Windows 10 start menu and the first match should be the Indexing Options control panel applet as shown below.
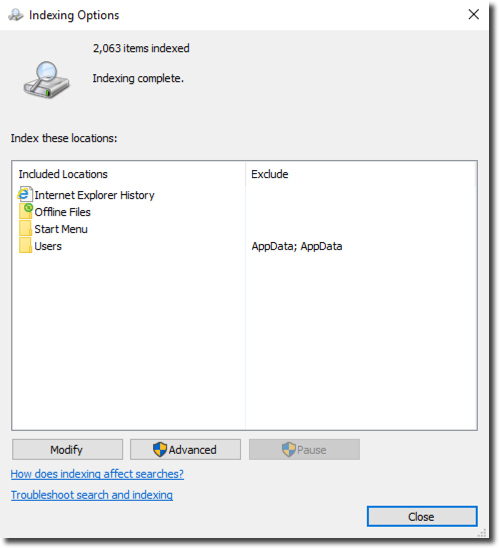
By default, you'll see that not too many folders are added. On my computer, only a few folders (and their subfolders) are indexed.
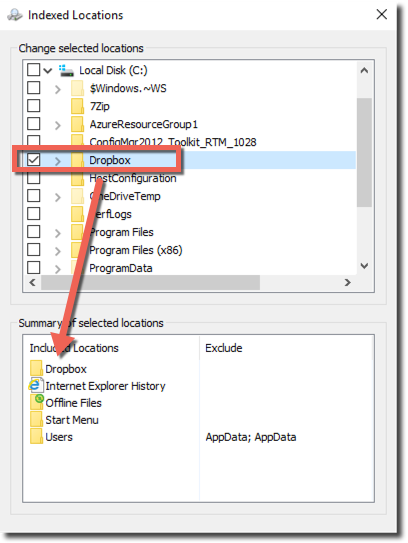
To add a folder to the index, click on the Modify button then select the folder you'd like to be indexed. In my example below, I'd like to index my Dropbox folder. To do this, I simply select the checkbox next to the Dropbox folder and it immediately appears in the Summary.
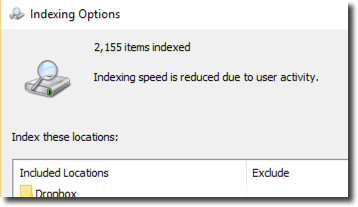
I then click OK and Windows 10 will immediately start indexing the new folder. You will notice the "items indexed" increment and you will also be notified that Indexing speed is reduced to user activity. Since Windows 10 knows that indexing does affect computer performance, it consumes more resources when the computer is idle vs. when you are using it.
Get Tom's Hardware's best news and in-depth reviews, straight to your inbox.
You will also see the Pause button at the bottom of the windows is now enabled, which indicates that indexing is running. This allows you to temporarily pause indexing.
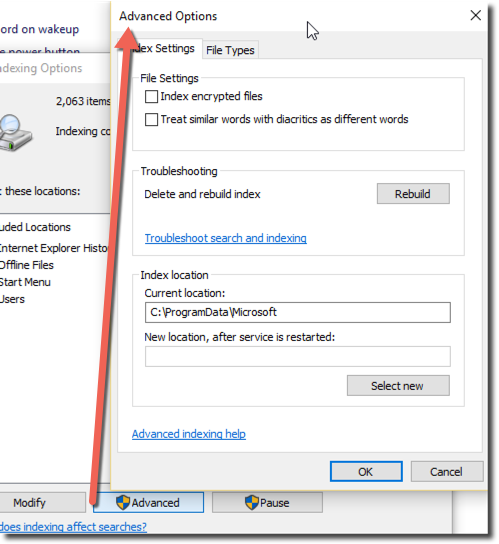
If you need further options to tweak indexing, you can also click on the Advanced button, which will bring up the Advanced Options window. In this window, you have numerous options. Here you can tell Windows Search to index encrypted files and even do some troubleshooting and rebuild the entire index all together. This is necessary sometimes when you are adding and removing lots of files at once or notice that Windows Search is displaying inaccurate results.
By default, your indexing database is located in C:ProgramDataMicrosoftSearch but you can easily change it here as well.
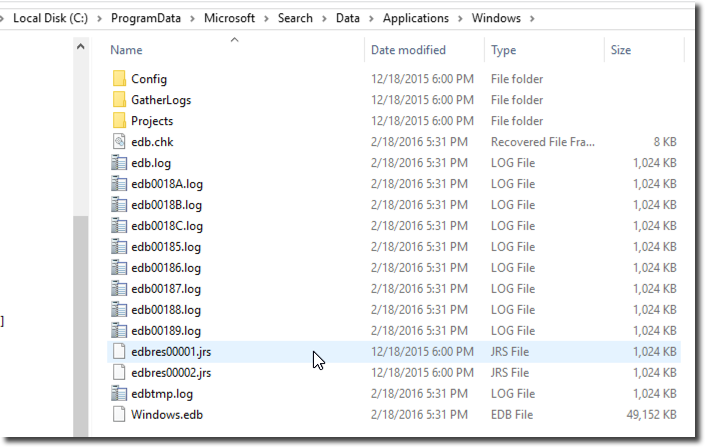
You can see the EDB database on my Windows 10 computer is located at C:ProgramDataMicrosoftSearchDataApplicationsWindows. As of now, it's indexed around 2,500 files and is 64MB in size.
If you need to ensure your index stays intact at all times, it might not be a bad idea to locate the index on a separate drive in case your main drive gets corrupted somehow.
How To Disable Indexing In Windows 10
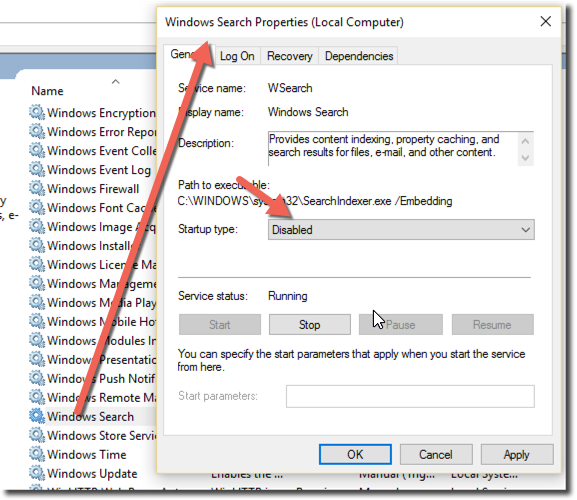
Finally, if you're finding that the indexing service is taking up too many resources or is more trouble than it's worth, you can disable it completely. To do this, you'll need to open up the Windows services applet, double-click on the Windows Search service, click Stop and finally change the Startup type to Disabled. This will prevent the indexing service from running in the future.
The Windows 10 Search is a much faster way to access those hard-to-find files. By querying a small database rather than sifting through thousands of files, Windows Search can greatly reduce the time it takes to find your files. But don't expect it to work perfectly out of the box. Be sure to add your frequently accessed folders yourself and remember to rebuild the index as your first troubleshooting step if you notice it not performing well.

