How to Map a Network Drive in Windows 10
Give a drive letter to a network resource.
Mapping a drive makes it easy to access information physically located on a different computer. A mapped drive is a simple shortcut to a remote hard drive. Assigning a local drive letter to the remote hard drive allows it to function with the same consistency as your local drives. It’s perfect for storing data you may not have space for on your PC, accessing files from your tablet, backing up content, or sharing access with multiple users.
Here’s how to map a network drive.
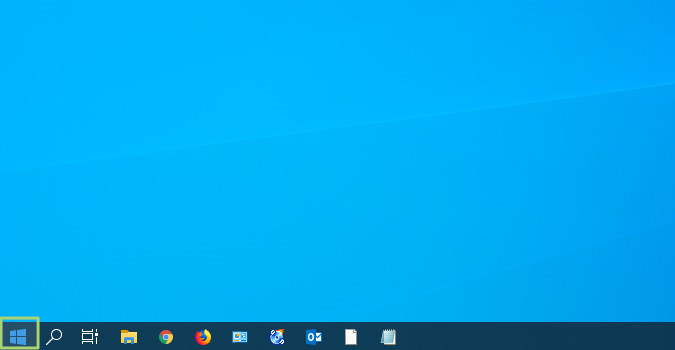
1. Click the Start Menu icon in the taskbar.
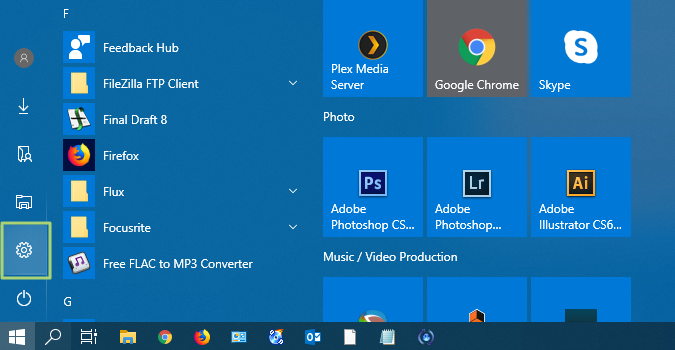
2. In the Start menu, click the Settings icon.
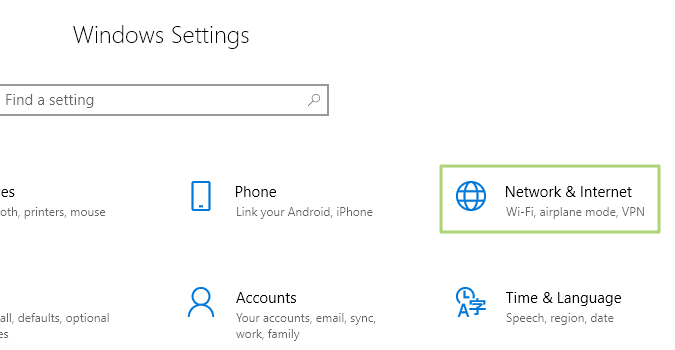
3. Click on “Network & Internet” in Windows Settings.
4. Under Change your network settings, choose Sharing options.
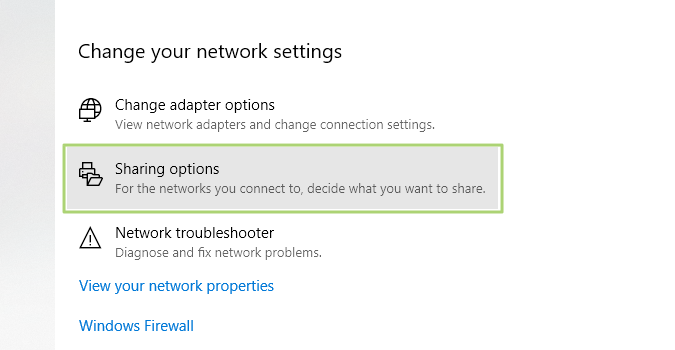
5. Select “Turn on network discovery”.
Get Tom's Hardware's best news and in-depth reviews, straight to your inbox.
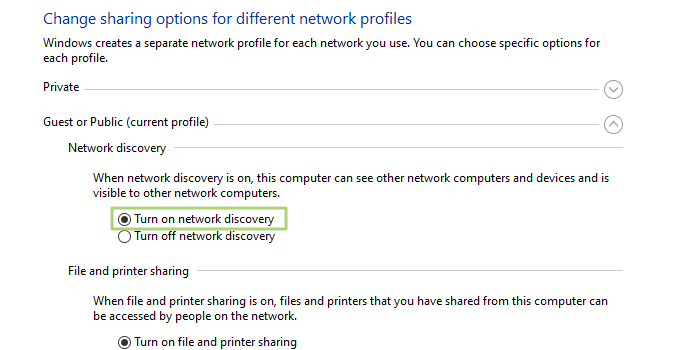
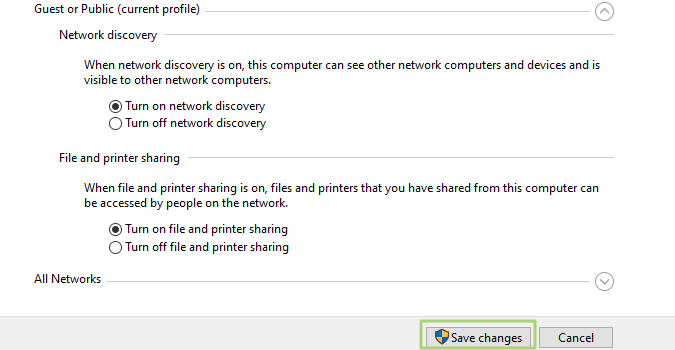
6. Click “Save changes.” If Network Discovery is already on the save changes button will be grayed out. Therefore you can ignore this step.
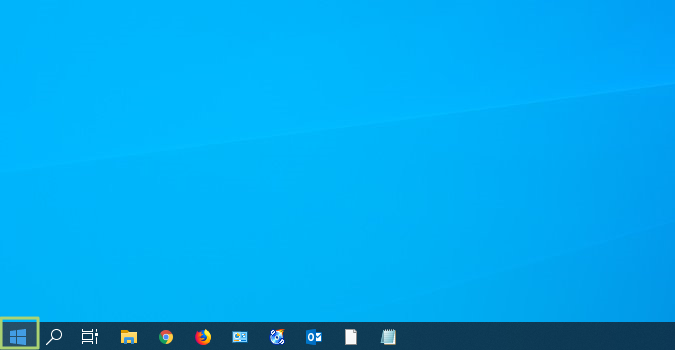
7. Click the Start Menu icon from your taskbar.
8. Click the File Explorer icon from the Start menu.
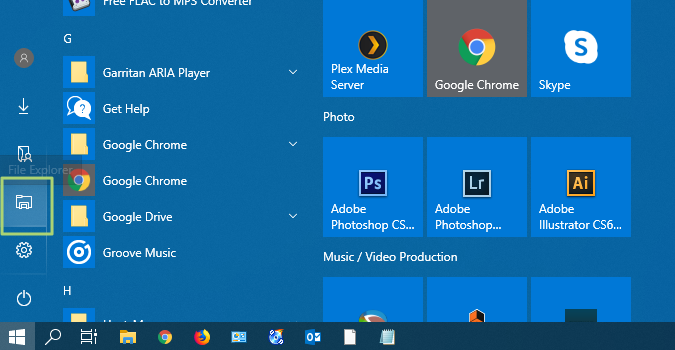
9. Select “This PC” from the left sidebar.
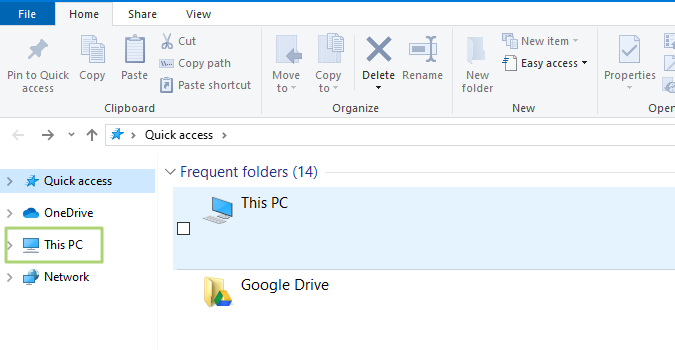
10. In the sub-header, click the Map Network Drive icon.
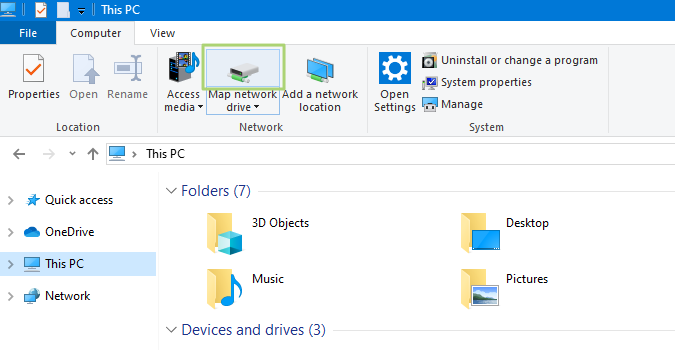
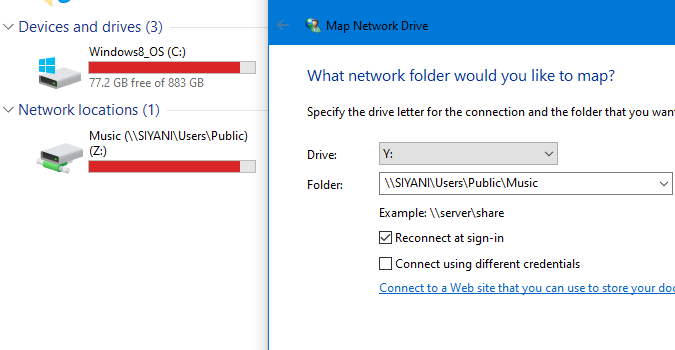
11. In the Map Network Drive, Specify the drive letter for the connection.
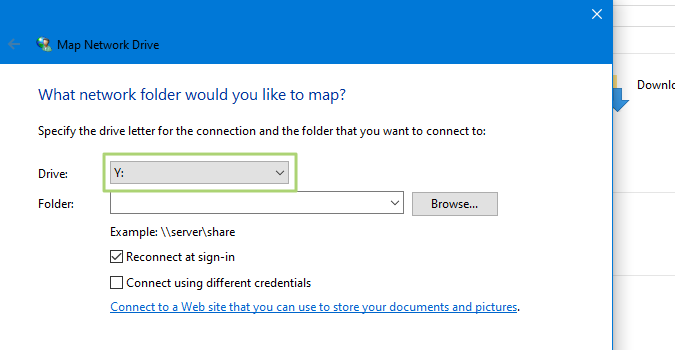
12. Click the Browse button to select the folder you want to connect to.
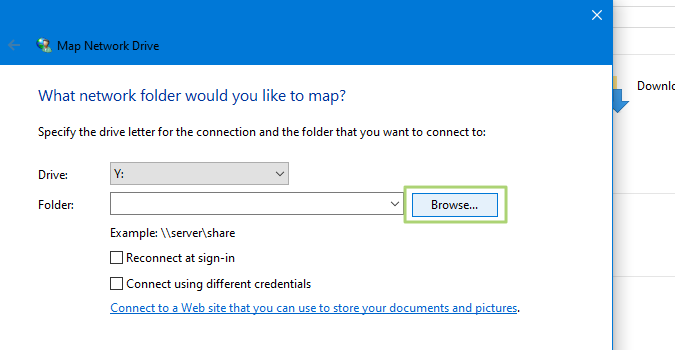
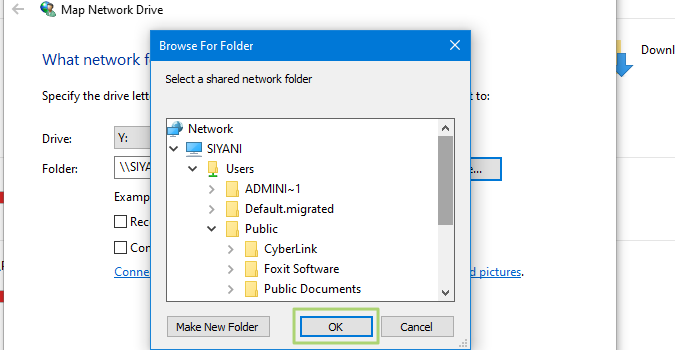
13. Select the folder you want a connection to and click OK. Fill in the username and password to map the shared folder if prompted.
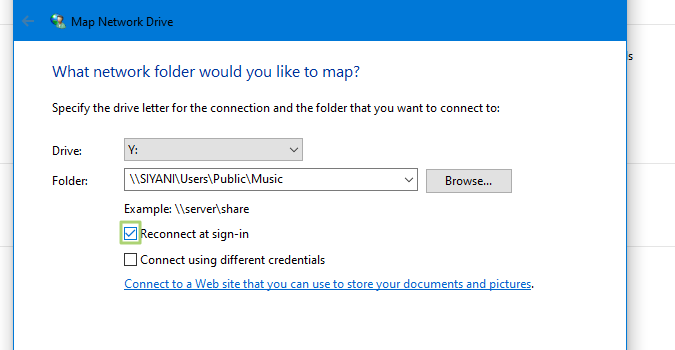
14. Ensure “Reconnect at Sign-in” is checked.
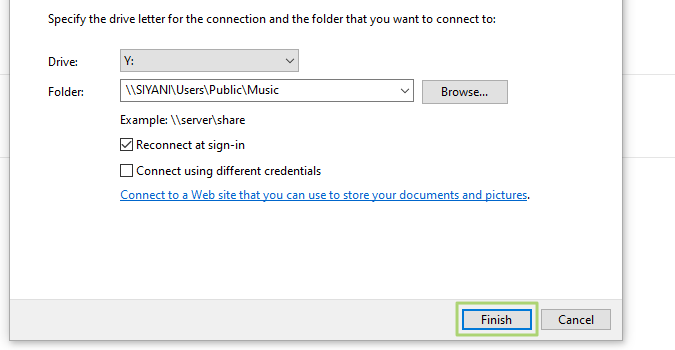
15. Click Finish.
-
kek986 Reply
1. Open File Explorer and select This PC.admin said:Give a drive letter to a network resource.
How to Map a Network Drive in Windows 10 : Read more
2. Click the Map network drive drop-down in the ribbon menu at the top, then select "Map network drive." (This is under the Computer tab, which should open automatically when you go to This PC, as above.)
3. Select the drive letter you want to use for the network folder, then hit Browse.
4. If you receive an error message, then you'll need to turn on network discovery. To do so, open the Control Panel, select Network and Sharing Center and choose Change advanced sharing settings from the top-left corner. From there, select Turn on network discovery. Save changes.
5. Navigate to the folder you want to map and hit OK after selecting it.
6. Confirm your selection and click Finish. You can choose to reconnect to the folder every time you sign in so it's always available. You can even use a different user account to connect to the folder if needed.
Hope this helps. -
kek986 Reply
True. Even if its the most simple thing I've heard of that probably should go on Tom's guide rather than here.NightHawkRMX said:Not an overall hard topic, but a guide is nice.