Homegrown Mod Manifesto: How To Build A UV PC
Mounting The Switch In The Drive Bezel
Nearly every time someone sees the switches that are mounted in the drive bezels on our systems at LAN parties or in systems that are part of articles at THG, we receive questions as to the best way to do this. Why are we mounting the switch in the drive bezels rather than someplace else on the case? The simple answer to this is two-fold: normally, you have more than one 5-¼ drive bezel left over after you mount both the CD-ROM and CDRW/DVD-RW drives, and this allows the opportunity to make a mistake. Next, by using the drive bezel rather than drilling a hole in the case, should you decide to change out the lighting or sell the case, you are not stuck with a switch mounted someplace outside the system. While several people have suggested that they prefer to hard wire their lighting inside their system with no switch, we prefer to have the ability to turn it on and off, as this provides the additional flexibility to turn the light off when you don't want to use it. While this might not be a big deal to some, we consider it a necessity. With some of the new-lighted switches that are becoming available, it is possible to make these even dressier.
As part of this article, we enlisted the help of Jon Roth of Central Ohio Computer (www.centralohiocomputer.com ) to assist me in getting the hole for the switch drilled in the drive bezel. Using a drill press and the method that we show you here, this little step-by-step should shed light on how easy it can be to get professional looking results when drilling holes in your case for lighting switches or the like.
One of the challenges that we faced in this situation was that the bezel was already painted black and we didn't want to scratch it, and this was compounded by the problem that the case is made of aluminum. This is why we chose to use a drill press to get the best hole with the least amount of work, while still achieving excellent results. Let's take a quick look at drilling the hole for the switch in the 5-¼-drive bezel.

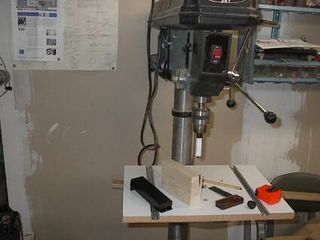
First, we gather all of the materials we will need to get the job done.
Stay on the Cutting Edge
Join the experts who read Tom's Hardware for the inside track on enthusiast PC tech news — and have for over 25 years. We'll send breaking news and in-depth reviews of CPUs, GPUs, AI, maker hardware and more straight to your inbox.
Current page: Mounting The Switch In The Drive Bezel
Prev Page Planning & Preparation Make The Job Go Faster, Continued Next Page Mounting The Switch In The Drive Bezel, ContinuedMost Popular

