Hands On: X-Chair's Elemax Adds Heat, Massage and Active Cooling to Your Premium Chair
There’s a battery this time, so you don't have to be tethered for power.
Get Tom's Hardware's best news and in-depth reviews, straight to your inbox.
You are now subscribed
Your newsletter sign-up was successful
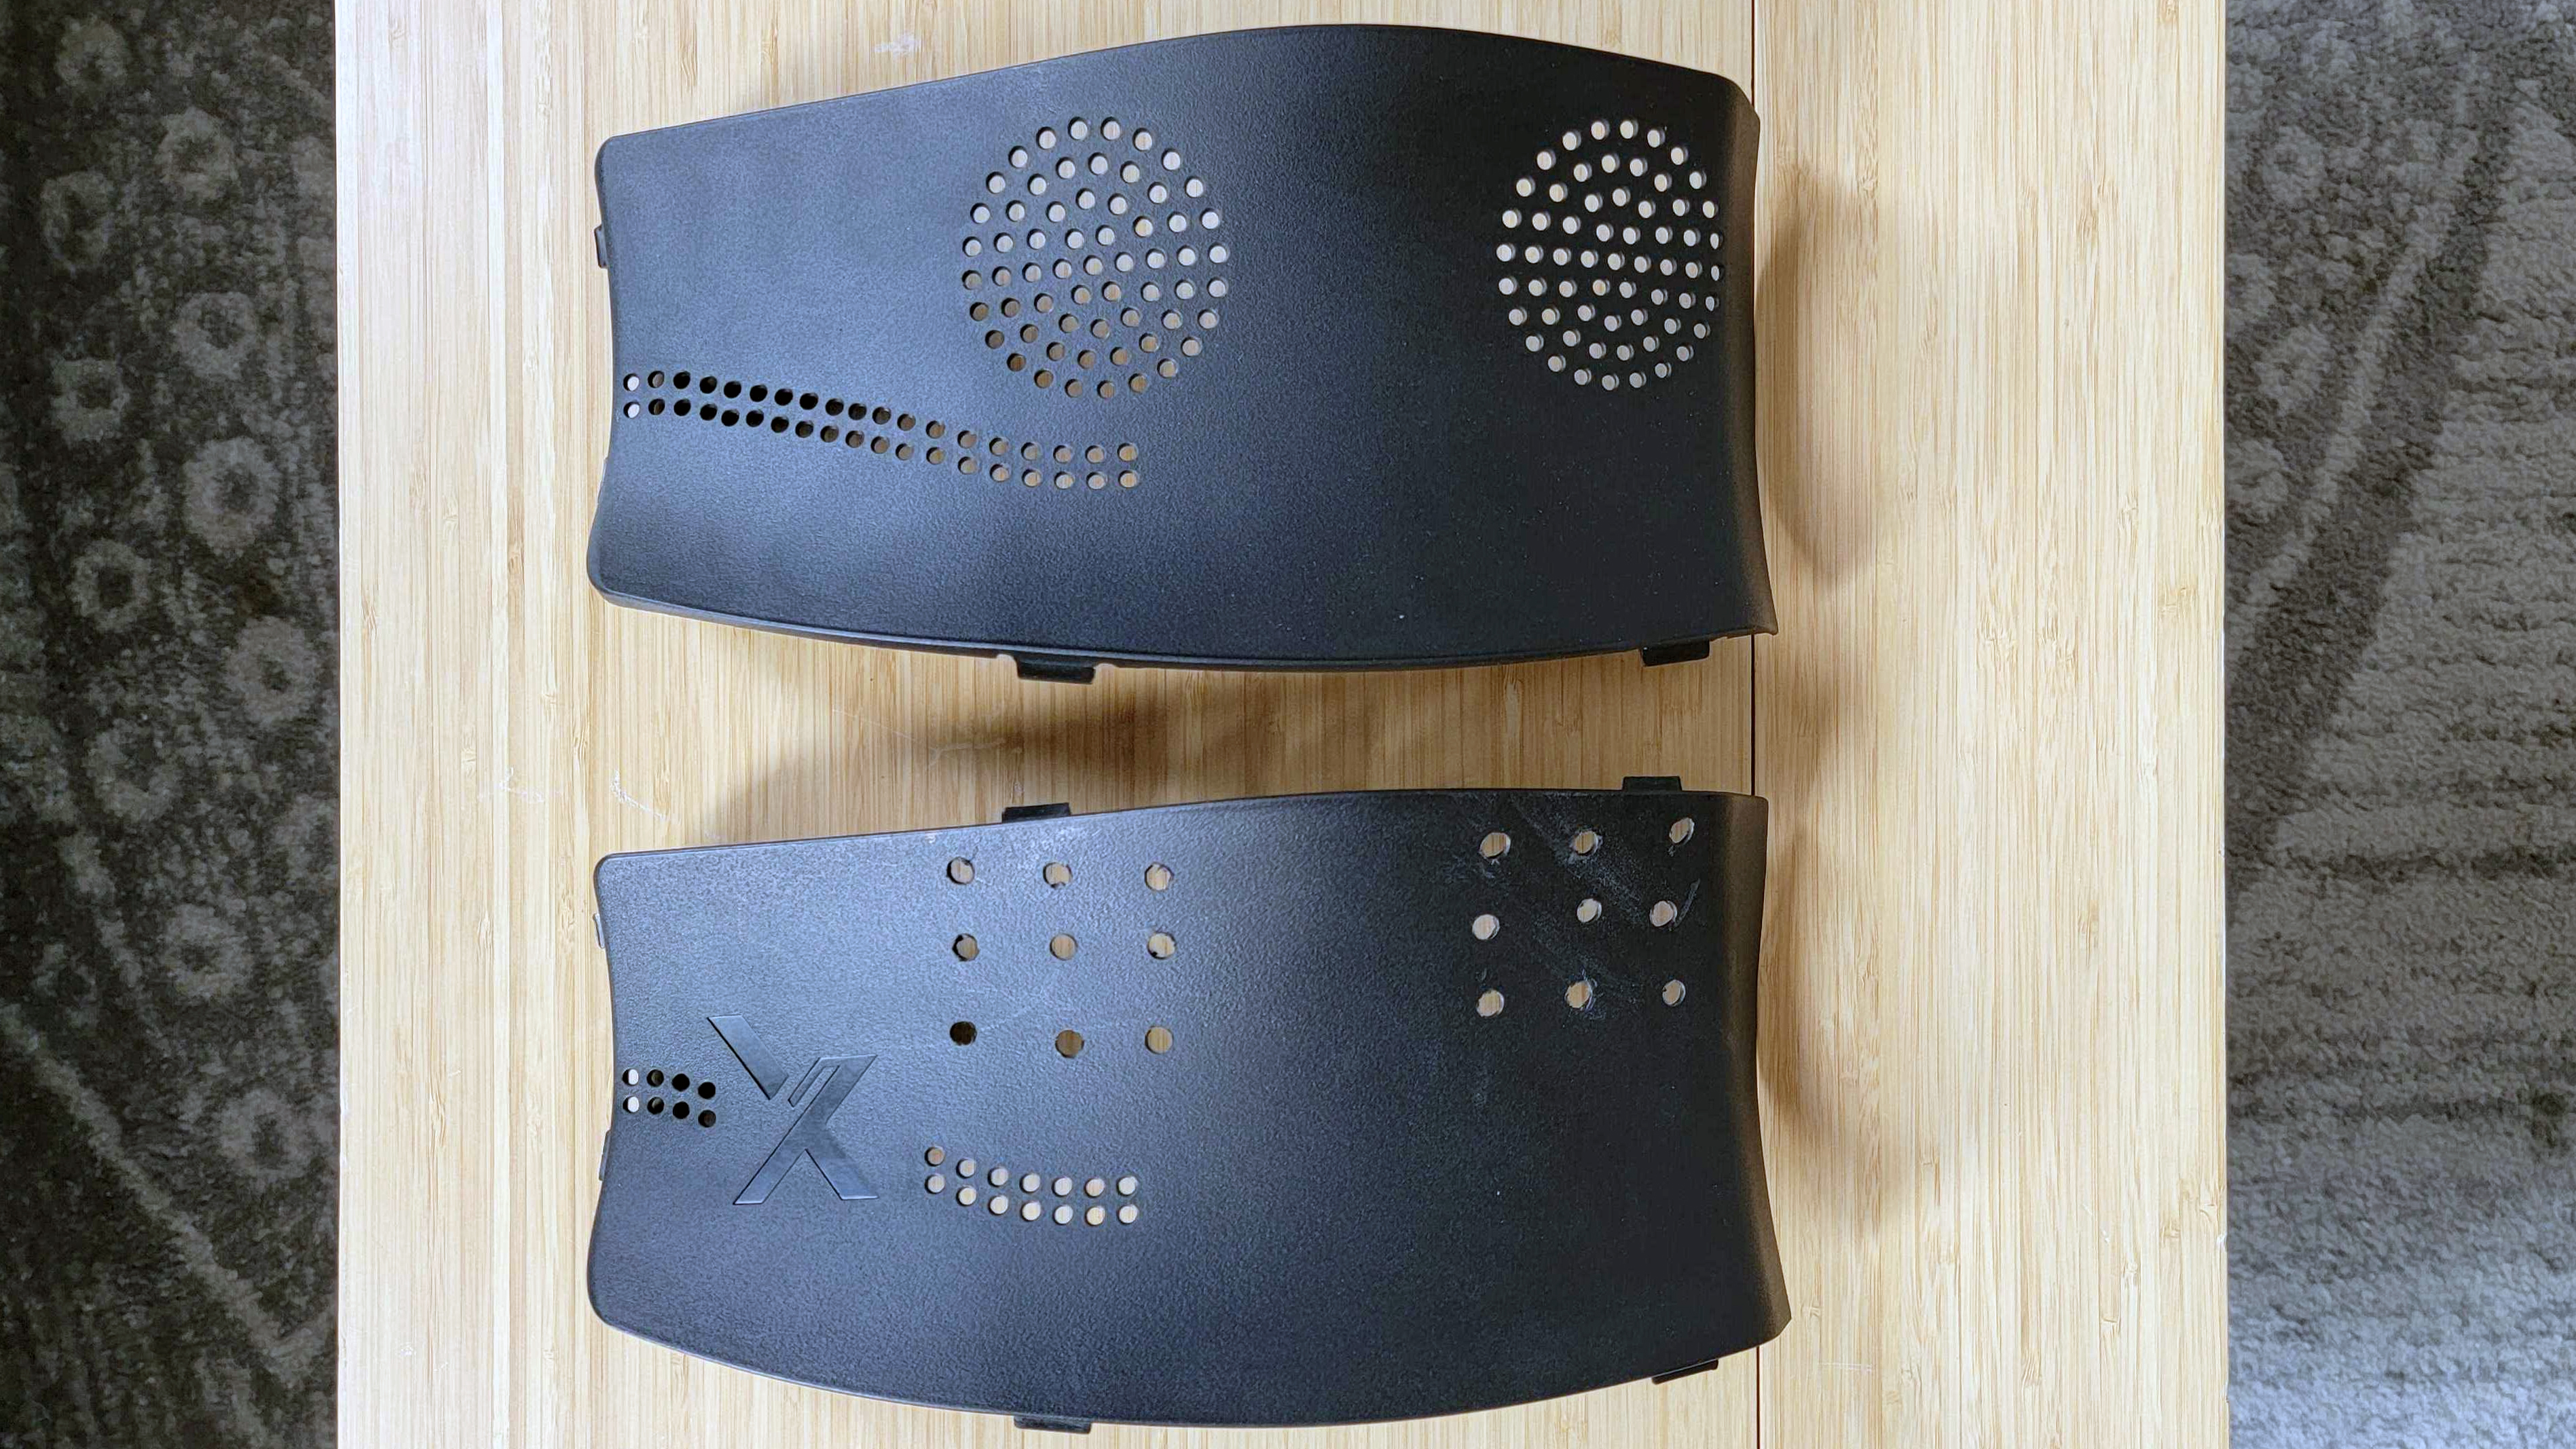
8/10/2021 Update: After the publication of this story, an X-Chair representative informed us that the company had actually sent us the wrong back cover for the Elemax kit. The company sent us another cover, with ample holes for air intake, in the same areas where I modified the original cover to improve airflow. You can see the updated cover in the image below, above the modified cover I made initially. This ventilated rear cover fixes the primary concern we had with the Elemax as tested, and is what buyers should receive with the kit or when including it in an X-Chair purchase.
The original story of our experience with the kit follows below.
Don't take this the wrong way, but I’m a pretty hot guy--in the literal sense. For as long as I can remember, I break out into a flop sweat whenever tasked with doing anything physical between the months of April and October. And I often overheat at night, to the point that I just recently decided to liquid-cool my mattress.
So when the creators of the X-Chair reached out about the Elemax, an add-on to the company's chair lineup that includes heating, massage and cooling, I was intrigued. I'd already tested and quite liked the company's X3 ATR Mgmt Chair (it currently sits on our Best Gaming Chairs list). And the idea of adding active cooling (in the form of two fans) to the chair's excellent dynamic variable lumbar support section seemed like a great idea.
Plus, considering the fact that the Elemax upgrade now includes a battery so you can use the heat, massage and/or cooling without being plugged into a wall or a USB port, the price ($129 when purchased with a chair or $159 as a standalone upgrade) also seems reasonable. But while I love the idea of a chair that cools my backside during the sweltering summer months, there's definitely room for improvement with the Elemax, especially when it comes to airflow.
Meet the X-Chair Elemax
To be clear, X-Chair already offered an option for many of its chairs that includes heating and massage. The primary difference with Elemax is the cooling that comes from a pair of small fans (about 3 inches or 75mm diagonally), which pull in air from the rear lower portion of the chair, near where your lower back is, and exhausts it through the front of the chair, against your lower back.
The Elemex is compatible with most of the X-Chair lineup. The company says its X1 Flex Mesh, X2 K-Sport and X3 ATR Mgmt Chairs, X4 Leather Exec and XG-Wing chairs will all work with the Elemax. That leaves the company's lower-cost Small Mgmnt, DVL and basic Task Chair models out of the loop.
The other change with the Elemax, which is at least as welcome, is an internal battery. That means you don't always have to have the chair connected to a power outlet or a USB port to use the heating, cooling and massage features. That said, you'll still likely need to recharge the Elemax daily -- if not more than once a day. A company rep told us you'll get up to 5 hours of use with just the massage feature. But if you combine features, like heat and massage, battery life is expected to be close to just 2 hours. This is still an improvement over no internal battery at all, but we'd like to see a larger battery for longer unplugged runtime. You can, however, still plug the USB charging cable into a larger external battery and attach it to the chair in some way to get more untethered heat, cooling and massage time.
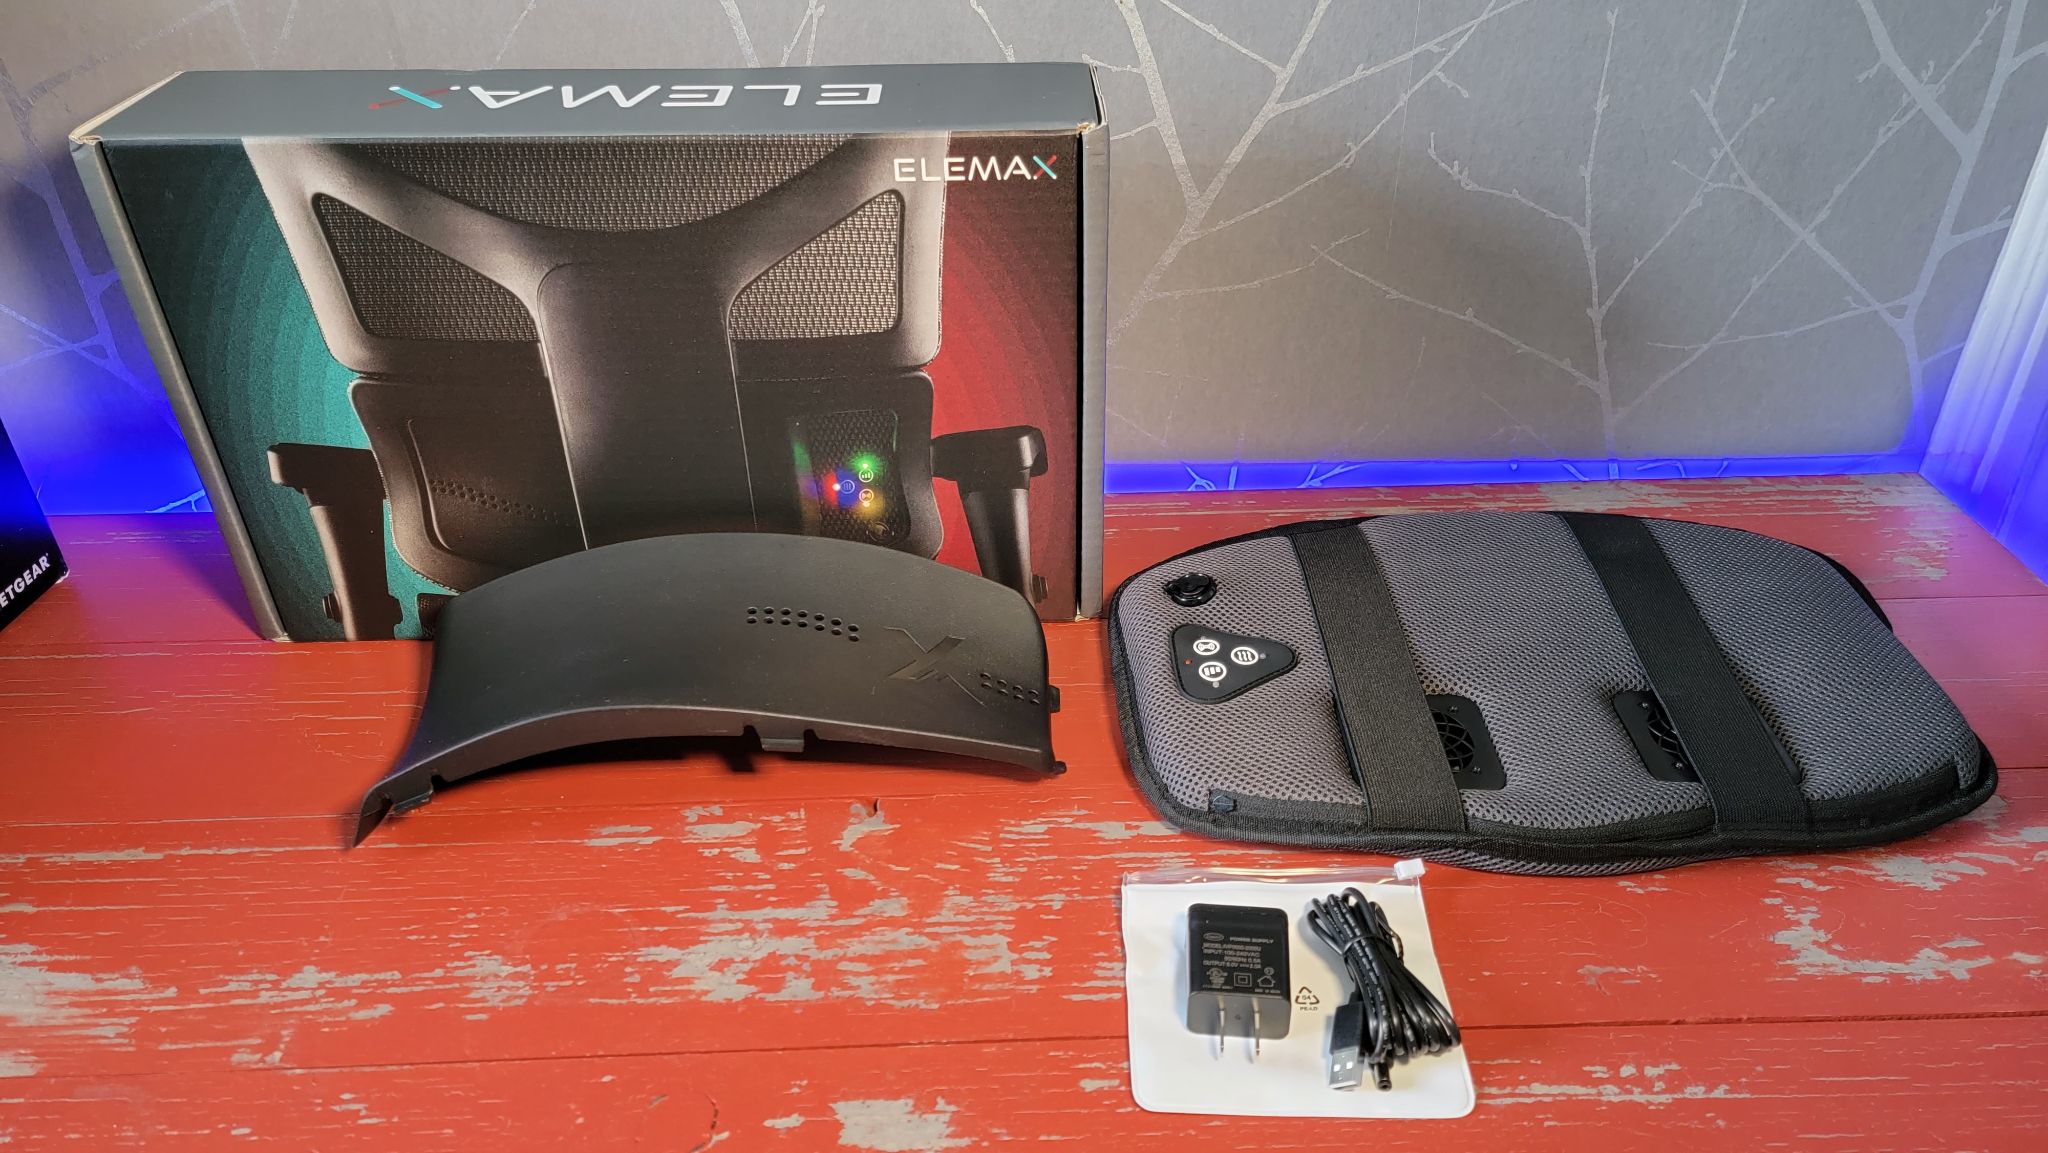
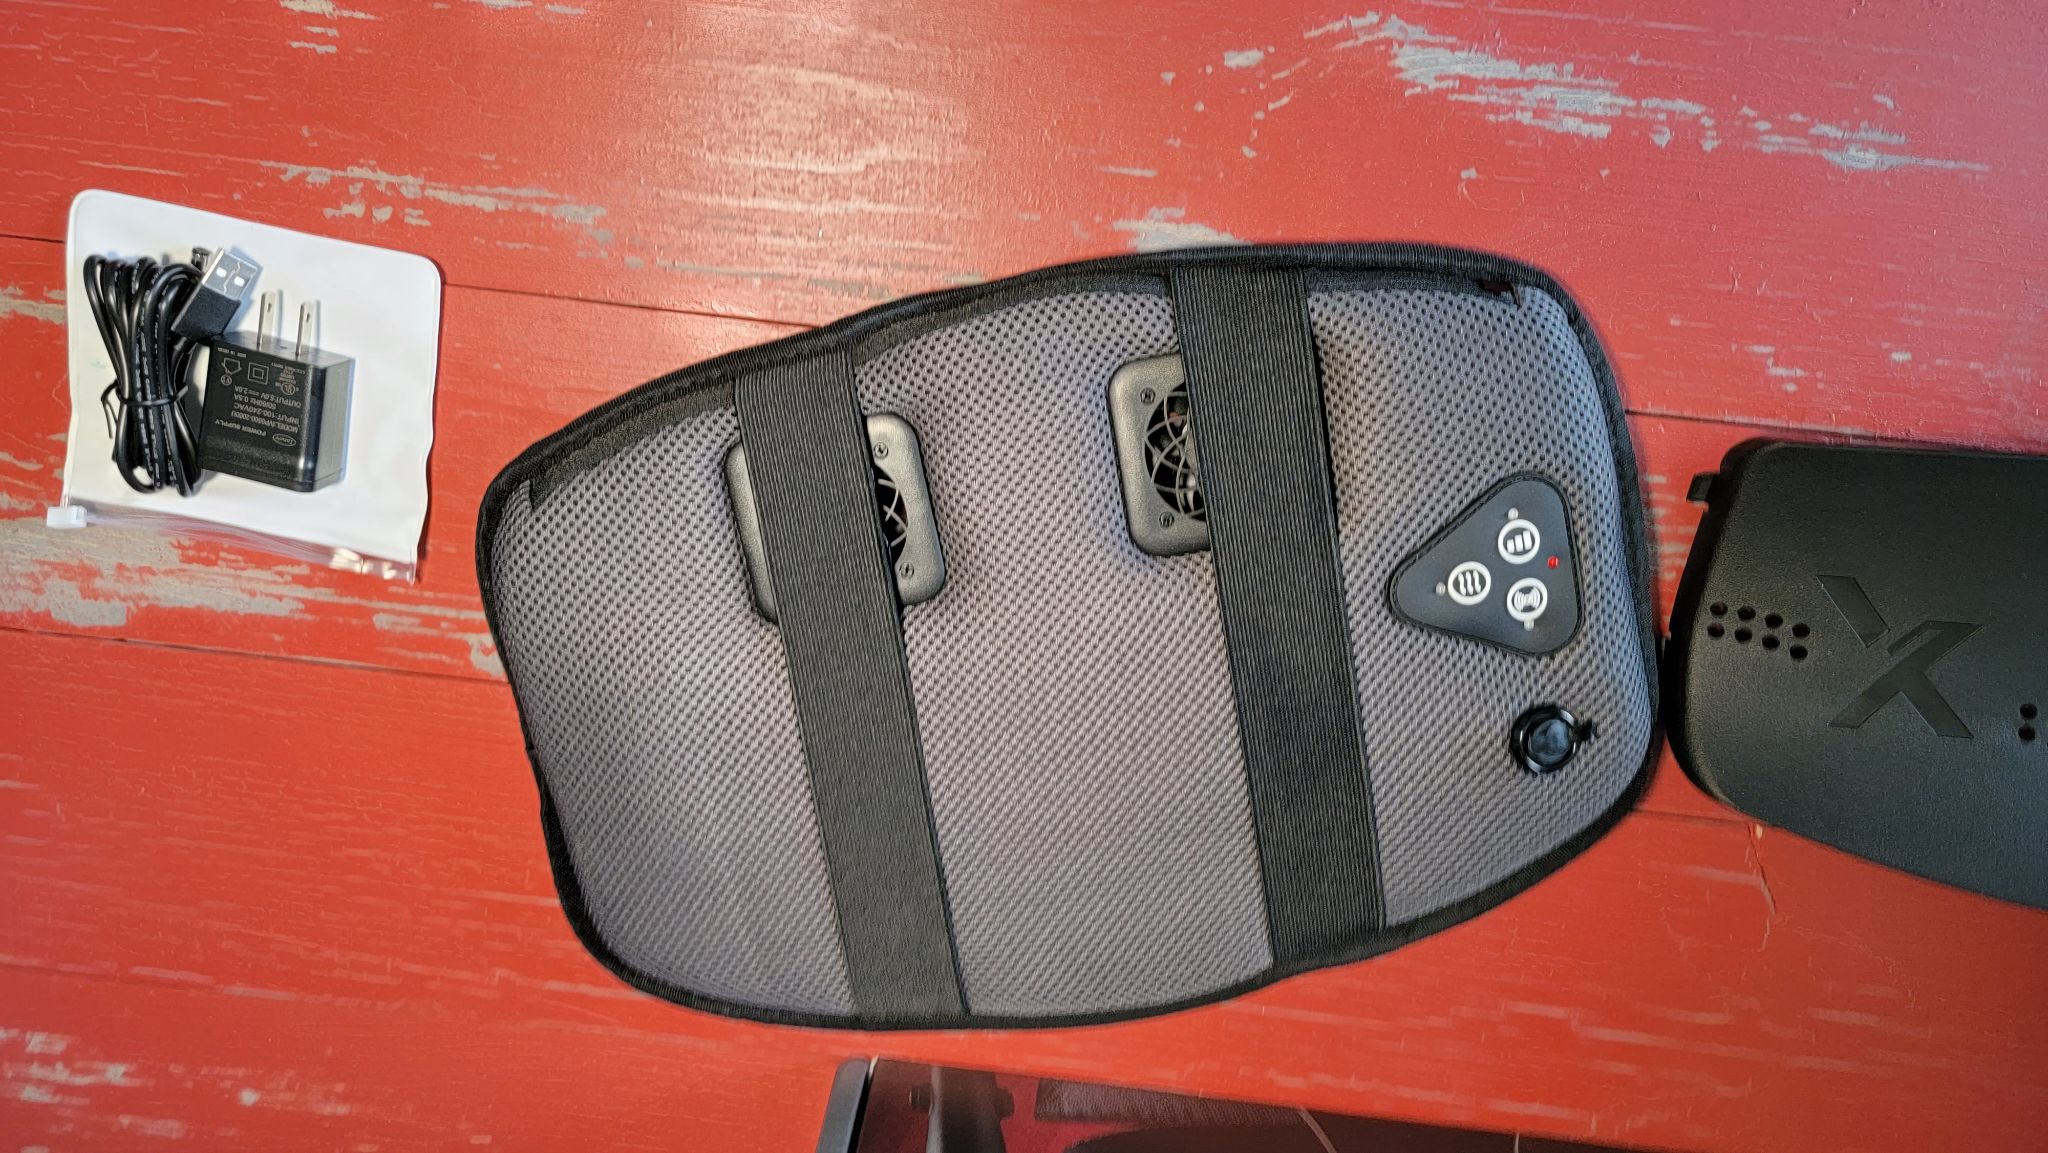
As for what's included in the box with the Elemax, there’s the main unit, which is basically a thin cushion with fans and some electronics and motors built into it, as well as some installation paperwork, a USB cable and a small USB charging brick like something you might get with a phone from a few years ago. Again, you can charge the Elemax via either a wall outlet, or a USB port on your PC or other device.
Get Tom's Hardware's best news and in-depth reviews, straight to your inbox.
Installation of the Elemax
Installing the Elemax on my X-Chair was pretty simple, though it did involve a fair bit of fiddling.
First, if your X-Chair has any other previous heat/massage element installed in it, as the one I tested did, you'll need to remove that. Next, unplug the device (if it isn't already), then remove the plastic plate from the lower rear lumbar area of the chair. This is done by pushing in on the right side of the plastic backplate to disengage the plastic clips before pulling down and then to the right and out, away from the chair. Once the right side comes off, the clips on the left edge should be easier to remove.
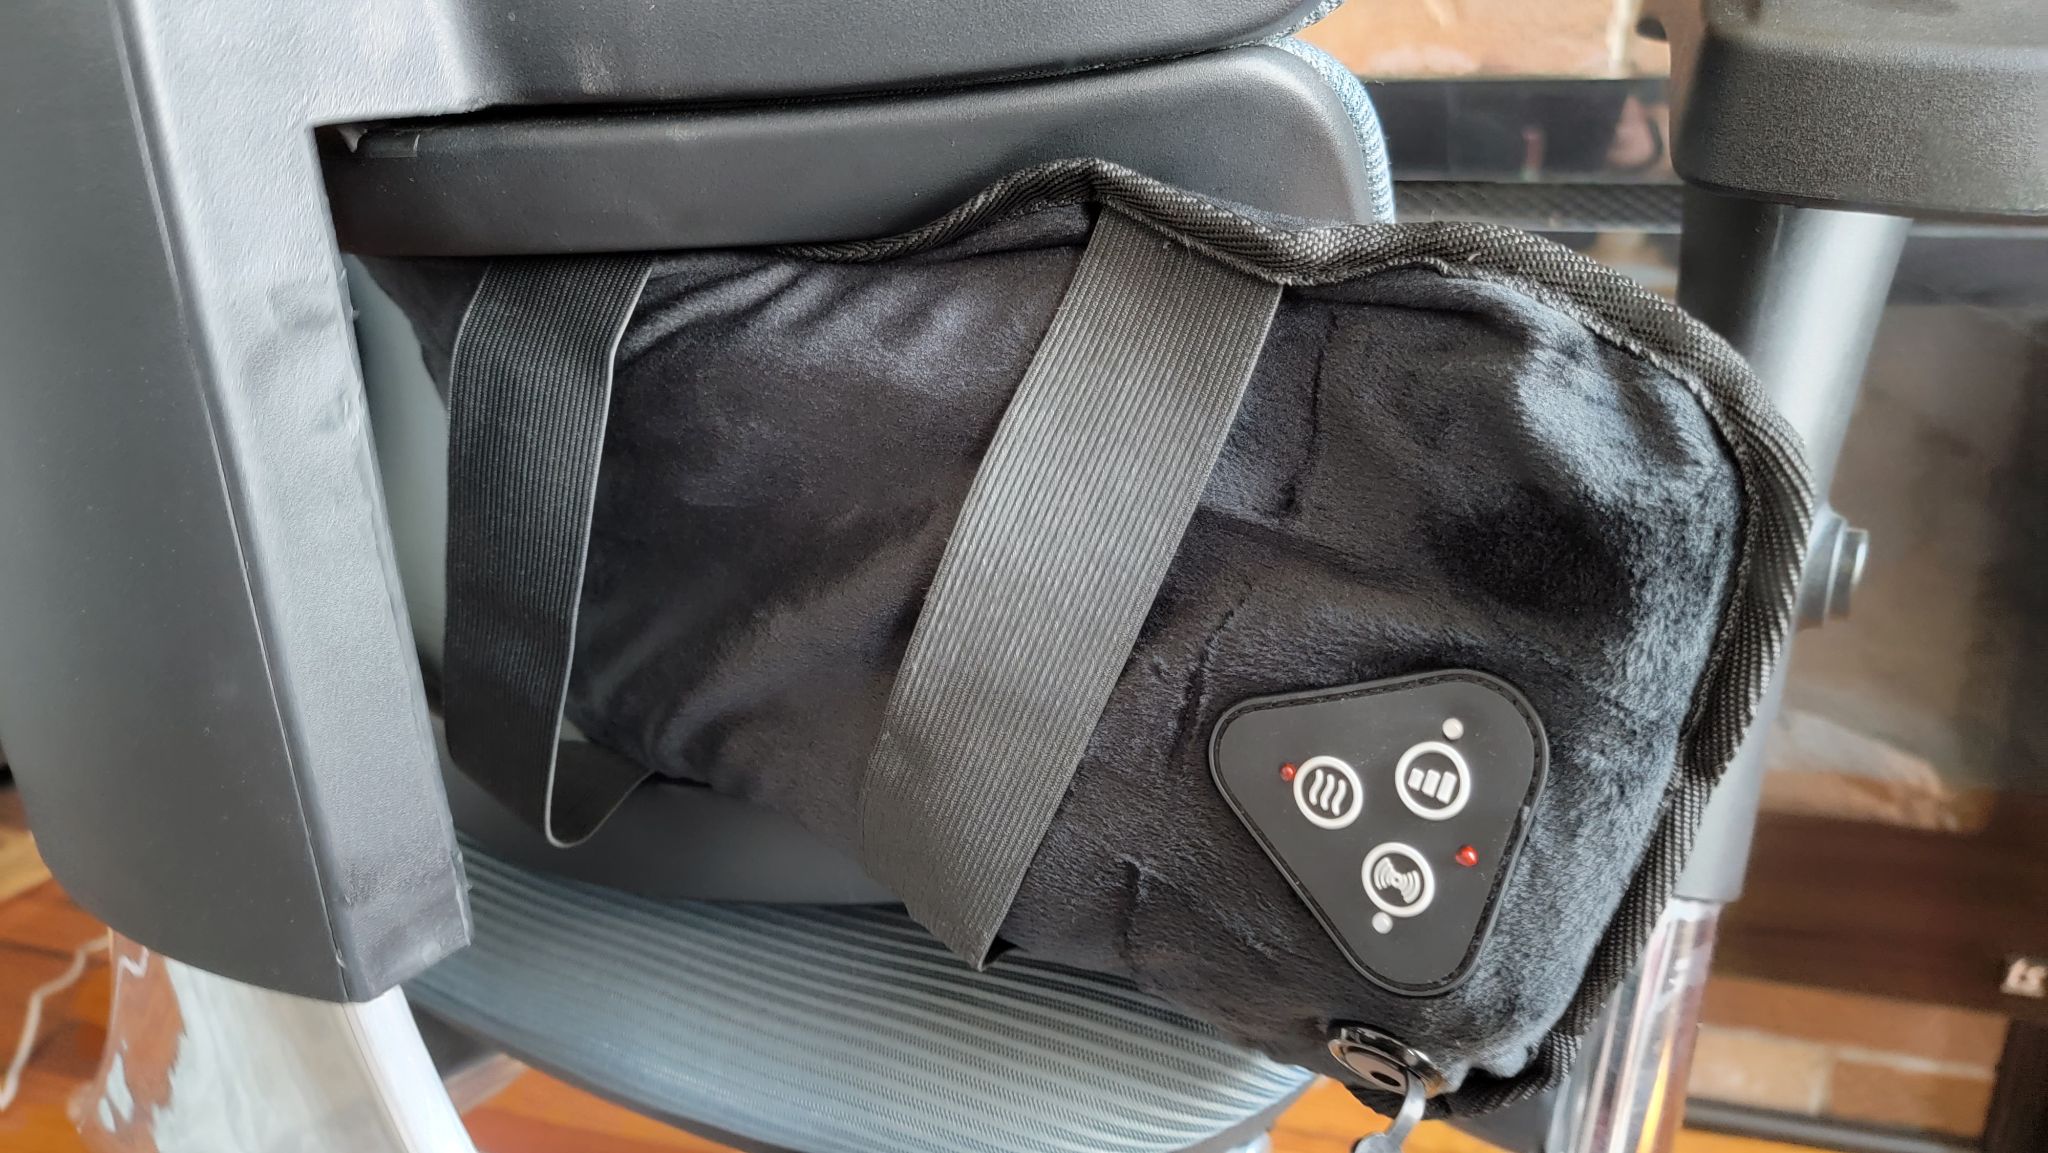
Slide the large plastic backplate out from behind the metal support bar on the back of the chair and set it aside. Then, you should be able to just grab the interior cushion/heat and massage element and pull it out. Disassembly is now complete, allowing you to install the Elemax.
What you do now is essentially the reverse of what you just did, but with the new cooling-capable cushion. First, you need to push the Elemax cushion completely and evenly into the area behind the lower-back portion of the chair. I found this was much easier if I first carefully tipped the chair horizontally while propping up the headrest on my couch or coffee table so that the back of the chair was horizontal, and I could better see and work around the metal and plastic support section of the back of the chair.
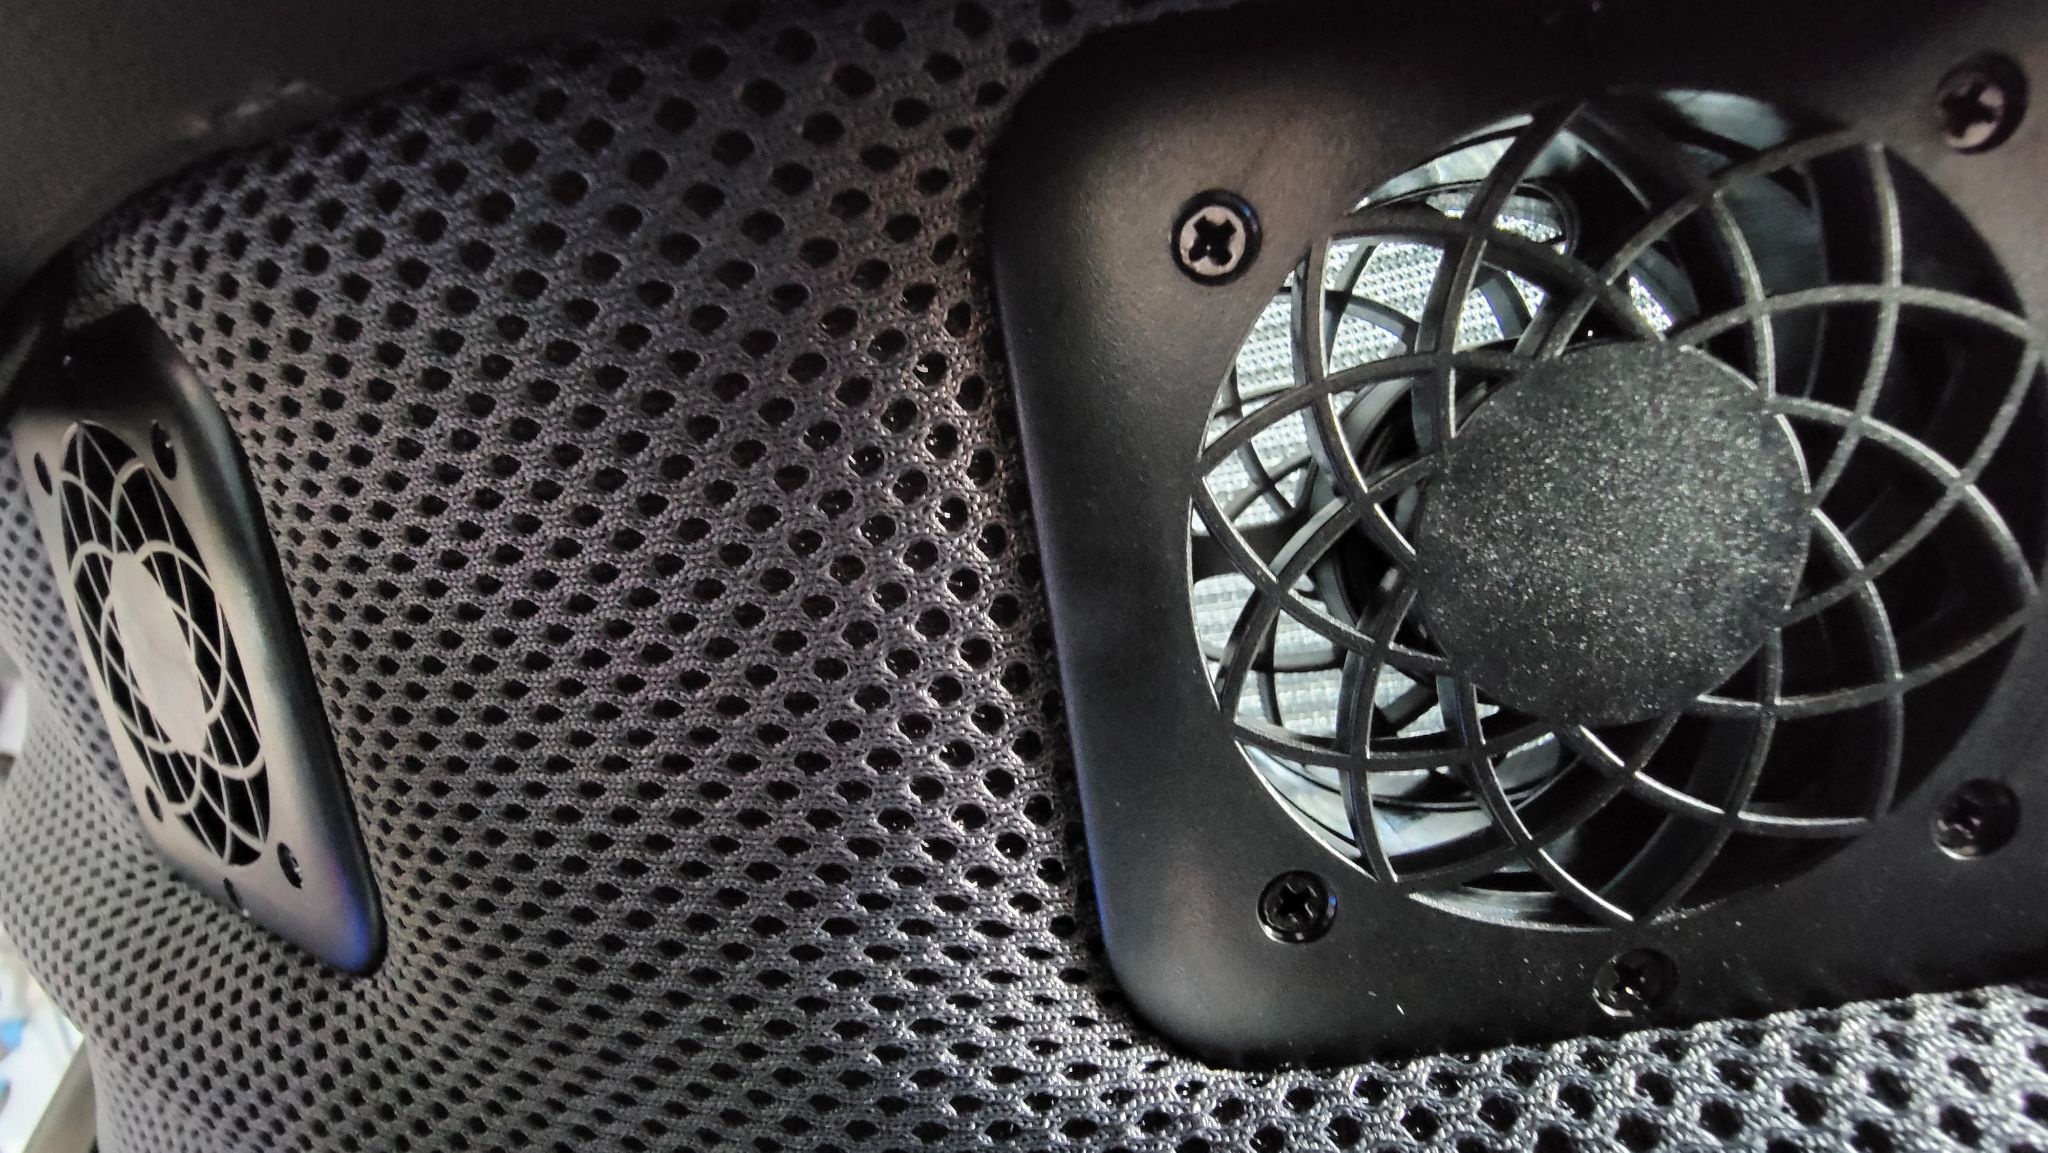
Essentially you'll want to methodically tuck the cushion portion into this area, keeping the rubber controls and power jack facing you, and work all the way around the outside, so that the whole cushion is tucked near the internal frame and not sticking out of the housing of the chair.
Next, you'll replace the plastic cover, using either the one that came with the chair initially or the one that came with the Elemax. For me, both were identical.
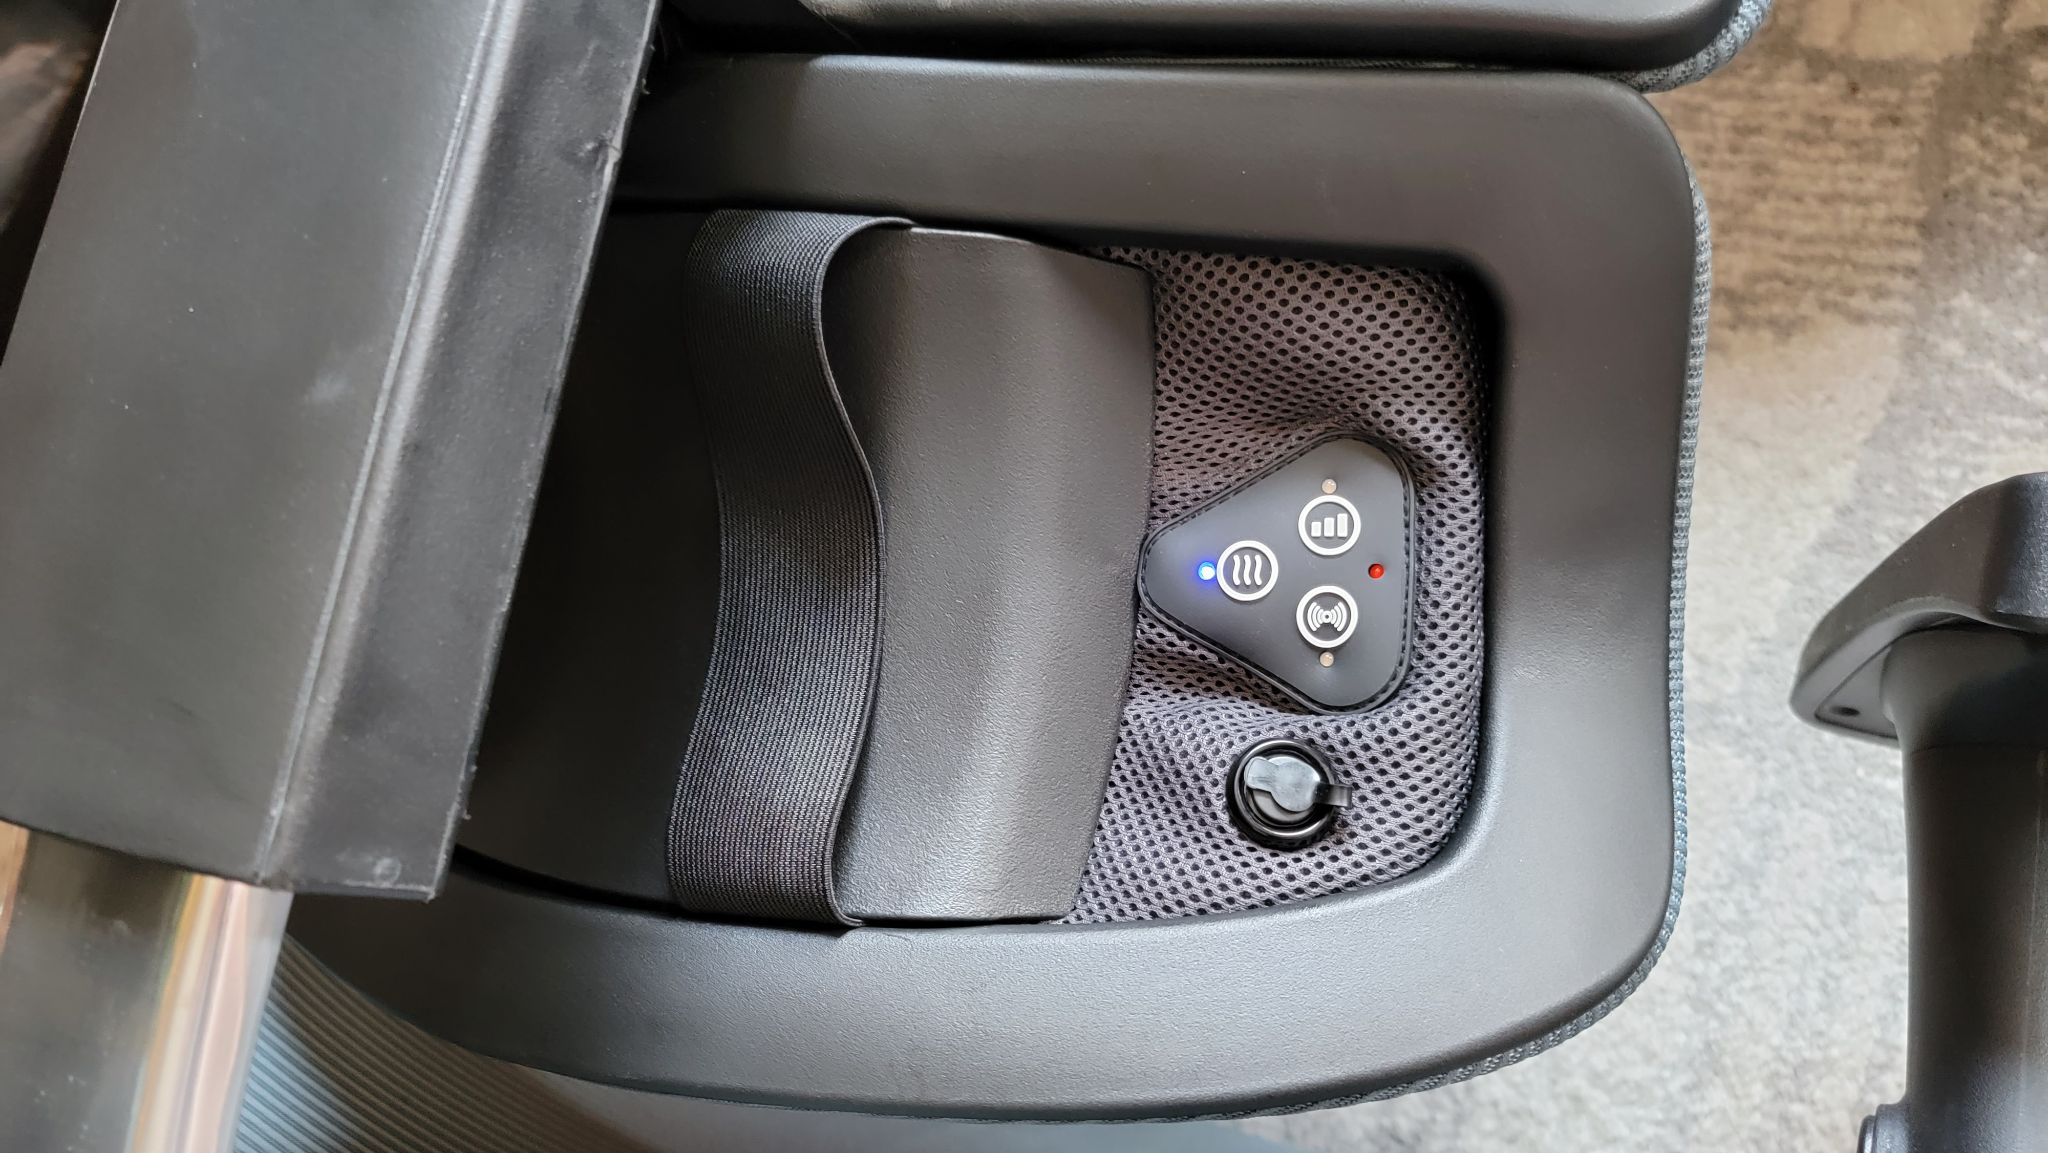
Airflow Issues
But when it comes to airflow issues, the backplate itself is the biggest culprit. It has 22 small airflow holes for intake, but all of them are on the left side of the plate. None are directly over the area where the fans are. So the airflow blowing over your back is impeded by plastic bits. But there's nothing to stop you from doing some simple modifications--more on that shortly.
Note that the Elemax's cushion has a pair of elastic straps that by default run over top of the rear of the fans, impeding air intake. You can loop them around the back of the Elemax before installing, but that would be worse, as they would impede air blowing onto your back. Alternatively, you could loop the external backplate of the chair through them, so that they are on the outside of the chair. There, they can be helpful for holding an external battery for longer unplugged runtime. You could also just cut them off I suppose, since it's not entirely clear what they're supposed to be for, and the installation pamphlet doesn't mention them at all. Even the drawings in the install guide seem to imply they don't exist.
So How Does the Elemax Feel?
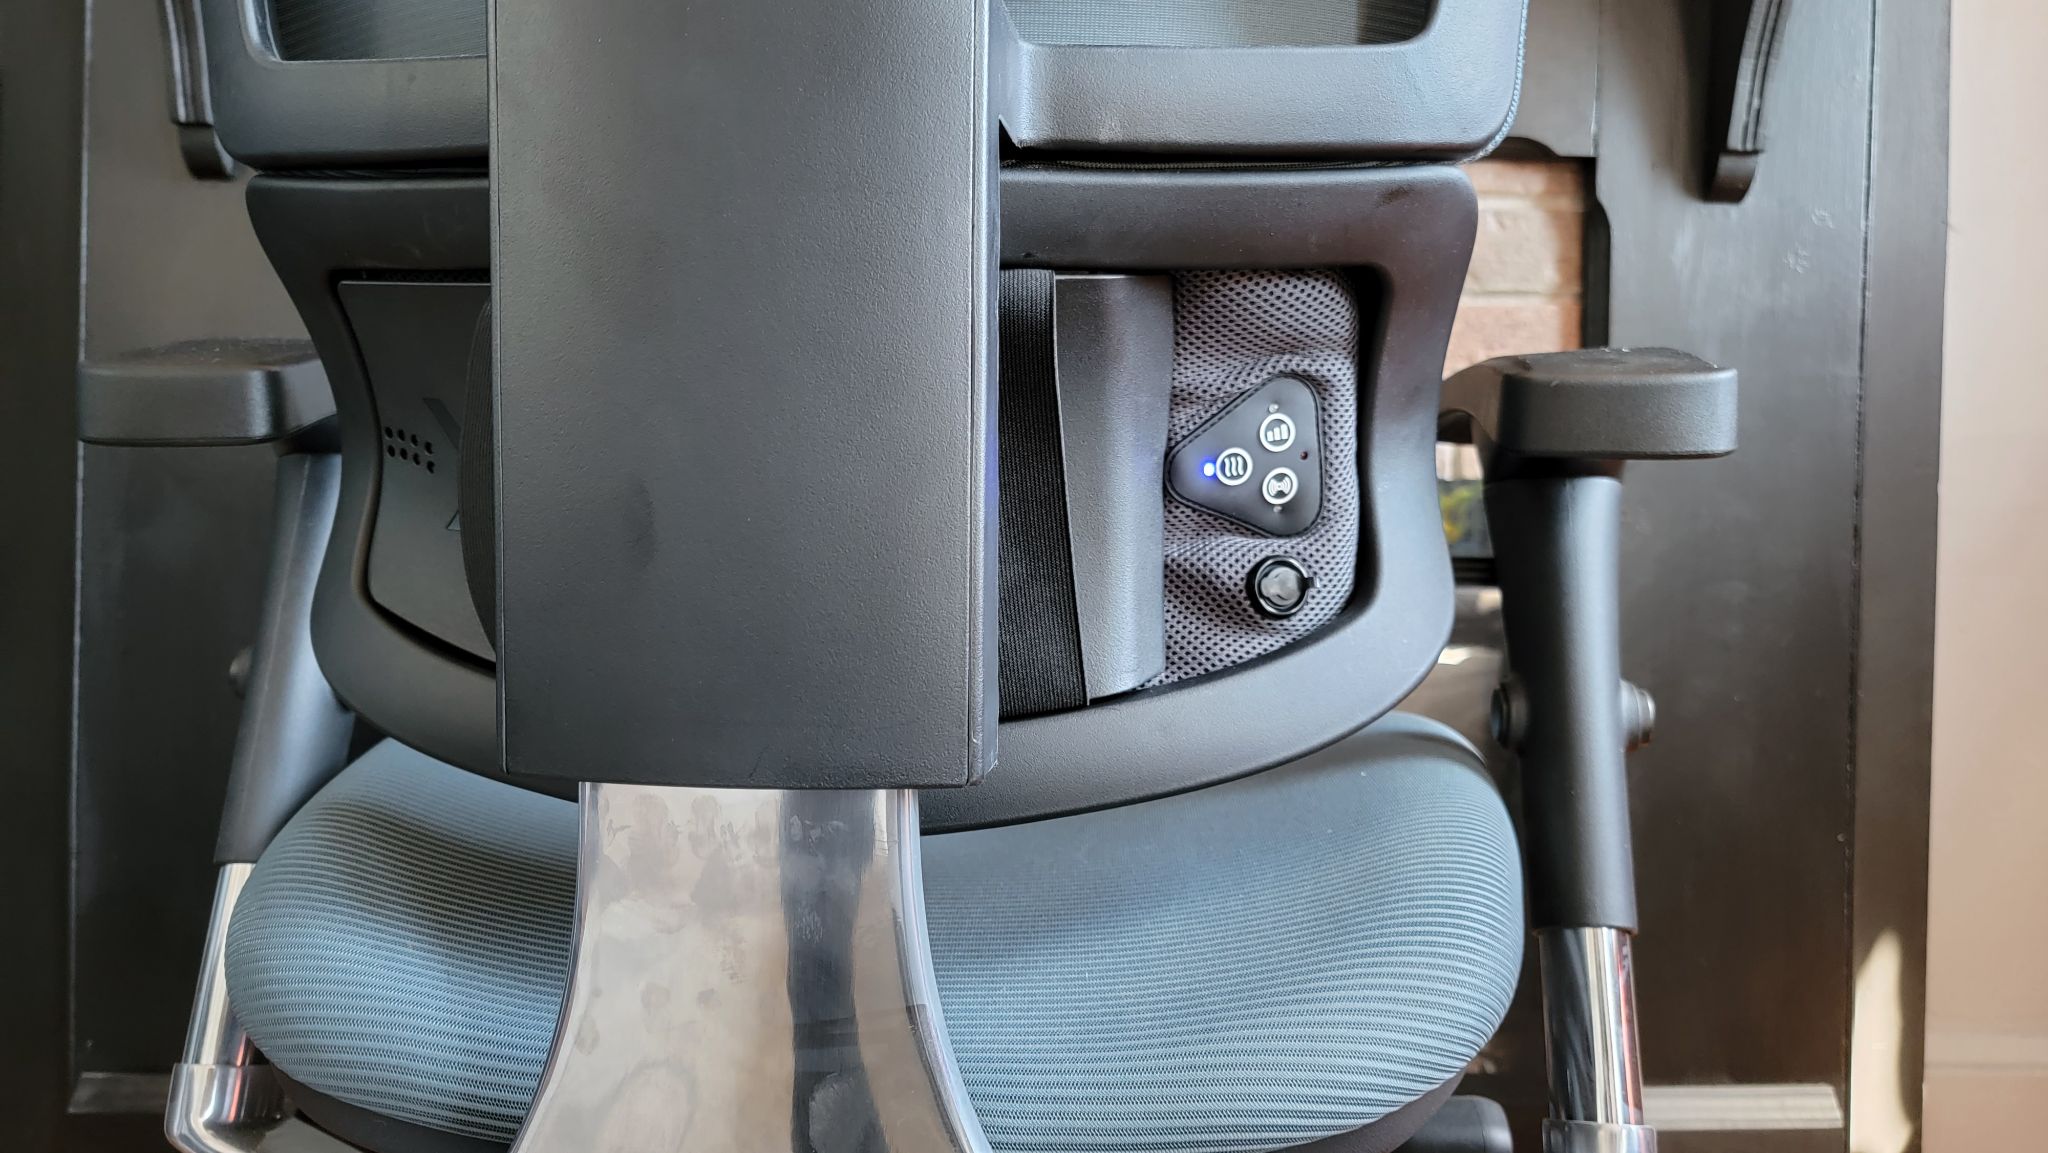
Would I buy the Elemax just for the cooling? Probably not. But as a $139-$159 addition that brings heat, massage and cooling to a chair you're already spending several hundred dollars on, I'd say it's easy to recommend, especially if you spend several hours a day sitting in your office chair and have back pain--is it even possible for those to two not to go together?
The Elemax’s controls are simple enough, though not always that easy to find while reaching around the back of your chair. Press the circle on the left once for heat or twice for cooling--a red or blue LED will light up to indicate which is enabled--and again for off. The bottom button turns the massage function on and swaps between pulses or constant massage, while the top button changes the intensity of the massage (high or low).
I covered my personal experience and feelings about the heat and massage functions in my X3 ATR Mgmt Chair review, but in a nutshell they both feel nice enough; although, not as powerful as you might get with a good standalone heater/massager.
And because these elements are housed in the lower-back area of the chair, you can't get the heat and massage features in the mid and/or upper parts of your back, where many people experience discomfort.
Most of those things can also be said of the Elemax’s cooling features. But arguably the best place to put cooling in a char is in the lower back area. And while the cooling feeling wasn't particularly strong all the time, it was quite noticeable on hot days when I'd just come inside from running errands or going for a walk. While the feeling of the airflow isn't strong against your hand, it produces a noticeable cooling sensation as air moves along your sweat-covered lower back.
Room for Improvement and a Potential Solution
While the active cooling in the Elemax isn't exactly a game-changer, it is pretty nice to have on a hot day as you come in from outside.
But without good airflow in the intake area of the fans, I can't help but feel X-Chair is leaving some cooling performance on the table. And before you ask, I tried just leaving the backplate off for better airflow. But without it, the cushion does not stay in place against the back of the chair, which moves the fans away from the back, thereby limiting cooling for a different reason. Eventually, it would just fall out if used without the backplate.
The solution to this would be simple: The company should just ship a backplate with intake holes over the area where the two fans are. Given that the plate is made out of fairly thin, bendy plastic, you could, of course, do this yourself with a saw, Dremel or drill. In fact, I did this myself and felt somewhat better airflow on my back.
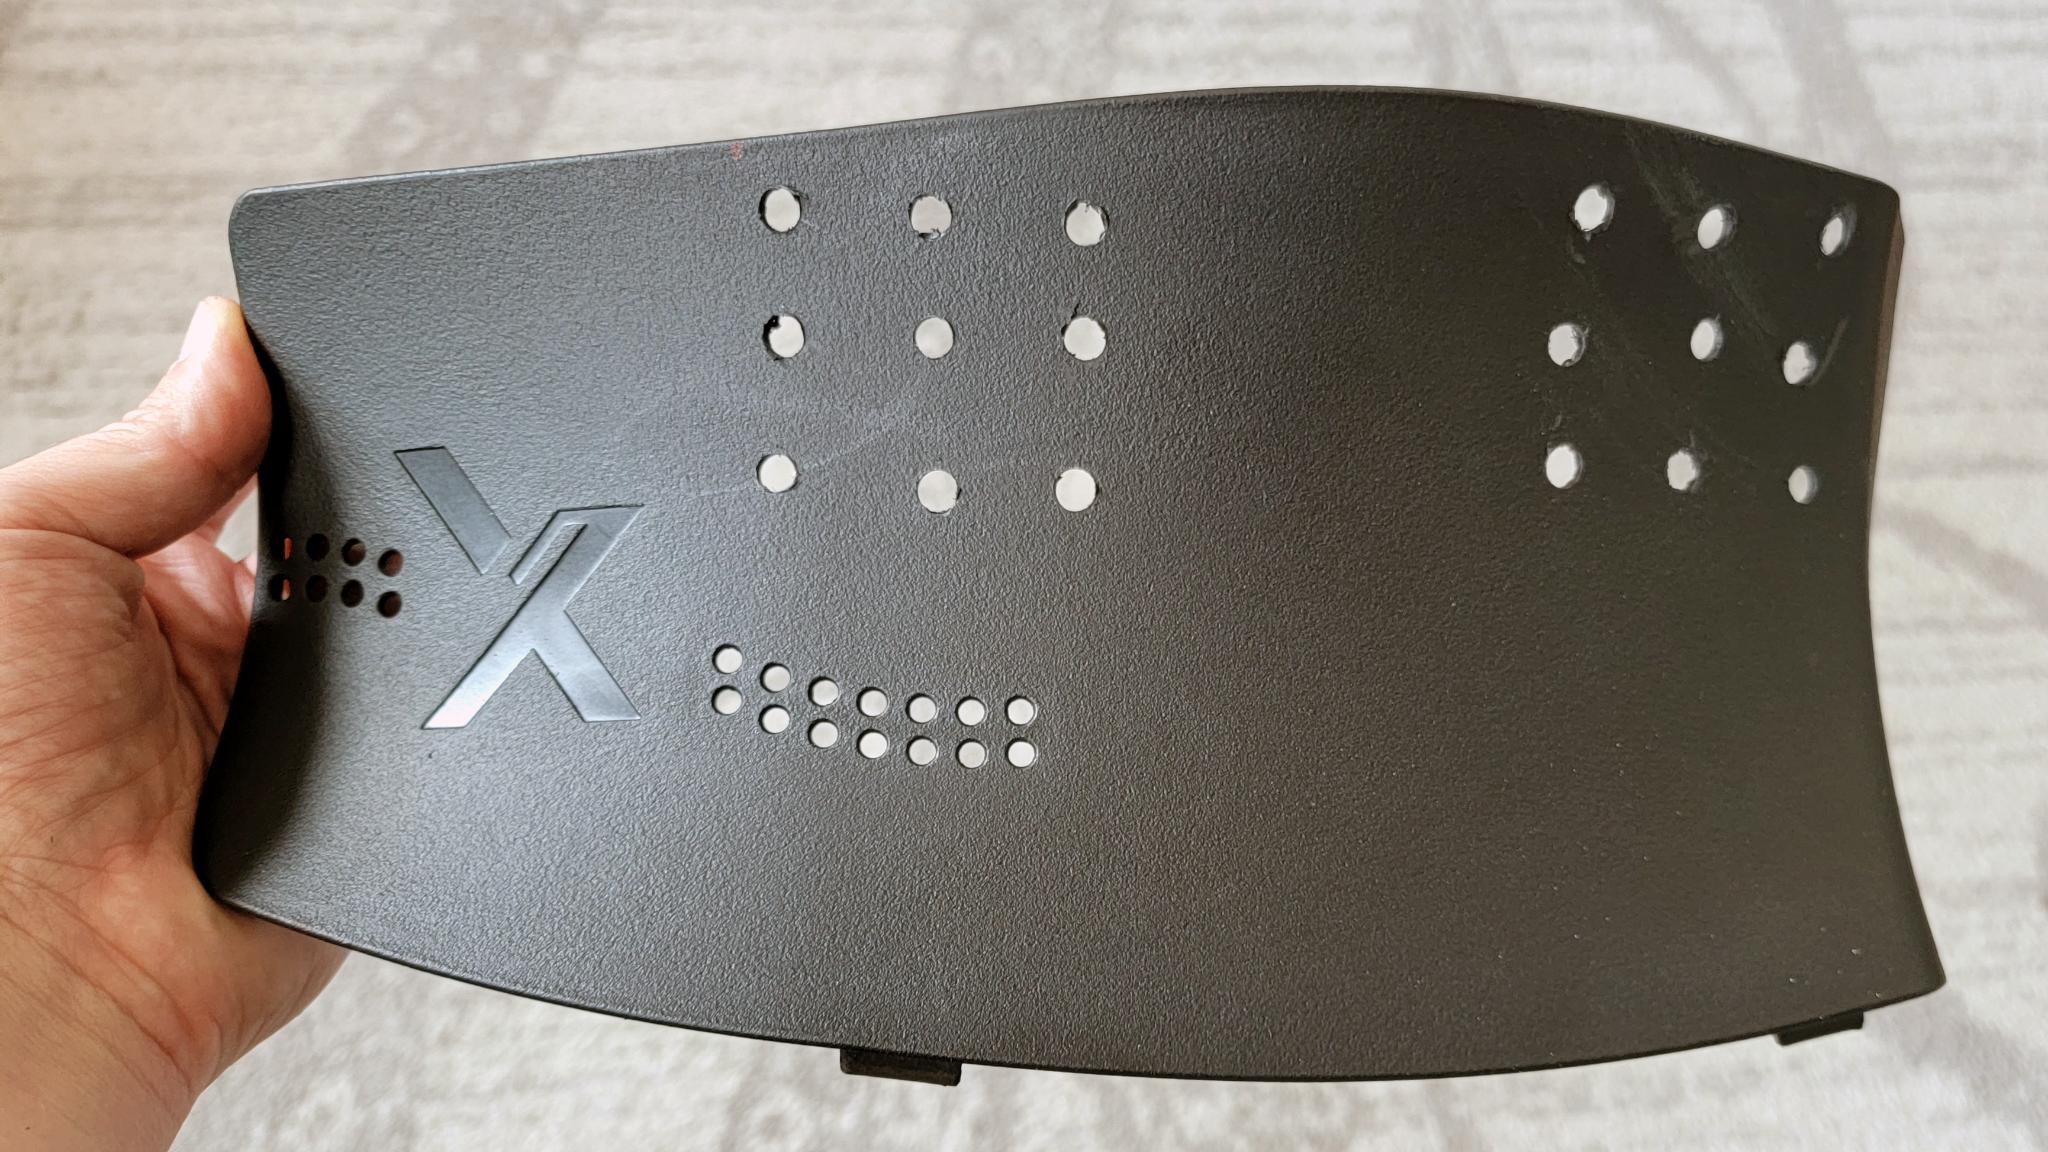
But given this is a $130-$160 accessory for a chair that in many configurations costs close to or over $1,000, having to modify the device to get better cooling is obviously far from ideal. There's much room for improvement in the design here, and some of it is so obvious that I'm a bit shocked it wasn't solved before the company brought the upgrade to market.
I accomplished this by cutting out some paper templates that were roughly the size and shape of the fans, taping them onto the backplate and dropping holes at regular intervals. The whole process took about 30 minutes and didn't require anything more exotic than a cheap cordless drill.
After a rough start with the Mattel Aquarius as a child, Matt built his first PC in the late 1990s and ventured into mild PC modding in the early 2000s. He’s spent the last 15 years covering emerging technology for Smithsonian, Popular Science, and Consumer Reports, while testing components and PCs for Computer Shopper, PCMag and Digital Trends.
-
Geef Much cheaper fix. Buy one of those cheap 12 dollar USB fans. They are small and quiet. Place it below the table maybe on a stand or chair opposite you. I use mine like that to set the fan on and as soon as I power up my machine the fan turns on and is blowing air on my junk.Reply
Works wonders.
