How to add chat to your livestreams using OBS — Live interaction with your viewers is easy with OBS
Connect to your viewers via game chat, Discord, or text chat.
The best part about streaming is talking to your viewers. You can talk to them via game chat, Discord, or text chat, but text chat is the most common way to connect with viewers. This is where inside jokes are born, nicknames, and bonds. You can’t build those bonds if you’re not looking at the chat and responding to viewers.
Once your Twitch account is linked you’ll be able to view chat in OBS. There is a way to add chat into your overlay on OBS. This is what all the pros do, i.e. me! I love having a chat on my stream. It helps me when I go back and watch the VODs to see what the chat was like, how active it was, and if I missed anything. This can be done for Twitch, Facebook, and YouTube.
- Connecting with your viewers is easy via OBS. Popular streamers link their chats to their live shows.
- Linking Facebook, Discord and Twitch chat to OBS is a simple and effective means to interact with viewers.
- Text, emoji's and memes can be shared live via the chat.
Before tackling this project it would be prudent to take a look at our How To Record in OBS and How to Stream on Twitch guides. Those two guides will act as a foundation for building the best stream for your viewers.
Here is how to add chat to your stream using Facebook, Twitch (using StreamLabs and StreamElements and YouTube.
How To Add Facebook Chat to Your Stream
1. Open your Facebook Like Page.
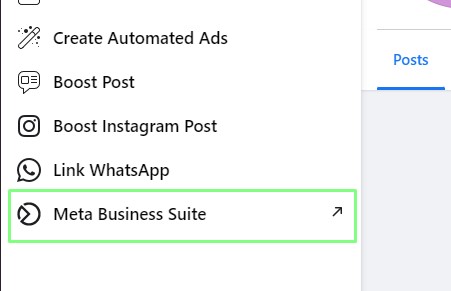
2. Click on the Meta Business Suite on the left hand side of the page.
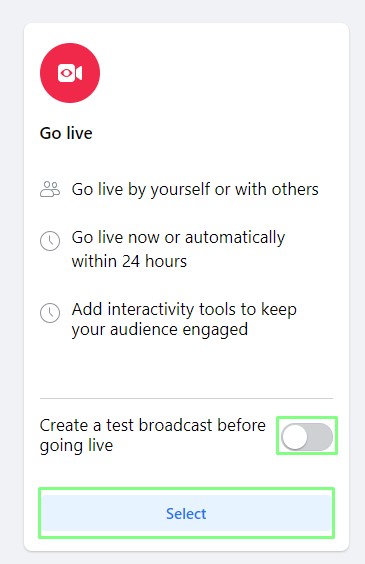
3. From the More menu, select Go Live.
Get Tom's Hardware's best news and in-depth reviews, straight to your inbox.
4. Toggle the test broadcast button and then click Select to start a live broadcast.The test broadcast button enables you to check your configuration before going live.
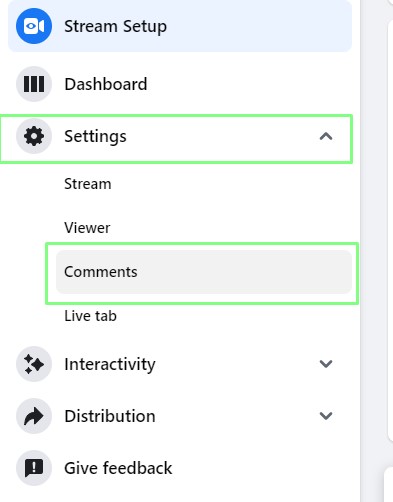
5. From the Settings menu select Comments.
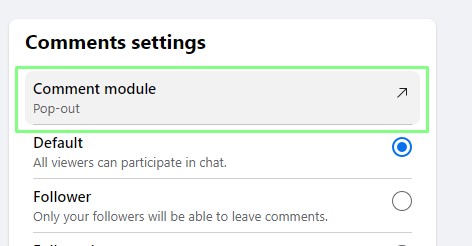
6. Pop out the comments module.
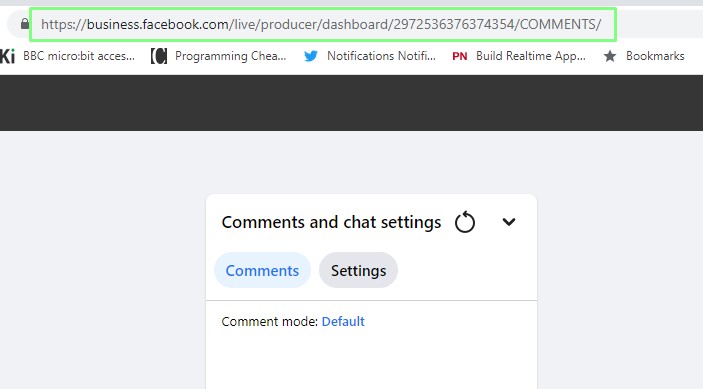
7. From the new Comments tab, copy the URL.
8. Open OBS.
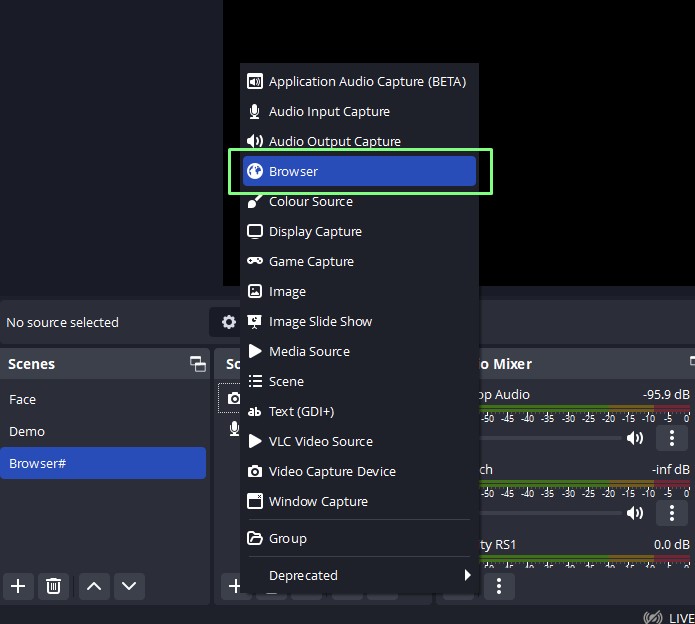
9. For your chosen scene, go Sources and add a Browser source called Facebook Chat.
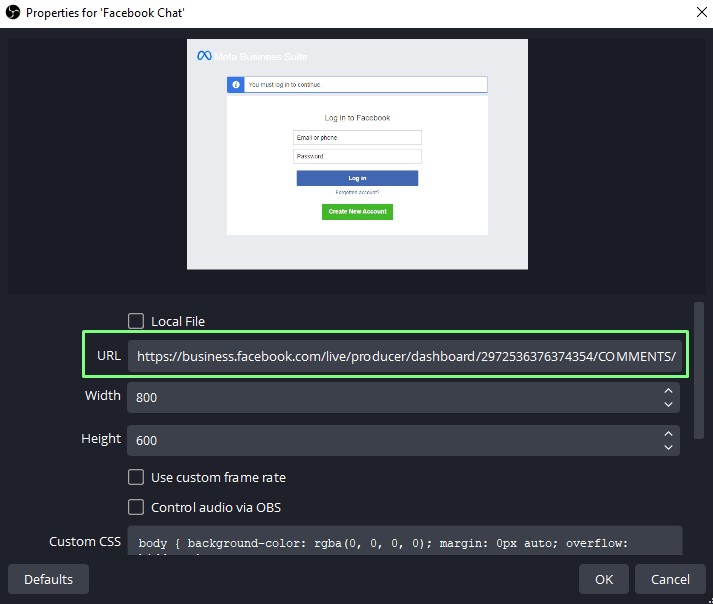
10. Replace the URL with the Chat URL.
11. Login to your Facebook account from the Browser window in OBS. Use the Interact button located above Sources and enter your login.
12. The chat window is now ready for use. Every time you start a live, refresh your URL comments Browser source. And you’re all set.
How To Add Twitch Chat To Your Stream
To add chat overlay to your Twitch stream you’re going to need to login into Streamlabs or StreamElements.
Using Streamlabs:
1. Go to the StreamLabs website.
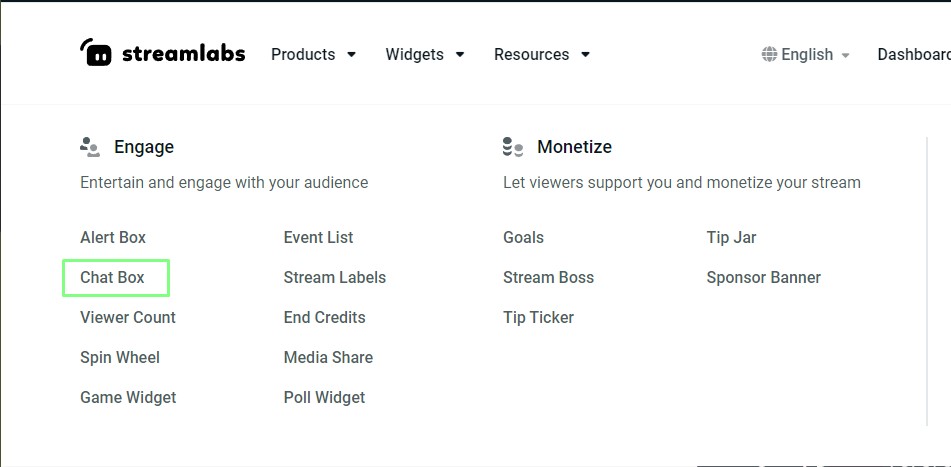
2. Click on Widgets >> Chat Box.
3. Log in to your account.
4. Search for chatbox via the search bar and select Chat Box Widget Settings.
5. Copy the Widget URL. Remember, do not share this URL with anyone. It is linked to your account.
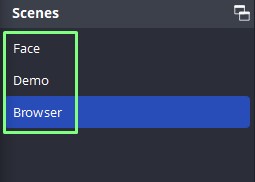
6. Open OBS and select the scene for use with the chat box. Here we are using the Browser scene for the chat box.
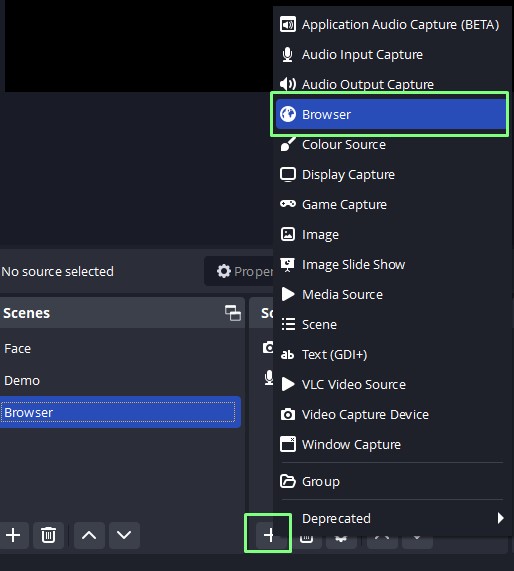
7. Under Sources, add a Browser source.
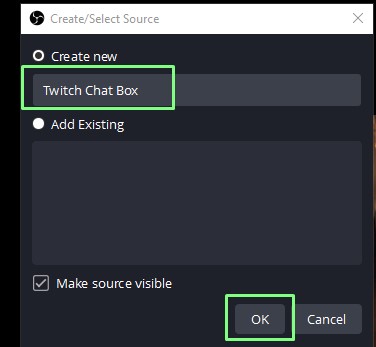
8. Rename the source to Twitch Chat Box and click OK.
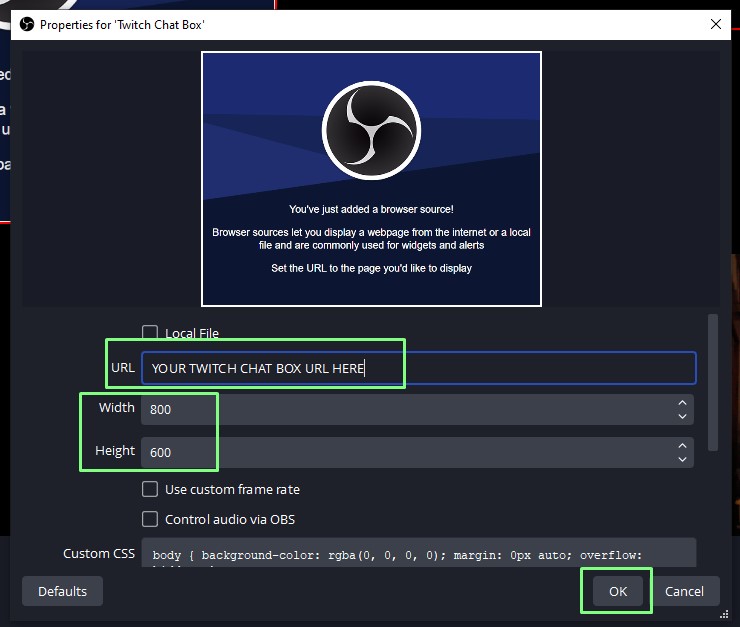
9. Replace the URL with the Chat URL and click OK to save. The width and height of the chat box can also be tweaked to provide the best possible layout.
10. Click on Start Streaming to stream your show with an embedded chat window.
Using StreamElements
StreamElements Chat Box is a bit more involved because you need to select an overlay. Then you’ll have a separate customizable chat feature.
1. Open a browser to the StreamElements website and login.
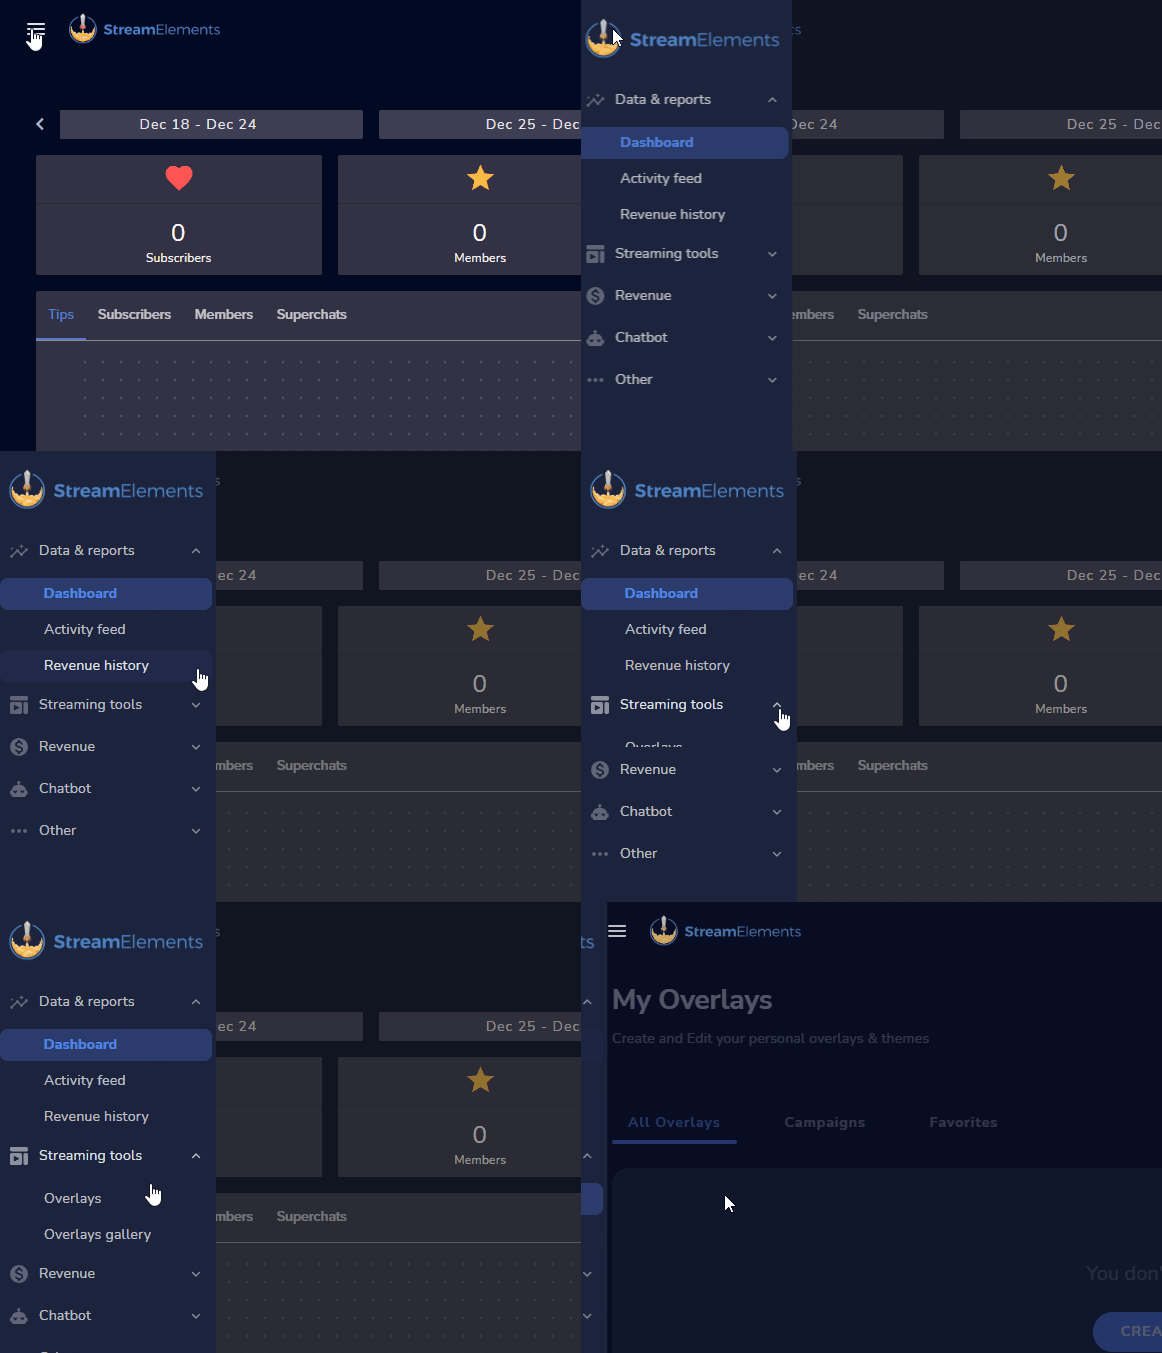
2. Select Streaming Tools >> Overlays from the StreamElements page Menu.
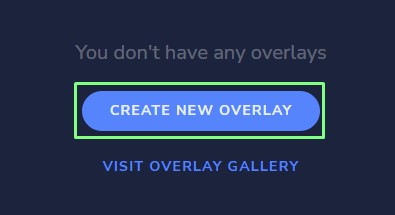
3. Create a new overlay.
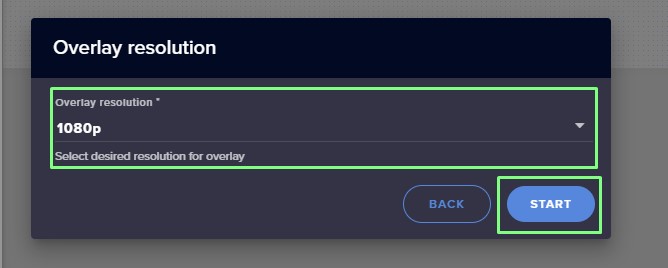
4. Set the overlay resolution to match that of your stream and click Start. In our case we chose 1080p.
5. Name the overlay “Chat Window” and click Save.
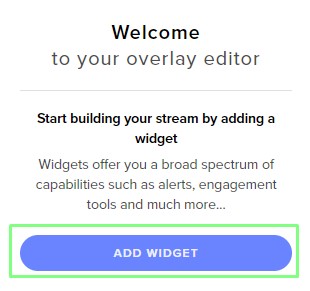
6. Click on Add Widget.
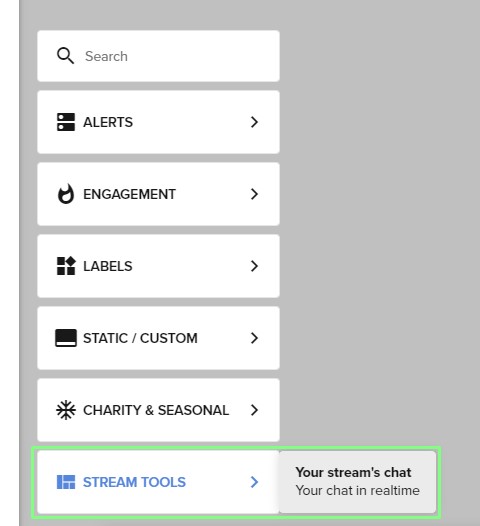
7. Go to Stream tools and select “Your Stream’s Chat”. This will place a black chat window on the screen. We can move the window around for the best layout.
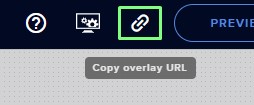
8. Copy the URL link via the icon in the top right corner.
9. Open OBS and select the scene for use with the chat box. Here we are using the Browser scene for the chat box.
10. Under Sources, add a Browser source.
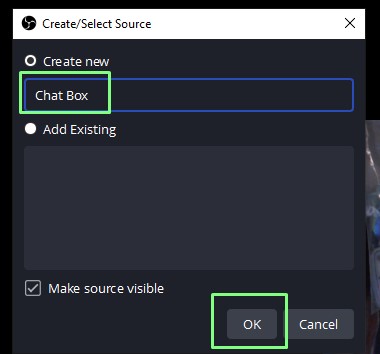
11. Rename the source to Twitch Chat Box and click OK.
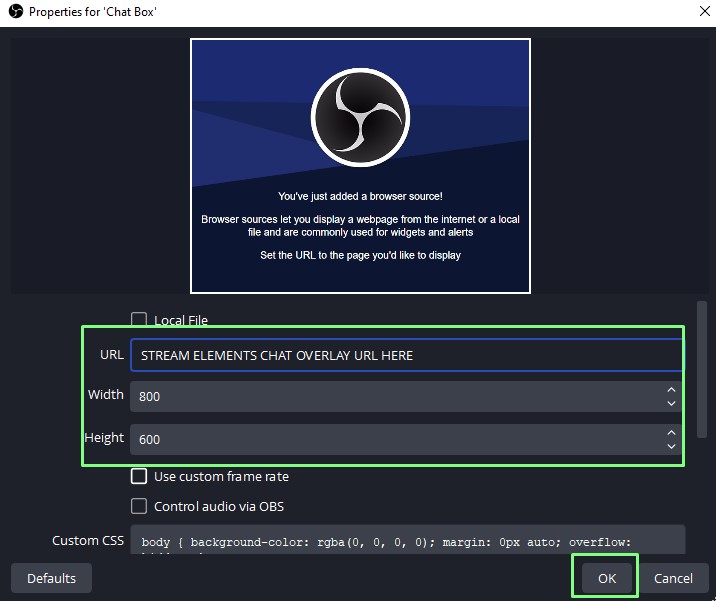
12. Replace the URL with the Chat URL and click OK to save. The width and height of the chat box can also be tweaked to provide the best possible layout.
13. Click on Start Streaming to stream your show with an embedded chat window.
Using YouTube
YouTube’s chat integration with OBS is the easiest of them all.
2. Go to your YouTube channel, the icon is in the top right corner.
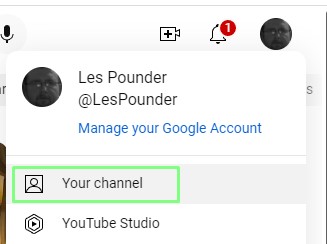
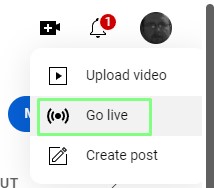
3. Select Go Live via the Camera icon’s dropdown menu.
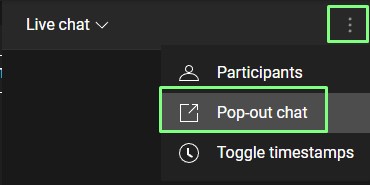
4. Select Popout Chat in the three dots menu in the top right.
5. Copy the URL of the popup chat window.
6. Open OBS and select the scene for use with the chat box. Here we are using the Browser scene for the chat box.
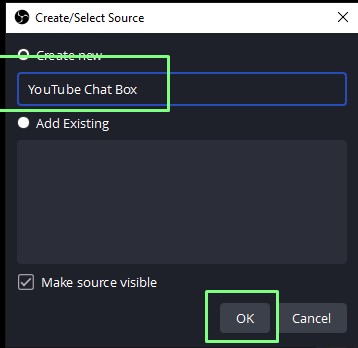
7. Under Sources, add a Browser source.
8. Rename the source to YouTube Chat Box and click OK.
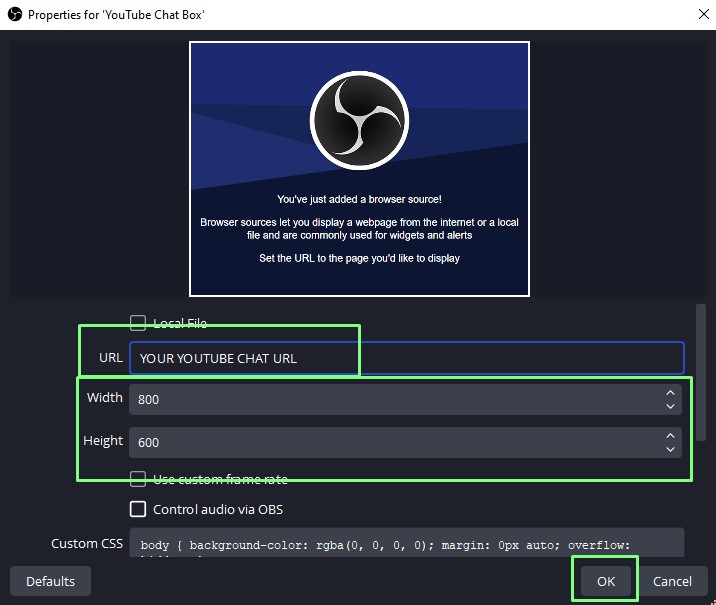
9. Replace the URL with the Chat URL and click OK to save. The width and height of the the chat box can also be tweaked to provide the best possible layout.
10. Click on Start Streaming to stream your show with an embedded chat window.

Les Pounder is an associate editor at Tom's Hardware. He is a creative technologist and for seven years has created projects to educate and inspire minds both young and old. He has worked with the Raspberry Pi Foundation to write and deliver their teacher training program "Picademy".
