How to Make Your Game Streams Accessible with Live Captions
Add real-time captioning to your stream on Twitch or other platforms.
Whether you’re broadcasting your game streams every day or doing the occasional “just chatting” session on weekends, you want to grow your audience. One way to grow and also to avoid alienating your fans is to make sure that your content is as accessible as possible for those with hearing or vision challenges. Adding closed captioning is the best place to start.
I have recently had several hard of hearing or visually impaired people join my community and I didn’t actually realize how inaccessible my broadcasts were to people I called my friends. During my discussions with others on accessibility I realized that, not only did I need to make my streams more accessible for friends, but also I was missing out on entire audiences of potential viewers. According to the NIH, 15 percent of American adults have some kind of hearing issue. And that doesn’t even include everyone who just likes to watch video with the volume off.
Accessibility is often overlooked in gaming. It’s seen as tedious to implement and a lack of ease of use can be intimidating. Hopefully this quick how to can help you on your journey to inclusion. Here’s how to add captions to your game streams.
What You’ll Need for Game Stream Captioning
- A capable PC, ideally one of the best gaming PCs or best gaming laptops. But if you’re streaming now, you are probably ok. My PC is an MSI GE63 Raider 8SE laptop. Prebuilt and a great beginners streaming laptop.
- Google Chrome as a web browser as I have found other browsers do not support the web captioner software.
- More than one monitor for display. Game and window capturing in OBS are impossible on one window so if you are running on a one screen set up this captioning setup isn't possible. See our list of best gaming monitors if you’re shopping.
- A headset is not necessary but helps cut down on background noise that might interfere with the transcription. The best gaming headsets will keep the game sounds from getting into the mic.
- A microphone, ideally one of the best gaming microphones. : The better the microphone the better the captioning service will be able to accurately capture your audio. For this tutorial I used a Blue Yeti X. A webcam isn't necessary for this but I always use one for broadcasts and here I used the Logitech stream cam. Here’s a list of the best webcams.
- OBS Studio Software. This is a free download. I also used the Streamelements plug-in for OBS as this is my preferred streaming software.
How to Set Up Real-Time Captions for Game Streaming
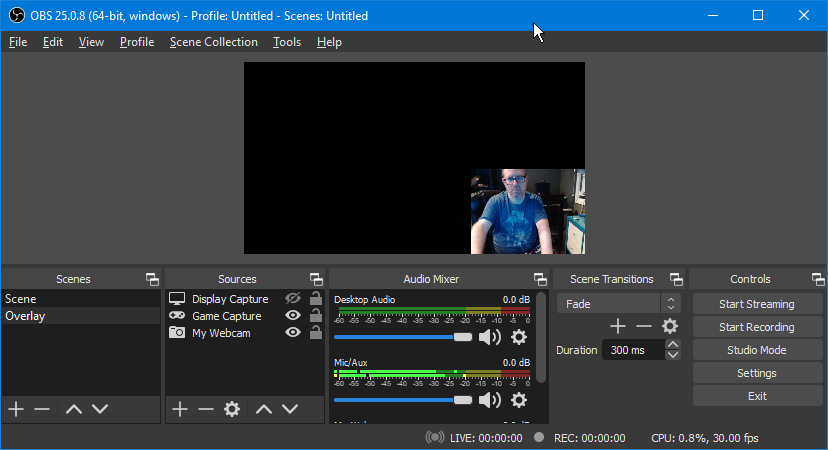
1. Launch OBS and move to whichever monitor you do not plan on launching your game from.
2. Navigate to https://webcaptioner.com/captioner in your browser.
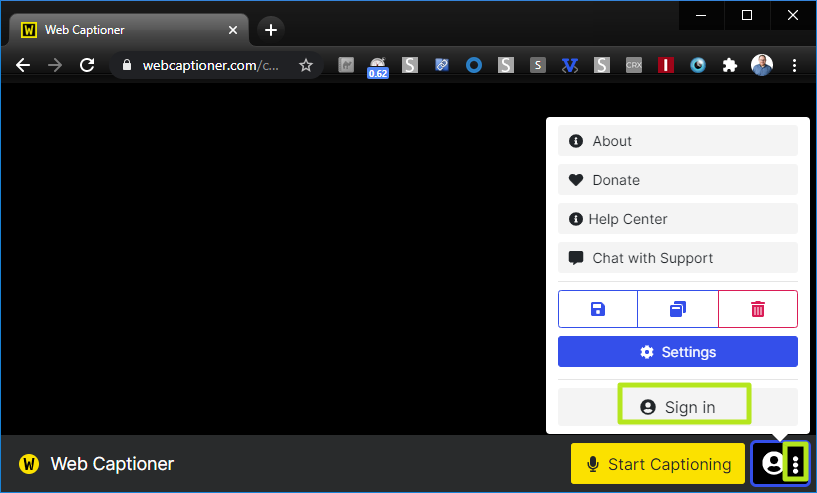
3. Sign in by clicking on the three dots in the lower right corner of the window and then the sign-in button. You can use your Google, Facebook or Twitter account as a login. This saves your information and configuration so you do not need to reconfigure every time you access the site
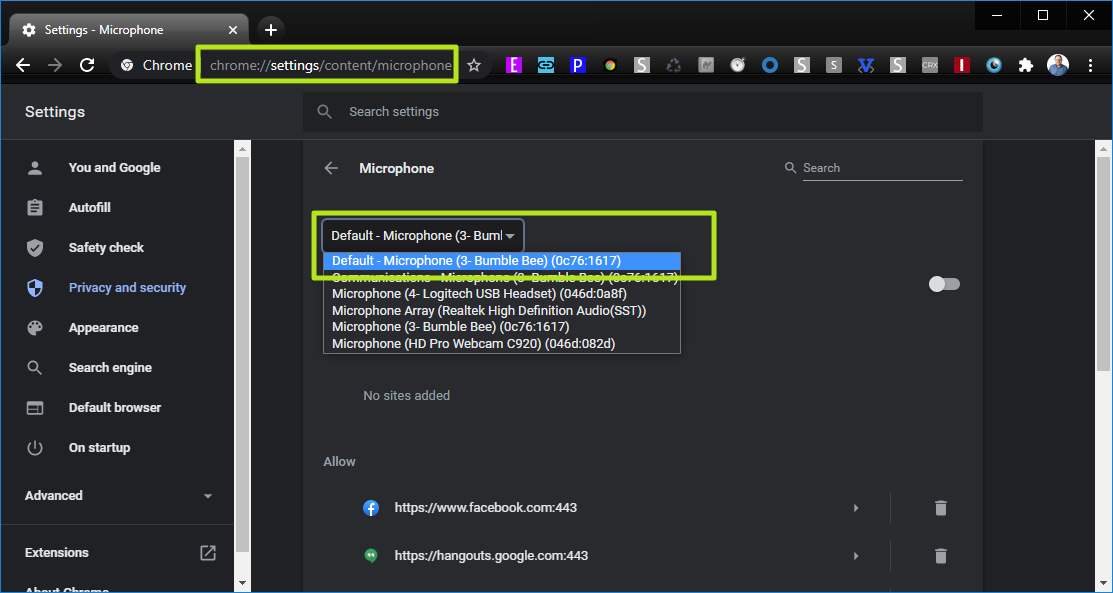
4. Make sure the site is capturing the right audio device by navigating to chrome://settings/content/microphone and making sure your microphone is selected.
Get Tom's Hardware's best news and in-depth reviews, straight to your inbox.
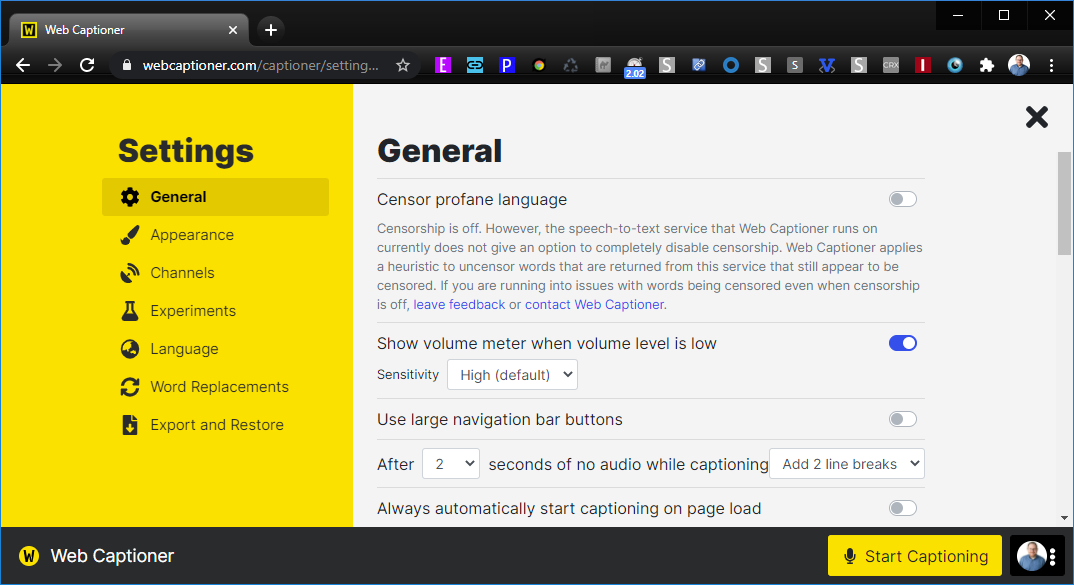
5. Adjust profanity settings and capture size and color by navigating to the settings menu (accessible by clicking the three dots). . I left mine on default and allowed profanity since my broadcasts are 18 and up.
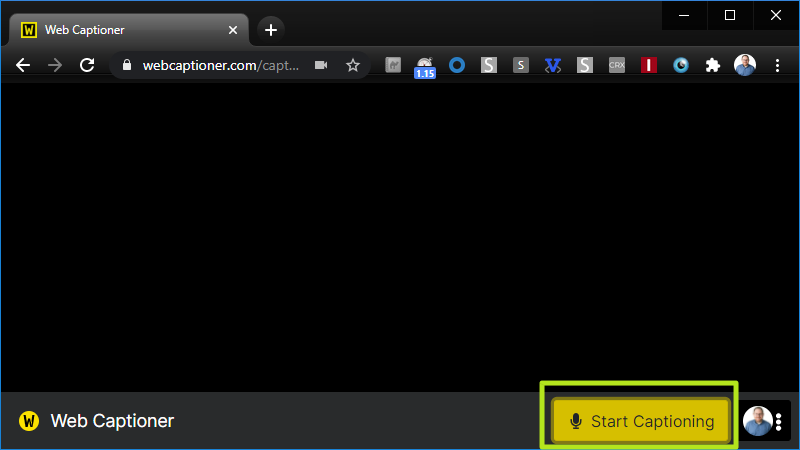
6. Click Start Captioning.
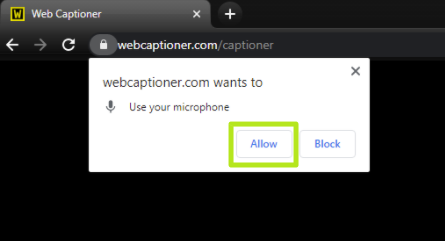
If you are prompted for permission to use your microphone, Allow it.
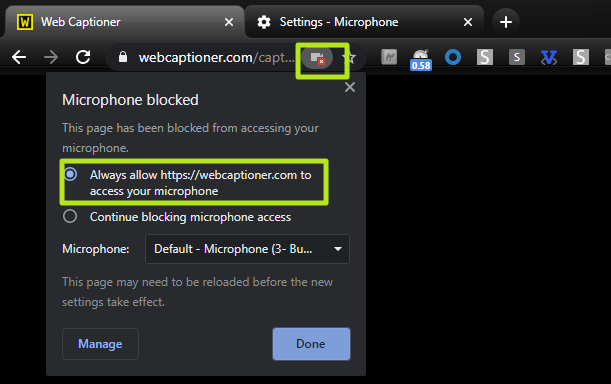
If you see that the microphone is blocked, click the camera icon and select “Always allow”
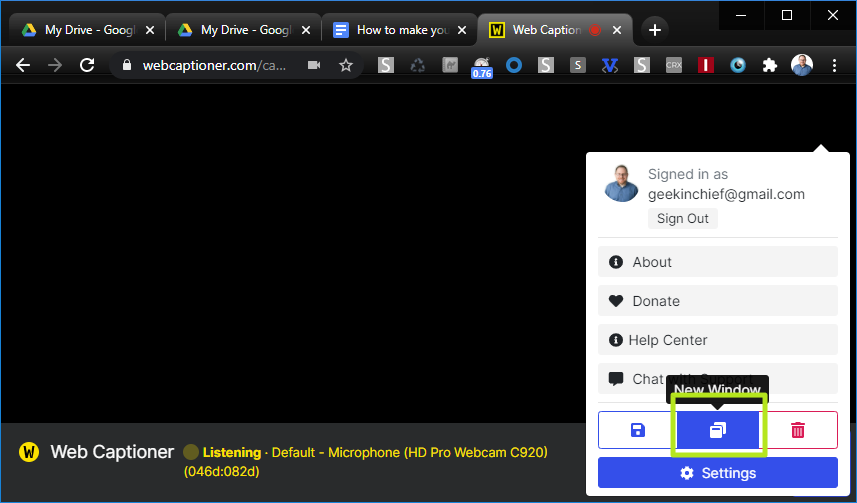
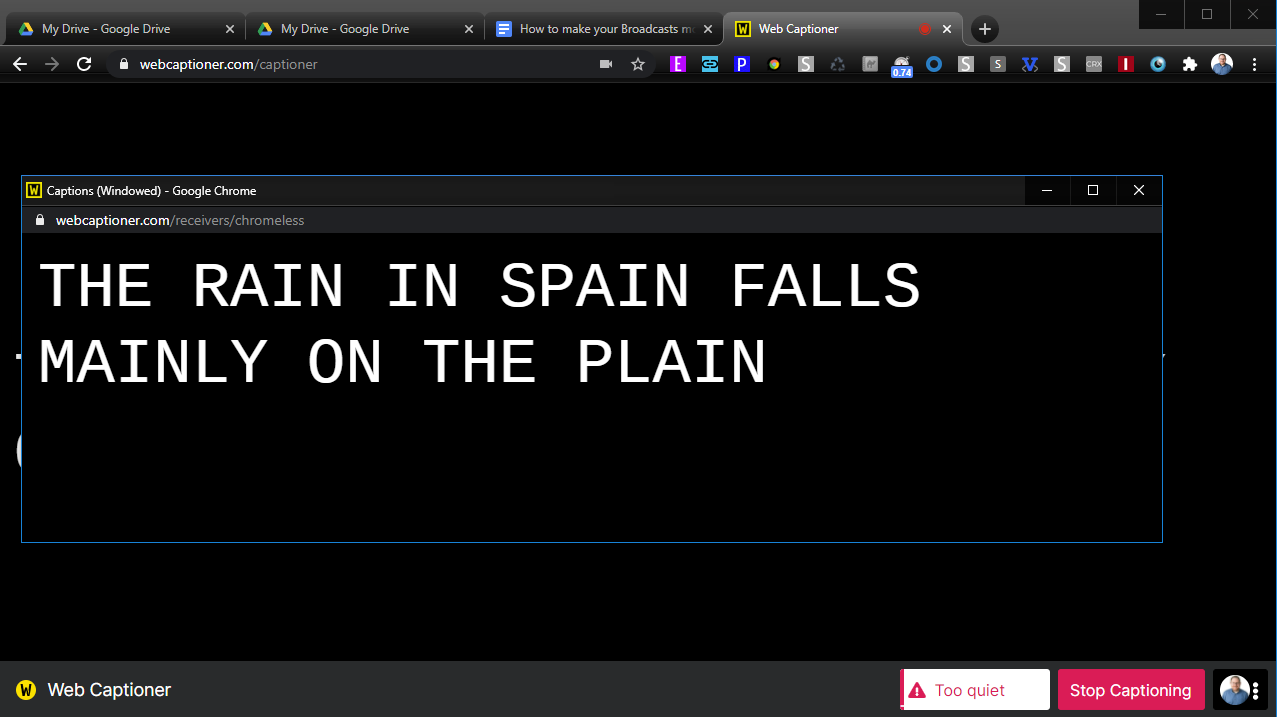
7. Select new window from the menu.
A second window appears, without any of the browser or bookmark bars in it. This is the window we’ll be showing in our stream, because we don’t want our viewers to see all the extra buttons and widgets, just the captions. DO NOT MINIMIZE THIS NEW WINDOW. OBS won’t see the captions if it is minimized.
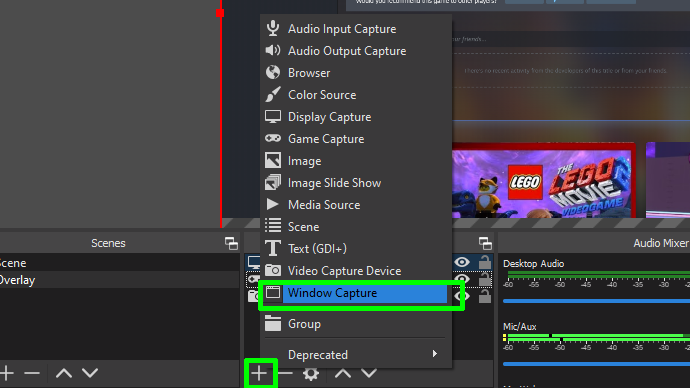
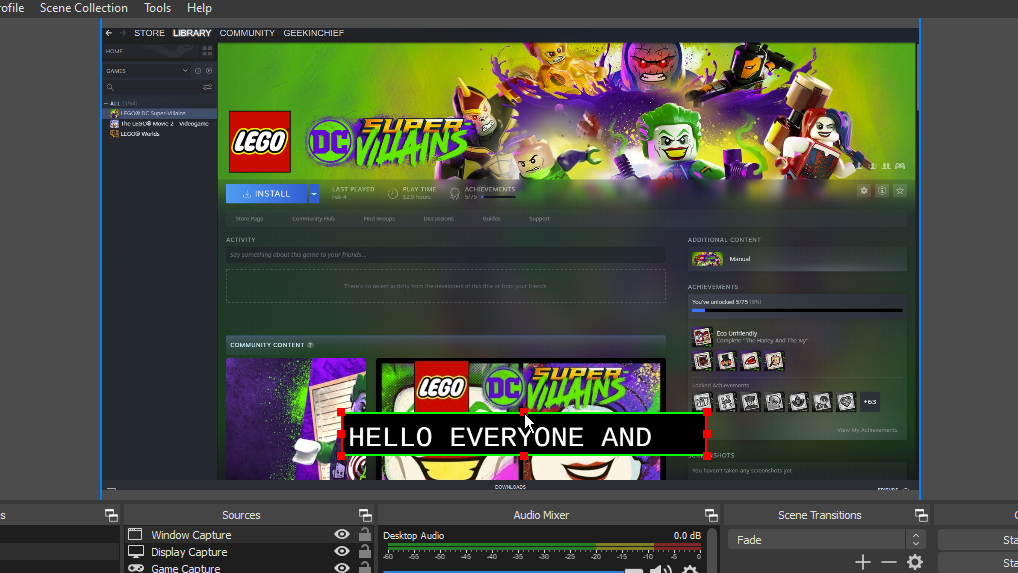
8. Click the + button under Sources in OBS and select Window Capture.
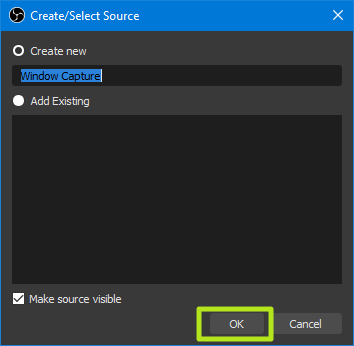
9. Click OK to create a new Window Capture source.
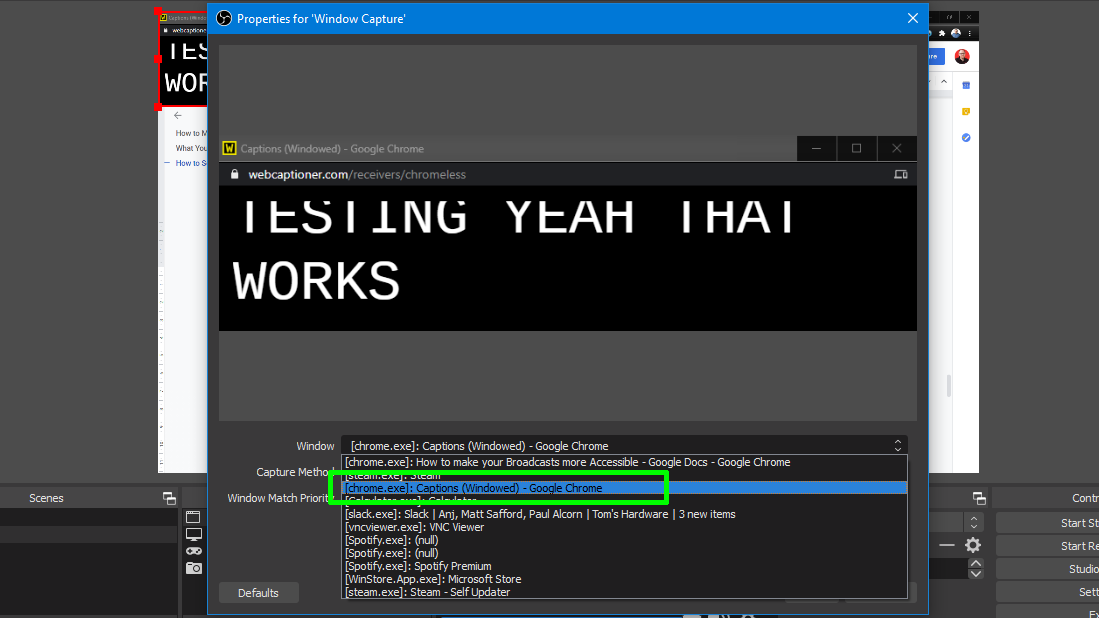
10. Select the Captions window from the Window pulldown, select Window title must match from the Window Match Priority menu and click OK.
11. Resize and position the box within OBS. Hold down the alt key and drag to crop the box so that it only shows the amount of text you want visible at once and doesn’t show the window title bar from the browser. I crop to a single line of text and place the box along the center bottom of my screen.
After this is complete you are ready to go live with a stream that is accessible. There are other closed captioning options embedded with Twitch or available through plugins but from the members of the disabled community I have spoken with, this is the easiest set up and most reliable captioning service.
Webcaptioner.com also recently announced that it will be working with OBS studio to encode closed captions in a stream via adding the OBS Studio channel. Making broadcasting and gaming more accessible doesn’t just benefit the audience, it also broadens the amount of viewers you as the broadcaster can reach. This is a great and relatively simple way to begin turning your broadcasts into an accessible and inclusive space.
Known in the gaming community as Zombaekillz, Natasha Zinda is a professional content creator, a diversity advocate and an activist. You can find her stream on https://twitch.tv/zombaekillz or follow her on Twitter at @zombaekillz.
-
JOSHSKORN Interesting. I saw a device on EVGA's website that is a streaming box. XR1. I'm interested in seeing how that plays out.Reply
