How to Create a Local Account in Windows 10
When setting up a Windows 10 profile for the first time, Microsoft requires the use or creation of a Microsoft account. If you don't want the computer linked to your Microsoft account, you can use a local account.
There are two ways to start using a local account in Windows 10. You can change your current profile into a local account or create a separate local profile.
Change Current Profile into a Local Account
This process will turn your current Microsoft account profile into a local Windows 10 profile.
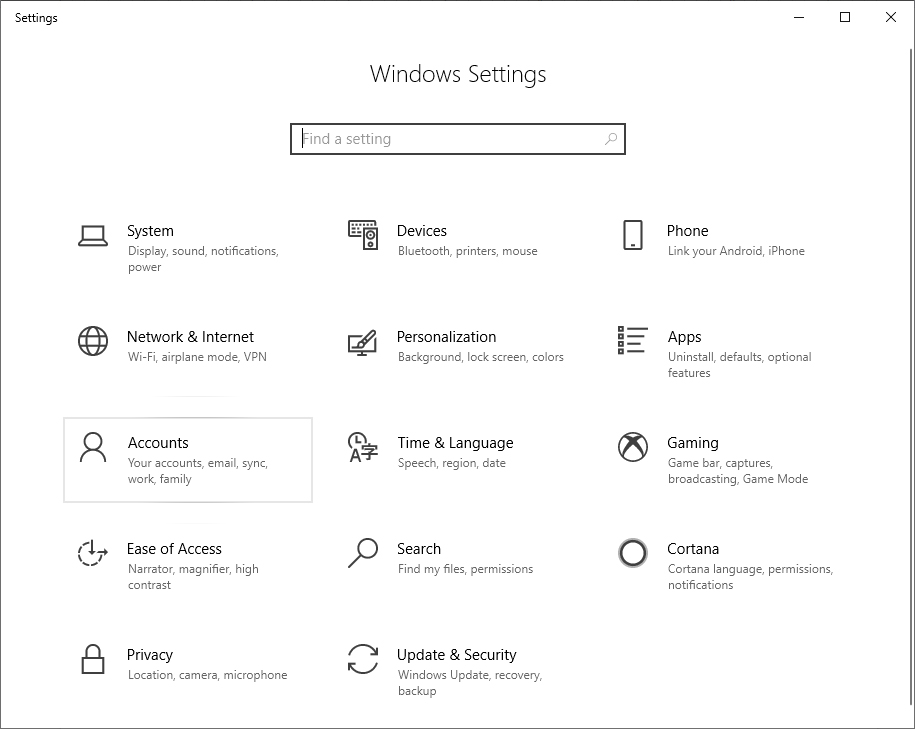
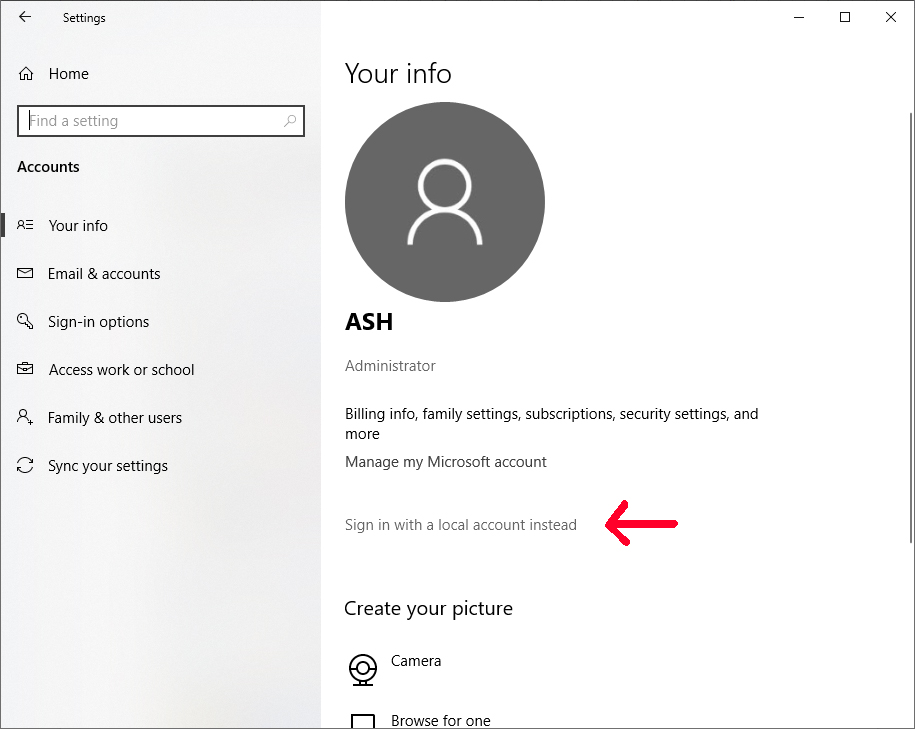
1. Open the Settings menu and go to Accounts > Your info. This will open a screen with account options for your current Windows 10 profile.
2. Click Sign in with a local account instead. You will be prompted to confirm your Microsoft account password. Follow the prompts to complete the local account creation.
Create a Separate Local Profile
Create a local profile separate from your current profile using this process.
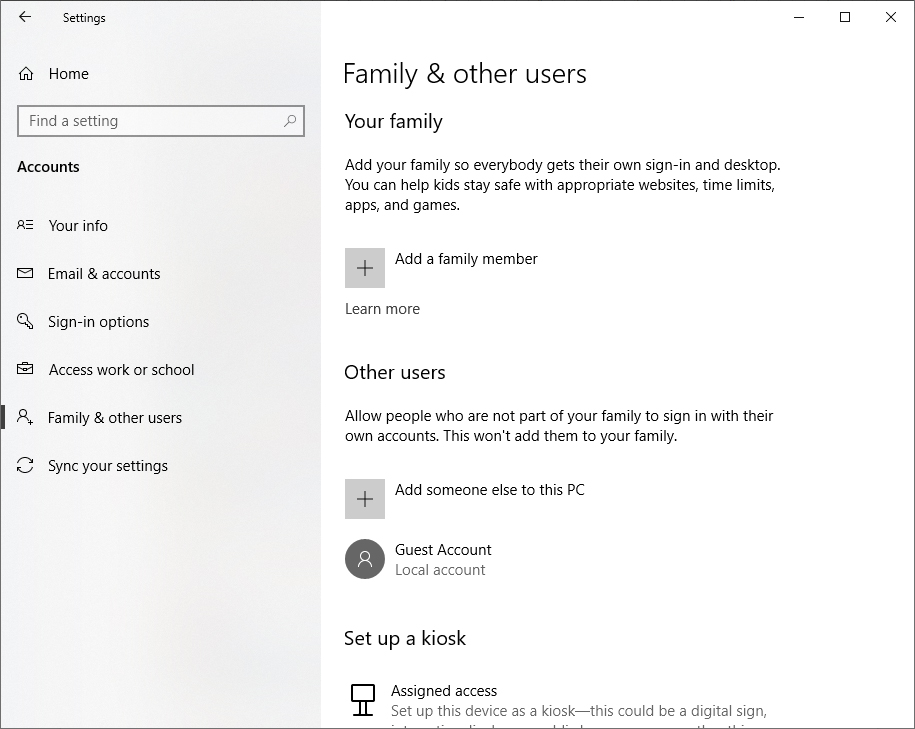
1. Open the Settings menu and go to Accounts > Family & other users. This will open a menu with options to create additional profiles.
Get Tom's Hardware's best news and in-depth reviews, straight to your inbox.
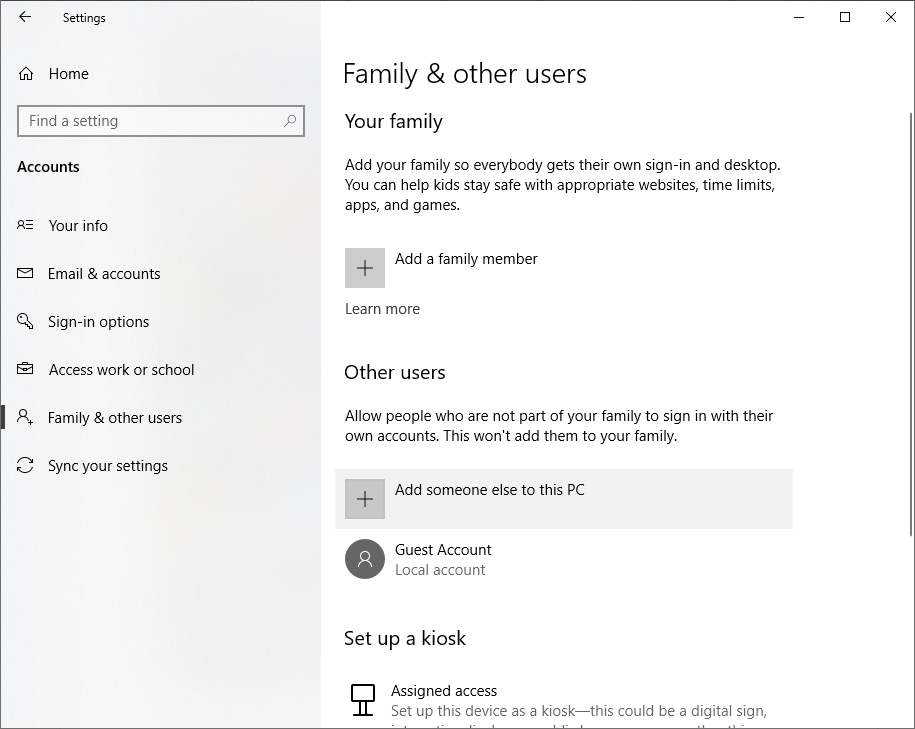
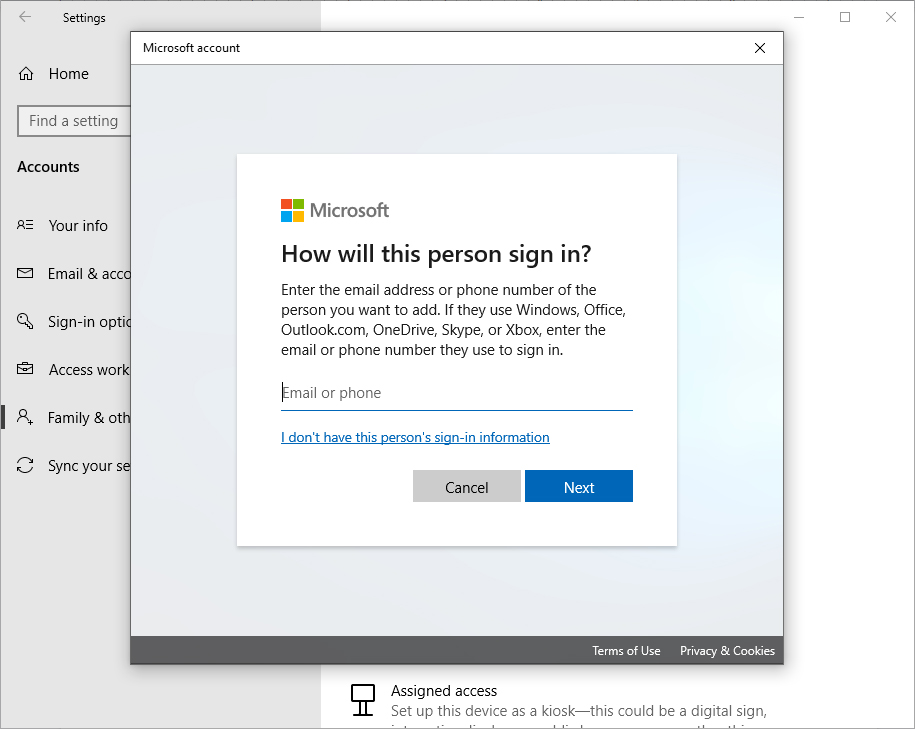
2. Click Add someone else to this PC. A wizard will appear to guide the account creation process.
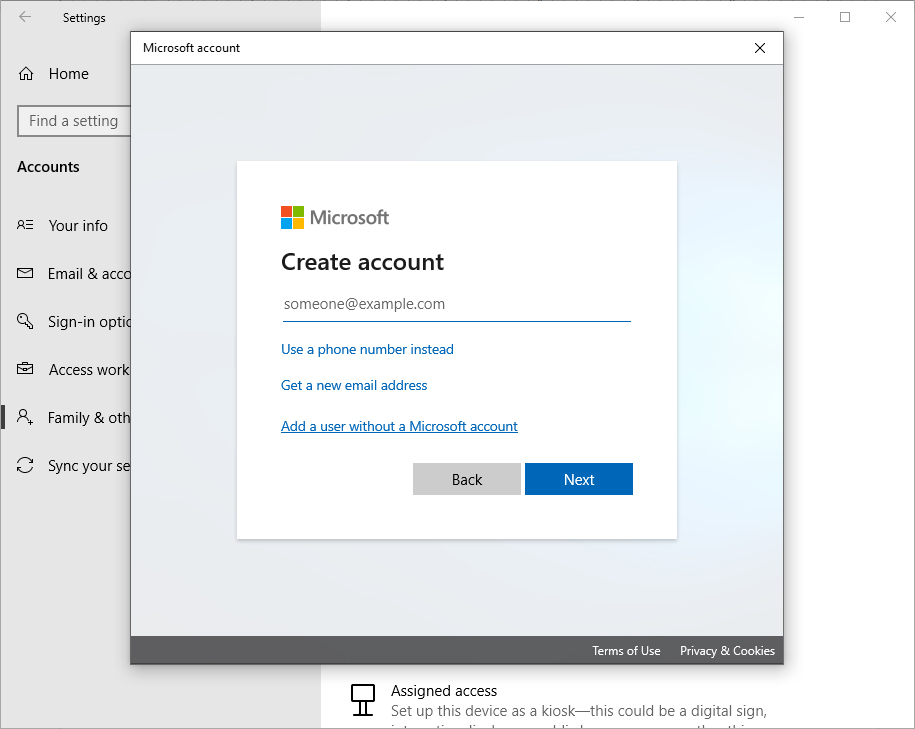
3. Select I don’t have this person’s sign-in information at the bottom of the window.
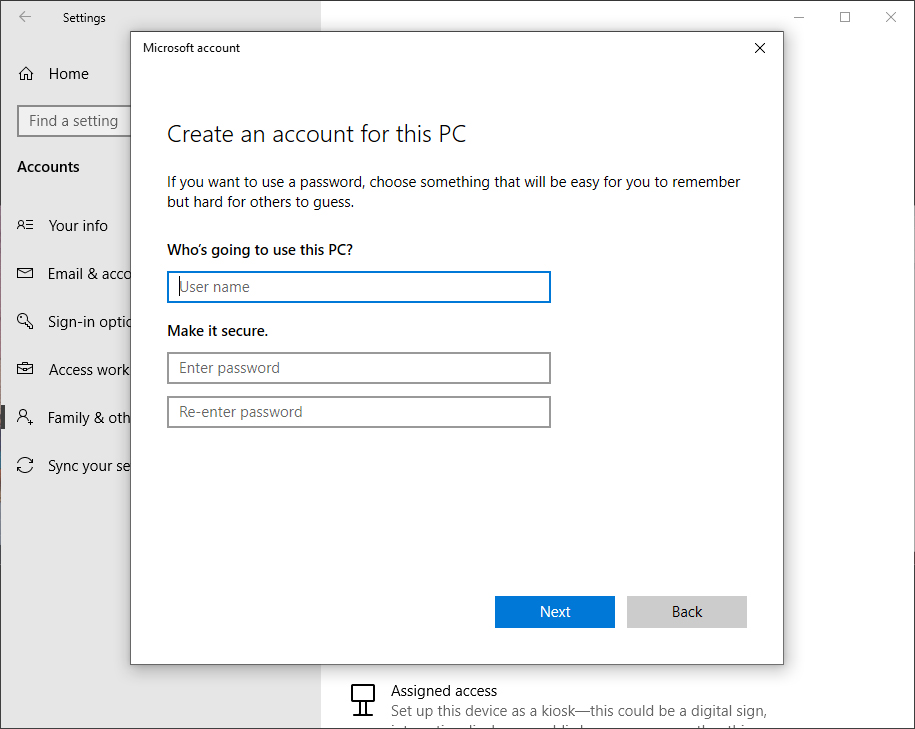
4. Choose Add a user without a Microsoft account. This will open the local profile account creation form.
5. Create a username and password for the local profile. Click next and follow the prompts to complete the account creation.

Ash Hill is a contributing writer for Tom's Hardware with a wealth of experience in the hobby electronics, 3D printing and PCs. She manages the Pi projects of the month and much of our daily Raspberry Pi reporting while also finding the best coupons and deals on all tech.
-
Colif If you want to do this at Installation, and use a local account instead of a MSA, you have a few optionsReply
If its Home, you have to make sure PC isn't attached to internet before you start
If its Pro, you get access to a Domain Join menu that lets you create a local user.
