How to Do a Fuzzy File Search in Linux
Use the fzf utility to find content when you don’t have an exact string.
Get Tom's Hardware's best news and in-depth reviews, straight to your inbox.
You are now subscribed
Your newsletter sign-up was successful
When looking for files on the Linuz desktop, you may often rely on the search feature of your favourite file manager. The conventional searching approach is to apply an exact search, so that only files or directories that are a perfect match to the search string are displayed.
A fuzzy search, on the other hand, performs an approximate search, and instead of identifying exact matches, displays matching results with each keystroke. The fzf utility identifies itself as a general-purpose fuzzy finder. Released under the MIT License, the cross-platform tool can be used across all flavours of Linux.
Installing fzf in Linux
The latest release, version 0.29.0, is offered only in the latest releases of distributions such as Fedora. Manjaro, openSUSE Tumbleweed, Ubuntu, Debian and Arch, while most others carry older versions in their repositories.
To install on a Debian / Ubuntu system
1. Open a terminal.
2. Update the list of repositories. This makes sure that we get the latest software.
sudo apt update3. Install f2f using the apt package manager.
Get Tom's Hardware's best news and in-depth reviews, straight to your inbox.
sudo apt install f2fApart from using the software repositories, there are several other ways to install fzf, including using the package manager homebrew for Mac. Of course, you can also use Git to clone the project’s directory to your hard disk and then install fzf using the install script. The benefit of using Git versus the package manager is that we receive the bleeding edge version.
To install via Git
1. Open a terminal.
2. Clone the repository.
git clone --depth 1 https://github.com/junegunn/fzf.git3. Change directory to the downloaded Git repository.
cd fzf4. Run the install script.
./install
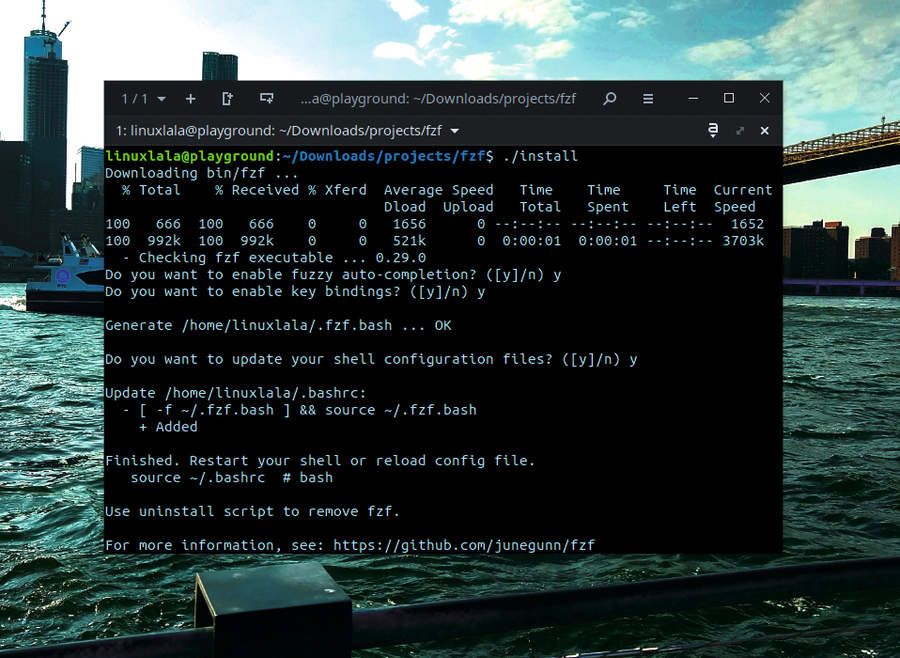
The fzf tool supports auto-completion and various key bindings. The install scripts asks if you wish to enable these and also offers to edit your ~/.bashrc file. Once enabled, you’ll be able to deploy the following keybindings to invoke fzf:
| Keybinding | Function | Header Cell - Column 2 |
|---|---|---|
| Ctrl+r | Search the recent command history based on $HISTFILE | Row 0 - Cell 2 |
| Ctrl+t | Recursively search for the filename in the $PWD | Row 1 - Cell 2 |
| Alt+c | Recursively search for a directory name under the $PWD, and cd into the selected directory | Row 2 - Cell 2 |
Working with fzf
The fzf tool is only a finder so it makes little sense to invoke it by itself. Instead, you can use it in conjunction with other commands such as cd , or to open files in a text editor such as vim or nano.
Before we try that, let’s start with something simple.
1. Open a terminal.
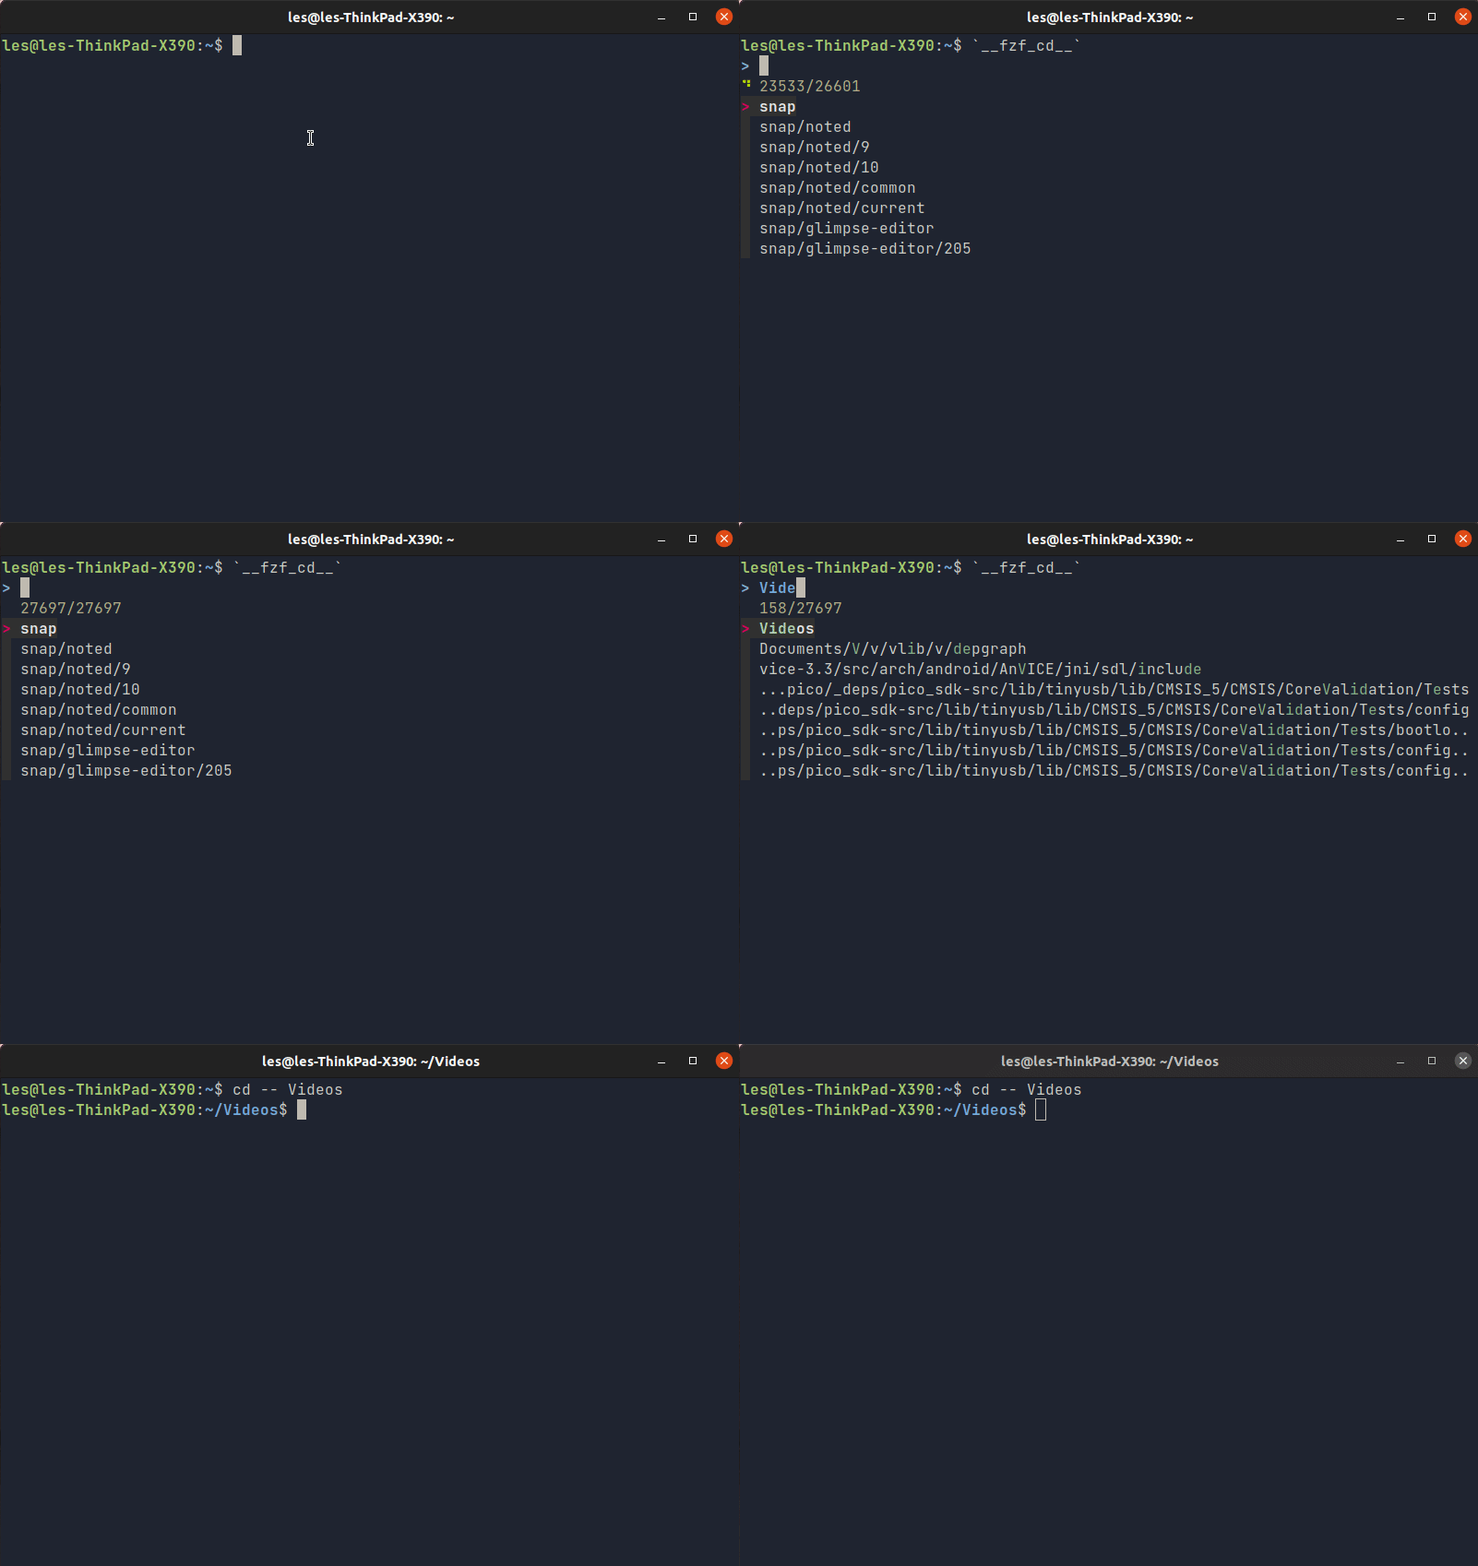
2. Press Alt+c to activate the directory lookup function. This function will only work in your present working directory (PWD). By default the terminal opens to our home directory.
3. Wait for the interactive prompt to load. The first time it loads, it may take a few moments for fzf to cache the data.
4. Start to type in the name of a directory, for example Videos. The interactive prompt will start to show directories which match the word.
5. Press Enter to change directory. If there are multiple entries use the up and down arrows to highlight, then press Enter to select.
If nothing is found, exit fzf by pressing CTRL + C or ESC.
Using fzf tab completion
You can use fzf as a replacement for tab completion with all the terminal commands. To invoke fzf tab-completion, you must use the ** identifier with a command. Here we use fzf tab-completion with the cd (change directory command) to list all of the directories which match our search.
1. Open a terminal.
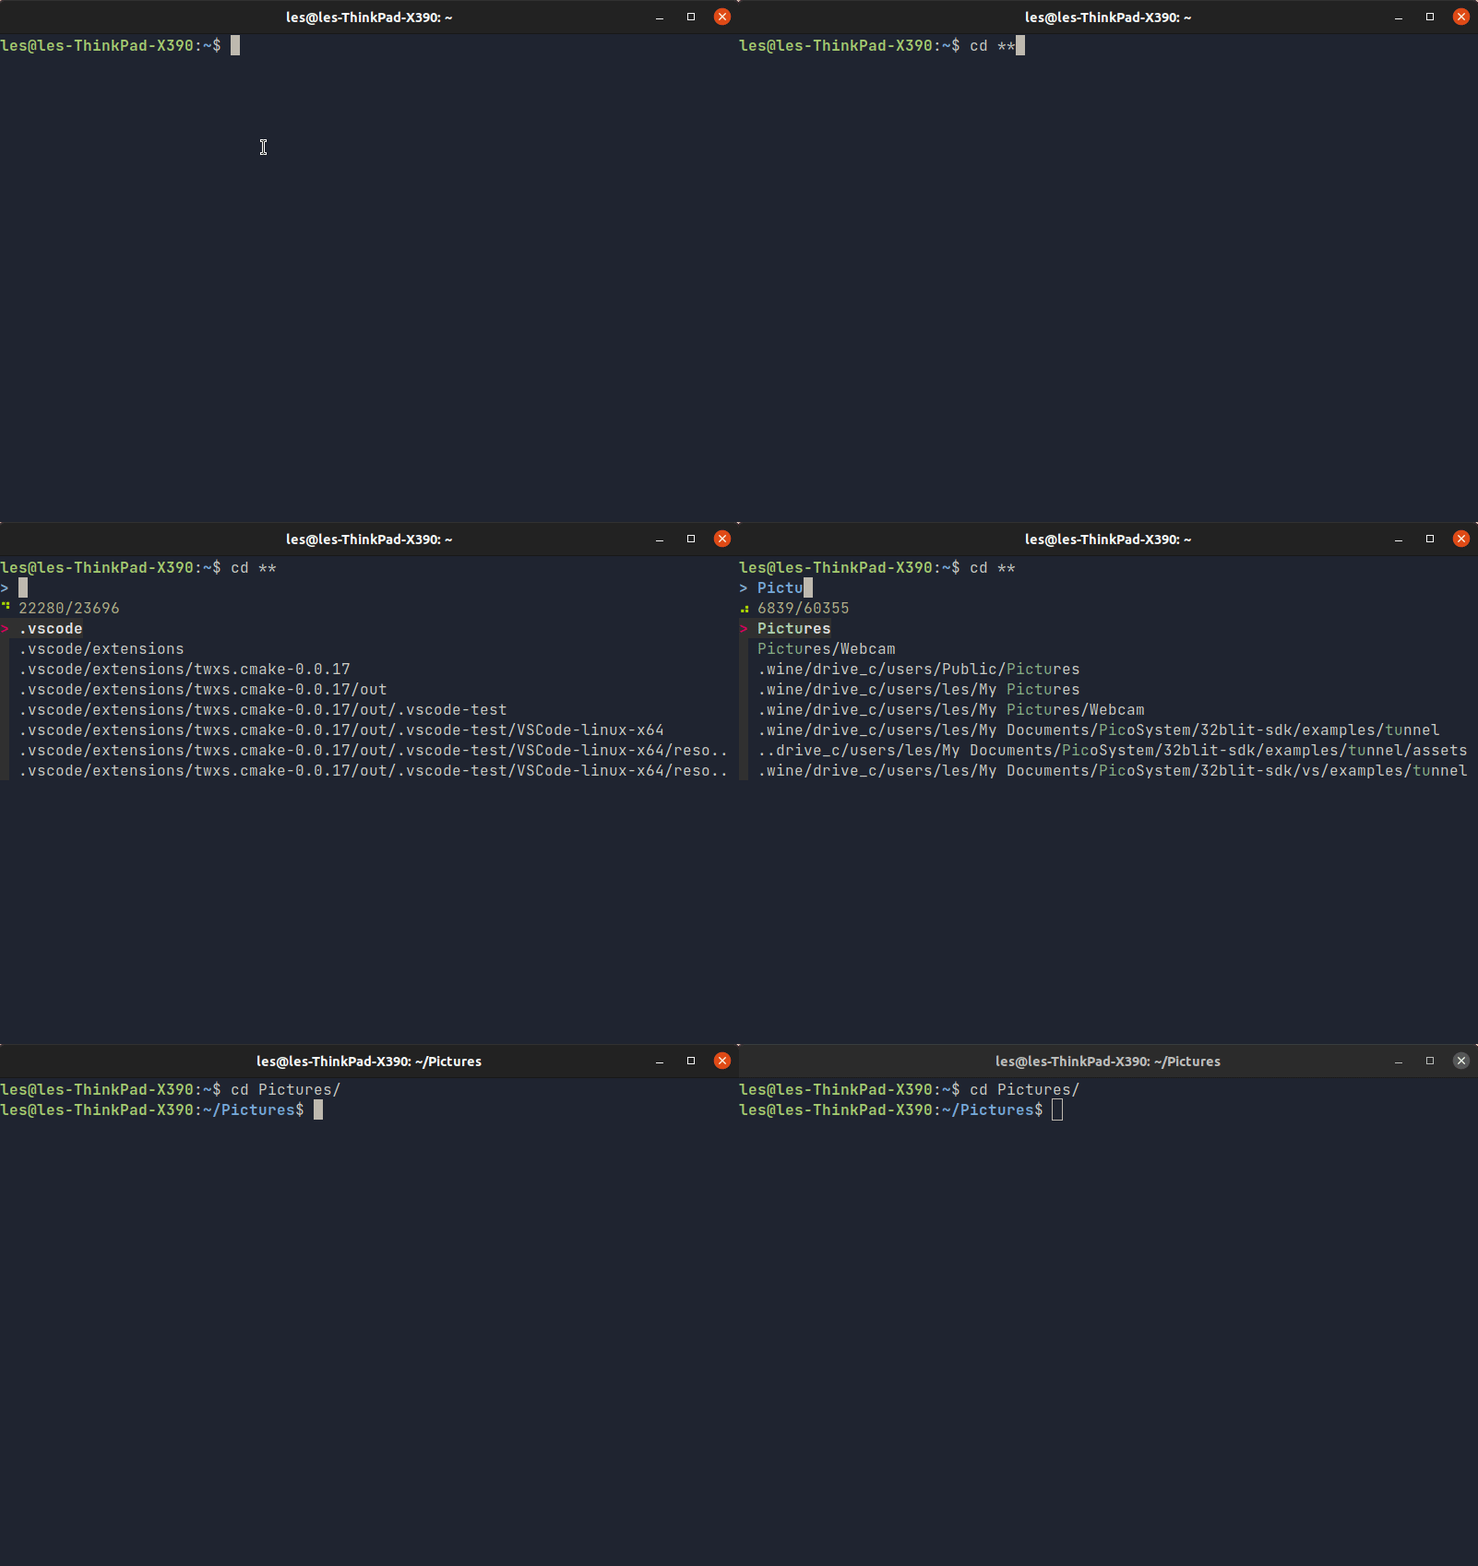
2. Type in the cd command then press space, followed by two **. Then press the TAB key to trigger tab-completion.
cd **<TAB>3. Search for a directory. In our example we searched for Pictures. As you type, fzf will search for directories which match the search term. The arrow keys can be used to scroll through a list of entries.
4. Press Enter to select the directory, then press Enter again to change directory.
Another example of tab-completion is using it along with the kill command to target a specific application / process and then kill it.
1. Open a terminal.
2. Use tab-completion with the kill command.
kill -9 **3. Search for an application/process. We had Inkscape running in the background so chose to search for that.
4. Use the arrow keys to select the correct process and press Enter to select.
5. Press Enter to run the kill command with the specified process.
Enhancing the Search
By default, fzf starts in extended-search mode, which means that you can type space-separated keywords to narrow down the file or directory you’re looking for.
However, you can also utilise different techniques to improve the search results. Here we use the filename search to find Python files.
1. Open a terminal.
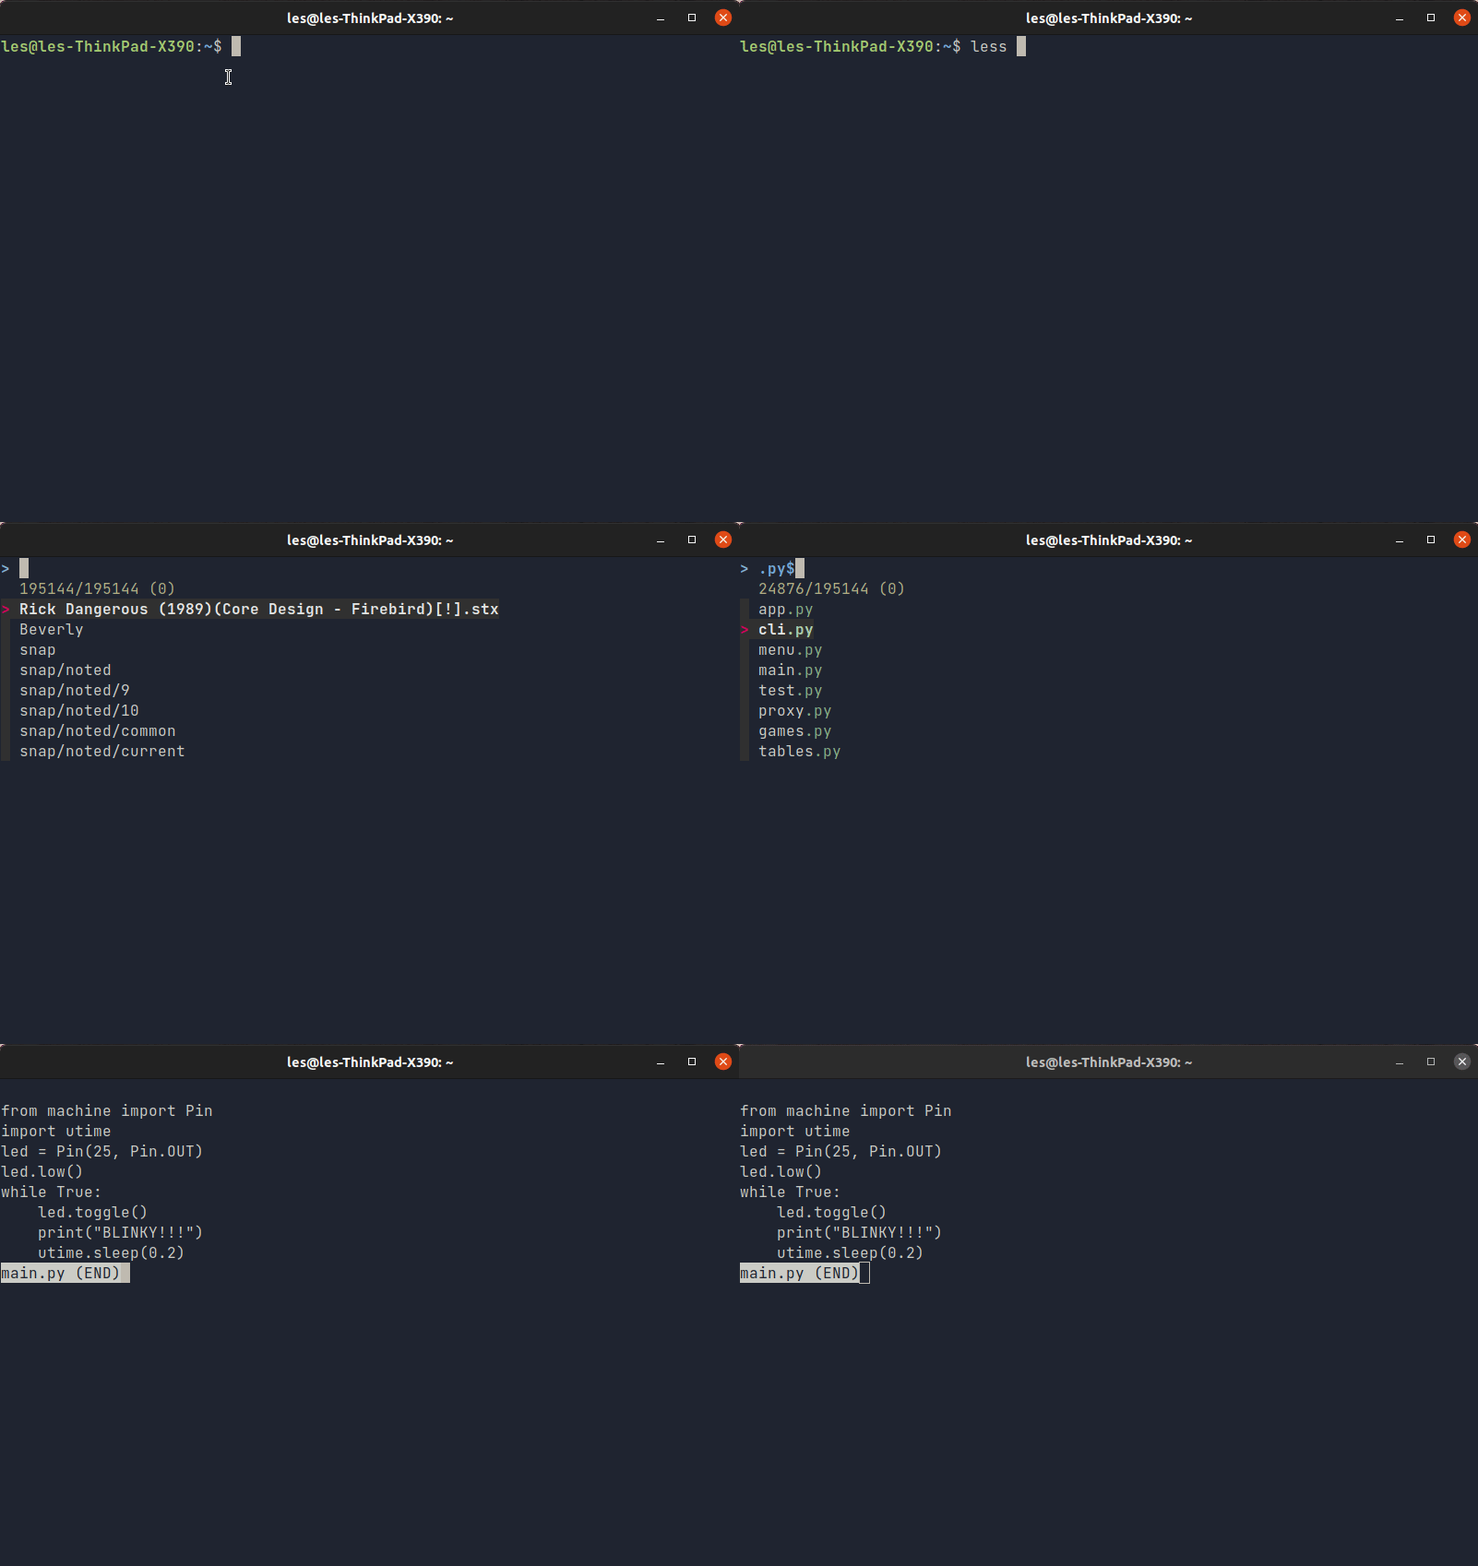
2. Type in less and then press CTRL + T to open fzf’s file name search tool. To view a file we use less as it comes with built-in pagination and tools to scroll through large amounts of text.
3. Type in the file extension, in this case .py, and add a dollar sign to the end of the line.
.py$
4. Use the arrow keys to select the correct file and press Enter to select.
5. Press Enter to open the file using less. Search
Table of further enhancements
| Token | Example | Explanation |
|---|---|---|
| string | string | Searches for string |
| ' | 'string | Performs an exact match for items that include the quoted string |
| ^string | ^LXF | Lists items that start with LXF by performing a prefix exact-match |
| .format$ | .odt$ | Lists files that end in .odt format by performing a suffix exact-match |
| !string | !dhc | Lists items that don't include dhc by performing inverse-exact-match |
| !^string | ~^LXF | List items that don't start with LXF by performing inverse prefix exact-match |
| !.format$ | !.odt$ | Lists files that don't end with .odt format by performing inverse suffix-exact-match |
This tutorial first appeared in issue 287 of Linux Format magazine.

Shashank Sharma is a freelance writer for Tom’s Hardware US, where he writes about his triumphs and joys of working with the Linux CLI.
-
Grobe Reply
The installation I suppose take less than 2 minutes to perform. How is that a lot of work?jkflipflop98 said:That's a lot of work to replicate what Windows does by simply hitting Win+S


