


These days, the Meta Quest 2 (aka Oculus Quest 2) is the best VR headset for just about anyone. The $399 headset allows you to play VR games either sitting or walking around. It runs as a standalone device or it can tether to your PC and run PC-based VR games either over a wired USB connection or Wi-Fi, the latter of which Meta calls AirLink.
If you want to play Minecraft in VR, there are three ways to do that on the Meta Quest 2, each of which has its own setup method. The best method to use is QuestCraft, an unofficial port of Minecraft Java that runs as a standalone app on the headset and supports a variety of mods as well as roomscale tracking. However, it’s an unofficial port and so could break or be blocked by Mojang at any time.
Here are the pros and cons of each method, and we’ll explain how to install below.
| Method | Pros | Cons |
|---|---|---|
| QuestCraft (standalone) | Standalone (can play without connecting to a PC) | Not officially supported |
| Best performance | Most difficult to install | |
| Supports Fabric mods | No ray-tracing | |
| Supports roomscale | No Forge mods | |
| Minecraft for Oculus (Bedrock): Wired or Wireless | Easiest to install | Only supports add-ons no mods |
| Works well in multiplayer | No roomscale | |
| Other players can only see your head move | ||
| Vivecraft (Minecraft Java): Wired or Wireless | Supports Forge and Fabric mods | Laggiest method |
| Supports roomscale | Multiplayer requires all players to have Vivecraft VR or non-VR Client installed | |
| Moving arms while standing can break blocks, attack mobs | Server must have Vivecraft server plugin | |
| Row 10 - Cell 0 |
How to Install QuestCraft: Standalone Minecraft VR for Meta Quest 2
While other methods rely on you using a PC to run the game and then sending the VR images over a USB or Wi-Fi connection, QuestCraft allows you to run the game entirely on the Quest 2. It’s an unofficial port of Minecraft Java, so you’ll need to enable developer mode and sideload the APK, a process which is fairly easy if you follow the steps below.
You’ll still need a legitimate Minecraft Java account to log in and play QuestCraft. However, since it’s an unofficial port, it’s always possible that future updates will break it.
1. Enable developer mode in the Meta Quest mobile app on your phone or tablet. To get there, tap Menu->Devices->Developer Mode and toggle it to on.

2. Download and install SideQuest, if you don’t already have it. This program allows you to sideload apps onto the headset.
3. Launch SideQuest with the Quest 2 plugged into your PC via USB. The app should detect your headset automatically. If this is the first time, you will see a prompt on the headset to allow USB debugging and you’ll probably want to accept “always allow from this computer” so you don’t get prompted again.
4. Enter “questcraft” in the SideQuest search box and click the top result.

5. Click Download App (Sideload). It will download and install. A status bar will quickly show when it has finished but then disappear. In our case, the process took less than 10 seconds.

6. Disconnect the headset and put it on.
7. Navigate to the apps menu on the Quest 2.

8. Click the filter button in the upper right corner.

9. Select “Unknown sources” from the pulldown menu.

10. Select QuestCraft to load it.

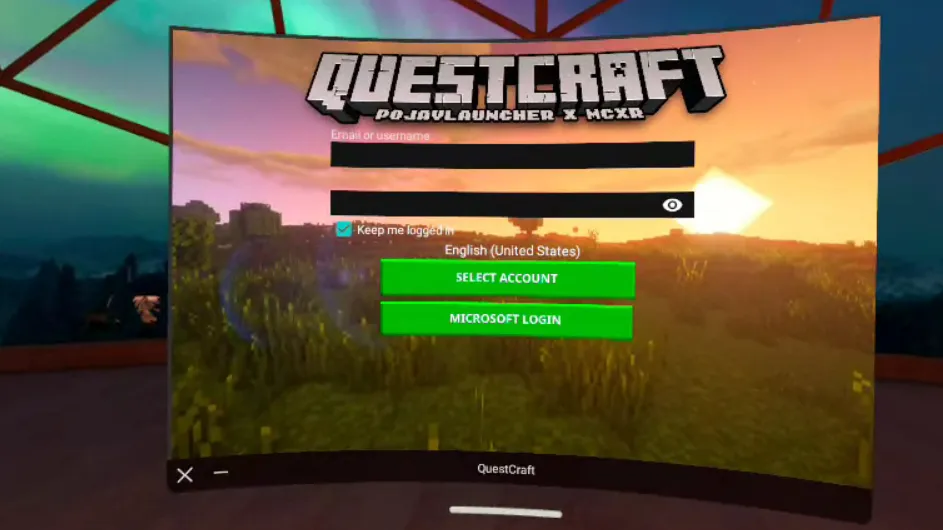
11. Click Login on the QuestCraft splash screen and follow the instructions to sign in.
12. Click Play.

It will take a few moments to download assets and load the game. The screen will turn black for a bit while it's loading. Don’t take off the headset or quit. When it shows you in a box made of Minecraft dirt blocks, it’s almost done loading.
Installing mods in QuestCraft: You can install some, but not all Fabric mods in QuestCraft. To do so, click Mod Manager in the QuestCraft menu and then click on the searchbox and use the keyboard to query for the mod you wish to download. Then click on the result to get information and then the down arrow button to install. If a mod is incompatible, the game won’t launch or will have bugs. You can see a community-maintained list of compatible mods here.
How to Configure Meta Quest 2 to Work in Wired Mode
If you don’t want to use QuestCraft, you’ll need to connect your Meta Quest 2 to your PC via either wired or wireless (Wi-Fi) connection. This is true whether you want to use Vivecraft (Minecraft Java in VR) or Minecraft for Oculus. As you might guess, wired offers much better performance, with the obvious trade-off that you must be near your computer.
It almost goes without saying that your PC has to meet the very modest system requirements for Meta Quest Link in order to run in wired or wireless mode. These include having a 4th Gen Core i5 or first-gen Ryzen 5 or higher CPU, Windows 10 or 11, 8GB of RAM and some kind of discrete graphics. Minecraft’s system requirements are even lower than these, but if you want to use ray-tracing, you need an Nvidia RTX or Radeon RX 6000 series graphics card.
1. Install the Oculus desktop app on your PC if you don’t have it already.
2. Launch the Oculus app.
3. Navigate to Devices.

4. Click Add Headset.

5. Select Quest 2 and click Continue.

6. Select Link (Cable) for wired connections. If you wish to use a wireless connection, skip to the section below on using Air Link for wireless connections.

7. Connect the Meta Quest 2 to a USB 3 or faster port on your PC and click Continue.
8. Navigate to Quick Settings on the headset and select Meta Quest Link. As long as your controllers are paired with the headset, they will automatically connect to your PC.
How to Connect Your Meta Quest 2 to PC via Air Link
Air Link is Oculus’ system for connecting your Quest 2 headset to your PC via Wi-Fi. Air Link works with either Minecraft for Oculus (Bedrock) or Vivecraft (Java), but it is the laggiest solution.
In order to work, both the PC and the headset must be connected to the same network. To reduce latency, It helps if the PC is connected via Ethernet. If you are using a mesh network, make sure you configure the router to only allow both devices to use one node so they are on the same node (or else it won’t work).
1. Navigate to Devices->Add Headset->Quest 2 in the Oculus desktop app as shown in steps 2 through 6 in the section above.
2. Select Air Link and click Continue.

3. Navigate to Settings->Experimental Features on the Oculus Quest 2.
4. Toggle Air Link to on.

5. On the Quick Settings menu, click Oculus Air Link.

6. Select the PC you wish to pair with and click pair. A pairing code should appear on your PC’s screen.
7. Click Confirm on the PC.
8. Click Continue and then Launch on the Oculus Quest 2.
How to Launch Minecraft for Oculus (aka Bedrock Edition in VR)
The only first-party method for playing Minecraft in VR is the simplest, but most limiting. If you already have Minecraft Bedrock edition installed (aka Minecraft for Windows or non-Java Minecraft), setting up VR will take just a few seconds. However, you won’t be able to use mods like you can with the other methods.
1. Create a desktop shortcut to launch Minecraft VR using the location of minecraft://Mode/?OpenXR=true. To do this, right-click on your desktop and select New->Shortcut. Enter minecraft://Mode/?OpenXR=true as the Location, click Next and name your shortcut Minecraft VR (or something similar).

2. Open the shortcut to launch Minecraft on your Oculus Quest 2. You’ll see Minecraft load in a Window on your desktop and on the headset view screen at the same time. It may take several seconds before the title screen appears.

How to Play Vivecraft (Minecraft Java VR) on Meta Quest 2
Vivecraft, which is a third-party VR launcher for Minecraft Java, provides the most immersive VR experience of any method. With Vivecraft, you can move your arms to perform tasks such as attacking, something you can only do with the controller in other versions. You can also use Forge mods.
As with Minecraft for Oculus, Vivecraft requires a wired or wireless connection to your PC.
1. Download and install the Forge Mod Loader (client), preferably the latest version. You will need to have the Java runtime library installed, which you do if you already have run any mods on Minecraft Java edition. Be careful because there may be a pop-up ad that tries to fool you into downloading malware. If you get the ad, wait until the skip button appears and click "skip."
2. Download Vivecraft from Modrinth. Be sure to select a the version that matches your Forge Mod Loader. Note that Java is required to install Vivecraft.
3. Launch the Minecraft launcher.
4. Click the folder icon next to Forge in the Installations tab. You won't see the folder icon until you hover over "Forge.

File explorer opens to the Roaming\.minecraft folder.
5. Create a subfolder called "mods".

6. Copy the Vivecraft .jar file to the mods folder.
7. Open the Oculus Desktop app and connect your Quest 2 headset.
8. Launch Steam (install it if it’s not already installed).
9. Launch SteamVR from within Steam. If it’s not already installed, install it.

10. Enable Meta Quest Link on the headset by going to the Quick Settings menu and selecting Meta Quest Link then selecting the computer that appears. If that doesn't work, check your connection.
11. Click the Play button next to Forge in the Minecraft launcher.

12. Click "I understand the risks" and Play if you receive a warning.

13. Click Yes when asked "would you like to use VR."

The game may ask you if you want it to ask you next time about using VR. We recommend saying "yes."
After this, the game will load and start on your headset. You can then navigate through the title screen and start playing.
Minecraft VR Controls on Oculus Quest 2
These controls apply to Vivecraft:
- A - interact / place
- Y - pause
- B - quick actions menu
- X - inventory
- Left joystick button - jump
- Left joystick - movement
- Right joystick - rotating, turning
- Left front trigger - teleport
- Right front trigger - mine / attack / select from menu
In Minecraft for Oculus (Bedrock edition) and QuestCraft, the controls are:
- Y - toggle immersive mode / living room mode (is radial menu in QuestCraft)
- X - opens inventory
- B - crouch
- A - jump
- Menu button - pause
- Left joystick - movement
- Right joystick - rotating, turning
- Right front trigger - mine / attack / select from menu
- Left front trigger - interact / place
- Right touch controller is cursor movement
MORE: Oculus / Meta Quest 2 Review
MORE: Best VR Headsets for PC and Gaming
MORE: Virtual Reality Basics
