How to Build a Raspberry Pi Body Camera
Using the Raspberry Pi Zero W to create a body camera can capture vital moments at protests or important moments of your life.
Get Tom's Hardware's best news and in-depth reviews, straight to your inbox.
You are now subscribed
Your newsletter sign-up was successful
There’s nothing quite like the power of real, first-person video. If you’re at home playing with your children or pets, wearing a body camera lets you save those special memories, without sticking your face in your phone. And, if you’re attending a protest and want to capture malfeasance on anyone’s part, it also fits the bill.
While you could go out of your way to buy a dedicated body camera, it’s easy enough to build one using a Raspberry Pi Zero W and a few inexpensive parts. Note that, if you are going to a protest, you’ll want to make your setup as unobtrusive and non-threatening as possible. If you have wires and duct tape hanging out of your jacket, people could get the wrong impression. The photos in this article show our best take on how to make the setup look like the body camera that it is, but you may be able to make it more compact and less scary looking.
This project will record your daily life at the push of a button. It will be constantly recording in two minute chunks, and when triggered it will save the video to disk, before uploading for safe keeping to a private Dropbox folder. So, even if your camera breaks or is confiscated, your video will be available in the cloud. From Dropbox, you can edit and share your videos as necessary.
What You’ll Need to Build a Raspberry Pi Body Camera
- A Raspberry Pi Zero W
- A microSD Card with Raspberry Pi OS on it
- Raspberry Pi Zero official case
- Raspberry Pi Camera Module. Note that Pi Zeros use a narrower camera cable than other Pis.
- Female to female jumper wires
- A USB power bank
- Soldering iron or Pimoroni Hammerhead to attach GPIO pins to Pi Zero W
- One momentary push button
- A mobile hotspot or phone that goes into hotspot mode
- Double sided tape and sticky tape
Hardware Setup of Raspberry Pi Body Cam
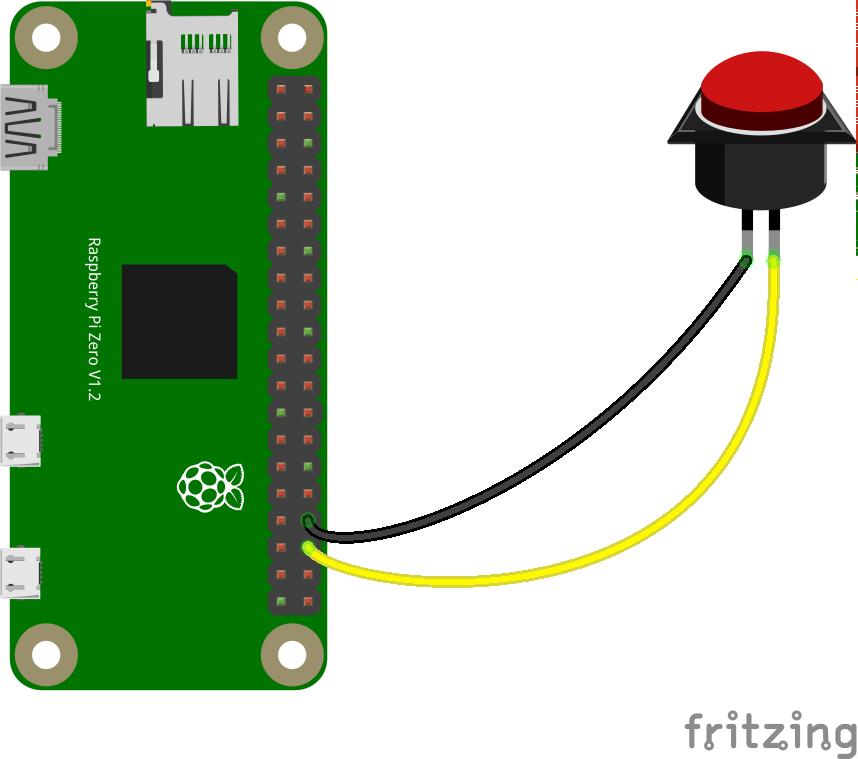
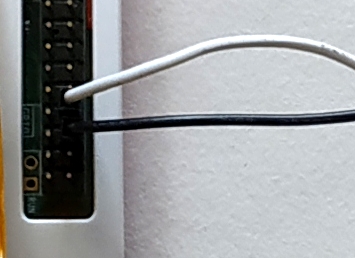
1. Attach two wires to GPIO 16 and GND on the Raspberry Pi Zero W. You can either solder the wires on or attach GPIO pins to the Pi Zero W, either by soldering them on or using a Pimoroni Hammer Header. Pre-soldered Raspberry Pi Zero Ws, known as the Zero WH, are also available for sale.
Using 2x female to female jumper wires and a 2 pin push button connect GPIO16 and GND to the button.
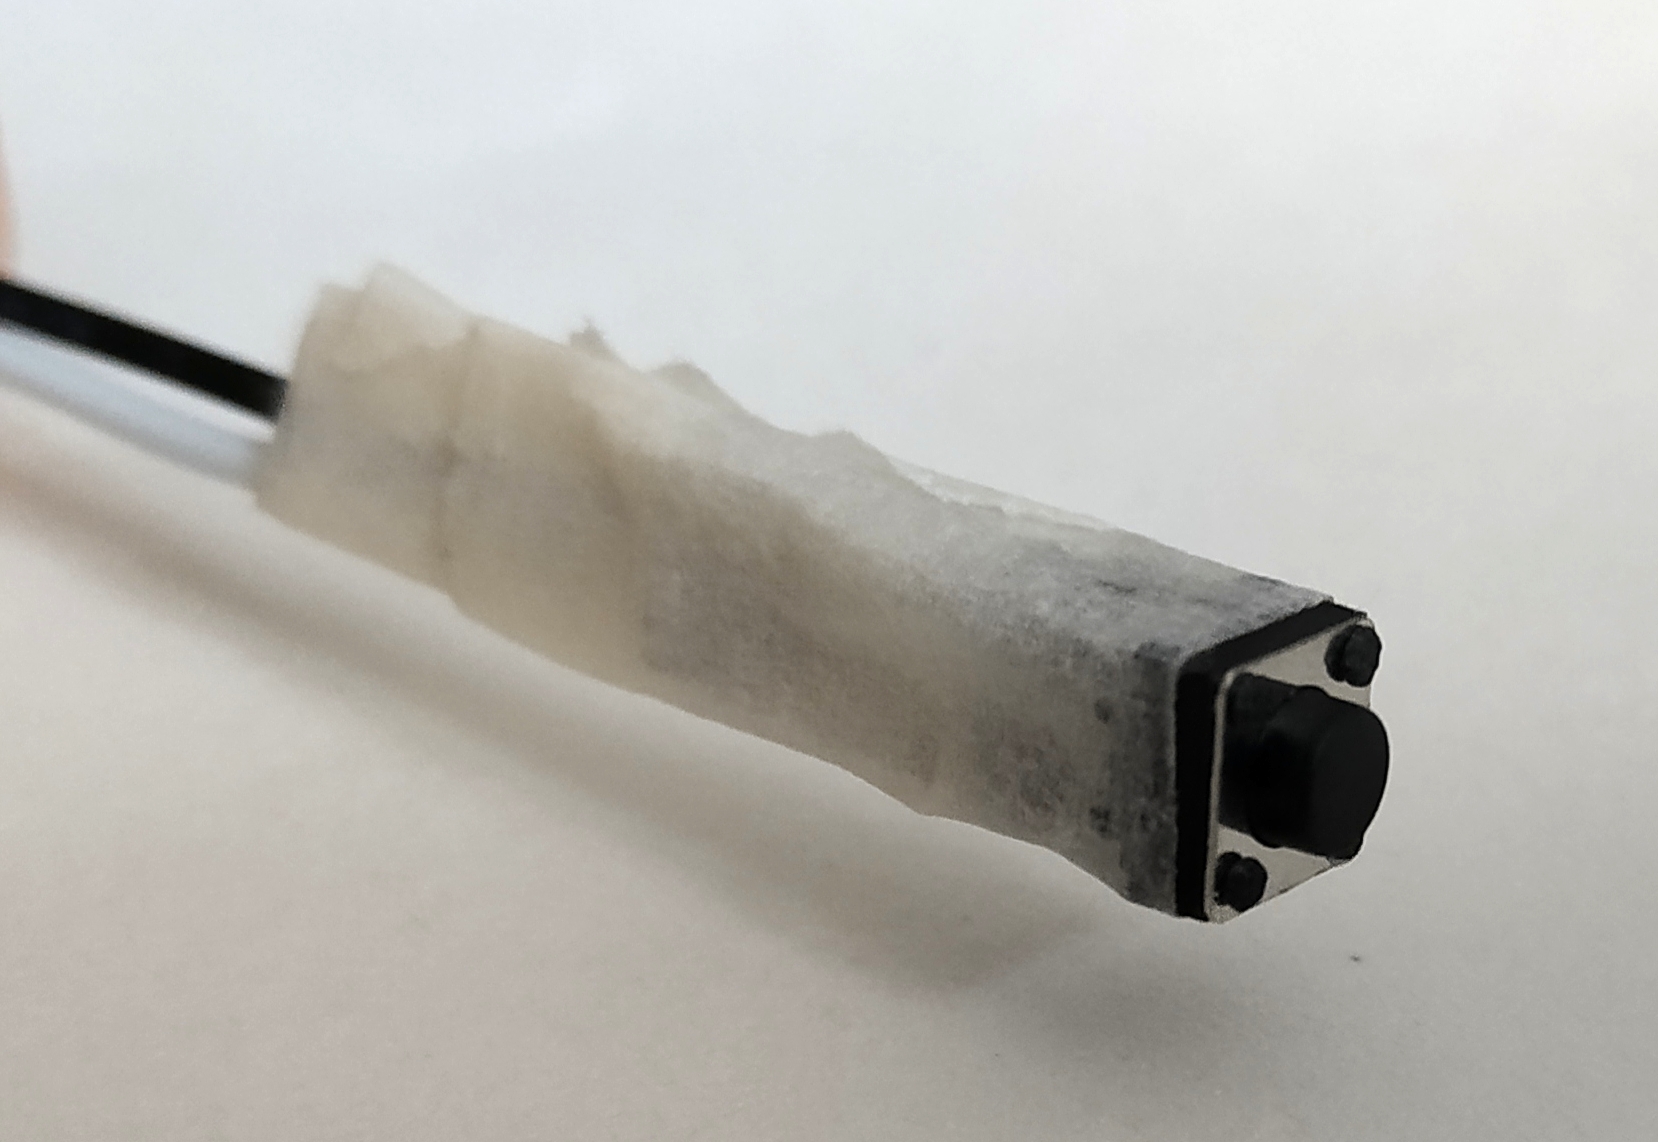
2. Use a little tape or heat shrink tubing to tidy up the connection. Wrap the tape so that the button and the wires are secure.
Get Tom's Hardware's best news and in-depth reviews, straight to your inbox.
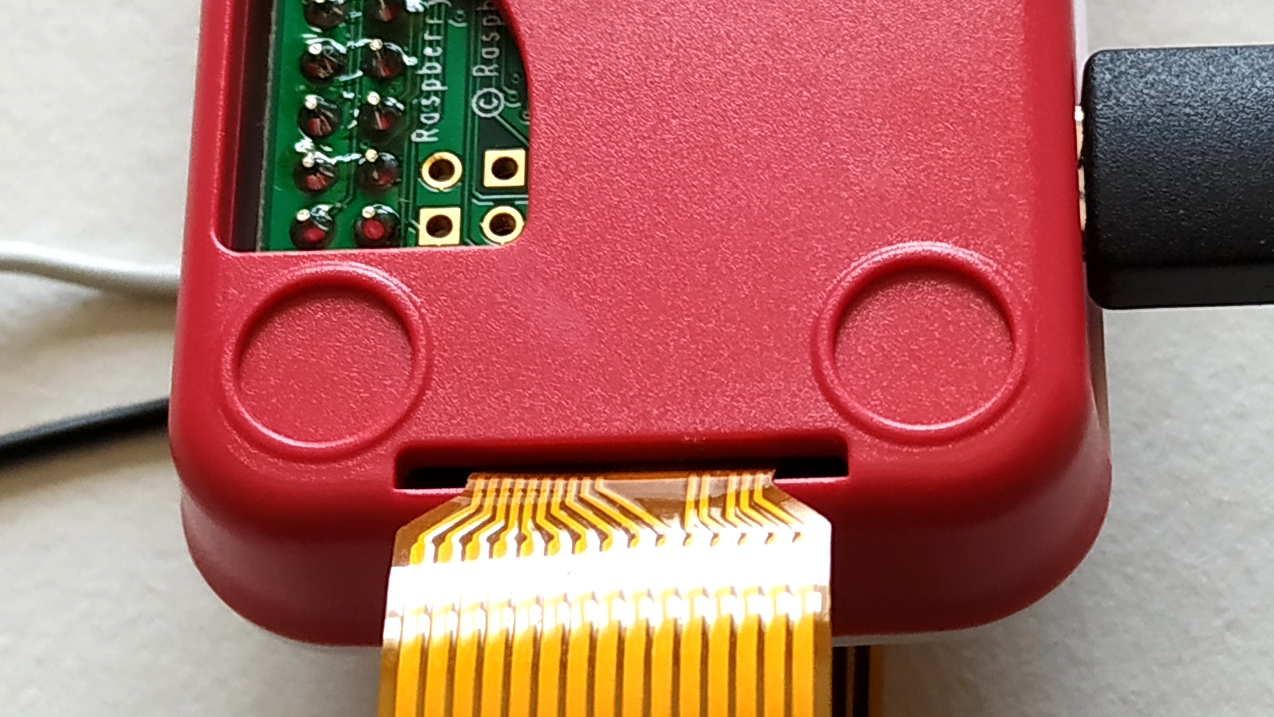
3. Insert the camera module to the Raspberry Pi Zero W Camera slot using the adapter. Ensure that the cable is inserted correctly and locked into place. If using the official Raspberry Pi Zero W case, feed the ribbon cable through the slot on the underside of the case.
Software Setup of Raspberry Pi Body Camera
4. Boot your Raspberry Pi Zero W with peripherals connected. If you don’t already have a microSD card see our article on how to set up a Raspberry Pi for the first time.
5. Turn on your mobile hotspot, or set your cell phone to act as an access point. Make a note of the access point name and the password.
6. Connect your Raspberry Pi to the hotspot via Wi-Fi.
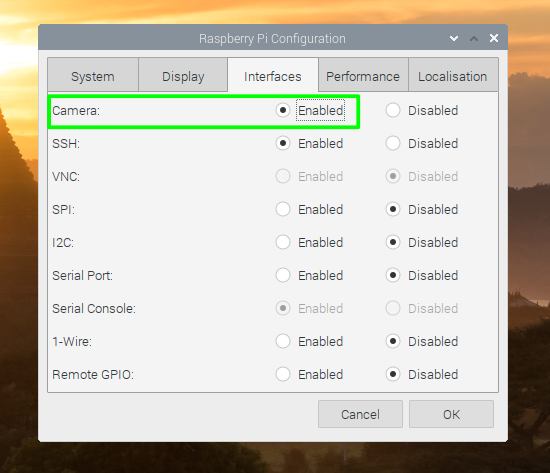
7. Enable the camera module in Raspberry Pi OS. You can do that, by going to Preferences >> Raspberry Pi Configuration, clicking on the Interfaces tab and ensuring that.the Camera interface is enabled. Reboot the Pi for this to take effect.
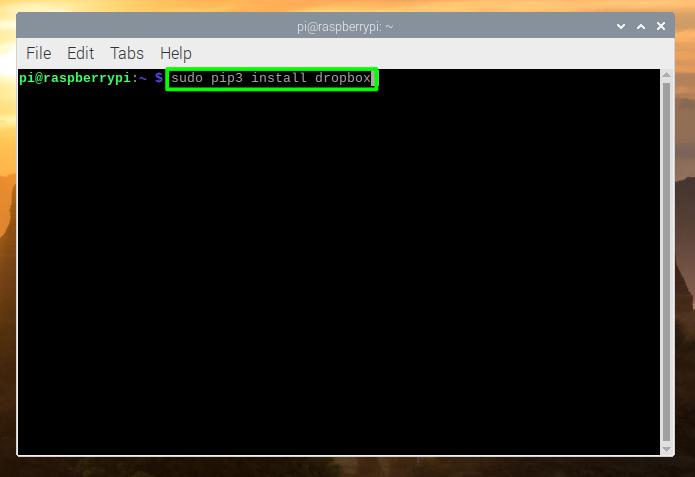
8. Install the Dropbox library for Python 3 by entering the following at the command prompt.
sudo pip3 install dropbox9. Navigate to Dropbox Developers www.dropbox.com/developers in your browser and Click on Create Apps to sign in. If you don’t already have a Dropbox account, register for one (2GB Basic Plan is free) and then return to this page.
10. Select the Dropbox API and App Folder access. Then name the app, which creates a folder to store the video files and click Create App.
A new screen appears.
11. Click Generate under Generated access token then copy this token into a spare text document for later reference.
Coding a Python Script for Raspberry Pi Body Camera
12. Open the Geany IDE, found in the Raspberry Pi Programming menu.
13. Enter the code as described below. The first line of Python is the location of the Python3 interpreter, this is needed to make the code executable from the terminal.
#!/usr/bin/python314. Import the following libraries to add support for basic IO, a push button, the camera, date / time and Dropbox.
import io
from gpiozero import Button
import picamera
from datetime import datetime
import dropbox
15. Paste the Dropbox token into the code, and then assign it to a variable called “token”. Then a connection to Dropbox is made using the token for authentication.
token = "DROPBOX TOKEN HERE"
dbx = dropbox.Dropbox(token)
16. Create an object, “trigger” that will be used to link the button connected to GPIO 16 to the code.
trigger = Button(16)17. Create a connection to the Raspberry Pi Camera, then set the resolution to 720p.
camera = picamera.PiCamera()
camera.resolution = (1280, 720)
18. Create a recording stream. A stream is used to create a circular buffer that will record events before the button is pressed. Here the camera is instructed to record 2 minutes before activation. The stream is recorded to an h264 file.
stream = picamera.PiCameraCircularIO(camera, seconds=120)
camera.start_recording(stream, format='h264')
19. Add a try statement which will attempt to run the code indented within it, in this case it will start with a loop to constantly run the code within.
try:
	while True:
20. Create a delay, forcing the camera to wait for one second each time the loop iterates.
camera.wait_recording(1)21. Create an if condition for the trigger and set the current date and time, used later as a timestamp. When the user presses the button, this if condition will start the process of capturing video.
                if trigger.is_pressed:
        	now = datetime.now()
22. Print a message to the terminal to show that the recorder has been triggered and set the recording time to 120 seconds.
                print("ACTION")
        	camera.wait_recording(120)
23. Add this code to save the video stream to a file, which uses the timestamp as the filename, and appends the file format to create a valid file. Another message is printed to advise the user.
                stream.copy_to(str(now)+'.h264')
        	print("Stream saved to disk...will upload to Dropbox")
24. Add this code to enable the script to open the freshly created video file in read only mode and upload it to Dropbox, overwriting any files that share the same name. A message is printed to the Terminal when this is complete.
with open(str(now)+'.h264',"rb") as data:
            	dbx.files_upload(data.read(),'/'+str(now)+'.h264',mute=True, mode=dropbox.files.WriteMode.overwrite)
        	print("File uploaded to Dropbox")
25. Create these last two lines of code to stop the camera recording when the user stops the code from running.
finally:
camera.stop_recording()
26. Save the script as video-recorder.py and then close Geany.

Les Pounder is an associate editor at Tom's Hardware. He is a creative technologist and for seven years has created projects to educate and inspire minds both young and old. He has worked with the Raspberry Pi Foundation to write and deliver their teacher training program "Picademy".
-
bit_user Wouldn't you be much better off with a 1-2 generation old cell phone, in a good case?Reply
That Pi-based contraption looks fragile, bulky, burns a relatively large amount of power, lacks a screen... the camera is low resolution, it's got no ISP to clean up the image... need I go on?
And with a cell phone, you can stream over wifi, or even 4G (assuming you have service for it). -
Stanto The casing is relative to how you design and build it. You could 3d print a slim enclosure, design a PCB, basically anything to make it smaller.Reply
Also the Pi in question has WiFi, so if you have a phone then you have 4g connectivity because it can run as an access point.
1-2 generation old cell phone also limits your development options, you wouldn't be able to perform image recognition or change the file format of the video, with this you have a lot more control over what you do and how it can be stored or streamed.
As for the image resolution, it's 1080p 30fps video, and higher resolution still footage. Look up the hardware first before criticising it? -
bit_user Reply
I don't have a ton of experience with phone development, but I have done realtime video processing on one.Stanto said:1-2 generation old cell phone also limits your development options, you wouldn't be able to perform image recognition or change the file format of the video, with this you have a lot more control over what you do and how it can be stored or streamed.
Also, a pi Zero doesn't have a lot of compute power and is much less energy-efficient than even 2-3 generation-old cell phones.
It's an article, and I'm commenting on what it said.Stanto said:As for the image resolution, it's 1080p 60fps video, and higher resolution still footage. Look up the hardware first before criticising it?
17. Create a connection to the Raspberry Pi Camera, then set the resolution to 720p.
It made no mention of 1080p or 60fps. If it can do that, great. I figured the article would probably use the max resolution available, but I guess I was wrong. However, I'd expect at least some justification would be given for doing otherwise.
With a cell phone, you typically get at least 1080p/60, probably image stabilization, and some phones have features like a low-light mode.
Anyway, if you want to use a Pi for this, more power to you! I'm just pointing out that other options exist, with some significant potential advantages.
I should add: I support holding authorities to account, by any means -pi, phone, body cam, go pro, or whatever else you've got. Also, I think the Pi can make a lot more sense for a non- body-worn camera, in which case most the article still applies. -
Stanto ReplyI don't have a ton of experience with phone development
It made no mention of 1080p or 30fps.
Unfortunately it appears you don't have experience with the Raspberry Pi either. The Raspberry Pi runs a VideoCore IV GPU, which performs hardware accelerated h264 encoding and decoding. Which it can do in realtime in hardware. There are some limitations on the type of camera used in the CSI port, which may make it 30fps, though there are now at least 4 different types of cameras available to use with the Raspberry Pi with different functionality.
probably image stabilization
While many phones /might/ do that in software, most likely do it slightly in hardware, which you could have a small gimbal if you wanted to in the design.
and some phones have features like a low-light mode
Easily done with parameters to the image/video capturing software, and/or using the 'noir' version of the camera, and/or adding GPIO controlled infrared LEDs.
Also, a pi Zero doesn't have a lot of compute power and is much less energy-efficient
I think you'll be surprised if you do a search for power benchmarks, and since it has a dedicated GPU the power requirements of the CPU for a camera which can be GPU accelerated isn't so important.
Anyway, if you want to use a Pi for this, more power to you! I'm just pointing out that other options exist, with some significant potential advantages.
Considering you're commenting on an article where the intent and purpose is to do it on a Raspberry Pi, then it's highly likely that yes, someone will want to be doing this with the Raspberry Pi and won't be doing it with other hardware and will be happy with the advantages given of doing it with the Pi than any other options.
I should add: I support holding authorities to account,
Then by all means ensure you do your research on the hardware and software capabilities when attempting to appraise them and compare them with others, else it's a bit moot offering other hardware when people probably come here intending on using the Pi. -
bit_user Reply
You have no idea what I have experience with.Stanto said:Unfortunately it appears you don't have experience with the Raspberry Pi either. The Raspberry Pi runs a VideoCore IV GPU, which performs hardware accelerated h264 encoding and decoding. Which it can do in realtime in hardware.
Realtime video compression is far different from general image processing, and the Pi's GPU is vastly weaker than anything you'd find in a mobile phone - especially if we're talking about the Vidcore IV. That GPU supports neither OpenCL nor OpenGL ES Compute shaders, rendering it virtually useless for general-purpose image processing.
I don't know how common mechanical stabilization is, in phones. However, they have accelerometers, which are often used to facilitate digital image stabilization algorithms. I have actually implemented image stabilization from first principles, so I know a bit about it.Stanto said:While many phones /might/ do that in software, most likely do it slightly in hardware, which you could have a small gimbal if you wanted to in the design.
It's often more sophisticated than that. Phone SoC's usually have hardware Image Signal Processors (ISP) that exist for the express purpose of implementing advanced image processing algorithms in a power-efficient way. On the Pi, you're basically limited to using the CPU cores (for reasons discussed) and that + the Pi's poor power-efficiency limits what you can do. Also, you have to worry about heat - especially if this thing is sitting in a pocket and you're maxing all the CPU cores.Stanto said:Easily done with parameters to the image/video capturing software,
I was talking about passive night mode. I/R illumination is tricky to do well. Often, you get quite a bit of glare, and it blows out the AGC, leaving everything outside a relatively small radius even harder to see.Stanto said:adding GPIO controlled infrared LEDs.
If you're worried about illumination, my recommendation would be to use a separate I/R illuminator that's physically separated from the body camera. If you can't get an I/R headlamp, maybe a good project would be to make or modify one with a relatively low-intensity I/R LED. -
Stanto ReplyPi's GPU is vastly weaker than anything you'd find in a mobile phone
https://www.phonebunch.com/phone-filter/gpu/broadcom-videocore-iv/page/1/
Since it's targeted at mobile devices, the Broadcom BCM2763 VideoCore IV is built using a 40nm process. Broadcom estimates that its reduced power consumption will lead to 4-6 hours of video recording and 8-10 hours of video playback on most mobile devices, and up 16 hours if the video is played over HDMI
https://www.gsmarena.com/broadcom_videocore_iv_records_1080p_video_takes_20mp_photos-news-1328.php#:~:text=Since%20it's%20targeted%20at%20mobile,video%20is%20played%20over%20HDMI.
if we're talking about the Vidcore IV. That GPU supports neither OpenCL nor OpenGL ES Compute shaders
"OpenCL implementation running on the VideoCore IV GPU of the Raspberry Pi models"
https://github.com/doe300/VC4CL
"The GPU bundled with Raspberry Pi 4 is a VideoCore VI capable of OpenGL ES 3.2, a significant step above the VideoCore IV present in Raspberry Pi 3 which could only do OpenGL ES 2.0 "
https://www.raspberrypi.org/blog/vc4-and-v3d-opengl-drivers-for-raspberry-pi-an-update/
You have no idea what I have experience with.
Not the VideoCore IV, evidently.
It's often more sophisticated than that
We're talking about the Pi here. Don't be vague to prove a point.
I was talking about passive night mode
I was talking about both. -
bit_user Reply
Those phones are at least 5 years old, or else probably not ever sold in the US. Anyway, let's not make this a game to find the worst phone possible.Stanto said:https://www.phonebunch.com/phone-filter/gpu/broadcom-videocore-iv/page/1/
People can read the reviews of phones' video capabilities and hopefully find one that's suited to the task.
Certainly, anyone planning on doing anything interesting with its GPU is going to find a phone with a reasonable GPU.
Right. Video recording. Just plain, vanilla recording. No fancy image stabilization or HDR processing or anything like that. And certainly not trying to do any kind of object recognition or other advanced image processing.Stanto said:... 4-6 hours of video recording ...
Stanto said:"OpenCL implementation running on the VideoCore IV GPU of the Raspberry Pi models"
https://github.com/doe300/VC4CL... The most notable features, which are not supported by the VC4CL implementation are images ...
Oops...
But, the VideoCore IV is so bad that it's almost pointless.
Plus, we don't even know if you can run OpenCL simultaneously with video recording, or whether it'll impact the video recording, or how much of the GPU capability will be left to do anything in OpenCL.
First, don't change the subject. The article is not using a Pi v4. Second, the VideoCore 6 is only about 50% faster, which still leaves it in the dust of modern cell phones' GPUs. I mean they're literally like 10x as fast - no exaggeration!Stanto said:"The GPU bundled with Raspberry Pi 4 is a VideoCore VI capable of OpenGL ES 3.2, a significant step above the VideoCore IV present in Raspberry Pi 3 which could only do OpenGL ES 2.0 "
With an older, lower-end phone, it should be no problem to find 2-5x. Let's take the Nexus 5X, which according to sold listings on ebay, can be had for < $100, in working condition (US seller). It used a Snapdragon 808 SoC, with an Adreno 418 GPU that could do 154 GFLOPS, Compare this with the VideoCore IV's 28 GFLOPS! It also supports OpenCL 1.2 full profile.
https://en.wikipedia.org/wiki/List_of_Qualcomm_Snapdragon_systems-on-chip#Snapdragon_808_and_810_(2015)https://en.wikipedia.org/wiki/Adreno
In fact, I was talking about the night-shooting modes of cell phones. The vagueness is by necessity, because they differ in capability. I cited it only as a potential advantage, meaning one could potentially find a phone that's proficient in low-light video. Unless we're going to start getting into the details of specific phone models (can we please not?), I can't be specific.Stanto said:We're talking about the Pi here. Don't be vague to prove a point.
Like I said, do whatever you want. If you like building stuff, that's great! My point was just that a Pi really doesn't seem like the best solution, here. That doesn't mean nobody should do it, but I guess it depends on what your priorities are. Somebody might learn more by using a Pi, but then you can also learn quite a lot if you really get down & dirty with Android development and do some NDK-level stuff. However, if I wanted a body camera that would survive days' of use and maybe some impacts and me lying on top of it, I'd sure as heck trust a phone in a good case more than a home-built Pi contraption. If nothing else, it'd be less painful to lie on a phone in my shirt pocket than a bulky pi contraption.
I don't really understand why that's apparently such a controversial point. If you really don't agree with that, then I guess we'll have to agree to disagree. -
Stanto ReplyThose phones are at least 5 years old
Still, it was used in a mobile phone, which was the point.
People can read the reviews of phones' video capabilities and hopefully find one that's suited to the task.
Again back to the previous point of the development cycle being very different on a phone and what you can have access to versus using a self-built solution on single board computer hardware. Android only breaks out so much on its API.
Just plain, vanilla recording
That goes for any hardware, even mobile phones. You're really picking and choosing what you're going on here aren't you?
Plus, we don't even know if you can run OpenCL simultaneously with video recording, or whether it'll impact the video recording, or how much of the GPU capability will be left to do anything in OpenCL.
You're welcome to perform benchmarks, rather than spouting something isn't possible.
First, don't change the subject. The article is not using a Pi v4.
the VideoCore IV present in ... could .. do OpenGL ES 2.0
Not changing the subject.
With an older, lower-end phone, it should be no problem to find 2-5x
You're forgetting people are reading this article to do a project with the Raspberry Pi. Not an old phone. Else I would have google searched for "How to make a body cam with an old phone" not "How to make a body cam with a Raspberry Pi".
The vagueness is by necessity, because they differ in capability
At this point I'm really not convinced you're aware of difference in capability here. You've admitted that you don't know what it would take to do this project on an old mobile phone, you're reluctant to admit that you don't know the features of the VideoCore IV (aside from saying 'oops'), and you're adamant in denouncing this blog post because you insist that a 'mobile phone would be better technology to do this with' without any comment on the specifics of which device would be better, why, and how you'd code it.
I think it's time to lay this to rest because you obviously take an objection with the intention of this blog post and frankly, I think we can say, this project isn't for you. It looks like it isn't even aimed at you, or intended for you. That's ok, however shutting it down because of your opinion based on the hardware used, isn't ok.
Take care. -
bit_user Reply
If you think that proves anything, it just shows you've lost the plot.Stanto said:Still, it was used in a mobile phone, which was the point.
No, many phones offer filters and other processing when you're recording video. So, it doesn't necessarily apply to phones.Stanto said:That goes for any hardware, even mobile phones. You're really picking and choosing what you're going on here aren't you?
What's not possible?Stanto said:You're welcome to perform benchmarks, rather than spouting something isn't possible.
Your quote was about VideoCore 6, which is only present in the Pi v4. That's what I meant about "changing the subject".Stanto said:Not changing the subject.
As for VideoCore 4 supporting OpenGL ES 2.0, that lacks compute shaders, which means you have to jump through additional hoops and are subject to much greater limitations, if you want to use the GPU for video processing.
Even if that's so (and it's certainly not the only way to land here), they might still be considering whether it's a good idea, or whether there could be better alternatives.Stanto said:You're forgetting people are reading this article to do a project with the Raspberry Pi. Not an old phone. Else I would have google searched for "How to make a body cam with an old phone" not "How to make a body cam with a Raspberry Pi".
You're not the only one with doubts about the counterparty, in this discussion.Stanto said:At this point I'm really not convinced you're aware of difference in capability here.
Don't put words in my mouth. I was about to walk away from this, but it really bugs me when someone mischaracterizes my statements and expertise.Stanto said:You've admitted that you don't know what it would take to do this project on an old mobile phone, you're reluctant to admit that you don't know the features of the VideoCore IV (aside from saying 'oops'), and you're adamant in denouncing this blog post because you insist that a 'mobile phone would be better technology to do this with' without any comment on the specifics of which device would be better, why, and how you'd code it.
I have actually done video recording, processing, and compression, on an Android phone.
When I said "oops" about the VideoCore IV, it was my attempt at a cute way of pointing out that you seemed to have missed how their implementation lacked support for images, which I quote right above it.
I also allowed that the article was still useful in showing how to use a Pi for recording. And any Pi how-to article probably has some merit, in that someone can use portions of it for something else.
If you want the last word, you'd better make it a nice one. You can't just lob a grenade over the fence and assume a response isn't in order.Stanto said:I think it's time to lay this to rest
I take an issue with the intention of building a pi-based body camera. That's not only obvious, it's essentially what I said in my first post.Stanto said:because you obviously take an objection with the intention of this blog post
Even though I agree, it sounds somehow hostile when you put it that way.Stanto said:and frankly, I think we can say, this project isn't for you.
That neither nullifies my right to weigh in on it, nor renders my opinion irrelevant.Stanto said:It looks like it isn't even aimed at you, or intended for you.
In fact, it is 100% okay for us to comment on articles however we see fit. That's the point of the commenting system on this site.Stanto said:That's ok, however shutting it down because of your opinion based on the hardware used, isn't ok.
You can disagree, as you've done. That's also okay.
However, suggesting that I can't voice a negative opinion of the article is actually sounding rather fascist. Good luck with that. -
vgatesr36 Okay, I am really late to this subject but the article was about building a body camera using a pi zero. I wanted something to do and this looked like an inexpensive time user and I really learning how much I don't know. But what I really don't know is why an article about pi zeros turns into a sort of nasty discussion about phone cameras. Sorry you have nothing better to do than.Reply
Has anyone else built a body camera based on the article and, if so, what problems did you come across. The most vexing problem I have had so far is getting to trigger to work correctly. The pin wants to stay high. Comments pertaining to body cam and pi zero will be appreciated
