How to Troubleshoot Windows Network Connections
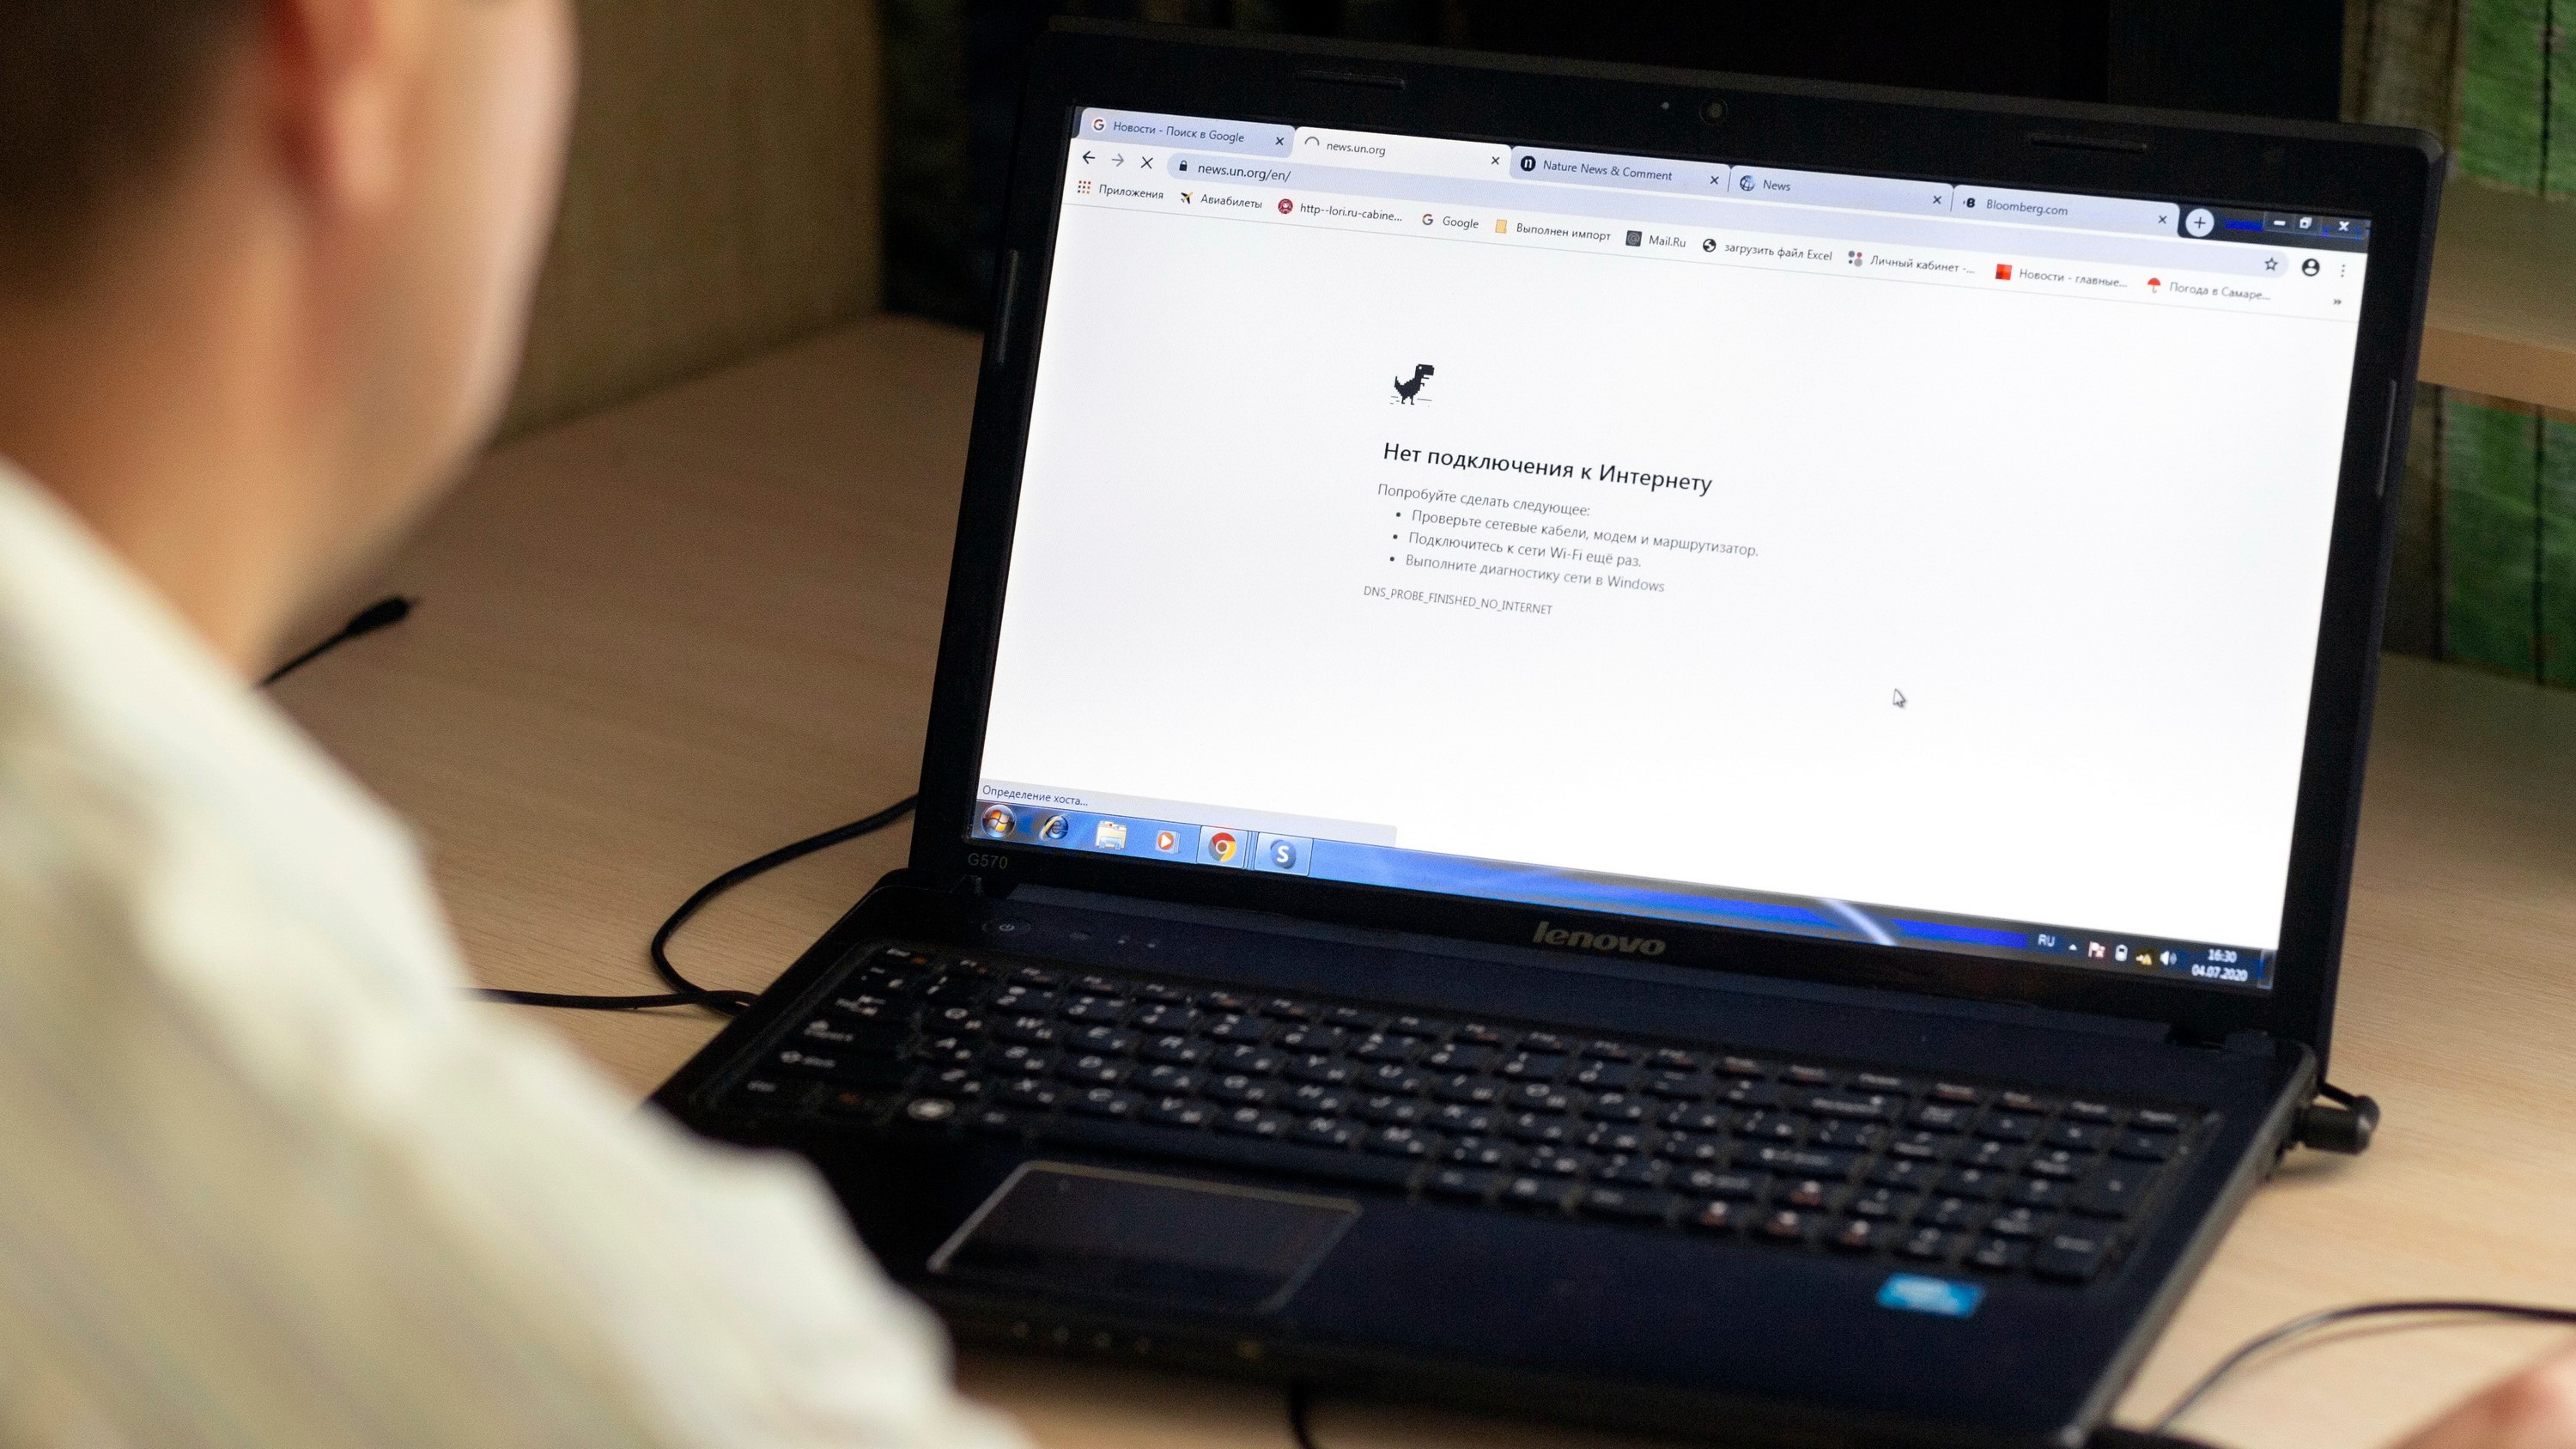
Without a working Internet connection, most Windows devices really can’t work the way they should, nor allow users to function completely or well. That makes fixing network issues extremely important. Here’s how to get that done.
Arguably, Windows without a working network connection isn’t really worth much. That’s because access to email, social media, the Web – and even Windows updates and apps – doesn’t work without network (and Internet) access. That’s probably why Microsoft has put a lot of time and effort into making networking issues easy to recognize, diagnose and fix as part and parcel of how Windows works.
Getting Network Troubleshooting Started
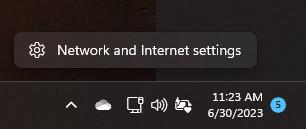
The views from the more recent Windows 11 and Windows 10 builds appear in Figures 1 and 2 following. What they show is that by right-clicking on the network symbol in the notification area of the Task Bar (right-hand side, by default) you can jump straight into troubleshooting your Windows network connection.
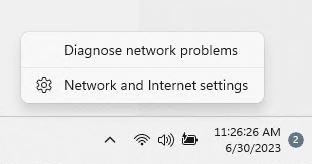
Figure 1: Right-click on the Wi-Fi (or Ethernet) symbol (bottom center) and “Diagnose network problems” pops right up in Windows 11 Insider Preview
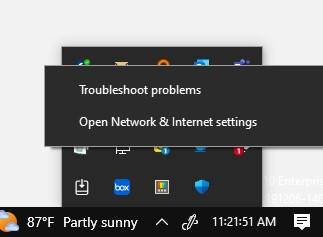
Figure 2: In all current Windows 10 versions, right-click on the active network symbol to get “Troubleshoot problems” instead.
Either way, it’s a one-click maneuver to start the network troubleshooting process in Windows 10 and in Windows 11 recent builds. Older Windows 11 versions aren’t quite as accommodating, as shown in Figure 3.
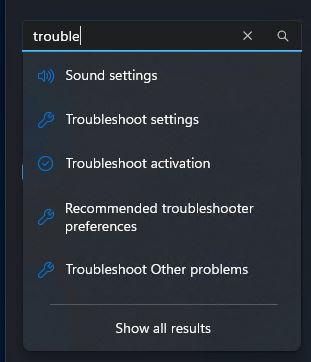
In older versions of Windows 11, however, network troubleshooting is never too far away. Click on Start 🡪 Settings, then enter “Trouble” into the Settings search box. As you can see in Figure 4, a number of options pop up in response, click the “Troubleshoot Other problems” item to continue.
When you follow that “Other problems” entry, the “Network and Internet” item finally appears. That’s what you want (and that’s where the other Windows versions take you more directly). Click the “Run” button at the right to proceed from here.
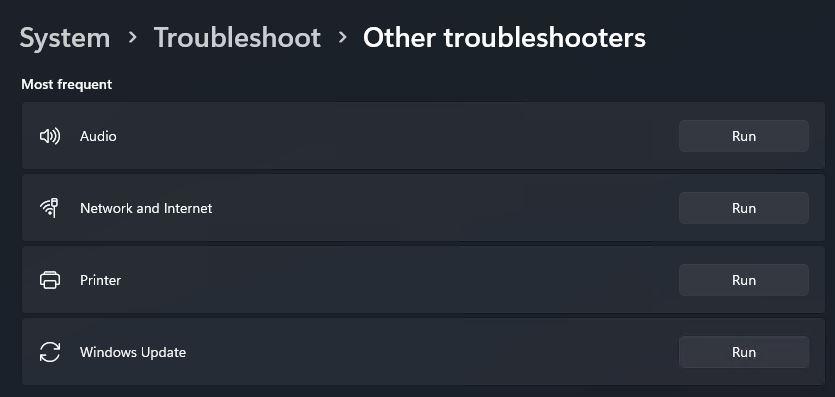
This approach works for all Windows 10 and 11 versions, actually (with some minor differences in Windows 10 for wording, but the pathway is pretty much identical).
Get Tom's Hardware's best news and in-depth reviews, straight to your inbox.
The Windows Network Troubleshooters
Because Windows networking mostly revolves around two kinds of networks, there are two kinds of troubleshooters to match: one for wired Ethernet, the other for wireless Wi-Fi, in all its many forms. Figure 6 shows the results of running the Wired Ethernet troubleshooter, with all options expanded in a “no trouble” situation:
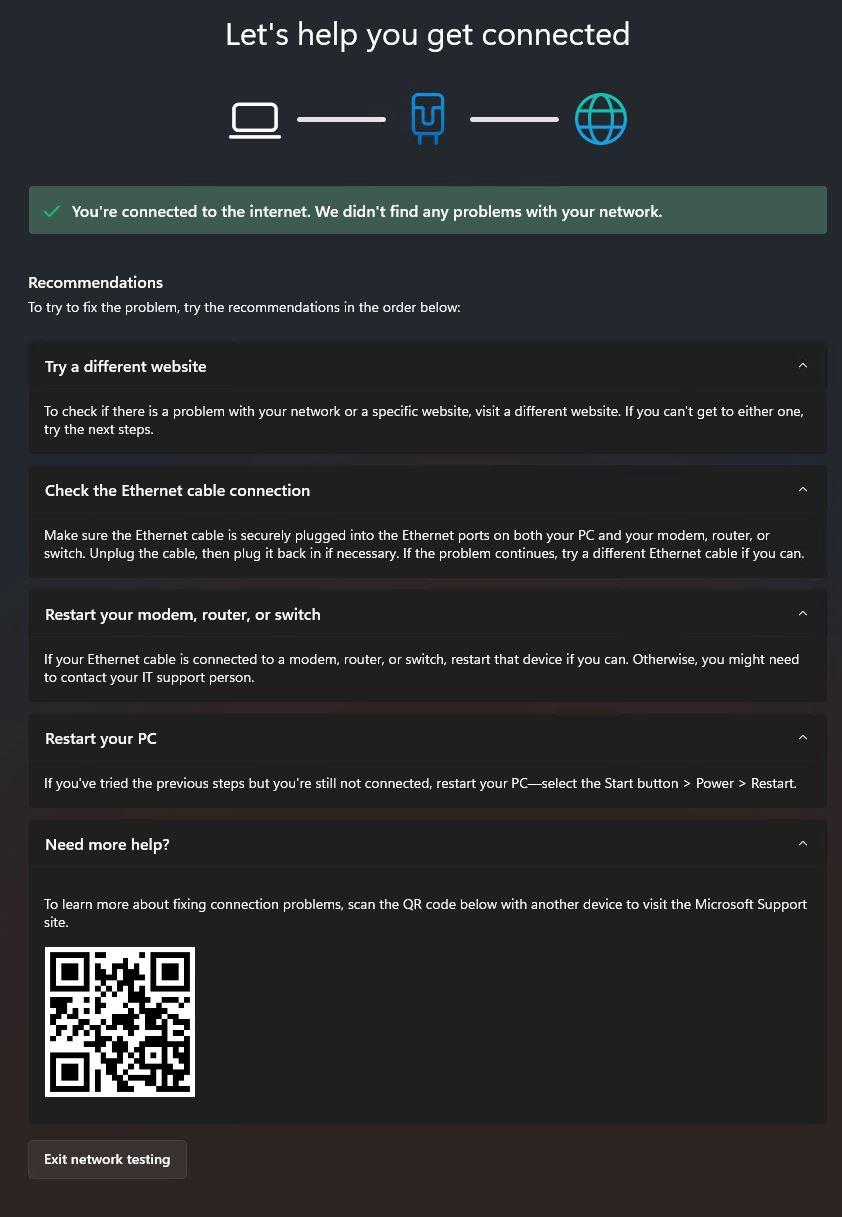
Figure 7 shows the same troubleshooter when run on a Wi-Fi attached system instead. Iconography and minor terminology changes aside, it’s identical to the version shown in Figure 6.
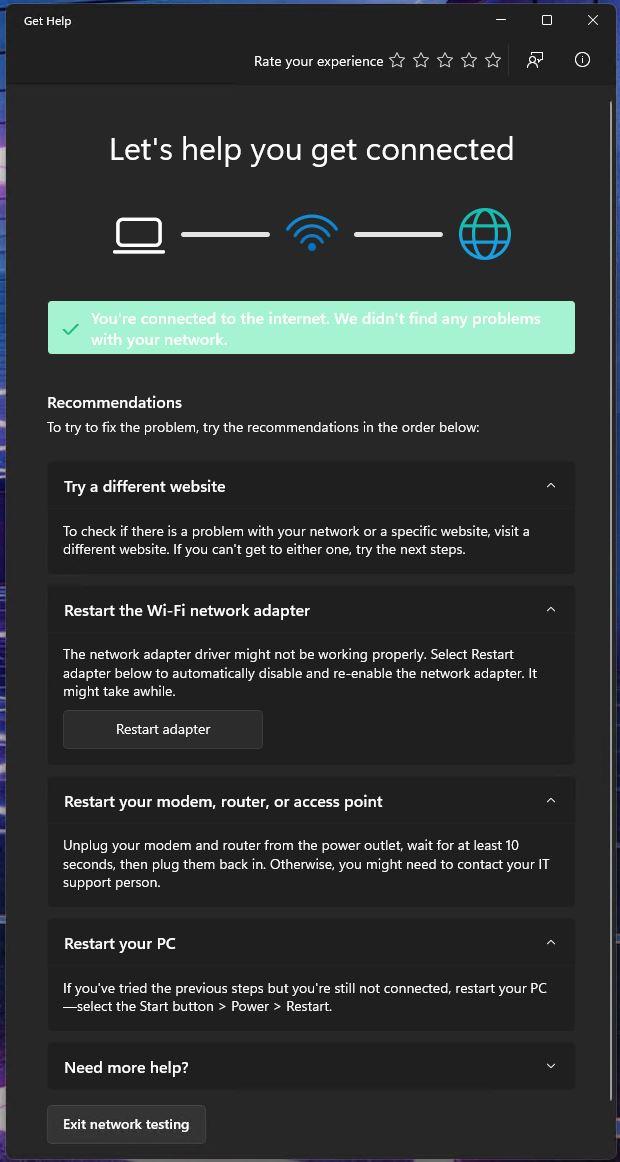
The various actions suggested in the troubleshooters cover a wide array of possible problem sources. Let’s walk through those items to discuss what the troubleshooters look for, what they might find, and related fixes.
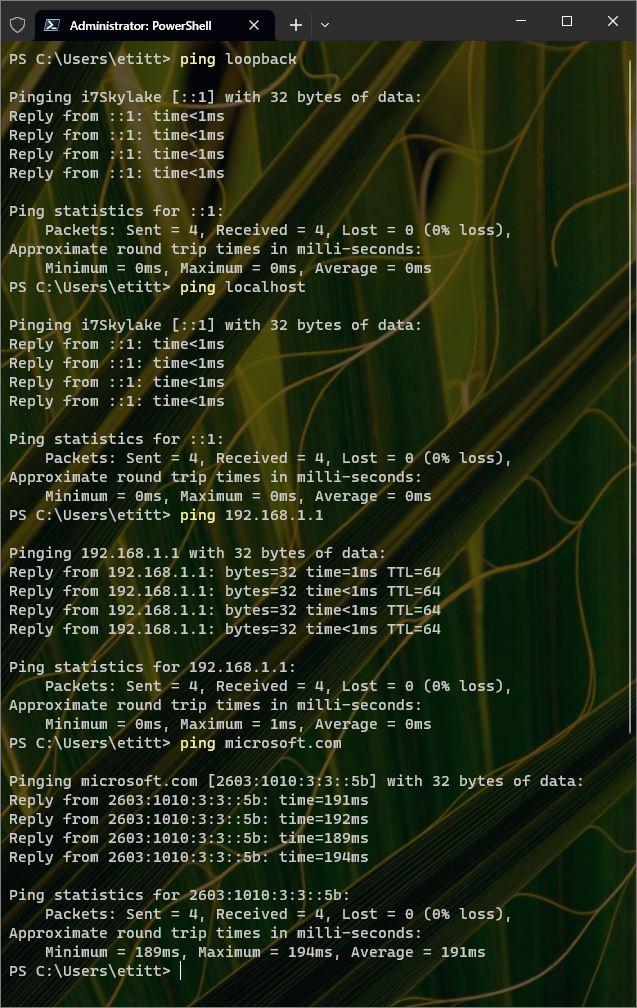
Try a different website: Any given website is, of course, somewhere on the Internet. But because websites go down, too, changing to a different one helps determine if the “other end” of the attempted connection is itself having problems. In the background, the troubleshooter checks local network access, Internet gateway access and then actual Internet access through a series of “reachability checks.” You can do the same thing at the command line using the PING command as follows:
1. Ping loopback (this checks that TCP/IP is working, and looks for a response from a synthetic address that’s always available).
2. Ping localhost (this checks that the current network interface device is up and running)
3. Ping the nearest router or gateway (Use ipconfig to look up the IP address for the “Default Gateway” – on my network it’s at 192.168.1.1, so that means ping 192.168.1.1 is the command to use)
4. Ping a known working Internet address; for whatever reason MS often uses ping Microsoft.com as its check). See this sequence in Figure 8.
Restart the network adapter (Wi-Fi or wired Ethernet, depending…): this basically turns off the network interface and then turns it back on. In some situations, signaling or traffic issues can cause the network interface to stop working temporarily. Turning it off, then back on, will usually clear such temporary glitches. Notice the button that reads “Restart adapter.” This performs the same actions you could do yourself in Device Manager by disabling the adapter, then re-enabling it after a short wait (usually 30 seconds or so).
Restart your modem, router, or access point (all three apply to Wi-Fi, and the first two to wired Ethernet). Anyone who uses a device at their network boundary to get off the LAN and onto an ISP’s network will see issues present at this device occasionally. I’ve seen power glitches, signaling issues, and even service outages show up as a boundary device issue. In many cases (except when a service outage persists) restarting the boundary device will set things back to rights. This is often signaled at the device itself (my Arris SAC2V1A has a status light that changes from blue to red to signal a connection problem, for example).
Restart your PC: In the DOS and early Windows days this was sometimes called the “three-fingered salute” and worked if the key combination CTRL-ALT-DEL was entered. Nowadays, if you use that same key combo, you’ll get the logout screen, from which you can indeed get to the restart button. But sometimes, Windows gets itself into a state where some things don’t work – including networking, in this context. But a restart will often clear whatever’s causing problems, so this is always worth a try if the network troubleshooter can’t fix what’s ailing your Windows network connection.
Other Sources of Network Difficulty
There are three basic ways in which networking can go wrong. This applies equally to Windows PCs and other devices, but the details will differ. First, the hardware that lets information come and go from the device might have issues (these span a wide range of possibilities including outright failure, shorts, partial or intermittent malfunctions, incorrect set-up or configuration, or incompatibility with local network capabilities and connections).
Second, the TCP/IP networking protocol (and wireless support, where applicable) may have issues with the software, or the addresses and services used to make it work – such as DHCP for local addresses, DNS for name resolution, and so forth. Third come all the various protocols used to support email, web, file transfer, and all the other Internet services that let users do things with networks they wish to access and use, along with the applications that support them (Outlook for email, Chrome or Firefox for Web access, and on and on).
The Windows network troubleshooter does a pretty thorough job of checking all of these things as it runs through its various tests. But if you find your PC still disconnected from the network (and/or the Internet) after it’s put through its paces, you can – and probably should – check on some (or all) of the following issues:
1. Make sure ipconfig shows a valid network address scheme and configuration.You can check this by entering “ipconfig” at the command line. One sure sign of IP troubles is PCs that present Microsoft Automatic Private IP Addressing (APIPA) addresses. These IPv4 addresses fall in the range from 169.254.0.1 – 169.254.255.254 (basically the tail end of the 169.254 Class B address. They show up automatically when other sources of addressing aren’t working. This usually indicates some kind of trouble with local DHCP services (not working or unavailable). Fixing this often requires restarting (or sometimes, replacing) the local router, gateway or wireless access point.
2. Make sure that DNS is working and points to the correct DNS server. Improper name resolution can cause all kinds of Internet access problems (and may indicate security is compromised). Run ipconfig /all and check DNS information for the network adapter in active use. On my network, for example, the default address comes from Spectrum my ISP and shows up as 1.0.0.1. It’s tied to CloudFlare, which is a well-known, well-respected, and highly secure DNS provider. See LifeWire’s Best Free and Public DNS Servers (June 2023) for a list of reliable public DNS providers.
3. Keep an extra network interface handy. I always have one or two extra hardware devices around, so I can try a different network interface if the one on any particular PC appears to be acting up. On the wired (GbE) Ethernet side, I’ve got an USB 3.0 to GbE adapter (US$20 -35): it plugs into any USB 3.0 (or better) port and provides an RJ-45 from which I can cable into my nearest switch. On the Wi-Fi side, I’ve got a USB 3.0 to 802.11ax adapter (US$20-60). If a PC’s existing adapter stops working, or has trouble, I simply need to plug one or the other in. That’s usually all it takes to get networking back (with an RJ-45 cable into the switch for GbE as well). In a pinch, in fact, I’ve used the USB-to-Wi-Fi device with my iPhone as a hotspot to keep working on the Internet even during ISP outages, some extended for days.
Bottom Line
Should one (or all) of your Windows PCs run into networking difficulty, turn to the Windows Network and Internet Troubleshoot as your first point of action in attempting to diagnose and fix whatever’s wrong. In the vast majority of cases – over 90% in my personal experience – it will also be the last tool you need to use to help figure out what’s wrong and get started on a fix. Indeed, except for situations that require hardware changes, or working with ISP boundary devices, or similar third-party issues, this will probably also be the last tool you need to use to get networking and Internet access working again.
Ed Tittel is a long-time IT writer, researcher and consultant, and occasional contributor to Tom’s Hardware. A Windows Insider MVP since 2018, he likes to cover OS-related driver, troubleshooting, and security topics.
