How to Turn an Old Router into a Wi-Fi Extender or Switch
Don’t throw that router in the trash yet.
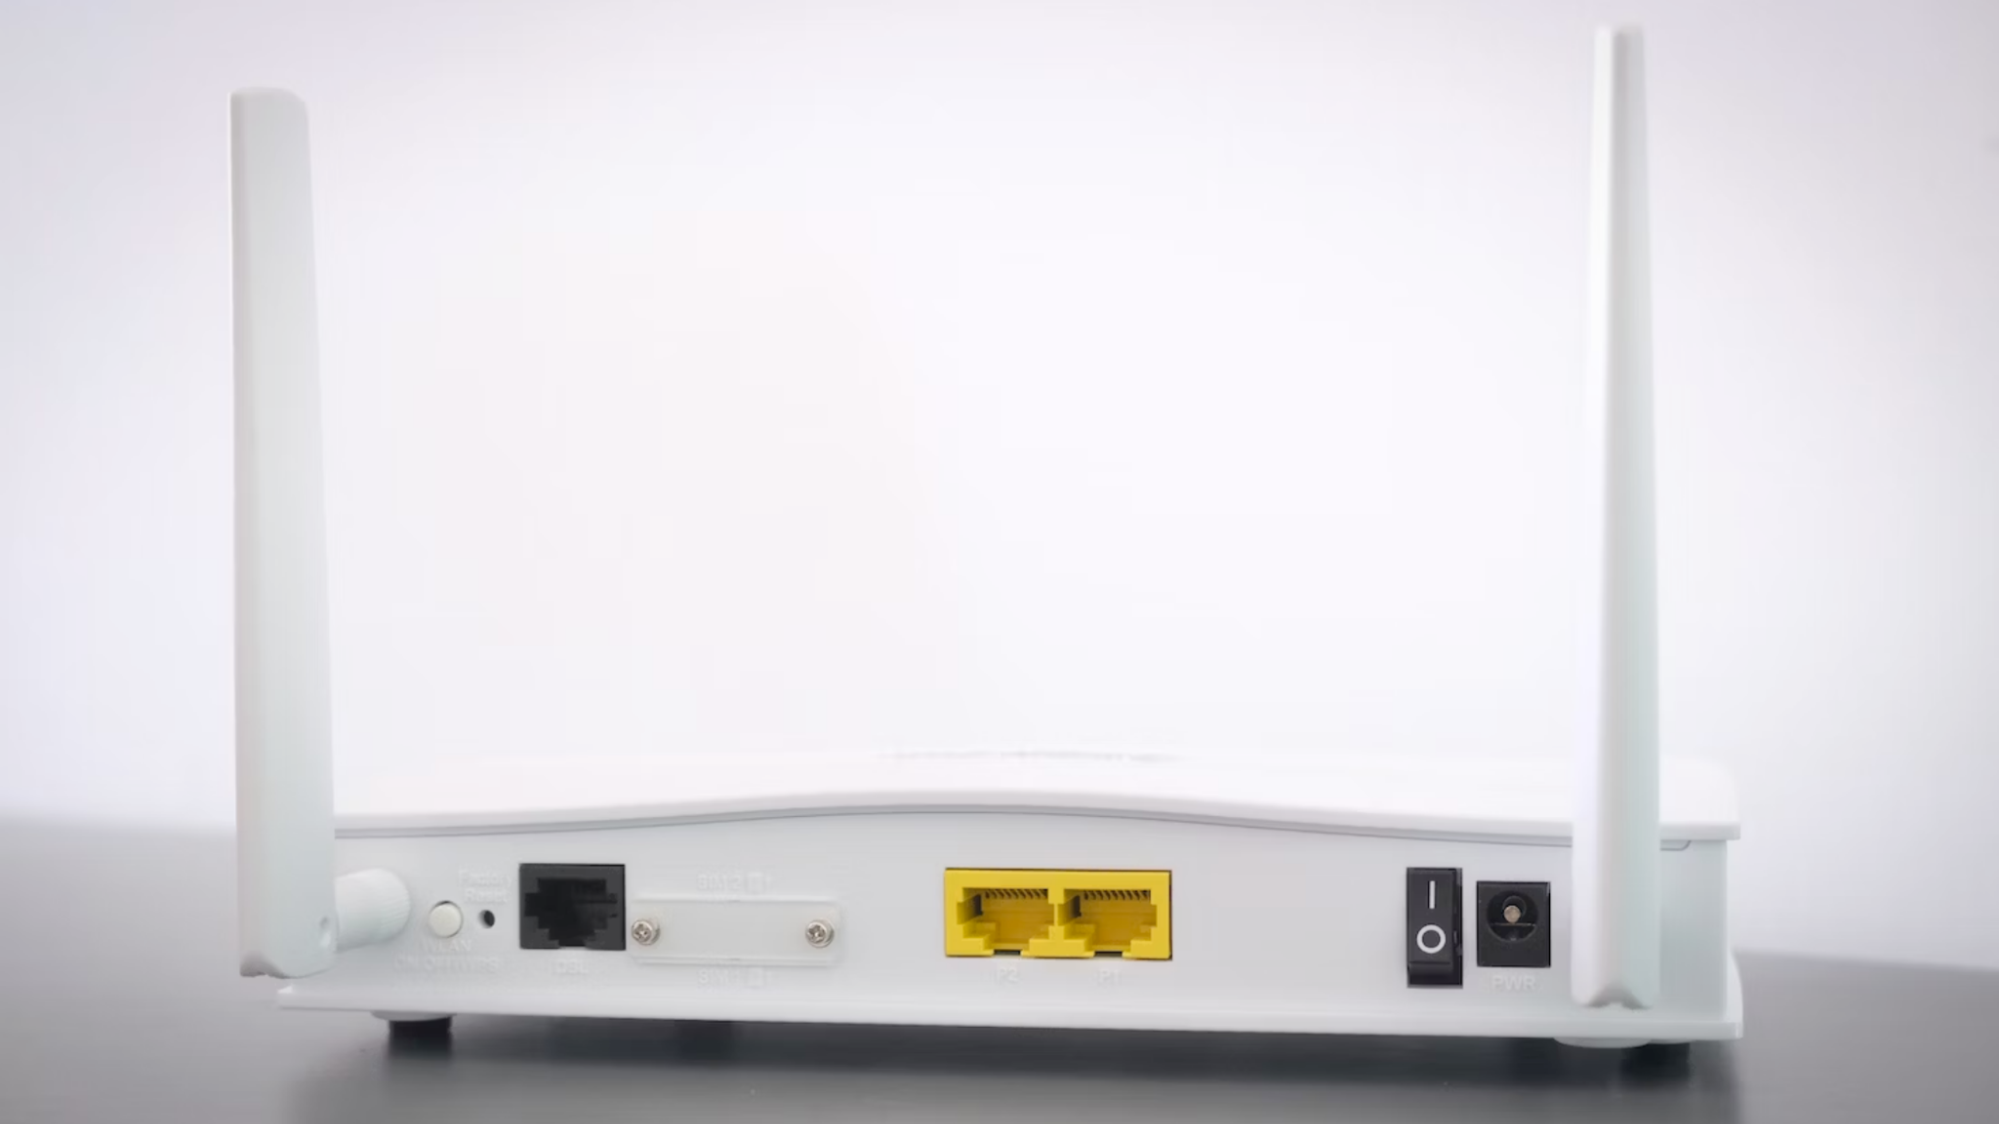
The network routers we use to connect all our Wi-Fi and Ethernet devices to the internet (and each other) are multifunction marvels, which can make it a little strange when you throw out your router or unplug the one your ISP gave you because there’s a faster unit available.
Fortunately, an old router can easily stand in as a Wi-Fi extender or as a simple network switch. If you have a look at the prices of good network switches, they aren’t so cheap that you’d say no-thanks to a free one, and that’s exactly what your old router can be.
What You Need
To set up your old router as either a Wi-Fi extender or a network switch, you’ll need a few things:
- Your old router (obviously)
- An Ethernet cable
- A computer with an Ethernet port
You’ll be configuring the router to do its new job by connecting it to a computer via Ethernet.
Wi-Fi Extender vs. Switch
If you haven’t decided what to turn your old router into, or don’t understand the difference, let’s take a brief moment to explain both concepts.
A Wi-Fi extender sits at the edge of your main Wi-Fi router’s good signal strength zone. It then repeats Wi-Fi data packets to and from the main router, effectively increasing the Wi-Fi footprint. This is handy if you have dead spots in your home, but one major caveat is that the repeater can only operate at half the speed of the main router, since it has to listen and send in both directions. The other problem with using an old router as an extender is that, if your old router is on a slower standard than your new one, you’ll get the slower of these. For example, if your old router is Wi-Fi 5 and your new one is Wi-Fi 6, the extender will obviously only connect devices at Wi-Fi 5 speeds.
A switch is a device that lets multiple Ethernet network devices connect to a single network cable. Unlike a router, a Switch does not assign IP addresses (each device’s unique identifier), but it does ensure that the right data packets get to the right devices. It’s a great way to expand the connectivity of a long single cable run from your router to another room.
Get Tom's Hardware's best news and in-depth reviews, straight to your inbox.
An Important Note About Router Differences
Because there is so much variation in capabilities and software interfaces between brands and models of router, it’s impossible to offer a step-by-step guide that will work for any but a small set of closely-related routers.
Instead, we’ll provide the universal set of things that have to happen to turn your router into an extender or switch, and in some cases you’ll have to locate the right settings in your router’s menus. The names may not be exactly the same, and sometimes accomplishing something may take more steps than it does for the router we used here.
Some routers also simply don’t have the features needed to work well (or at all) as an extender or switch. Sometimes router manufacturers purposely disable features on cheaper routers in their product lines. In some cases you have the option of installing custom third-party firmware on your router, which lets it do pretty much anything, assuming its CPU and RAM are up to it. Popular examples include DD-WRT, OpenWRT, and Tomato.
How to Turn Your Router Into a Wi-Fi Repeater
To turn your router into a Wi-Fi repeater, here’s what you need to do:
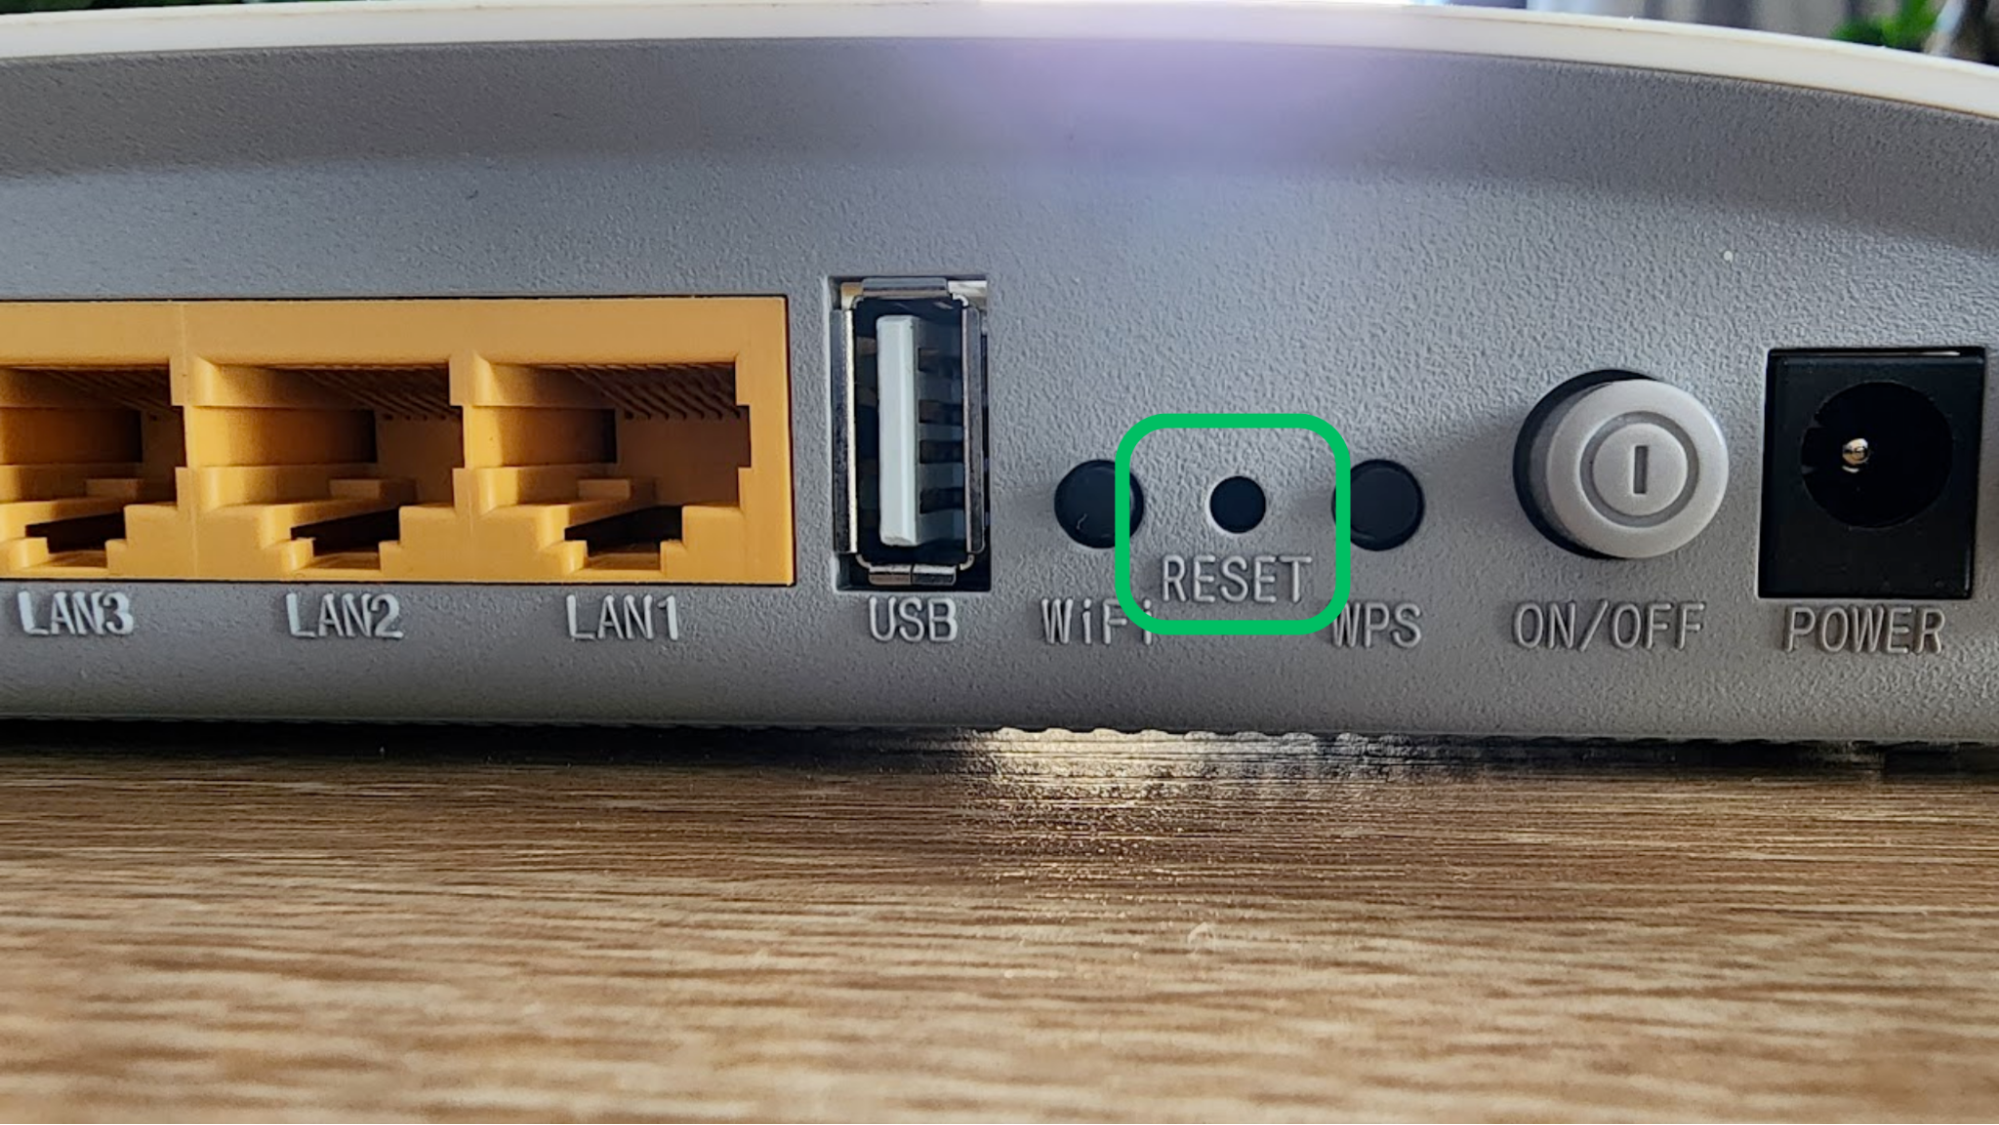
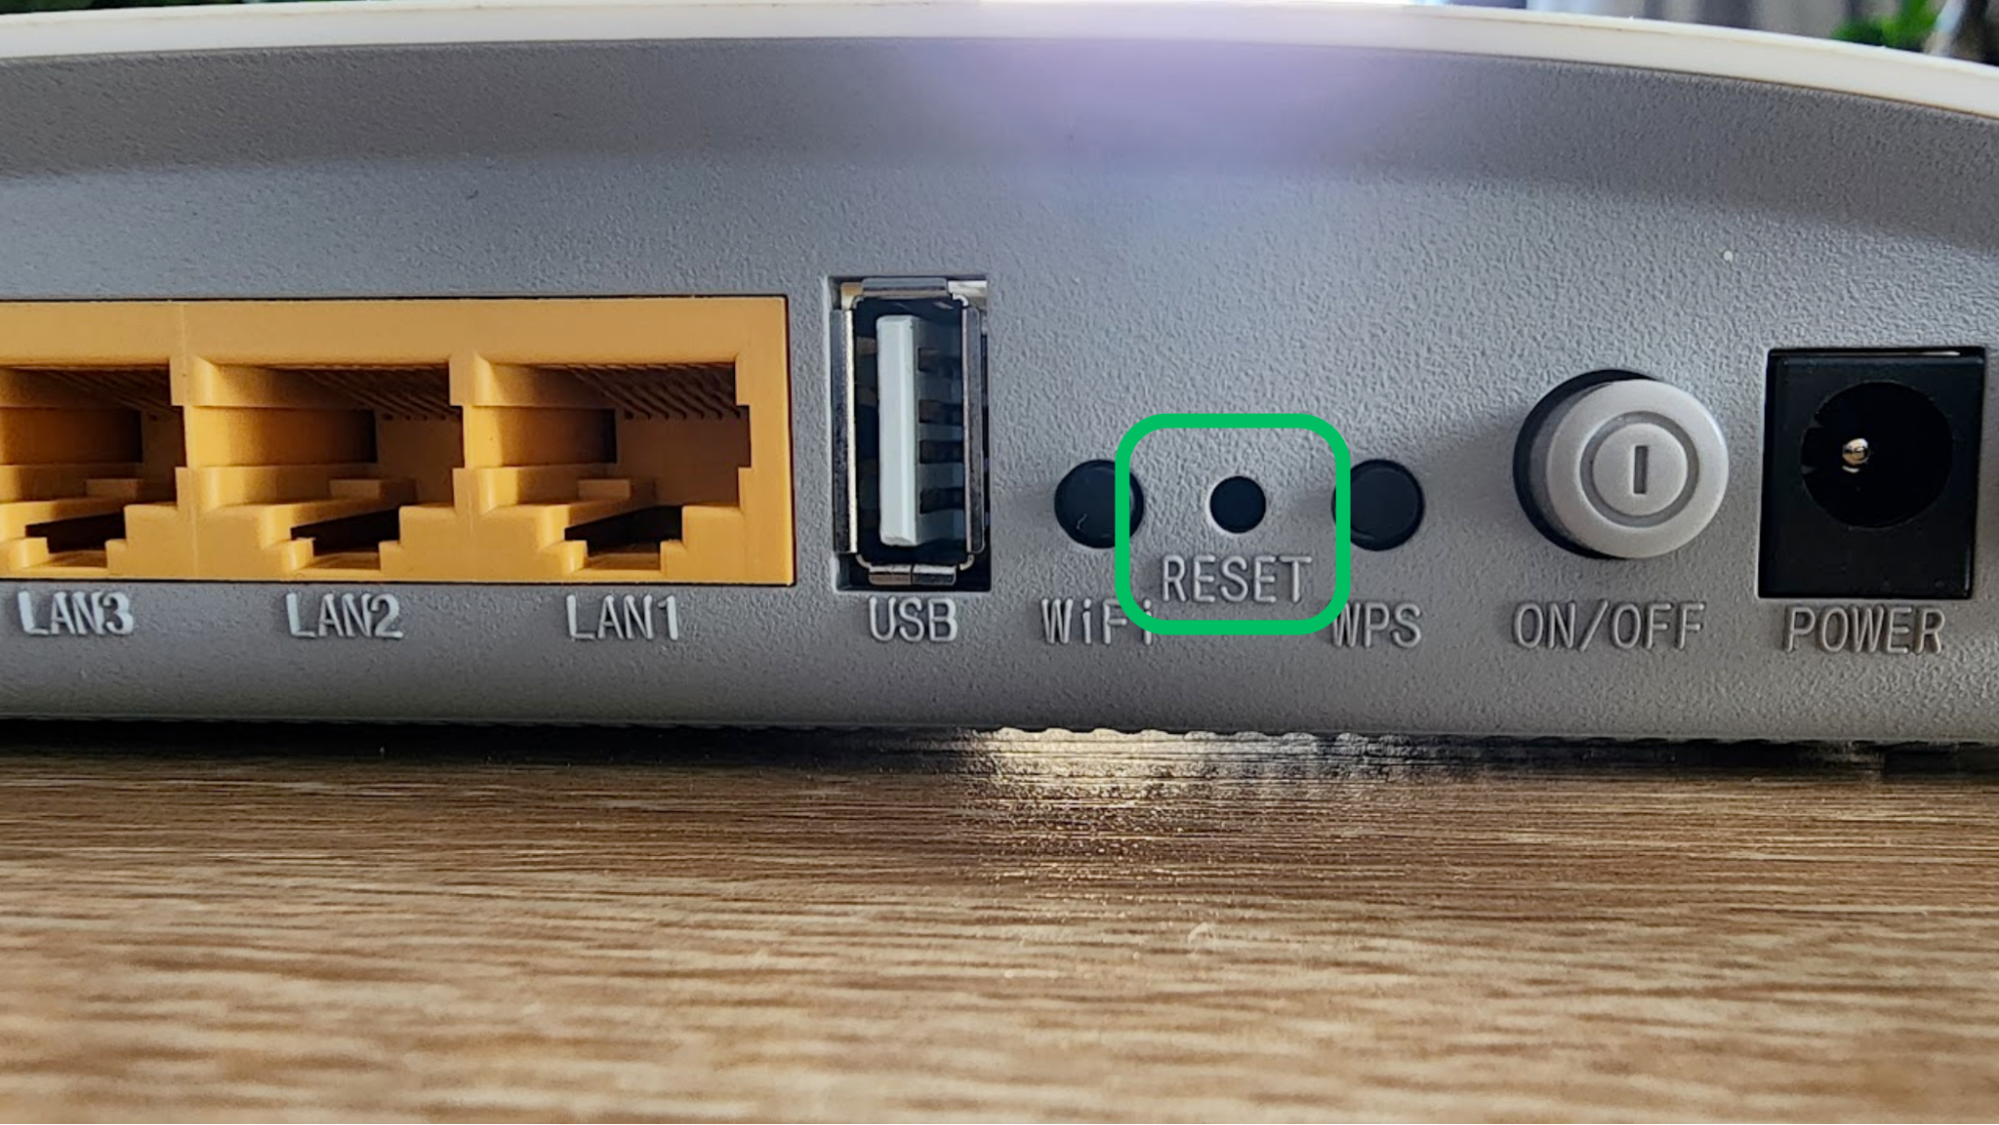
1. Factory reset the old router. Usually, this is done by pressing a recessed button on the back or bottom of the router, and holding it for a few seconds. Refer to your router’s manual for the details. This will reset the default admin password for the router, which is usually printed on a sticker on the bottom of the unit.
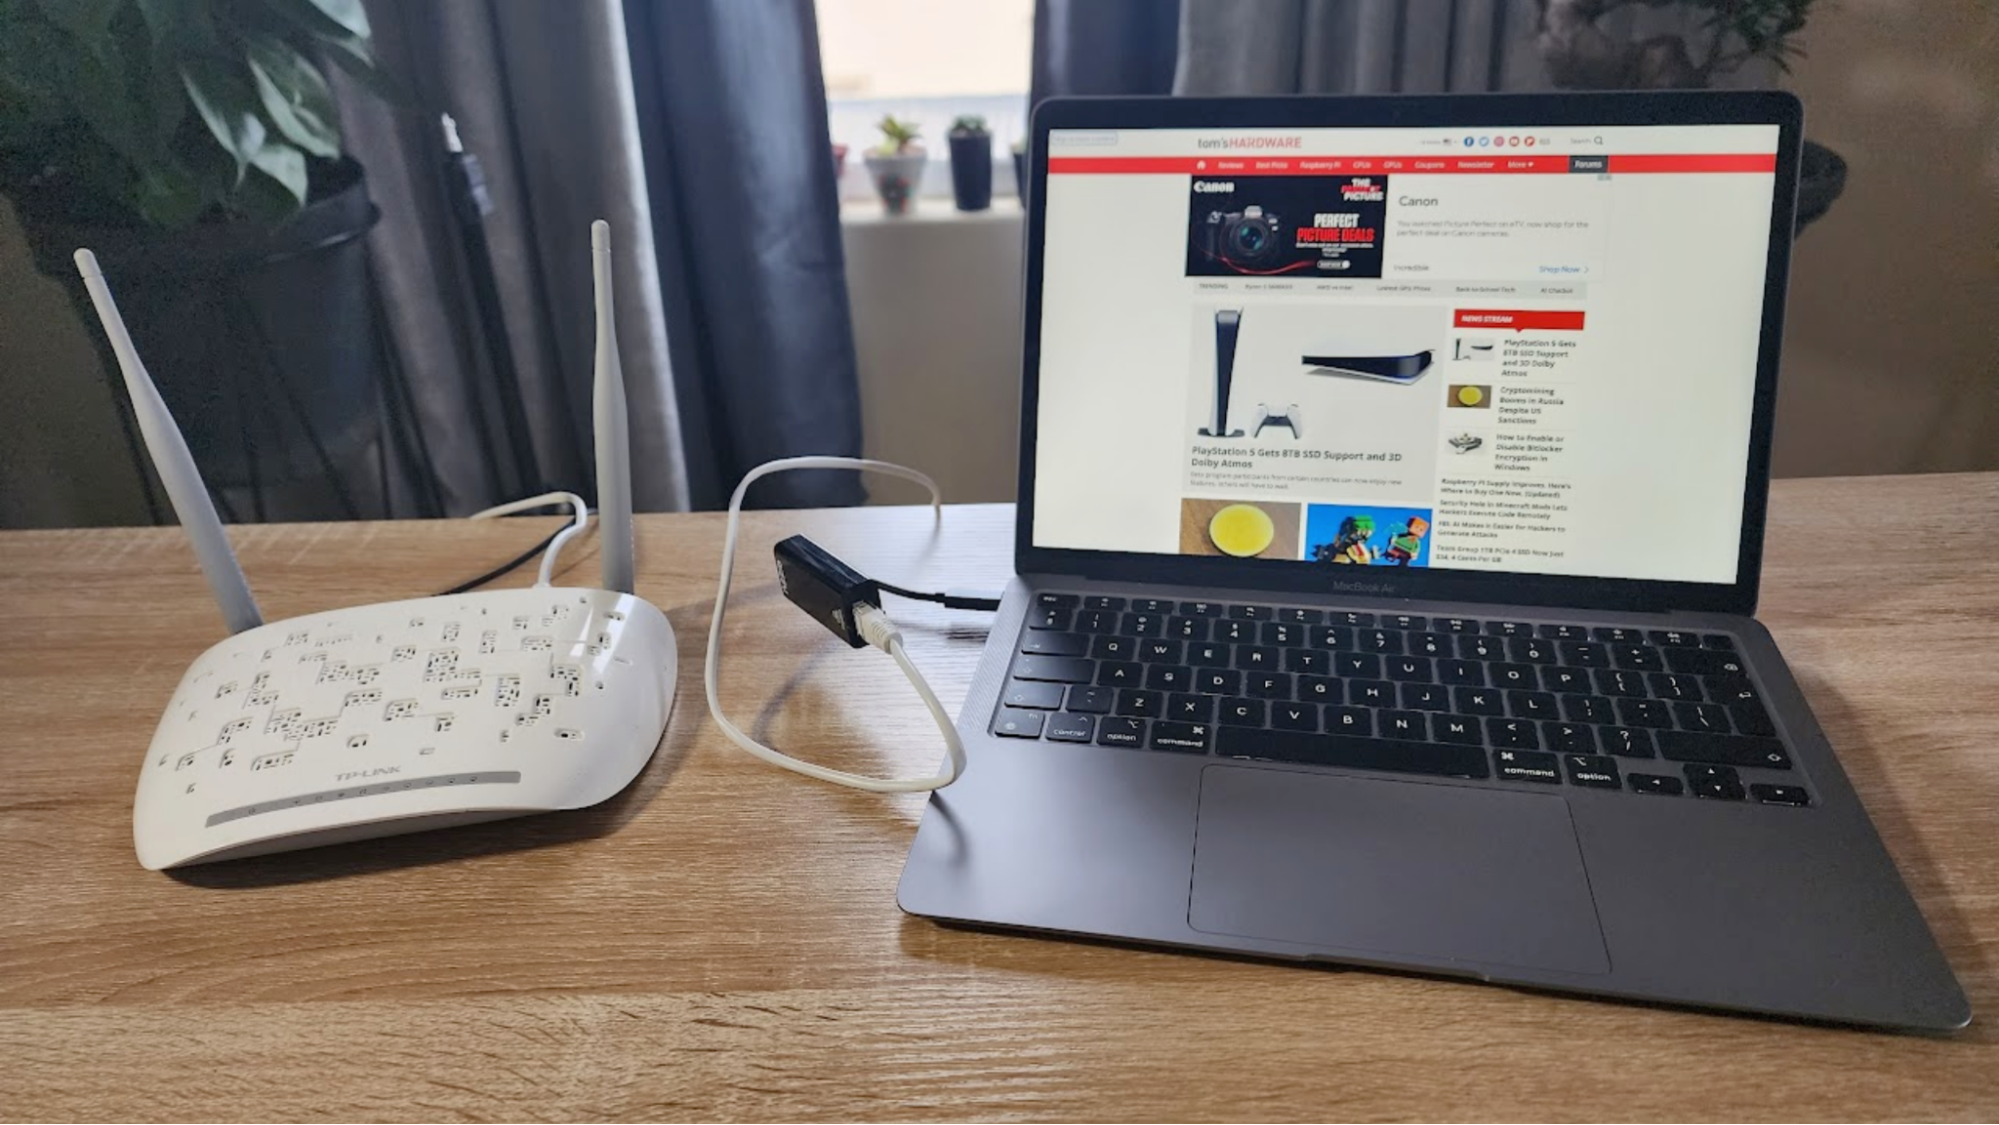
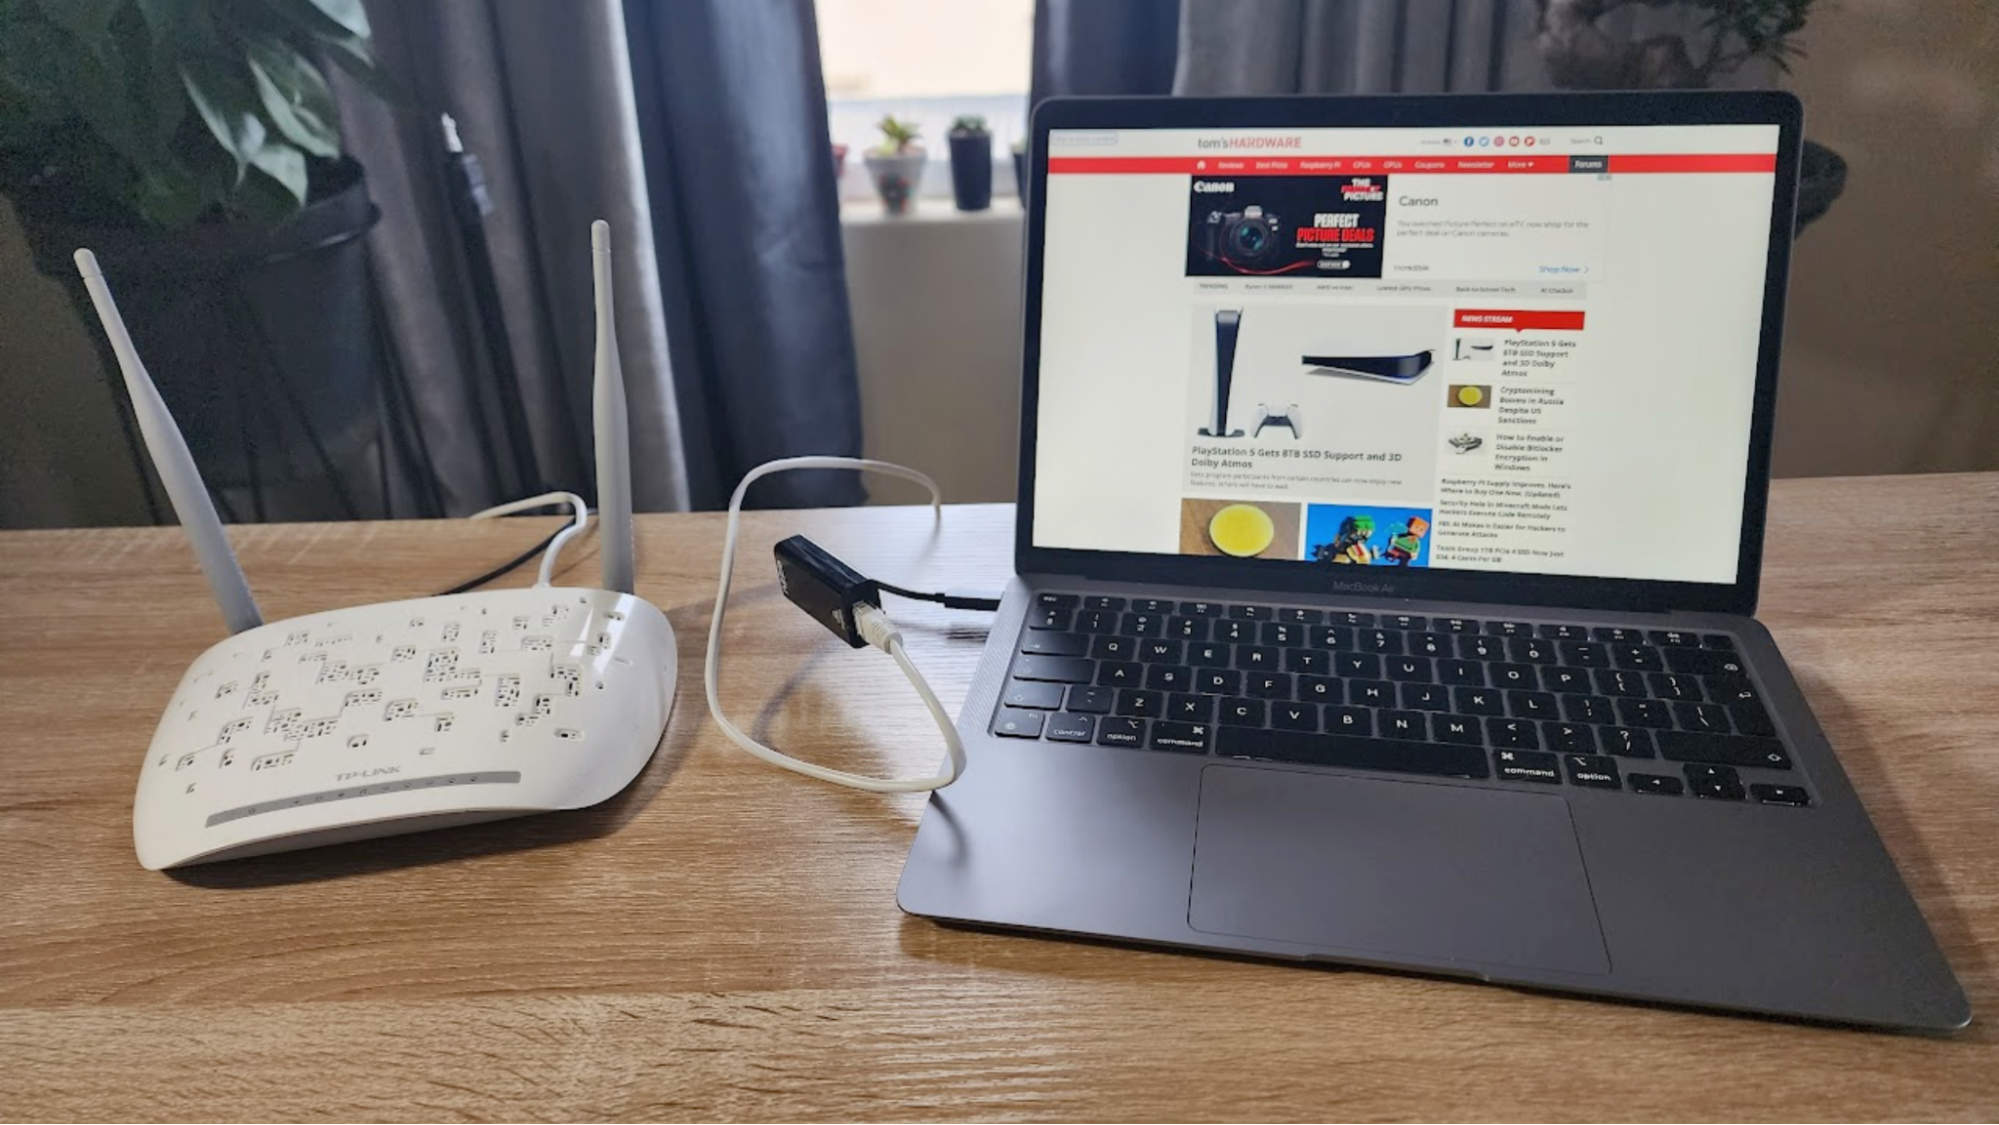
2. Connect the router to a computer via Ethernet.
3. Log in to the router’s web interface. Check the bottom of the router for the IP address, some routers have a URL instead. Type whichever you find on the device into your browser’s address bar and press Enter. If your old router doesn’t have a web interface (requires a phone app for setup), you may not be able to do this.
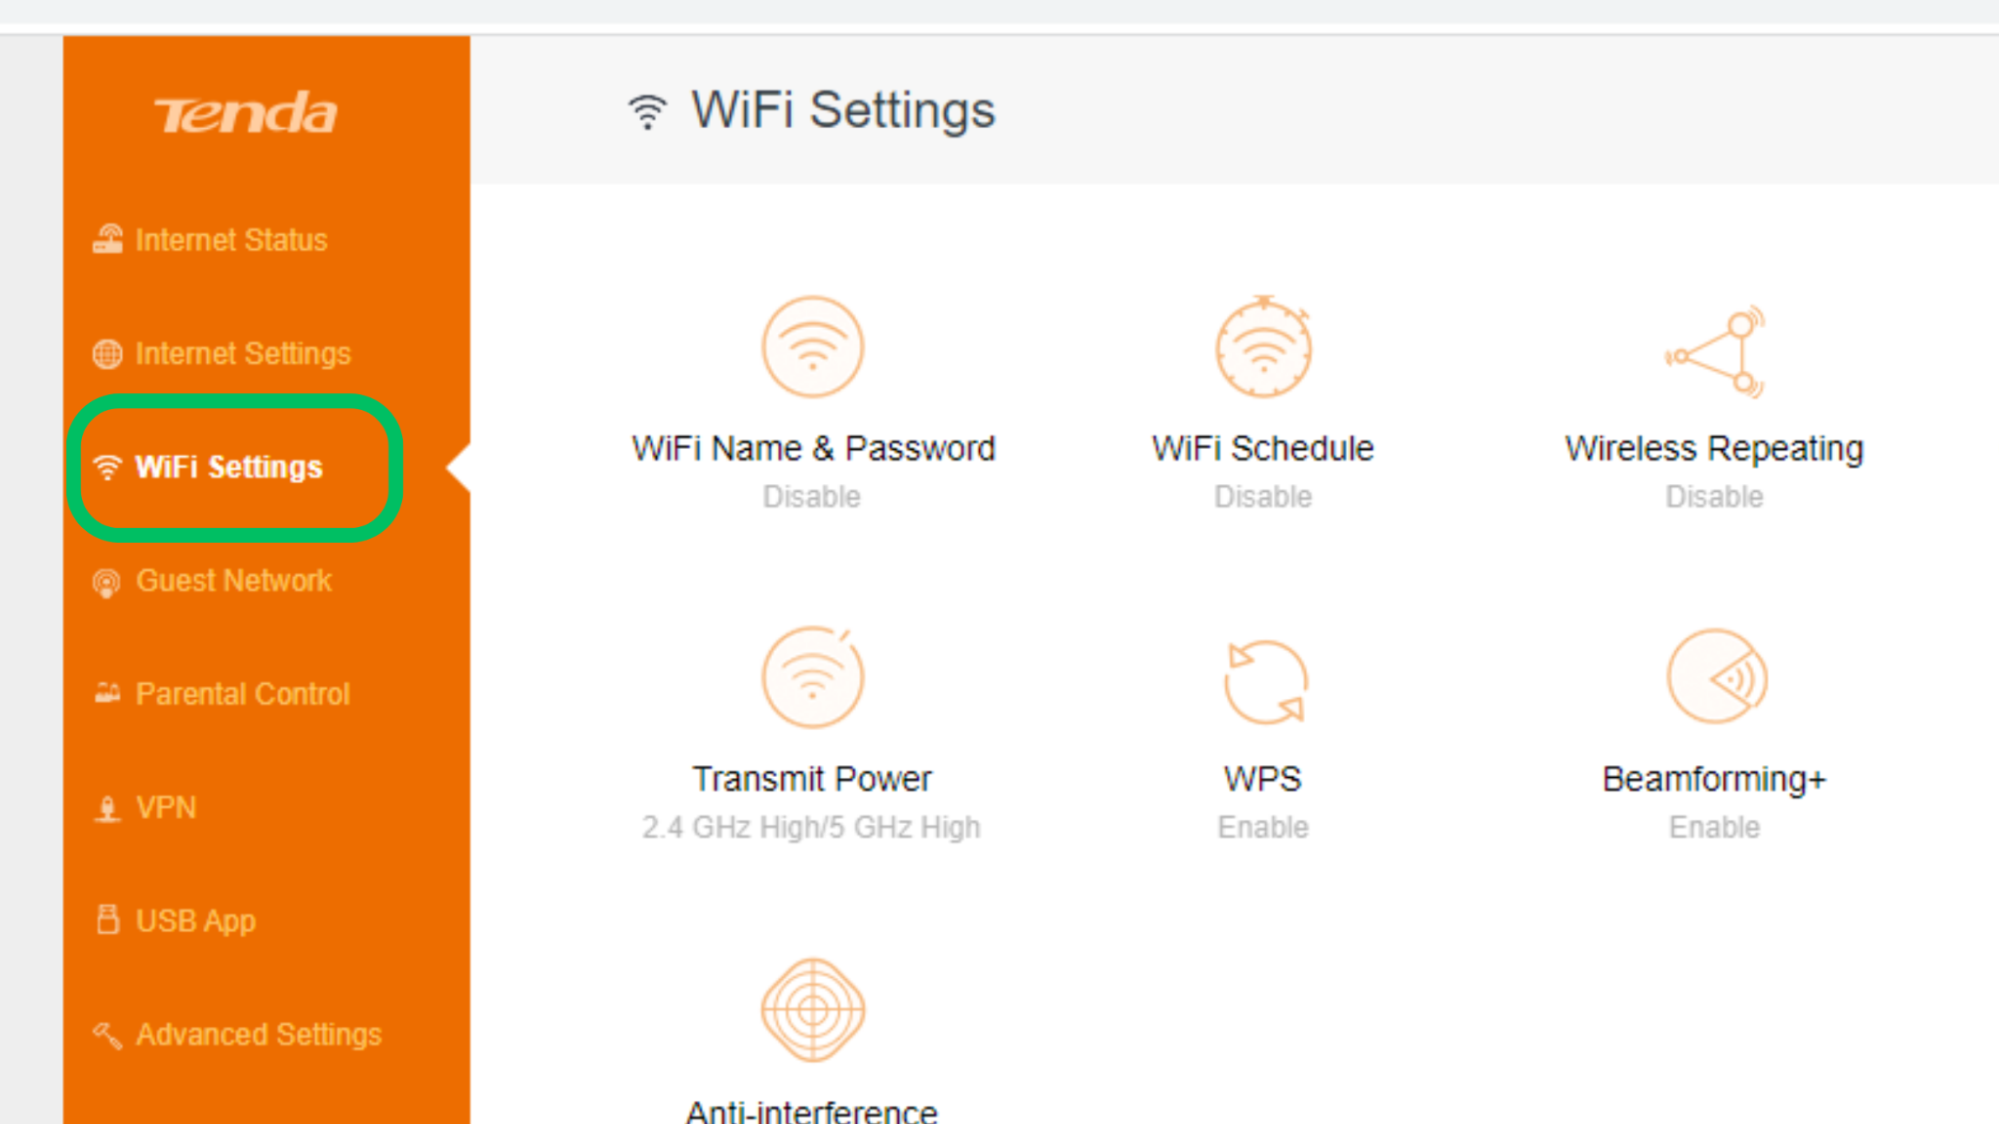
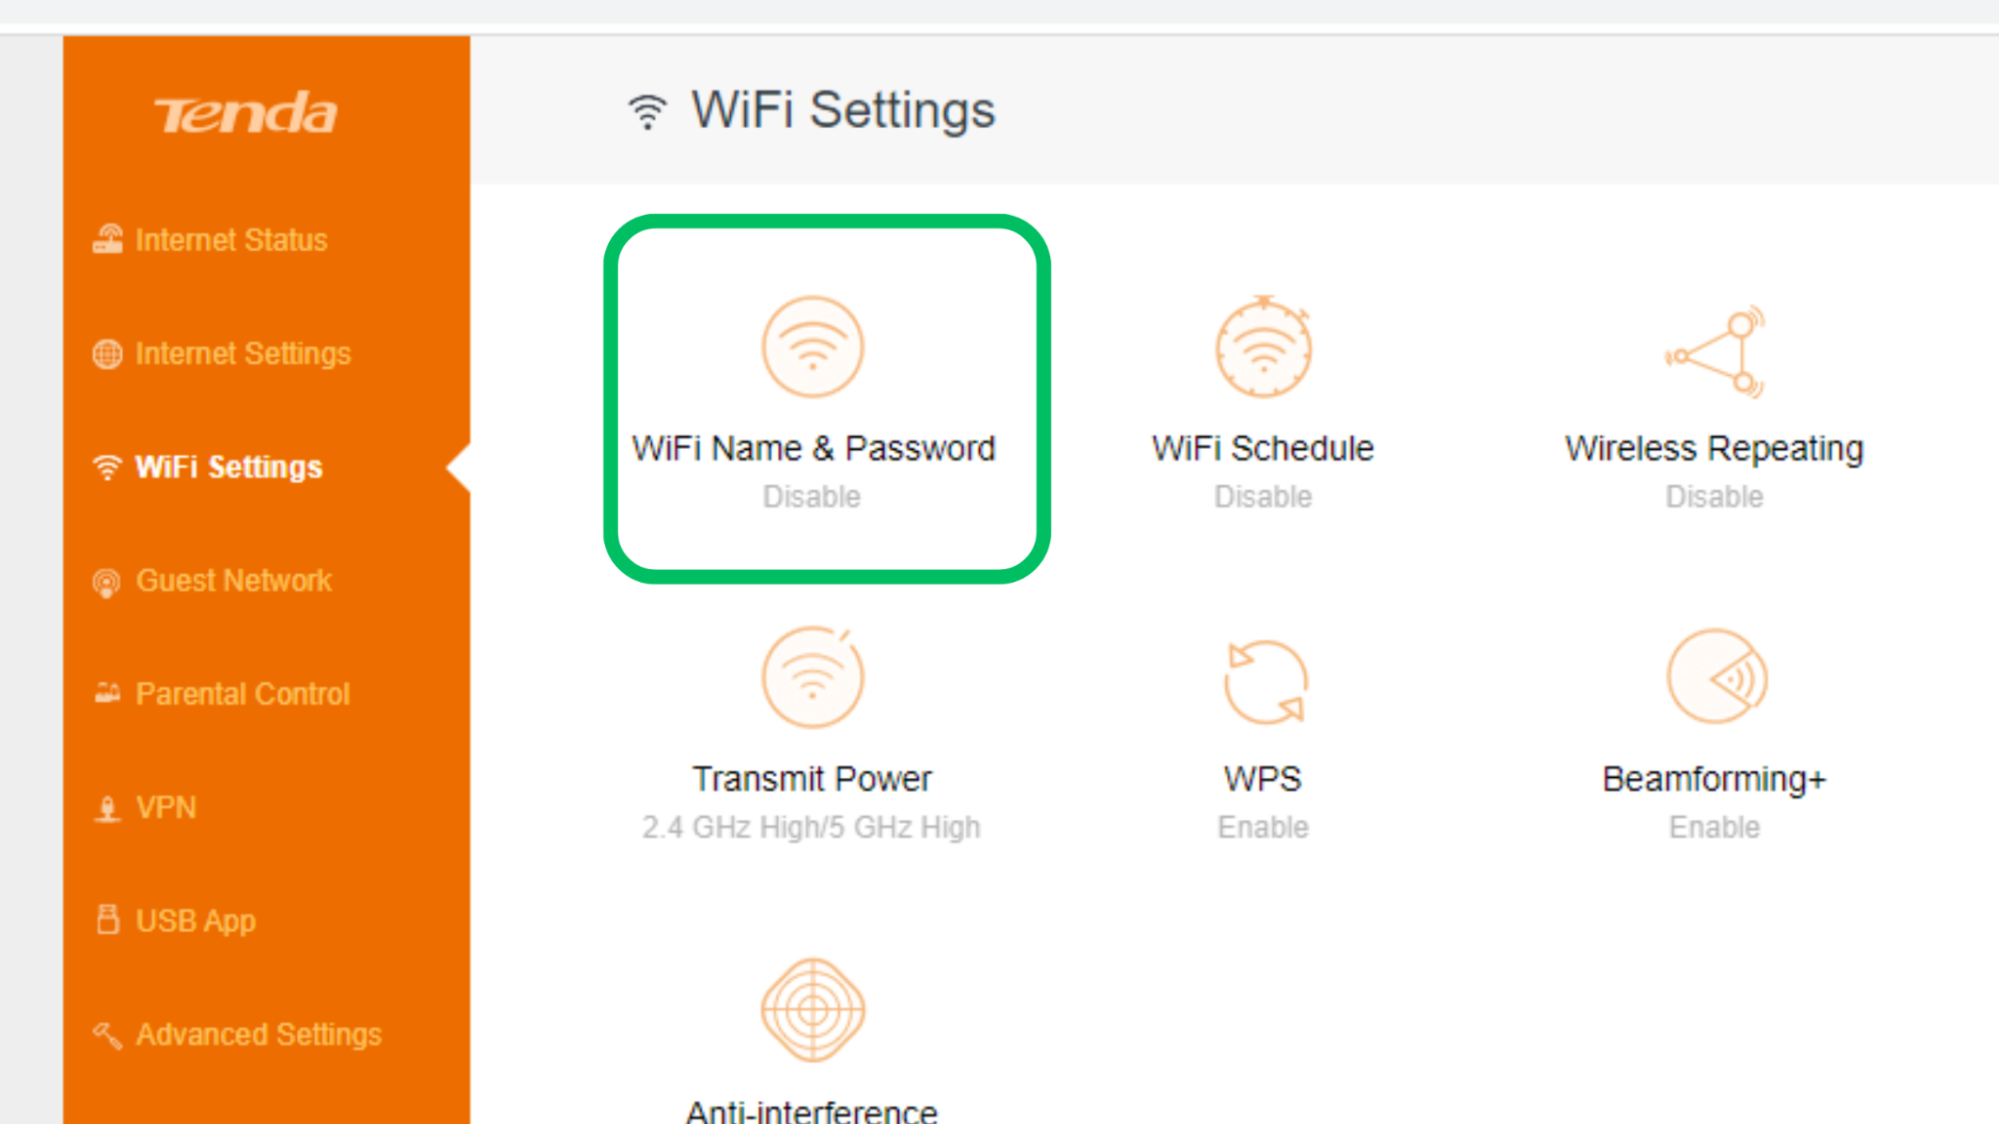
4. Look for the Wi-Fi section.
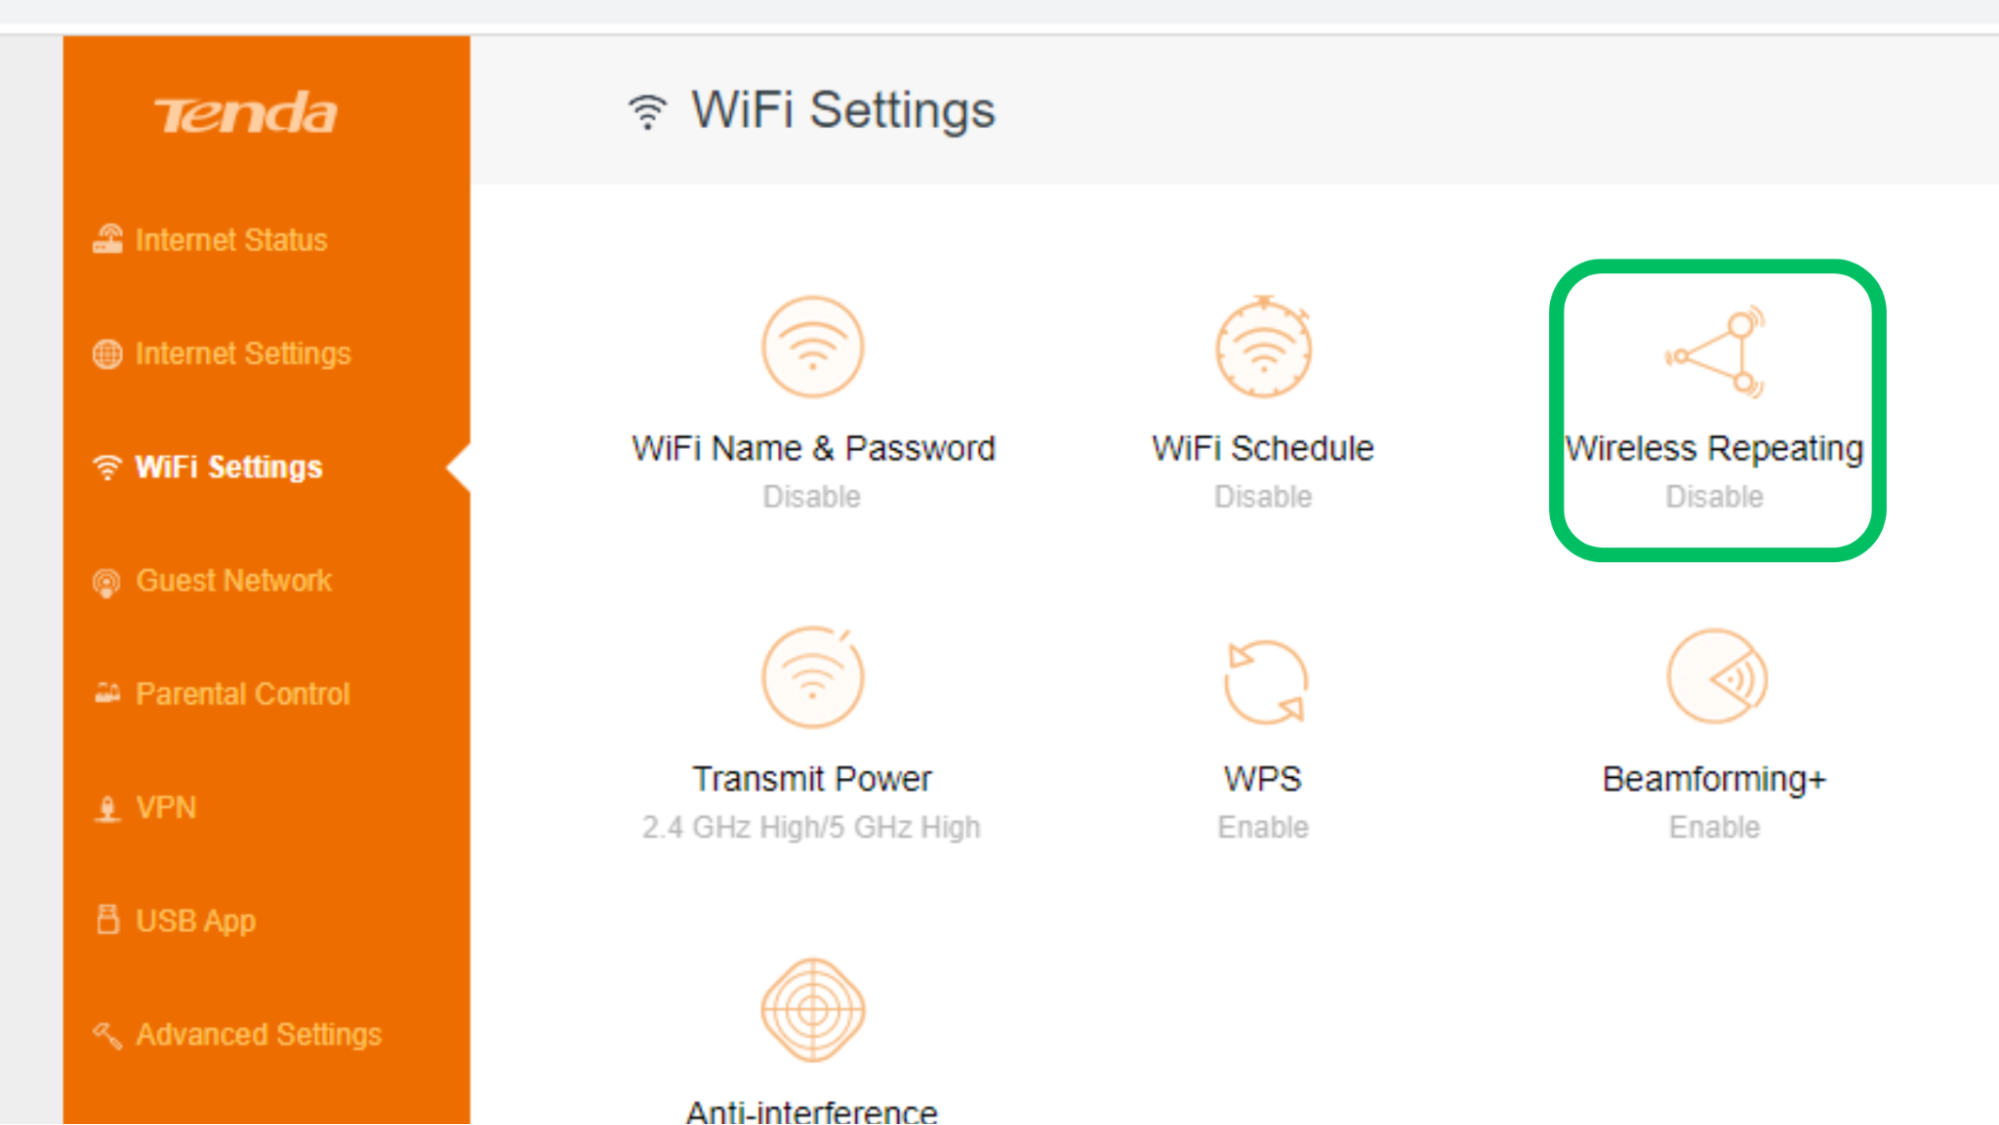
5. Look for a setting called “repeater” or “wireless extension.” On some older routers, there’s a feature known as “wireless bridge” which can also be used to extend the main router’s reach, but most of the time the security of this feature is not good enough by modern standards, and we don’t recommend it.
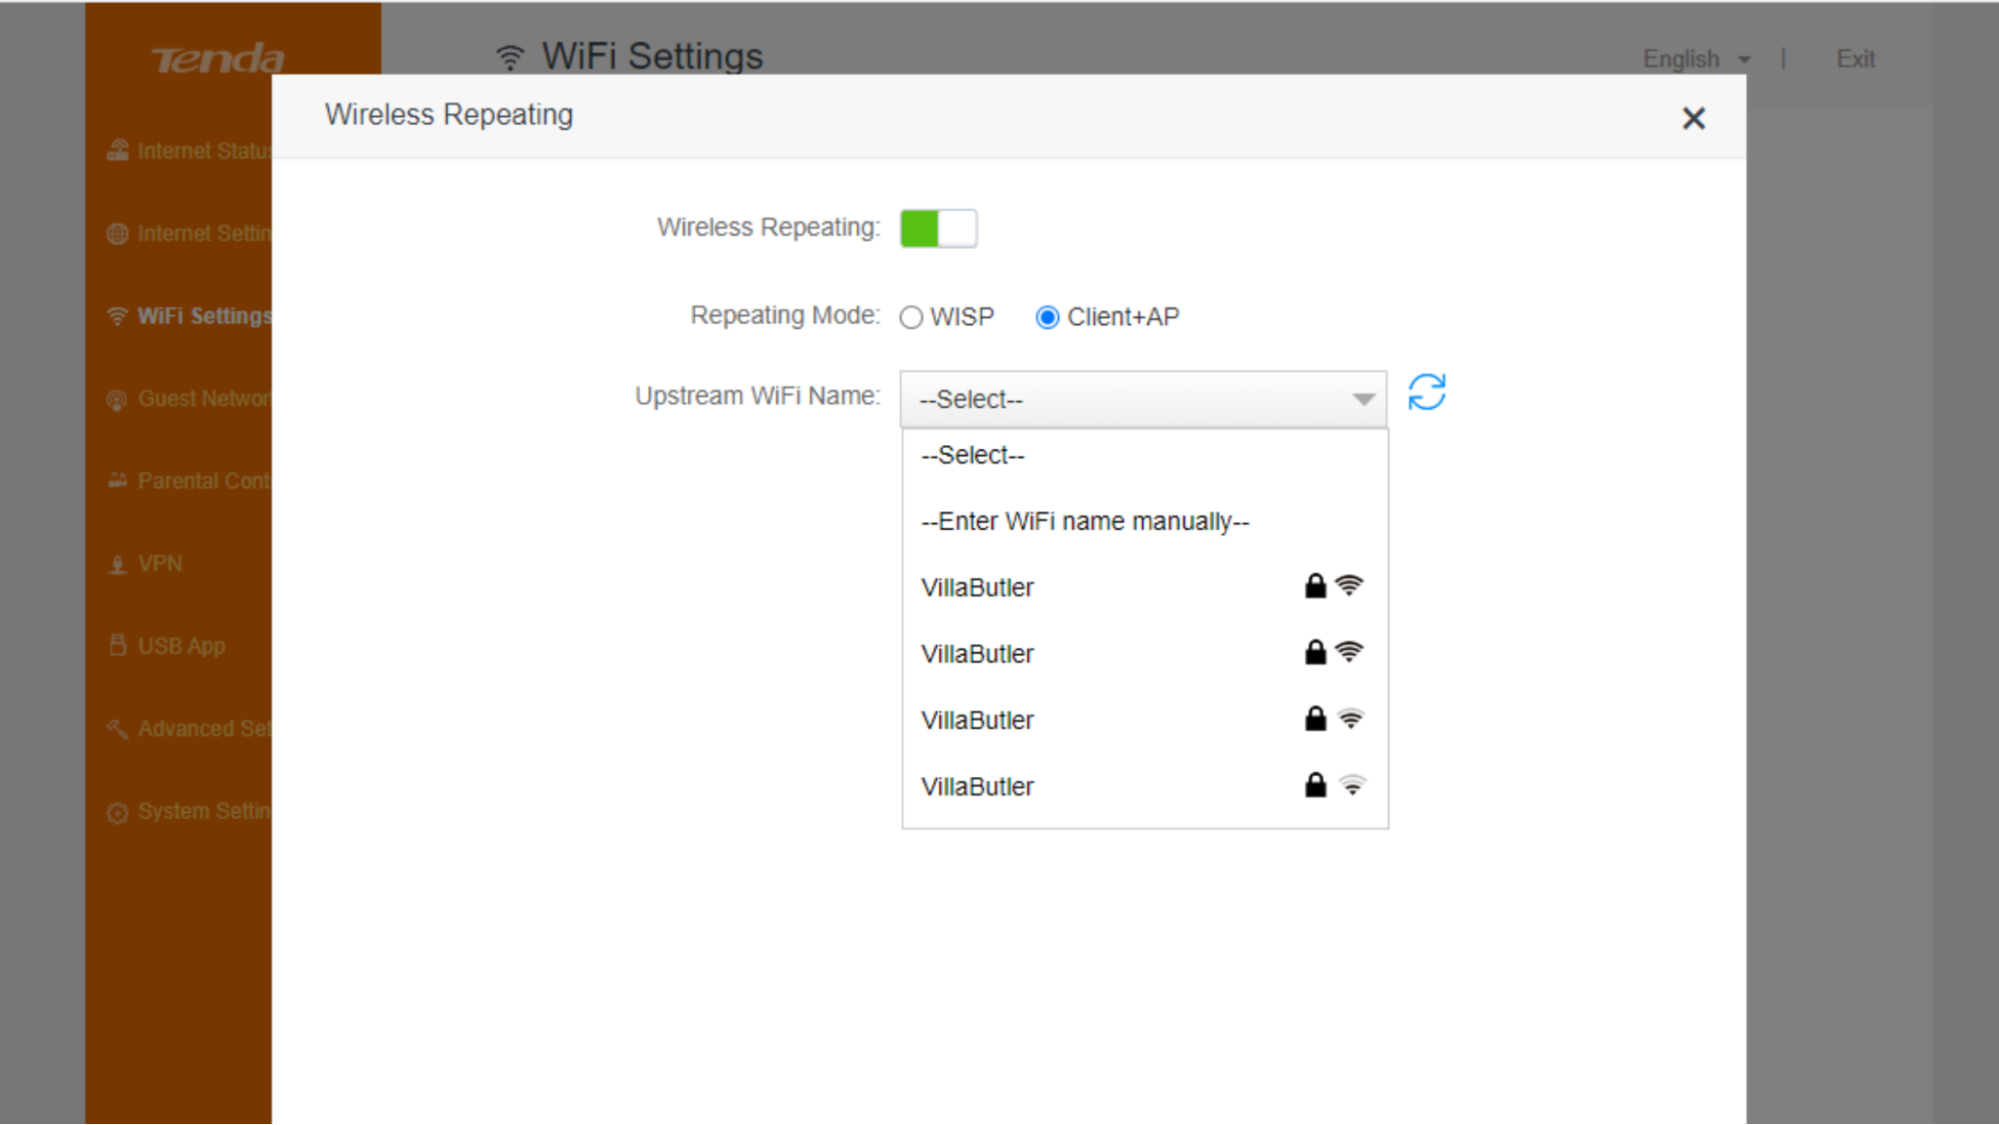
6. Activate repeater mode. In most cases you’ll be shown a list of nearby networks. Choose the one you want repeated and then enter its Wi-Fi password when prompted.
7. Change the Wi-Fi SSID (name) and password of the repeater. You can usually change the Wi-Fi network name and password of your router under the “wireless” section, or something similar. If you give the repeater the same SSID and password as the main router, you run the risk that some of your devices won’t automatically switch to the stronger signal, so we recommend giving it a unique name instead.
Now you should get a good Wi-Fi signal from your new repeater. An alternative to using your router as a wireless repeater, is to use it as a wireless Access Point instead. In this case you’d run an Ethernet cable from your main router to your old router, usually plugging it into the old router’s WAN/INTERNET port. Consult your router’s manual to see how it can be put into “AP Mode.”
How to Turn Your Router Into an Ethernet Switch
When using our old router as an Ethernet switch, we’ll disable a number of router features, so that the main router can do its job without interference. Here’s how:
1. Factory reset the old router. As before, reset the router back to its factory setting using the reset button on the back or bottom of the device.
2. Connect the computer to the old router using the Ethernet cable.
3. Log in to the router’s web interface.
4. Disable Wi-Fi. We won’t be using the Wi-Fi feature here, so disable Wi-Fi under the router’s “Wireless” section.
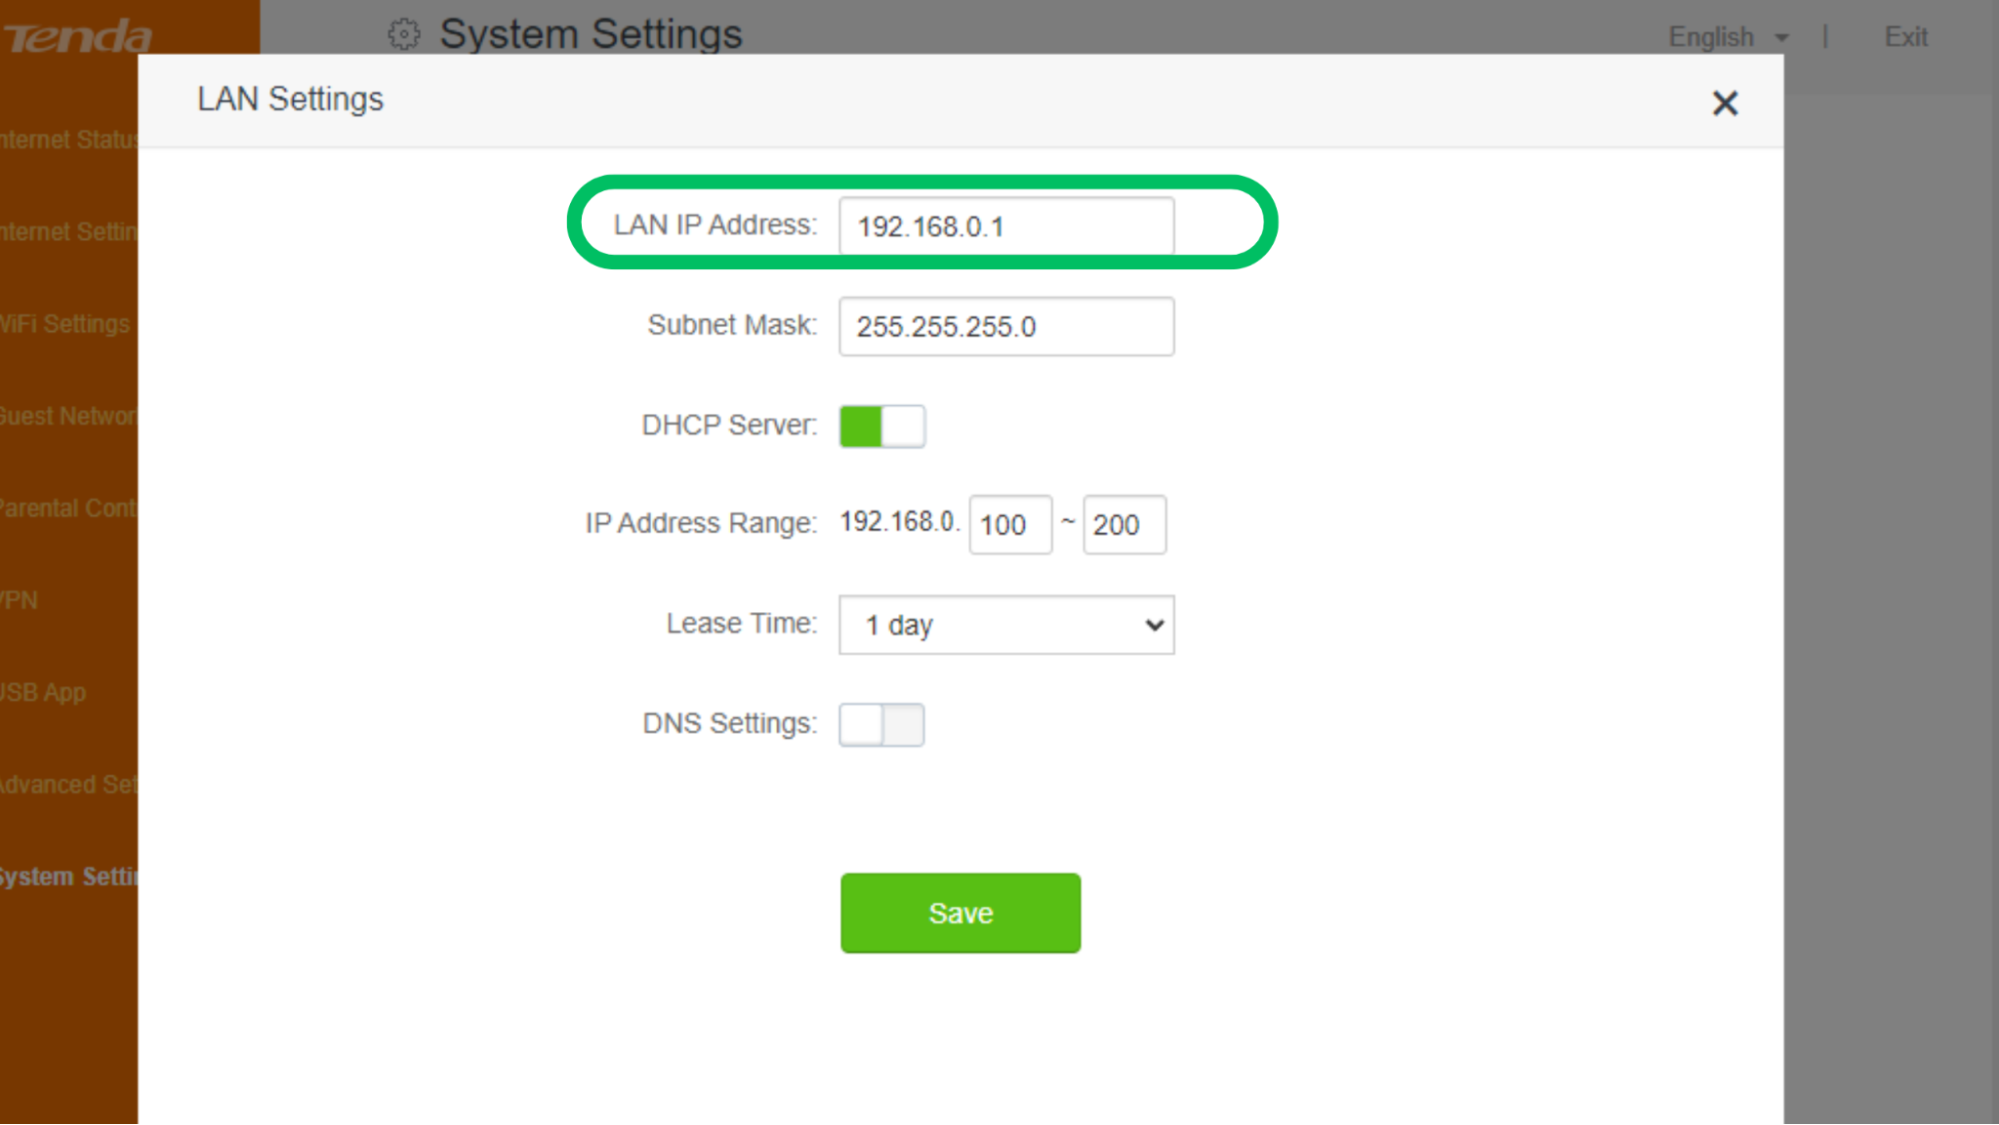
5. Change the router’s IP address. Look for a setting called “LAN IP” or similar. Here you’ll want to change the router’s IP address to one that the main router won’t assign to another device, which will create a conflict.
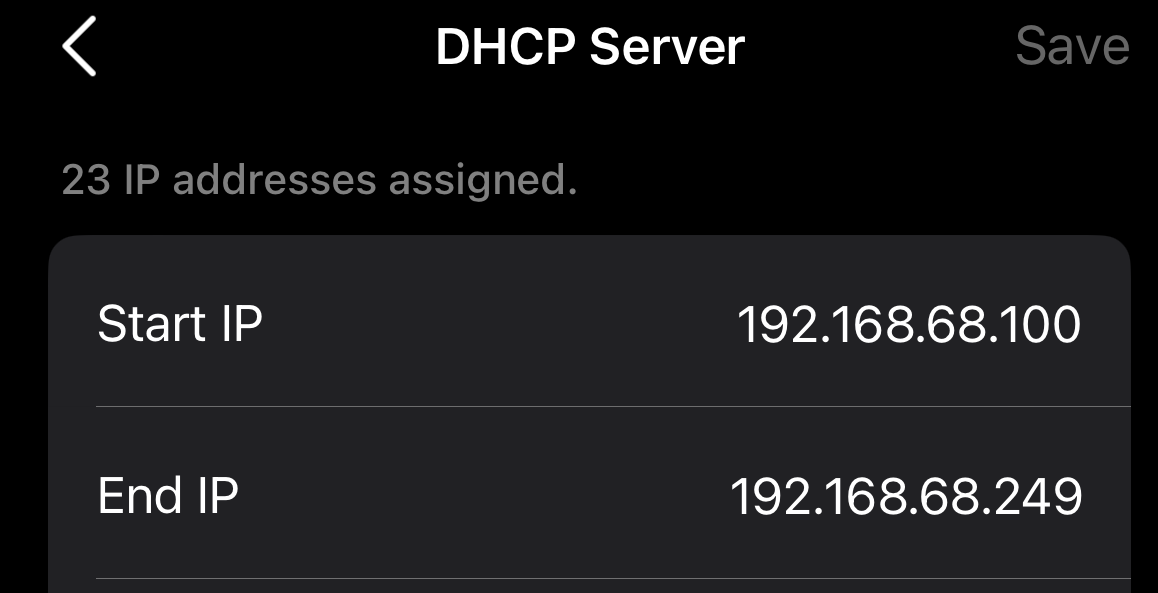
If your main router is set to automatically assign an IP address (as most are) you’ll need to log into the main router’s settings and look at its DHCP IP range.
This is the range of addresses that it will use to assign automatically, you can change that range by shrinking it a little, and then change the secondary router’s LAN IP to fall outside of the main router’s DHCP range. Here we’ve changed the DHCP range to and on 192.168.68.249 instead of 250, leaving 192.168.68.250 open for the secondary router. The subnet masks for both routers must be identical.
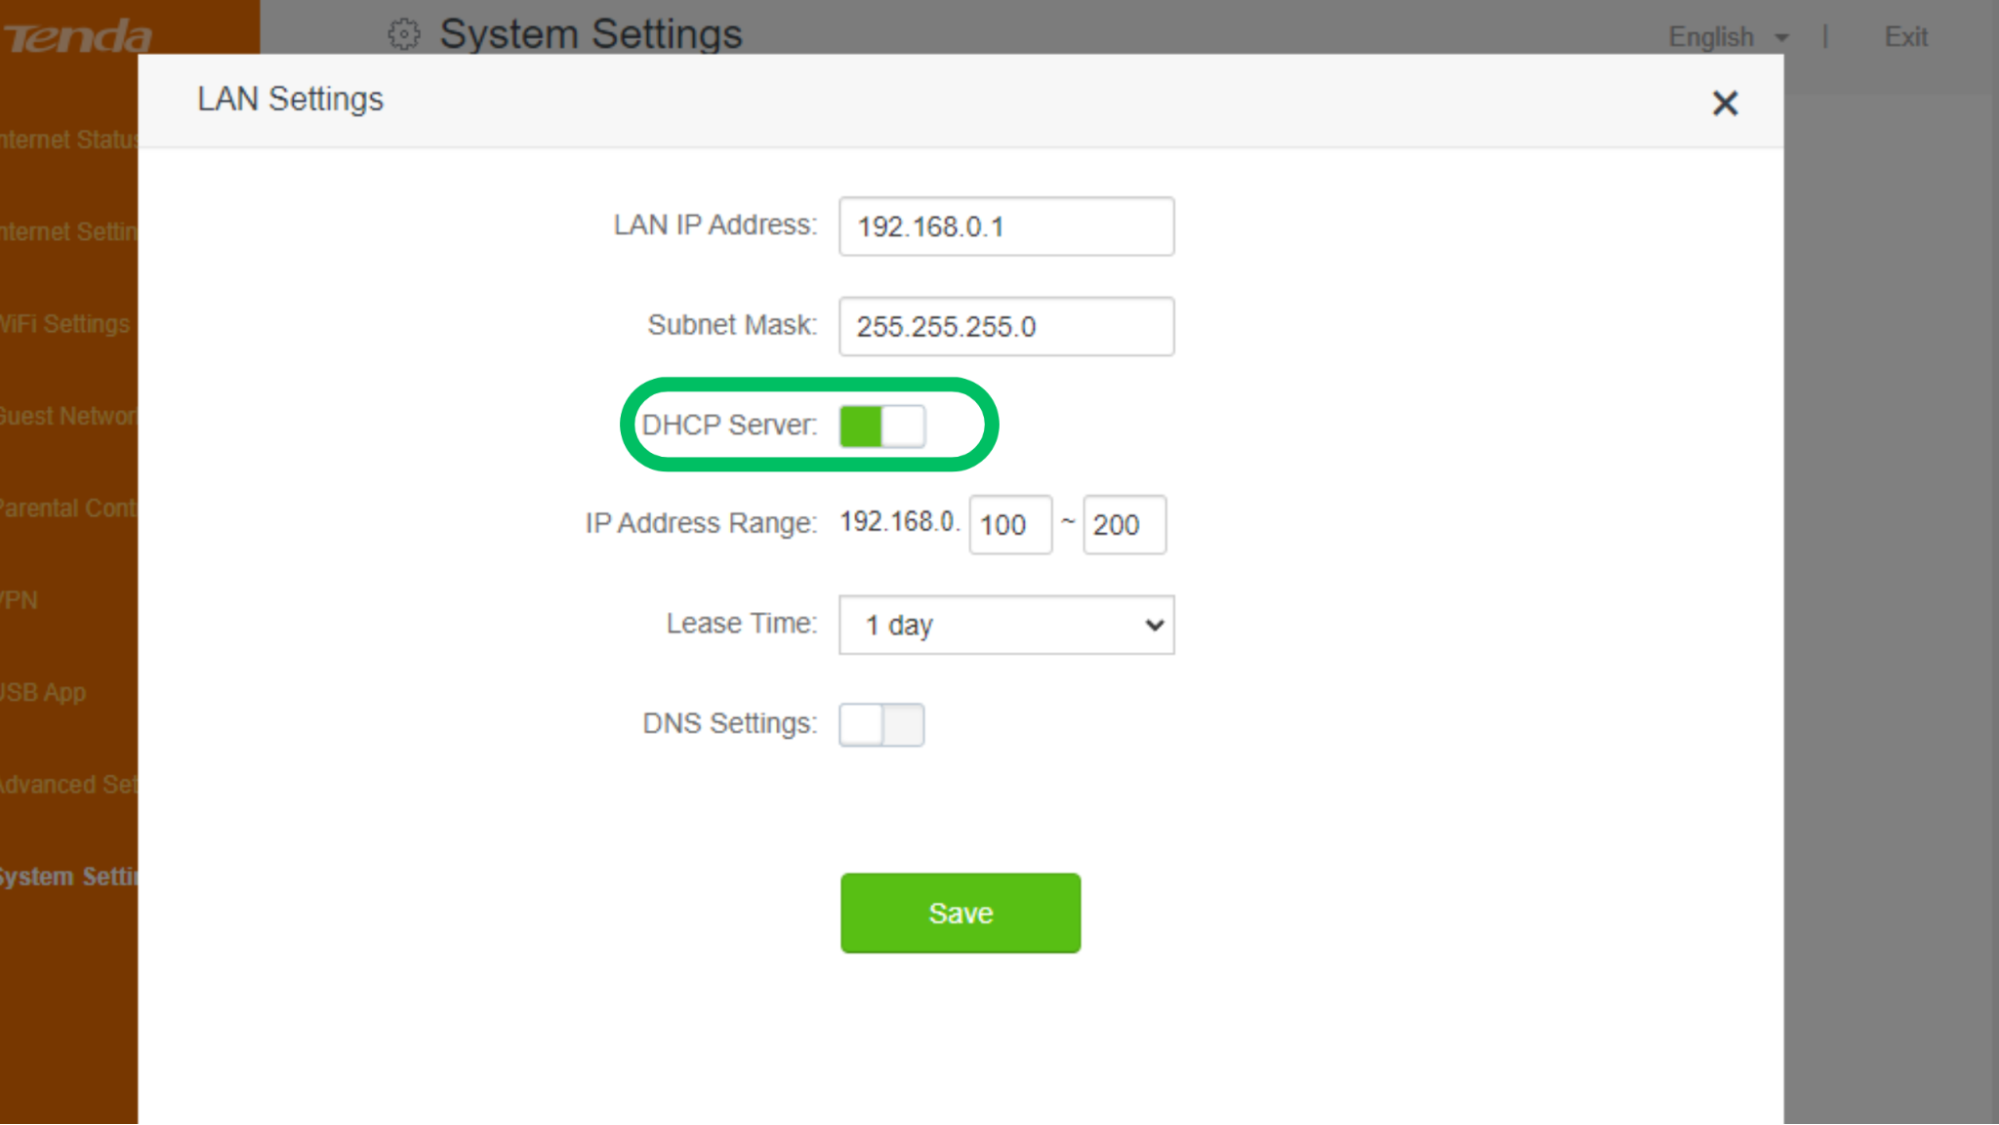
6. Disable DHCP on the secondary router. Usually found under LAN settings, likely in the same place you adjusted the LAN IP, disable the DHCP server function of the secondary router.
7. Connect the two routers. Plug the Ethernet cable into a free port on the main router. Then plug the other end into a free port on the secondary router. Some routers won’t work as a switch if you plug the cable into the WAN/Internet port, but do try it first to confirm, since otherwise you might think you have one fewer port available than you do.
Now you should have internet and network access for all the devices plugged into the old router. On some models of router you can remove the Wi-Fi antennas to have a cleaner-looking device, and since you won’t use Wi-Fi when using the old router as a network switch, they’re superfluous. If you want to use both the Ethernet ports and Wi-Fi, you should use the router in AP mode instead.
Sydner Butler is a freelance writer for Tom's Hardware. He is a PC technician with decades of experience in system building. He covers a wide range of topics from PC hardware troubleshooting, software guides, to VR gaming.
