I'm building a media server out of leftover PC parts and a 3D printed case
A little time and a lot of filament!

I've got 3D printers and lots of low-power single board computer (SBC) and related items in my office, so what do I do with them? Of course I had the crazy idea to 3D print my own file / media server.
I'm not designing this from scratch, rather I am using the excellent Modular Attached Storage Stack (MASS) from Haydn Bao. Specifically the free version of the kit, but from what I have seen, I shall be paying the $27 (£20) for the premium model.
MASS is a compact and modular NAS enclosure that has been designed by Bao to print on many of the best budget 3D printers. I printed 99% of my parts using an Elegoo Centauri Carbon, and 1.5KG of Elegoo Rapid PETG filament. The remaining 1% of the 3D print process was completed on my older Elegoo Neptune 3 Pro. Why? Because it prints TPU (flexible filament) extremely well and I need four feet to stop the case sliding around the desk.
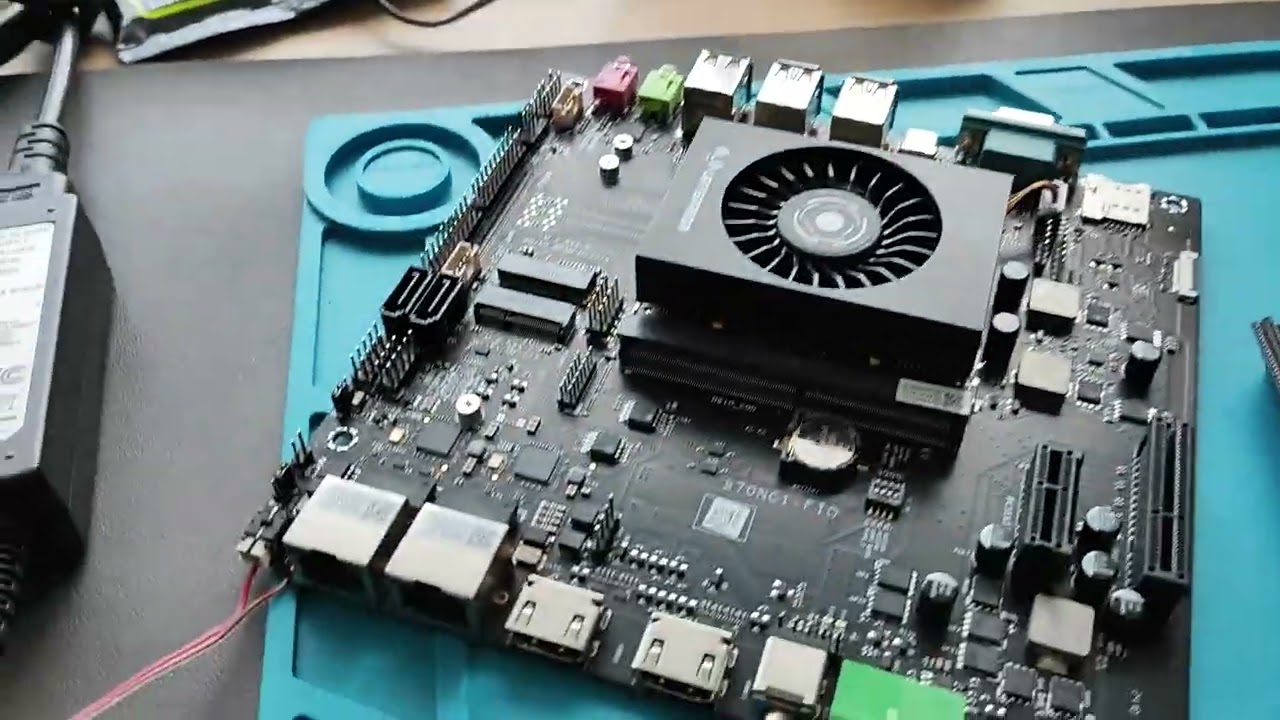
The brains for this project is a LattePanda Mu with an Intel N100 and a mini-ITX motherboard. Inside the Mu's module I have a quad-core Intel N100 CPU capable of up to 3.4GHz, 8GB of LPDDR5 and 64GB of eMMC. I'll be installing a Linux based operating system and to manage the drive, OpenMediaVault.

Right now, I have a plethora of 3D printed parts which have been printed over the past week. I'll have a breakdown of the times and amount of filament used over the entire build process, and I will have links to key tools and products used so you can make your own.
I know what you are going to ask. "Why are you 3D printing a case when you can buy one?" The simple answer is, because I can and I want to give my Elegoo Centauri Carbon a real project so it can show just how good it is. So join me in this live blog as I show you the ups and downs of 3D printing your own NAS device.
The quality of this project is excellent!
Haydn Bao's Modular Attached Storage Stack (MASS) project oozes quality. From the 3D printable models to the instructions, I can see that I will have a lot of fun building this kit.
First of all, the models. The MASS Instructables and project page show off both the free and premium versions of the kit and Bao is meticulous in detailing the differences, so that we have an informed choice as to what model we want to print.
| Row 0 - Cell 0 | Premium | Free |
Drive Bays | Up to 10 x 3.5 inch, 3 x 2.5 inch drivers | 4 x 3.5 inch, 3 x 2.5 inch |
PCI-E Slot | One slot, low-profil | None |
PSU | SFX, SFX-L, FlexATX | SFX, SFX-L |
Fans | 3x 140mm or 120mm | 3x 140mm or 120mm |
CPU Cooler | 66mm tall | 55mm tall |
Printer Requirements | Min. Bed 210x210, 240C Nozzle | Min. Bed 200x200, 240C Nozzle |
Core Size (APU) | 210x199x162mm 6.7L | 203x199x151mm 6.1L |
Bay Module | 199x162x150mm 4.8L | 199x150x150mm 4.5L |
Motherboard | ITX | ITX |
Material | 1-2kg PETG | 1-2kg PETG |
Handles | Low profile and standard options | None |
Display Mod | Up to 7 inch | Up to 5 inch |
Additional 2.5" Bays | Optional mounts for 2x2.5" drives in a 3.5" bay | None |
Mechanical PBT | Optional: use keyboard switch as power button | Optional: use keyboard switch as power button |
I downloaded the free kit and opened the ZIP archive and found lots of parts to print and an optional section (which I used for a few parts) for parts to augment your build.

Loading these parts into a slicer, in my case Elegoo's fork of Orca Slicer, Elegoo Slicer, and I can clearly see that these parts have been designed with ease of printing in mind. They come pre-oriented for best printing and Bao has designed supports directly into the parts.

The instructions are awesome. A great mix that illustrates the build process in words and pictures. How to attach the parts together, their orientation, what screws to use and advising on optional parts for your build.

I love the instructions! Now, I have to use them to build my server, but first I need to perform a little surgery on my LattePanda Mu, specifically the power button!
I've got the power, finally!
The LattePanda Mu's Mini ITX development board sadly does not have common ATX-style power connectors, but it does have a 5525 DC barrel jack for an external power brick. Great!
It also has a power button on the motherboard, so what is my problem? Well, the rear panel of the MASS case has a breakout for a 16mm push button, or a standard PC key switch but the LattePanda development board doesn't have a conventional breakout for power buttons, case LEDs etc. So I had to improvise.
So where does the button connect on the motherboard?

I dug out my trusty UNI-T UT58C multimeter, set it to continuity, and probed the four test points with the power off! The outer most points connected when the power button was pressed, this makes a connection and triggers the board to power up. So I soldered on some wires, and tested the connection with a 16mm button from my collection.

I chose to use ferrules on the bare wires that are held in the jaws of the screw terminal. Why? Better mechanical grip and they reduce the risk of shorts. Also, I love ferrules.
I tested this setup before committing to the wiring, and all went well so I made the fix permanent using some Kapton tape and better soldering.

The Kapton tape also acts as strain relief, handy as the next part of the process sees me build the motherboard into the case, using plenty of M3 screws and nuts.
Building time!
Let me say this first, this is a great build! I'm actually enjoying it, no hype or hint of falsehood, I am having a great time.


First of all I inserted some M3 nylon standoffs into the top and bottom sections of the APU where my LattePanda board resides. Why nylon standoffs? Because my other brass M3 standoffs weren't long enough so I had to improvise. With the standoffs in place I lined up the screw points on the motherboard and used some nylon M3 screws to secure the motherboard to the top and bottom frame, effectively using the motherboard to provide extra strength in the central core. Don't make my mistake, get yourself a selection of screws for PC case building. Mine are on the way from Amazon.

Following the instructions, I'm using M3 20mm self tapping countersunk screws to secure the 3D printed sections together. I bought a 100 from Amazon so I have plenty of spares. When screwing into plastic, make sure that you are committed to the task, unscrewing and re-screwing will only weaken the build. Personally, I would've liked to have seen threaded inserts melted into the screw holes, but time and talent did not allow this time.
I lined up the screws, and carefully screwed them in until I felt them "bite". To do this I used a small Wera ratcheting screwdriver from my PC first aid tool kit, which also has a 3D printed project hidden inside it.

Once they are lined up, I bring out the big guns. The HOTO Electric Screwdriver that myself and a few other editors own. This makes short work of driving the screws into the PETG plastic, but the ratcheting screwdriver helps me "feel" when the screw is in correctly.

I now carry on with the build process, I have clips and case sides to add.
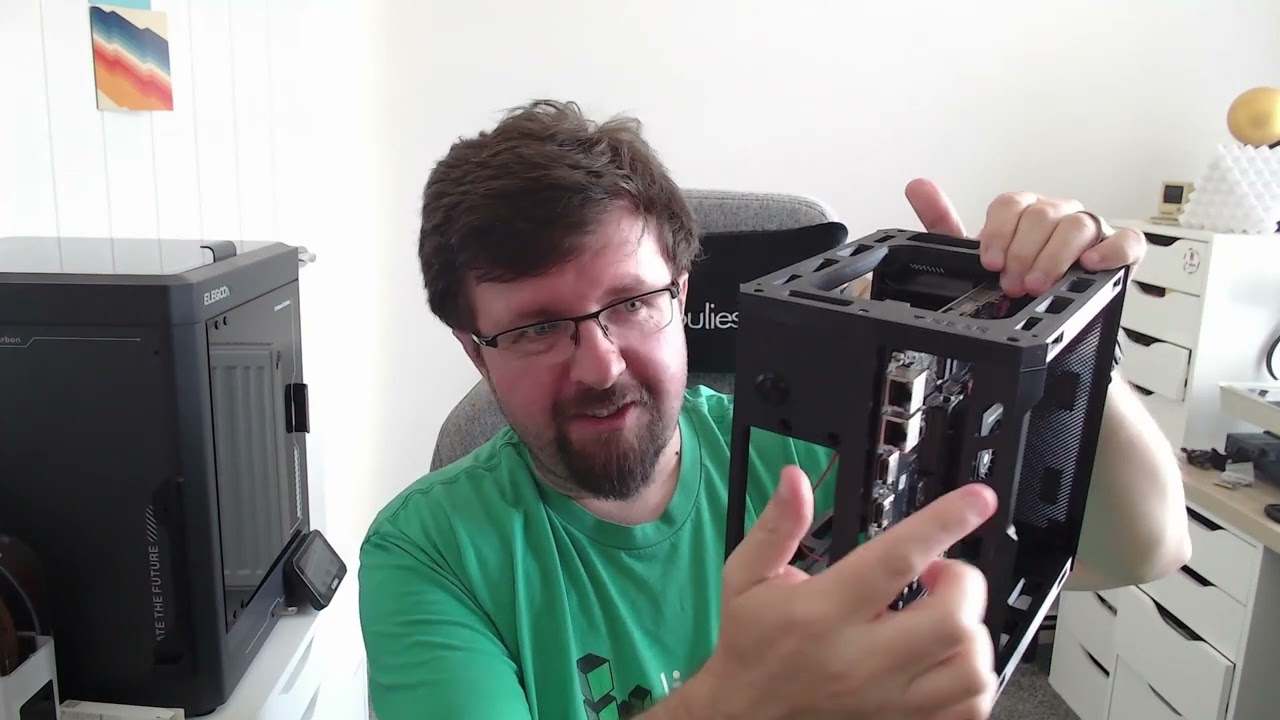
Last update for today — I've got a 3D printed PC case!
Wow, just wow. I did not expect the build to come out like this. I am truly stunned, and I can't wait to start work on the next part, the drive bays which can hold up to four 3.5 inch drives, and it even has rails to pull the drives in and out of the bays!
I'll be back tomorrow for more fun as I build this truly excellent kit!
I forgot to talk about the clips

In my haste yesterday, I forgot to talk about the quickest 3D print in the project. The clips!
To connect the mesh panel (side and the top), Bao has integrated a series of 3D printed (of course they are 3D printed!) clips that insert in to cut-outs around the case. They simply push into the space designed for them

Then all we need to do is insert the panel and the clips connect with the specially designed studs to lock the panel in place. The case is designed for the side panels to easily pull off via small indentations on the case. If you need to take the top panel off, use a guitar plectrum, Lego brick separator or a plastic spudger. I wouldn't use metal as it will damage the plastic.
Ok, my next job is to do a smoke test on the build. Then install a Linux OS to make sure that all of this work hasn't been wasted.
Who's got two thumbs and forgot that there are no USB ports on the rear of the motherboard?

Whoops! I want to install Ubuntu 24.04.3 LTS on the LattePanda Mu. No problem, right? Wrong!
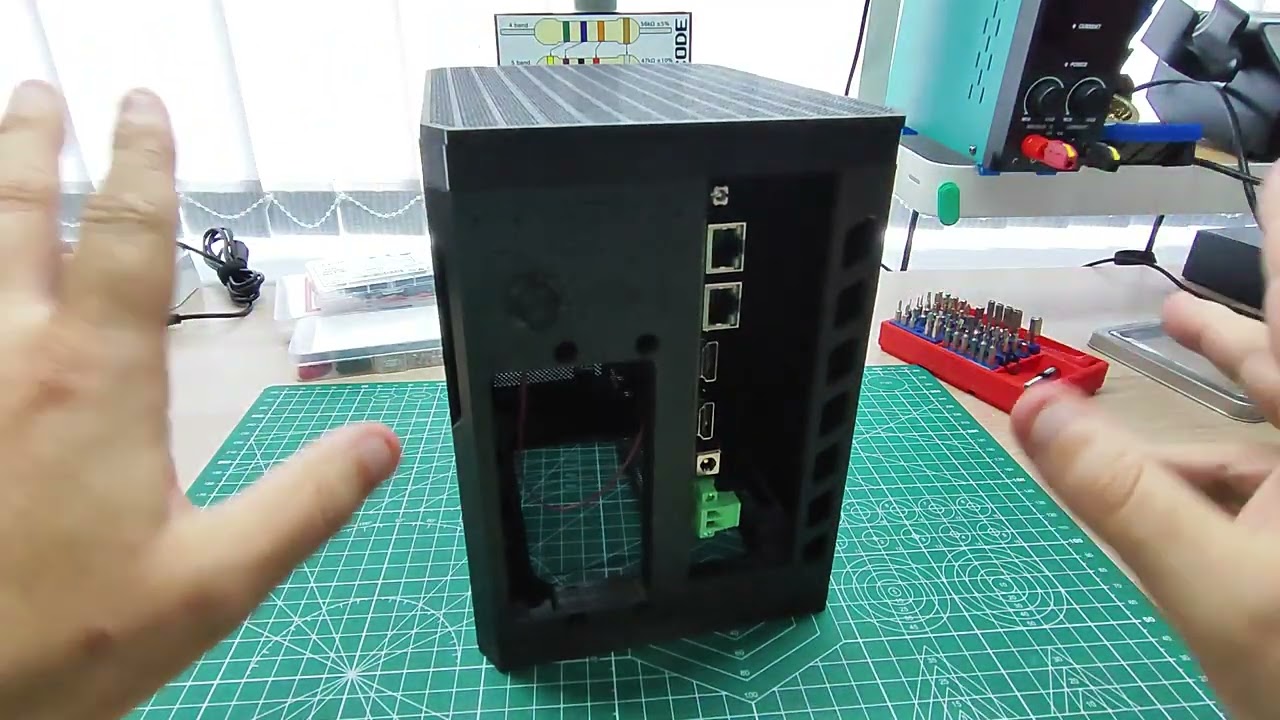
The LattePanda Mu ITX breakout board has all of the USB ports at the front, and the MASS case has just a big mesh there!

I tried plugging in a USB C Steam Deck dock into the solitary USB C port. Why? Because it has a right-angled connector.

Did it work? Nope. Now I am ordering some right-angled USB 3 adapters from Amazon (once I test and confirm they work, I'll share the link) and right now I need to disassemble the front of the case so that I can install Ubuntu.
This is an example of a concept that I used to teach.
FAIL
First
Attempt
In
Learning
I really should take my own advice, sometimes! Onwards!
Ubuntu 24.04.3 is installing!

After taking the front panel off I have access to the USB ports and I can boot from a copy of Ubuntu 24.04.3 LTS Server and install the OS before moving onward.

I've connected up the server to my Elecrow CrowView Note, a laptop with no brains and designed to interface with a Raspberry Pi on Nvidia Jetson. But with the right cables you can connect anything to it, including this server!
I chose to install Ubuntu on to the 64GB eMMC drive that comes with the N100, it should be fast enough for booting and running the OS. If not, there is an M.2 NVMe option that I can use.
First boot and all appears well!

Phew, that was a close call. I thought the project was dead before it got going. Ubuntu 24.04.3 LTS has been installed and it appears to be working to spec. Now that the smoke test is done, I can install OpenMediaVault and then build the rest of the server.
OMG I installed OMV

Bad pun, sorry! Ok, so I have OpenMediaVault (OMV) installed on the eMMC drive of the LattePanda Mu and all appears to be working. I erroneously thought that I could install OMV inside of Ubuntu Server, but according to the website I need to download a specific ISO and install using that. I've built OMV servers before, but they were always built around a Raspberry Pi and so my brain thought that was the process.
Its installed, so now I can consider the test complete, and now I can move on to building the drive bays!
Assembling the bay module, with a little help from hot air

The bay module is where up to four 3.5 inch hard disk drives will be slotted into place. This will form the base of the server build. The module is made from two 3D printed halves, front and back. These halves join together with pegs, but also need M3 20mm screws to hold everything together.


The instructions say to use four screws, but there are eight screw holes. I put four in, and everything is solid. If you've got spare screws, go for eight and pray that you never need to open it up.
Screw access is tight, you'll need a long PH2 screwdriver to get down there. Luckily I have a Wera Vario that can just get into the recesses.

Everything is assembled, but I have one last job to do. Clean up the wispy bits of PETG floss that appeared during the print. This could've been generated by moisture in the filament (but it was a brand new, unopened pack), retraction settings, or even Z-hop.
To clean them up I use a hot air rework station (something I reviewed for the best soldering irons and stations page) at 150C and 50% air speed to melt the wisps away. Do be careful doing this, you don't want to damage your print, or more importantly, yourself!
Sliding the HDD rails into place

The HDD sliders, best printed in TPU but I chose PETG because I didn't read that bit, fix to the screw points on your chosen 3.5 inch hard disk drive. But if you get them the wrong way round, the screw heads will not slide into the channel and you will get a 20 minute headache, well I did anyway.


You'll need some M3.5 screws, common in PC builds, to secure the slider to the drive. Pay attention to the location as the screws need to slide into the channel. If incorrect, the screw heads will hit the outer edge of the rail and prevent the sliders going into the channel.
Once the drive is in, you will need to secure the cables to the motherboard, and then attach the HDD retainer to the front of the case. There is no other mechanical means to secure the drive. In this case, please don't tip your server until everything is secure and in place.
Lots of build progress, but I've hit an issue

Progress has been made! I've inserted the hard disk, a spare Seagate 4TB drive that I used with building Raspberry Pi powered NAS. The connections for power and data have been done, and the HDD retainer is in place so my drive should now tumble to an untimely death.


An ultra quiet Noctua NF-P14S Redux 140mm, 1500 PWM fan has been connected and is set to force cool air in from the bottom of the case, over the hard drive(s) and to the N100 which has its own cooling system. Everything sounds so quiet!


I've attached the bottom section, lifting the fan off the desk, and fitted four TPU feet to stop the server skidding around my desk.


So why doesn't OpenMediaVault see the drive? In fact, the underlying OS cannot see the drive either. I think I need to check the manual to see if the SATA ports are enabled by default.


I can hear the drive starting up as I power on the server, and when I power down I hear that it is powered down, the cable has been re-seated.
I checked the motherboard manual, there is a jumper to change, just next to the clock battery. I changed it to enable SATA ports 1 and 2. Powered up the server, no change. This is a head scratcher.
I tried another drive, that didn't work either

I tried a readily available SATA SSD, just to see if the system could see that. It cannot. Same error.

I checked the manual and configured the DIP switch to enable the two SATA ports. Alas, same issue. This is a head scratcher!
It detected my NVMe test drive

I've got an old WD Black 1TB NVMe SSD and I use it for testing PCIe performance on single board computers. I wondered if NVMe was working on the board, so I grabbed an M.2 to PCIe adapter and plugged it in.

OpenMediaVault saw it, so the problem is confirmed with SATA on the motherboard. Time for some more reading.
A new day dawns, and I've got some work to do
Welcome to the final day for this project, and I've not got much time to diagnose the SATA issue, so lets crack on!
The LattaPanda Mu development board has its own BIOS, and so does the Mu itself. From the motherboard I can select between the two, and the Mu's BIOS seemingly can't see the SATA connections, but PCIe and NVMe drives work fine. Switching to the dev board's BIOS and I can see the SATA drives!
Yay! Right?
Errr no. Because those BIOS cannot see the Ethernet ports and a NAS without Ethernet is a bit useless. Also a NAS with no SATA storage is equally as useless.
My plan is to check the BIOS for any weird things that I have missed. Scour the Internet for others who faced the problem, and then possibly update the BIOS.
First, coffee.
Read the small print!

Looking in the manual for the Lattepanda Mu Full Evaluation Board (dev board) it seems that SATA is only enabled if...
"The switch between SATA and PCIe functions will only take effect after flashing the corresponding BIOS firmware, following the modification of the DIP switch settings."

If I have read that correctly, I need to set the DIP switch to the BOT BIOS, which selects the evaluation board's BIOS, then flash the new BIOS to the board.
Ok then, here goes nothing.
BIOS woes
I've got the correct BIOS files, and I've read the instructions, no really!
I powered up the server with the USB installed, and logged in, no remote SSH connections here, I am sat right in front of the server. I mount the USB drive and list the contents.
The contents are different to what I put on there, very different!
So, I booted from Ubuntu 24.04.2 LTS via my Ventoy USB flash drive, created for the PC First Aid Toolkit. I then mount the USB drive, copy the contents to the Desktop and then make a file called FPT executable via chmod that'll work, right? Nope, permissions errors, everywhere. So I have installed Ubuntu on the N100's eMMC, overwriting the OpenMediaVault install. Now to try it all again.
The 3D printing part of this project was super smooth, enabling SATA on the LattePanda Mu Full Evaluation Carrier Board is not.
Adapt, Improvise, Overcome

I have a lot of spare PC parts laying around, but sadly only two Mini ITX motherboards. The first is the LattePanda Mu evaluation board, the other is a RISC-V board. The former has issues with SATA, the latter won't work with OpenMediaVault.
I'm having BIOS flashing issues, I borked it once, didn't fancy fixing it all over again. So I have gone to plan D. Using a PCIe based breakout board.

I have plenty of these, but the free MASS case design is not compatible, I would need to print the premium model and sadly I do not have time. So what do I do? I've got a Sabrent NVMe to PCIe adapter and a 4TB Lexar drive NVMe SSD, so lets make the best of a bad situation.
I wanted to use the spare 3.5 inch 4TB Seagate drive that resides in a drawer, but alas that is not destined to be. So lets get this drive installed, OpenMediaVault re-installed and get this project over the line!
Finally, some success!

Yes, finally something has gone right!
All it took was digging out a "spare" 4TB NVMe SSD and PCIe adapter, reflashing the OpenMediaVault (OMV) ISO image to a USB drive (it went really weird and buggy), installing OMV to the eMMC of the LattePanda Mu, then setting up the 4TB drive in OMV, then Samba / SMB. But yeah, here we go!


The share works across my Windows 10 and Ubuntu 24.04 systems and this, finally, makes me happy!
Workflow to setup and share a disk in OpenMediaVault

You've all been patient, thanks for following me along this rollercoaster of a live blog!
The 4TB drive is connected and ready to share across my network. So lets do that by creating a SMB (Samba) share for a single user.
Change your admin password!

Before you do anything, change the default admin password from openmediavault to something less likely to get hacked.
- Click on the user account icon (top right) and select Change Password.
- Enter a new password.
- Logout and test the password.
Create a new storage device
We need to tell OpenMediaVault where to find out storage drive.
Click on Storage >> Disks.

The drive should be listed, if not, click on the spyglass to search for it.
Select the drive and click on wipe (second icon) to wipe the drive ready for use. Obviously do not delete data that you want to keep.

Click on Storage >> File Systems and click on the + to create a new file system. I chose EXT4, you choose what you need.
Click on the Device, and then Save.
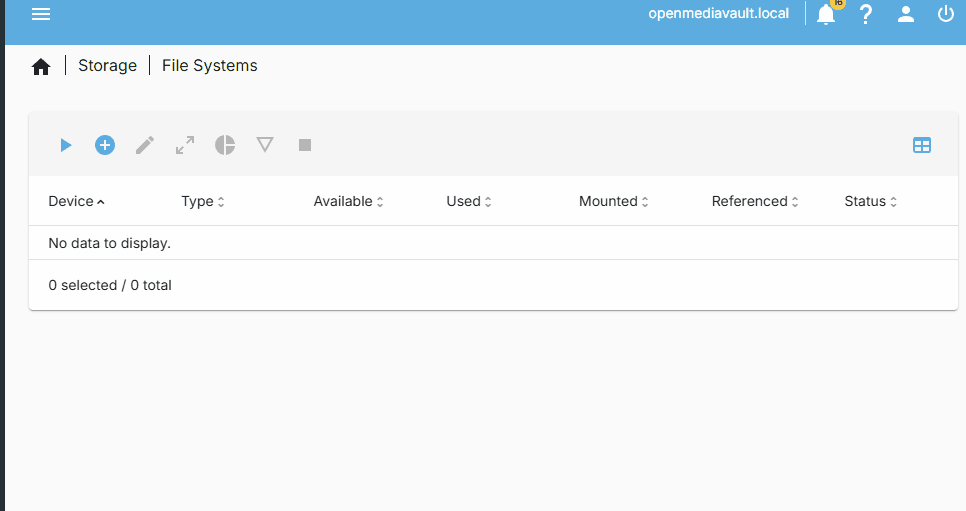
Go back to Storage >> File Systems and click on the Play button to mount an existing file system. Select your freshly created file system and make sure to write the configuration changes (big yellow banner warning.)

Click on Storage >> Shared Folders and create a new shared folder on your drive. I also set the permissions so that anyone can read and write from the shared folder. In a production environment I would not do that, I would create groups and users with granular levels of access and permissions. But this drive is just for me, so I can do it this way.
Next, click on Services >> SMB/CFS.

Click on Settings, then tick Enabled. Scroll down to Save and then write the pending changes.
Click on Services >> SMB/CFS and then Shares.
Click on the + to create a new share.
Set the shared folder to the file share that we have just created.
Add any extra features such as a Recycle Bin, then click Save and write the configuration changes.
Now create a user who can log in to the shared folder.
Click on Users >> Users

Click on + and Create a new user with a user name and password.
Add the user to the sambashare group and click Save. Then write the pending configuration changes.
Now open the Windows File Manager and click on Network.
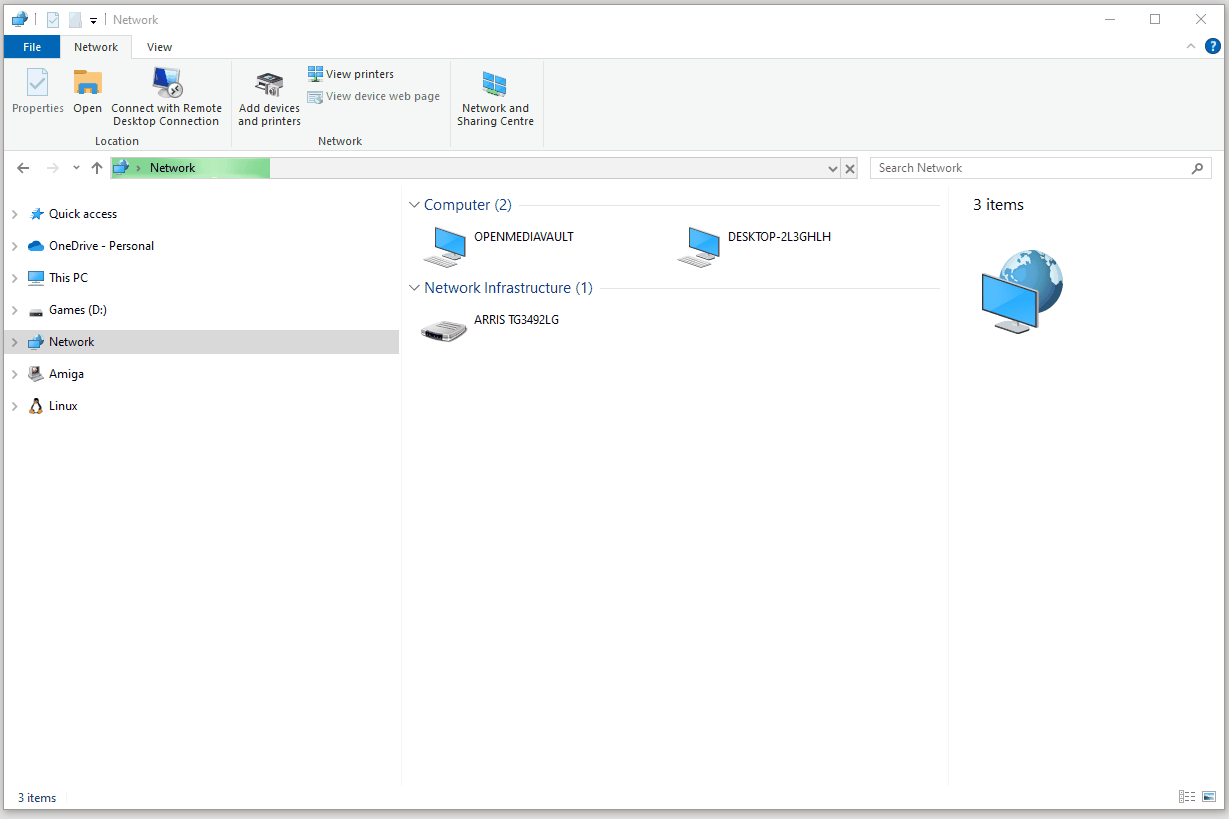
The server, OPENMEDIAVAULT should be there.
Double click on the drive and enter your user details.
The shared folder "Fileshare" is available, and we can store our files on the network drive.
We've done it, we've made a 3D printed media / file server using recycled parts!
We got there in the end — final thoughts
Raise your hand if you thought the 3D printing was going to be the hardest part?
The 3D printed MASS case has been an absolute joy and I am happy to throw $27 to the designer for such a great experience. It 3D printed extremely well, went together with ease and it looks and feels like a super expensive piece of kit.
So what went wrong? First of all my choice of motherboard. The LattePanda Mu is a great Intel N100 board, and the full evaluation board is essentially a mini-ITX motherboard, but the port placement is terrible for this project. So I'll be looking for an alternative over the next few weeks.
Add to that the SATA port issue, requiring a BIOS update and DIP switch settings changes, means that I spent far too much time chasing issues than having fun.
I got there in the end, but for 24 hours I was slowly losing my confidence in the project.

OpenMediaVault is a powerful piece of software and well worth investing your time and effort into. You'll soon have your own NAS full of content, served across your home.
For now I am going to slowly fill up this new server and understand more about what it can do for my workflow.
Thanks for following the live blog. Its largely been great fun, apart from the moments of sheer terror and panic as I tried to fix multiple problems that were ultimately there from the start.
Does it require two "drives" or can it be operated all in one (SD card)?
I guess I've got no choice but to read how it goes tomorrow..
IMO, your CPU cooler might be too small. With a decent CPU cooler and room enough for your M.2 drive to breathe, I think you shouldn't need any other fans. The other option would be to use a passively-cooled board and supply active cooling with a case fan. That's what I did with the ODROID H4:
https://www.hardkernel.com/shop/odroid-h4-plus/
You can buy a case from them and add an optional low-profile 90 mm fan, but I bought their mini-ITX adapter kit and used a case that can accommodate low-profile 120 mm fan.
https://www.amazon.com/dp/B09PC1BZ7N
The fan spins so slowly it's basically inaudible.
Edit: Oops, I misread the headline. I thought this was meant to be a HTPC. I guess the case makes more sense, now. The ODROID H4+ still makes a ton of sense, for a project like this.
https://www.newegg.com/lian-li-atx-mid-tower-aluminum-computer-case-black-pc-9f/p/N82E16811112304
Granted, it's ATX and not mini-ITX. I wonder if they ever built a mini-ITX version with 1-2 fewer 3.5" bays and 1-2 fewer optical bays. Right now, it's only populated with 4 hard drives (out of 6 slots, in the main stack).
Having just upgraded its guts, I can say one gripe I have is the lack of clearance between the top edge of the board and the top of the case. Or, like if the entire motherboard tray were either removable or at least on a hinge, that'd make it a lot easier to work with. Other than that, I think it's still pretty optimal for the purpose.
I have always wanted a media server like this one, and I live in a household where that kind of thing would make sense, but I have a very, very deep seated trauma of setting up one.
I've attempted building one multiple times since the Windows 8 (even Win 7 days), I've tried everything, various kinds of devices, setups, routers, etc, and for the life of me, could never get it to work. All kinds of issues would crop up, either :
- unreliable connection
- drives not detected
- entire computers not detected
- files not appearing,
- explorer loading forever
- PC crashing while trying to load the files
- various "permissions" and "security issues"
- PC disconnecting from the network while trying to access the files
- loading files taking forever
- or the entire thing just crumbling to dust
It's basically disaster after disaster every time... Super unreliable, I can probably gamble on whether the server I made would work in a given day..
I had better luck growing and maintaining a 4 hectares (nearly 10 acres) land worth of plantation than setting up a single server for years. That's how hopeless the situation is for me.
I have accepted that I'm doomed and will never be able to enjoy a working media server. Don't worry though, I'm already content of copying files through a flash drive and carrying them upstairs every time my family wants to watch a movie that's not available on streaming.
It's alright.
I bought a NAS in 2005, having expected it to be optimized and streamlined beyond what I could easily do on my own. After setting it up, I was quite disappointed that it only managed about 300 Mbps, in spite of having a Gigabit Ethernet interface.
When I replaced it, in 2010, I initially had some problem with it detecting the drives. I reached out to the manufacturer, who had been bought by Netgear, and the response I got was that it was no longer covered by warranty. After that, I should've never bought anything from Netgear again, but I digress. Fortunately, the NAS maker had a fairly active forums community and someone provided some useful tips that enabled me to get my data off of it.
(As another aside: a couple years ago I tried posting some power usage measurements of a router & cable modem to the current Netgear forums and my posts were deleted by a moderator. They were not disparaging, just purely factual and placed in the correct locations: when will I learn?)
That's when I built my own Linux fileserver. I just completed my 3rd upgrade of that machine. Never had any issues with it, nor has it had any problems hitting Gigabit (or now 2.5 Gbps). I'm probably more knowledgeable with Linux than the average power user, but there are some projects out there which make it a lot simpler to do than it was when I started, such as UnRAID, FreeNAS, TrueNAS, and maybe this OpenMediaVault. As for myself, I still just use an Ubuntu Server base install and manually setup everything to my liking.
If you don't really know what you're doing, I'd refer to build guides maintained by those communities, for hardware recommendations.
I'll be honest, I only ever used old, repurposed hardware for all my attempts. Think of old PCs or laptops lying around. And yes, they all ran Windows. I think I tried building one using Linux once (that was years ago) and I fell into this rabbit hole of setting up dockers and all that, which as someone who didn't (and still doesn't) understand computers much, was... really demanding.
Maybe I should give it another try. I'm in the process of considering running Linux on my personal laptop (not the work one), because it seems like Windows performance is getting somewhat worse and laggy as time goes on... But I digress...