Raspberry Pi 4: How to Run Emulators Like RetroPie
For years, Raspberry Pi fans have been running game emulation platforms such as RetroPie, Recalbox and Lakka. However, when the Raspberry Pi 4 launched in June, none of these platforms officially supported the new hardware and users were left looking for early beta versions or workarounds that didn't work so well. As of this writing, the situation has improved, but isn't completely resolved. Below, we'll show you how two ways to get emulation up and running on your Raspberry Pi 4 right now.
Running Lakka on a Raspberry Pi 4
Though Retropie is, by far, the most popular choice because of its attractive user interface (UI), Lakka is the first platform with a final, non-beta version that supports Raspberry Pi 4. Lakka has strong performance, but just doesn't offer as many options or have as much support as its competitor.
1. Insert a microSD card (at least 16GB) into your PC.
2. Download the latest version of Lakka for Raspberry Pi. Note that it is currently labeled as Pi 2 / 3 but it works for 4. Look for the latest file with the .img.gz file extension.
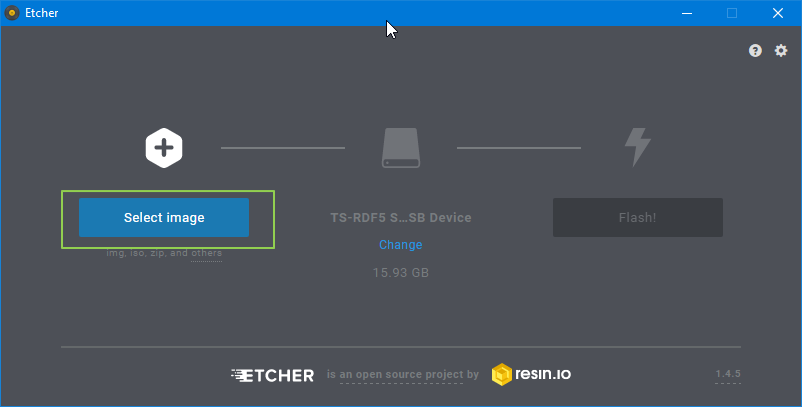
3. Launch Etcher on your PC. Download and install Etcher if you don't have it already.
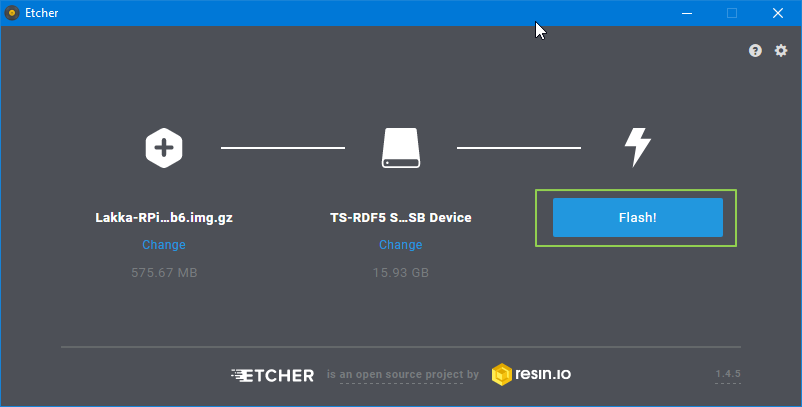
4. Click Select Image and choose the file you just downloaded.
5. Click Flash.
Get Tom's Hardware's best news and in-depth reviews, straight to your inbox.
After your microSD card is done burning, you can put it into the Raspberry Pi 4 and boot.
Installing RetroPie on a Raspberry Pi 4
To install RetroPie on your Pi 4, you won’t need to do a lot of work, but you will have to be patient. Once you get the install process up and running, you will need to walk away and leave it going for an hour or two.
1. Install the latest version of Raspbian Buster on your Pi 4, if you haven’t already done so and boot into it. We recommend installing the lite version, which doesn't come with X Windows preloaded. If you don’t know how to install Raspbian, see our article on getting started with Raspberry Pi.
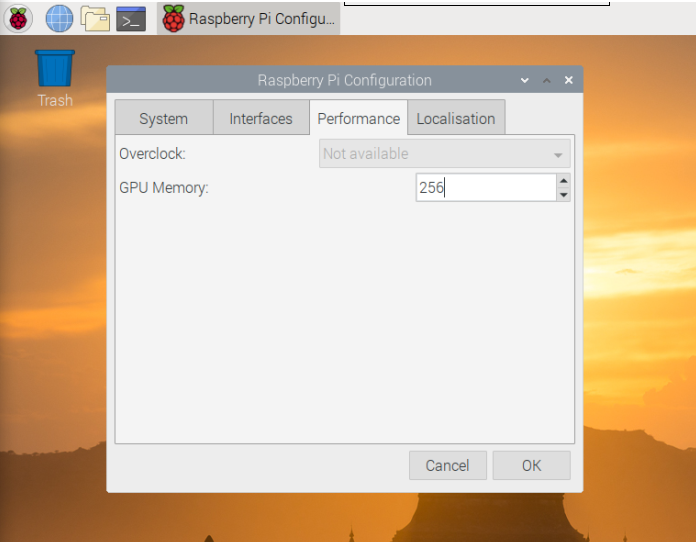
2. Set the Raspberry Pi 4's GPU memory to 256MB. At the command prompt / terminal window, you do that by typing raspi-config then selecting Advanced Options->Memory Split and typing in 256. If you have X Windows, you do it by navigating to Preferences->Raspberry Pi Configuration, clicking on the Performance tab, changing the number to 256 and clicking Ok. In either case, reboot afterwards.
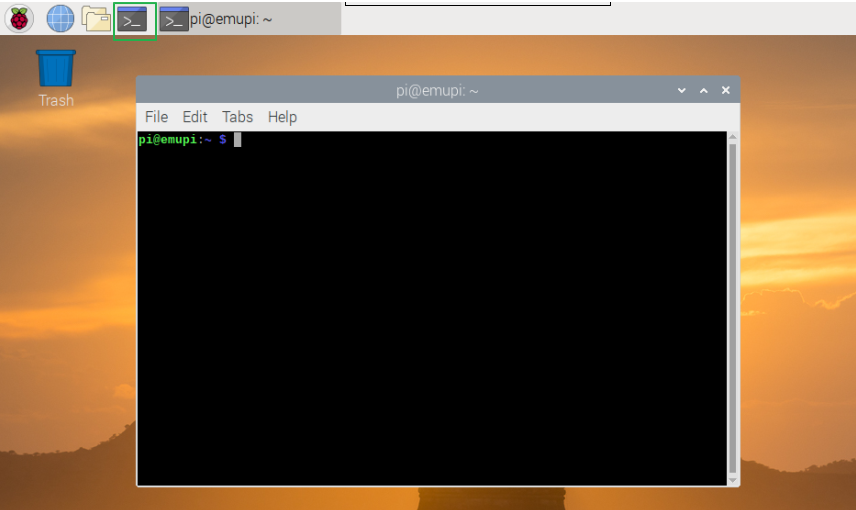
3. Launch a terminal window on the Raspberry Pi 4 if you haven't already booted to the command prompt . In X Windows, you can get there by clicking the terminal icon or hitting CTRL+ALT+T.
4. Download Retropie's setup files by typing:
sudo git clone --depth=1 https://github.com/RetroPie/RetroPie-Setup.git
If you have a decent Internet connection, this will take only a few seconds.
5. Type cd RetroPie-Setup to enter the setup directory.
cd RetroPie-Setup
6. Type git fetch && git checkout fkms_rpi4 to get the proper FKMS version of RetroPie (the one that works with Pi 4).
git fetch && git checkout fkms_rpi4
7. Execute the setup script by typing:
sudo ./retropie_setup.sh
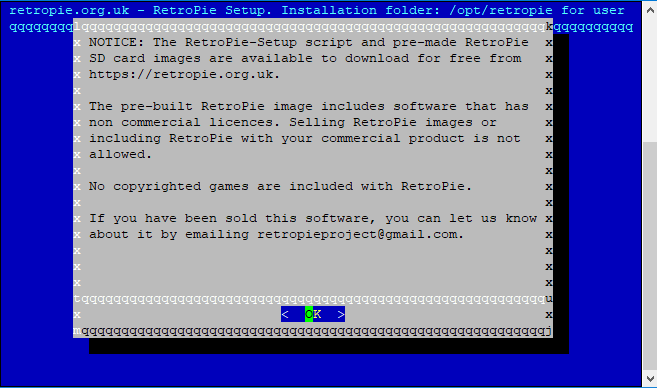
This process will take a few, so maybe walk away and come back. When you return, you'll see a blue screen with a menu on it.
8. Click Ok by hitting Enter and click Ok again if prompted.
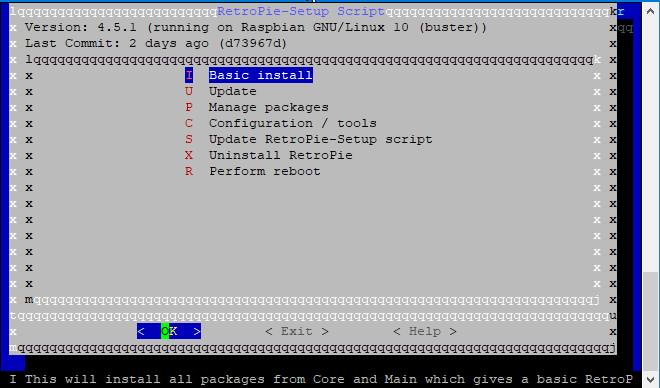
9. Select Basic Install from the menu and hit Ok.
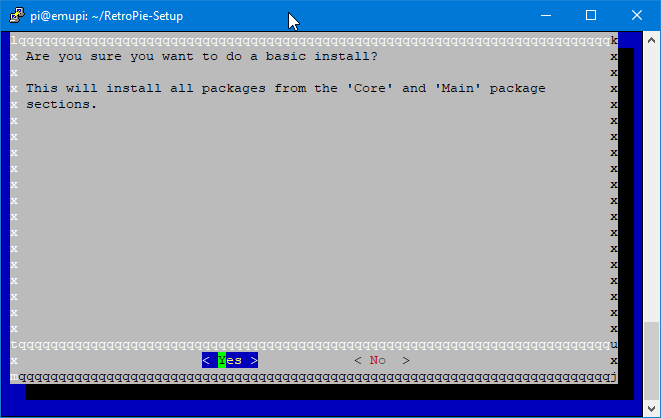
10. Hit Yes when asked to confirm the install.
Now the install process will begin in earnest. Walk away for at least 45 minutes, maybe more.
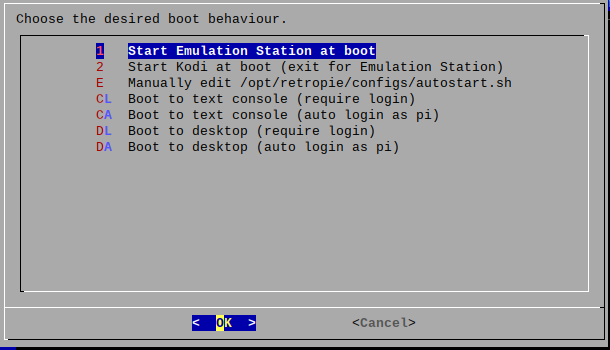
11. Select Configuration / tools -> autostart - > Start Emulation Station at boot.
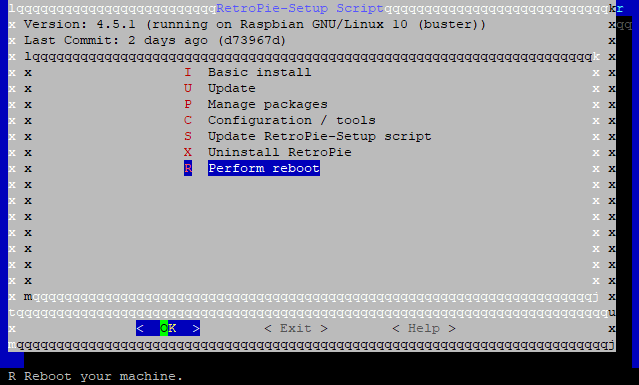
12. Select Perform Reboot and hit Ok. Confirm if prompted.
The Raspberry Pi will reboot.
Bottom Line
While we're still waiting for RetroPie to have official Pi 4 support, which would also mean a premade disk image, you can at least use it now. Or you can go with Lakka, which isn't as popular but works pretty well. We'll update this article when conditions change.
MORE: Raspberry Pi GPIO Pinout: What Each Pin Does
MORE: How to Use Raspberry Pi as a VPN Gateway
MORE: Raspberry Pi Tutorials
Avram Piltch is Managing Editor: Special Projects. When he's not playing with the latest gadgets at work or putting on VR helmets at trade shows, you'll find him rooting his phone, taking apart his PC, or coding plugins. With his technical knowledge and passion for testing, Avram developed many real-world benchmarks, including our laptop battery test.
-
mitch074 "However, if you simply tell the Pi to launch EmulationStation after Windows every time, it works." - strange, as I thought the Raspberry was running a modified Debian distro with the LXDE window manager, not an unknown build of MS Windows...Reply -
ksuquix Out of curiosity, has anyone following this gotten mouse functions (e.g. trackball) to work on pi4 yet?Reply -
motosport Thank you for this article but I have a problem, the emulation station is crashing the first time that I launch it and keeps crashing until I reset the configuration in the installer. With this, I can launch it but it does not appear to behave correctly...it never saves my configuration and I don't have any possibilities to launch any games. Do you have any idea why ?Reply
Thanks,
Alexandros -
Skvli I bought the Rpi 4 with 4GB of RAM. Would setting the memory setting higher than 256mb be adviseable? I don't care too much past N64/PS1 performance. That's what I'm really going for.Reply -
redgarl Bought a PS Classic and hacked it. No latency, and work like a charm. Way better than a rasbery pie.Reply -
Graylord I got Retropie working flawlessly on pi4 using the method previously described in this article, but managed to accidentally ruin my image later, so I came back to the article and see that it has now been changed and I cannot get the new method to work. Following the steps, I cannot get the pi4 supported version as" git fetch && git checkout fkms_rpi4 " results in "permission denied" errors. I tried to use chown on the entire ./git folder, but just got messages that I do not have permission to use those operations, and my command line experience ends there, and I don't know what to do.Reply
The old method just tricking the retropie into thinking you're a pi3 worked perfectly for me, but I cannot for the life of me figure out where you went to manually config the platform permanently, and the old article is no longer available, you have also blocked waybackmachine, so I cannot tell what you originally did. Could you please post the old method or let me know where to config the platform? -
Guipster ReplyGraylord said:Following the steps, I cannot get the pi4 supported version as" git fetch && git checkout fkms_rpi4 " results in "permission denied" errors.
The problem on this tutorial is the --depth=1 on the git clone command (item 4 on this tutorial). To solve that, just remove that part, which will result on the line below (just copy it).
sudo git clone https://github.com/RetroPie/RetroPie-Setup.git
Hope it helps! :) -
SpinLock08 Thanks for this tutorial. I got as far as the "git fetch && git checkout fkms_rpi4" part, but got the following:Reply
"error: cannot open .git/FETCH_HEAD: Permission denied"
Noob that I am, I figured I'd add sudo, as in "sudo git fetch && git checkout fkms_rpi4". This time it read
"fatal: Unable to create '/home/pi/RetroPie-Setup/.git/index.lock': Permission denied"
Any tips? I really am new to Linux. Thanks in advance! -
darth_pi ReplySpinLock08 said:Thanks for this tutorial. I got as far as the "git fetch && git checkout fkms_rpi4" part, but got the following:
"error: cannot open .git/FETCH_HEAD: Permission denied"
Noob that I am, I figured I'd add sudo, as in "sudo git fetch && git checkout fkms_rpi4". This time it read
"fatal: Unable to create '/home/pi/RetroPie-Setup/.git/index.lock': Permission denied"
Any tips? I really am new to Linux. Thanks in advance!
I had the same problem and what I did to solve this problem was to change into the root uer then run the command git fetch && git checkout fkms_rpi4
But since the root user does not have any password set by default in raspberry pi you will have to give the root user a password first with this command passwd root then change into root simply by typing in su rootHope this works for you too as it did for me. -
Openupitsdave I followed this tutorial perfectly for use with Raspbian Lite, but when I type in sudo git clone --depth=1 https://github.com/RetroPie/RetroPie-Setup.git, it says "sudo: git: command not found".Reply
And when I tried using Raspbian Buster (regular, without recommended apps), I get the error "error: cannot open .git/FETCH_HEAD: Permission denied". So I tried using the methods in the following two posts, but both failed as well:
darth_pi said:But since the root user does not have any password set by default in raspberry pi you will have to give the root user a password first with this command passwd root then change into root simply by typing in su rootHope this works for you too as it did for me.
I typed in "passwd root" and it said I am not allowed to view or modify password for root.
Guipster said:The problem on this tutorial is the --depth=1 on the git clone command (item 4 on this tutorial). To solve that, just remove that part, which will result on the line below (just copy it).
sudo git clone https://github.com/RetroPie/RetroPie-Setup.git
Also did not work. I got the same "permission denied" error.
I had it working with the old tutorial except I could never get Autostart to Emulationstation to work which is why I keep coming back...Now nothing works. Does anyone know where I can find the old tutorial? I forgot how to manually change the version to rpi3. EDIT: I figured out how to change the platform version: do cd RetroPie-Setup then sudo __platform=rpi3 ./retropie_setup.sh
This tutorial needs an update or a rollback.
