10 Tips For Working In And Around Windows 7
Windows 7 is fairly similar to Windows Vista, but the operating system includes several enhancements. In this piece, we have a handful of tips that might make the transition to Windows 7 a little easier and improve your productivity in Microsoft's latest.
Introduction
After Windows Vista, which did not exactly sell like lemonade on a hot day, Microsoft is counting on its latest operating system (Windows 7) to earn back the trust of its customers. Windows 7 is, in fact, quite similar to Windows Vista, but with several improvements. In this article, we have a handful of tips that may make your everyday work in Windows easier and more productive.
God Mode And More
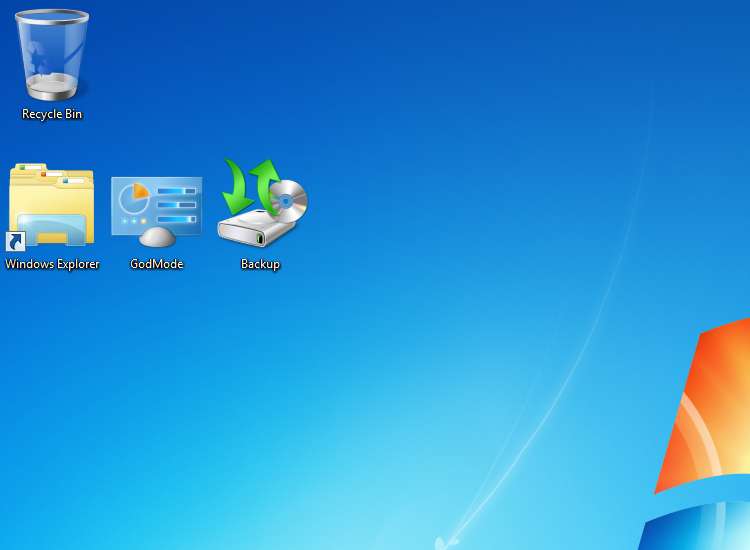
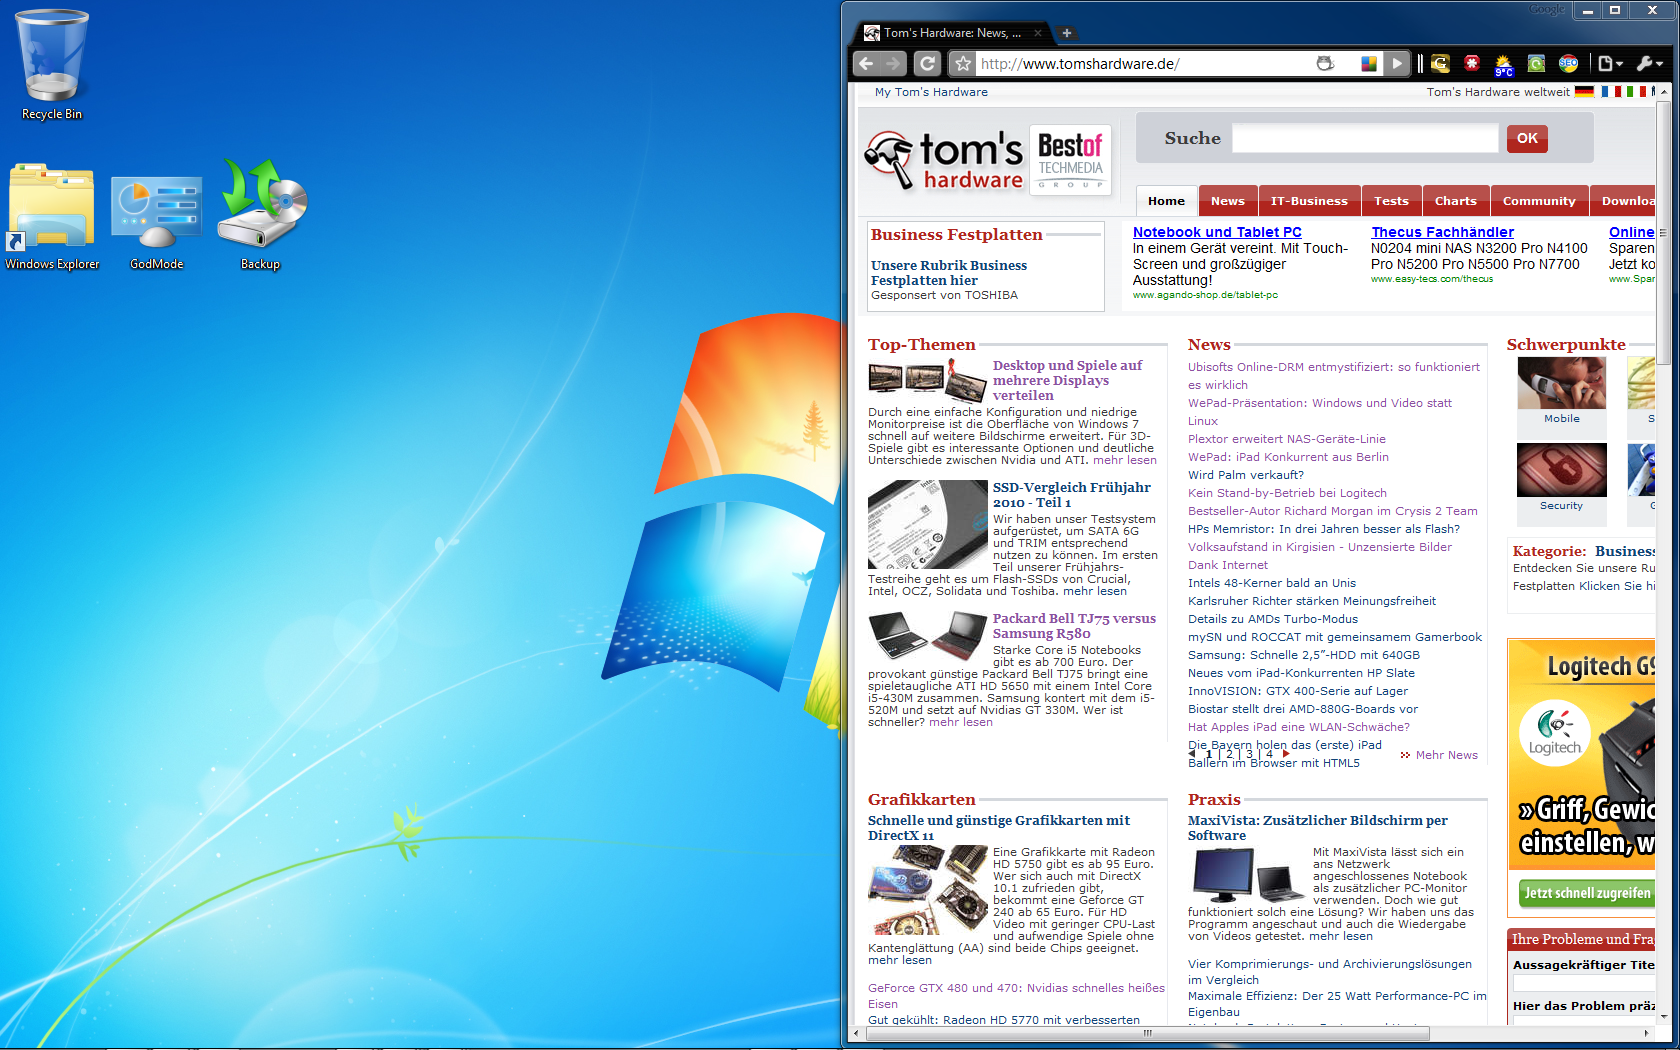
To get access to all available system settings, you start by creating a new folder. It can be named anything, as long as it has the following string added to the end of its name: .{ED7BA470-8E54-465E-825C-99712043E01C}. For example GodMode.{ED7BA470-8E54-465E-825C-99712043E01C}
This trick, known as Windows GodMode, has been making its rounds on the Internet for some time now. Less known, however, is the possibility of using the above method to directly access some elements from the Control Panel. For example, to create direct access to the ‘Backup and Restore Center,' you create a folder with any name and add this string to the end: .{B98A2BEA-7D42-4558-8BD1-832F41BAC6FD}. A complete list of GUIDs corresponding to the items in the Control Panel can be found on Microsoft's site here.
Delayed Shutdown
You have probably had to leave or shut down your computer a couple of times while it was still working on some task for you. In these cases, it sure would have been practical if the computer could have shut itself down after finishing its work. Many programs offer such a feature, but not all.
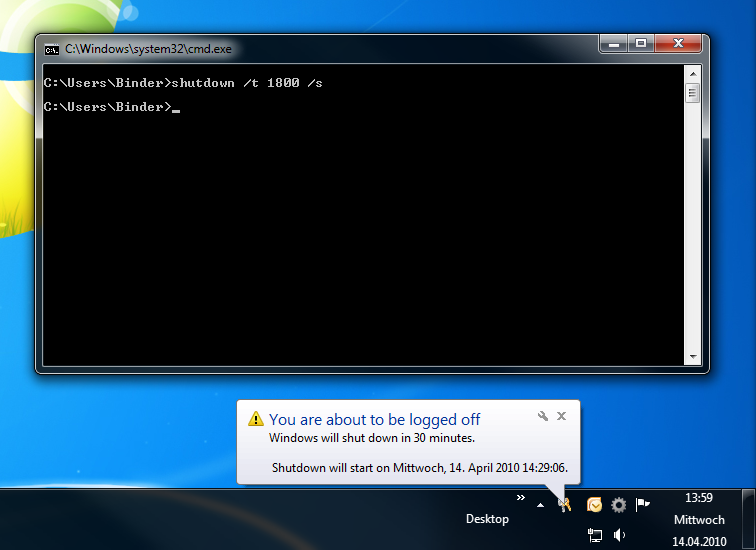
To perform a scheduled Windows 7 shutdown, use the command prompt line 'shutdown.' Add parameters for more specific instructions, for example ‘/t 180 /s’ to tell the program that the computer should be shutdown after three minutes. If you want the computer to be shutdown after one hour, use the parameter ‘/t 3600 /s’. If you would prefer to put the computer to hibernate after a certain period of time rather than shut it down, then simply replace the ‘/s’ parameters with ‘/h’.
Sleep Mode: Create A Shortcut
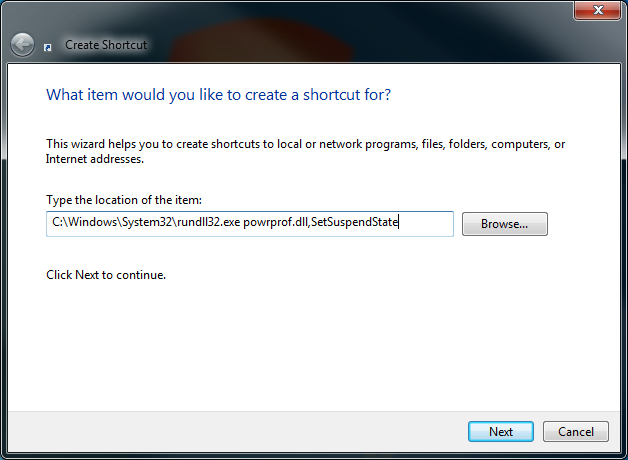
Anyone frequently using the built-in Windows Remote Desktop solution is probably already using ‘shutdown.exe’ from the command line to reboot or shut down the remote computer. However, if you just want the computer to go into sleep mode, ‘shutdown.exe’ offers no suitable parameter. You can circumvent this by creating a new shortcut (for example, on the desktop) and assign it the command: C:\Windows\System32\rundll32.exe powrprof.dll,SetSuspendState
After a double-click on the newly-created shortcut, the computer is immediately put into sleep mode. If the remote desktop feature is the only way to reach the computer, you should ensure that it can be reactivated, for instance, with the Wake on LAN feature, before you do this.
Get Tom's Hardware's best news and in-depth reviews, straight to your inbox.
Timed Sleep Modes
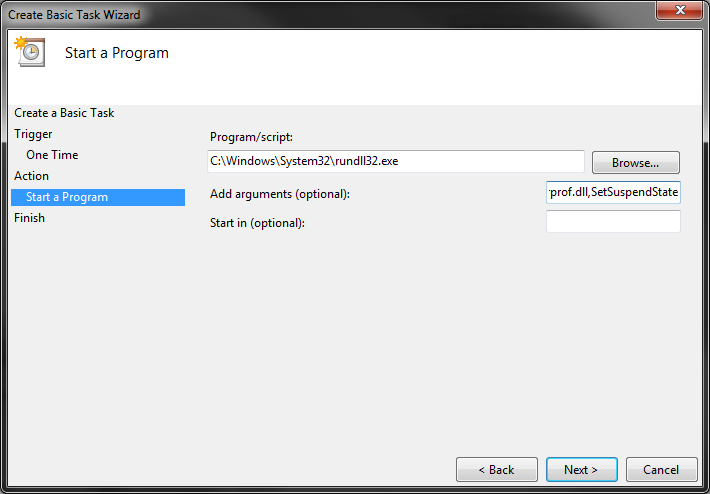
On the previous page, we presented a command that makes the computer enter sleep mode. But it can be used in more ways than just as a shortcut you click manually. With the help of the command, it is also possible to order the computer to go to sleep at any given time. To achieve this, we need to use the Windows Task Scheduler, which can be started from the Start Menu search field by entering the command 'taskschd.msc'.
Here, we select the menu Actions -> Create Simple task, and assign the task a name in the opened window. In the next step, we choose a time when we want the computer to run the task. After this step is completed, we still need to specify that we want the task to put the computer in sleep mode. For this, we enter the string C:\Windows\System32\rundll32.exe in the 'Program/script' field and powrprof.dll,SetSuspendState in the 'Add arguments' field. In the final step, we confirm our data and conclude the process. The computer is now put in sleep mode at the specified time.
Fast Screenshots For E-mails
Our next tip is somewhat of a classic, and should, in fact, be well-known. Despite this, the question of how to snap a screenshot of a program window, or even the entire desktop, keeps popping up.
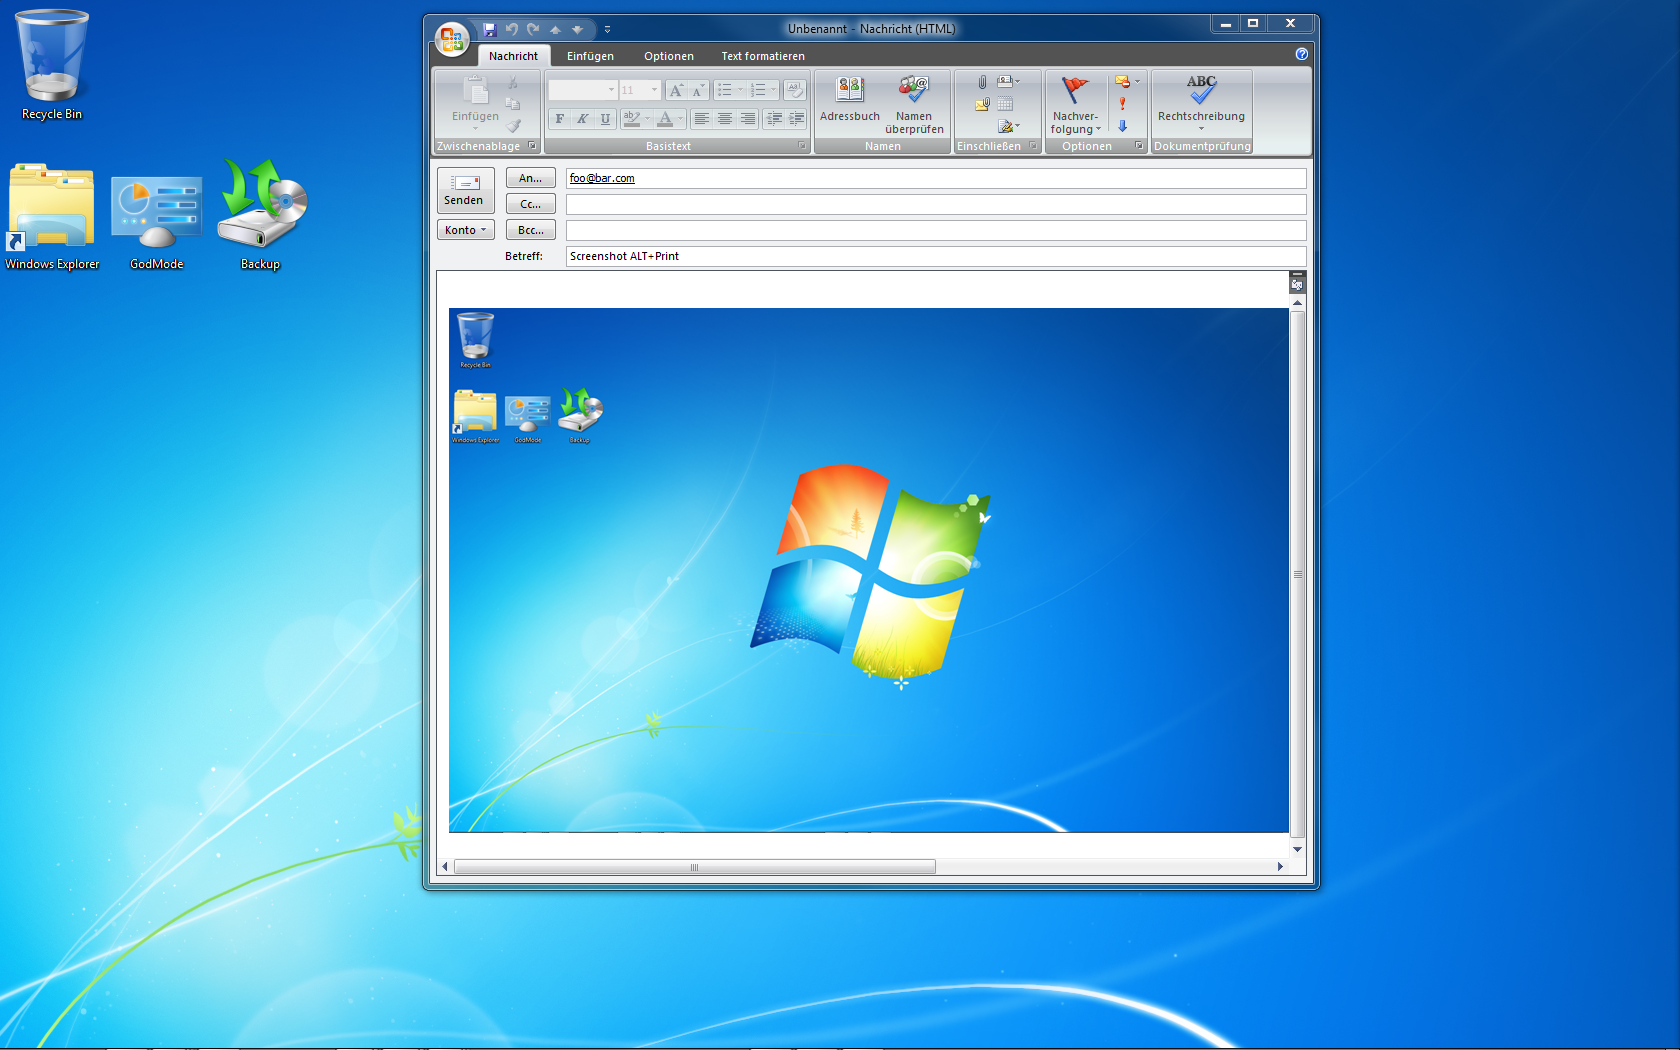
While the first instinct might be to look for additional programs to answer this question, Windows 7 (and indeed earlier versions of Windows as well) has an integrated screenshot function. Use the key combination [ALT] + [Print Scrn] to save a screenshot of the active window to the clipboard. Then paste it, for example, directly into an e-mail in Outlook. A screenshot of the entire monitor is created by simply pressing the Print Scrn key, once again saving the screenshot to the clipboard for further use.
In case you are looking for a fast way of only saving certain areas of the desktop to the screenshot, you can use Windows' integrated Snipping Tool.
Make Windows Explorer Open To My Computer
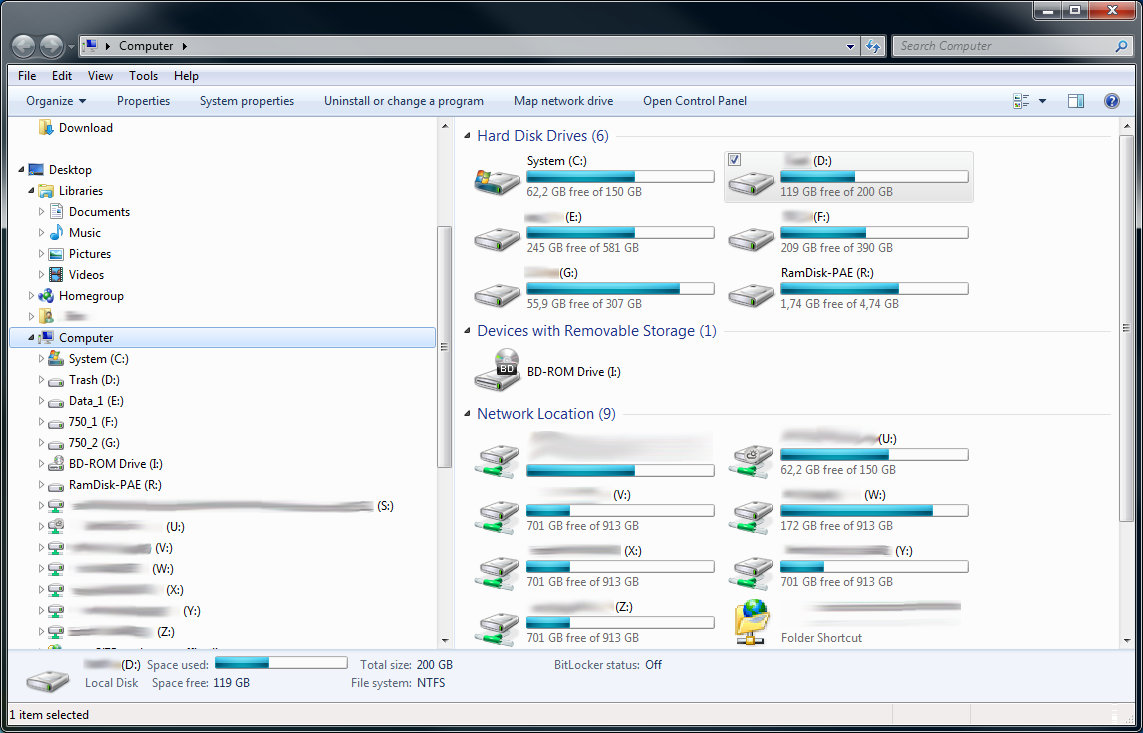
If you open Windows Explorer in Windows 7 via the shortcut in the taskbar, the libraries are displayed by default. Making Windows Explorer display the My Computer view that we are used to from earlier versions of Windows is a matter of some minor surgery.
Simply right-click the Windows Explorer icon in the taskbar. Another-right click on the ‘Windows Explorer’ line takes us to the properties of the shortcut. Replace the existing string %windir%\explorer.exe with the string %SystemRoot%\explorer.exe /e,::{20d04fe0-3aea-1069-a2d8-08002b30309d}. After accepting the changes, clicking the shortcut will now make Windows Explorer display the My Computer view instead of the library view when opened.
Step By Step Troubleshooting
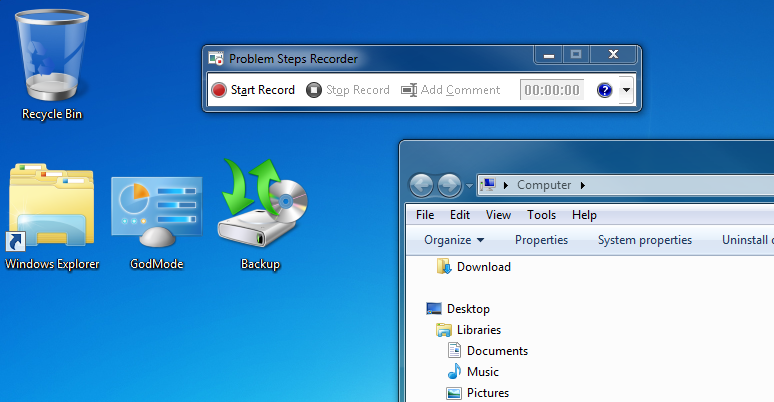
Whenever you are dealing with a computer problem and talking through it to someone over the phone, a lot of time is usually spent just trying to understand each other. This is where the Windows tool ‘Problem Steps Recorder’ comes in handy. Start it from the search bar in the Start Menu by entering ‘psr’ and click OK. After pressing record, this program creates a zip file containing an HTML file, in which each step leading up to the problem or solution is documented with a screenshot. Simply send the zip file as an e-mail to the other person, and hopefully that will make solving the problem easier.
Window Management
Power users working with multiple open program windows know how fast the screen gets cluttered. Windows 7 provides a quick way to turn the temporary chaos into order.
With the hotkey command [WIN] + [Home], all inactive application windows are minimized, leaving just the active window on the screen. For positioning the window, [WIN] + [Arrow left / right] docks the window to the respective desktop edge. Pressing [WIN] + [Arrow up] maximizes the active window. To quickly minimize the window, press the shortcut [WIN] + [Arrow down].
Fast System Analysis
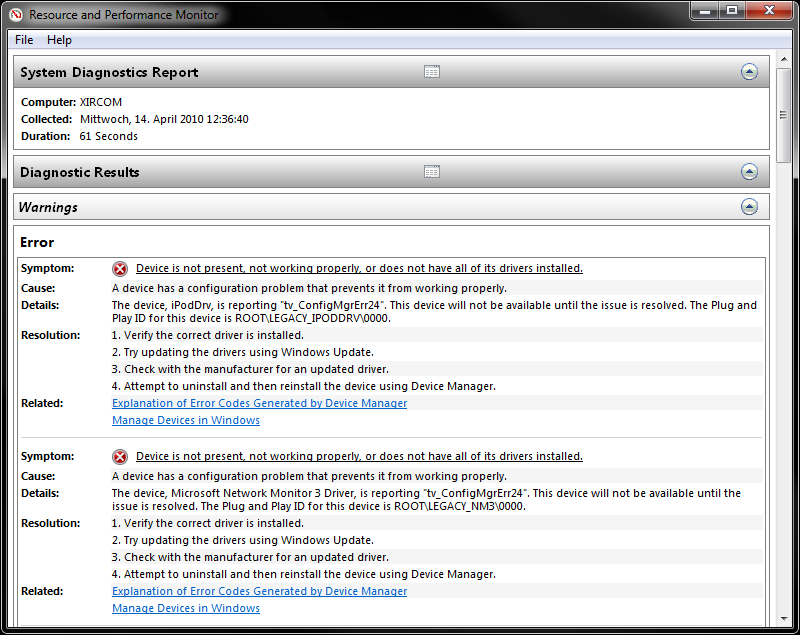
Are you having problems with the computer's hardware resources? Is the computer not working as it should? To get an overview of the current status of local hardware resources, processes, and local system response times, enter the command ‘perfmon /report’ into the search box in the Start Menu. The tool analyzes the system, and after about a minute you get an overview of the state of the system.
Customize The ‘Send To’ Menu
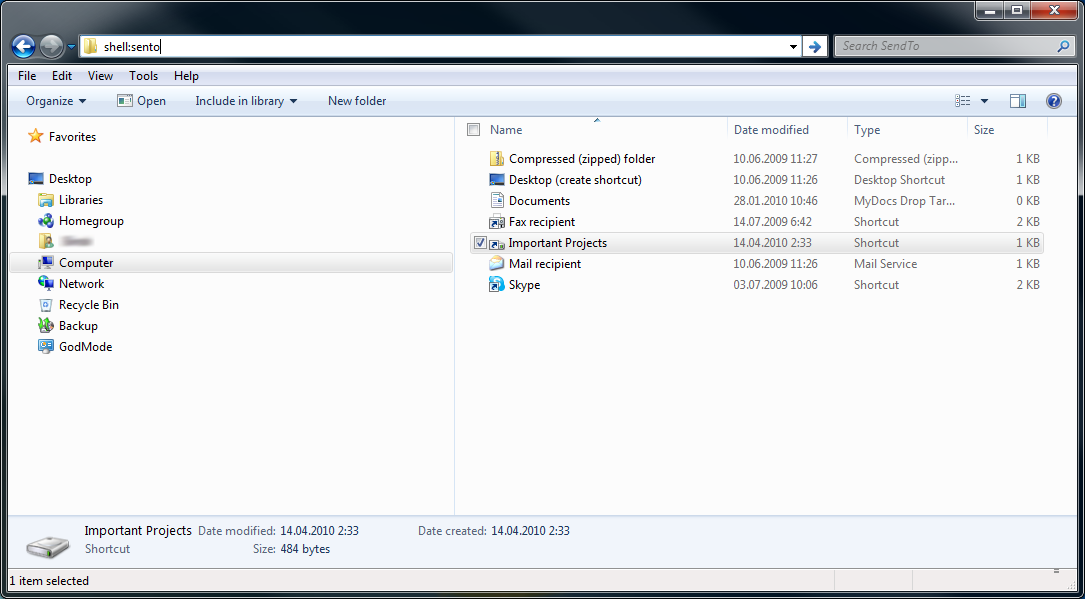
Using the ‘Send To’ Menu is a quick way to copy files to a specific place or to open them with a program. However, you don't always find the choices you need in the menu. Personalizing the menu is quite straightforward. Simply open Windows Explorer and enter the string shell:sendto in the Address Bar. This will make Windows Explorer open a directory in which you can create shortcuts that are of use to you. These links will then be available in the ‘Send To’ Menu.
What tips, tricks and techniques make your daily work easier? We welcome your comments and suggestions!
-
oldscotch Thank you for 7/12, I hate Explorer defaulting to My Computer or whatever it's called now.Reply -
If you hold shift while right-clicking something in the Windows shell, you get extra options. Some of my favorites:Reply
File or Dir:
"Copy as path"
Dir:
"Open command window here"
Executable:
"Run as different user"
Inactive Task Bar Button:
all of the nice options you get when right clicking a shortcut
-
haplo602 hmm ... and people do not like Linux because they have to use the shell ... now this article realy scares ... all the easy to understand and find ID strings for different features, lots of command line usage, easy to find utilities you recomend here ...Reply
funny world .. -
nevertellLinux is so much easier to write scripts for.Reply
Batch scripting on windows is really frustrating, but Powershell scripting on windows is absolutely fantastic! I hope to never write a batch script again! -
WarraWarra I had so much issues with win7. The nasty start menu, horrible control panel and 20 click to get to networking static ip setup.Reply
If there was a Win7 classic start menu / classic explorer / classic desktop / classic control panel then it would be much easier to use.
Win2008 is much easier and more stable to use than Win7 and makes more sense, just not as "desktop" friendly as XP.
I upgrade back to XP and Linux. -
zybch WarraWarraI had so much issues with win7. The nasty start menu, horrible control panel and 20 click to get to networking static ip setup.Reply
Really? I mean, REALLY? I just tested to see how many it took me and the answer was 6 click when starting from the main desktop.
I think its more a question of you being an irretrievably dumb user rather than Windows 7 being 'bad'.
Besides, why on earth would anyone think they still need to use a static IP address.
You really are still living in a windows 98 world aren't you. Wake up and get a clue. -
chodaboy zybchwhy on earth would anyone think they still need to use a static IP address. Protected domains at work, wireless acces points, and i'm pretty sure there's more...Reply
-
godnodog Windows XP was/is much easier to config and use than Windows 7.Reply
There are several things I really dislike about Win7:
- the Start Button, the classic way was much easier and faster to use
- to access folder options, they should be accessed by the folder»tools»folder options line in XP, I´m only able to use them by going to Help and search for folder otions
- sharing folders SUCKS BIG TIME, it was stupidly simple to share in XP, now is stupidly complex to share in 7, most of the time I can´t share folders
- the "intuition" policy taken by microsoft resulted in Microsoft products becoming harder to work, we waste to much time using intuition to find stuff,
- some services just wont stop working, the Media Player network service(don´t remember the exact name)keeps working even after it has been ordered to stop and the service disabled
there are other, but despite all this I am very pleased with the performance of Windows 7, in overall they´ve done a really good job.
When will Microsfot do a Windows that is trully custumizable, where you can actually choose the services you want installed (there for saving disk space).
I want a fully customizable Windows OS!!!! -
liquidsnake718 Interesting my netbook has 7 and my full blown power pc is still Vista... i doubt i am getting the full expieranceReply
